
This page offers a guide on how to complete the second trial of the ![]() Gauntlet of Shar: The Self-Same Trial. This second trial will be unique to everybody but below we’ll detail some handy tips for dealing with the trial! You need to complete this trial to retrieve an Umbral Gem and it is also a part of
Gauntlet of Shar: The Self-Same Trial. This second trial will be unique to everybody but below we’ll detail some handy tips for dealing with the trial! You need to complete this trial to retrieve an Umbral Gem and it is also a part of ![]() Shadowheart’s personal quest to become a Dark Justiciar.
Shadowheart’s personal quest to become a Dark Justiciar.
Gauntlet of Shar: How to Start Self-Same Trial
In order to start this trial, you’ll need to head down the hallway to the north from the Gauntlet of Shar waypoint. If you’ve not already made your way to the Gauntlet of Shar - you can use our handy page on All Umbral Gem Locations in the Gauntlet of Shar to navigate the area!
To start the Self-Same Trial, you’ll need to open the second door on the left wall (the first door takes you to the Soft-Step Trial which we also have a guide for!). When you go in, offer some blood at the altar, or have Shadowheart do it and then proceed into the trial room.

Use the Sacrificial Bowl to start the trial.
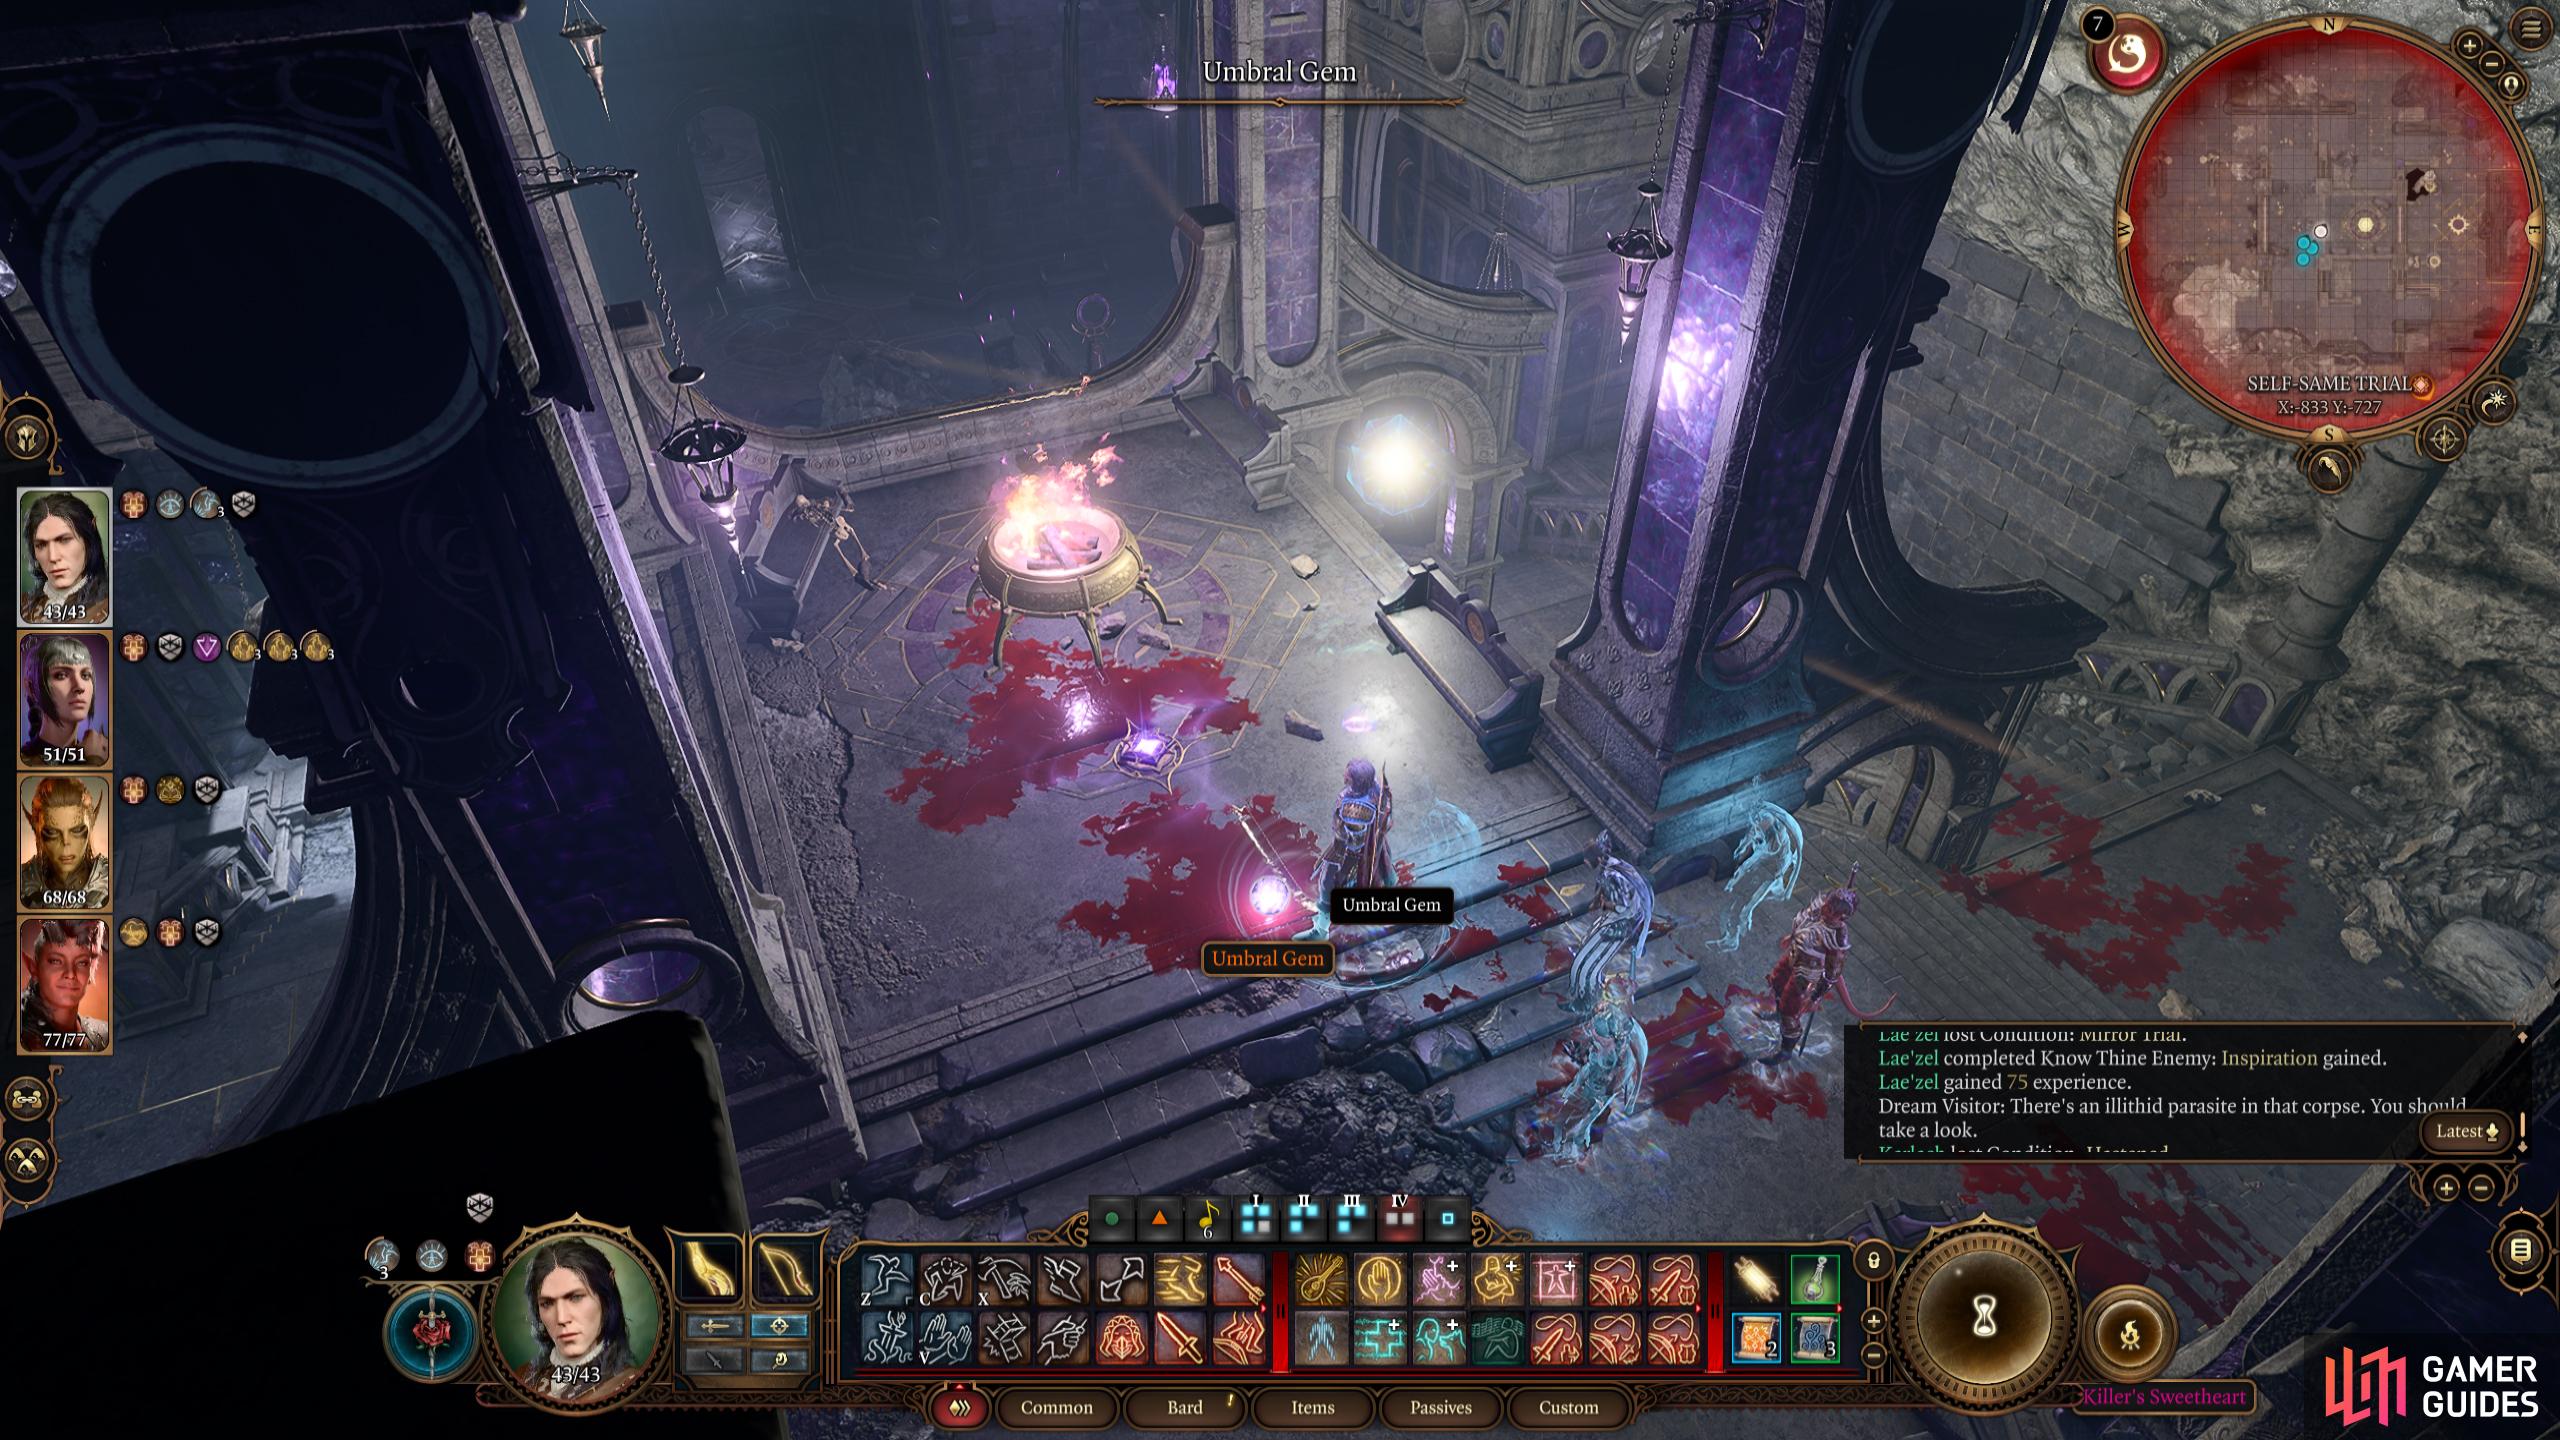
The Umbral Gem will drop off the last person you defeat.
Self-Same Trial Tips and Tricks
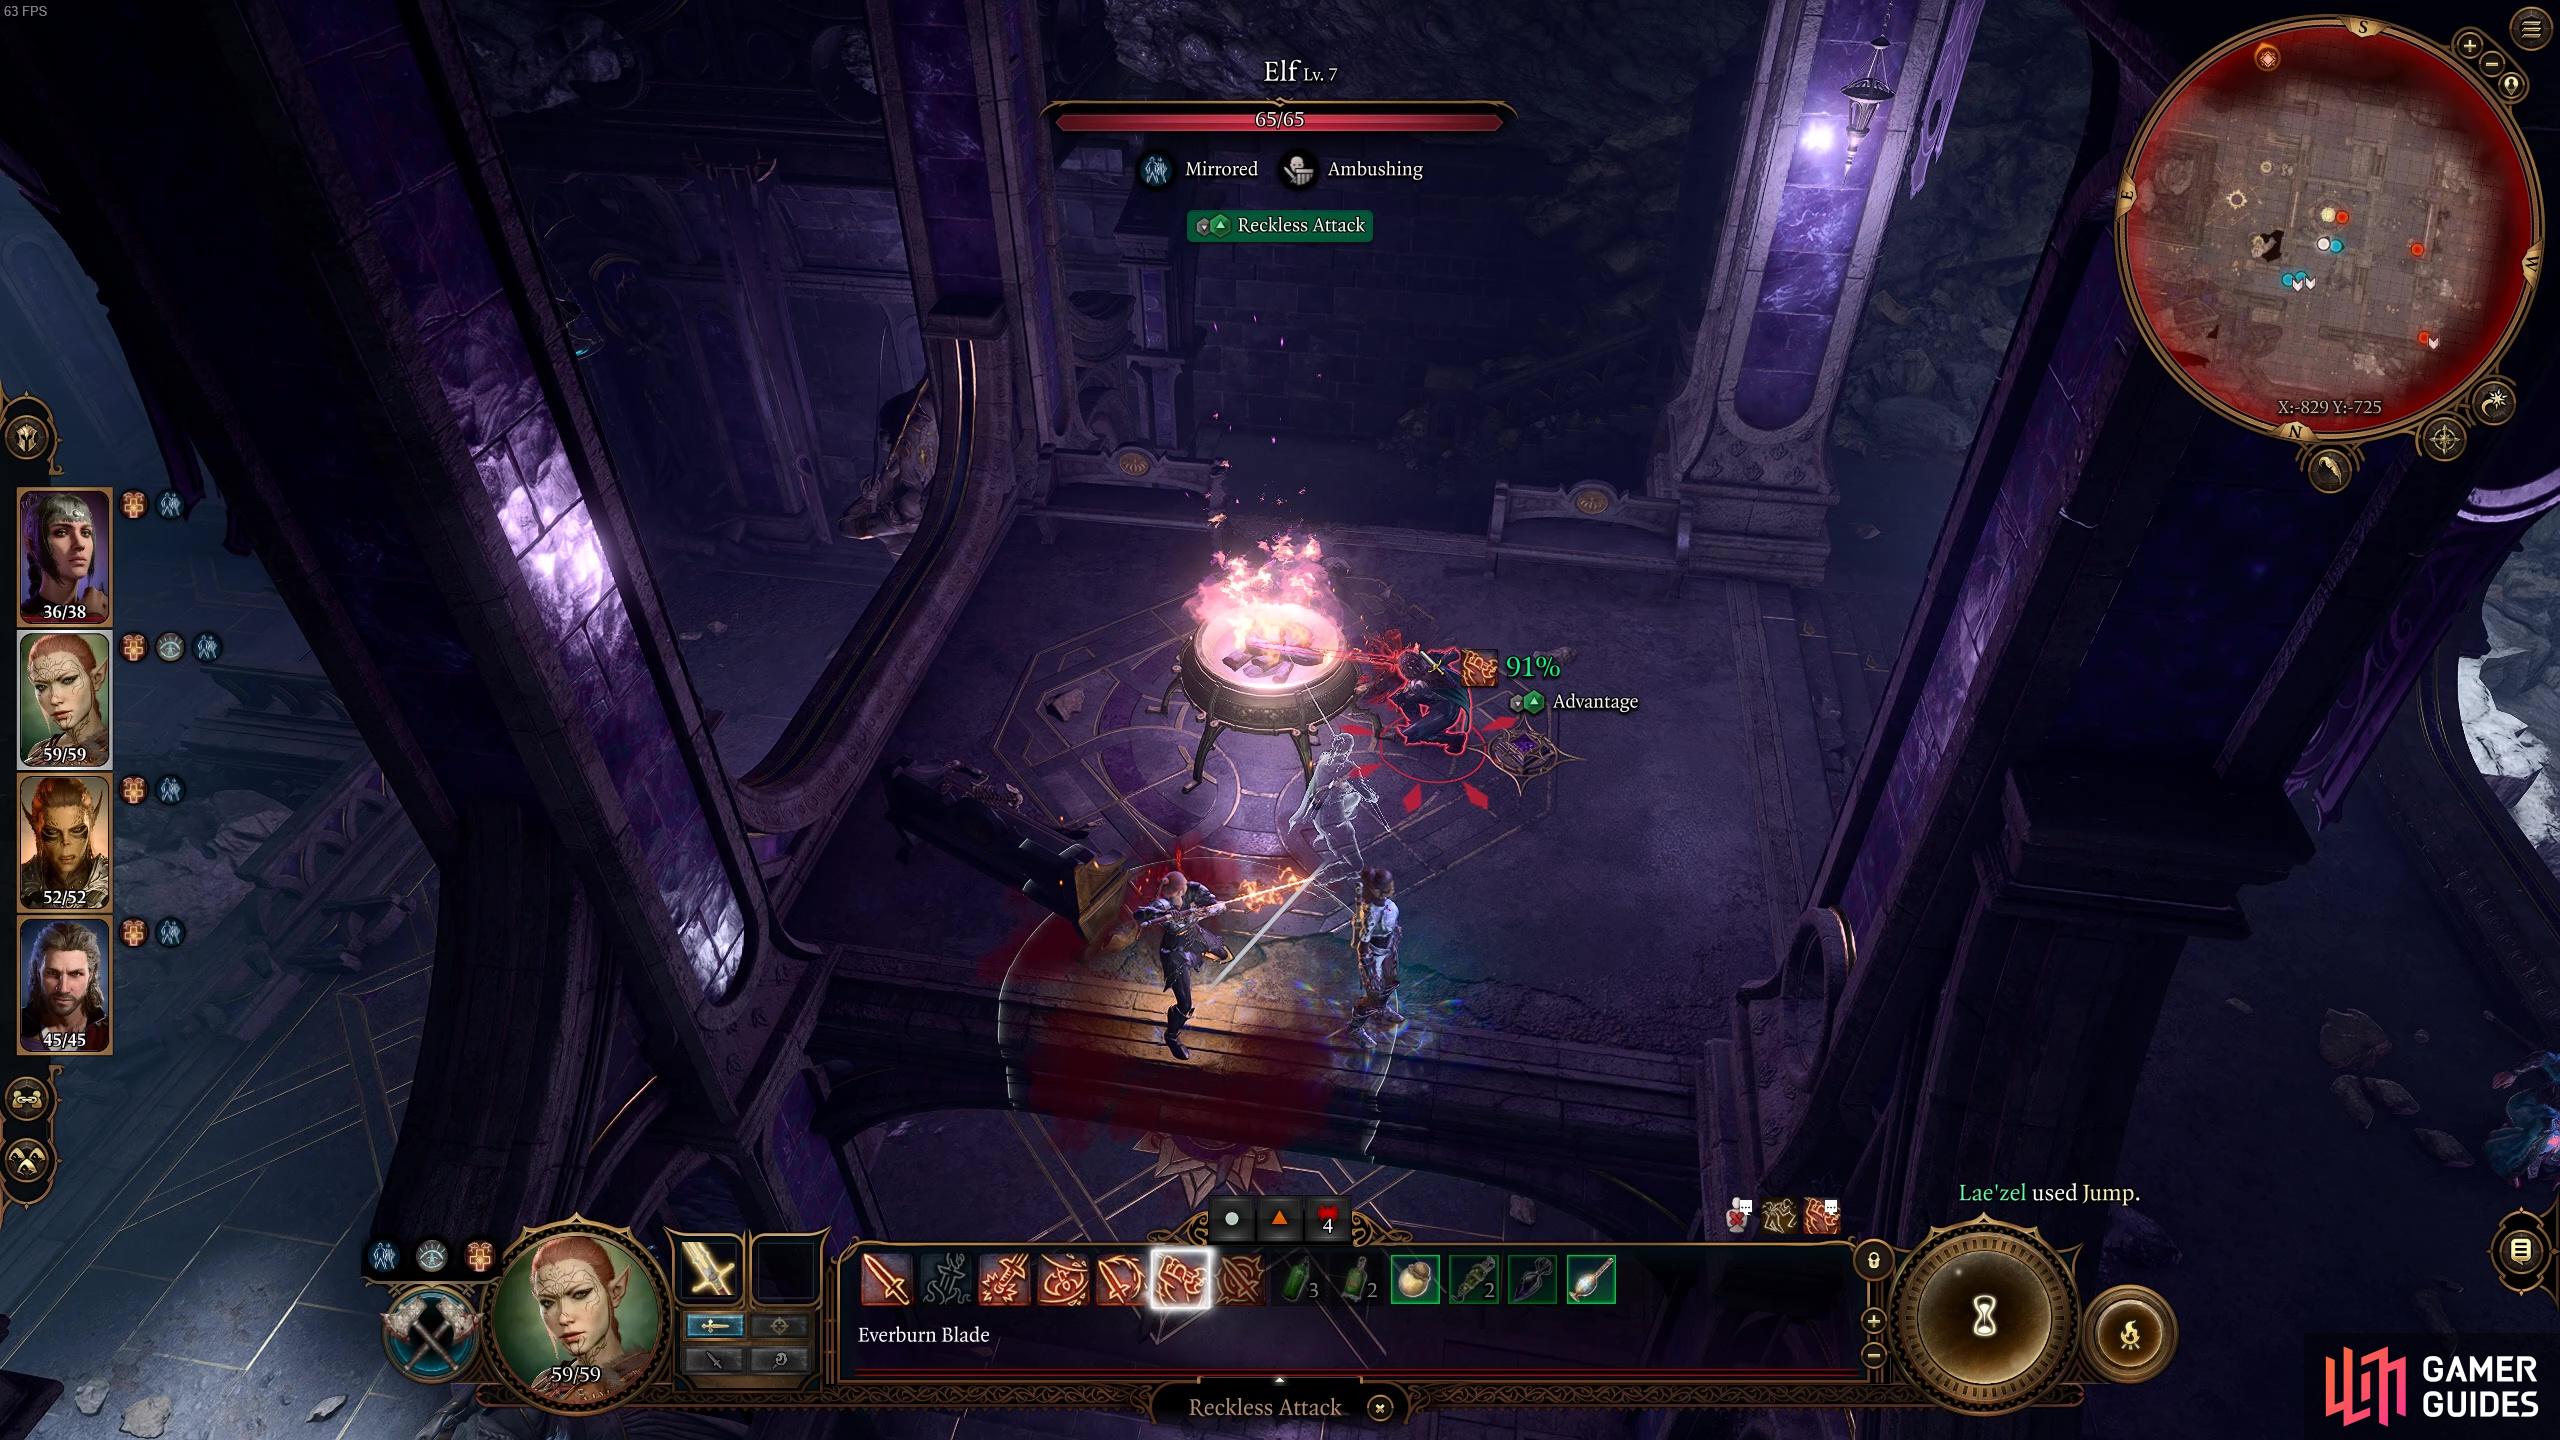
This trial is all about fighting mirror versions of your party members and so each trial fight will be unique to each player. That being said, there are a few things you’ll need to know about before you go in.
Firstly, they’re going to try and surprise attack you by hiding from you. If any one of your party members succeeds on a perception roll as you approach the middle of the room, you’ll be told that there’s an ambush. Instead of being the ambushed, you can do the ambushing instead! All you need to do is take one of your characters up to one of the mirror images and attack it to initiate a surprise attack round (the mirror images won’t get a turn for one round). Make sure to attack one of the closer mirror images and also to use the same character as the mirror image because during this fight you should only have your characters attack their mirror selves and no one else’s.
You can switch the script and surprise them instead!
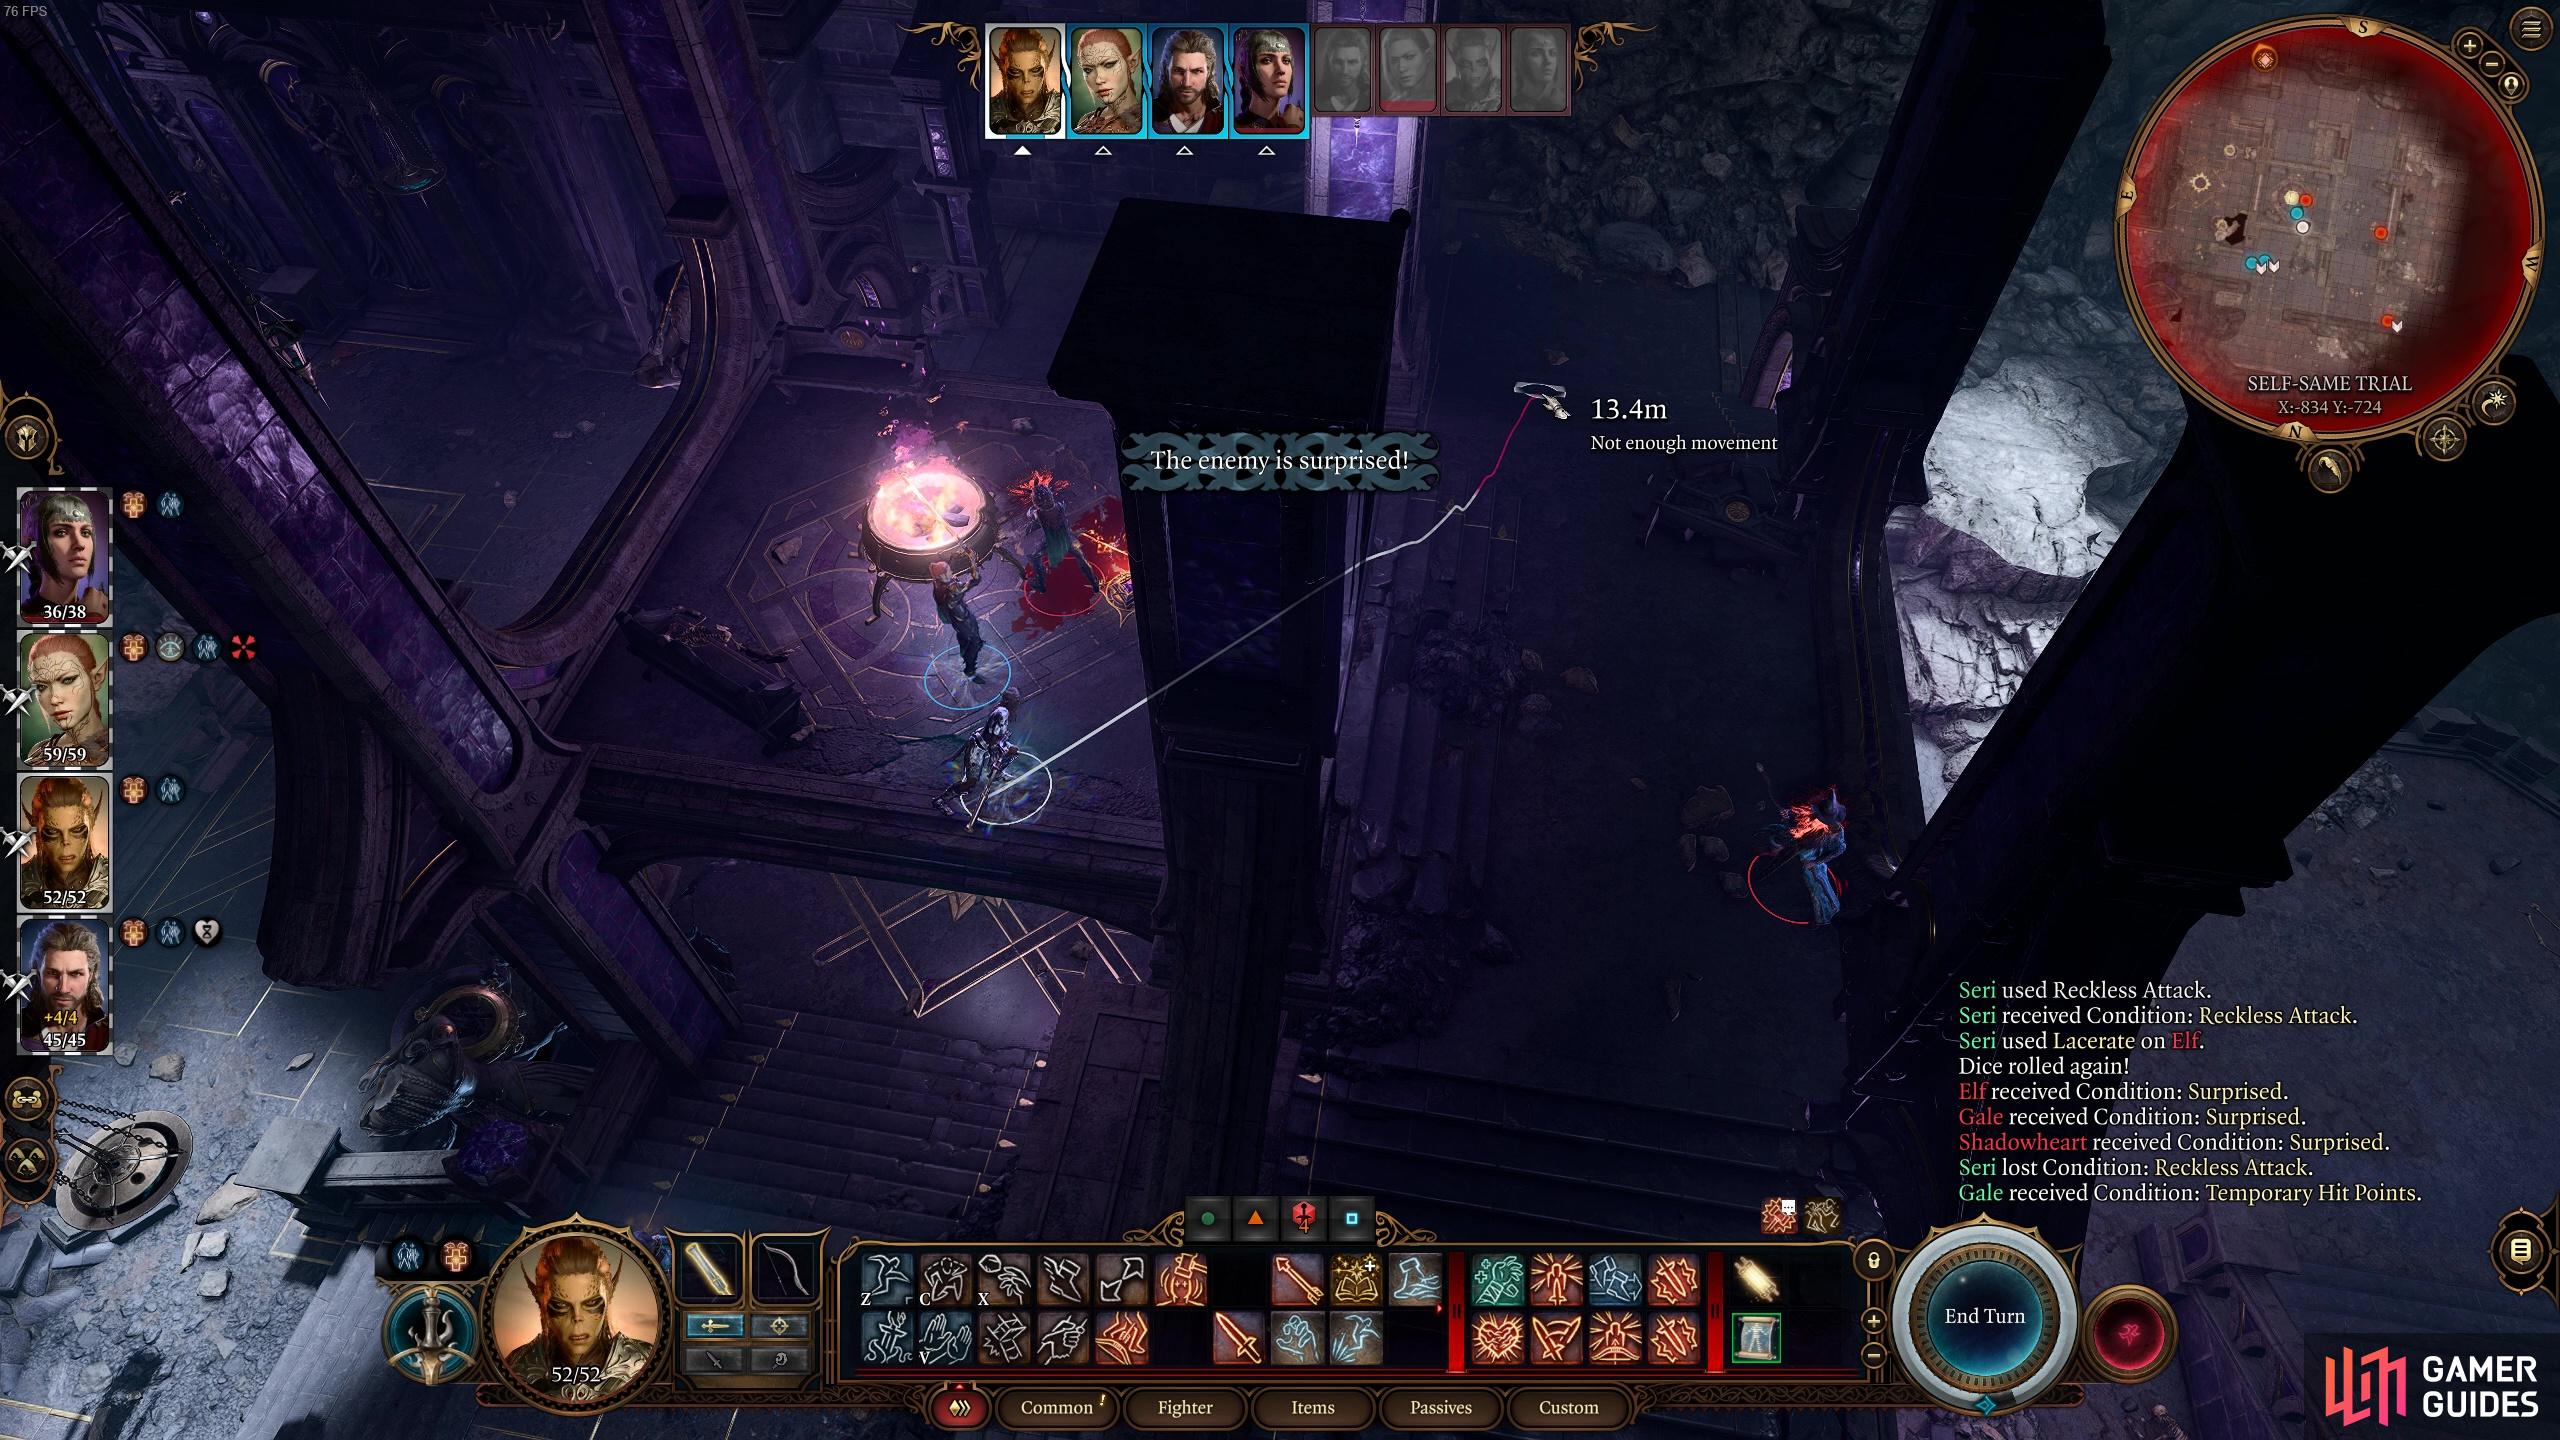
This will cause them to lose one round of combat!
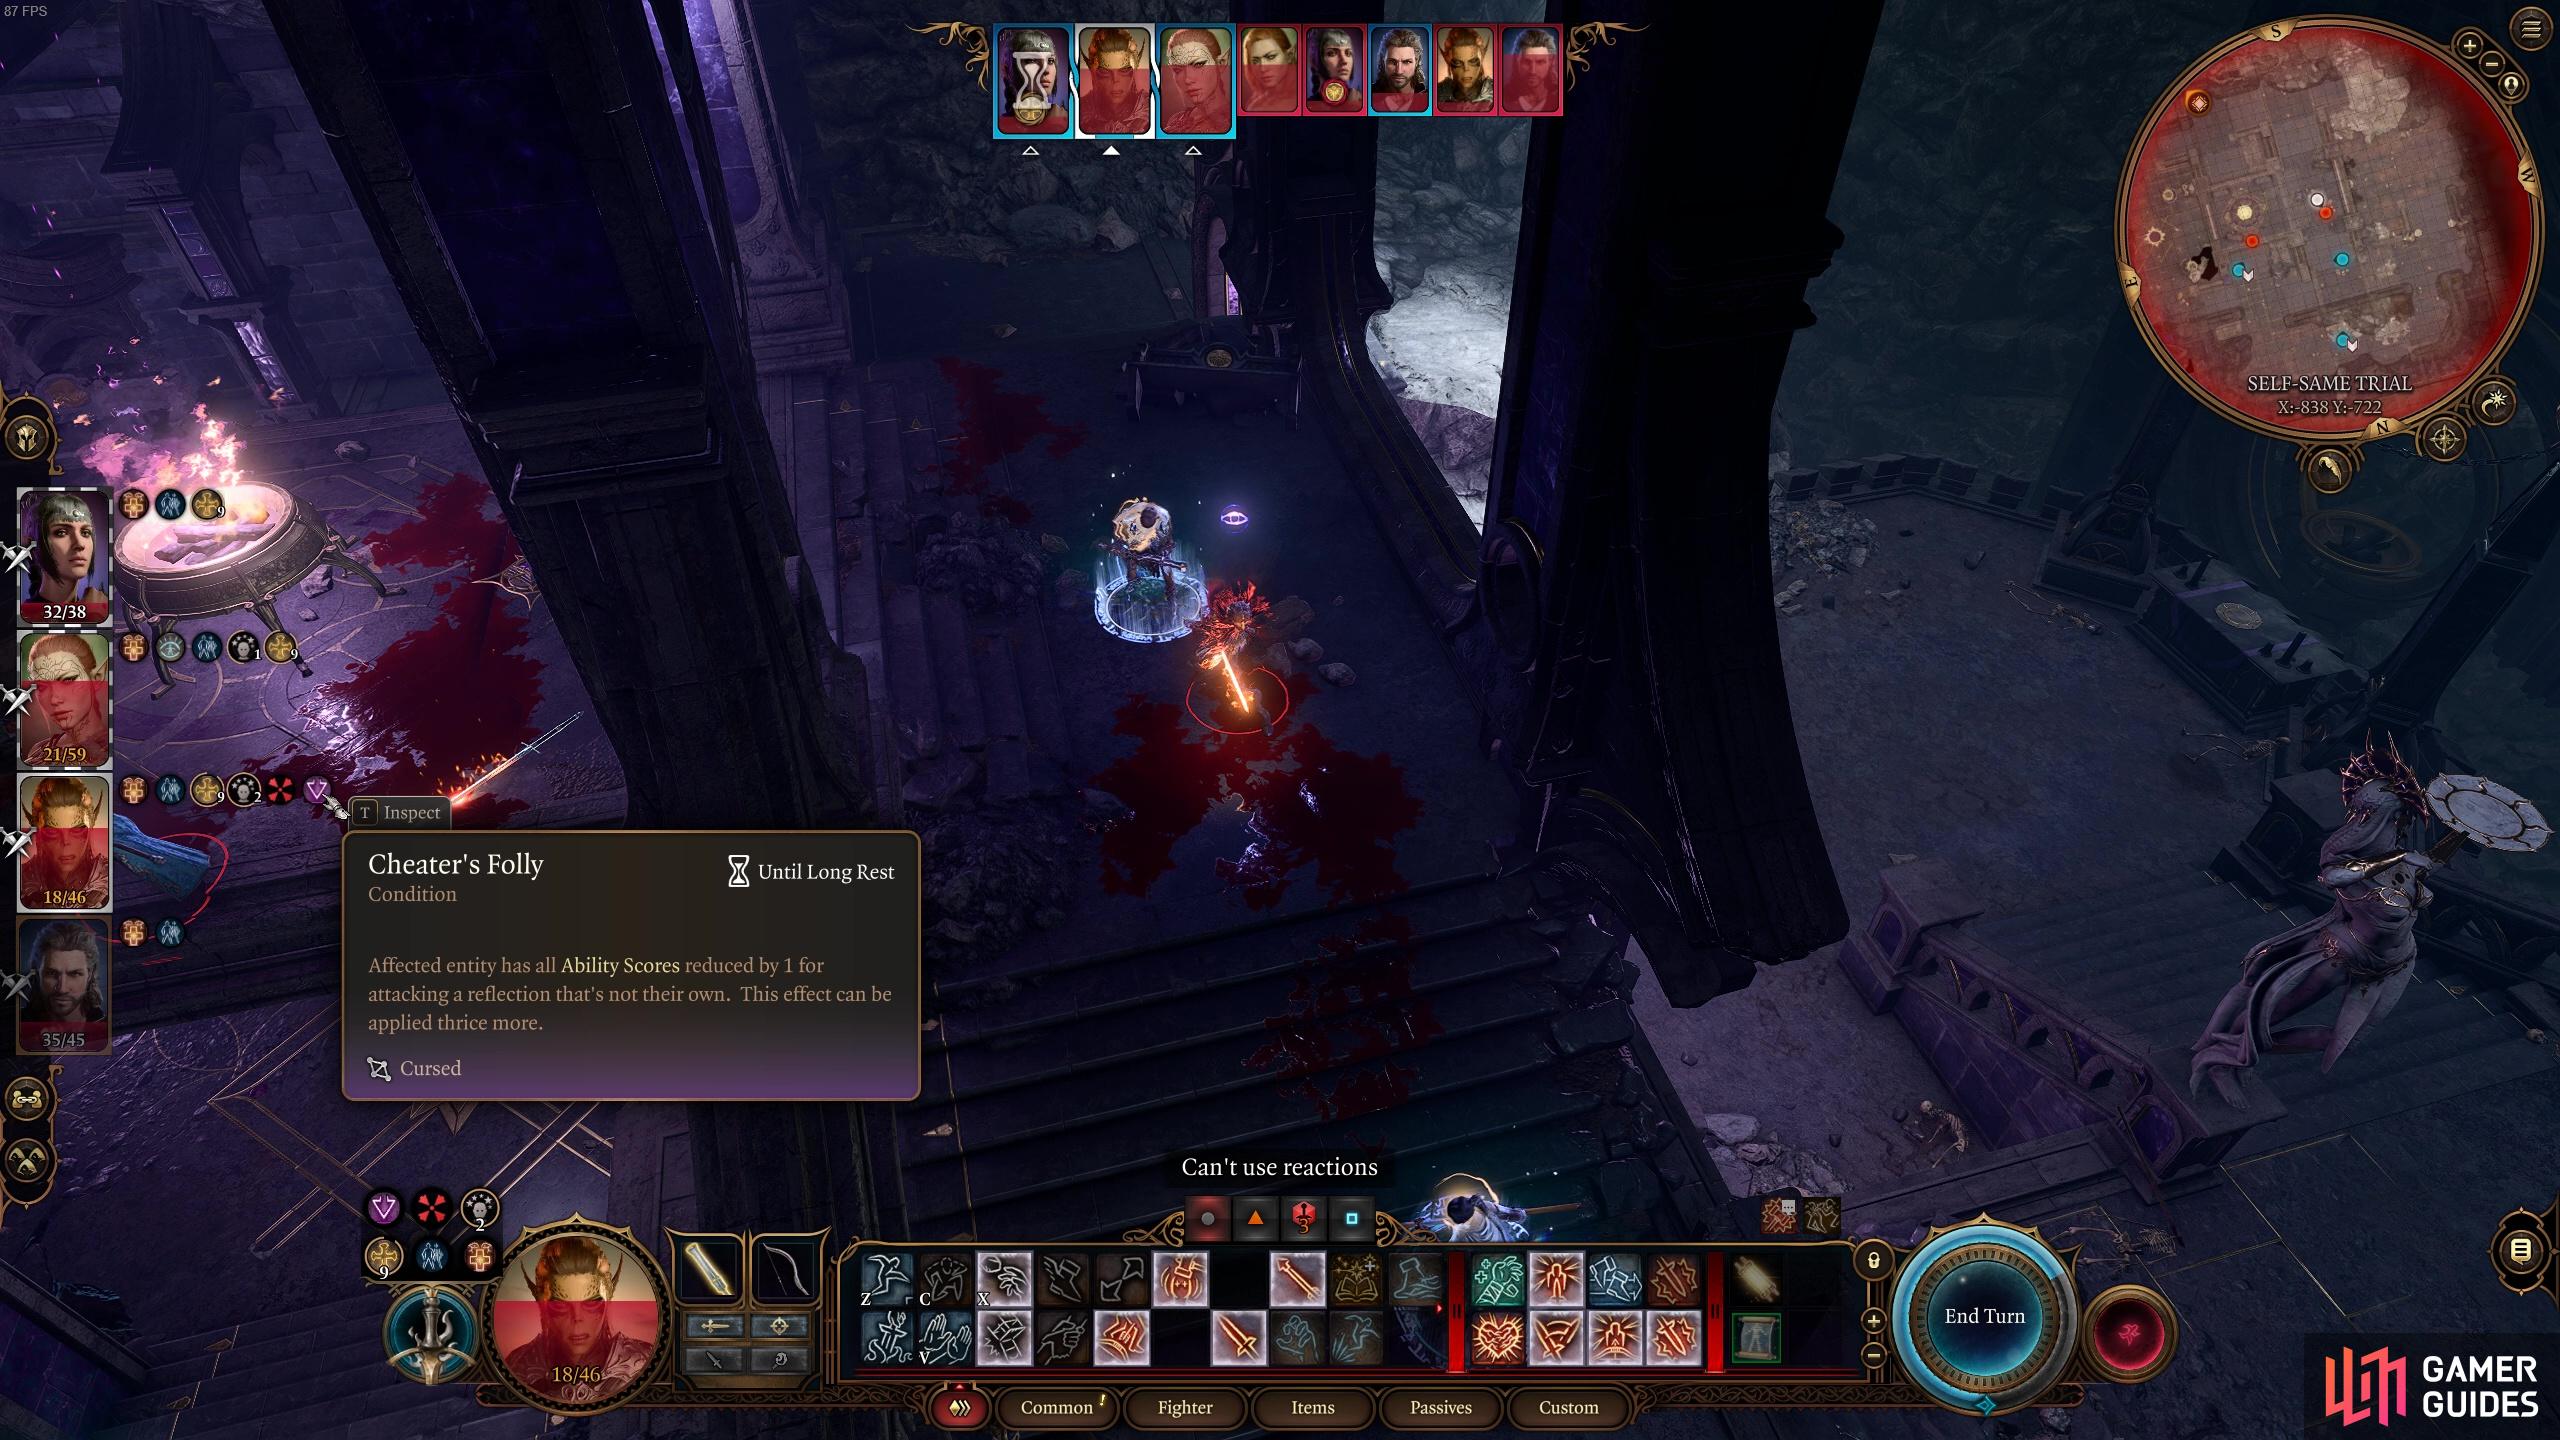
Unfortunately, you should avoid sending in your OP fighter to oneshot the squishy spellcaster mirror enemies as each time you have a character attack a different mirror enemy they’ll get hit with the curse condition Cheater’s Folly, which reduces all of that character’s abilities by 1 until long rest, and it can stack up to four times! Shar doesn’t like when you cheat! However, this won’t stop the mirror images from attacking the other counterparts though!
This is easily the trickiest aspect of the trial as you won’t really want to attack their squishies and trigger the curse but the mirror images of your big burly fighters won’t hesitate in slapping around your spellcasters! If you plan on having a long rest after the trial then it won’t be too bad if you do want to “cheat” and hit the other mirror images.
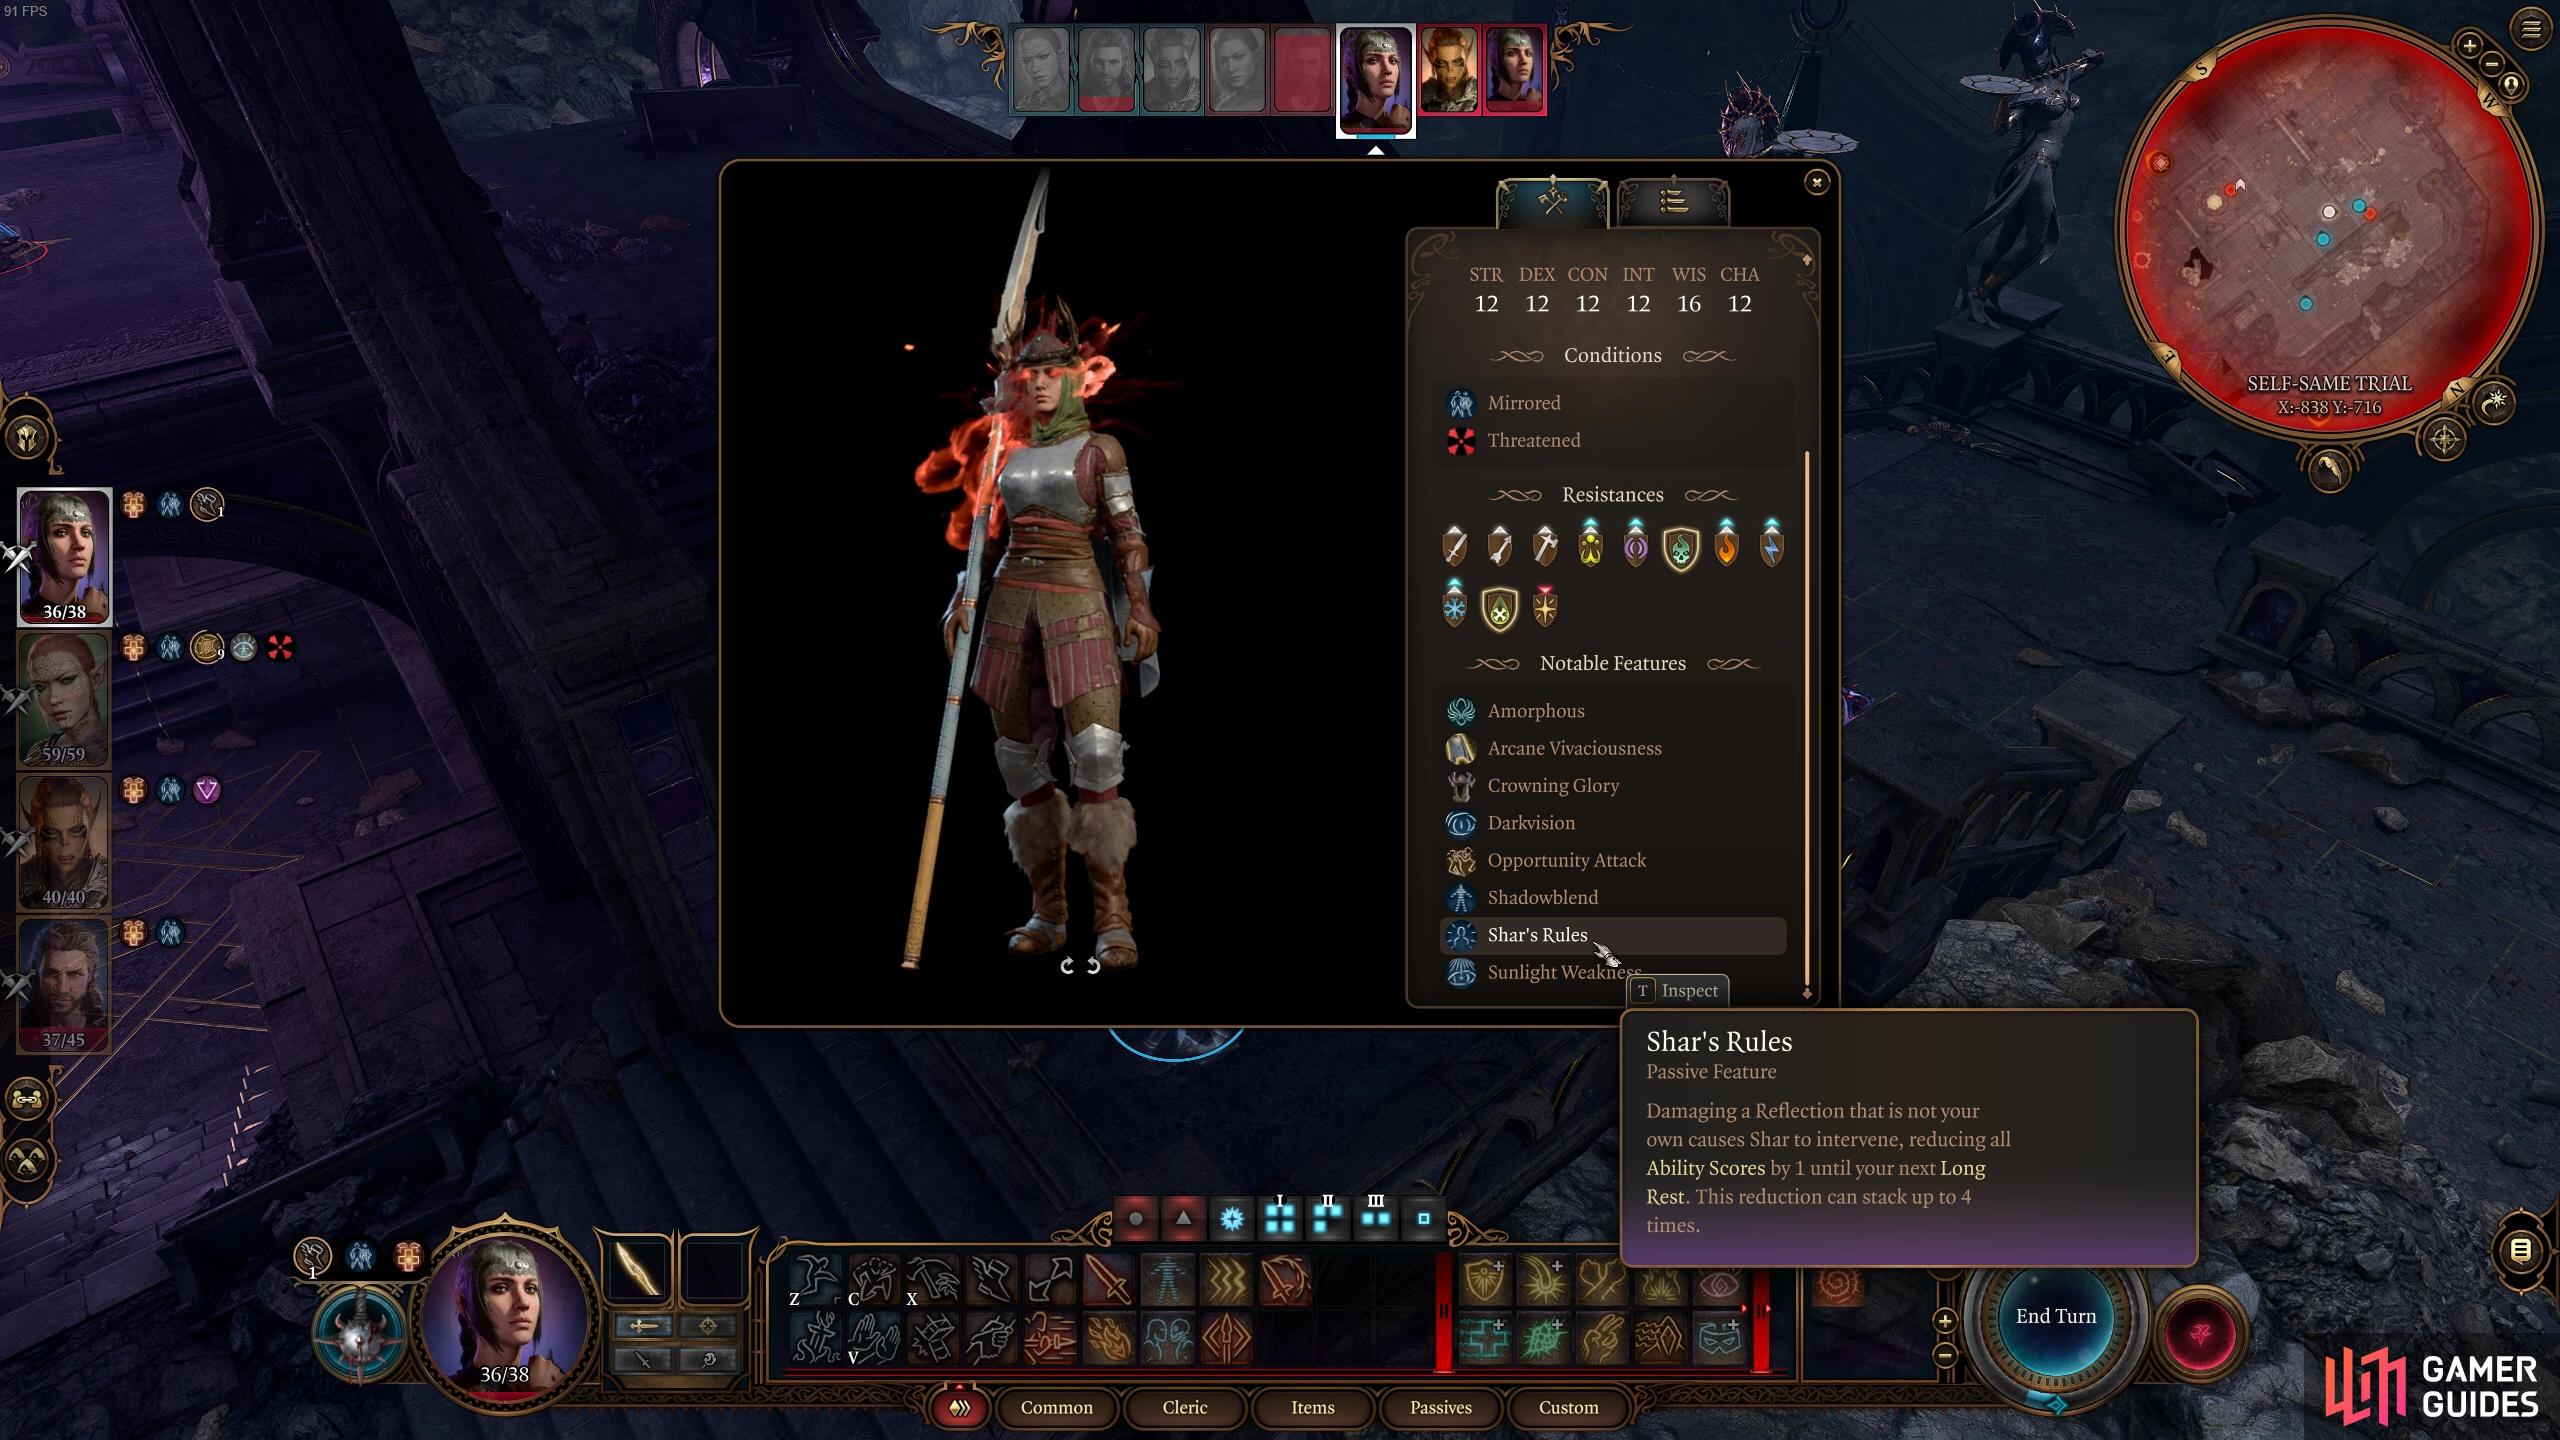
If you don’t want to feel Shar’s wrath
try to avoid attacking other mirror images.
Additionally, you’ll find that the mirror images cannot be shoved, pushed or thrown due to their Amorphous Passive Feature. They also have the ability to become invisible whilst lightly or fully obscured in shadows meaning you’ll find that they often disappear during the fight, making it tricky to get damage in. It could be good to conjure up a type of ![]() Light spell (like
Light spell (like ![]() Daylight) if you have one, because in addition to preventing them from going invisible they also have Sunlight weakness which means they have disadvantage on attack rolls and saving throws.
Daylight) if you have one, because in addition to preventing them from going invisible they also have Sunlight weakness which means they have disadvantage on attack rolls and saving throws.
This fight is really fun because you’ll get to see how the game AI uses your characters’ abilities and spells in a fight. It’s a good opportunity to remind you of some of the things you might have in your arsenal that you haven’t used in a while. Sometimes you can get in a bit of a rut of using the same old spells and attack hits, so consider analyzing what the mirror images do and try out some new stuff in your own combat!
After defeating all of the Mirror Images, pick up the Umbral Gem and return to the main area of the Gauntlet of Shar. The next trial on your to-do list is the Faith-Step Trial!
If you really want to make this fight easy, separate your party and take Shadowheart in by herself to the make the blood sacrifice (I also closed the door behind her but I'm not sure if that matters). Once you make the sacrifice the door will be locked behind you. You can then try for a DC20 lock pick to open it and bring the rest of your party in with you. You will only have to fight a shadow copy of Shadowheart at this point with the strength of your entire party..
If you really want to make this fight easy, separate your party and take Shadowheart in by herself to the make the blood sacrifice (I also closed the door behind her but I'm not sure if that matters). Once you make the sacrifice the door will be locked behind you. You can then try for a DC20 lock pick to open it and bring the rest of your party in with you. You will only have to fight a shadow copy of Shadowheart at this point with the strength of your entire party..