
The main story of Baldur’s Gate 3 takes you through three main acts. Act 2 mostly takes place in the Shadow-Cursed Lands (aka Shadowlands), but there’s also a substantial amount of content in the ![]() Mountain Pass, which bridges a gap between Act 1 and Act 2. Here you’ll find
Mountain Pass, which bridges a gap between Act 1 and Act 2. Here you’ll find ![]() Rosymorn Monastery and the Githyanki Creche. It’s worth doing this content before you venture to the Shadowlands. You’ll earn some valuable XP and have the chance to acquire some useful items that will help you in the darkness, such as
Rosymorn Monastery and the Githyanki Creche. It’s worth doing this content before you venture to the Shadowlands. You’ll earn some valuable XP and have the chance to acquire some useful items that will help you in the darkness, such as ![]() The Blood of Lathander legendary weapon. On this page, we’ll take you through a complete guide for Act 2 in BG3 so that you don’t miss any quests or secrets, including our recommended progress path to make the most of the story.
The Blood of Lathander legendary weapon. On this page, we’ll take you through a complete guide for Act 2 in BG3 so that you don’t miss any quests or secrets, including our recommended progress path to make the most of the story.
Complete Act 2 Walkthrough in Baldur’s Gate 3.
Overview for All Quests in Act 2 of Baldur’s Gate 3
As with Act 1, the quests available to you during Act 2 will vary depending on your prior choices. In this case, most of what is and isn’t available to you will be related to whether or not you decided to save the Emerald Grove, or attack it. If you chose to attack it, you’ll have fewer quests available to you during Act 2 in general. As you might expect, anything related to helping the Tieflings or Halsin’s questline will be blocked if you’re playing the baddie, so you’ll miss out on a significant amount of XP from additional quests related to them. You also won’t have access to Dammon’s shop at the Last Light Inn, which also prevents you from acquiring the Helldusk armor that he can craft. So, if you played the baddie during Act 1, your experience of Act 2 is likely to be shorter and less rewarding.
If you want to jump to specific sections of this walkthrough, see the links below:
In addition to the main quests, side quests, and secrets / side content covered below, you will also be continuing the companion quests that you started in Act 1. There is some overlap between these and the main content, and it’s difficult to miss the objectives so long as you cover everything. If you want to make the most of the story in the Shadowlands during Act 2, we highly recommend having ![]() Shadowheart in your party, but you will also have more options for interaction with
Shadowheart in your party, but you will also have more options for interaction with ![]() Astarion and Raphael here too. However, if these aren’t your preferred companions, you can get a condensed version of their reactions back at camp after completing the relevant quests. Needless to say, Shadowheart won’t be too pleased if you go to the
Astarion and Raphael here too. However, if these aren’t your preferred companions, you can get a condensed version of their reactions back at camp after completing the relevant quests. Needless to say, Shadowheart won’t be too pleased if you go to the ![]() Gauntlet of Shar without her.
Gauntlet of Shar without her.
Table of Main Quests and Side Quests in Act 2
Act 2 Checklist in Baldur’s Gate 3
If you’re looking for a brief summary of the steps necessary to advance Act 2 in both the Mountain Pass and the Shadow-Cursed Lands, we’ve included one below. This includes essential steps to get through this part of the story, but also to make the most of the side content without missing out. This is not an exhaustive list, so we’ve included more details in the breakdowns below, including links to relevant guides for each quest. Some of the quest objectives here are time-sensitive, which we’ve highlighted, so be aware to prioritize those and complete them as soon as possible.
- Make sure you’ve covered everything in the
 Underdark and Mountain Pass
 - Be sure to rest frequently to advance companion dialogue & quests
- Prioritize finding the Last Light Inn when you reach the Shadowlands
- Don’t advance to
 Moonrise Towers before acquiring a reliable lightsource
 - Complete
 Wake up Art Cullagh quickly to recruit Halsin
 - Make a manual save before you approach Moonrise Towers so you can save Rolan
- Complete all side content roughly in the order below before advancing main quests
- Bring Shadowheart to the Gauntlet of Shar to make the most of it
- Make use of traders within Moonrise Towers, and take Infernal Iron to Dammon
- Avoid fighting with Moonrise Towers inhabitants until you’ve explored it thoroughly
- When ready, assassinate Moonrise Towers inhabitants to make the last fight easier
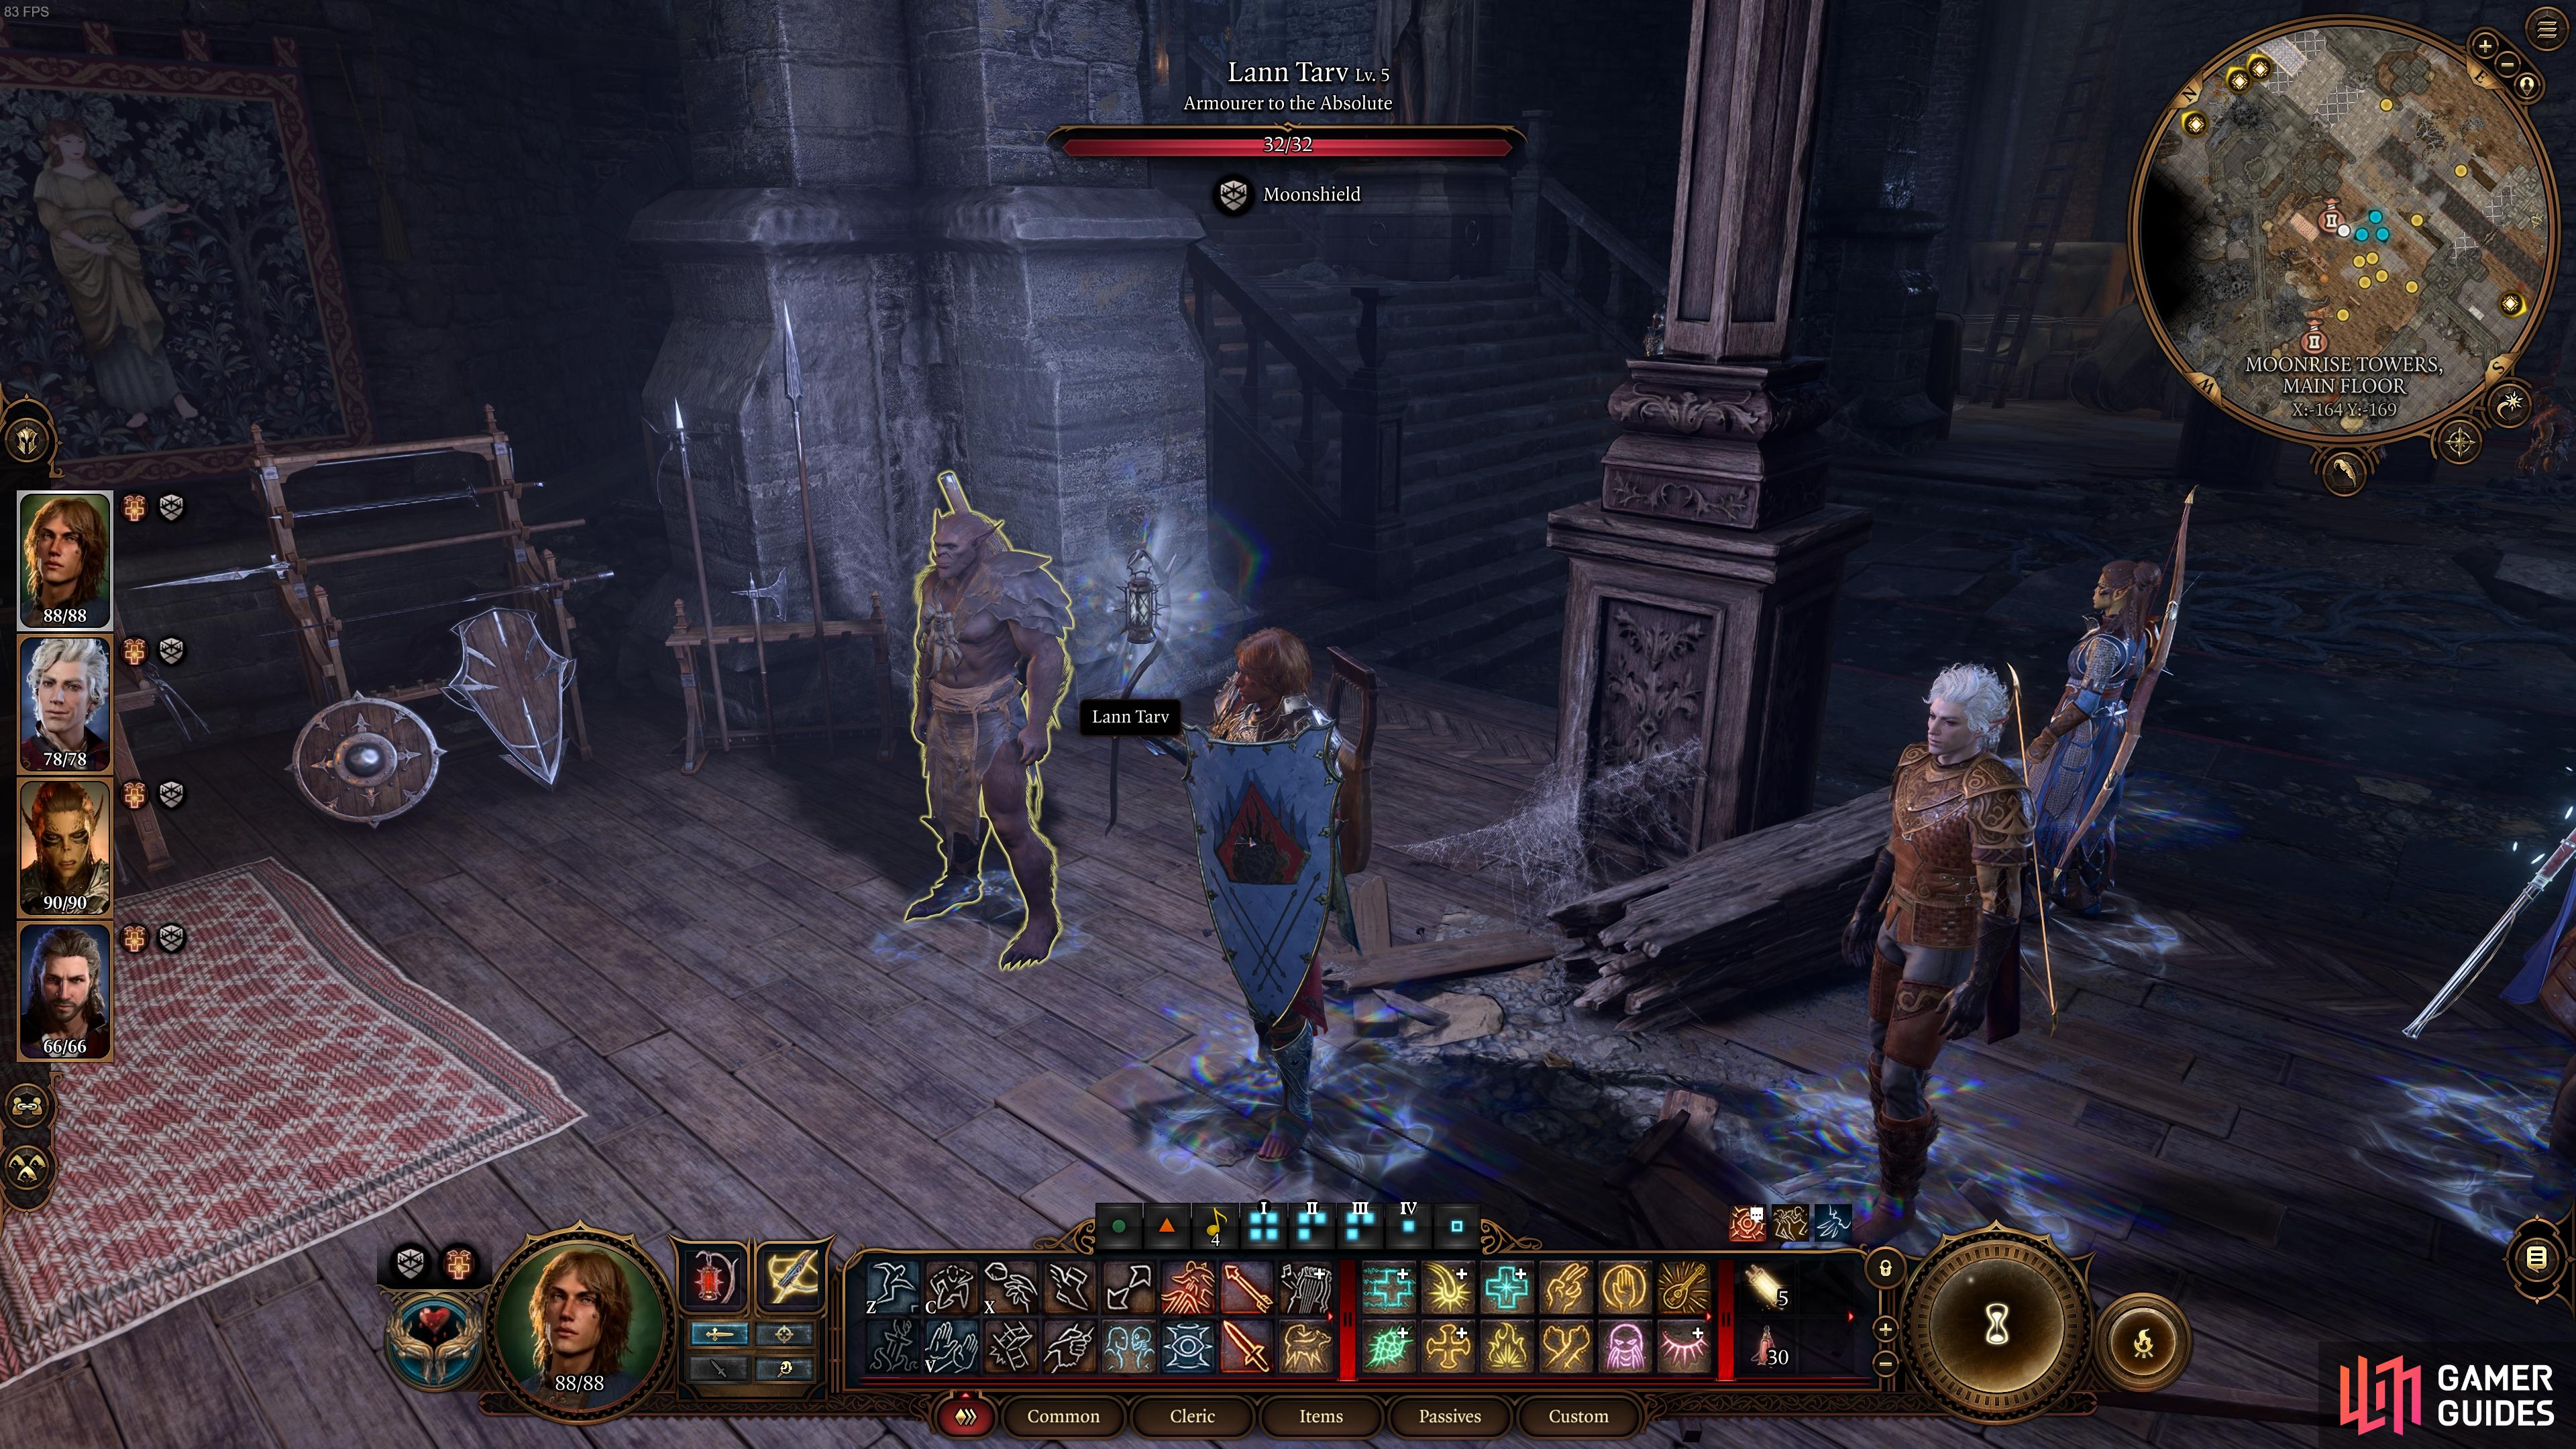
(1 of 4) Make use of the traders in Moonrise Towers before killing them.
Main Quests
Seek Protection from the Shadow Curse
One of the first things you’ll need to do when you enter the Shadow-Cursed Lands is find a way to protect yourself from the Shadow Curse. This is a blight that has spread throughout the land, and it will slowly kill you unless you have a light source that is sufficiently powerful to withstand the curse. There are multiple ways of obtaining such a light source, and one of them is by using The Blood of Lathander mace, which you can obtain by completing the puzzles associated with the Rosymorn Monastery and the Githyanki Creche. This is why it’s a good idea to go through the Mountain Pass and complete those areas first, before coming to the Shadow-Cursed Lands.
If you don’t have the mace, you’ll need to use torches or a light-based spell, such as ![]() Daylight, to keep the curse at bay for now. If you came to the Shadow-Cursed Lands via the Mountain Pass, it won’t be long before you acquire a Moonlantern from an NPC named Kar’niss, the Drider. If you came through the Underdark instead, you should seek the refuge of the Last Light Inn as soon as possible, then venture out with the Harpers to find Kar’niss with them instead. Alternatively, once you reach Moonrise Towers, you can find another
Daylight, to keep the curse at bay for now. If you came to the Shadow-Cursed Lands via the Mountain Pass, it won’t be long before you acquire a Moonlantern from an NPC named Kar’niss, the Drider. If you came through the Underdark instead, you should seek the refuge of the Last Light Inn as soon as possible, then venture out with the Harpers to find Kar’niss with them instead. Alternatively, once you reach Moonrise Towers, you can find another ![]() Moonlantern in Balthazaar’s room. Whichever way you do it, once you have the Moonlantern you’ll need to keep it equipped for it to be useful.
Moonlantern in Balthazaar’s room. Whichever way you do it, once you have the Moonlantern you’ll need to keep it equipped for it to be useful.
If you want to use a weapon while still being protected from the Shadow Curse, you should consider releasing the pixie which has been imprisoned in the Moonlantern. You can learn more about this on our Should You Release the Pixie in BG3 page. Ultimately, to gain permanent protection from the Shadow Curse you need to remove it from the land, or at least weaken it, and that can be done by pursuing Halsin’s questline in the Shadowlands, which begins with waking up Art Cullagh. Be sure to check our How to Wake Up Art Cullagh in Baldur’s Gate 3 page to learn more about how to start that process. You can also learn more about how to survive the Shadow Curse in general on our How to Survive the Shadow Curse in Act 2 page.
Follow the Convoy
This quest begins if you choose to follow Kar’niss and the convoy of the Absolute followers all the way to Moonrise Towers. Along the way, you will be ambushed by Harpers and you’ll have the chance to betray Kar’niss, help the Harpers, and take the Moonlantern there and then. You’ll have an easier time if you help the Harpers here, and they’ll show you where to find the ![]() Last Light Inn after the fight, so we recommend taking this option. If you go to Moonrise Towers with Kar’niss, you’ll need to continue to play the part of a True Follower of the Absolute, which requires more roll checks and, potentially, a more difficult fight against the Harpers.
Last Light Inn after the fight, so we recommend taking this option. If you go to Moonrise Towers with Kar’niss, you’ll need to continue to play the part of a True Follower of the Absolute, which requires more roll checks and, potentially, a more difficult fight against the Harpers.
To read more about this quest, see our How to Ambush and Defeat Kar’niss in BG3 page.
Resolve the Abduction / Capture Isobel the Selunite Cleric
This quest begins once you meet Isobel at the Last ![]() Light Inn. You’ll have the option to protect her from Flaming Fist Marcus, or to help him in bringing Isobel back to Moonrise Towers. To save Isobel, you just need to defeat Marcus before she sustains enough damage to bring her to 0 HP, then defeat the Winged Horrors which are attacking the Last Light Inn. This can be a tough fight if you’re not prepared, so we recommend reading our page on How to Save Isobel at the Last Light Inn.
Light Inn. You’ll have the option to protect her from Flaming Fist Marcus, or to help him in bringing Isobel back to Moonrise Towers. To save Isobel, you just need to defeat Marcus before she sustains enough damage to bring her to 0 HP, then defeat the Winged Horrors which are attacking the Last Light Inn. This can be a tough fight if you’re not prepared, so we recommend reading our page on How to Save Isobel at the Last Light Inn.
If you chose to follow Kar’niss and the convoy to Moonrise Towers, you’ll get the ![]() Capture Isobel the Selunite Cleric quest instead. This will lead you to the Last Light Inn, but in rather different circumstances than if you entered it as a friend. If you choose to go through with abducting her, the Last Light Inn will lose its protection from the Shadow Curse, causing the death of many of its inhabitants. We strongly recommend against doing this if you want to play a vaguely “good” character.
Capture Isobel the Selunite Cleric quest instead. This will lead you to the Last Light Inn, but in rather different circumstances than if you entered it as a friend. If you choose to go through with abducting her, the Last Light Inn will lose its protection from the Shadow Curse, causing the death of many of its inhabitants. We strongly recommend against doing this if you want to play a vaguely “good” character.
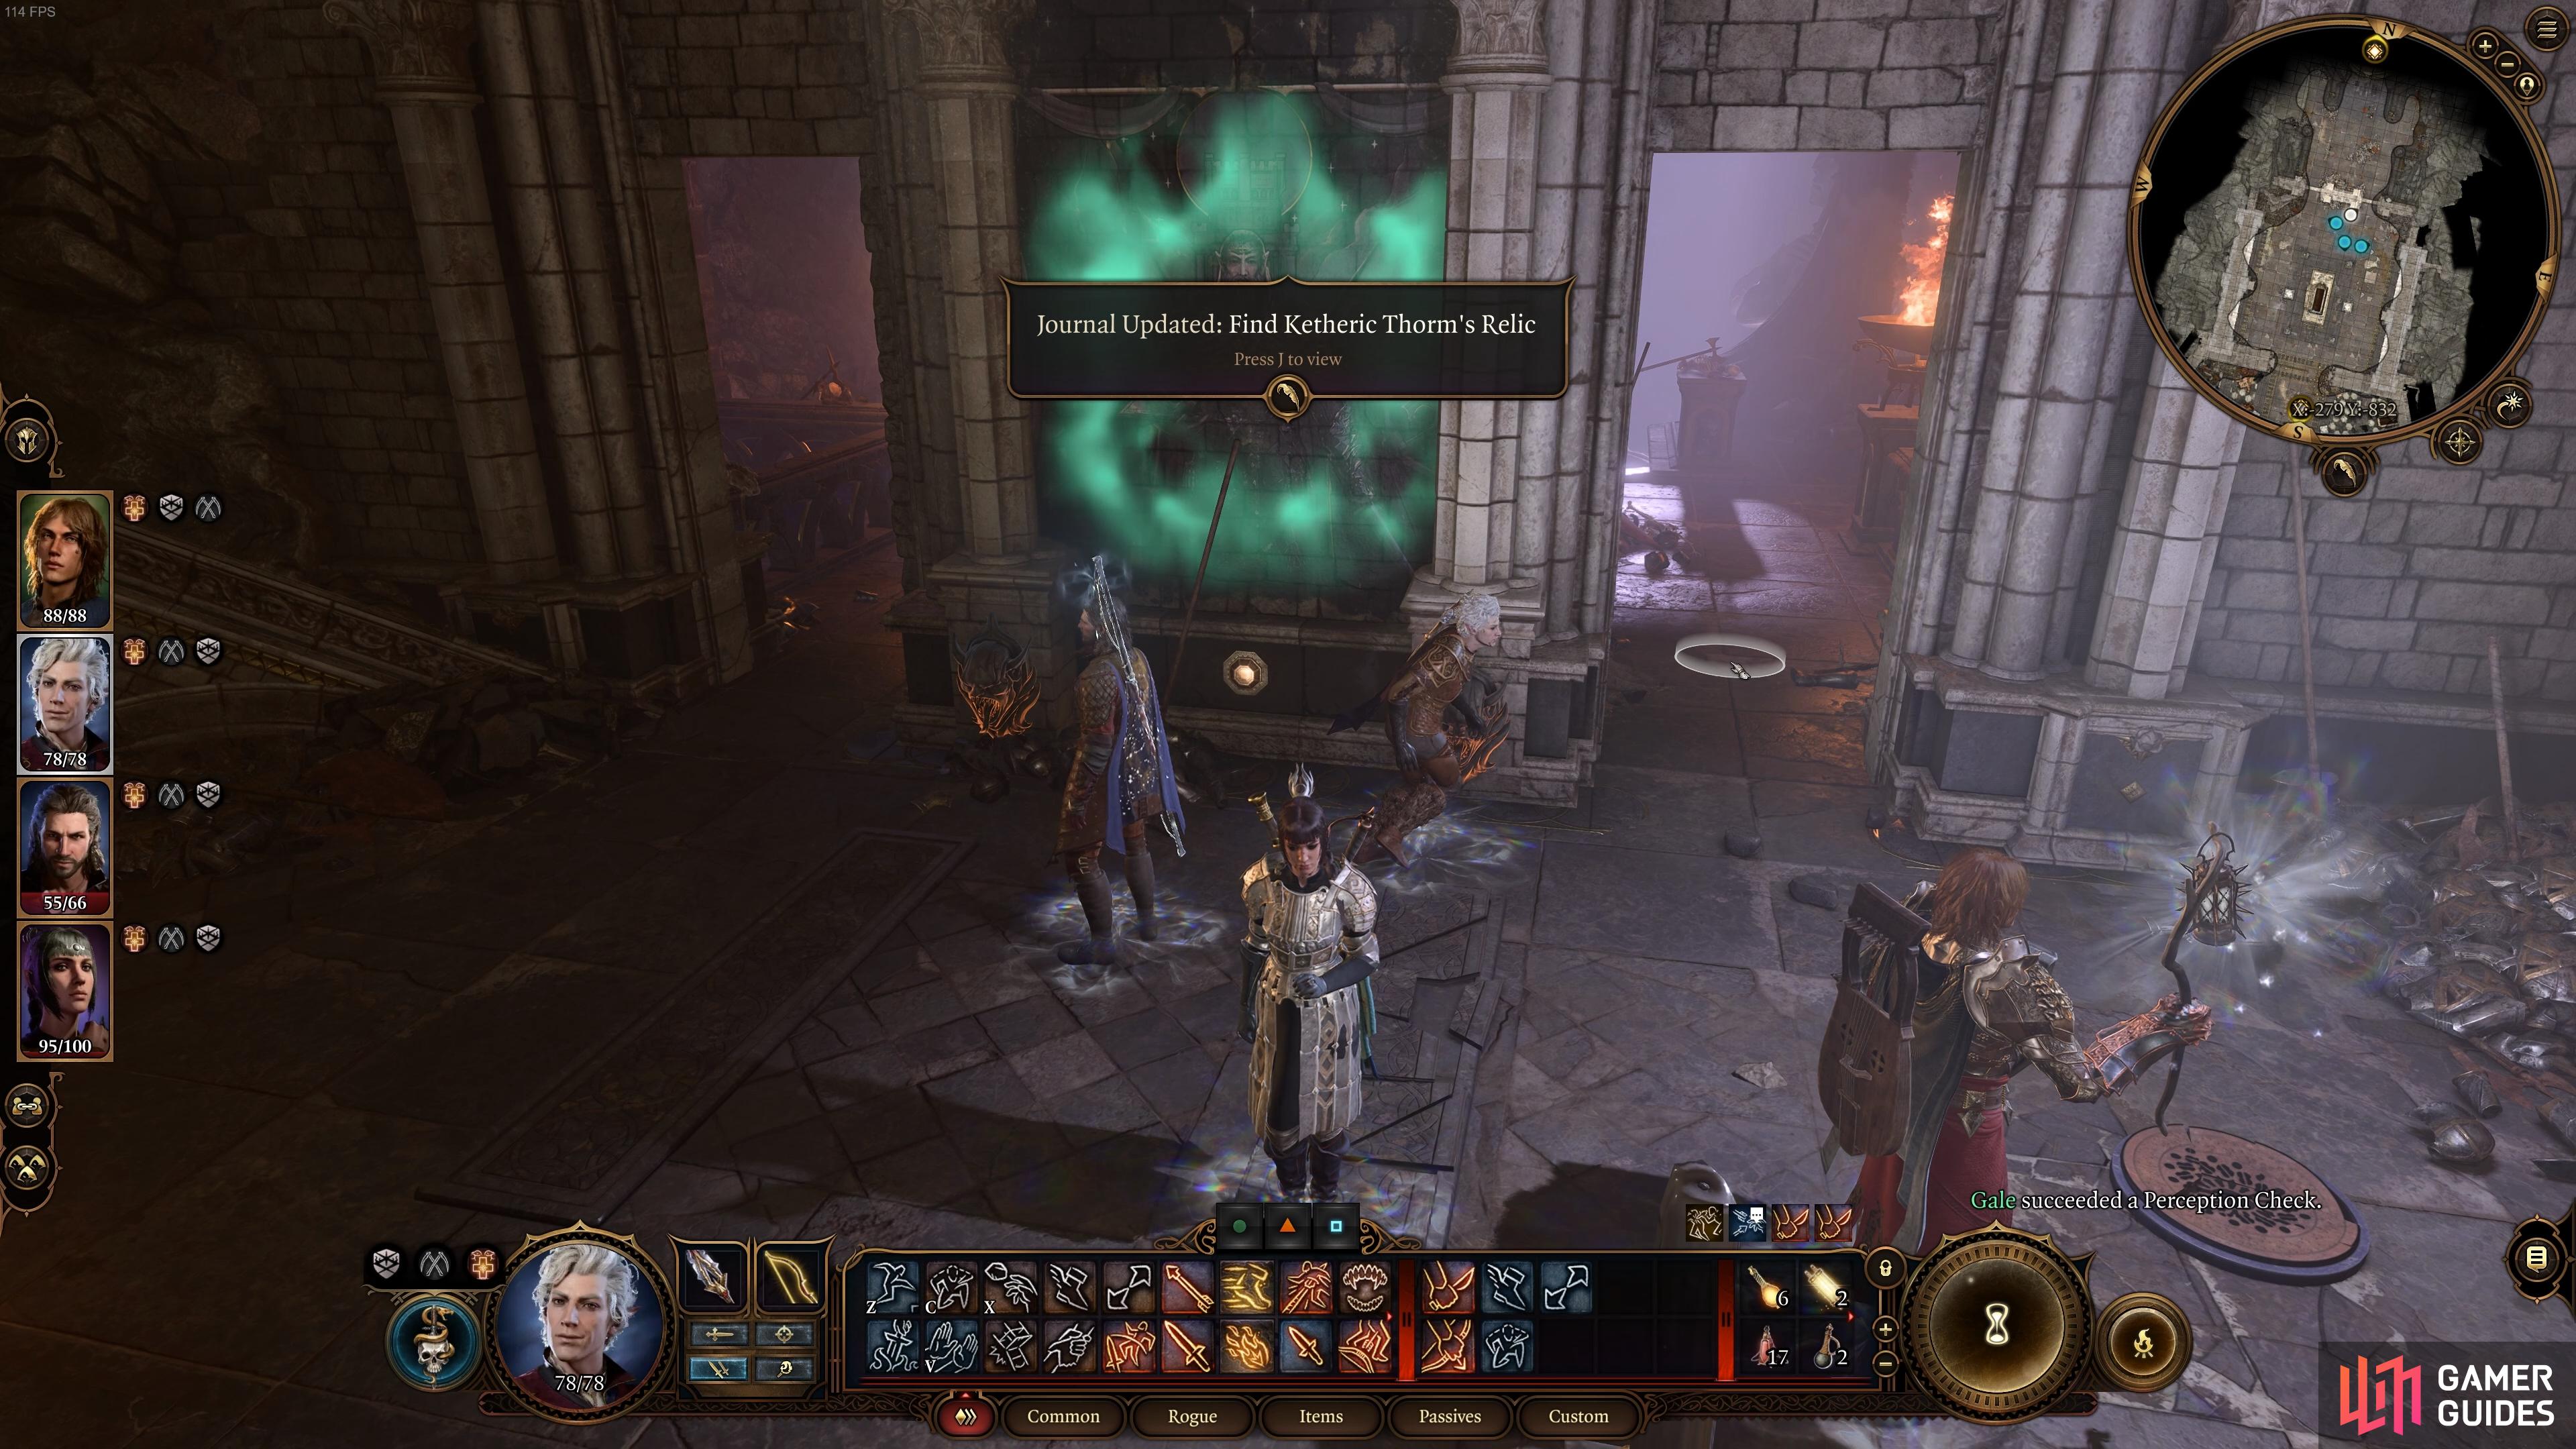
Find Kethric Thorm’s Relic
This quest will start properly once you reach Moonrise Towers and begin to learn about the relic which makes Kethric Thorm invulnerable to damage. As a good character, you’ll learn a bit more about this when you speak with Jaheira at the Last Light Inn, but ultimately you begin to learn the most about it after speaking with Disciple Z’rell, who can be found at Moonrise Towers. This quest will be the main guiding force through Act 2 of the main story in the Shadow-Cursed Lands, and it will see you looking for Balthazar, exploring his room, completing the Gauntlet of Shar with its associated puzzles for the Umbral Gems, and ultimately progressing the Nightsong quest, which ties in with Kethric Thorm and his relic.
We recommend leaving the last phase of this quest, at the point where you encounter the Gauntlet of Shar, until the very end of your adventures in the Shadow-Cursed Lands. This is because completing the quest fully will irrevocably change aspects of the world in this region, making it impossible to complete some side quests if you haven’t done so already. When you’re ready to tackle it, you can find a detailed walkthrough on our Gauntlet of Shar and Temple of Shar Complete Walkthrough in BG3 page.
Side Quests
Find the Githyanki Creche
As mentioned in the introduction to this walkthrough, we suggest going through the Mountain Pass before you enter the Shadow-Cursed Lands. This is because you can find the Rosymorn Monastery and the Githyanki Creche there, both of which offer a significant amount of XP and loot which will prove useful to you in the Shadowlands. Exploring the Githyanki Creche is also crucial for you to advance ![]() Lae’zel’s questline, so if you have her in your party you will need to go here to get the most out of her story. You can find a detailed walkthrough for how to find the Githyanki Creche, and how to navigate it safely once inside, on our Find the Githyanki Creche Walkthrough page.
Lae’zel’s questline, so if you have her in your party you will need to go here to get the most out of her story. You can find a detailed walkthrough for how to find the Githyanki Creche, and how to navigate it safely once inside, on our Find the Githyanki Creche Walkthrough page.
Steal a Githyanki Egg
As you enter the Mountain Pass from the ![]() Wilderness region of Act 1, you’re likely to stumble upon an NPC named Lady Esther. She will ask you to steal a Githyanki Egg from the Githyanki Creche, which she intends to bring back to a guild known as the Society of Brilliance in Baldur’s Gate. There’s a bit more to this tale than meets the eye, and there are some serious consequences depending on the choices you make, including whether to give her the Owlbear Egg that you may still have from Act 1. You’d do well to read our page on whether you should Give Lady Esther the Githyanki or Owlbear Egg before committing to a specific choice.
Wilderness region of Act 1, you’re likely to stumble upon an NPC named Lady Esther. She will ask you to steal a Githyanki Egg from the Githyanki Creche, which she intends to bring back to a guild known as the Society of Brilliance in Baldur’s Gate. There’s a bit more to this tale than meets the eye, and there are some serious consequences depending on the choices you make, including whether to give her the Owlbear Egg that you may still have from Act 1. You’d do well to read our page on whether you should Give Lady Esther the Githyanki or Owlbear Egg before committing to a specific choice.
It’s a good idea to check what Lady Esther has to offer from her shop before you enter the Githyanki Creche. She has some useful items which have the potential to make your life easier once inside the creche!
Find the Blood of Lathander
The ![]() Find the Blood of Lathander quest can be acquired as you explore the Rosymorn Monastery, which is directly above the Githyanki Creche in the Mountain Pass region. The quest alludes to a mysterious weapon, which if you’ve read anything of the main story quests associated with Act 2 above, you’ll know is a mace which can help to withstand the Shadow Curse. This is an extremely useful weapon to have while exploring the Shadow-Cursed Lands, and it has a powerful level 6 spell which can inflict massive damage to most enemies, especially those affected by the Shadow Curse.
Find the Blood of Lathander quest can be acquired as you explore the Rosymorn Monastery, which is directly above the Githyanki Creche in the Mountain Pass region. The quest alludes to a mysterious weapon, which if you’ve read anything of the main story quests associated with Act 2 above, you’ll know is a mace which can help to withstand the Shadow Curse. This is an extremely useful weapon to have while exploring the Shadow-Cursed Lands, and it has a powerful level 6 spell which can inflict massive damage to most enemies, especially those affected by the Shadow Curse.
We highly recommend taking the time to find The Blood of Lathander mace, but you’ll need to do some puzzles in both the Rosymorn Monastery first, then in the Githyanki Creche, if you want to get it with the least trouble possible. Be sure to check our page on Find the Blood of Lathander Puzzle in Baldur’s Gate 3 for all the details.
Punish the Wicked
If you enter the Shadow-Cursed Lands from the Underdark, one of the first NPCs you’re likely to encounter is the mysterious He Who Was. This character seeks to punish a woman named Madeline for her perceived crimes in life, but there may be more to the story than he’s letting on. In any case, this will bring you to the Waning Moon Tavern, which can be found in the far western part of the Shadow-Cursed Lands, where you’ll meet someone named Thisobold Thorm, son of Kethric Thorm. You can go through with this encounter in multiple ways, but the main purpose is to get the ledger which He Who Was requires from the tavern.
Once you have the ledger, you’ll need to take it back to He Who Was, hand it to him, and then decide how you want to proceed after speaking with Madeline during the ritual. You can check our Should You Side With He Who Was or Madeline in BG3 page for an overview of what happens.
Decide Minthara’s Fate
This quest will be available to those who helped Nightwarden Minthara during Act 1. To refresh your memory: Minthara is one of the three goblin leaders that you were asked to kill at the ![]() Goblin Camp. She is a Drow, and a fairly powerful one at that. She can become a constant companion in Act 2, but you need to pass some roll checks to convince her to join you. You can learn more about this on her recruitment page: How to Recruit Nightwarden Minthara in Baldur’s Gate 3. Needless to say, if you killed her at the Goblin Camp, this quest will not be available for you. It may also be unavailable if you blow your cover as a True Soul too soon.
Goblin Camp. She is a Drow, and a fairly powerful one at that. She can become a constant companion in Act 2, but you need to pass some roll checks to convince her to join you. You can learn more about this on her recruitment page: How to Recruit Nightwarden Minthara in Baldur’s Gate 3. Needless to say, if you killed her at the Goblin Camp, this quest will not be available for you. It may also be unavailable if you blow your cover as a True Soul too soon.
Capture Isobel the Selunite Cleric
This is another quest that you can only start if you’re playing the role of a baddie, or if you want to maintain the illusion of a True Follower for as long as possible. However, if you go this far a number of innocent people will be harmed, so it will ruin some relationships with people at the Last Light Inn. If you’re already on the path of someone who rejoices in chaos and destruction, you’ll know what you need to do for this quest. It’s essentially the counterpart to the ![]() Resolve the Abduction quest, only rather than protecting Isobel from the cult of the Absolute, you’re bringing her into its clutches.
Resolve the Abduction quest, only rather than protecting Isobel from the cult of the Absolute, you’re bringing her into its clutches.
Wake up Art Cullagh
This quest is important to complete early on if you want to recruit Halsin as a permanent companion. It will also allow you to work towards lifting the Shadow Curse and weakening its influence in the region, but you won’t see the full benefits of this until you come to leave the Shadow-Cursed Lands at the end of Act 2. It’s a requirement to complete this quest before you can begin the subsequent ![]() Lift the Shadow Curse quest. It’s also worth doing early on since it directs you to the
Lift the Shadow Curse quest. It’s also worth doing early on since it directs you to the ![]() House of Healing, just above Moonrise Towers, which is a location relevant to the
House of Healing, just above Moonrise Towers, which is a location relevant to the ![]() Find Arabella’s Parents quest. Finally, there are some puzzles and secrets that can be found in the region between the House of Healing and Moonrise Towers, so it’s worth exploring for those. You can find more information on them in our Secrets and Loose Ends in Act 2 section below.
Find Arabella’s Parents quest. Finally, there are some puzzles and secrets that can be found in the region between the House of Healing and Moonrise Towers, so it’s worth exploring for those. You can find more information on them in our Secrets and Loose Ends in Act 2 section below.
A more complete guide to the details of this quest can be found on our How to Wake Up Art Cullagh in Baldur’s Gate 3 page.
Lift the Shadow Curse
As mentioned above, this quest can be acquired after completing Wake up Art Cullagh. It’s an essential quest to complete before you can recruit Halsin as a permanent member of your party, but it can be a tricky one if you’re not prepared. You should consider making a manual save before progressing with the quest, since if you fail you could lose Halsin forever. You’d do well to allow Halsin to do any talking during dialogue scenes for the duration of this quest, and be ready for a relatively tough fight in the final objective. You can learn more about how to succeed in recruiting Halsin on our How to Rescue and Recruit Halsin in Baldur’s Gate 3 page, especially the How to Recruit Halsin as a Permanent Companion section.
Find Arabella’s Parents
As you’re exploring the Shadow-Cursed Lands north of Moonrise Towers (which is located in the far southwest of the map), you’re likely to stumble upon Arabella, a young Tiefling who you first met at the Emerald Grove in the Wilderness region during Act 1. She’s in a bit of trouble and she’s lost her parents, so you’ll have to decide whether or not you’re going to help her find them. This will take you to the House of Healing (located north of Moonrise Towers), which is also related to the Wake up Art Cullagh quest. You can check our page on Can You Save Arabella’s Parents in BG3? for more information.
Find Rolan in the Shadows
This one is linked to the Rescue the Tieflings quest, which we’ll cover below. However, unlike many of the Tieflings who were captured by the cult of the Absolute (assuming you haven’t already killed them at the Emerald Grove as part of an evil playthrough), Rolan has eluded capture. You have the chance to speak with him briefly at the Last Light Inn when you first arrive, but he soon sets off to Moonrise Towers in an attempt to rescue his kin. If you want to save Rolan, it’s important that you find him quickly once he has left the inn. You’ll find him beneath the bridge (on the southern side) where the Tollhouse towards Moonrise Towers is located.
We highly recommend making a manual save before you leave the Last Light Inn to make your way toward the bridge where Rolan can be found. Saving him can be tricky, since you find him in a rough state. He may also be hostile towards you until you kill all the shadows which are attacking him. Don’t be fooled into thinking that you changing your weapons to non-lethal damage can knock him unconscious and save him. Sadly, he will still die even if you attempt to neutralize him in this way. The only way we were able to save him was by continuously healing him while fighting the shadows. If you want to learn more about this, be sure to check our page section on how to save Rolan from the shadows.
Rescue the Tieflings
As mentioned above, saving the Tieflings from Moonrise Towers is an important quest for anyone pursuing the story as a vaguely “good” character. The Tieflings will reappear throughout the story, adding to its depth and continuity, so it’s worth saving them for that alone. You can find the Tieflings in the prison / dungeon section of Moonrise Towers, and you can rescue them in a number of different ways. If you’re taking the route of violence, it’s a good idea to kill the guards outside at the docks first, since they’ll be waiting to stop the Tieflings as they attempt to run away. There’s more to consider if you want to do it in a sneaky way, so be sure to check our page on Rescue the Tieflings in BG3: Moonrise Towers Prison, which includes details on how to get the useful ![]() Potent Robe reward.
Potent Robe reward.
Rescue Wulbren
This quest will become available to you once you reach the prison of Moonrise Towers. When you speak with the imprisoned Tieflings, they’ll refer to some gnomes in a nearby cell. You can speak to Wulbren, their de facto leader, to learn more of their plight. You don’t necessarily know what motivates these gnomes at this point, but you can decide whether to help based on what you can glean from speaking with them here. It makes rescuing the Tieflings a little more risky, but we recommend doing it nonetheless. They can help in a small way with fighting the guards if they’re alerted to the breakout. As with the Tieflings, there are multiple ways to rescue Wulbren and his kin, and you can learn more about them on our Rescue Wulbren Walkthrough in BG3: Different Methods & Results page.
Investigate the Selunite Resistance
This quest can be started in two ways. You can either find and read Halfred’s Note in the cellar of the Last Light Inn, or you can open the Potter’s Chest, which is located in the ruins of a building located west of the Shadowed Battlefield waypoint, near the center of the Shadow-Cursed Lands map. Either method will set you on a course to explore hidden parts of the Last Light Inn cellar, before then directing you to the ![]() Mason’s Guild in the western part of the map, just east of the House of Healing. Here you’ll find more hidden chambers which contain remnants of the Selunite Resistance, alongside a fair amount of traps and decent loot to obtain along the way. You can read more about how to start and complete this quest on our Investigate the Selunite Resistance in BG3: Last Light Cellar, Mason’s Guild & Potter’s Chest page.
Mason’s Guild in the western part of the map, just east of the House of Healing. Here you’ll find more hidden chambers which contain remnants of the Selunite Resistance, alongside a fair amount of traps and decent loot to obtain along the way. You can read more about how to start and complete this quest on our Investigate the Selunite Resistance in BG3: Last Light Cellar, Mason’s Guild & Potter’s Chest page.
Kill Raphael’s Old Enemy
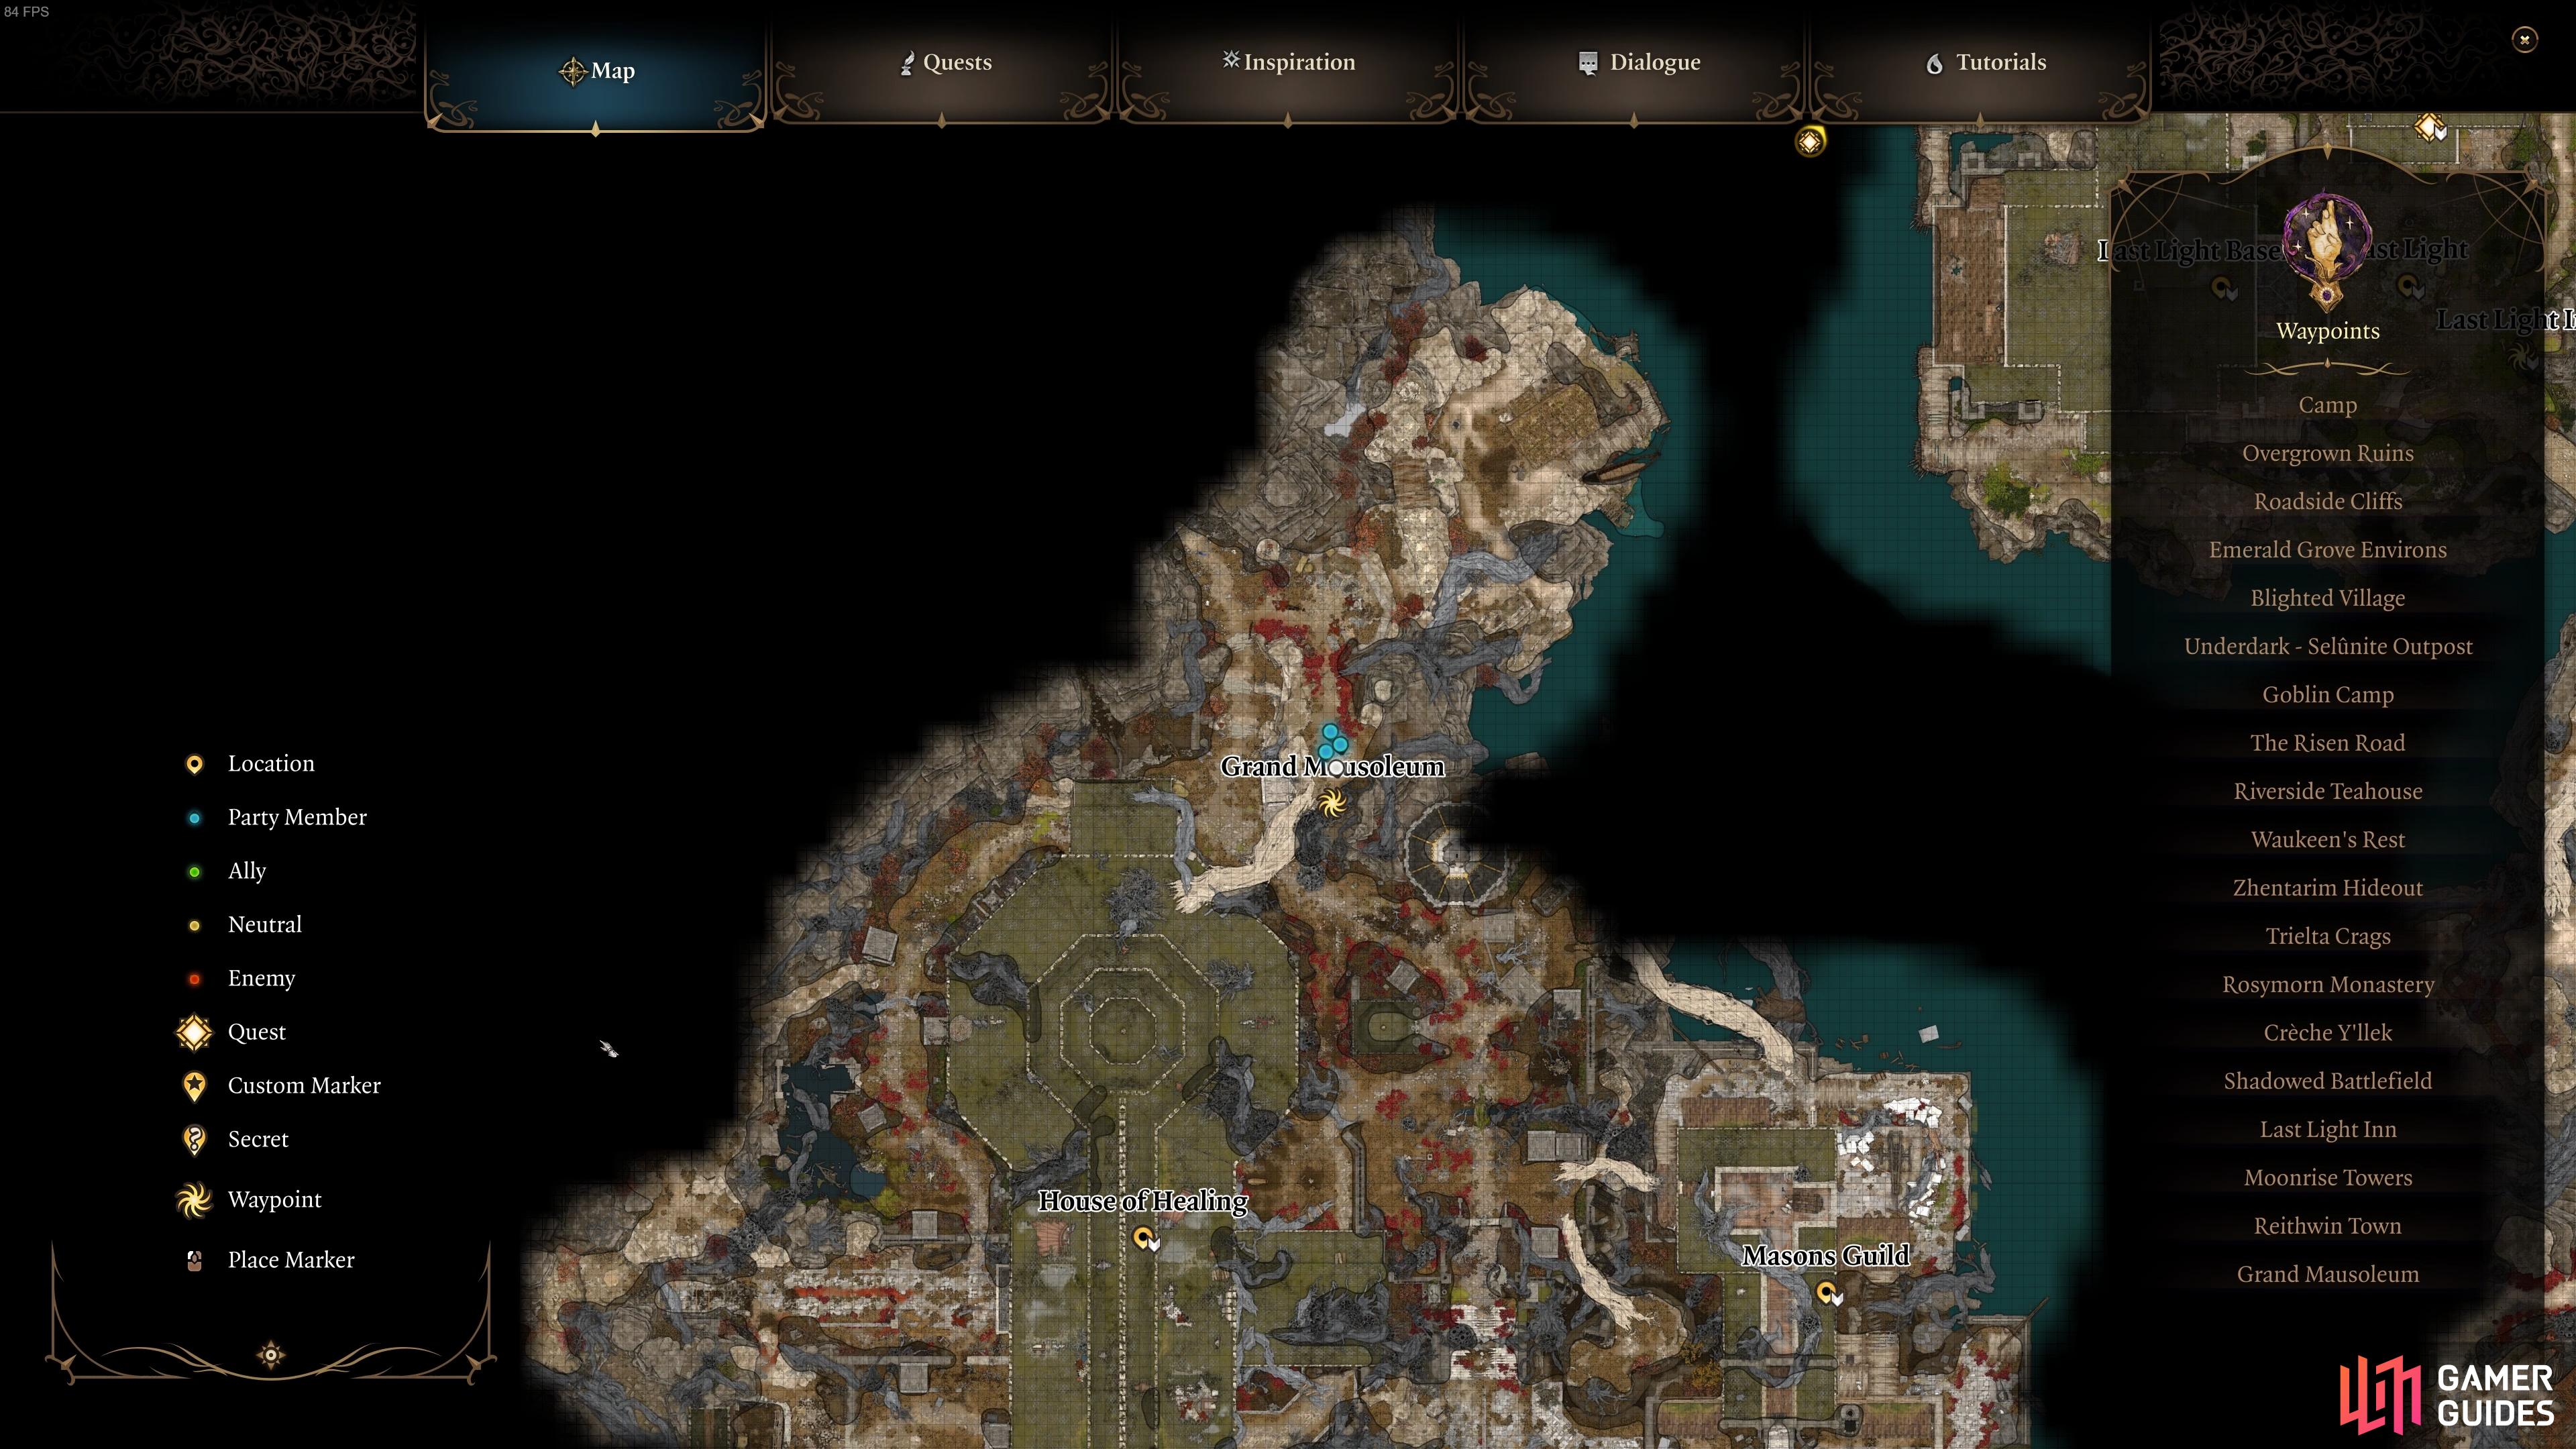
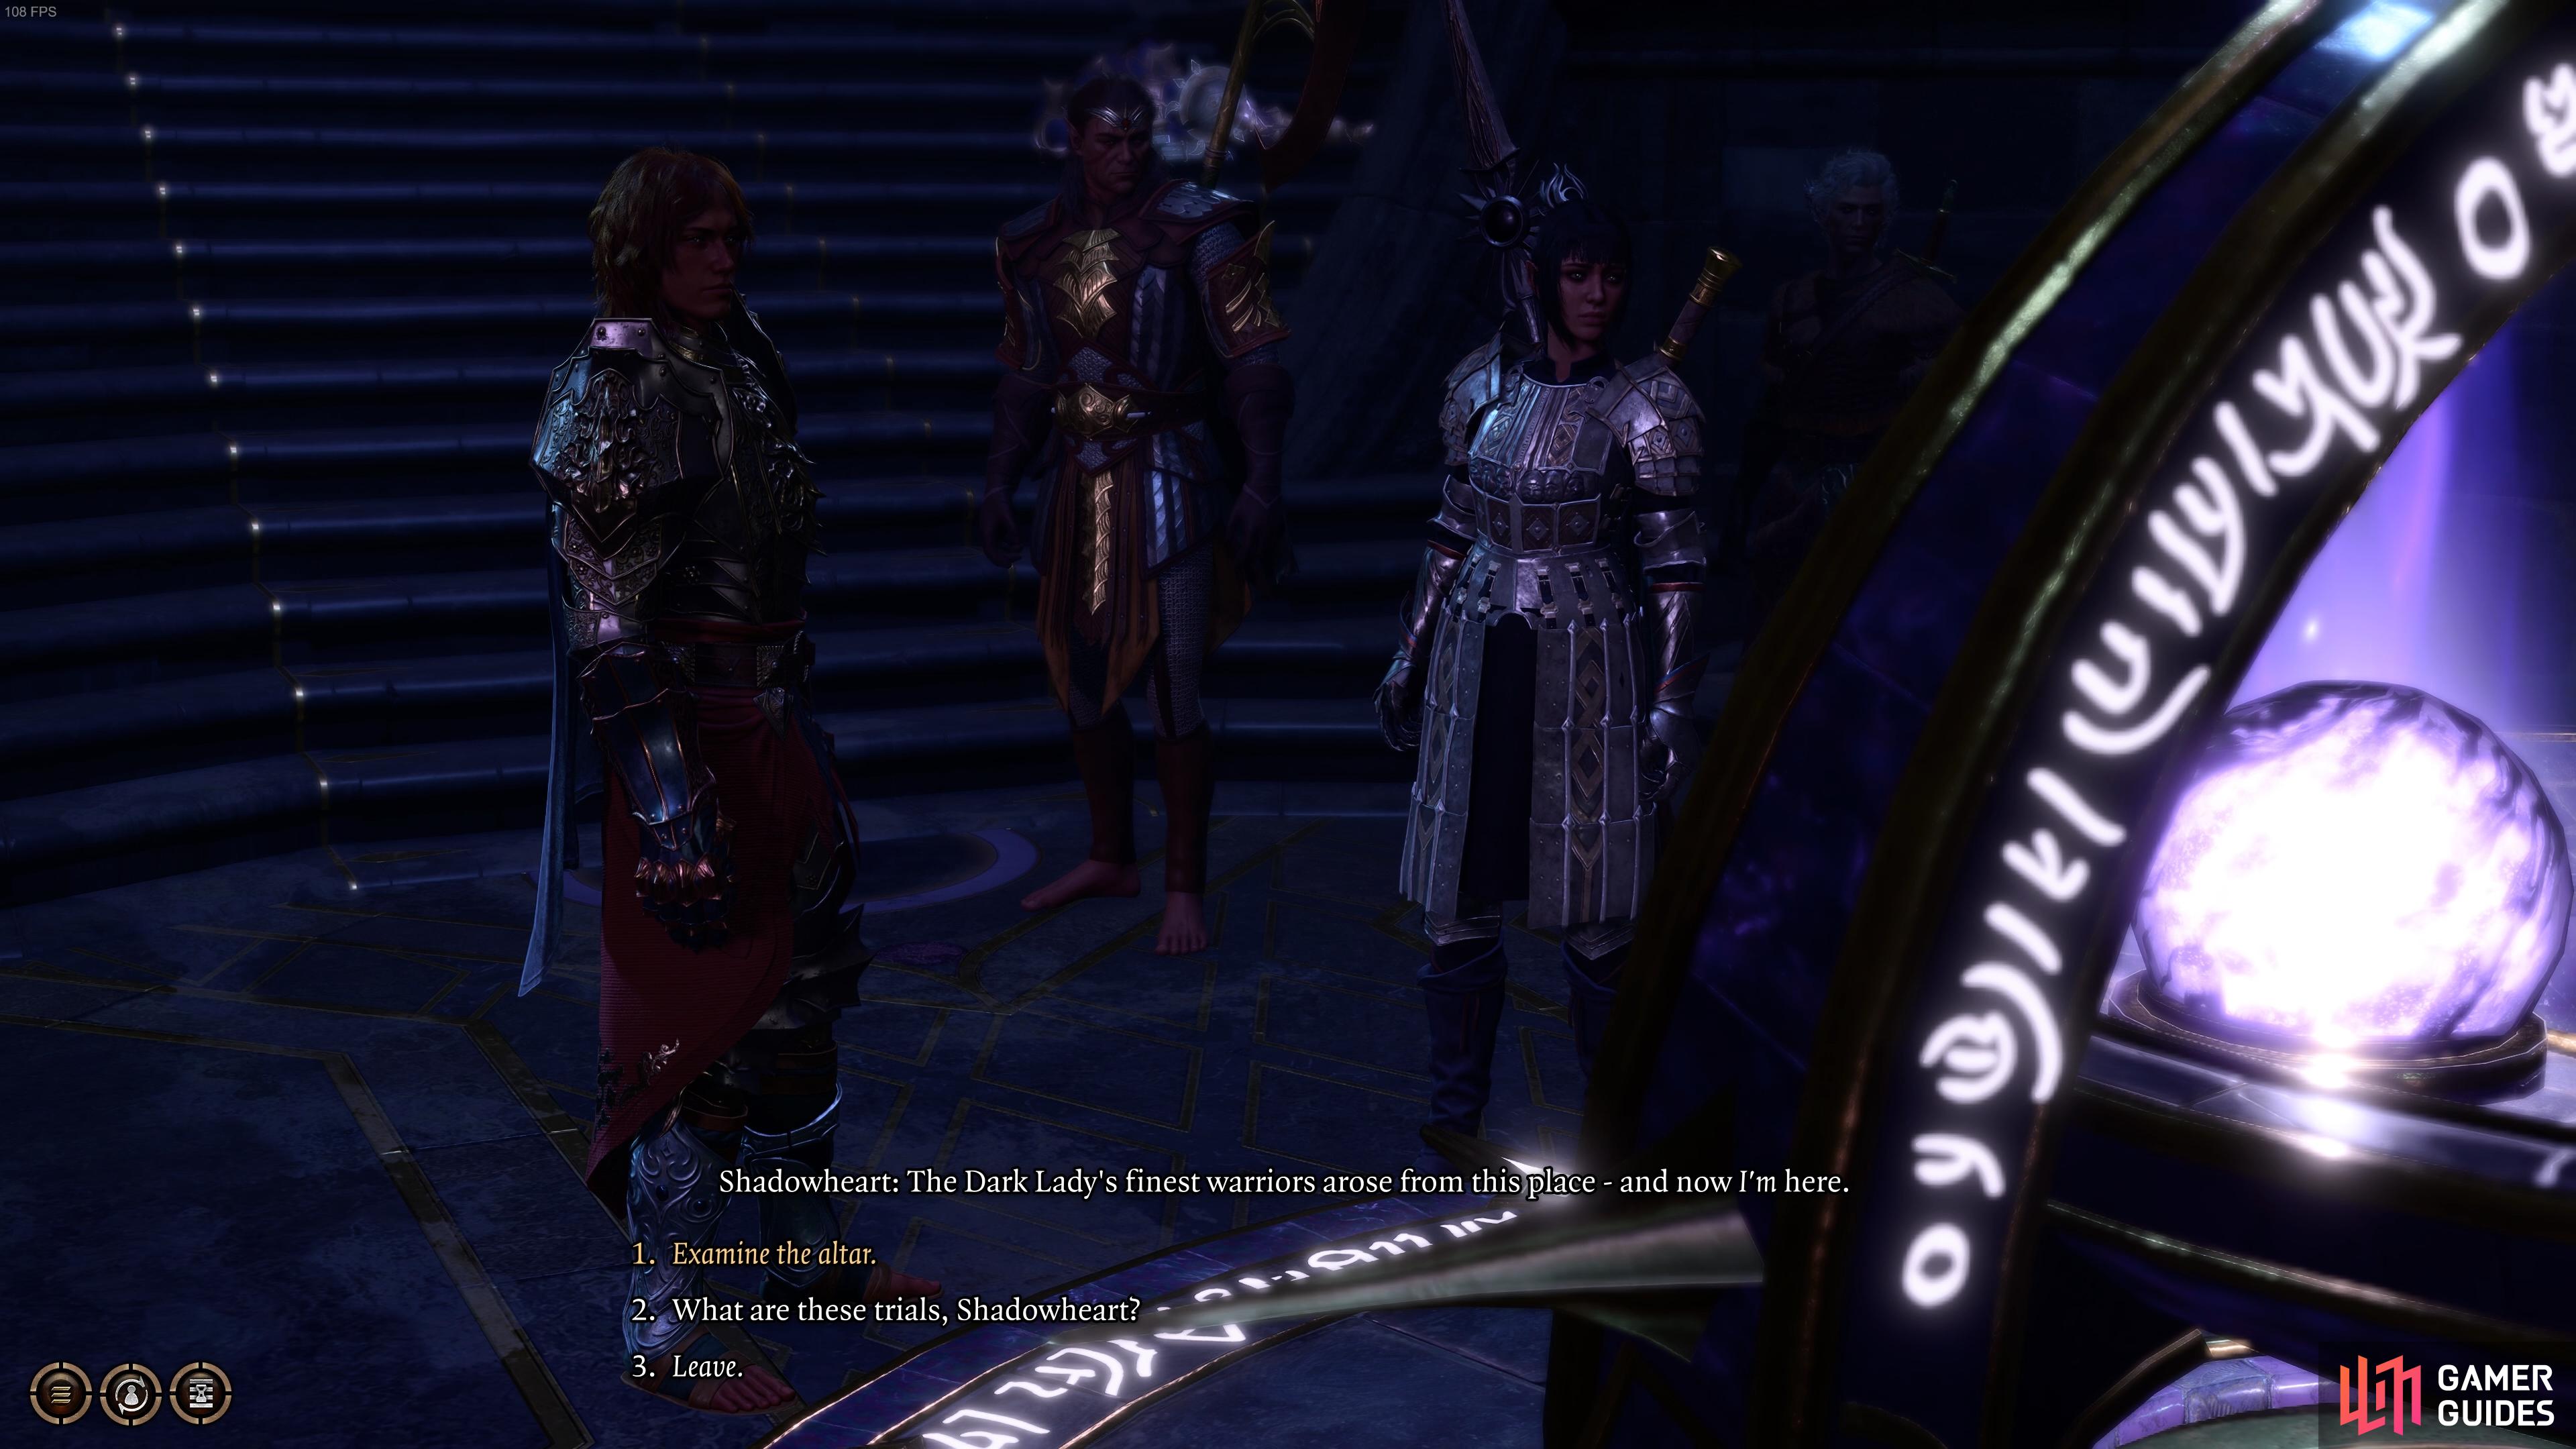
This quest is first started when you reach the Grand Mausoleum, located in the far northwest of the Shadow-Cursed Lands map. As you near the entrance a cutscene with Raphael will begin, during which he tells you about an ancient enemy that resides within. To find this enemy, you’ll need to go to the back of the Mausoleum (on its northern side) and solve the simple painting puzzle to reveal the hidden entrance to the Gauntlet of Shar. You can reach it using the Traversal Gem, then once you’re inside the temple continue north until you reach the central area just east of the Gauntlet of Shar waypoint. You need to turn east from here to explore the northeastern chamber of the temple, where you’ll soon encounter Raphael’s old enemy. If you need some help with the choices from this point on, be sure to check our Should You Kill or Help Yurgir in BG3 page.
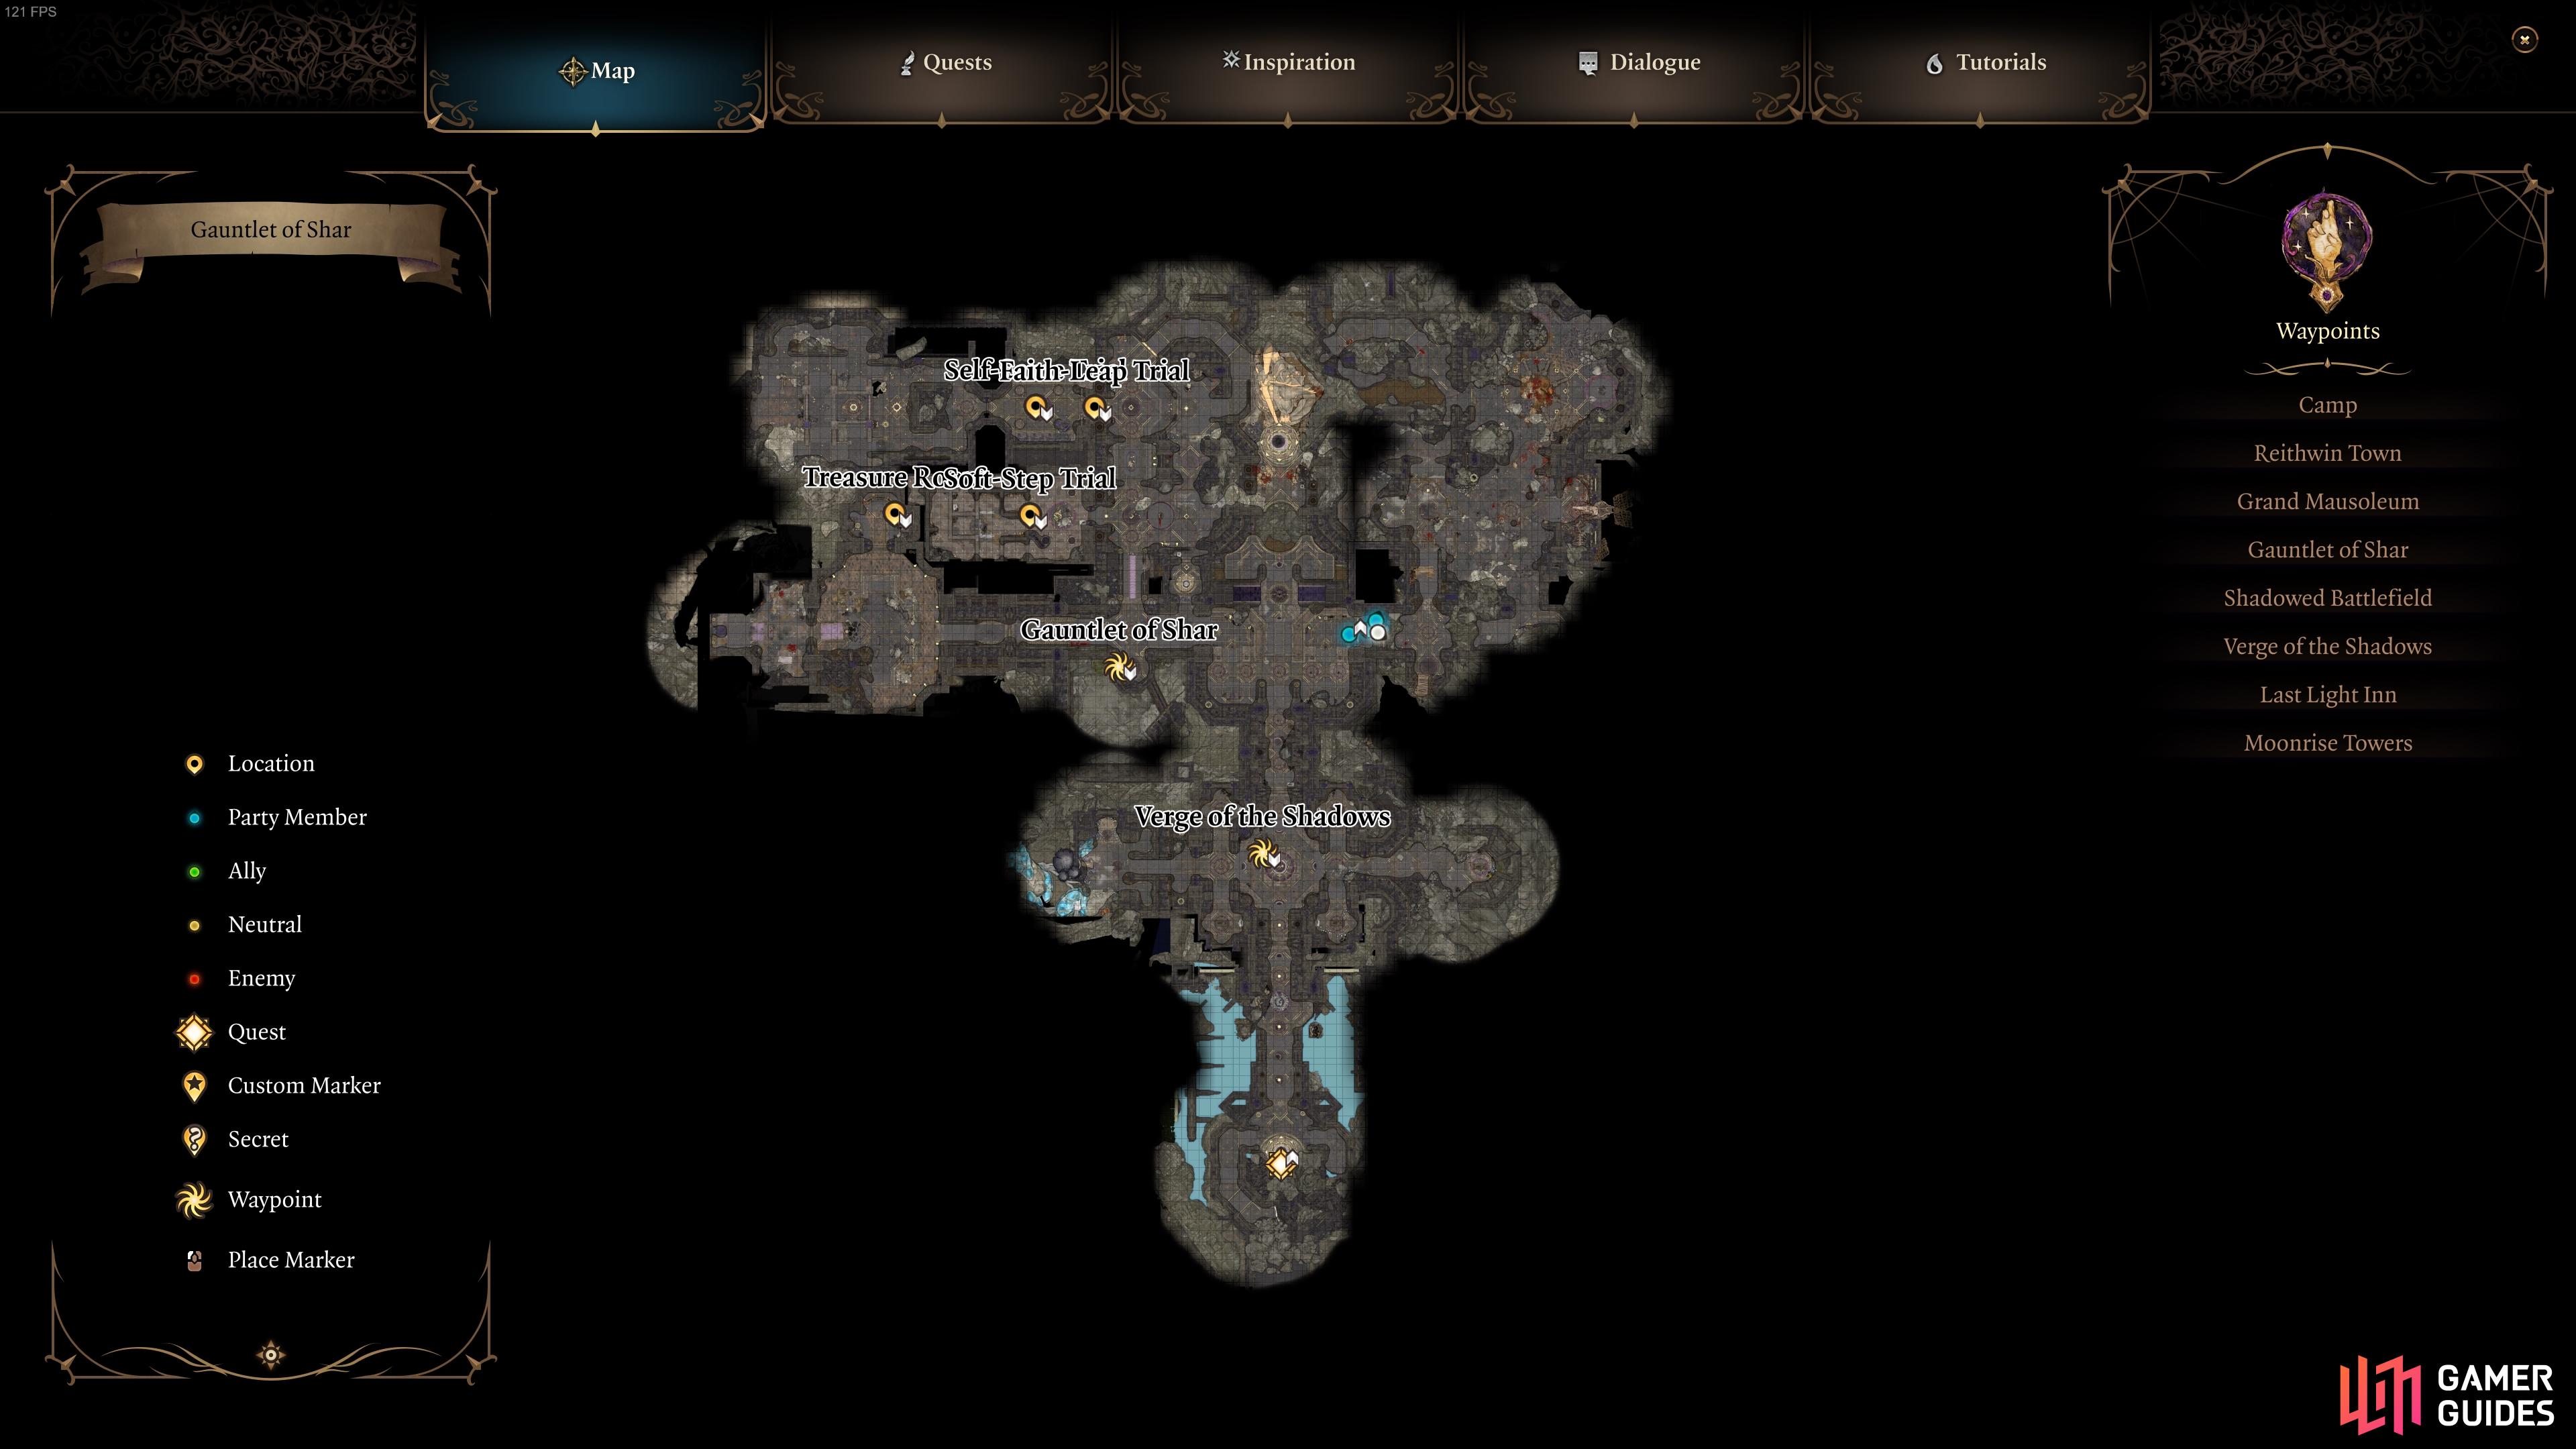
(1 of 2) Raphael’s old enemy can be found in the northeast chamber within the Gauntlet of Shar.
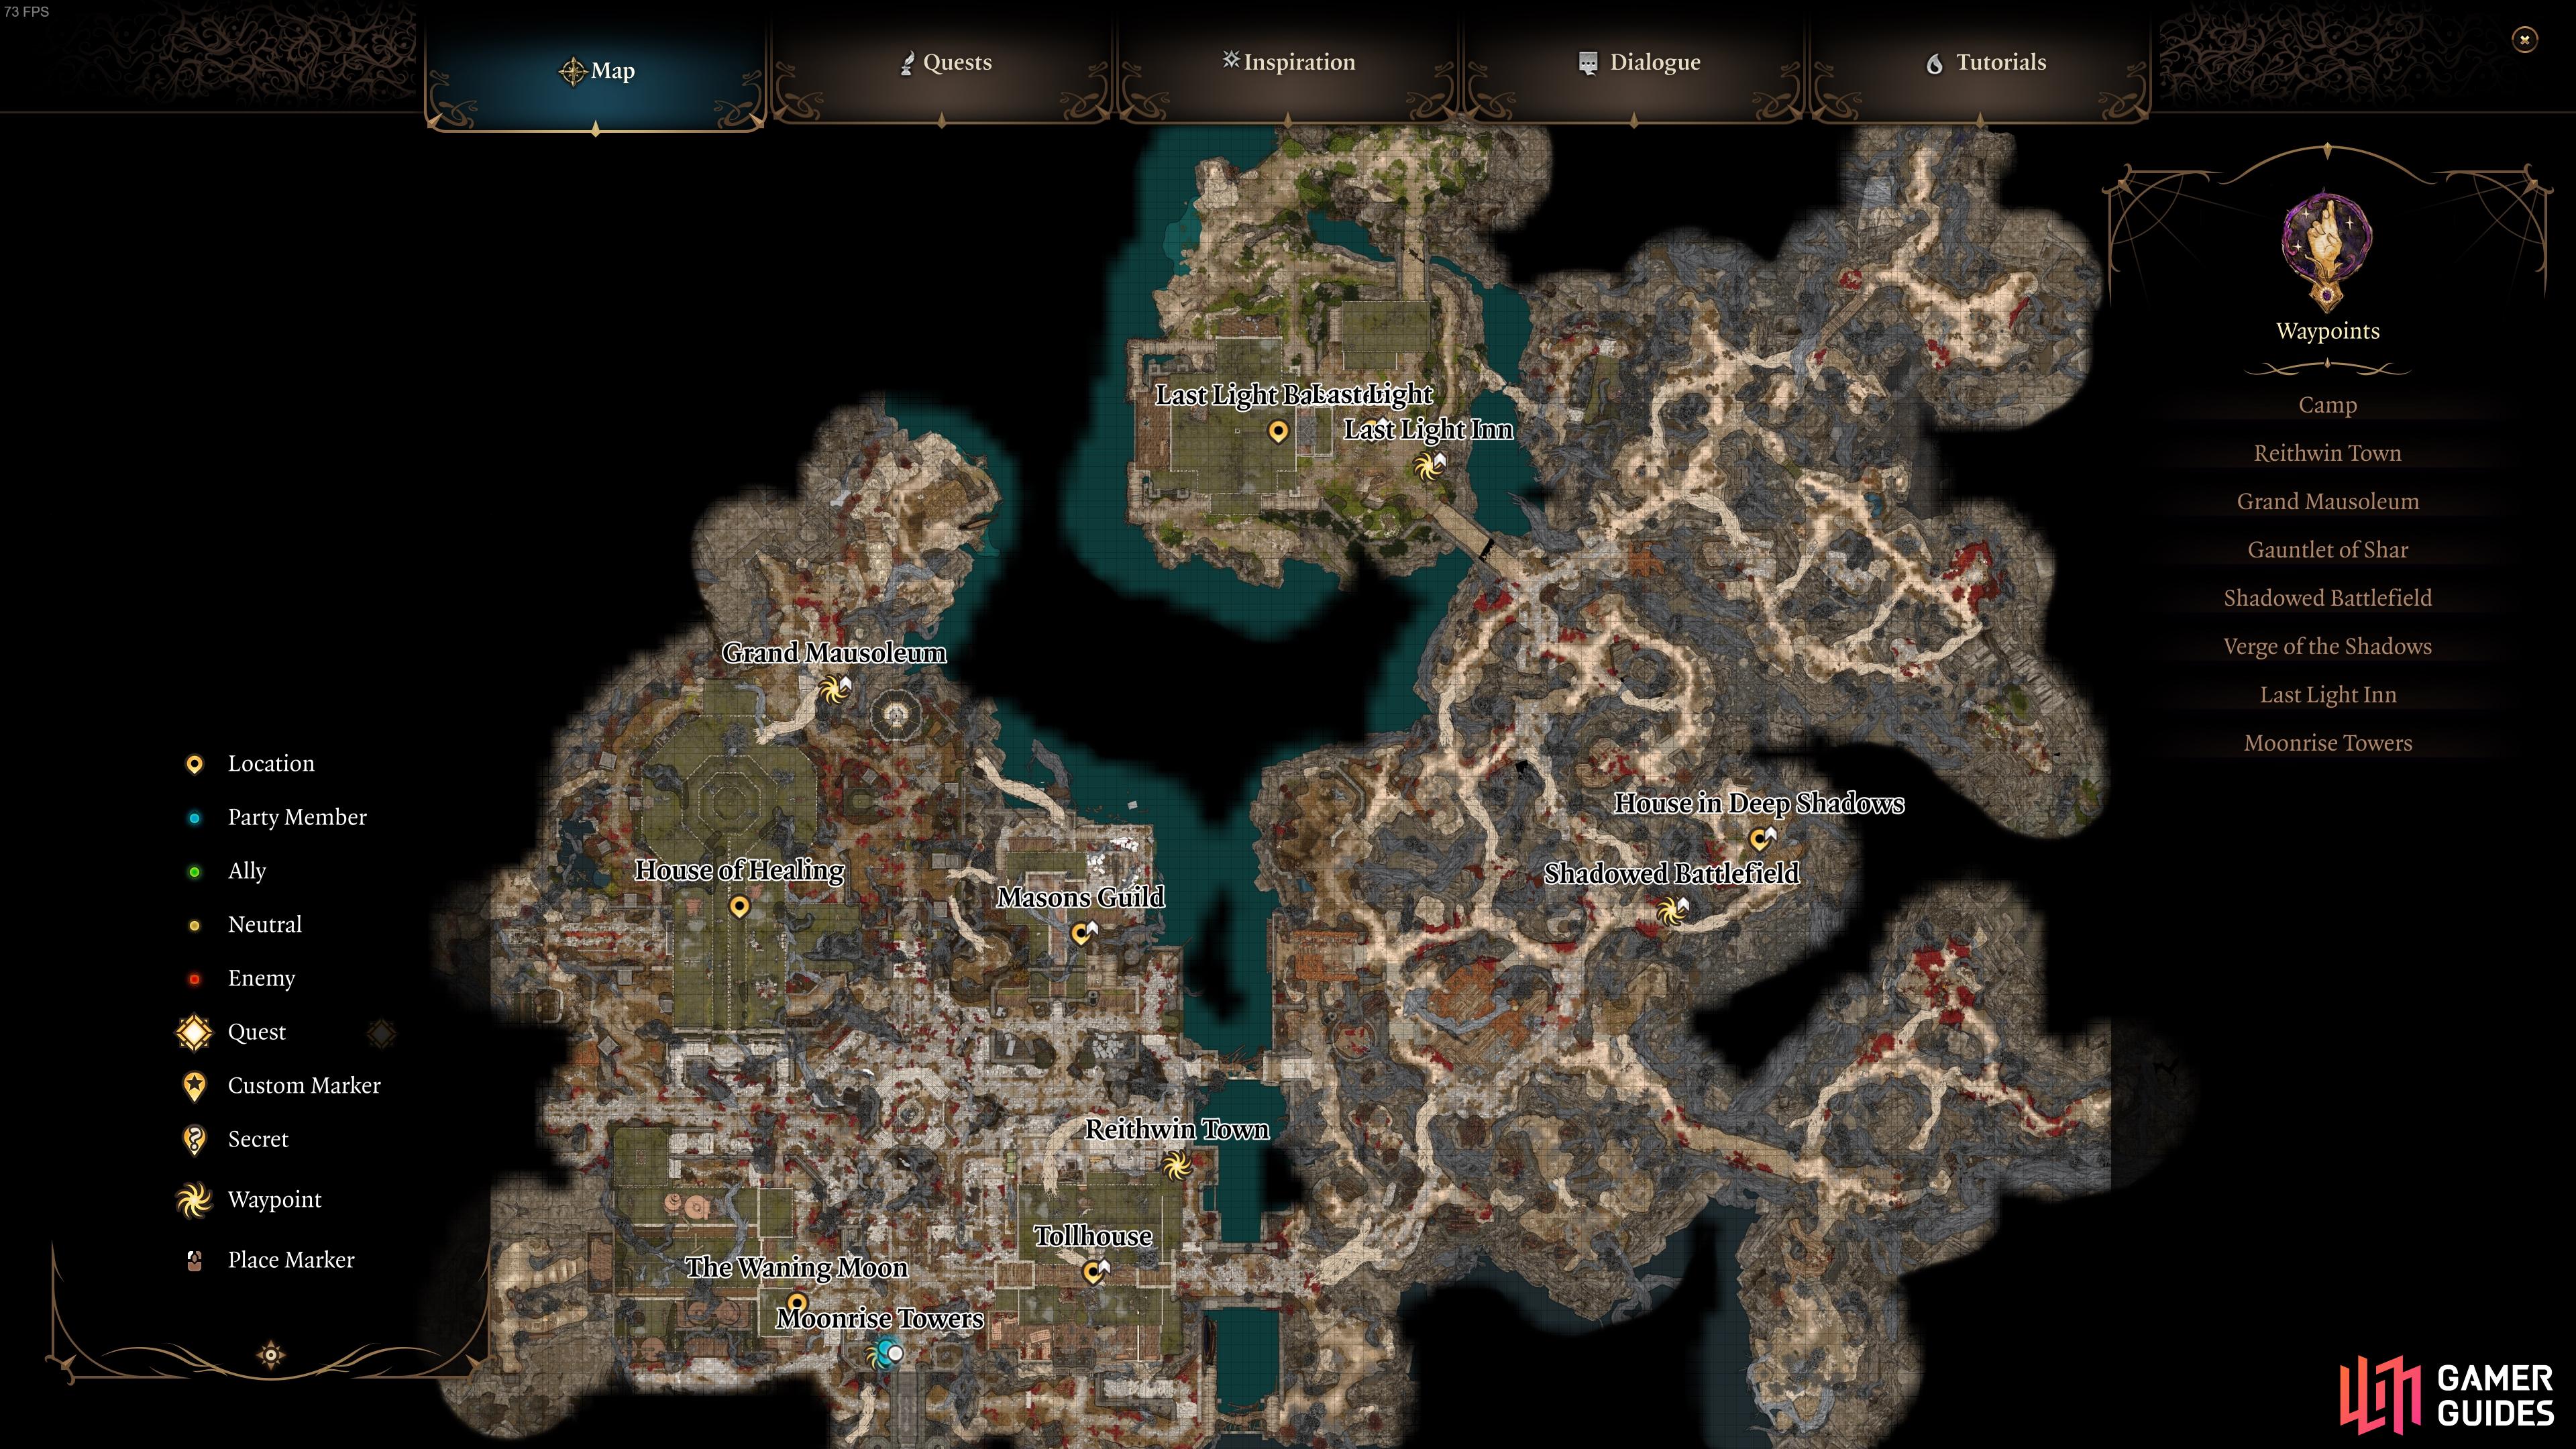
Raphael’s old enemy can be found in the northeast chamber within the Gauntlet of Shar. (left), A map of the Shadowlands, showing the main points of interest. (right)
Find the Nightsong
This quest begins in Act 1, but you can’t do much with it until you reach Act 2. It’s another one which can be completed towards the end of the Gauntlet of Shar, but there are a number of things you need to do within the gauntlet before you can access it. It’s related to an important part of the main story in the Shadow-Cursed Lands, so we highly recommend completing it once you’re done with everything else above. If you’re looking for a more detailed walkthrough of this quest, you can see our Nightsong Walkthrough in BG3: Location, Puzzles, Choices & More page.
Find Zevlor
This quest will become available to you once you reach the Last Light Inn and speak with the Tieflings. However, you won’t be able to complete it until you reach the end of Act 2. Without spoiling too much, Zevlor is located in an area that you won’t be able to access until you’ve fought Kethric, so don’t worry too much about this quest until you reach that point. If you want to learn more about exactly where to find Zevlor, and how to rescue him, check our page on Where to Find Zevlor during Act 2 in BG3.
Find Mol
The ![]() Find Mol quest is similar to that of Zevlor’s, in that you won’t be able to progress it until later in the game. In this case, you won’t find Mol until you reach Act 3, even though the quest suggests that they may be found at Moonrise Towers. You can explore it for clues if you wish, but don’t worry too much about this quest otherwise. Although started during Act 2 after the fight with Flaming Fist Marcus at the Last Light Inn, there isn’t much you can do from there beyond speaking with the Tiefling children to reassure them. This is worth doing regardless so that you discourage them from trying to find Mol on their own.
Find Mol quest is similar to that of Zevlor’s, in that you won’t be able to progress it until later in the game. In this case, you won’t find Mol until you reach Act 3, even though the quest suggests that they may be found at Moonrise Towers. You can explore it for clues if you wish, but don’t worry too much about this quest otherwise. Although started during Act 2 after the fight with Flaming Fist Marcus at the Last Light Inn, there isn’t much you can do from there beyond speaking with the Tiefling children to reassure them. This is worth doing regardless so that you discourage them from trying to find Mol on their own.
Secrets and Loose Ends in Act 2
The above breakdowns cover the main quests and side quests associated with Act 2, but there are other things you can do which aren’t always directly related to those quest objectives. We’ve included a list of these below, just in case you’ve missed anything. It’s worth doing these before you embark on the last stages of the main quests of Act 2 in the Shadow-Cursed Lands. There is some overlap here, but checking these pages will help you to avoid missing anything important.
- Plaque Puzzle and Sharran Sanctuary Guide in BG3
- Reithwin Toll House BG3 Walkthrough: Tollhouse Boss, Loot & More
- Araj Oblodra Items and Astarion Choices in BG3
- Balthazar’s Room in BG3: Bookcase Puzzle, Ancient Altar and Moonlantern Location
- How to Defeat Malus Thorm Without Fighting in BG3
- How to Defeat Thisobald Thorm Without Fighting in BG3
- Where to Find Corpse Flowers in BG3 - How to Make Thisobald’s Purple Worm Poison
- How to Find the Suspicious Sound in Moonrise Towers
- Blacksmith Dammon: How to Get Flawed Helldusk Armor in BG3
- Infernal Iron Locations in BG3
- How to Get the Gloves of the Automaton from Barcus Wroot in BG3
- Where to Find the Unseen Menace Pike in BG3
- Where to Find the Gloves of Dexterity in BG3
More Baldur’s Gate 3 Guides
If you’re looking for more Baldur’s Gate 3 guides, including some Act 3 content directly after Act 2, be sure to check the links below.

 Sign up
No Comments