
If you’ve been thoroughly exploring the ![]() Blighted Village in Baldur’s Gate 3, you would’ve come across Highcliff’s Blueprints which will give you the quest “
Blighted Village in Baldur’s Gate 3, you would’ve come across Highcliff’s Blueprints which will give you the quest “![]() Finish the Masterwork Weapon”. In the same room is a forge that you can light up, and combine to craft a weapon. Unfortunately, it’s not that easy, and you’ll need to venture into the dank
Finish the Masterwork Weapon”. In the same room is a forge that you can light up, and combine to craft a weapon. Unfortunately, it’s not that easy, and you’ll need to venture into the dank ![]() Underdark to get the required materials. Read below to find out what materials you need, where you can find them, and what you can craft in the Finish the Masterwork weapon quest.
Underdark to get the required materials. Read below to find out what materials you need, where you can find them, and what you can craft in the Finish the Masterwork weapon quest.
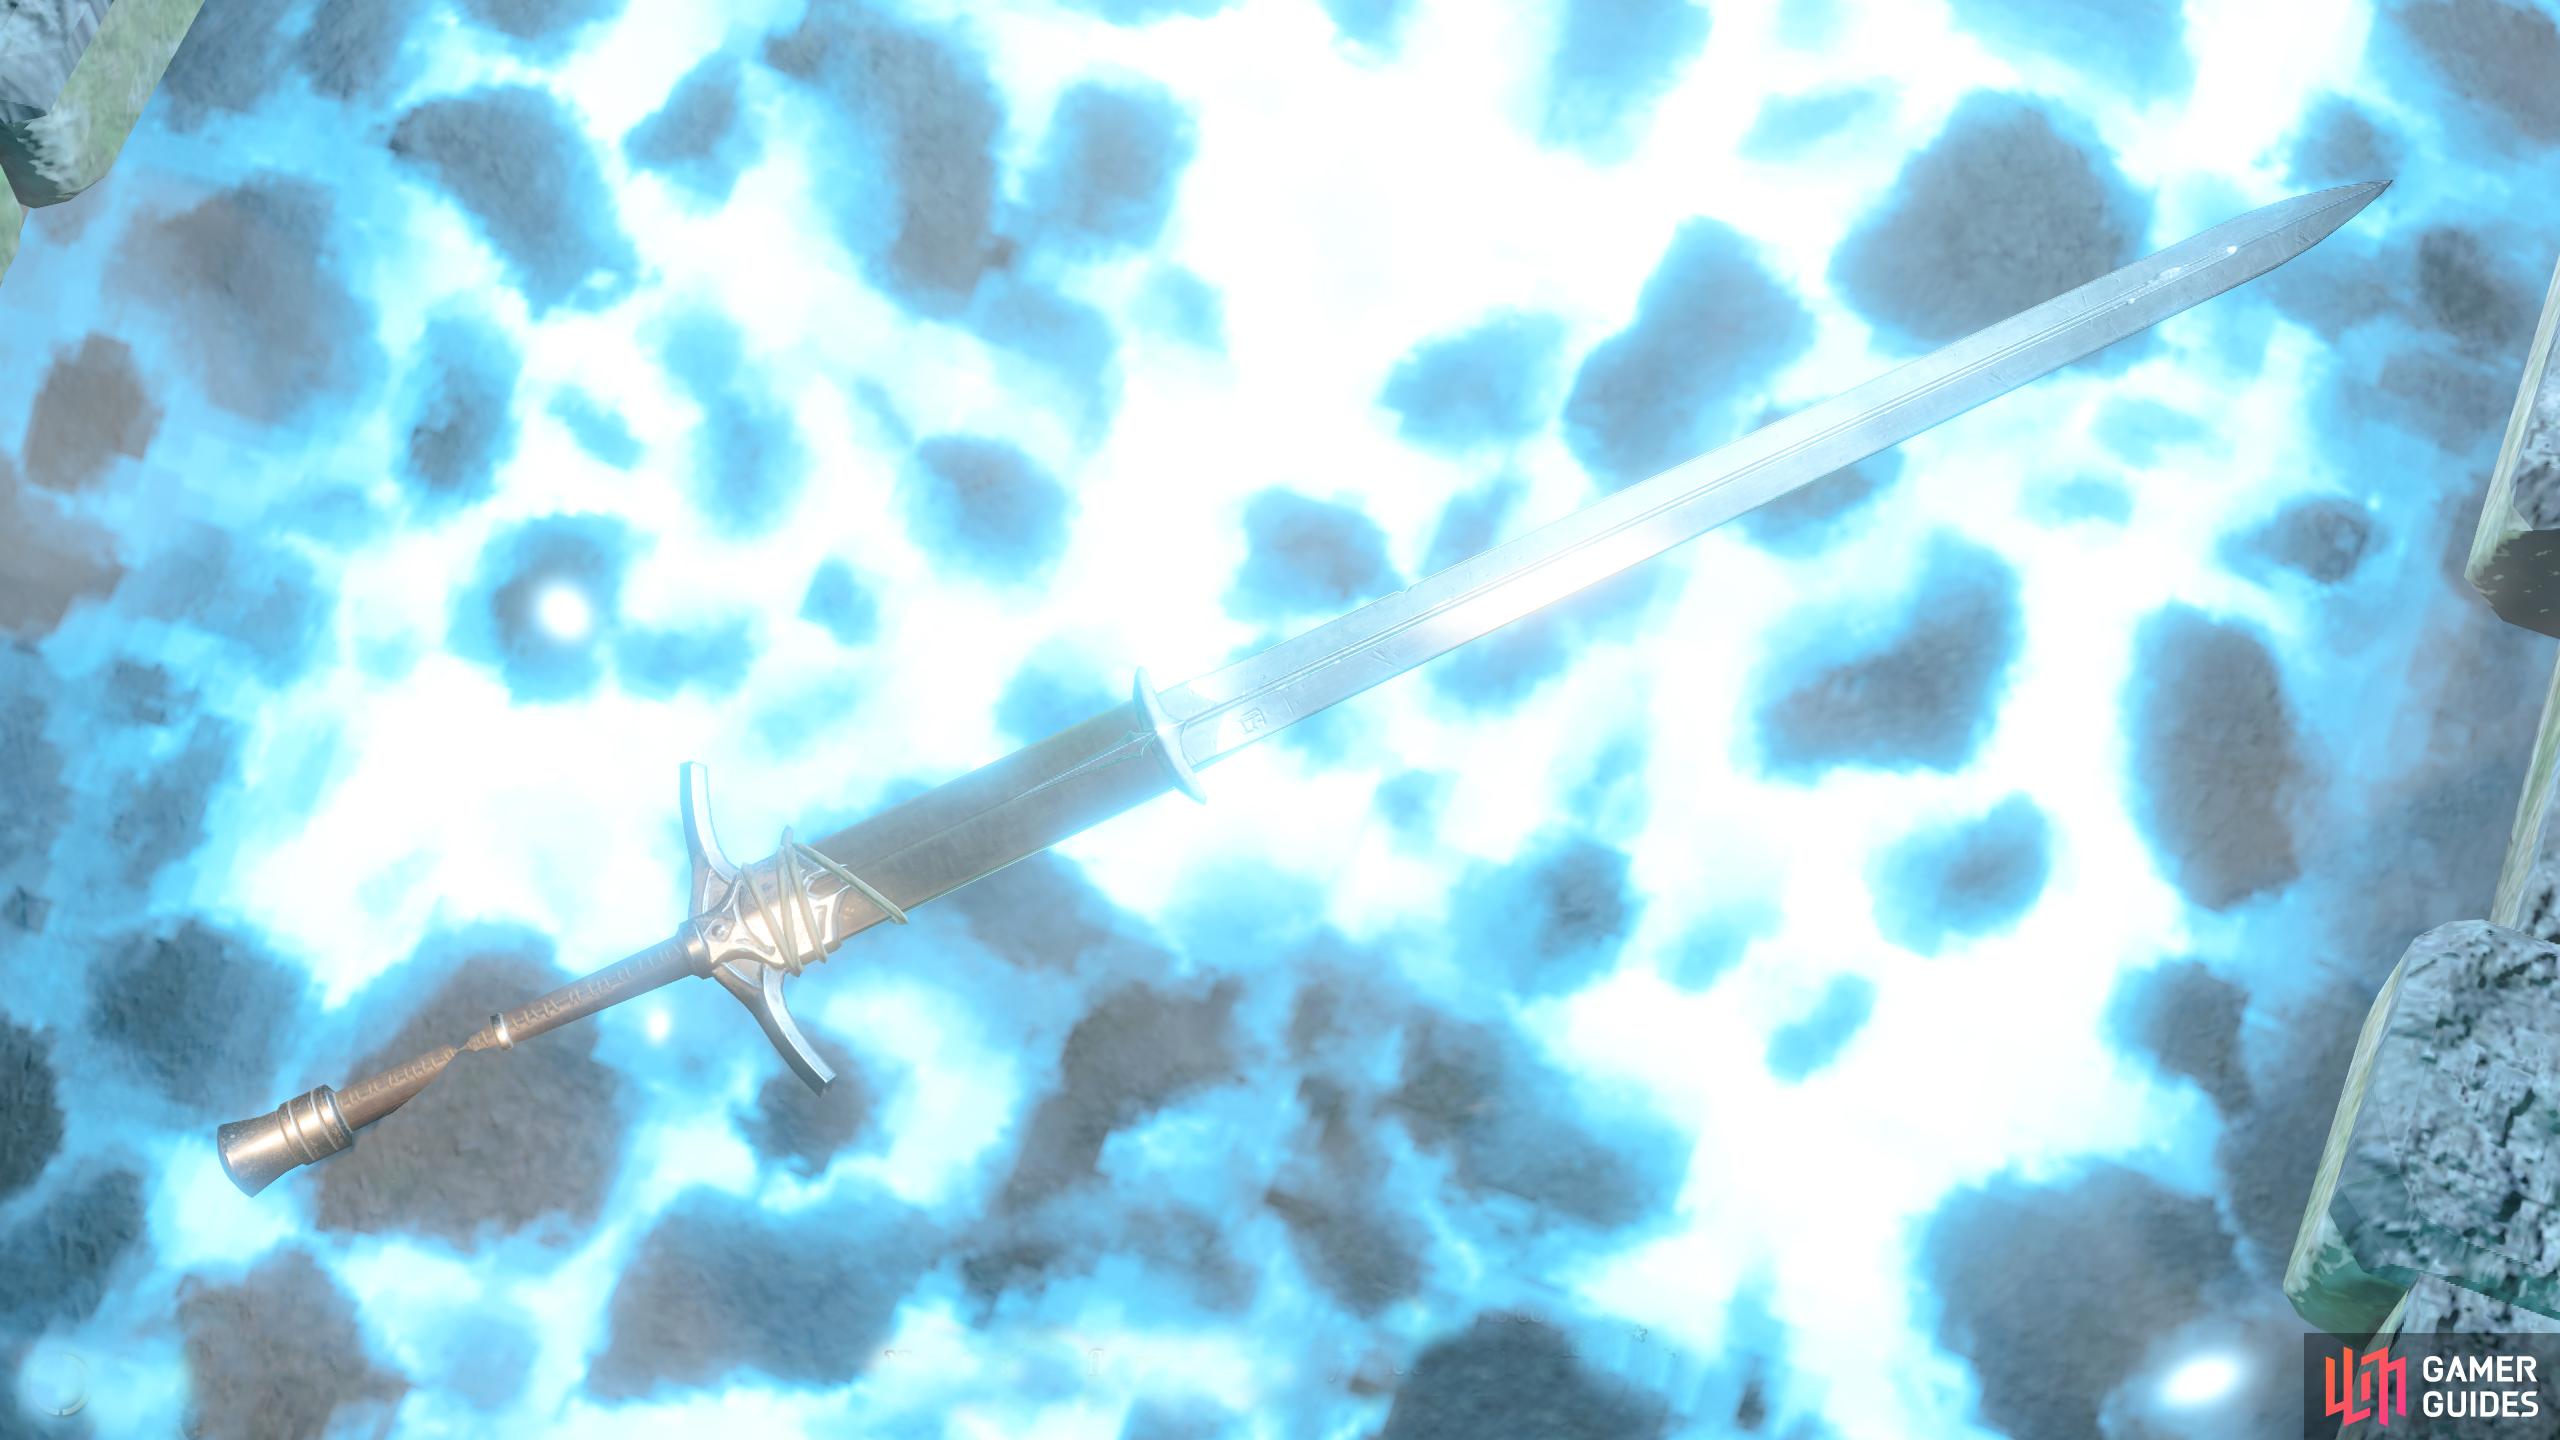
Completing the Finish the Masterwork Weapon quest allows you to craft one of three weapons.
Finish the Masterwork Weapon Quest Location
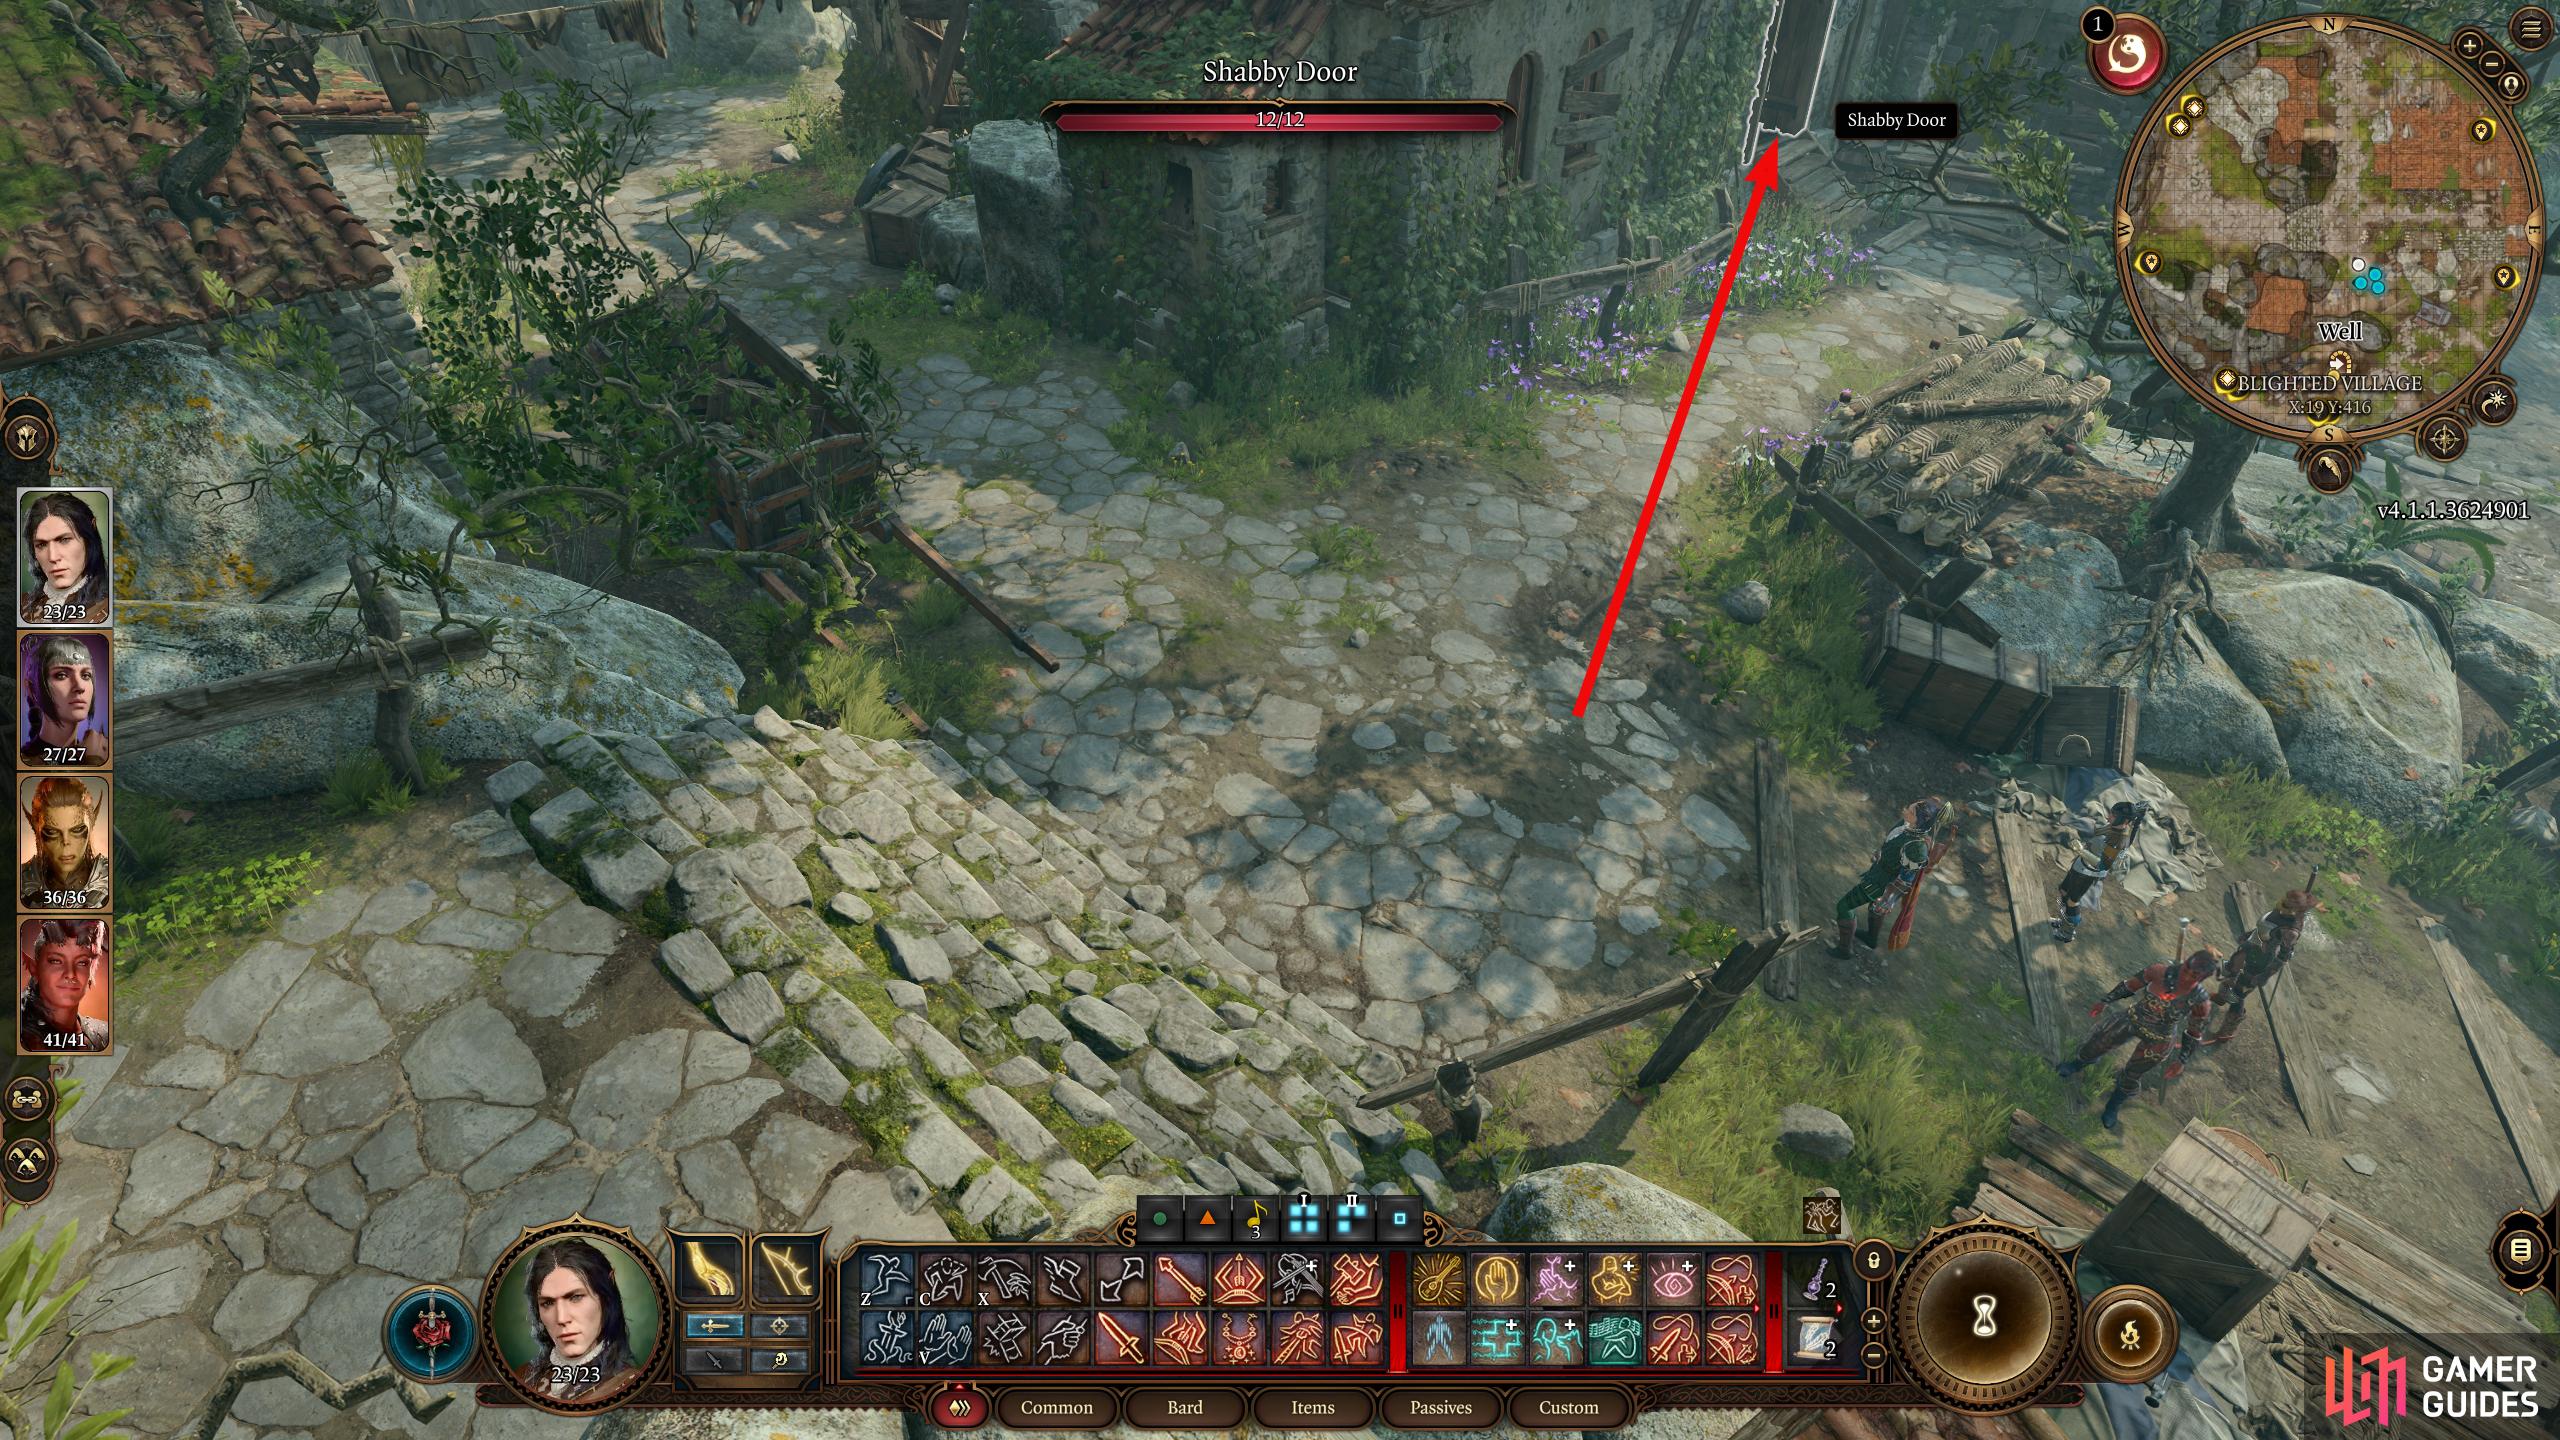
As briefly stated above, you’ll need to get to the Blighted Village which is west of the Emerald Grove also known as the !Druid’s Grove. When you get there, you’ll notice the area is full of Goblins who will attack you unless you convince them that you’re no threat. When you get noticed by them, use the [Illithid] [Wisdom] dialogue option which only requires a 2 DC Wisdom check then you can search the area unimpeded.
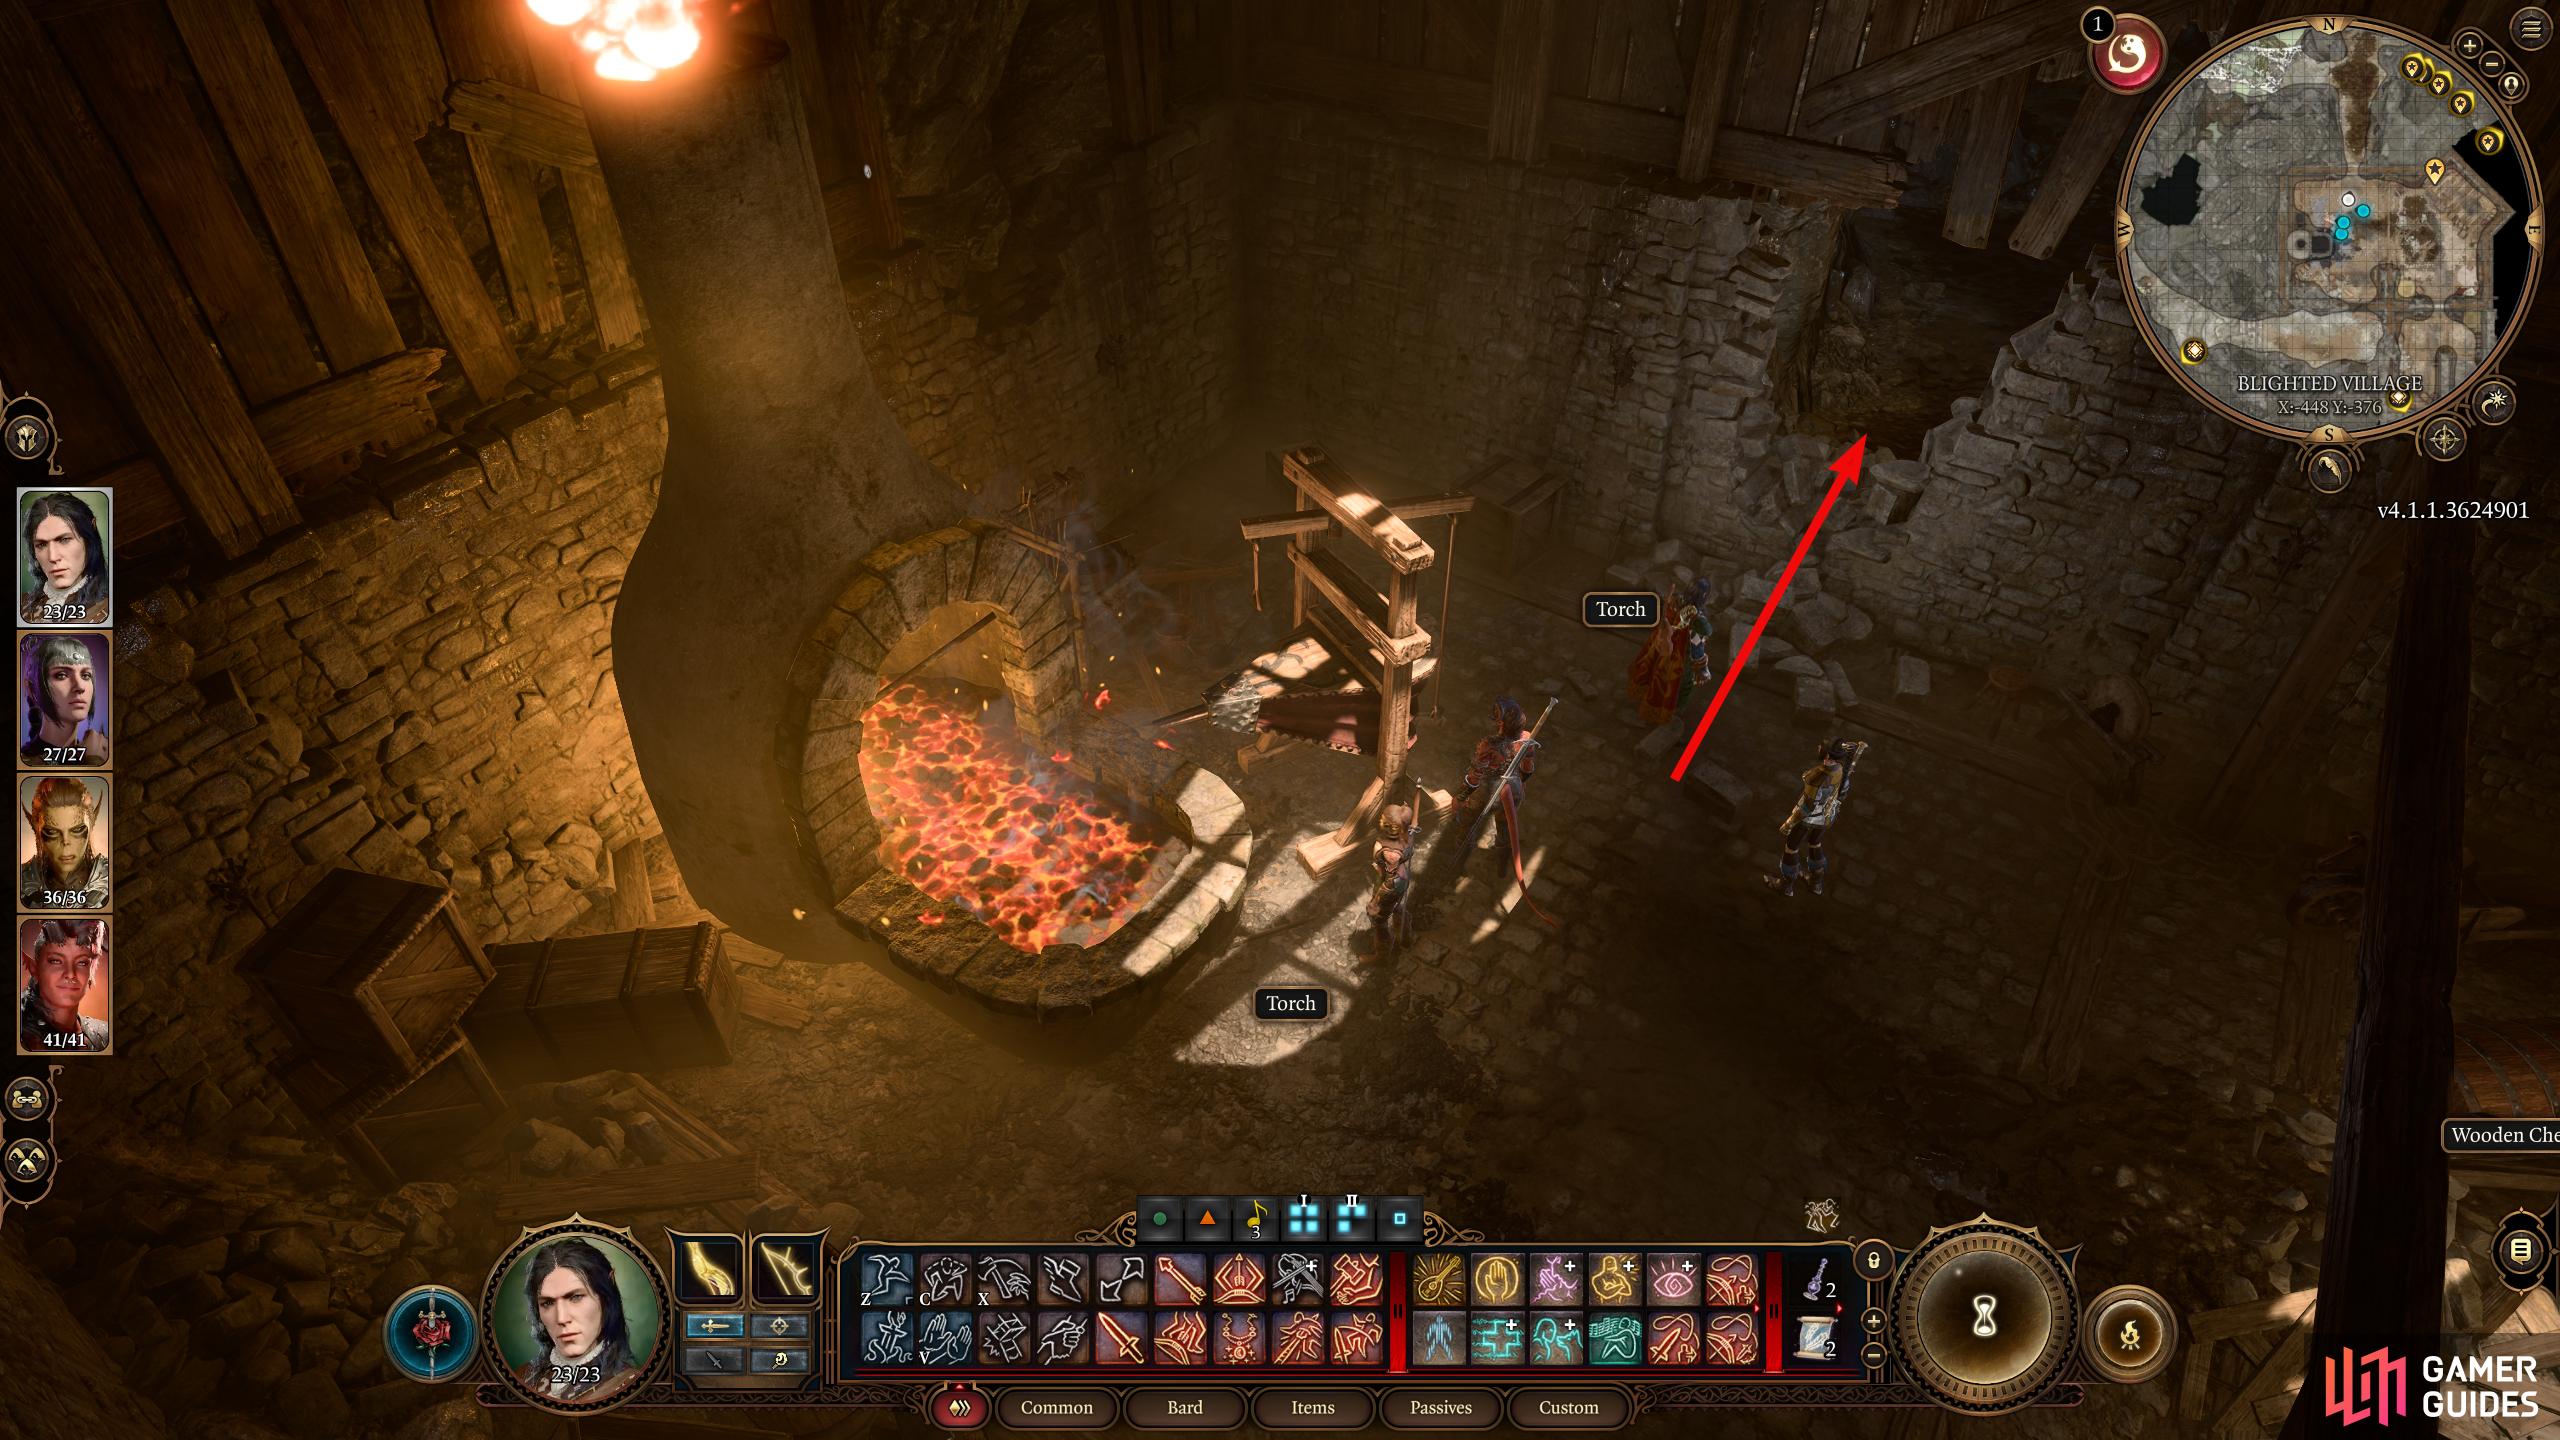
In the center of the village is the waypoint, unlock it then head north towards the narrow path with a wagon next to the building. Head east of that and enter the building, then make your way to the adjacent room. In here is a hole covered up with a calcified web, attack it with your torch, or cast a ![]() Fire Bolt on it, then jump down the hole. This will take you to a basement which has lots of loot for you to plunder, but if you climb the ladder/jump to the ledge above where you landed, you can unlock the chest on the left for an Infernal Iron.
Fire Bolt on it, then jump down the hole. This will take you to a basement which has lots of loot for you to plunder, but if you climb the ladder/jump to the ledge above where you landed, you can unlock the chest on the left for an Infernal Iron.
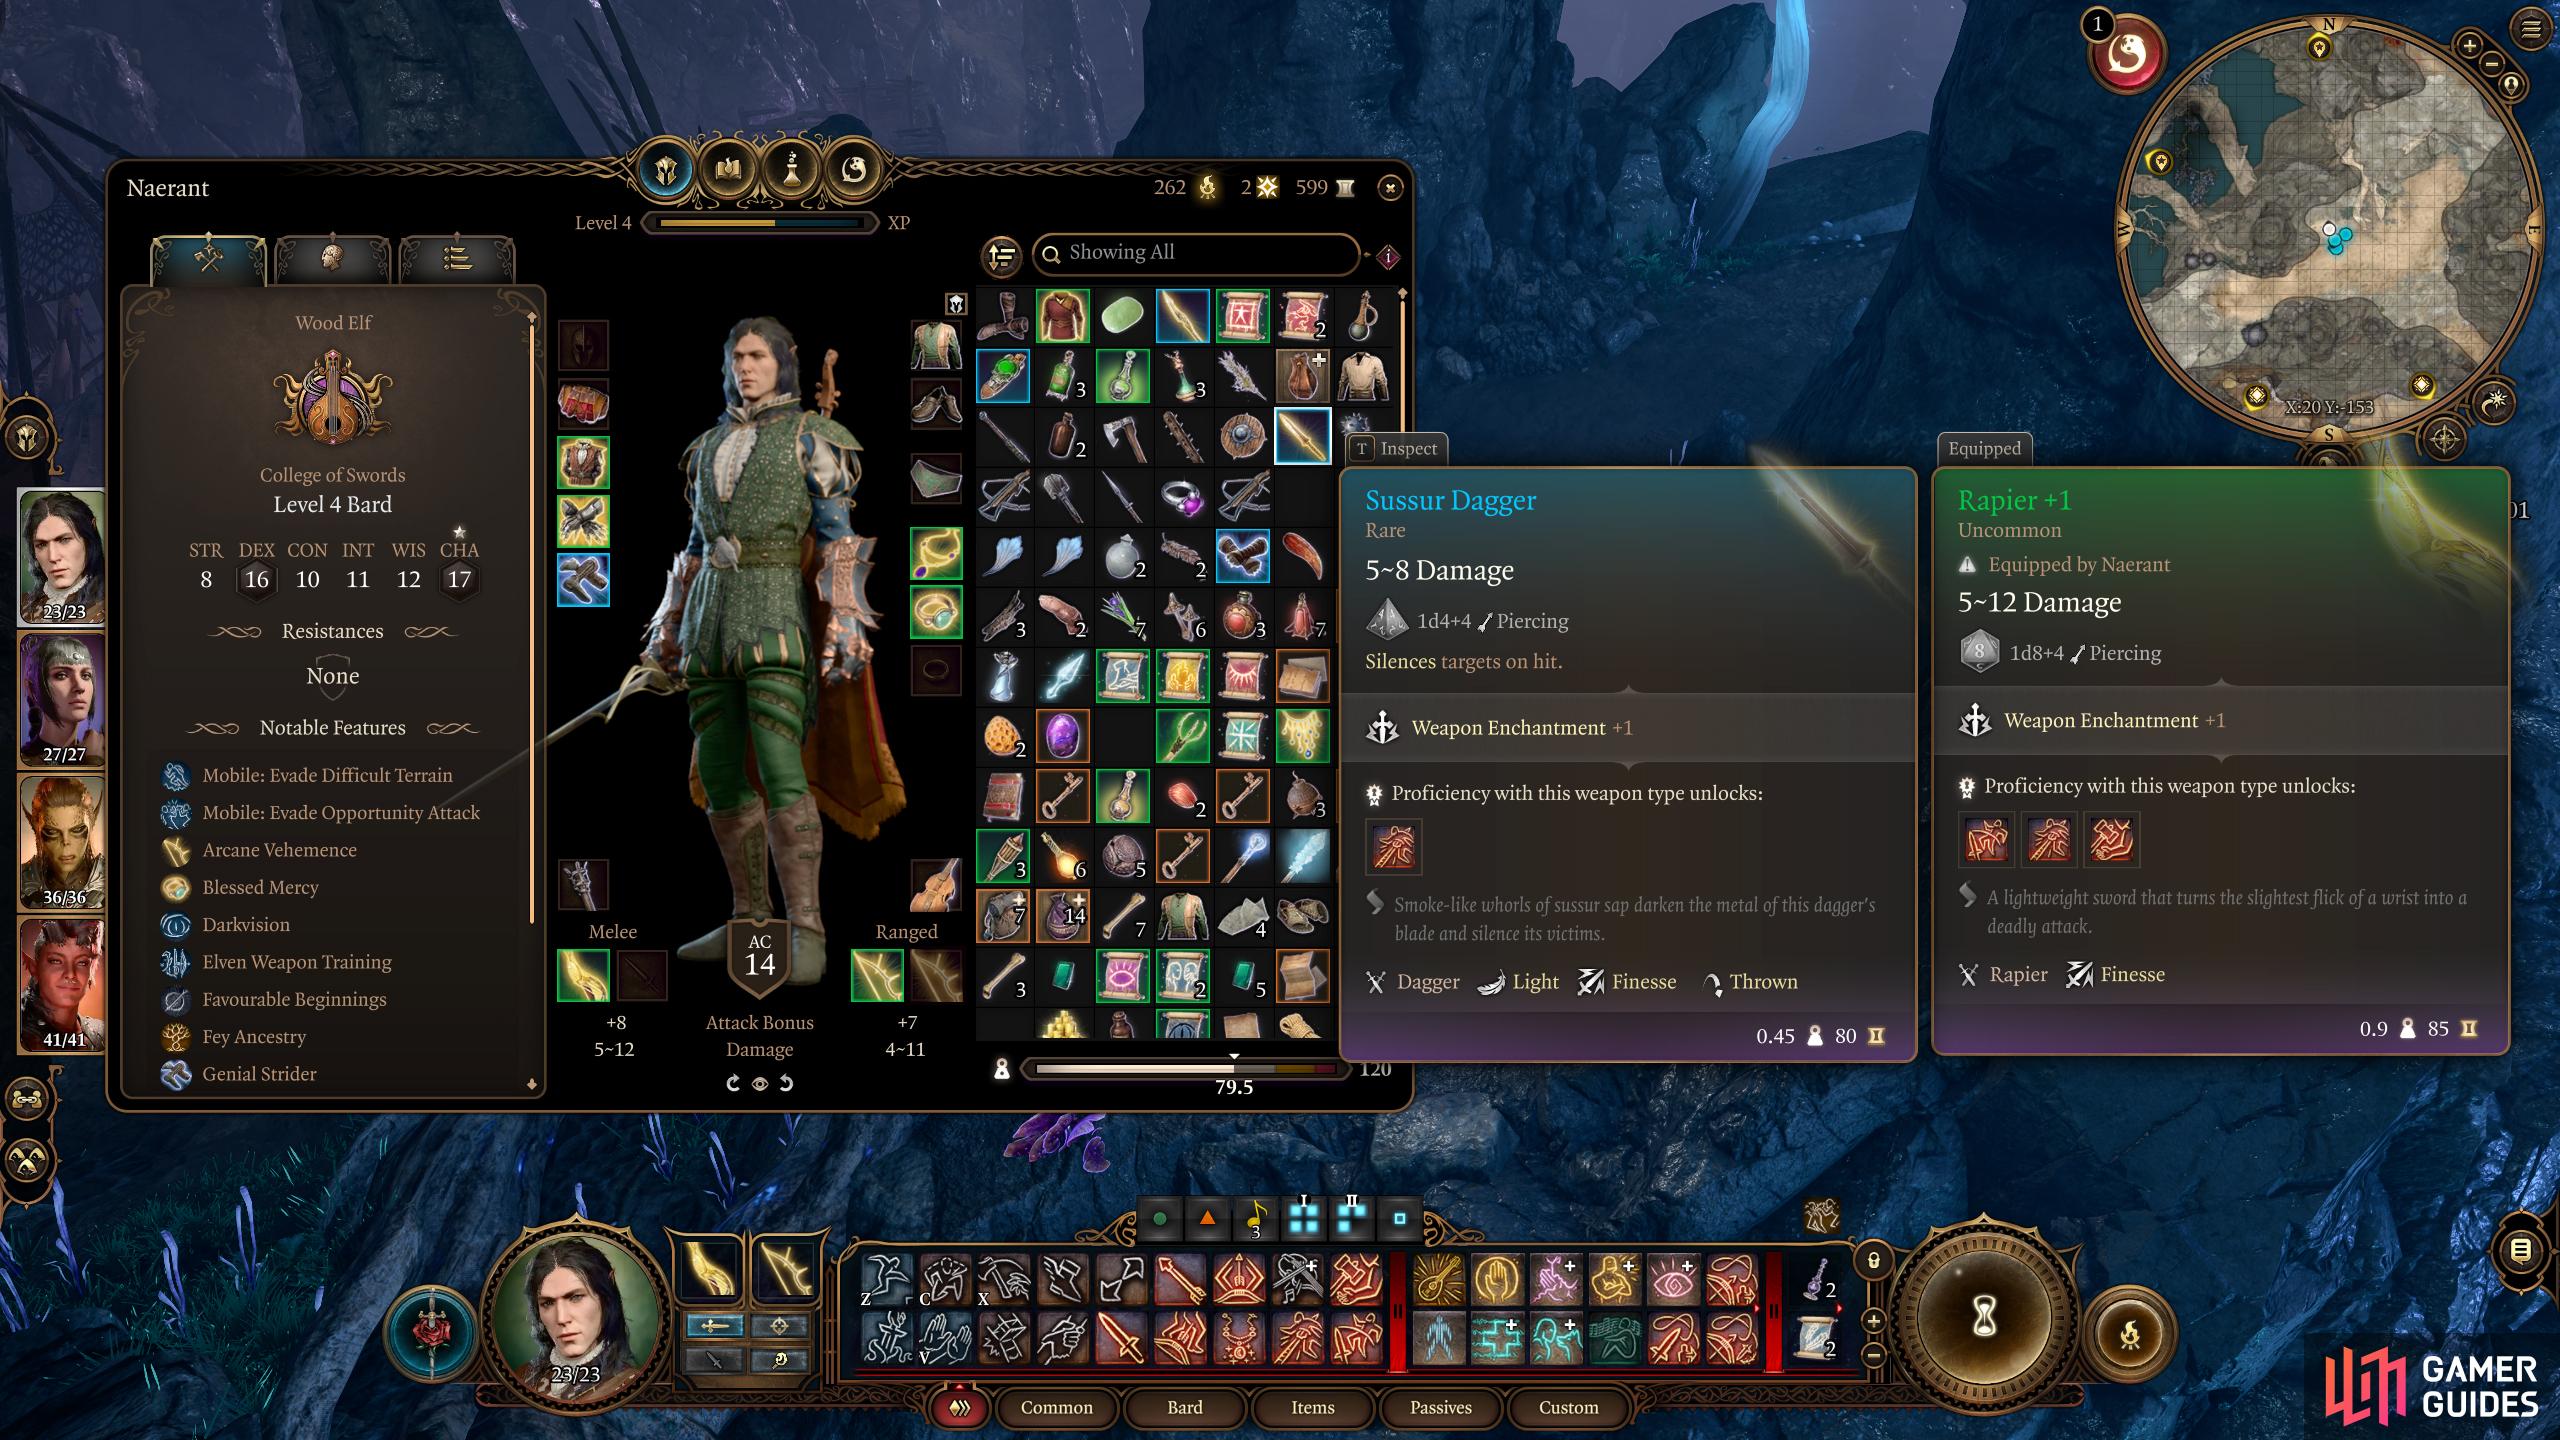
In the same room, opposite the Melting Furnace is a chest next to the ladder which contains Highcliff’s Blueprints, but be careful as the chest is trapped and will require you to disarm it. Picking these up will grant you the “Finish the Masterwork Weapon” quest. Reading the note will tell you that you can craft a Sickle, ![]() Dagger, or
Dagger, or ![]() Greatsword by infusing them with Sussur Bark. The bad news? You can only get Sussur Bark in the dreaded Underdark which is quite the journey.
Greatsword by infusing them with Sussur Bark. The bad news? You can only get Sussur Bark in the dreaded Underdark which is quite the journey.
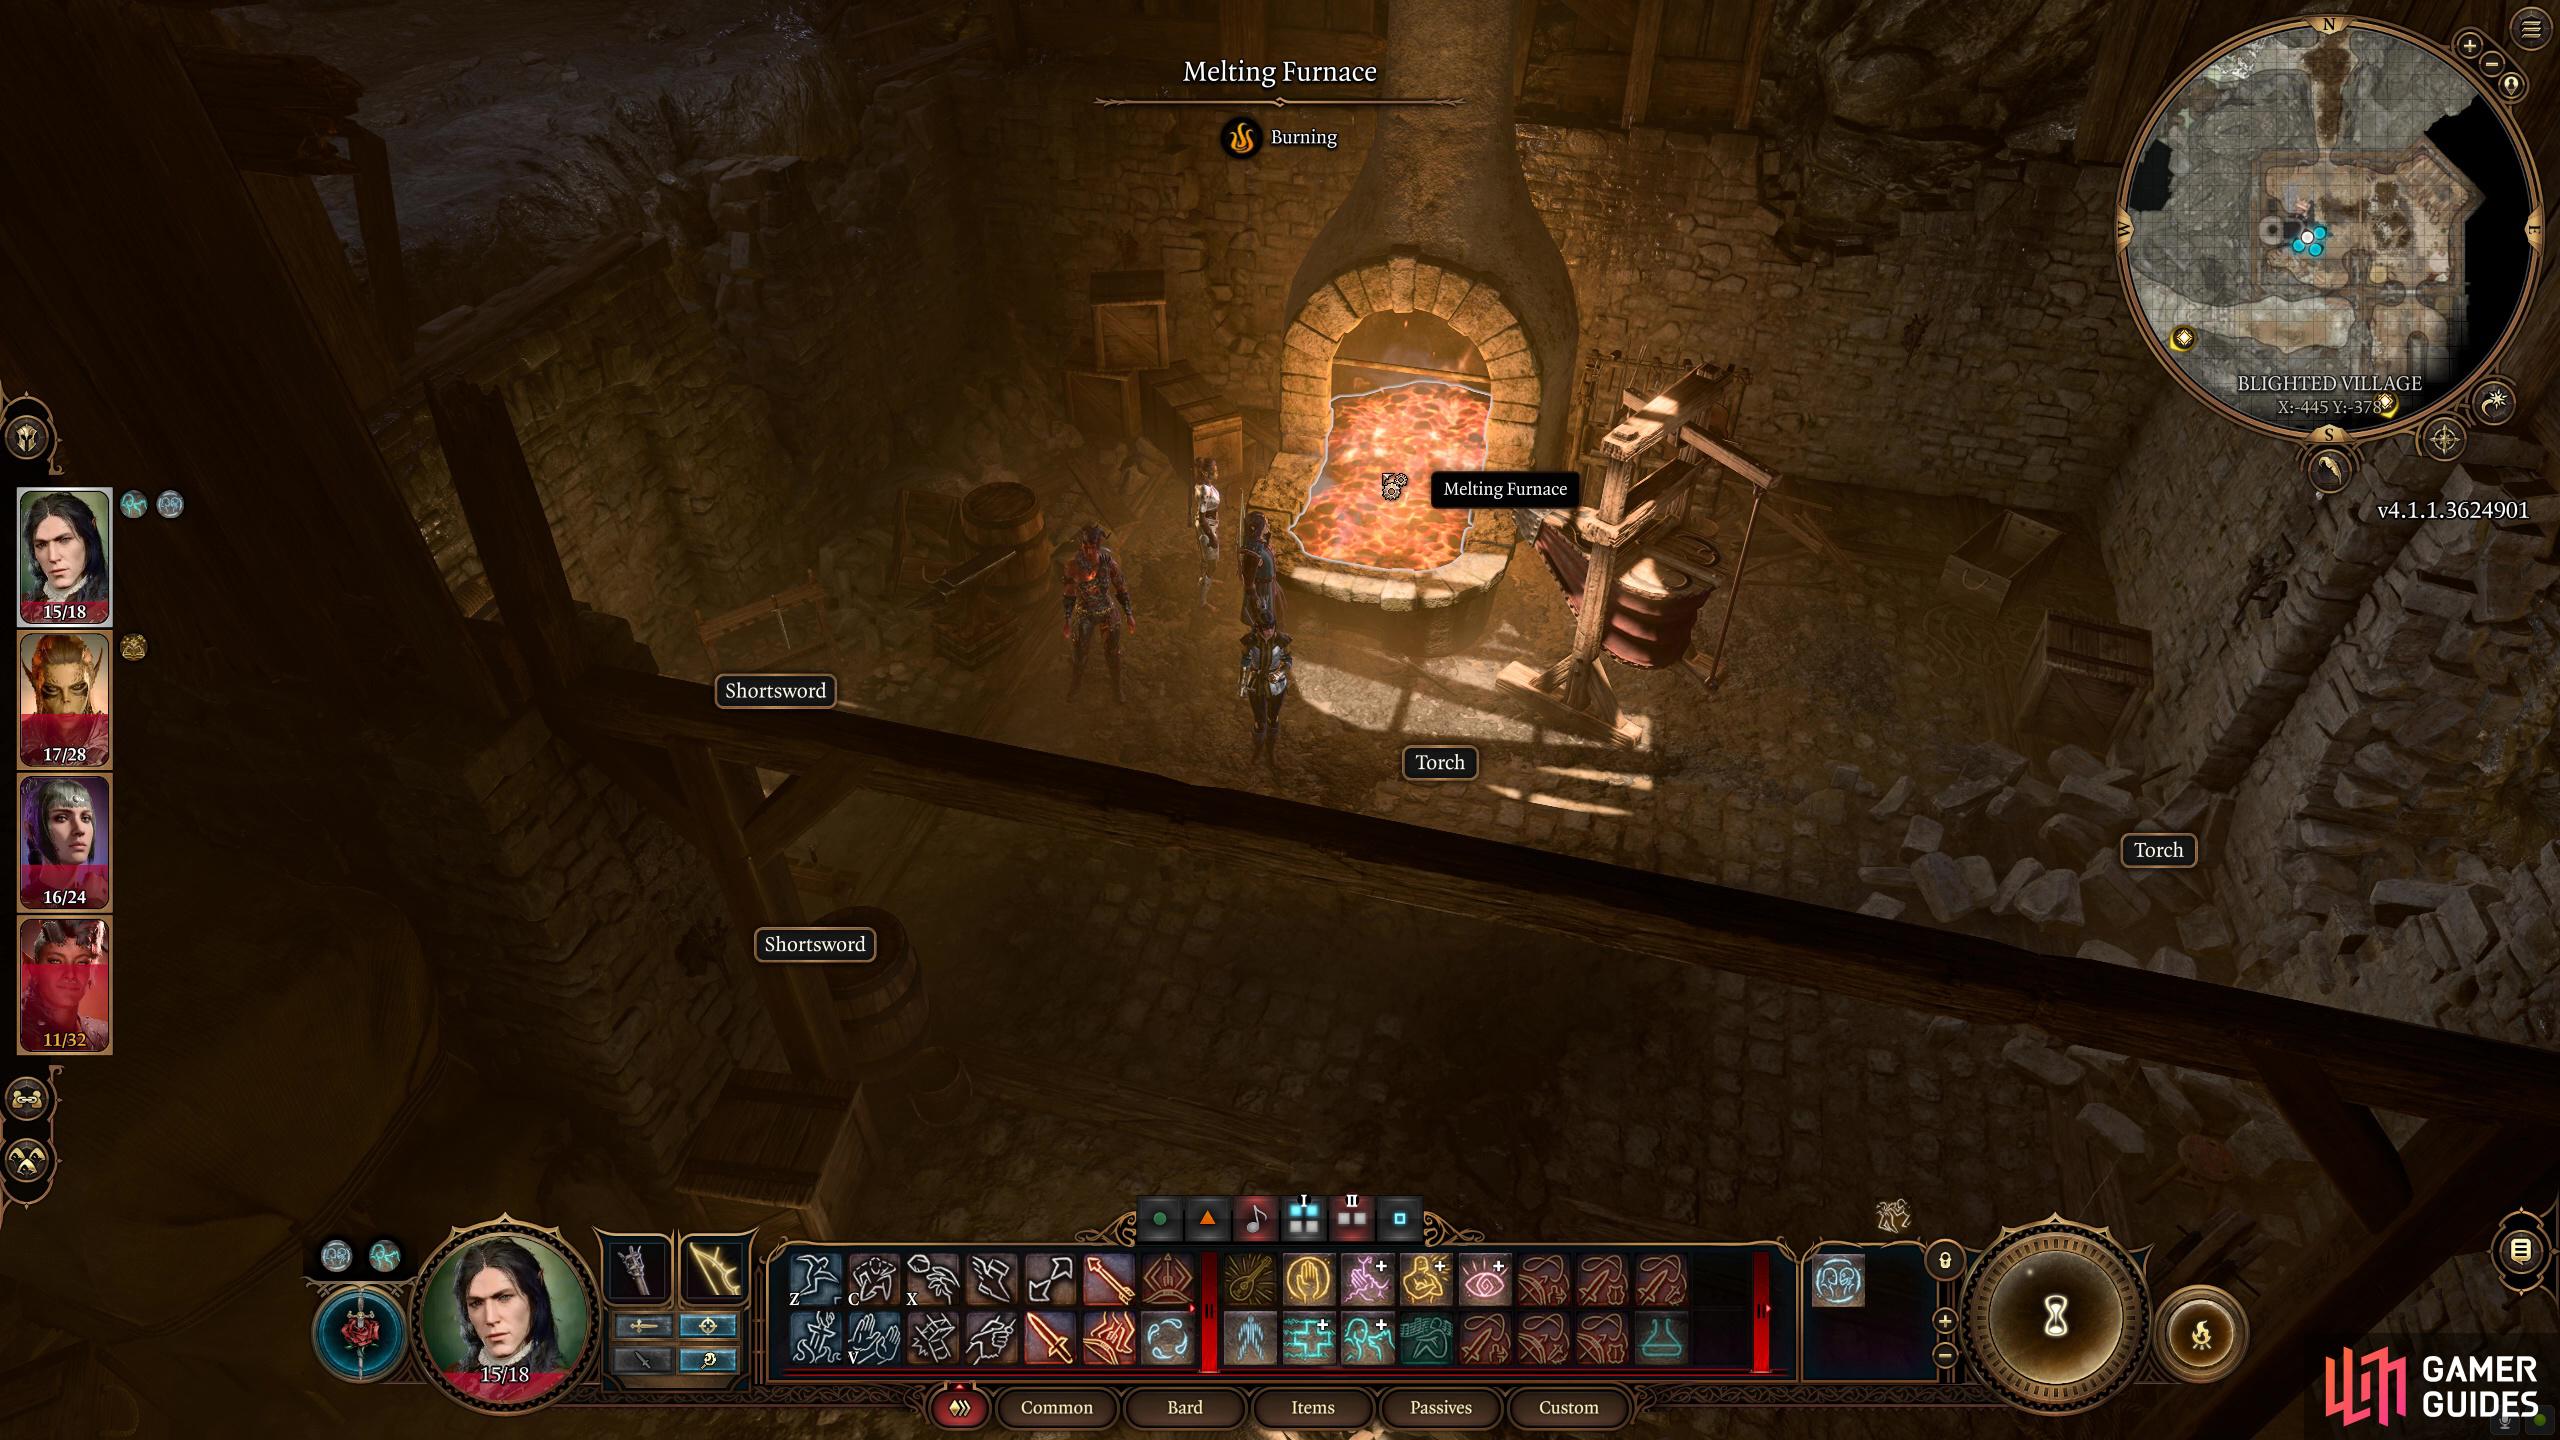
In the basement, you’ll find a Melting Furnace. This is what you’ll use to complete the quest.
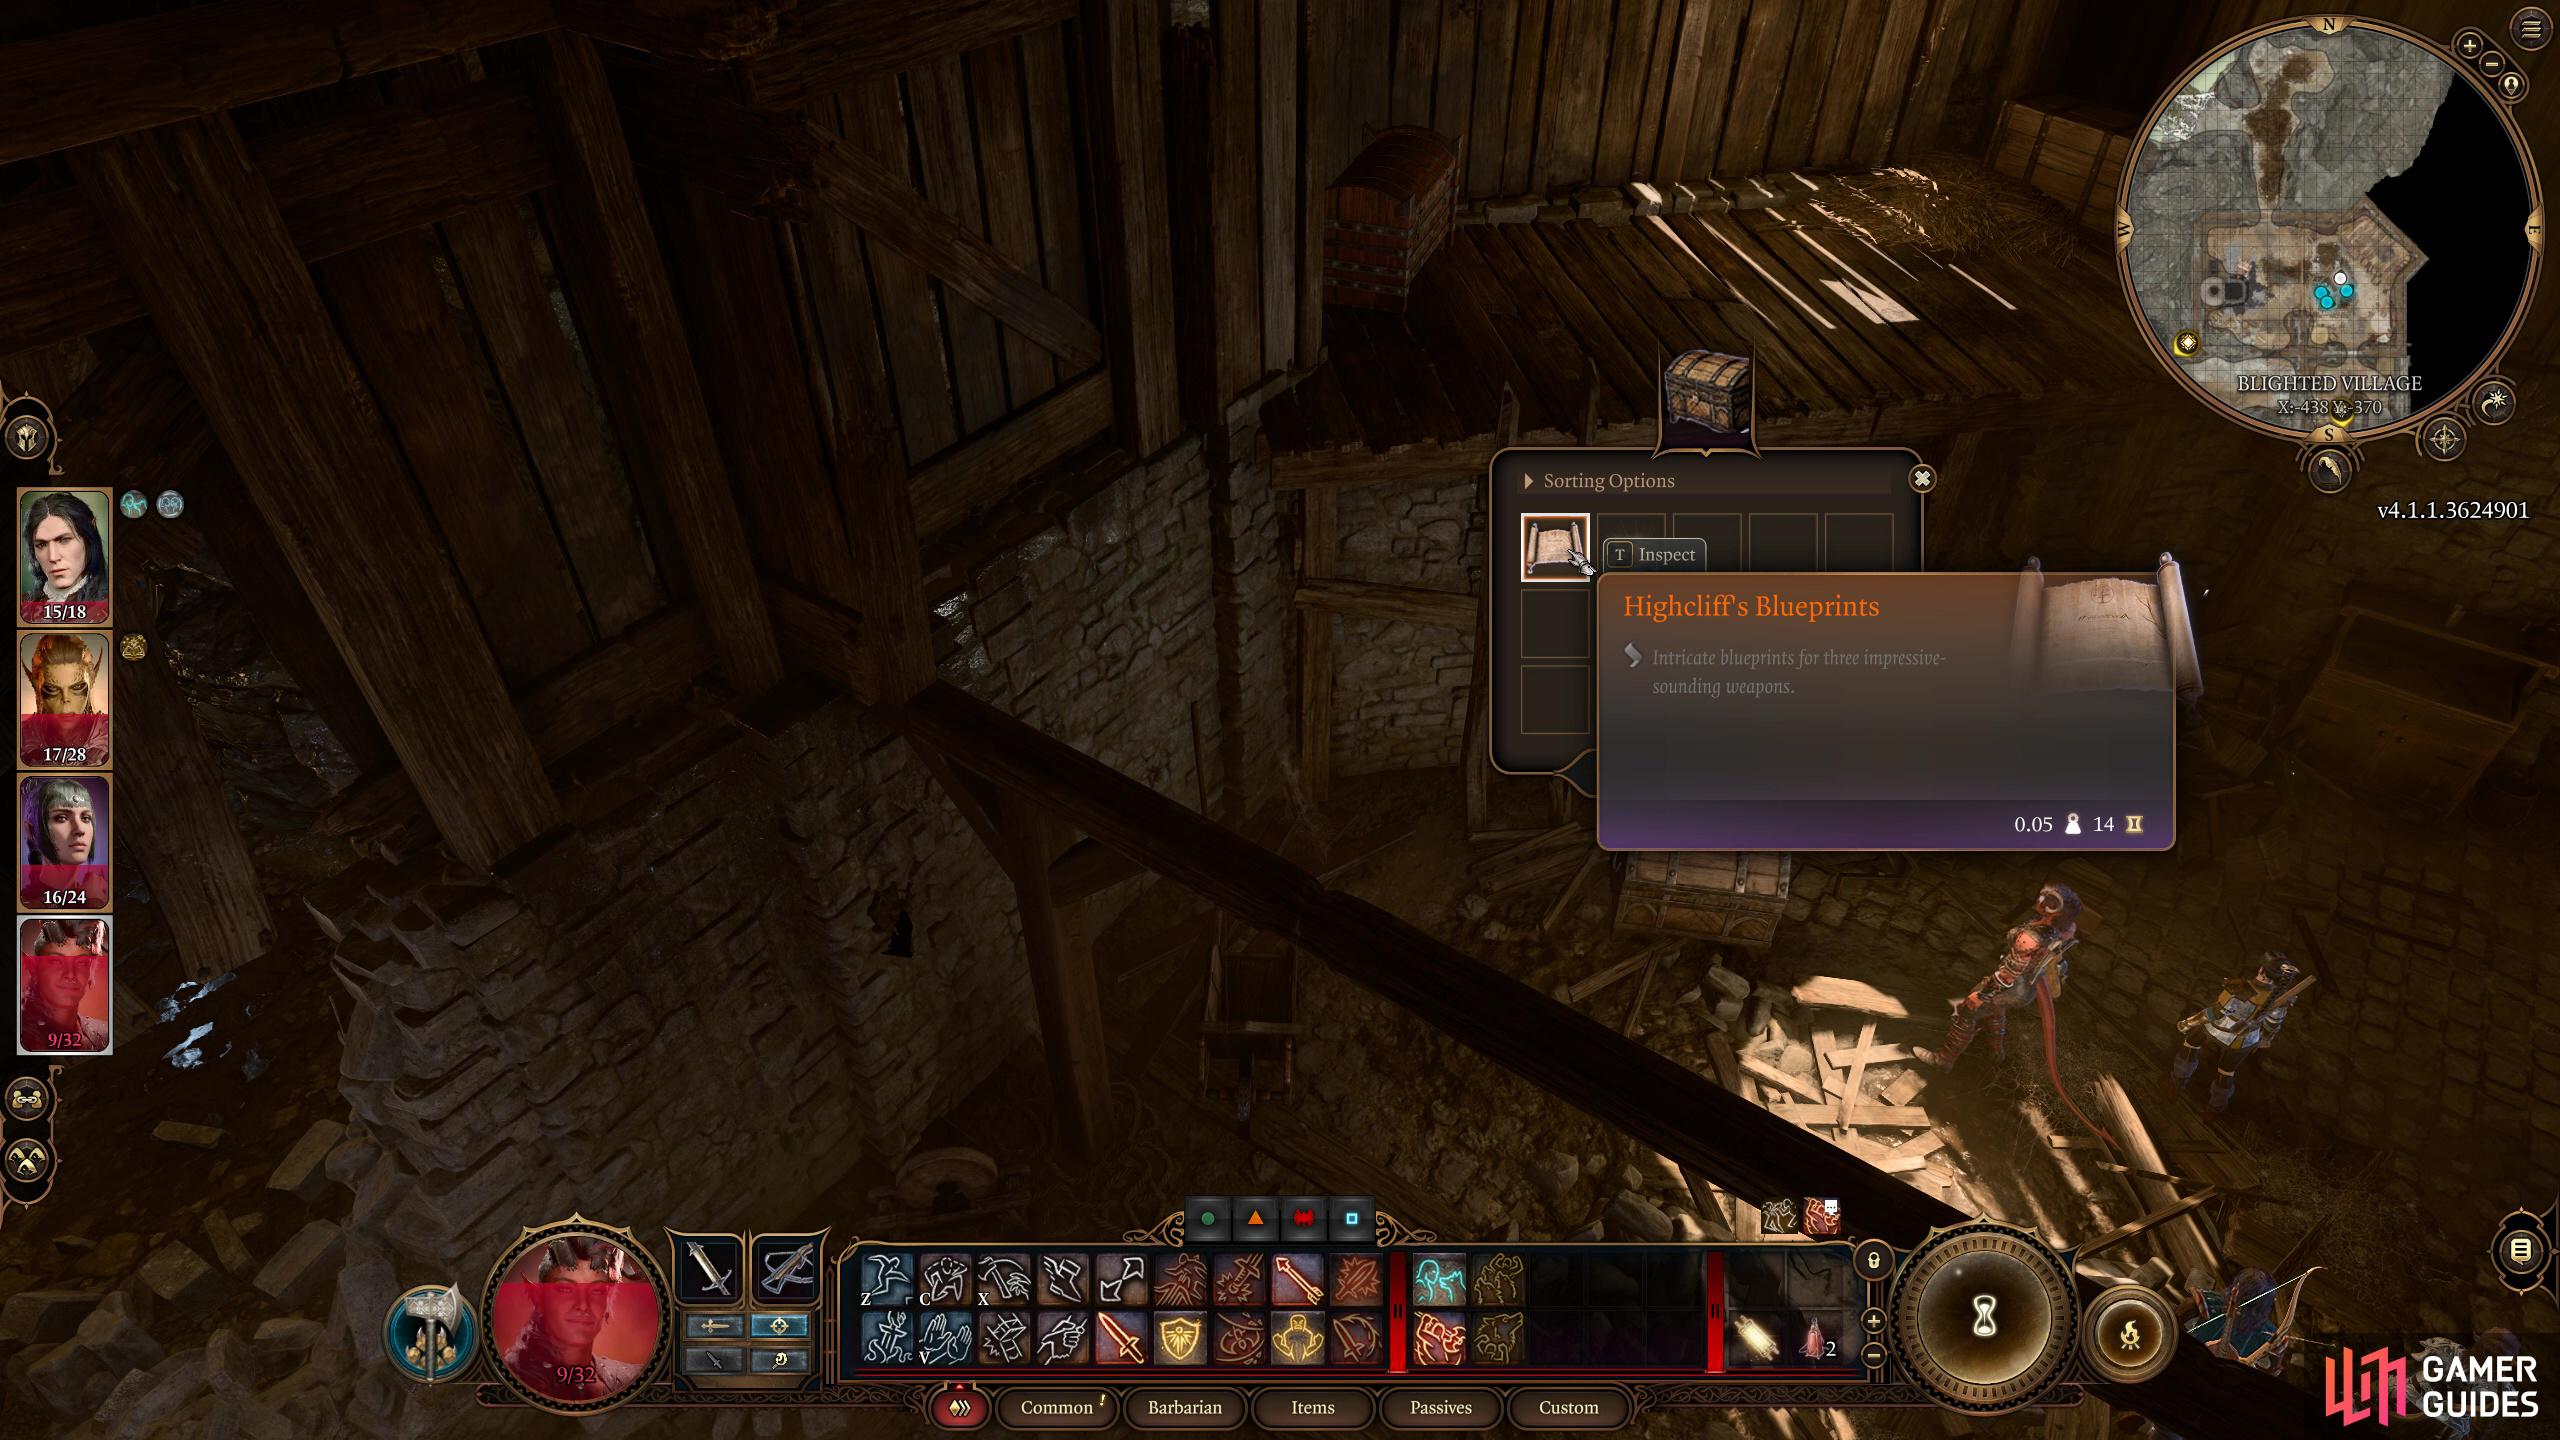
You can find Highcliff’s Blueprints in a chest opposite of the Melting Furnace which will start the quest.
Where to Find the Sussur Tree in the Underdark
Now it’s time to enter the Underdark, but before you do, prepare for a long arduous journey and buy/craft some healing potions, food supply if you need it, and especially a scroll or two of ![]() Feather Fall as you’ll need this to reach the Underdark. In the same room as the Melting Furnace, there is a Cracked Wall to the right of the furnace, attack it with a weapon until it becomes rubble. Go through the new entrance you created for yourself, and you’ll be in a cave system full of spiders and Ettercaps.
Feather Fall as you’ll need this to reach the Underdark. In the same room as the Melting Furnace, there is a Cracked Wall to the right of the furnace, attack it with a weapon until it becomes rubble. Go through the new entrance you created for yourself, and you’ll be in a cave system full of spiders and Ettercaps.
Did I mention that they’re Phase Spiders? Meaning they can teleport? No? Well, there are. What you want to do is make your way northwest where you’ll find a large hole you can drop into. But on your way there, you’ll have a couple of fights. The first will be against Phase Spiders and Ettercaps then you’ll have to fight the Phase Spider Matriarch boss enemy along with Phase Spiders when you get to the hole.
You could try to sneak there, but if you go along the web bridges, you could alert the nearby creatures due to the web vibrating and making a noise. If you do choose to sneak, use ![]() Shadowheart’s
Shadowheart’s ![]() Pass Without Trace spell to help you. On the other hand, if you fight them, you should make sure everyone has access to ranged attacks with either bows, spells, or both.
Pass Without Trace spell to help you. On the other hand, if you fight them, you should make sure everyone has access to ranged attacks with either bows, spells, or both.
An excellent tip to use on the spiders is if they are on the web bridges, you can break the bridge with fire to make them drop to the floor, this includes the Matriarch, and it can deal significant damage to them. Other than that, make sure you have a way to deal with acid by preventing, or curing it. When you reach the Matriarch, you’ll find a hole in the floor beneath her. If you precast Feather fall on the party, you can jump into the hole, and avoid her, but you’ll need to be quick about it.
Fighting the Matriarch on the other hand can be difficult, you’ll have multiple phase spiders to contend with as well as her, and throughout the battle, she’ll hatch some eggs which spawns several small spiders. They’re easy enough to deal with as they only have little health, but they can be a nuisance, stopping you from moving due to Opportunity attacks. When you’re fighting the Matriarch, she’ll either spit venom at you from a distance, or phase (teleport) around the area, making her hard to hit.
At some point during the battle, she’ll phase to you, and perform a couple of strong bite attacks on the party which can leave you in dire need of healing. If you ever see her on a web bridge, break it to drop her to the floor which can deal up to 35 damage (this varies on difficulty). ![]() Karlach is suitable for this battle as she deals a lot of damage at this point of this game, and Shadowheart can cure the poisons as well as buff your party, but a good ranged character will make this battle significantly easier. Whatever route you take, descend into the hole with Feather Fall on the party, and be prepared to tackle the Underdark.
Karlach is suitable for this battle as she deals a lot of damage at this point of this game, and Shadowheart can cure the poisons as well as buff your party, but a good ranged character will make this battle significantly easier. Whatever route you take, descend into the hole with Feather Fall on the party, and be prepared to tackle the Underdark.
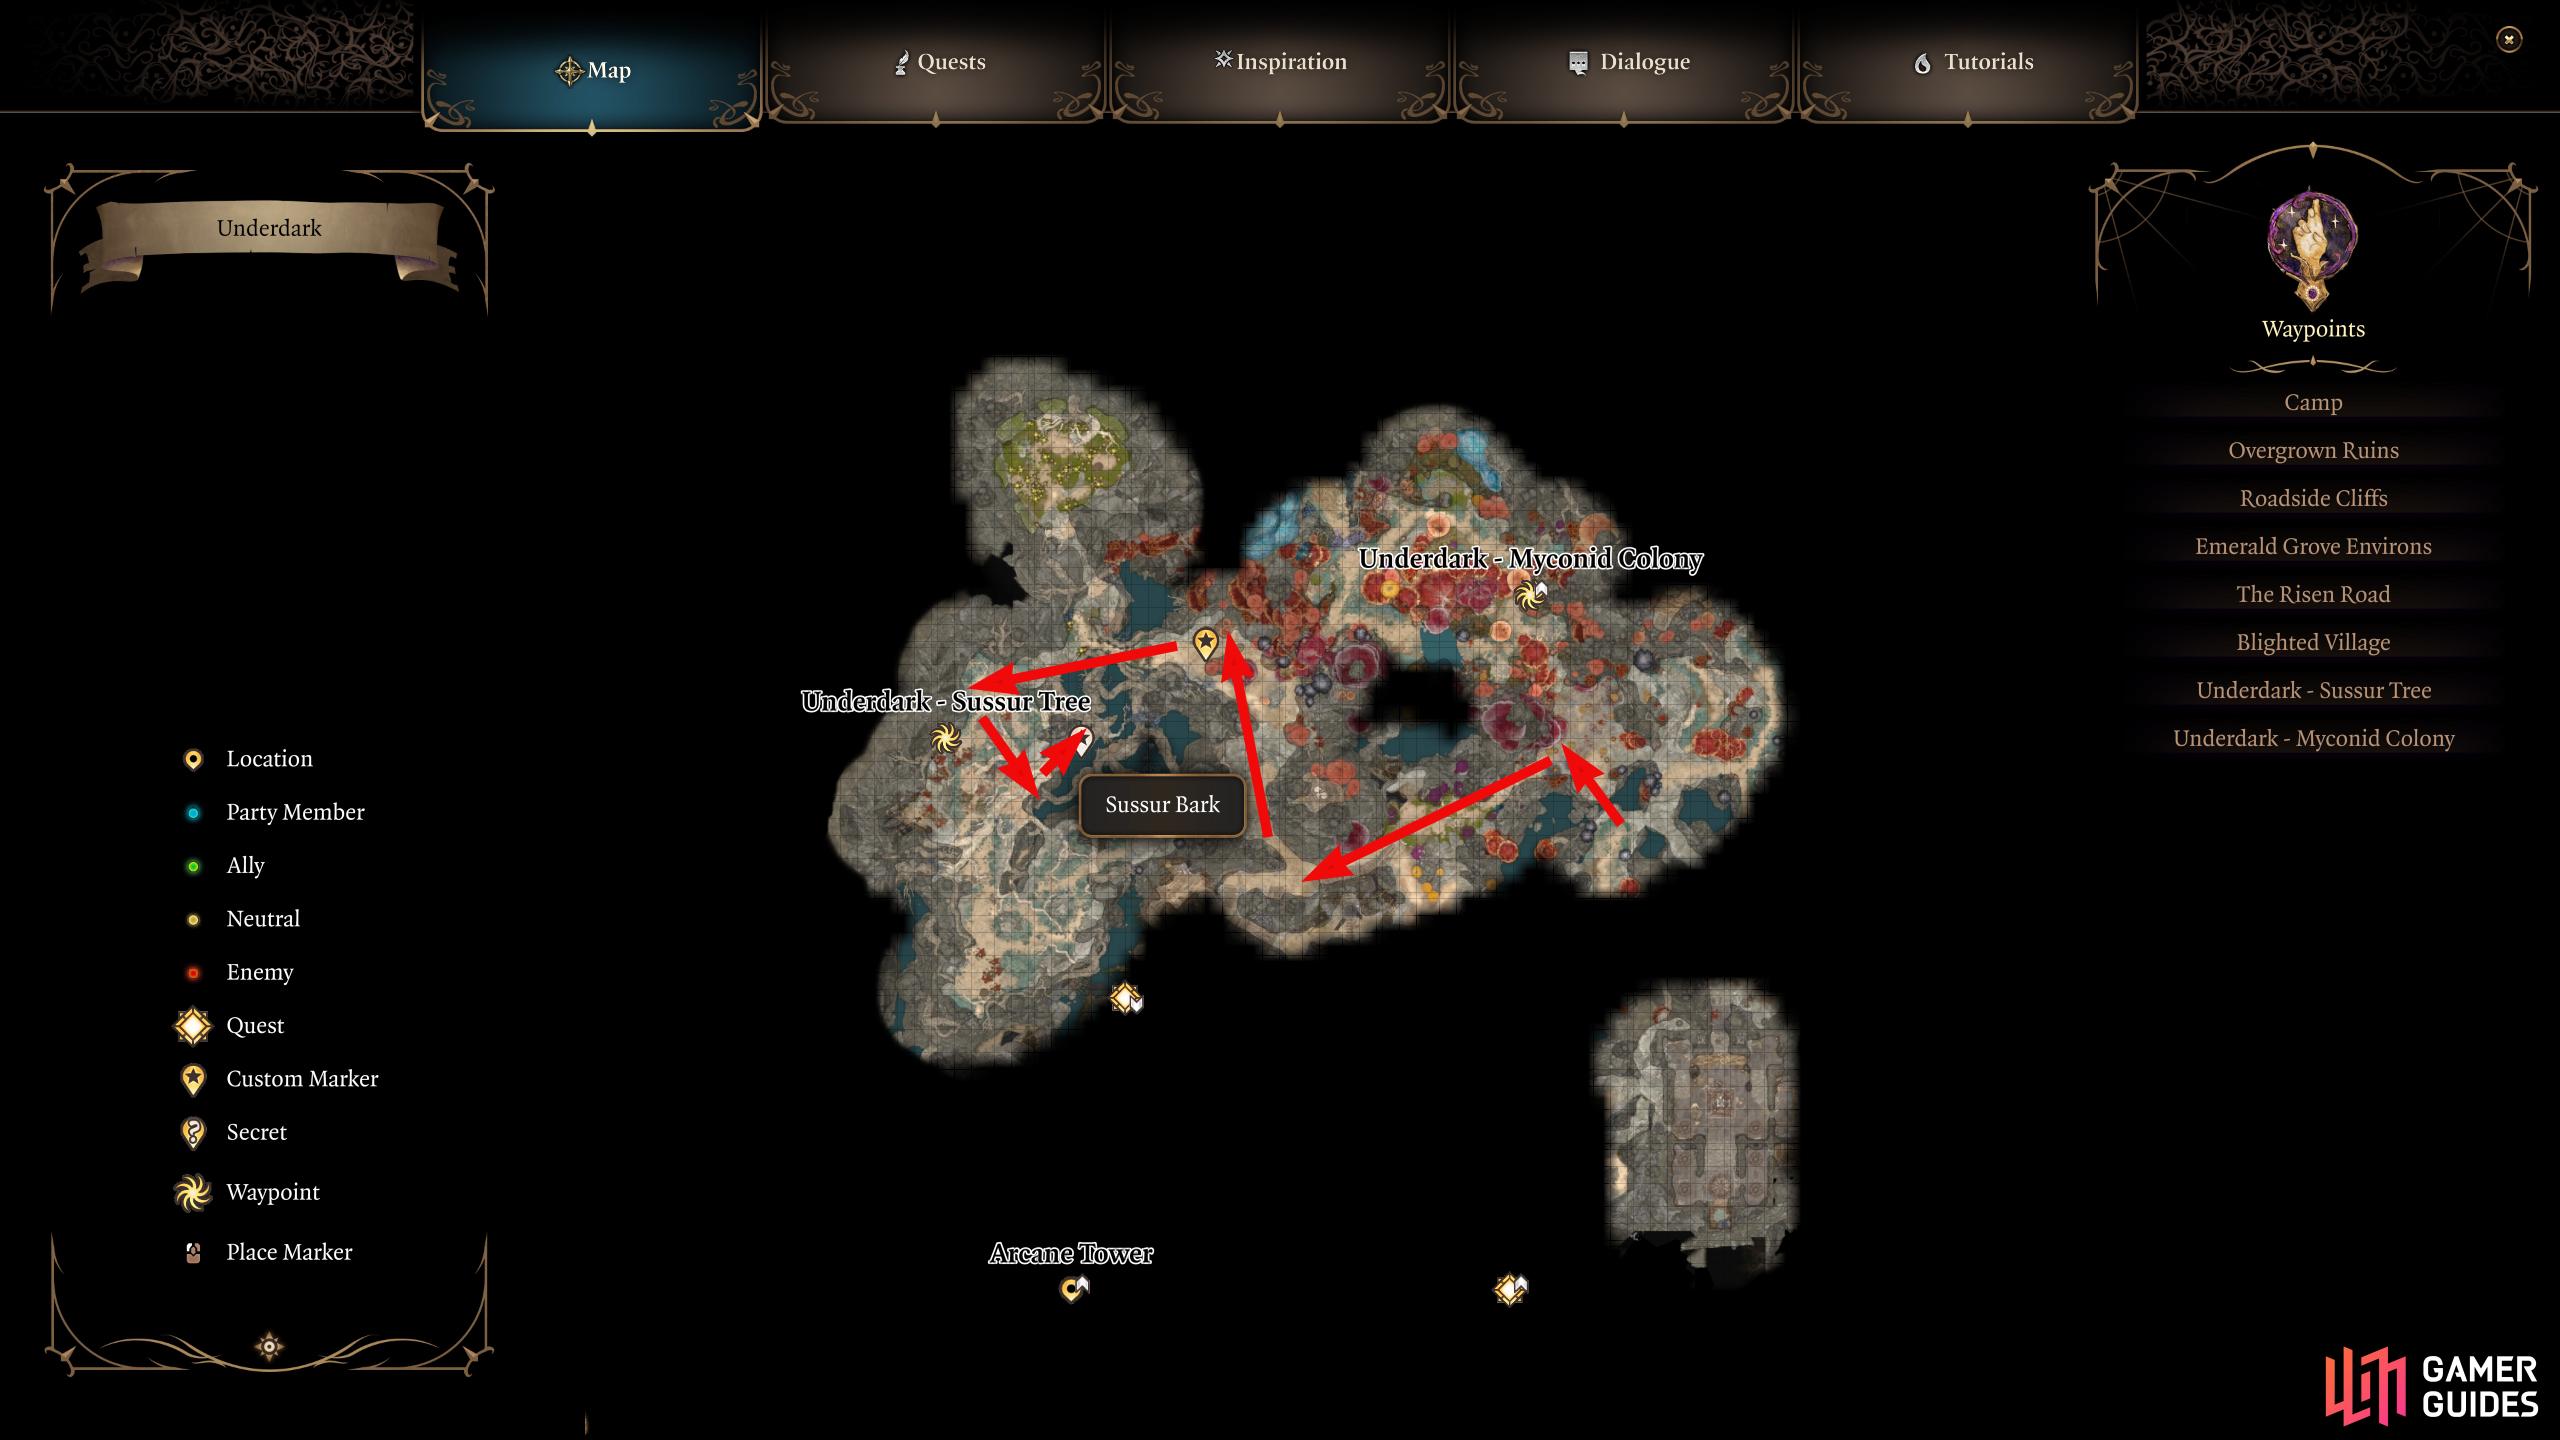
Ideally, you’ll be around at least level 4 by now which should be enough to deal with the horrors that lurk here. The Sassur Tree can be found to the west, but to get there, you’ll have to go through various obstacles such as confusion-inducing mushrooms, exploding mushrooms, or poisonous mushrooms and that’s not including the enemies! The mushrooms are as follows:
- Timmask - Blue Flowers with their petals spread which confuses you (There are smaller ones where they’re closed up).
- Bibberbang - Green circular mushrooms that explode when you get near them.
- Torchstalk - Orange mushrooms that also explode when you get near to them.
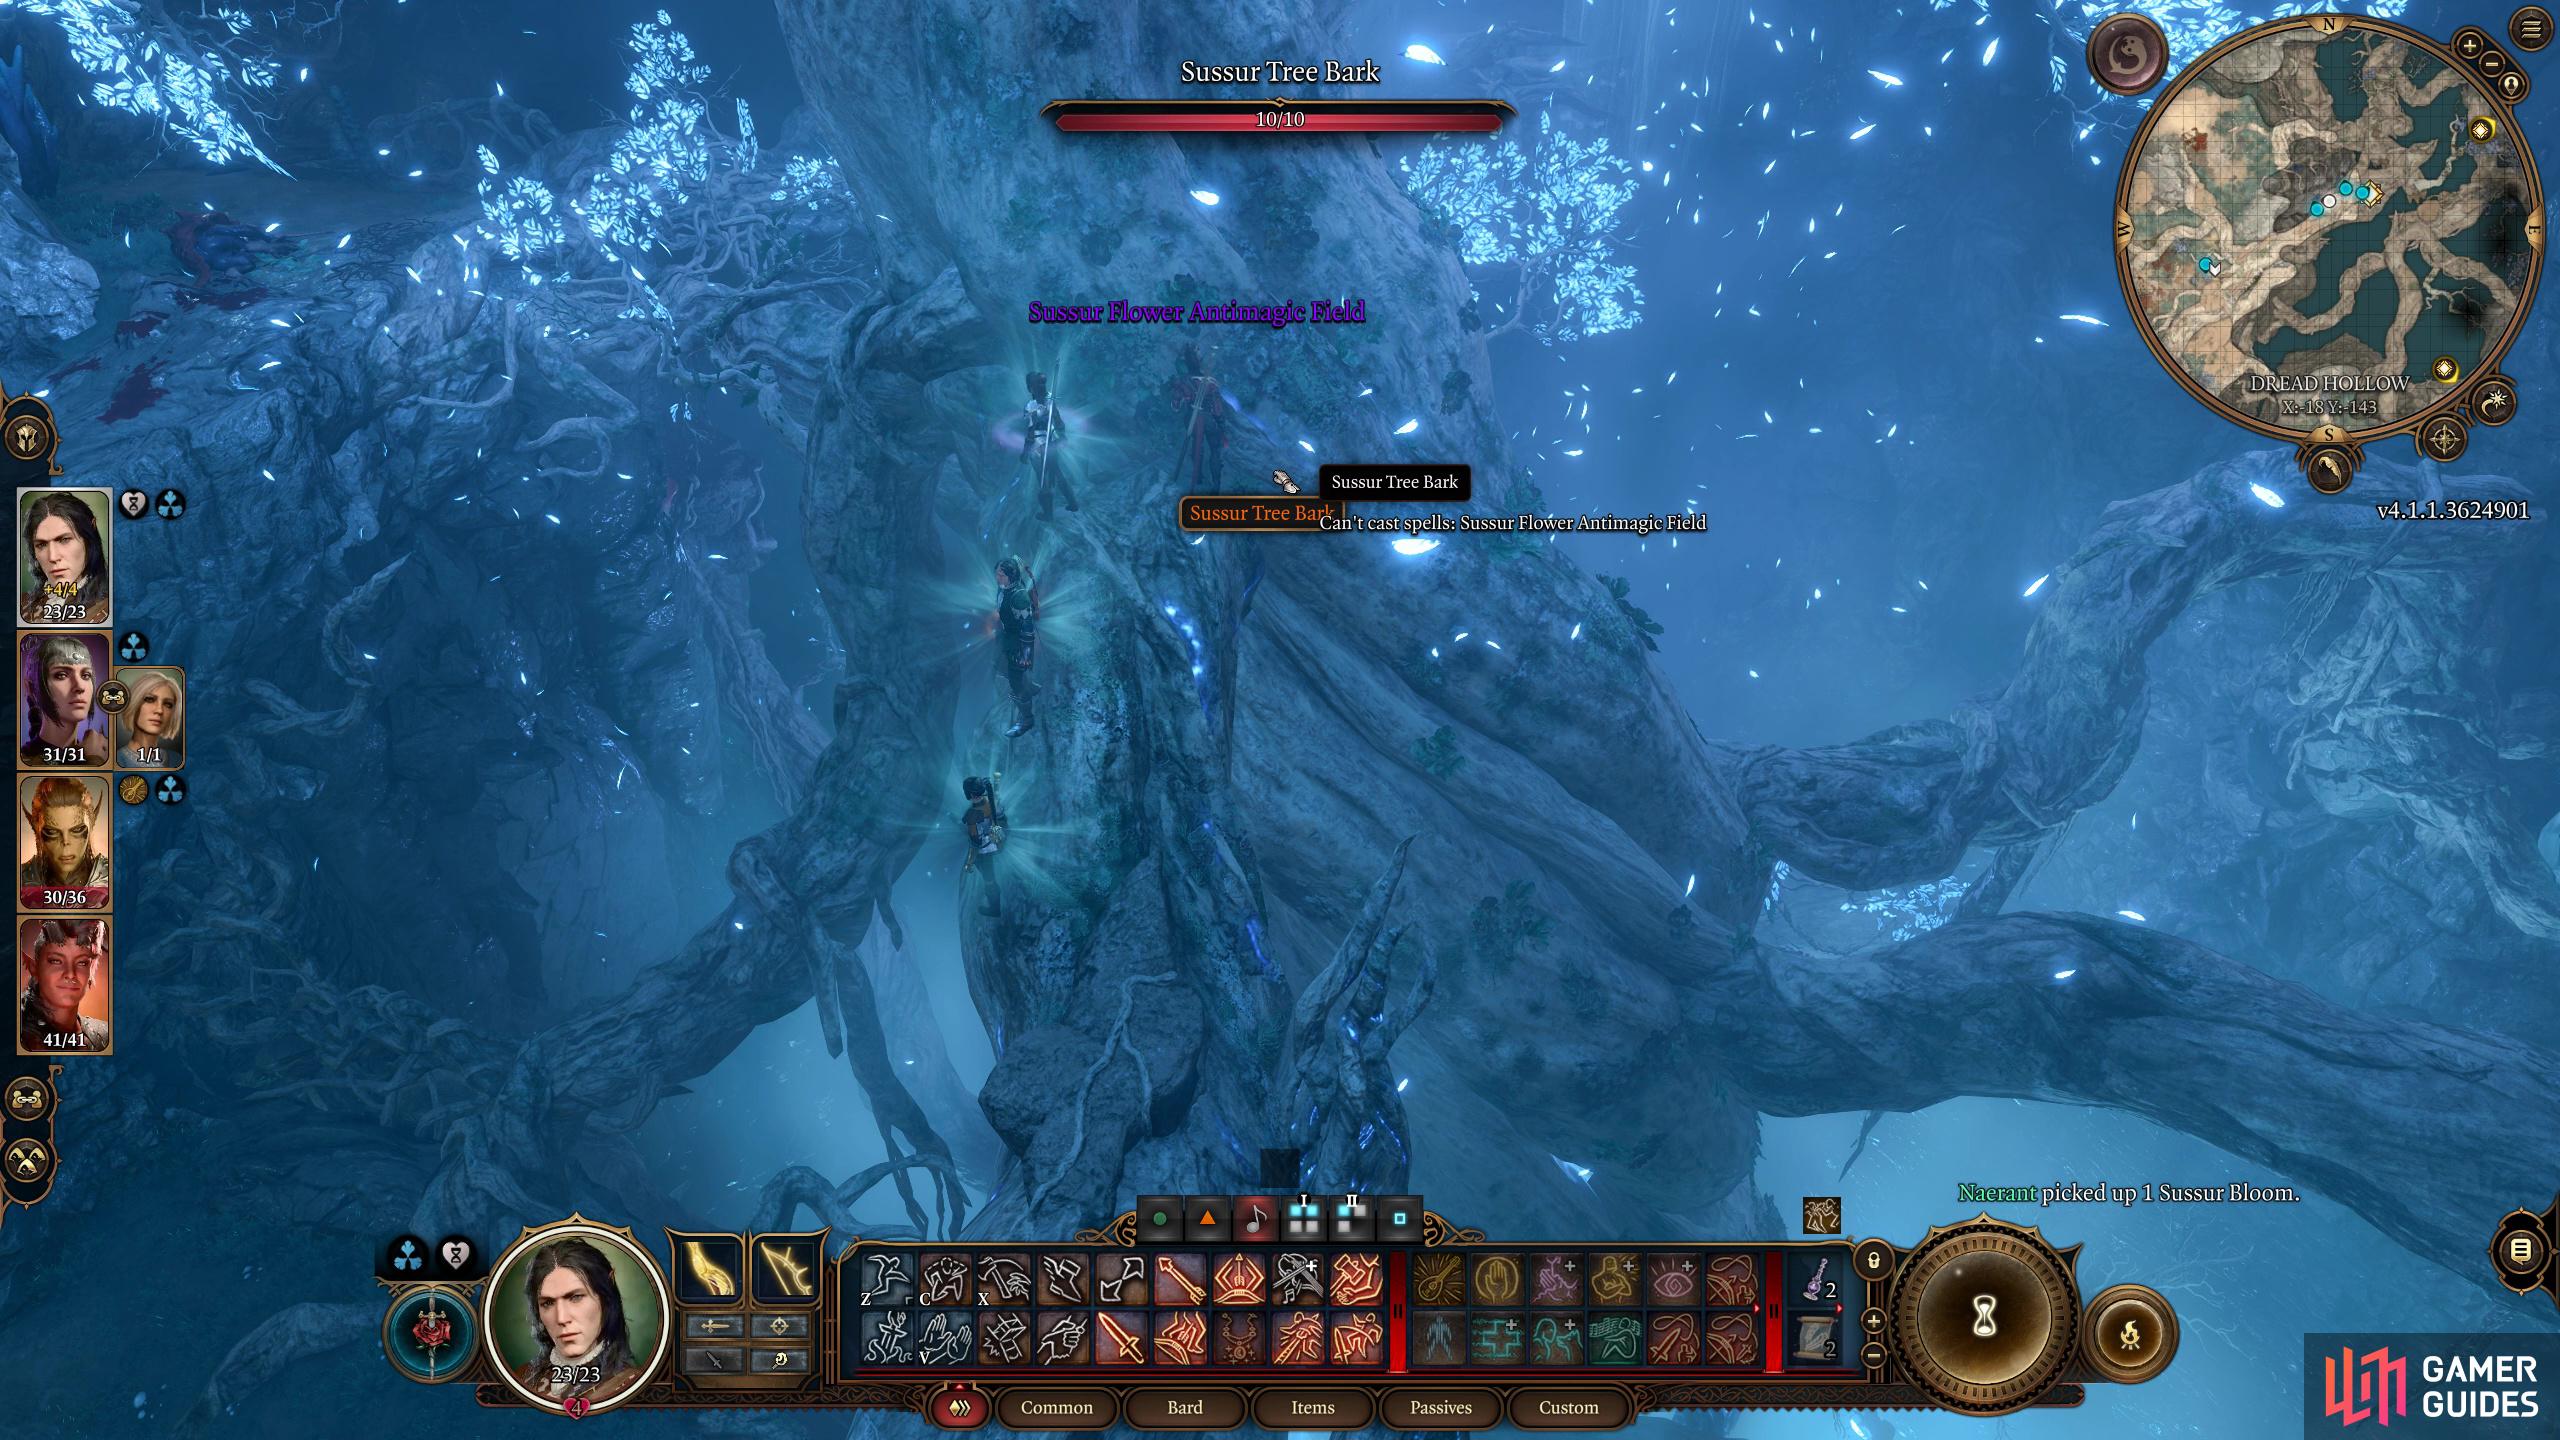
- Sussur Flower - These cause Anti-magic to anyone near them. You won’t see these until you’re near the Sussur Tree. They also work against enemies too.
You can destroy all of these mushrooms by throwing a Fire Bolt, or another fire spell at them, or shooting either a Bibberbang/Torchstalk near the others, just make sure you’re not close to them when you do.
As soon as you land in the Underdark, there are some Minotaurs to your north which, depending on your difficulty, can be pretty tough to fight. Instead, sneak and follow the winding path down then continue following the path west until you reach a narrow path full of purple glowing gems. Continuing west, you’ll see an encampment of sorts to the left, ignore this for now, and take the northern path to bypass it.
Continue north, and climb the rocky slope where you’ll find the Myconid Colony. These won’t attack you providing you say the right things, and you can even pick up some supplies, get a waypoint, and even talk to Oppelum, a friendly Mindflayer, about your predicament. For the sake of the quest, we’ll ignore that for now. Take the northwestern path, and you’ll see the Sussur Tree to your south, but you can’t do anything just yet. Keep following the path, and you’ll encounter a few things.
You can drop to the path north, and help a lost man escape a field of Bibberbang in the “![]() Find the Mushroom Picker” quest, but you’ll need a scroll of
Find the Mushroom Picker” quest, but you’ll need a scroll of ![]() Misty Step to do so, or you can continue forward where your path will also have some Bibberbang to deal with. On the other side of the path is a Hook Horror enemy, wait for it to come closer to you, and shoot it with a ranged weapon to initiate a battle, then attack the Bibberbang with a fire arrow/spell to destroy the Bibberbang which will either defeat, or deal significant damage to it.
Misty Step to do so, or you can continue forward where your path will also have some Bibberbang to deal with. On the other side of the path is a Hook Horror enemy, wait for it to come closer to you, and shoot it with a ranged weapon to initiate a battle, then attack the Bibberbang with a fire arrow/spell to destroy the Bibberbang which will either defeat, or deal significant damage to it.
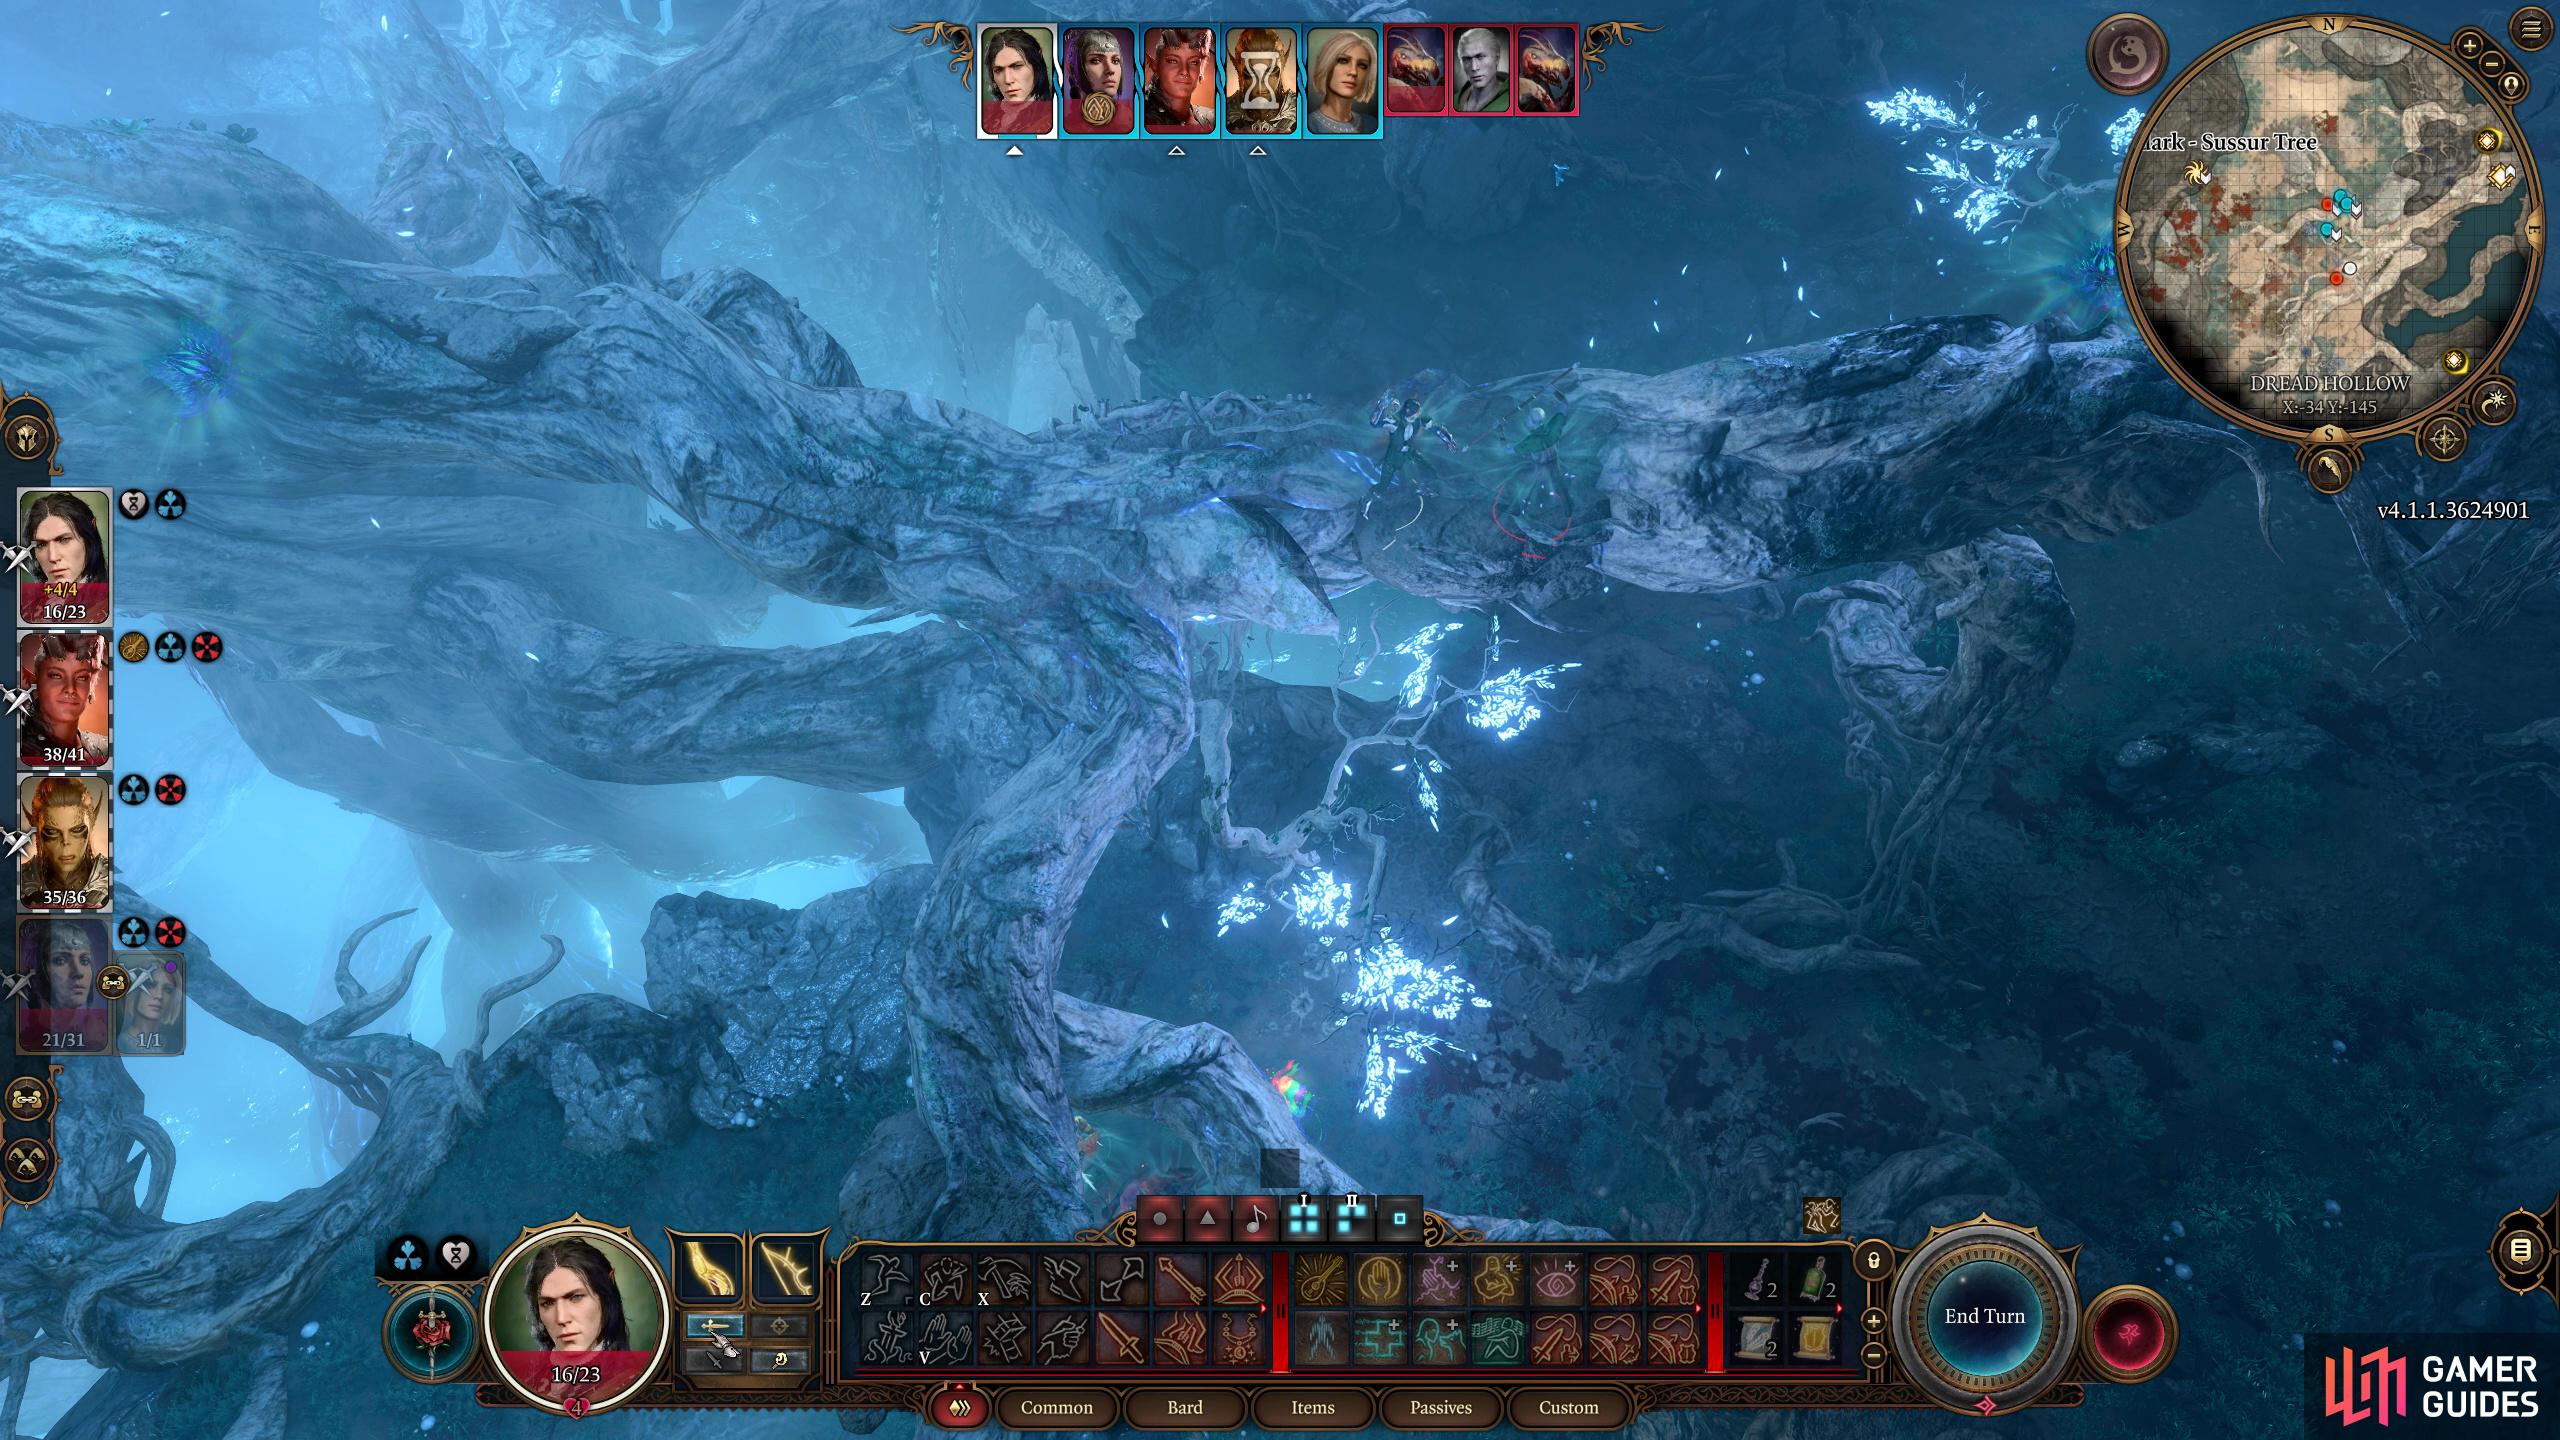
Once that’s dealt with, continue along the path west, and you’ll notice that you’ll see the message “Sussur Flower - Antimagic Field ‘’ appear. This is due to the Sussur flowers on the tree causing this, but you can use this to your advantage, more on that in a bit. When you go down the make-shift steps made from the rocky ledges, you’ll find a topple tree trunk you can go up with another Hook Horror waiting on top. Rush the Hook Horror, and take it out, but be careful not to get knocked into the chasm from its leap attacks. The Hook Horror can call reinforcements to the battle, so make sure you deal with it swiftly. Next to the Hook Horror is a Sussur flower, pick it up with a melee character who doesn’t need to use any spells, and continue along the branch.
If you pick up a Sussur Flower from the tree branch, and stand next to Filro, you’ll stop him from casting any magic on you while you’re in proximity to him. Which for a spell caster, is a very bad thing.
After you’ve dealt with the enemies in the area, climb back up the branch where the first Hook Horror was, and you’ll find the Sussur Bark. Now head back to the basement in Blighted Village.
Up here, you’ll find Filro the Forgotten, a lost soul with a penchant for magic, good thing you picked up that Sussur flower, right? Send the person carrying the flower in front of Filro to keep his magic casting at bay while the others focus on whatever Hook Horrors are left. If you have a Bard with the College of Swords subclass, you can use the Mobile Flourish actions to yeet them off the cliff.
Once the encounter is finished, make sure to unlock the waypoint which is on the wall opposite the tree then ransack Filro’s camp before heading back up the tree branch where you grabbed the Sussur Flower. Follow it toward the trunk, and you’ll find the Sussur Bark, the required material for the quest. Now teleport back to the Blighted Village, and head back to the basement where the Melting Furnace is, and place the Bark in the slot to combine it with the forge.
What Weapons can you Craft at the Masterwork Forge in Blighted Village?
If you remember Highcliff’s note, it mentions either a Dagger, Greatsword or a Sickle. Now that the forge is glowing a brilliant blue, place any of the above weapons into the slot, and hit combine to get a rare weapon of your choosing. Make your choice count as you can only use it once. Note that the weapons have to be generic common weapons for it to work. Here are the weapons you can craft.
| Weapon Type | Damage | Weapon Actions |
|---|---|---|
| 5-8 Damage, Silences on hit | ||
| 2-12 Damage, Silences on hit | ||
| 1-4 Damage, Silences on hit |
No Comments