
When you first stumble upon the Mausoleum along the northern edge of the map, you might not think much of it, especially if you haven’t cleared the rest of ![]() Reithwin Town. If you have dealt with the Thorms in their various residences (the
Reithwin Town. If you have dealt with the Thorms in their various residences (the ![]() House of Healing, Toll House and The Waning Moon) and/or have visited
House of Healing, Toll House and The Waning Moon) and/or have visited ![]() Moonrise Towers and talked to Z’Rell you’ll have a better clue of what awaits you, and perhaps some extra incentive to explore. The Thorm Mausoleum is actually just the entryway to a much larger dungeon, the
Moonrise Towers and talked to Z’Rell you’ll have a better clue of what awaits you, and perhaps some extra incentive to explore. The Thorm Mausoleum is actually just the entryway to a much larger dungeon, the ![]() Gauntlet of Shar, which is arguably the most significant dungeon in Act 2. This page will provide a step-by-step walkthrough for the Gauntlet of Share, guiding you through the area and linking out to more in-depth pages covering the various puzzles and encounters within.
Gauntlet of Shar, which is arguably the most significant dungeon in Act 2. This page will provide a step-by-step walkthrough for the Gauntlet of Share, guiding you through the area and linking out to more in-depth pages covering the various puzzles and encounters within.
How to Find the Gauntlet of Shar
The Gauntlet of Shar, as mentioned earlier, is hidden under the Thorm Mausoleum along the northern edge of Reithwin Town. There’s a good bit of lore you can pick up from various diaries within the mausoleum, but the highlight is the Painting Puzzle, which is covered in detail on the linked page. Solve this puzzle and you’ll find a disc that’ll take you to the Gauntlet of Shar.
Step-by-Step Walkthrough for the Gauntlet of Shar
Now that you’ve reached the Gauntlet of Shar, it’s time to solve the dungeon’s myriad puzzles so you can advance to the Temple of Shar, the next section of this large dungeon. Your main task here is finding four Umbral Gems, something discussed in more detail on the linked page. This mostly involves completing three trials, as well as dealing with Raphael’s Rival, but there’s also the odd extraneous bit of exploration, and this page will focus on providing an overview for all the content in the Gauntlet of Shar, step-by-step.
(1 of 4) Walking towards the statue of Shar will end with a forceful - but not painful - rebuke.
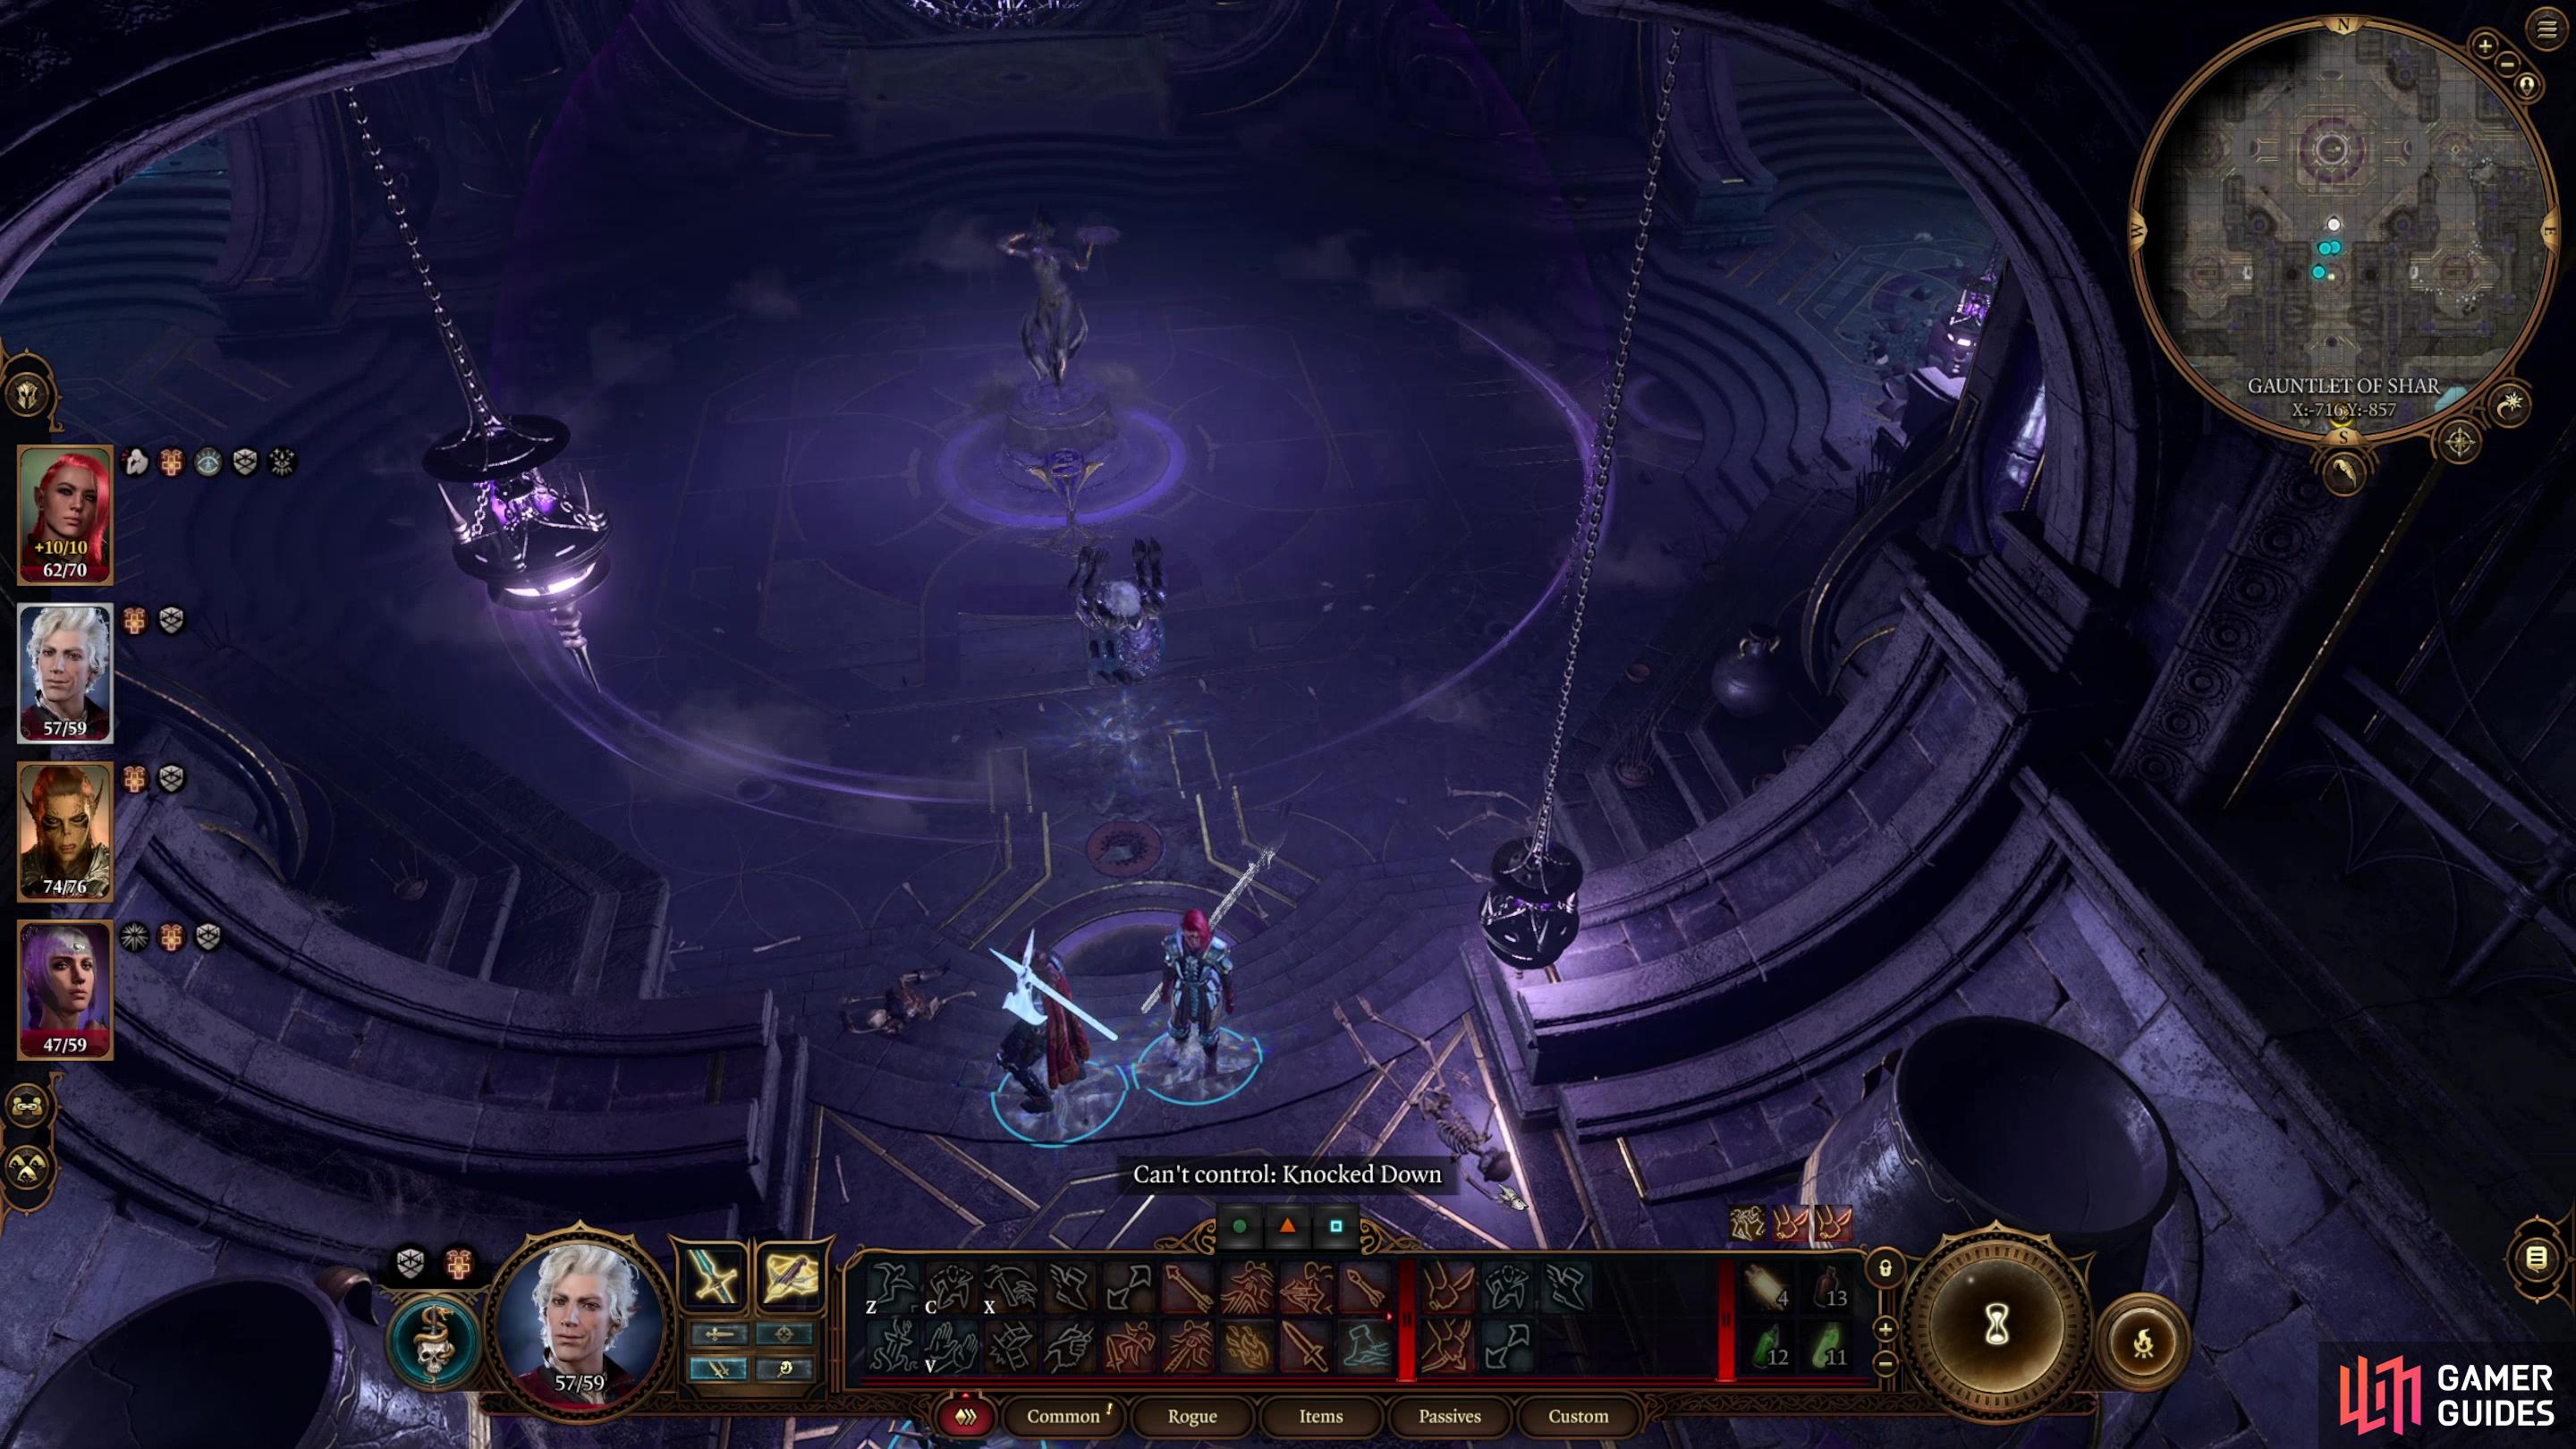
The Shar Statue Puzzle - How to Open the Sealed Door
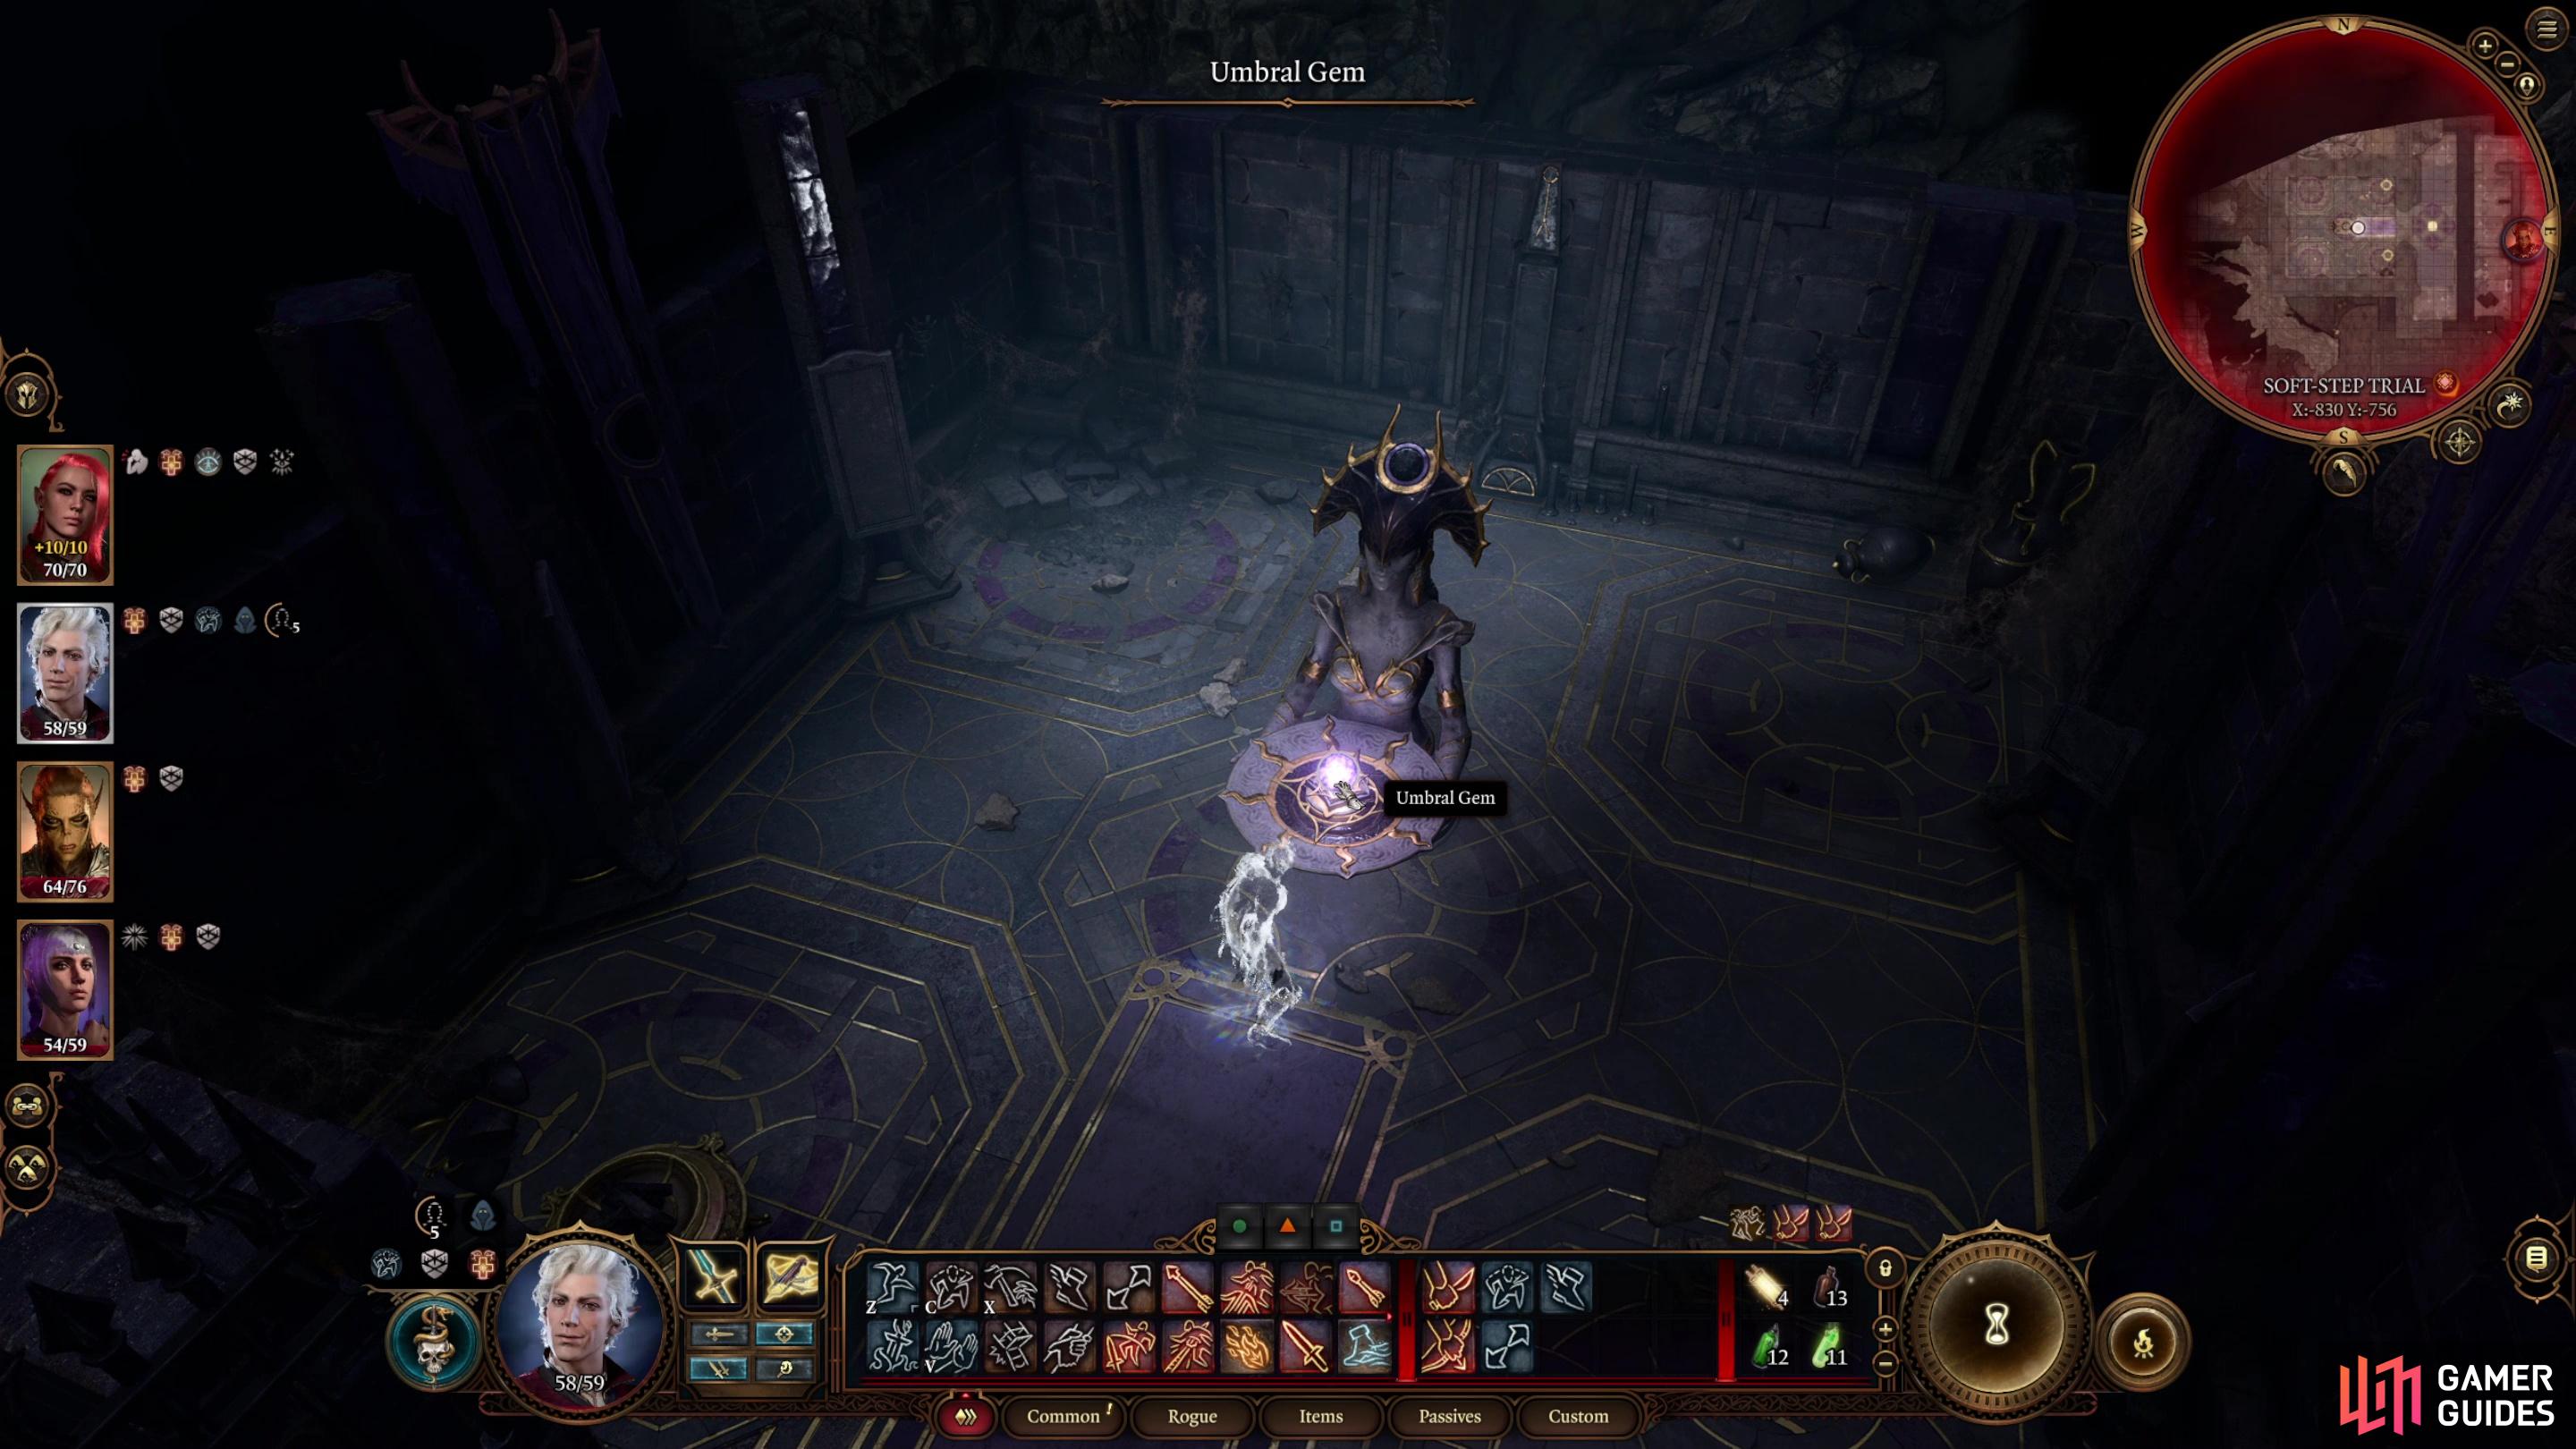
The first puzzle in the Gauntlet of Shar is fairly simple, and optional. In the center of the first large chamber ahead you’ll find a statue of Shar with an Umbral Gem in front of it, and to the north is a sealed door. All you have to do is reach the Umbral Gem to dispel the ![]() Arcane Lock on the door, after which you can pass through, but there’s a repulsion field around the statue of Shar that will fling you back. It doesn’t deal any damage, but it’s still annoying, and to get past the barriers you’ll need total darkness in order to see the runes on the ground creating the barrier, and hence the path around them. Enter some side rooms, being wary of traps as you explore, pull a Lever in each room and lower some “Mystic Thuribles”, which are illuminating the room. Snuff their light and make sure you aren’t providing any supplemental light (a
Arcane Lock on the door, after which you can pass through, but there’s a repulsion field around the statue of Shar that will fling you back. It doesn’t deal any damage, but it’s still annoying, and to get past the barriers you’ll need total darkness in order to see the runes on the ground creating the barrier, and hence the path around them. Enter some side rooms, being wary of traps as you explore, pull a Lever in each room and lower some “Mystic Thuribles”, which are illuminating the room. Snuff their light and make sure you aren’t providing any supplemental light (a ![]() Light spell, for example) to reveal two incomplete rune rings around the statue of Shar. Just avoid stepping on the runes to reach the Umbral Gem and unlock the door to the north.
Light spell, for example) to reveal two incomplete rune rings around the statue of Shar. Just avoid stepping on the runes to reach the Umbral Gem and unlock the door to the north.
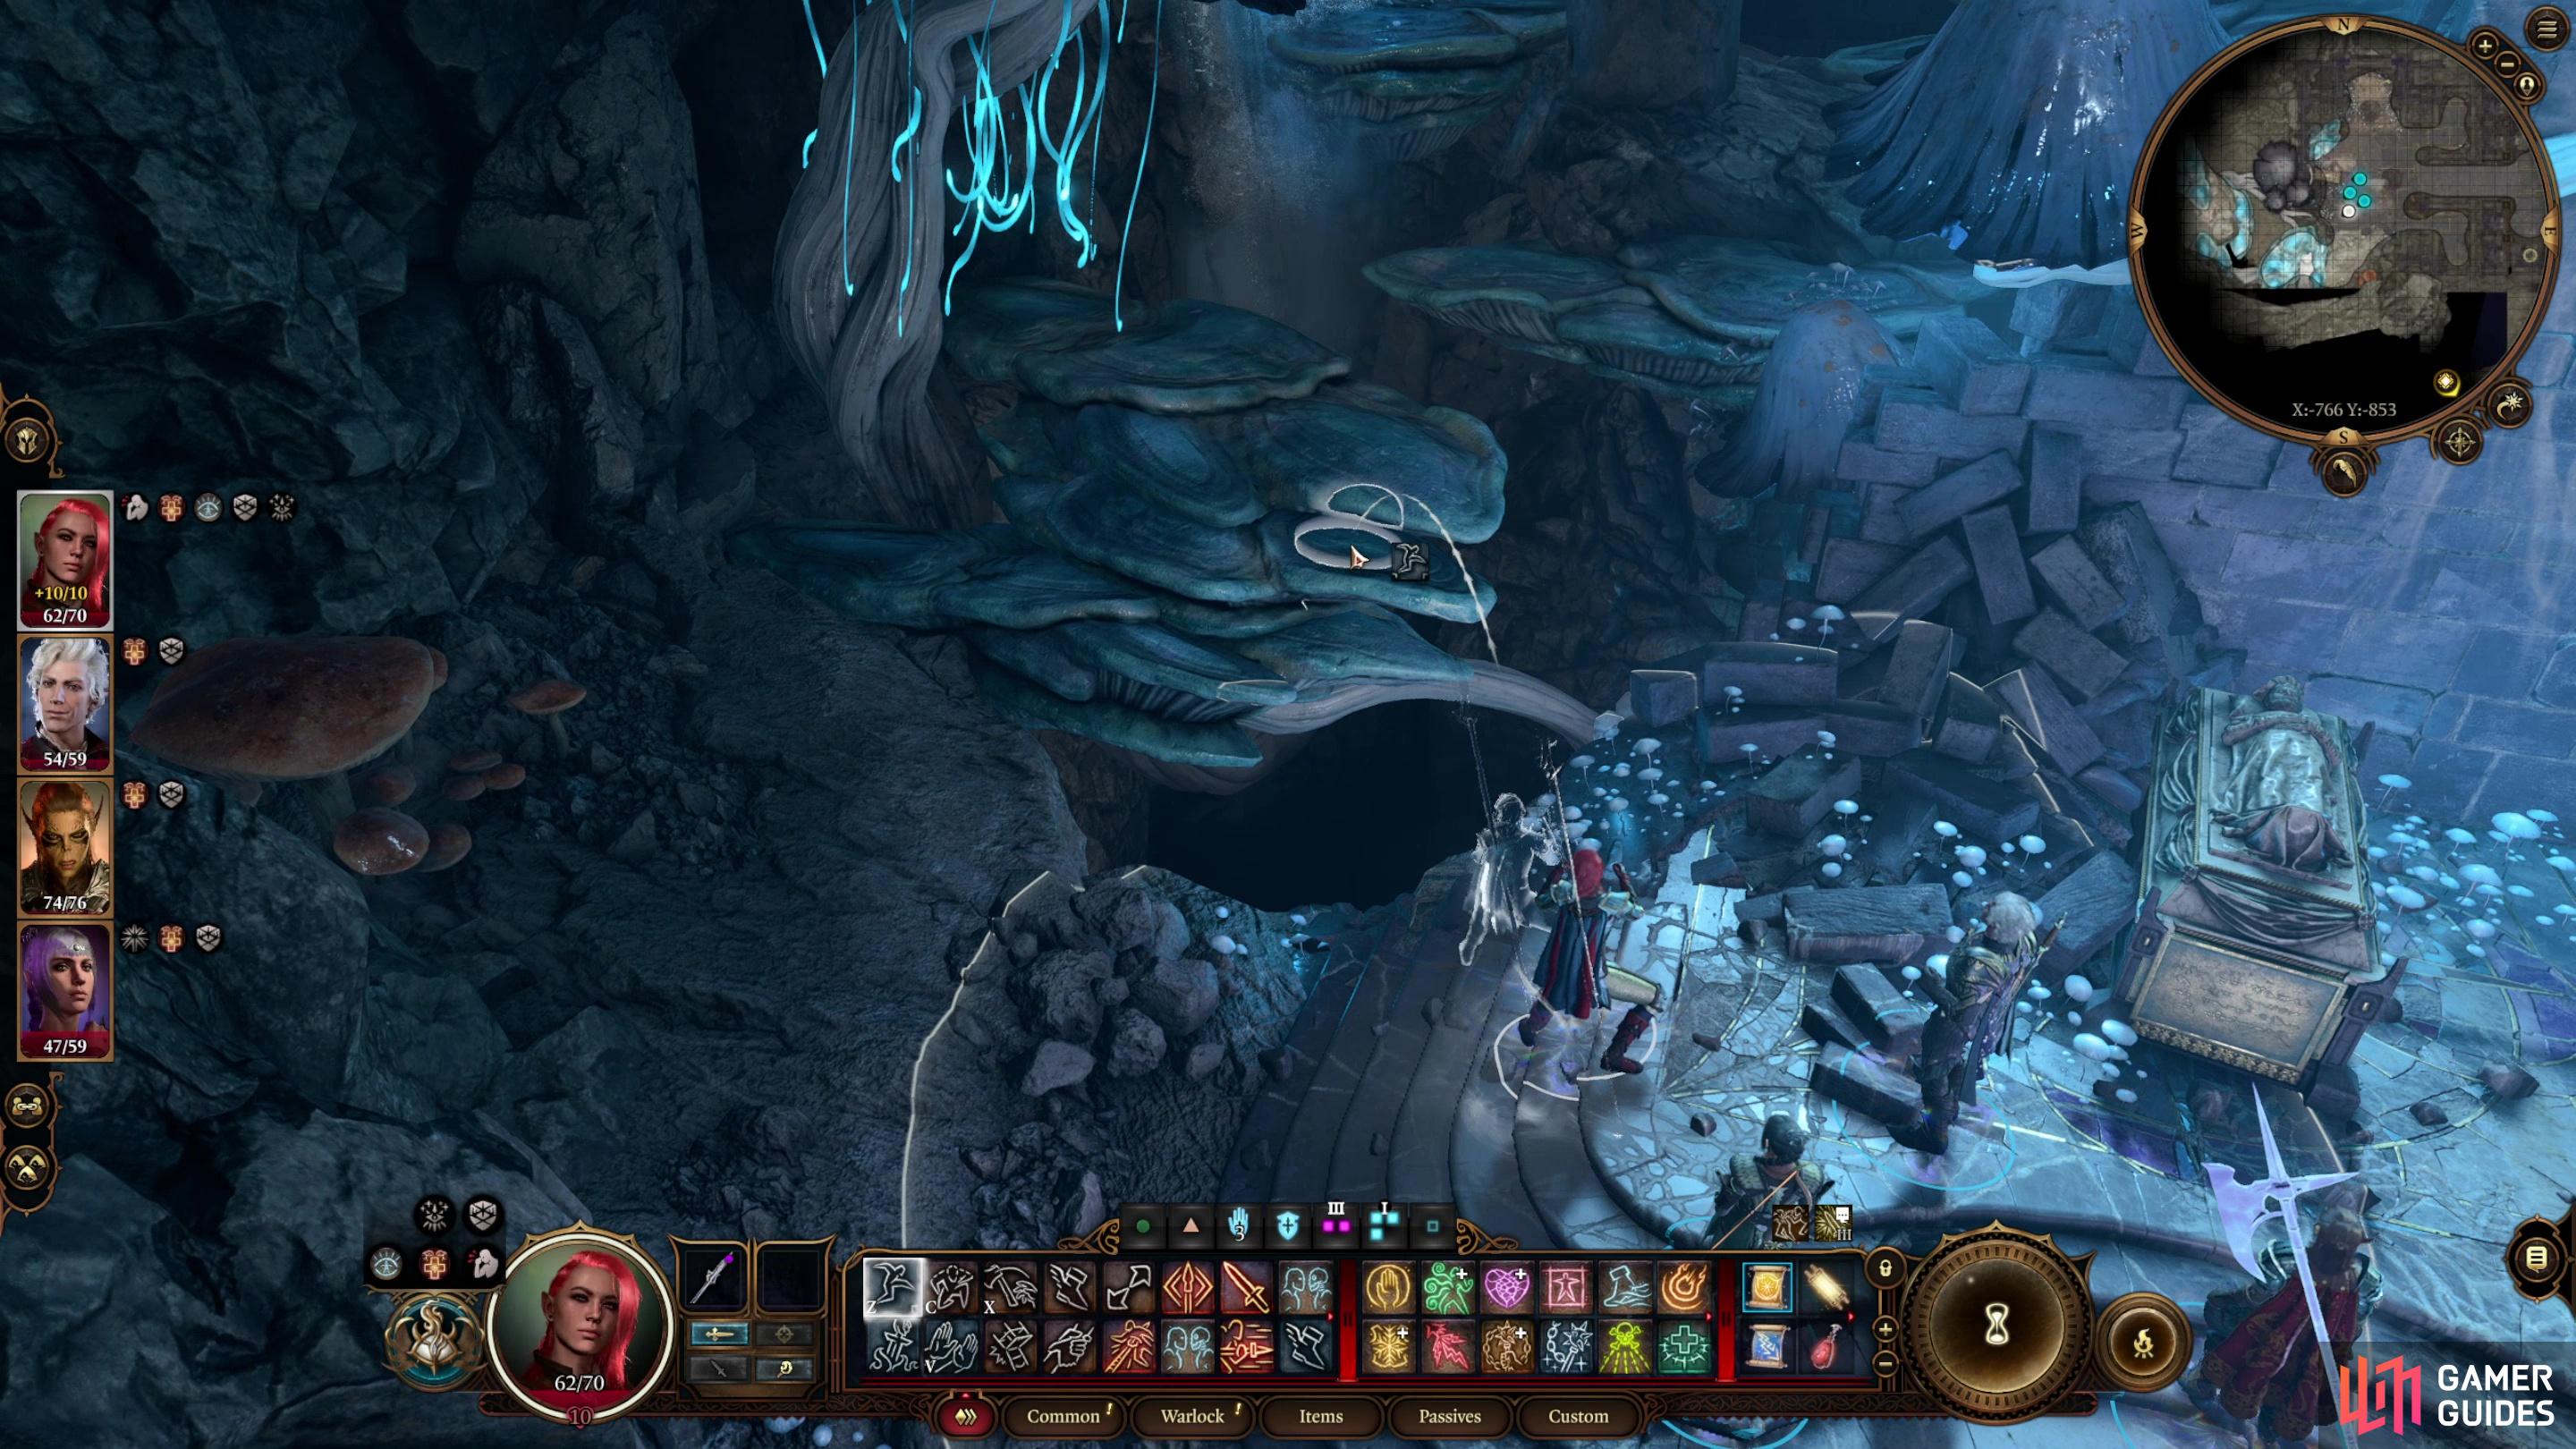
You can bypass the statue of Shar puzzle and instead leap onto some mushrooms,
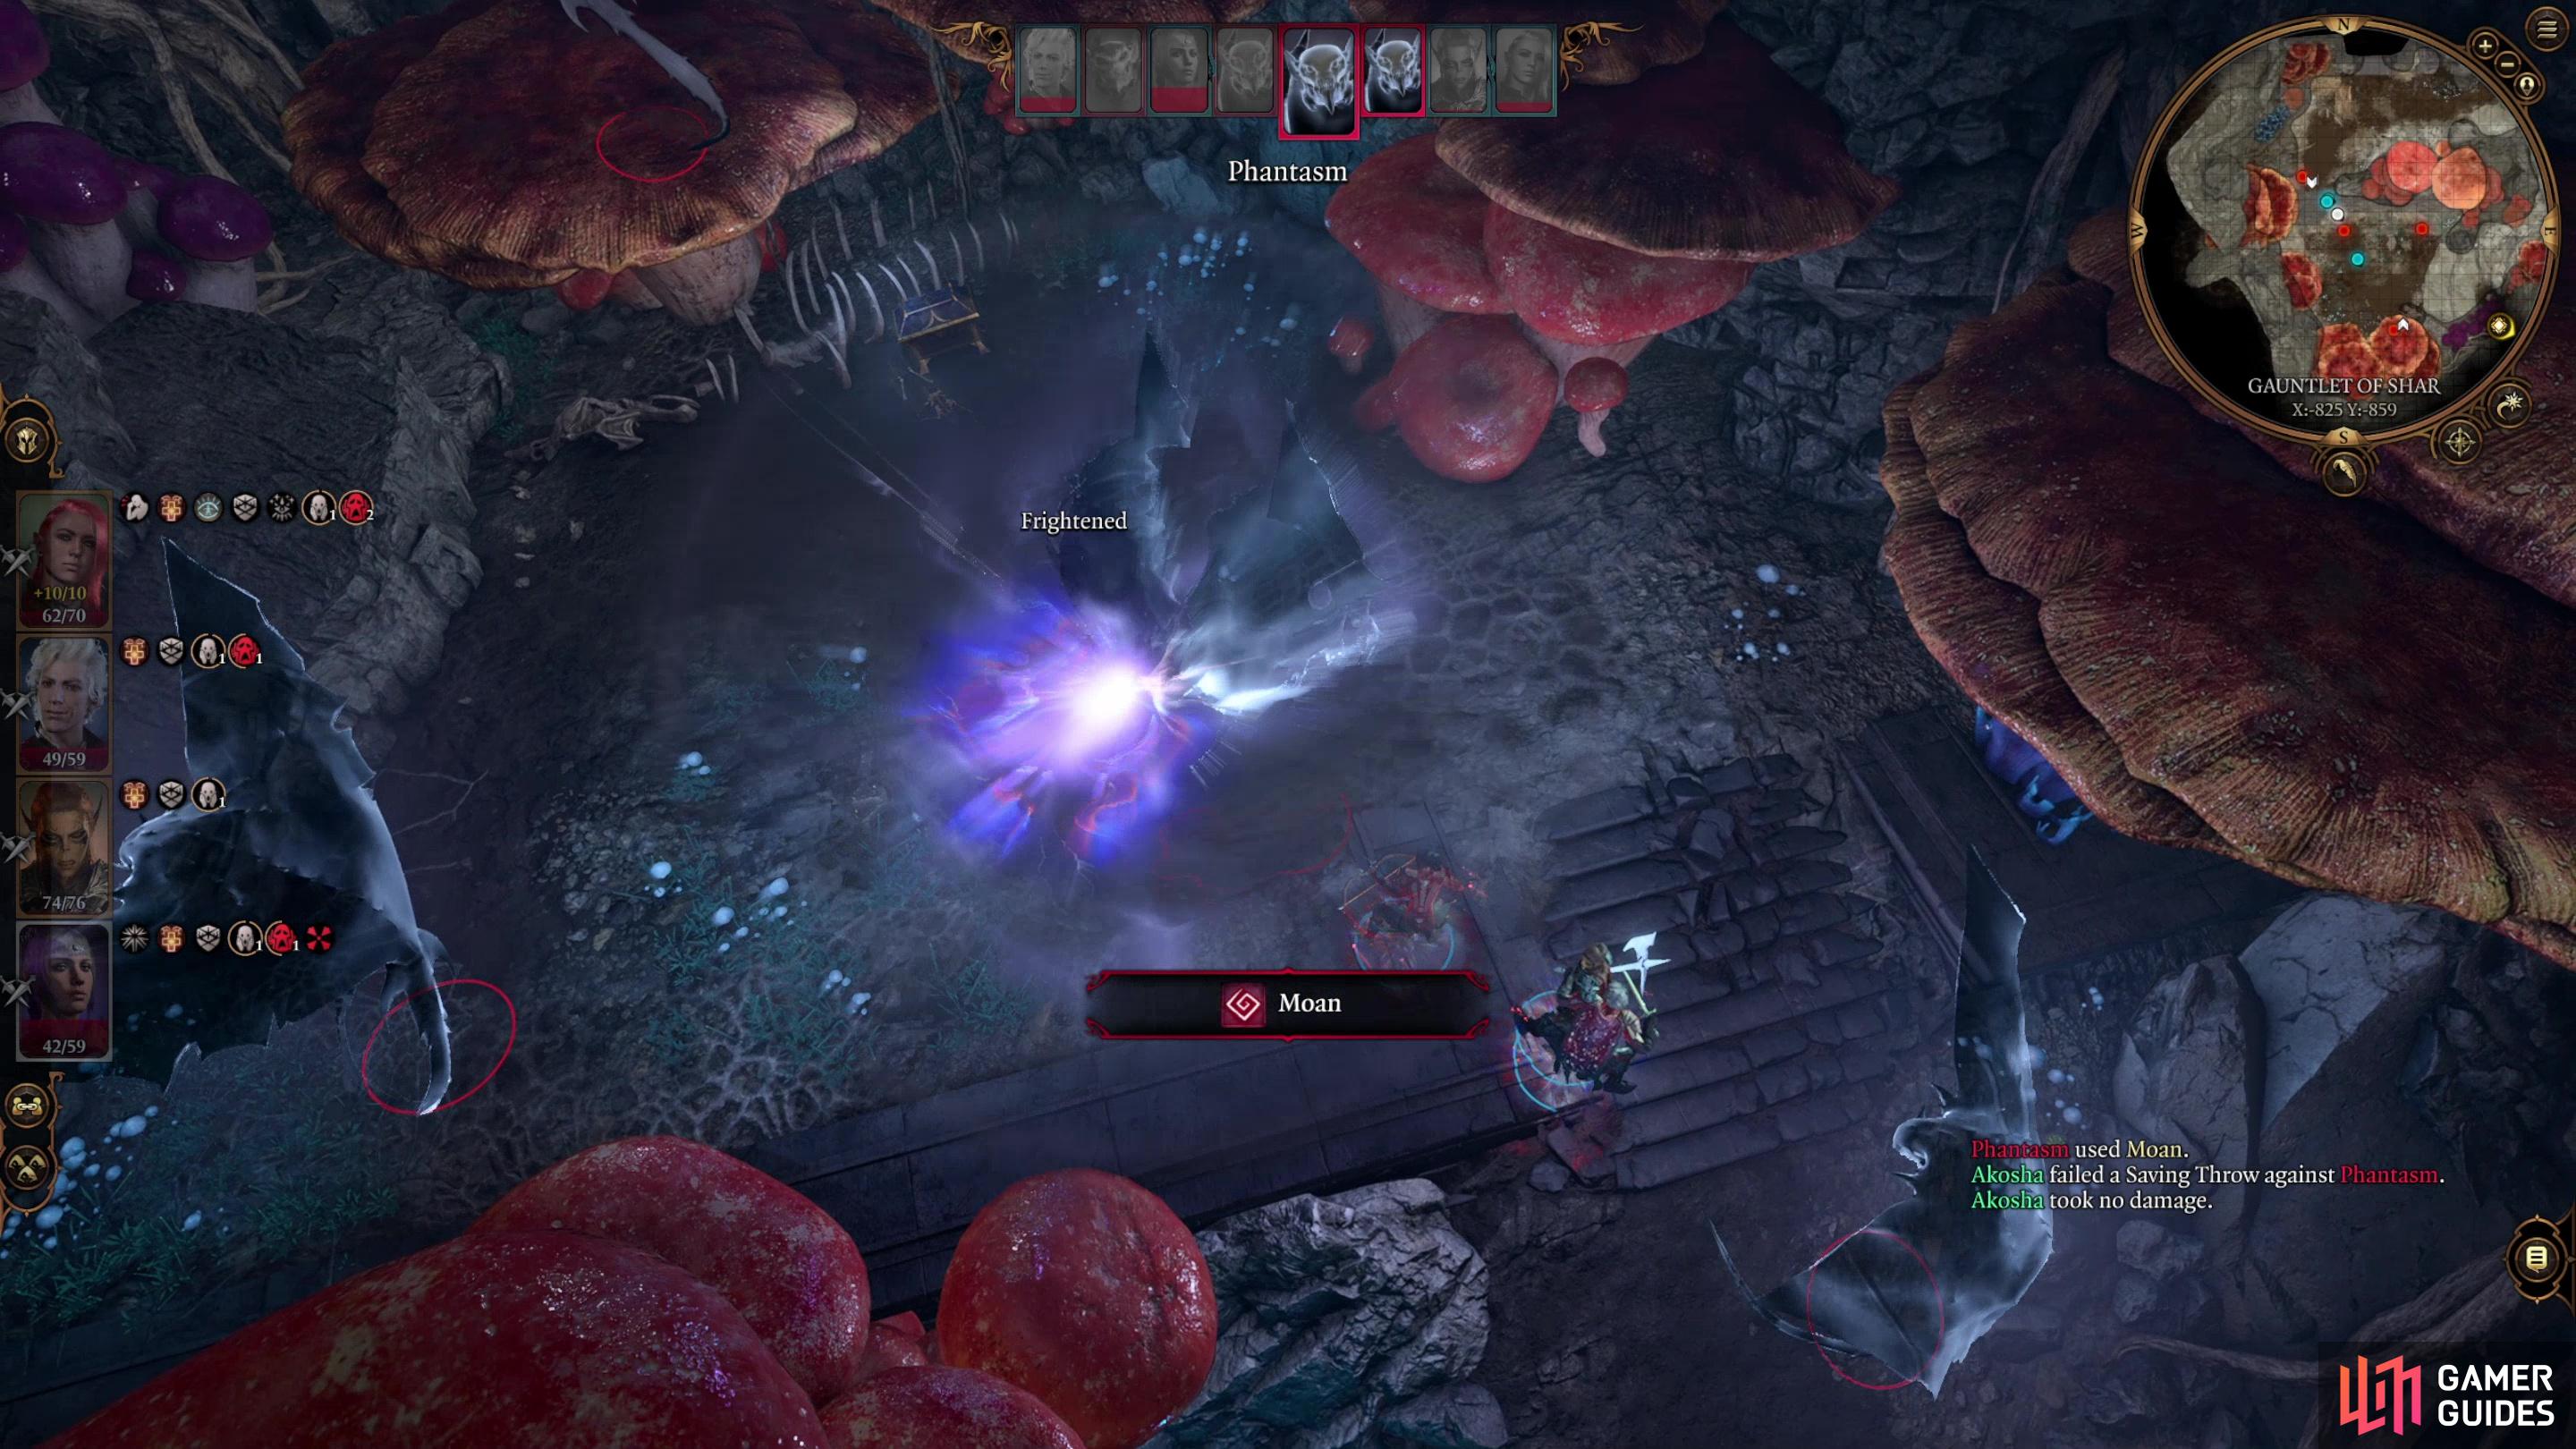
which will lead you to a Cloaker’s lair, an annoying beast who will create several Phantasms that can debuff and damage you with their moans.
Cloaker Chamber
Alternatively, you can travel west from the statue of Shar to reach a sarcophagus, southwest of which are some mushrooms you can jump on to reach a (mostly) natural stone cavern overgrown with mushrooms. This is also the lair of a Cloaker, an annoying enemy that will create phantasms of itself which can frighten victims in an area with their Moan attacks, while the Cloaker itself prefers to harass debuffs individuals in melee. All will ![]() Fly away after attacks, but they’re not always keen enough to avoid provoking attacks of opportunity when they do so. While not the most difficult encounter, the treasure (in the form of a chest in the middle of the Cloaker lair) isn’t really lucrative enough to make this a fight worth recommending.
Fly away after attacks, but they’re not always keen enough to avoid provoking attacks of opportunity when they do so. While not the most difficult encounter, the treasure (in the form of a chest in the middle of the Cloaker lair) isn’t really lucrative enough to make this a fight worth recommending.
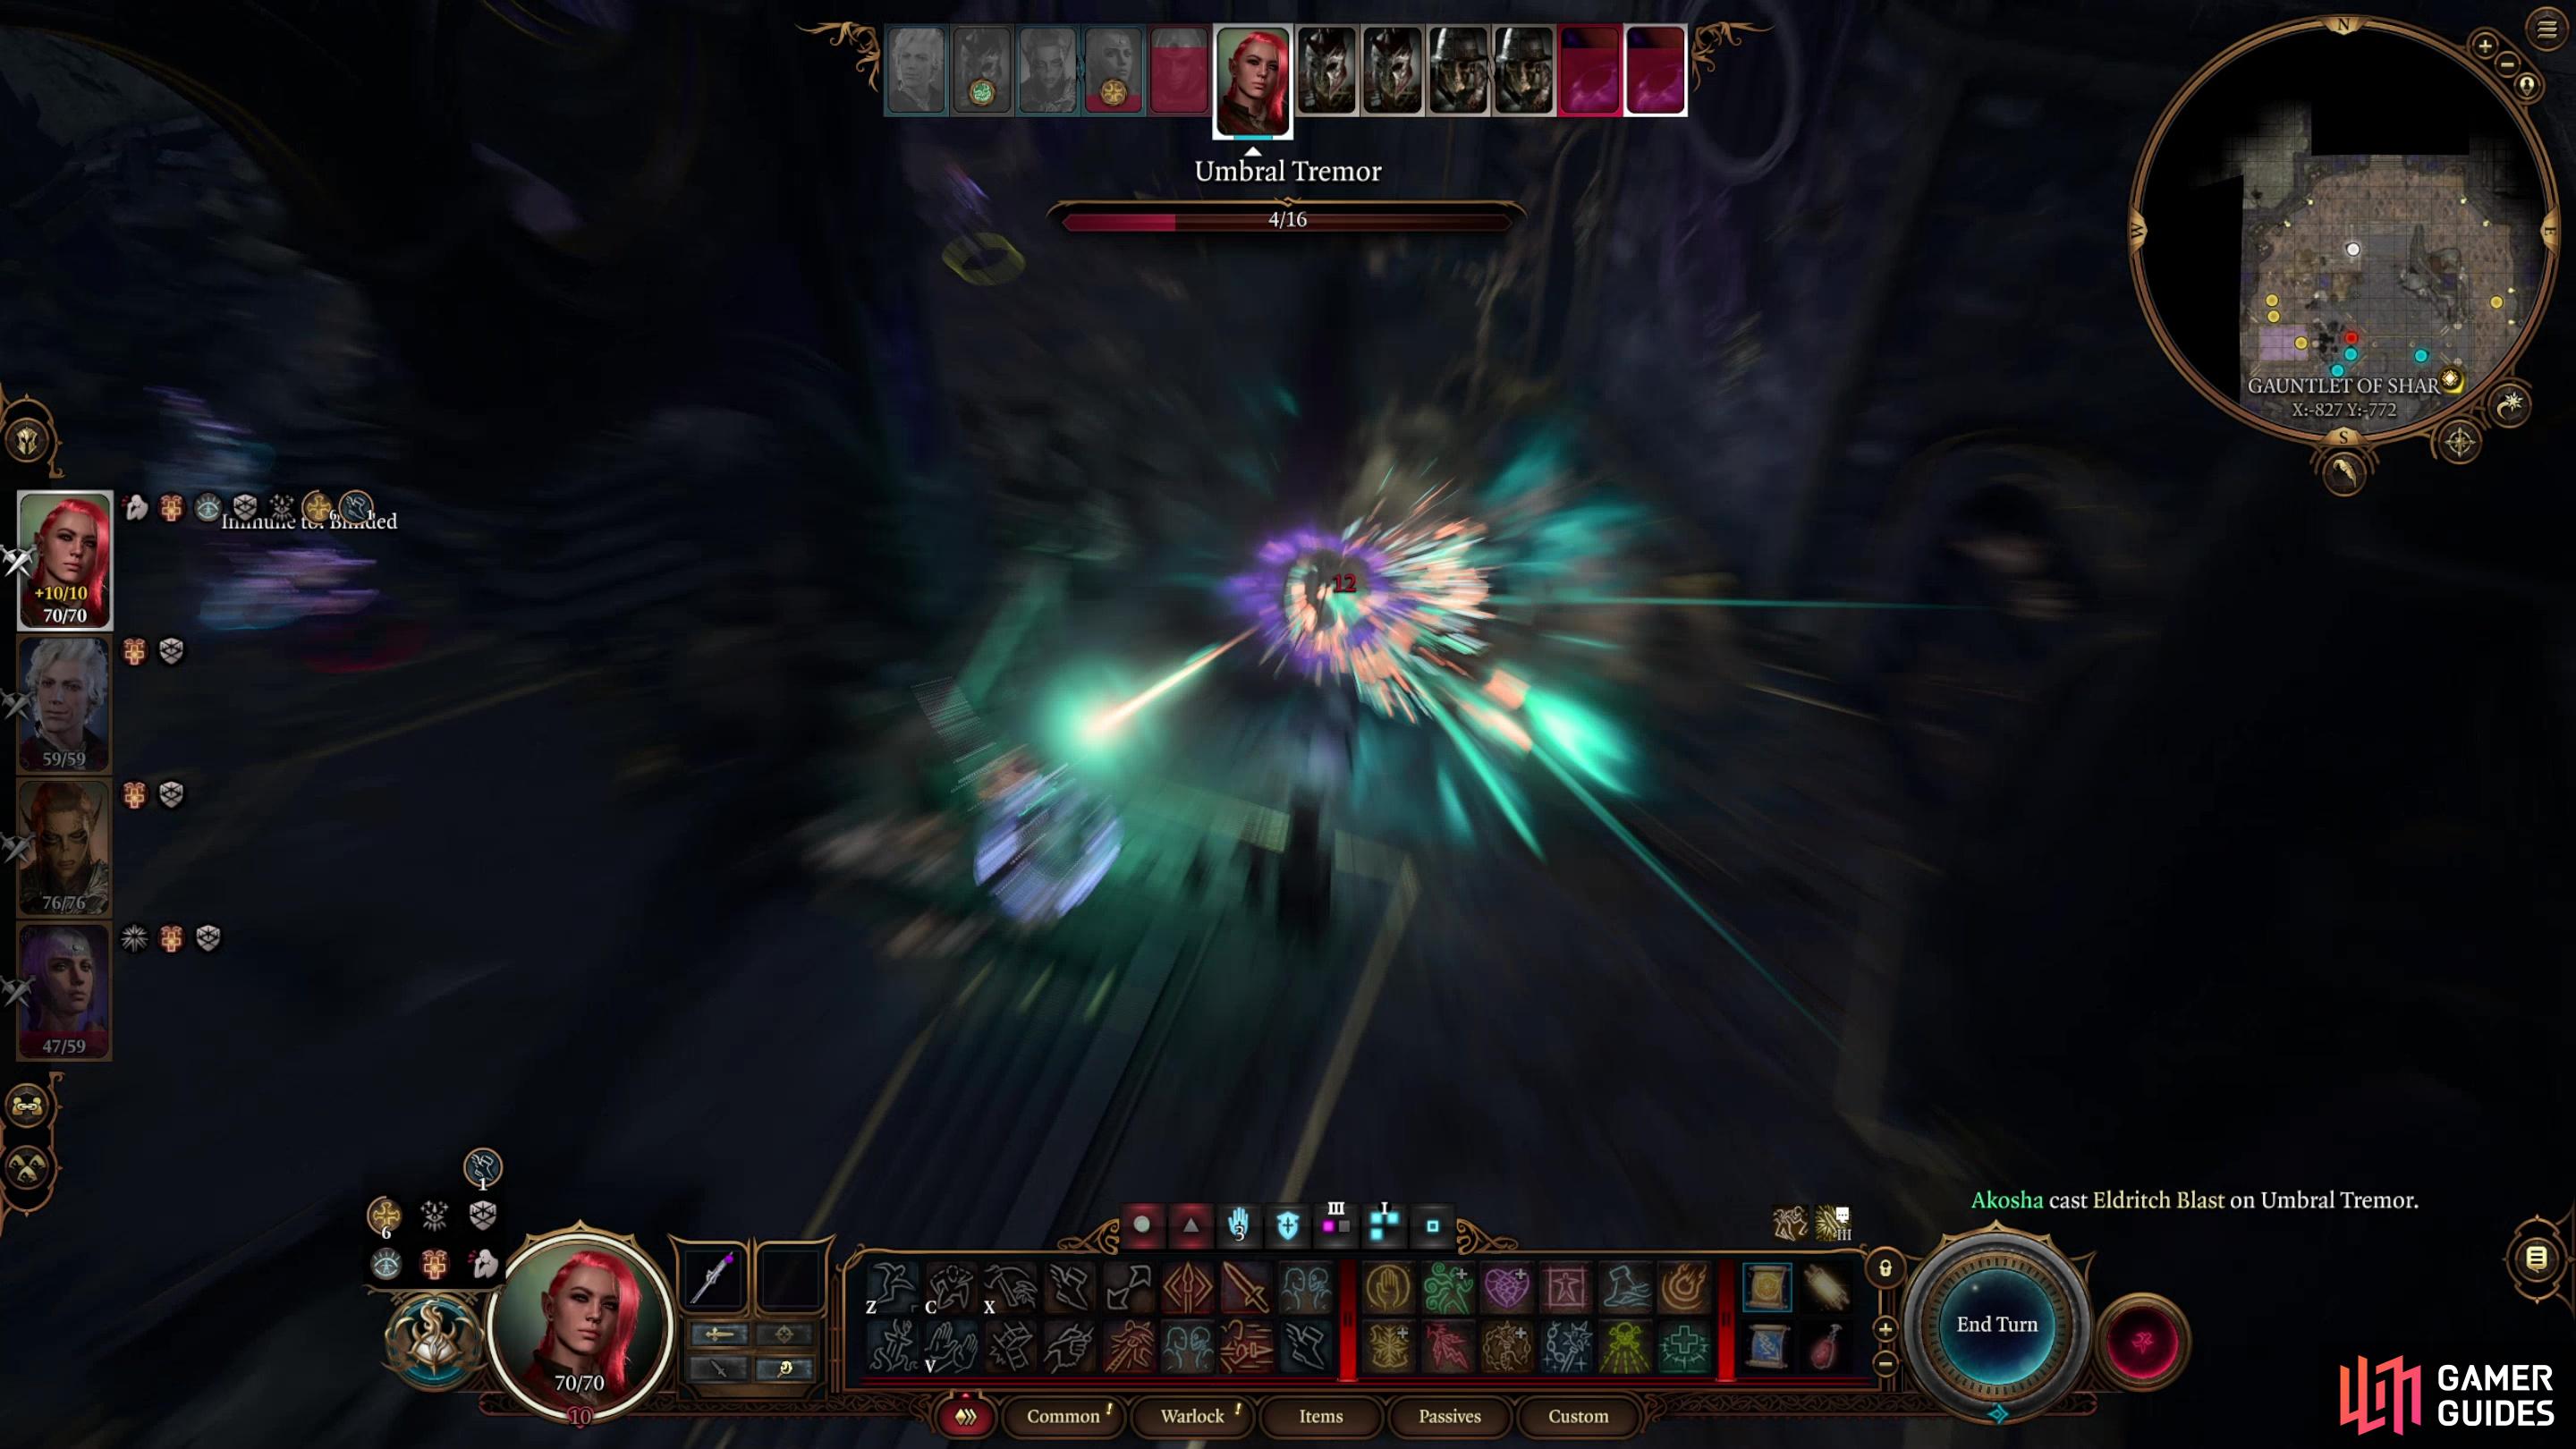
When you reach the shrine, quickly dispatch some Umbral Tremors lest they summon more shadow Justiciars.
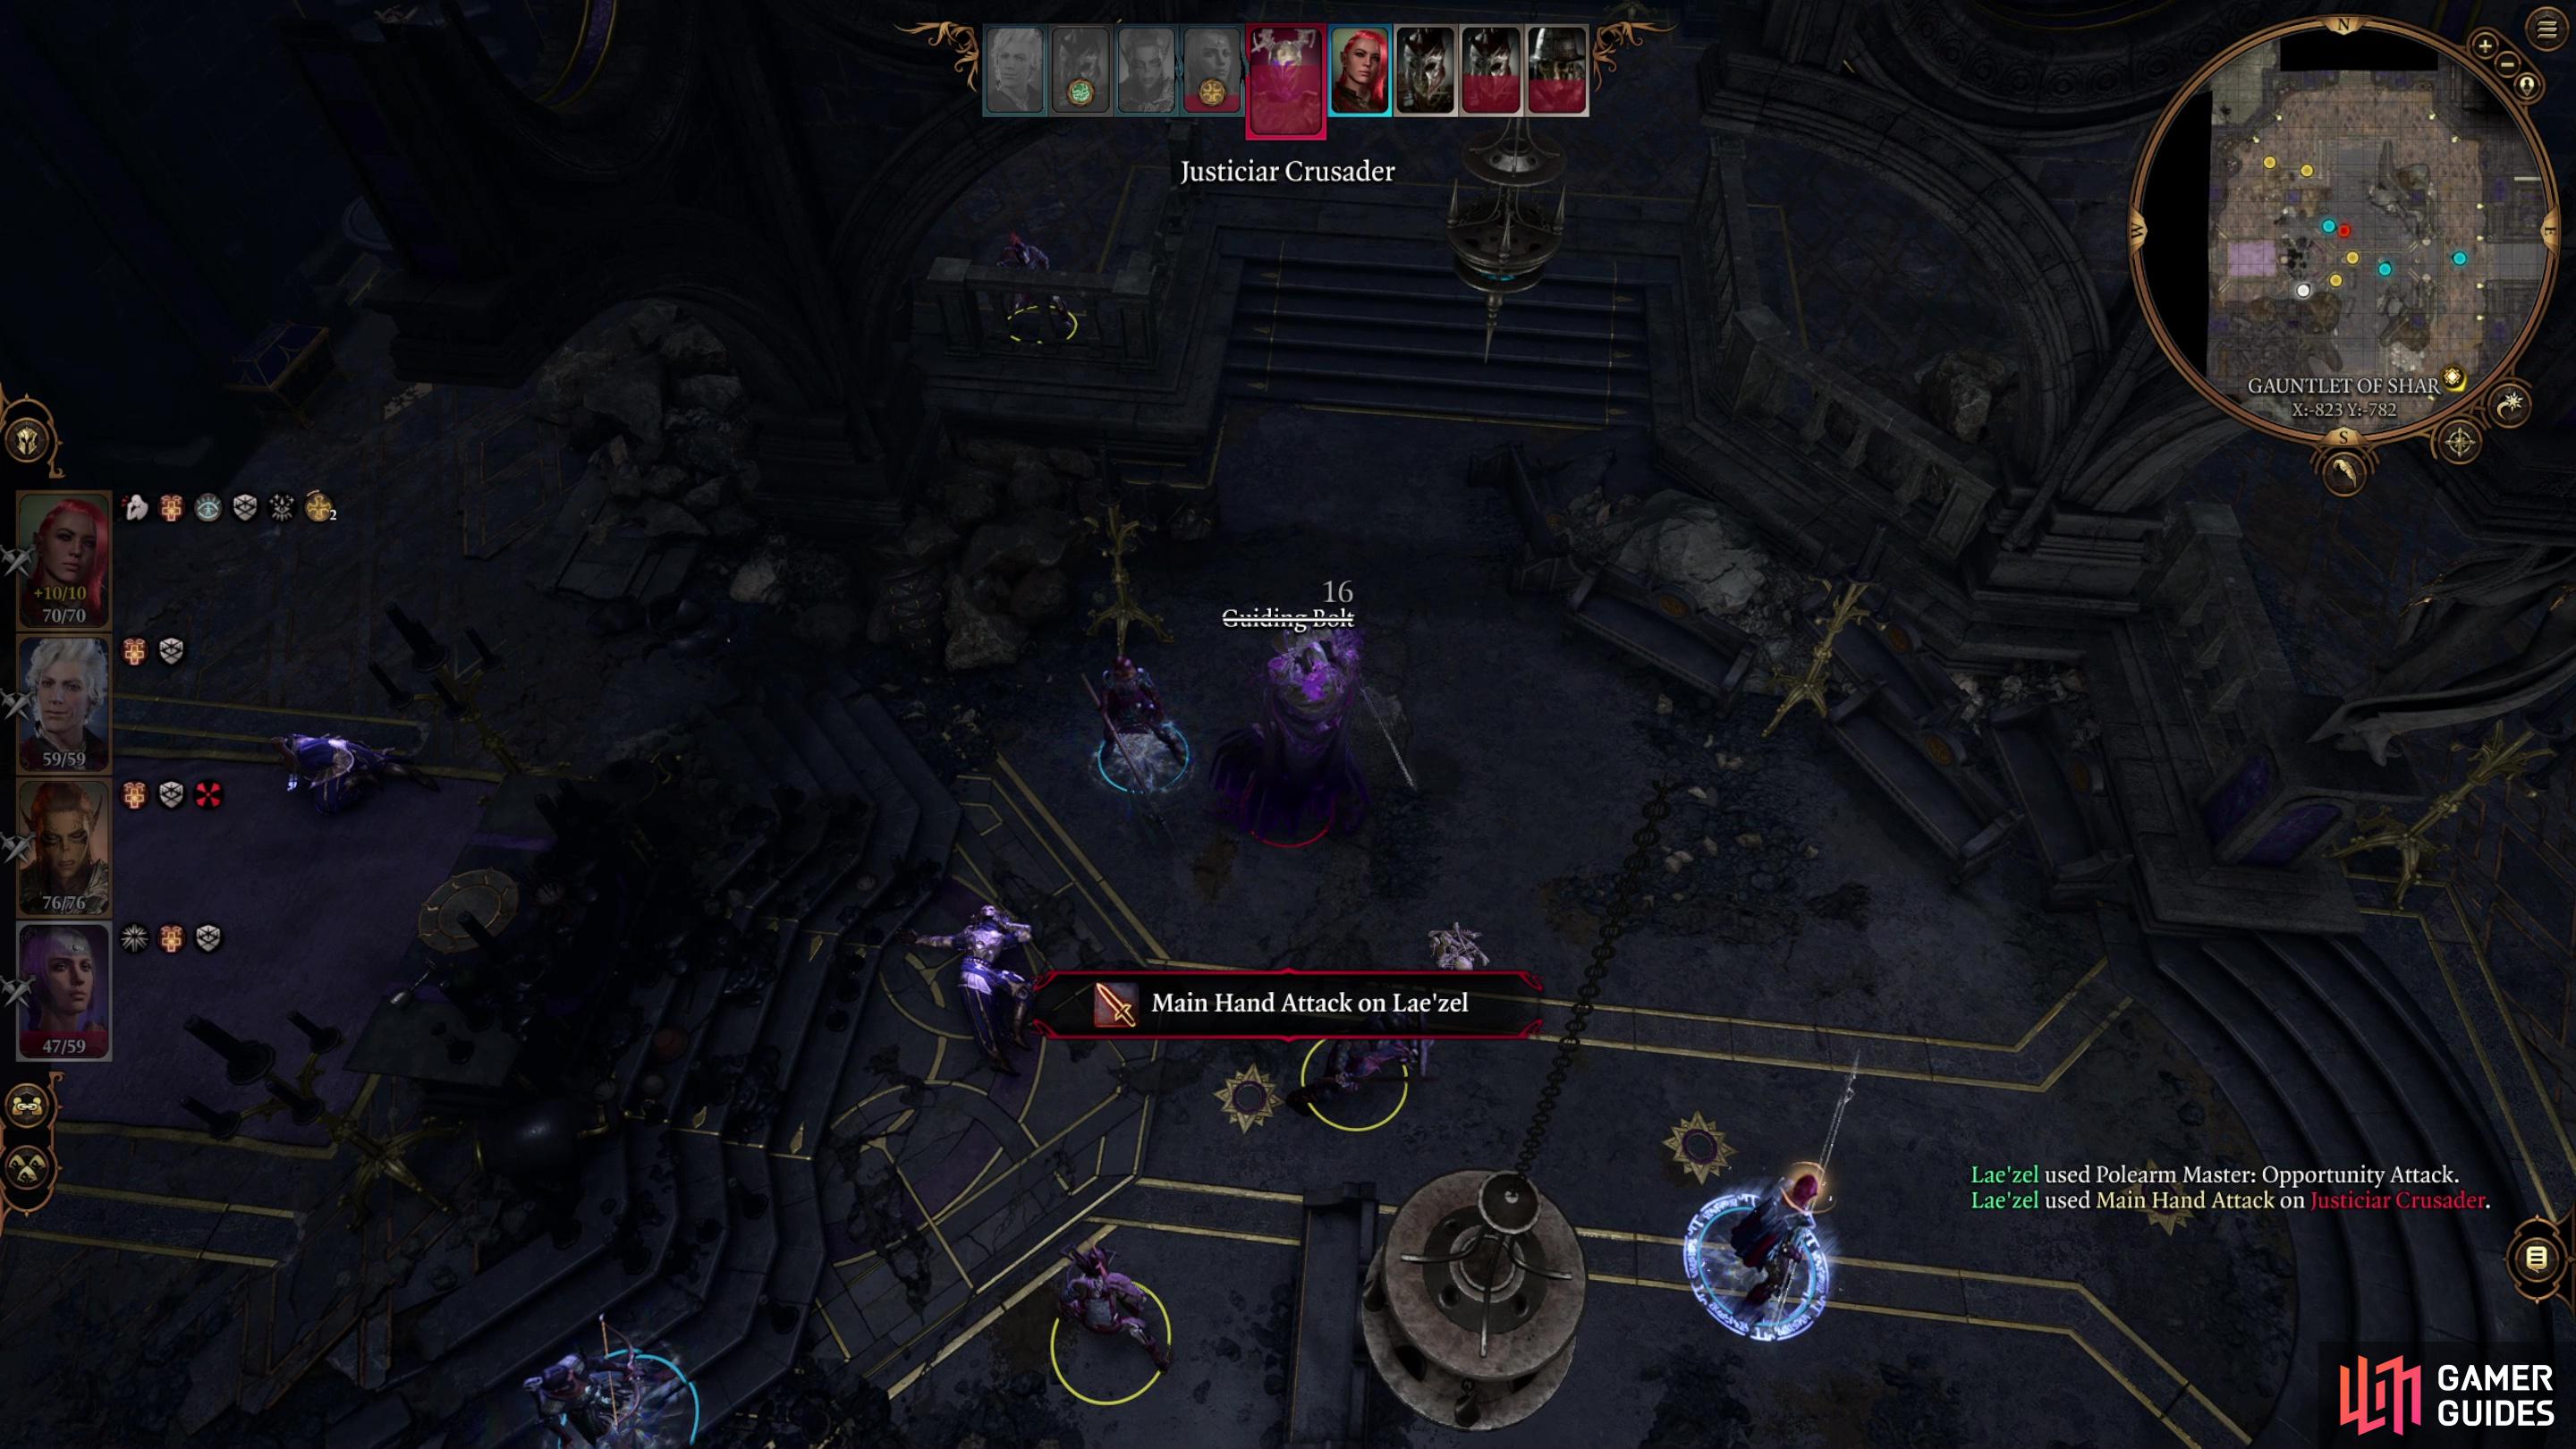
A Deep Umbral Tremor will summon a Justiciar Crusader - a miniboss who is surprisingly squishy, despite its high Hit Points.
Defeat the Shadow Justiciars
If you completed the statue of Shar puzzle, or you went west through the Cloaker lair, you’ll eventually be funneled to the same encounter. In the former case go north and you’ll encounter some skeletal undead who are clearly being puppeteered by some as-of-yet unseen entity, and they’ll be somewhat cross with you when some shadows arrive, blaming your intrusion for the appearance of these undead Justiciars. You’ll need to destroy several Umbral Tremors to prevent more Justiciars from spawning, then dispatch the Justiciars themselves, with the other group of undead serving as allies. The best they’ll do is draw fire from the undead Justiciars, however, they won’t accomplish much else, and will likely not target the Umbral Tremors.
Should you pass through the Cloaker lair, you’ll bypass this encounter and instead will need to head north through two locked doors [Sleight of Hand 14 and 18] to reach a large shrine where you’ll find more (or in this case, your first) controlled skeletons. This is the encounter that you’ll eventually converge upon, as if you went through the door north of the statue of Shar you’ll eventually turn west, grab the Gauntlet of Shar waypoint, then continue west to reach this shrine.
Either way, more skeletons will talk to you before you end up engaged in a larger battle against more Shadow Justiciars. This is essentially the same as the previous version of this fight, but there will be more Umbral Tremors spread out over a larger area and fewer Justiciars, at least initially. Neglect the Umbral Tremors for a round or two and they’ll spawn Justiciars, which are more annoying to put down. Eventually a Deep Umbral Tremor will spawn with twice the Hit Points of a normal one, and it’ll spawn a Justiciar Crusader if it’s not tended to, a somewhat squishy miniboss with a lot of Hit Points for a relatively low Armor Class. If you’re vigilant you may be able to destroy all the Umbral Tremors before they spawn anything, if not, clean up the Justiciars until no more Umbral Tremors and Justiciars are in the shrine.
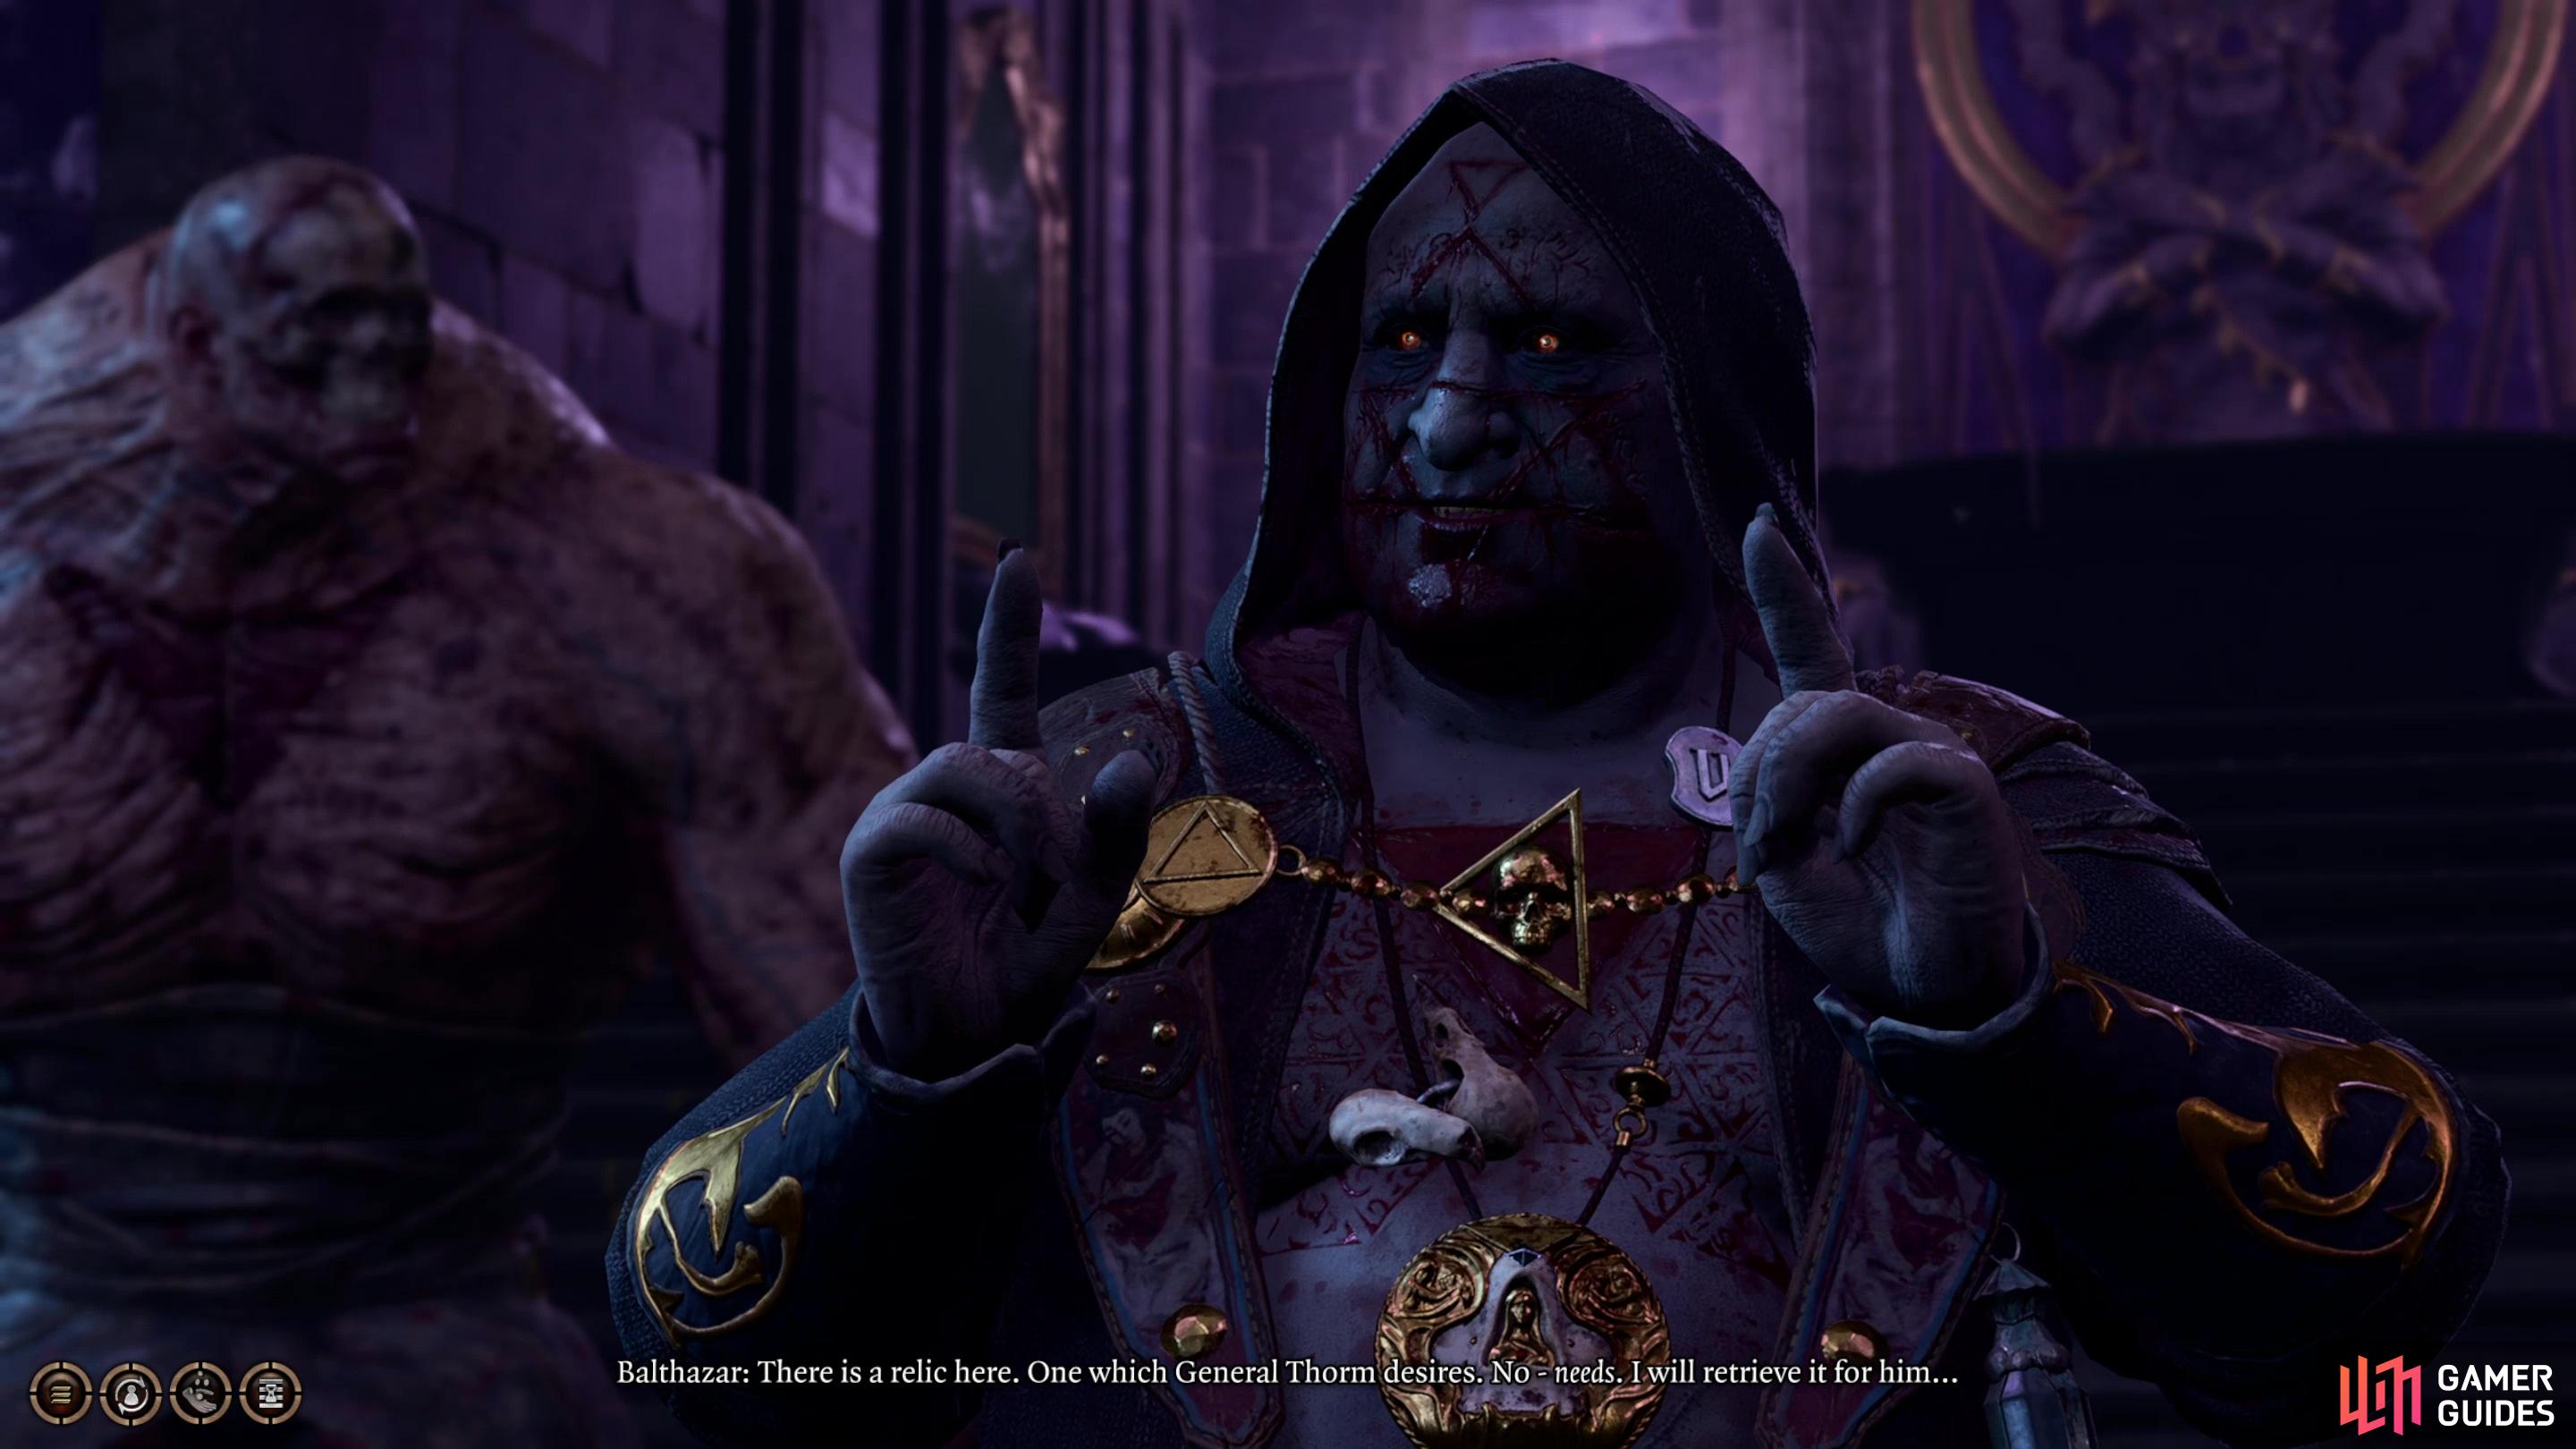
Talk to Balthazar, and, provided you don’t go out of your way to pick a fight, he’s willing to let you do his job for him. Generous guy.
Meet with Balthazar
Defeat the shadow Justiciars and a door will open to the west, beyond which you’ll find Balthazar, one of Ketheric’s chief agents who has been deployed to this dungeon to seize a relic… which is your overall goal in this dungeon, as well. You can pick a fight if you wish or agree to help. You can even convince Balthazar to lend you a Summon Golem Bell which you can use to call backup from Balthazar’s Flesh Golem, should a fight be going sideways. There’s no harm in cooperating with Balthazar for the time being, regardless of what your ultimate goals may be.
If you haven’t discovered the Gauntlet of Shar way point yet (likely if you approached from the Cloaker lair) exit the shrine and head east to the intersection where it is located. We’ll continue exploring the rest of the dungeon from here.
Find the Umbral Gems
Your next major task in this dungeon is to find four Umbral Gems, which you’ll need to advance. Three of these will be obtained as rewards for completing the three trials in this region, and the fourth is obtained as part of the quest Kill Raphael’s Old Enemy. Follow the links to find more in-depth walkthroughs, but as per the norm we’ll provide some overview here.
Go downstairs to the north and you’ll find the first two trials, the Soft-Step Trial and the Self-Same Trial. Continue north and descend more stairs and you’ll be standing in front of the Faith-Leap Trial.
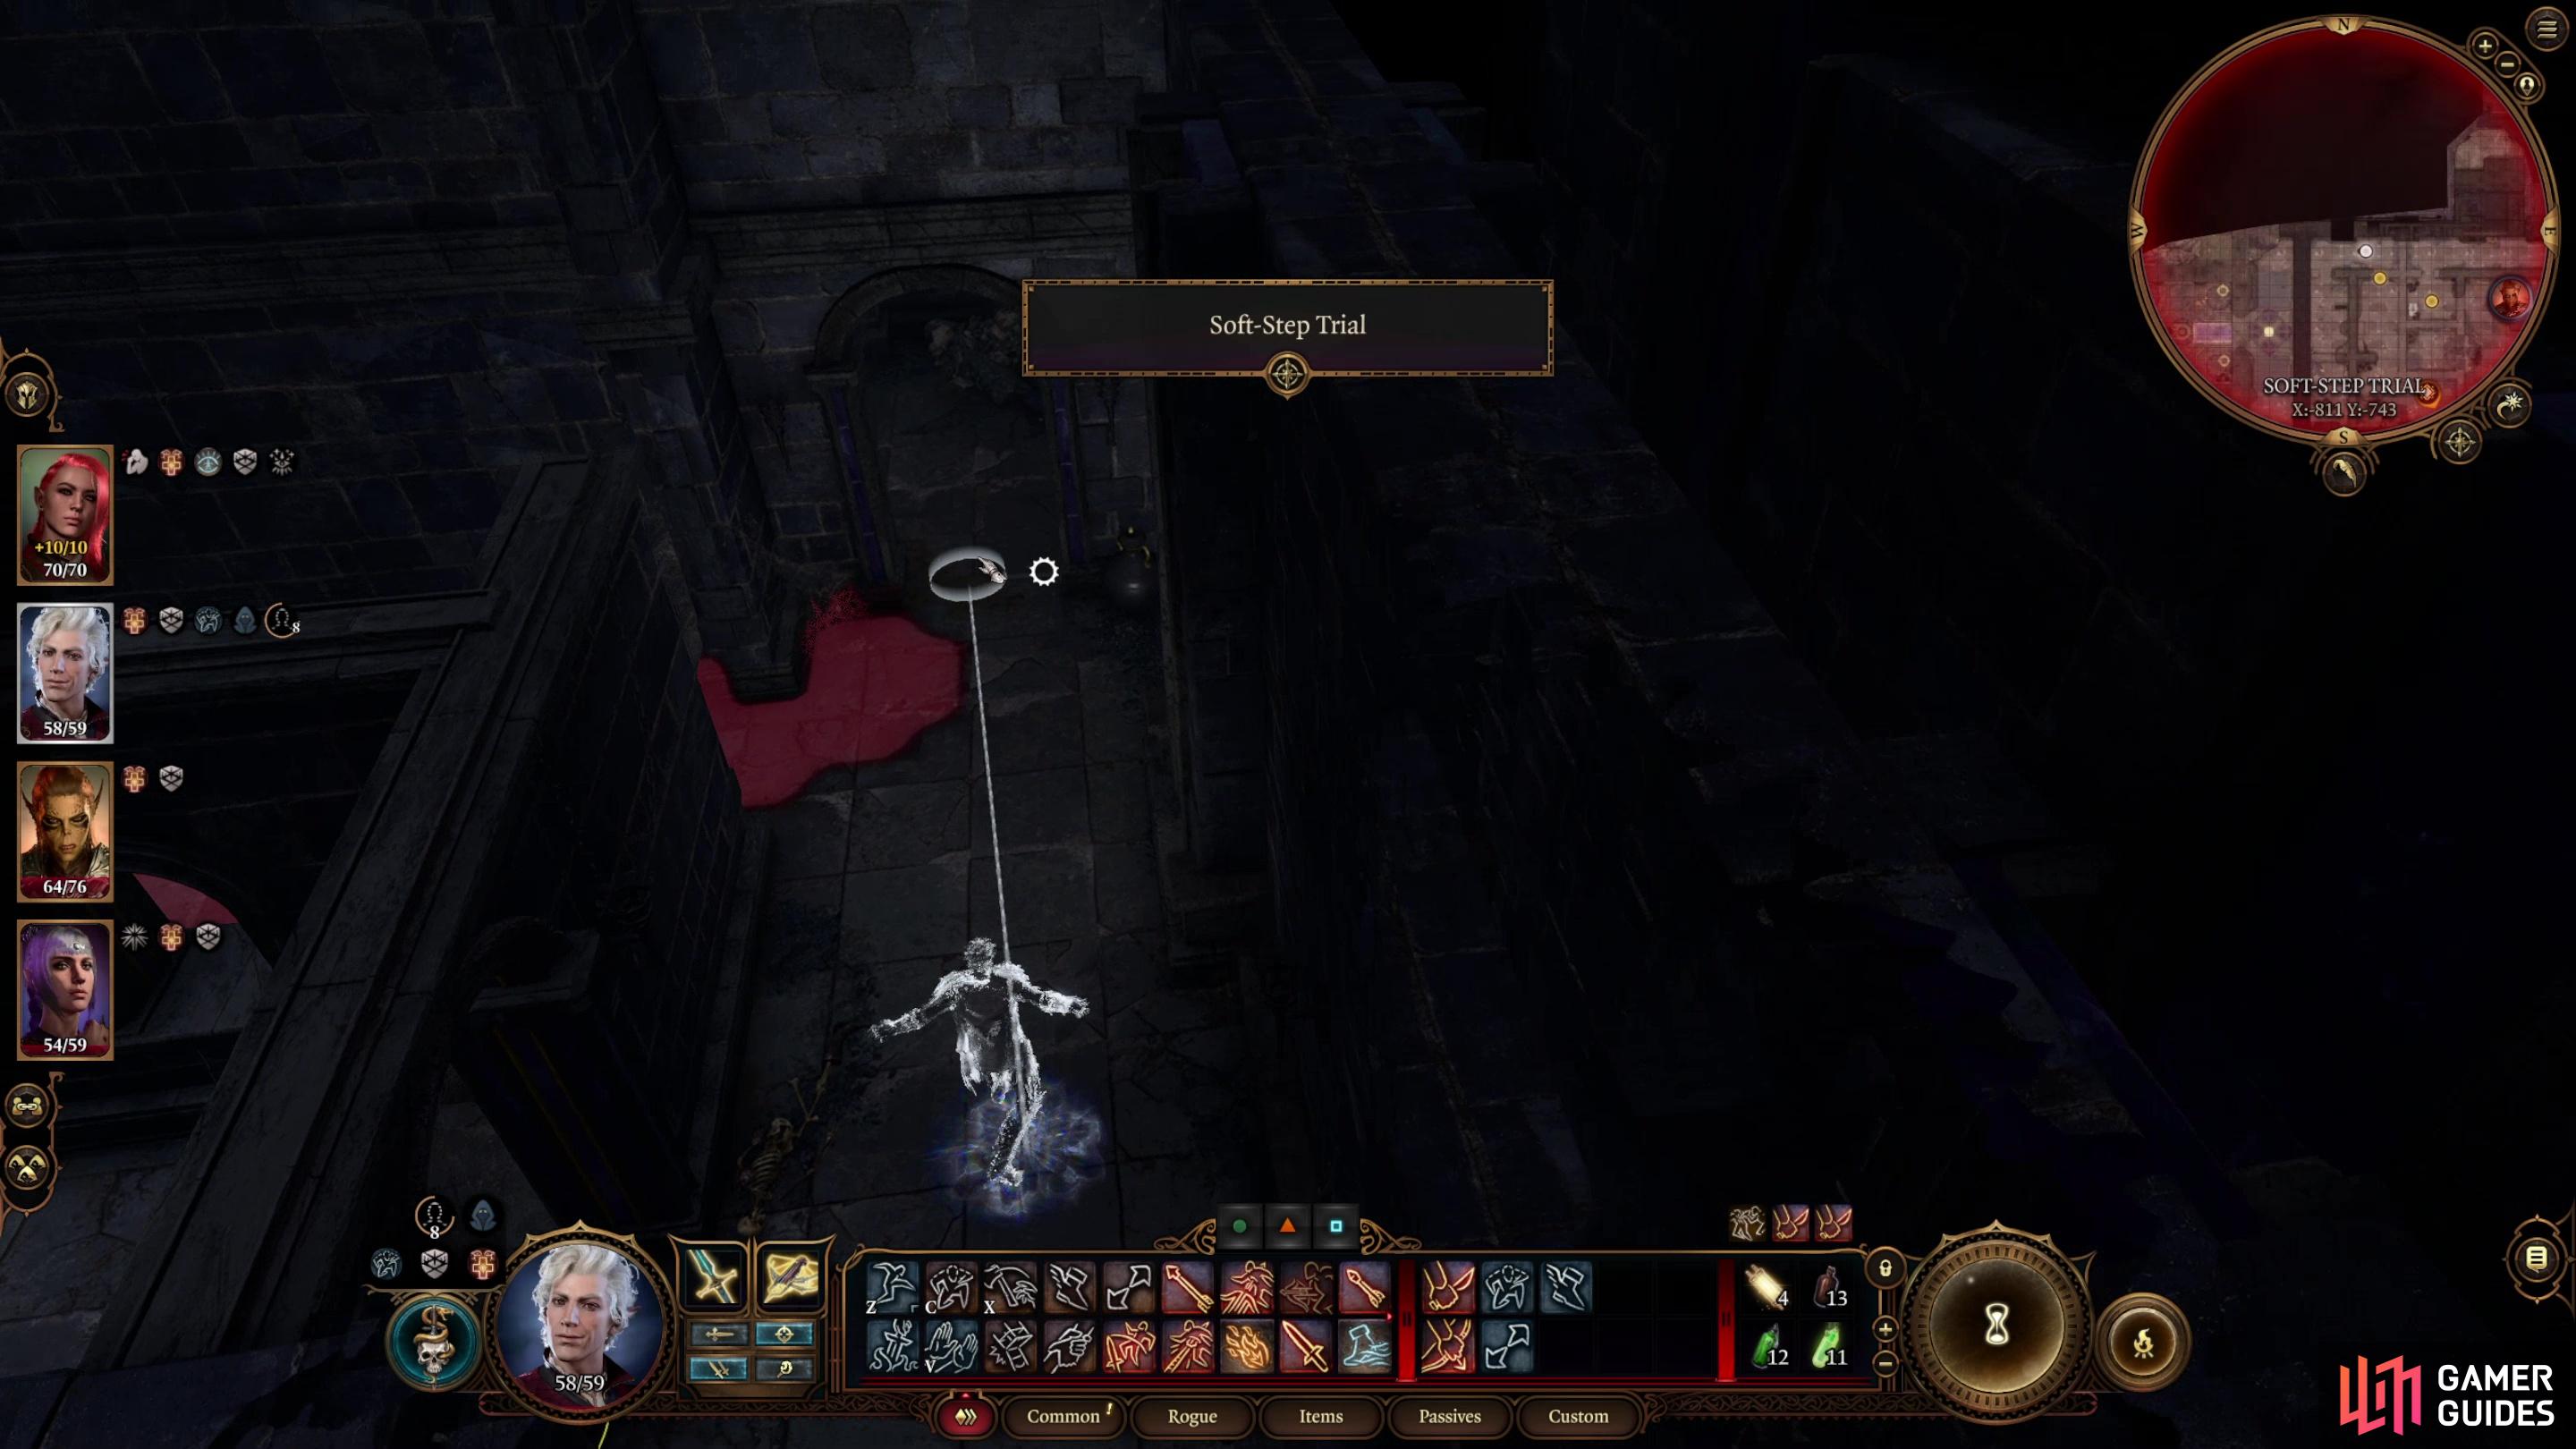
Prepare the path ahead of time and an invisible sneaker can just waltz through the Soft-Step Trial,
and snatch its Umbral Gem.
Complete the Soft-Step Trial
A deceptively easy trial, if you’ve got a good Rogue in your party (or anybody with high Sleight of Hand and Stealth skills). You’ve got a short maze ahead of you that you need to navigate without being detected, and while this may be a challenge if you don’t know what to do, you don’t have to actually figure anything out.
Ungroup your party, ignore the Sacrificial Bowl that starts the trial, then continue through the northernmost door [Sleight of Hand 20]. Continue west down the hallway ahead and press a button on the northern wall to remove the wall ahead of you, then continue west through a doorway, up some stairs, and pick another locked gate [Sleight of Hand 10], beyond which lies the statue that holds the Umbral Gem… or it will, once you start the trial. You’ve cleared the way and know where to go - straight shot west from the northern gate, pretty much, so you just need to avoid the line of sight of patrolling enemies, a task made easier (even trivial) if you buff with ![]() Invisibility beforehand, but it’s not necessary, either. Use the Sacrificial Bowl at the start of the trial, then walk down the hallway, past the patrolling guardians (such as they are) and pluck the Umbral Gem out of the basin. Easy.
Invisibility beforehand, but it’s not necessary, either. Use the Sacrificial Bowl at the start of the trial, then walk down the hallway, past the patrolling guardians (such as they are) and pluck the Umbral Gem out of the basin. Easy.
Remove your gear - at least your arms and armor - before the Self-Same Trial and you’ll have no trouble besting your mirrored selves.
The last clone defeated will drop the Umbral Gem you need.
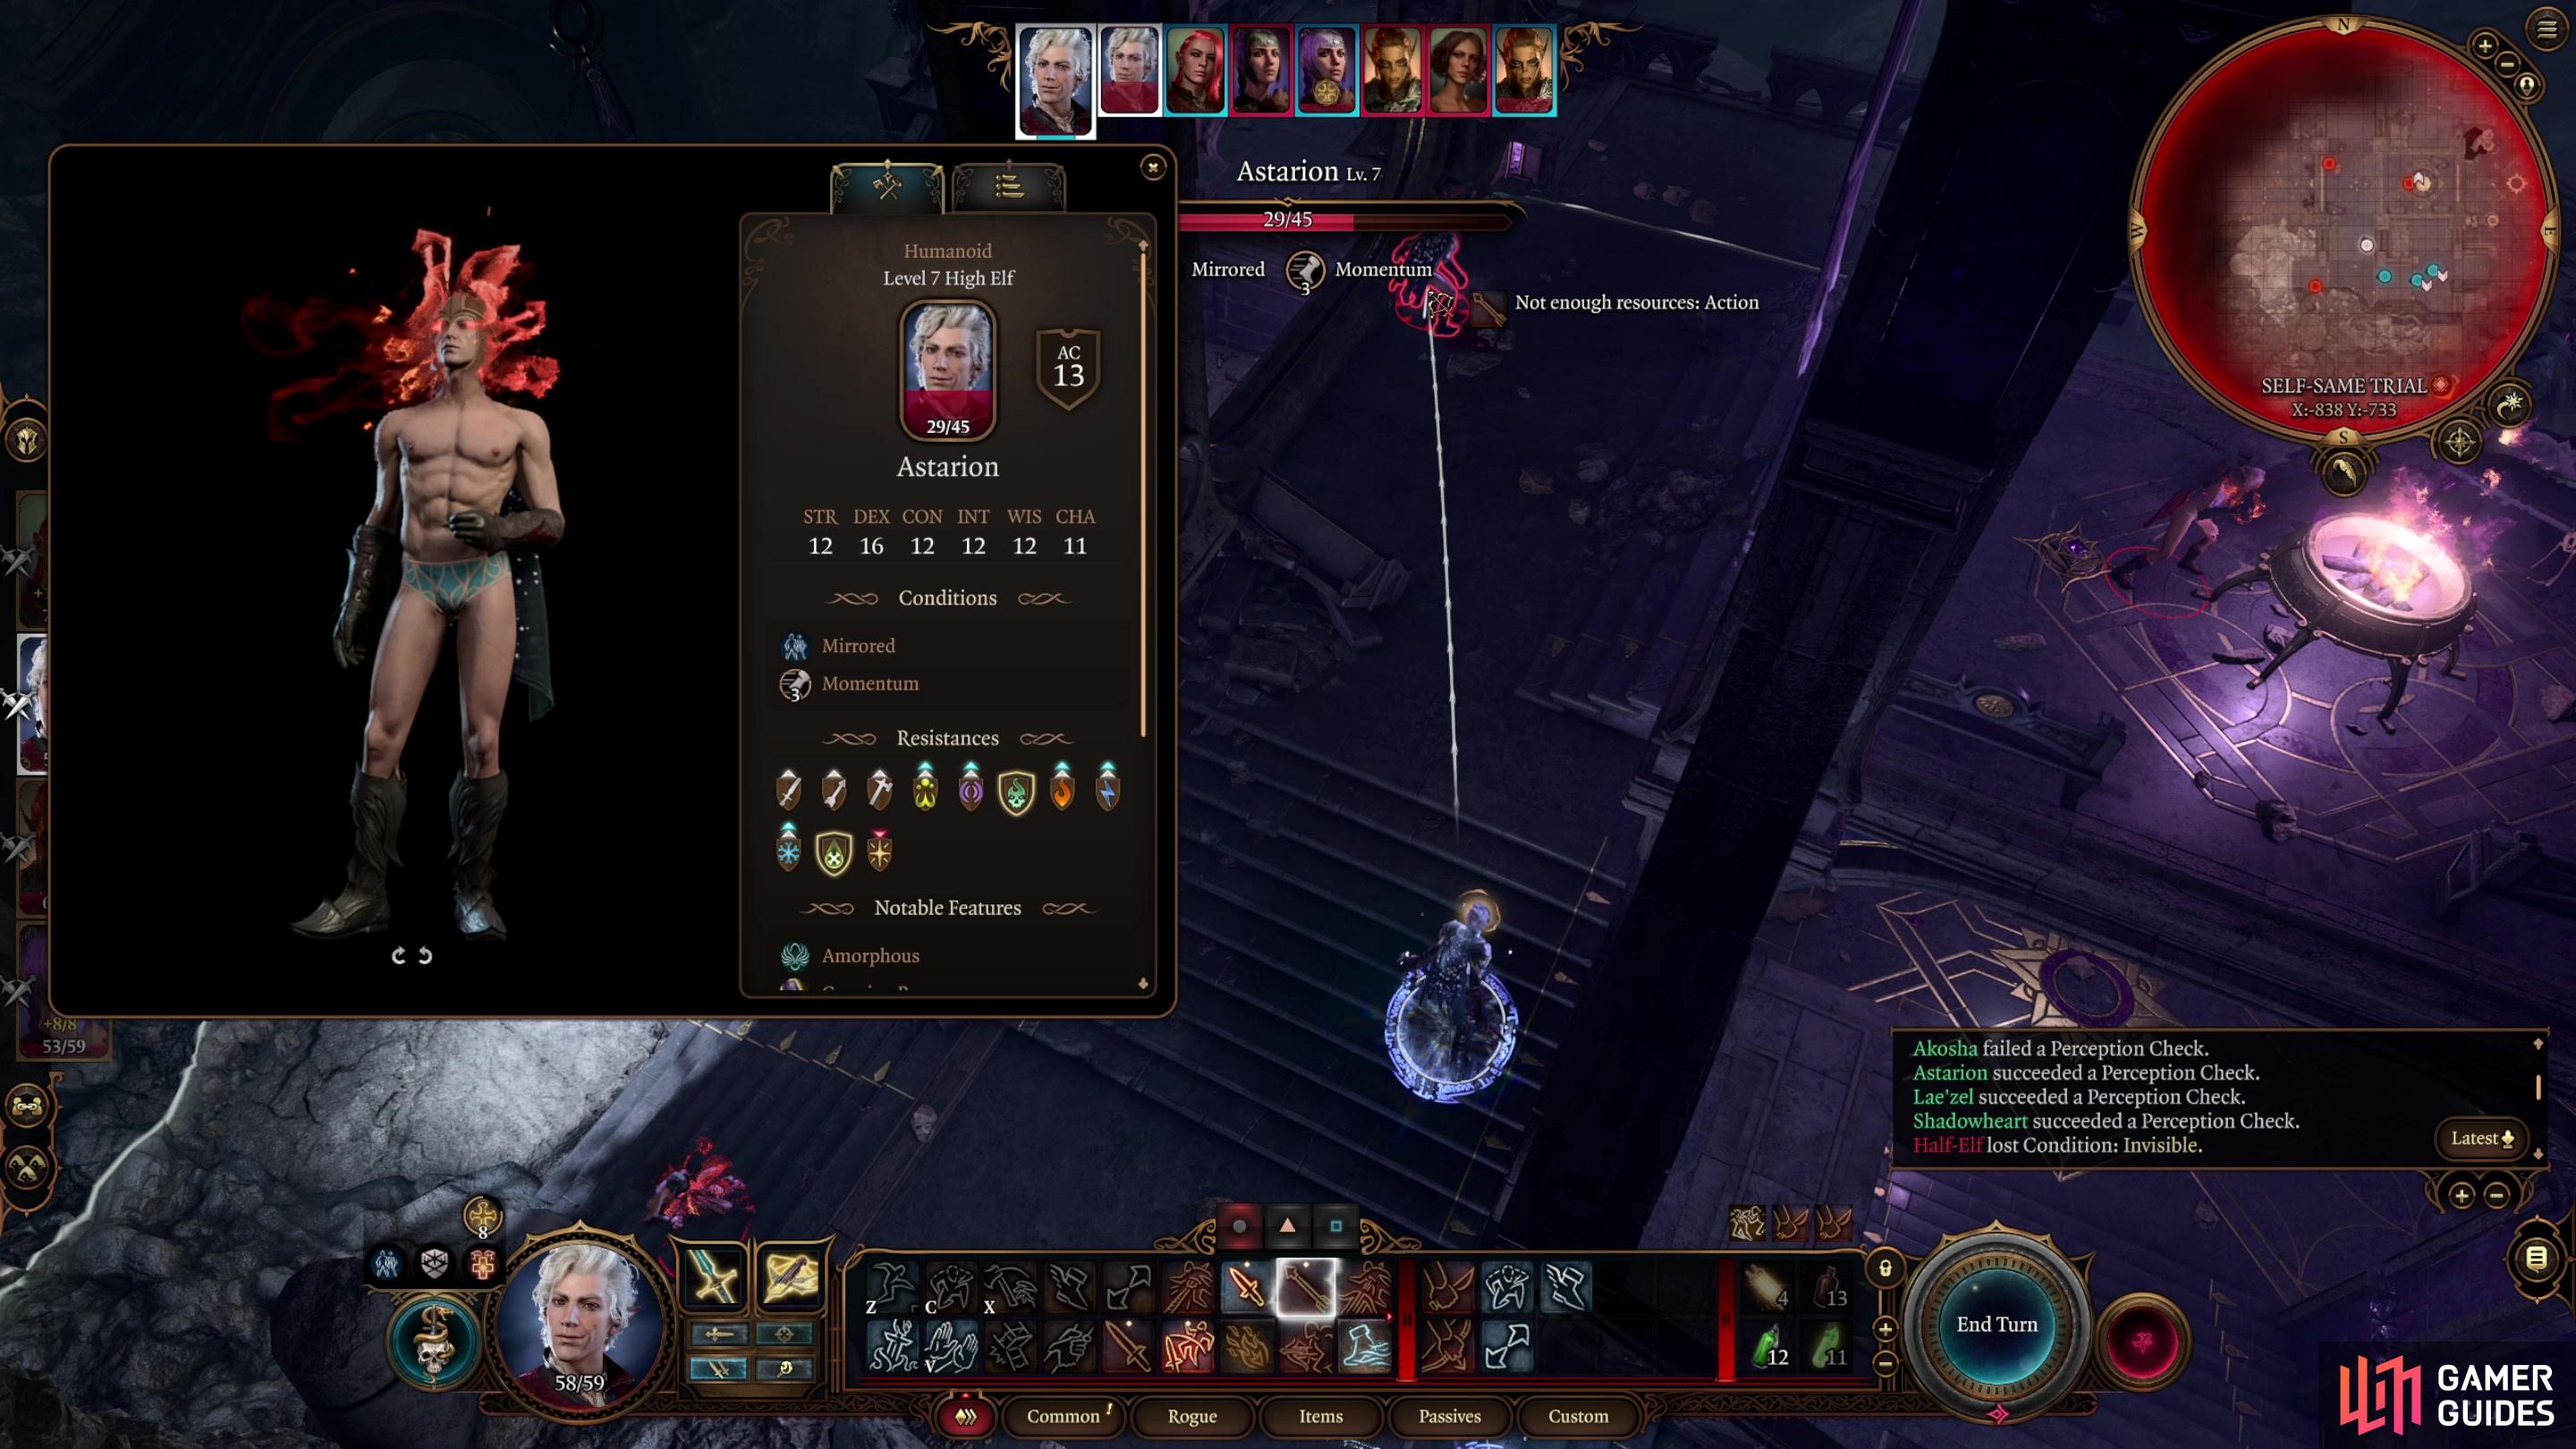
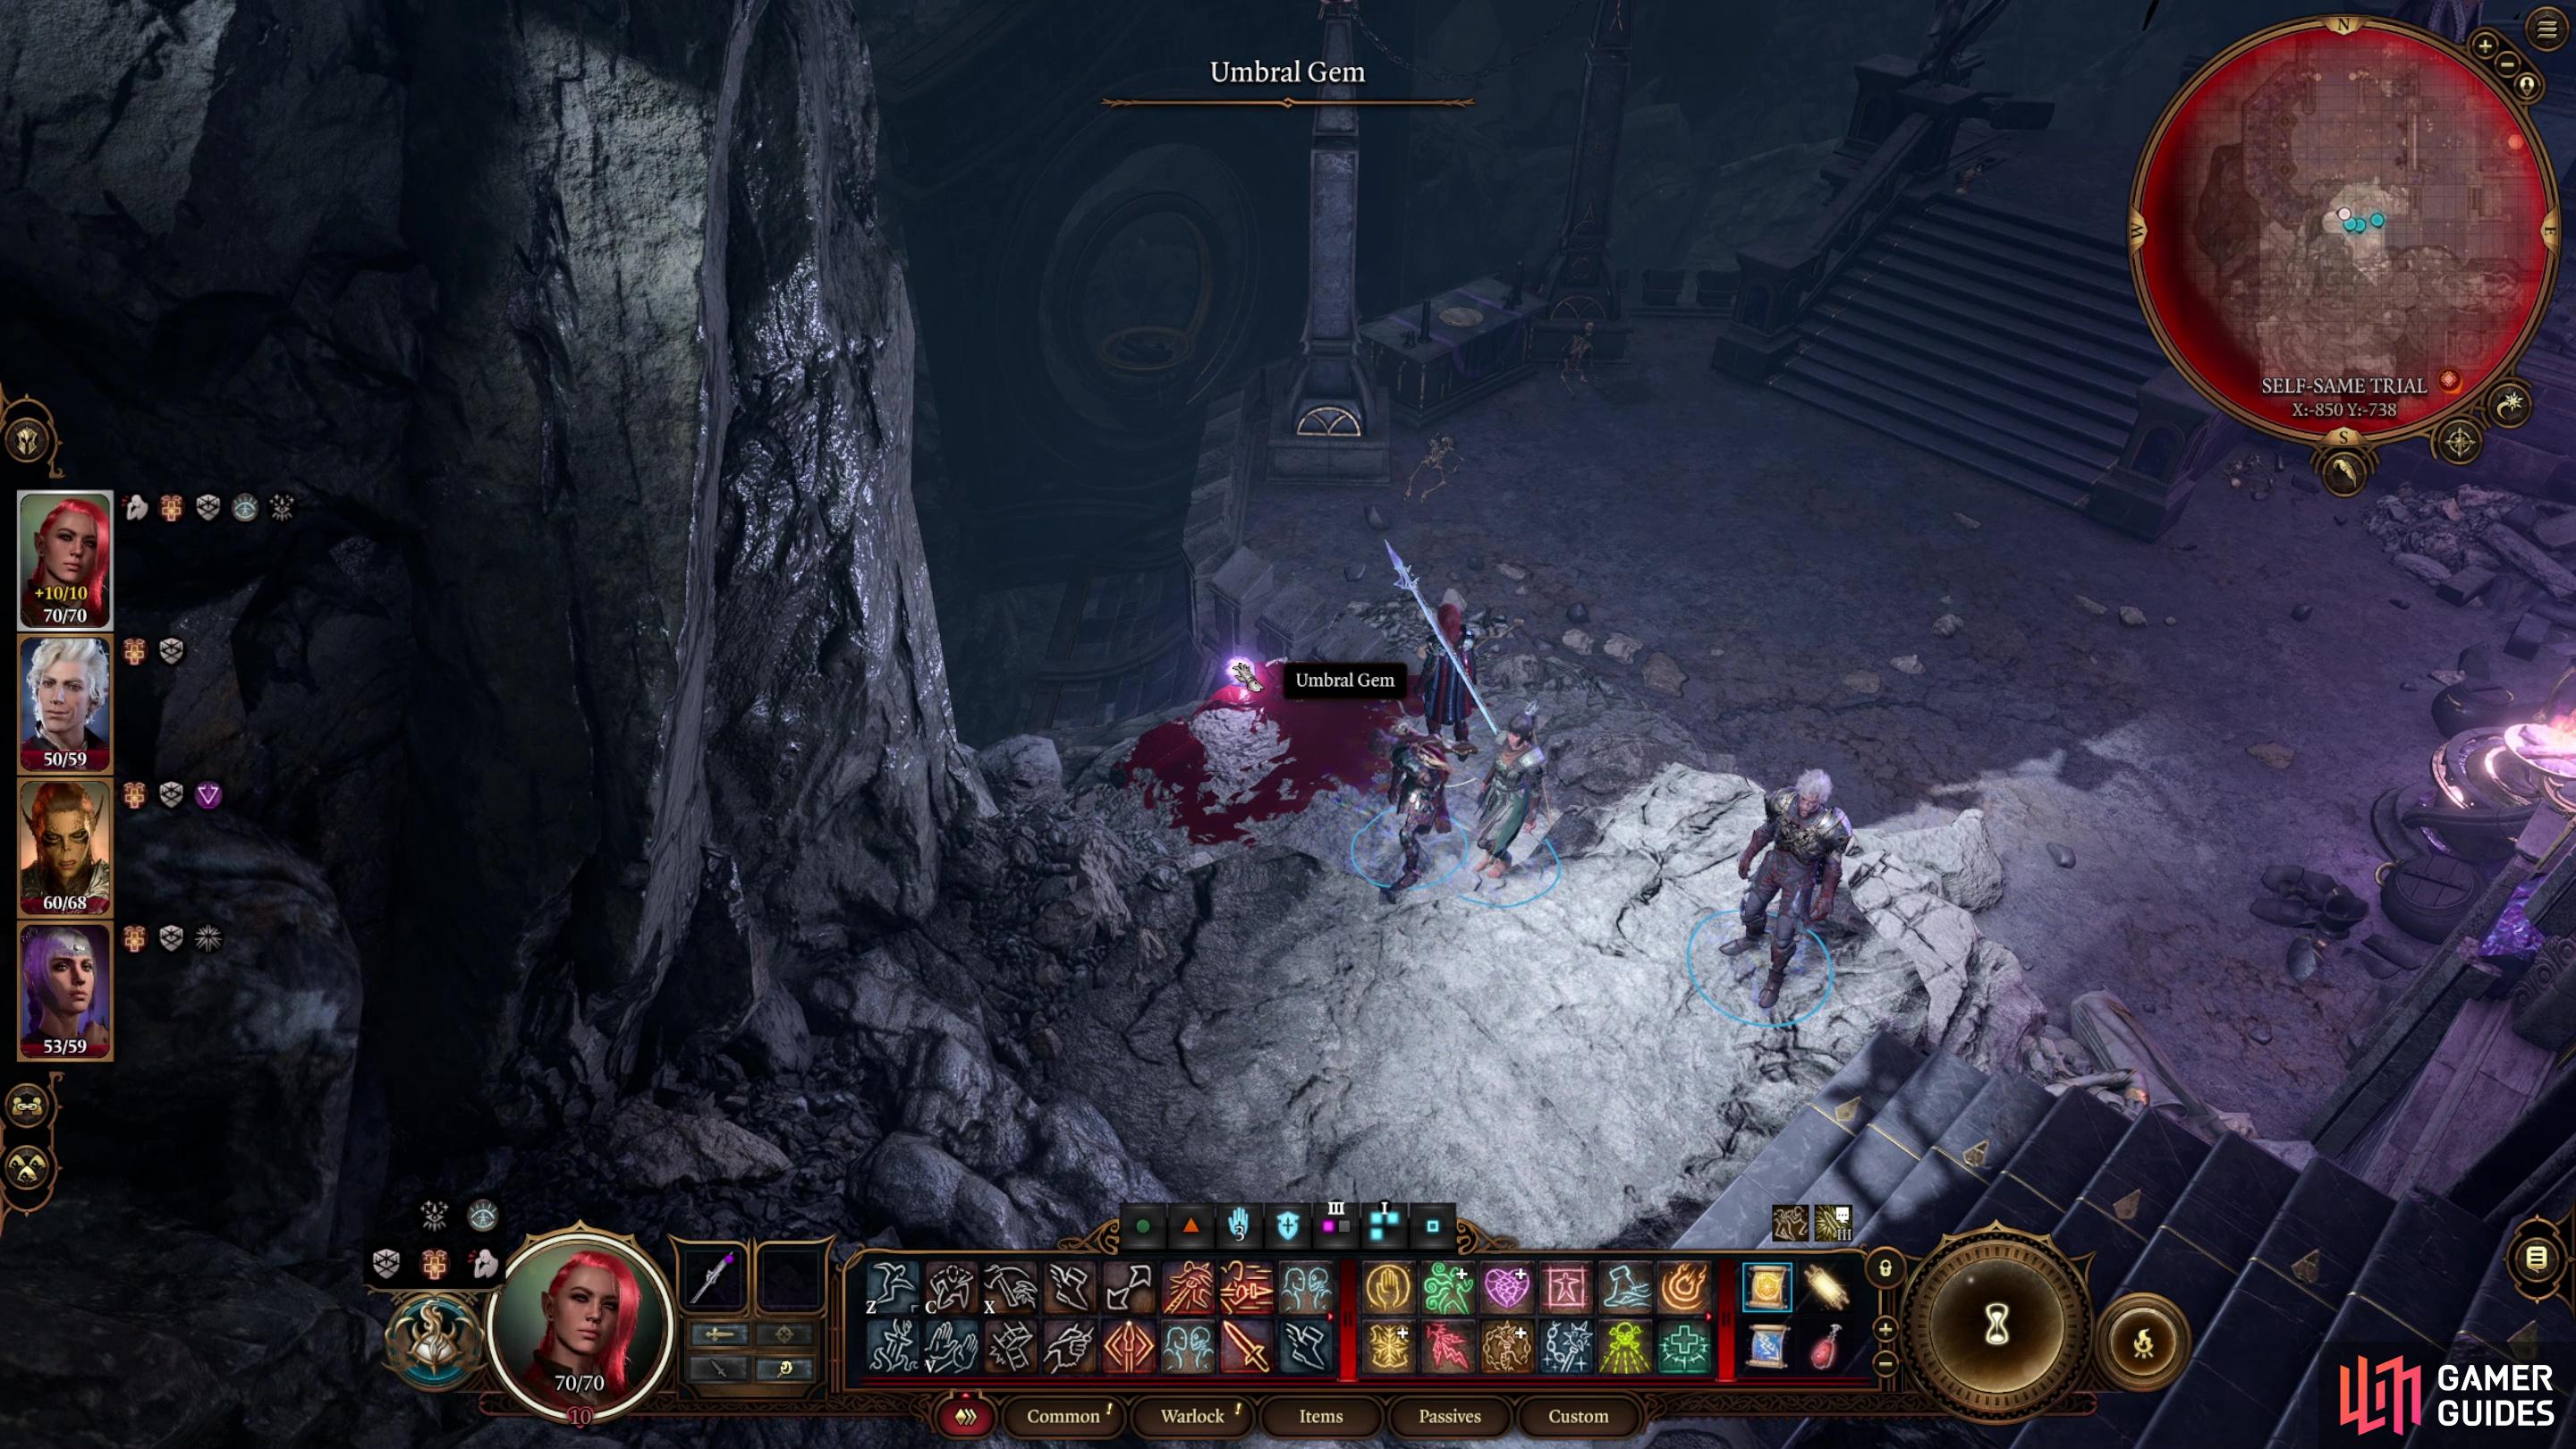
Complete the Self-Same Trial
The obligatory fighting a clone of your party gimmick, the mirrored enemies you fight will vary depending on the characters you bring, and they generally won’t be quite as strong as your own party members. They do get some boons, however, including starting the encounter out hidden, being able to disappear again if they end up obscured by shadows (Shadowblend), having immunity to being pushed, shoved or thrown due to their Amorphous nature. They also have any boons your own equipped gear would give them. Worst of all, a feature named “Shar’s Rules” are in effect; you’re meant to attack your own mirrored self, and if you break that rule by attacking a different clone you’ll take a -1 penalty to all ability scores (Strength, Dexterity, etc.) until you next take a Long Rest. This is not a handicap the clones suffer. In addition, the mirror clones are resistant to many forms of damage, and immune to both necrotic and poison damage while being vulnerable to radiant damage.
As with most of these trials, there’s a way to cheese this one, at least to some degree. Before you make a blood offering at the Sacrificial Bowl at the start of this trial, unequip your characters - at least removing your armor and weapons. Start the trial, head inside, reequip your gear when you get near a structure (the [Perception 15] checks you’ll automatically make are a good reminder!) then continue on until a fight starts. Your clones will be lacking arms and armor, while you’ll be ready to go, giving you an Armor Class and damage advantage that will serve you well. It’s also worth noting that once a character has slain their clone, they’ll be freed from the constraints of the trial, meaning they can freely attack any other clone without suffering the “Cheater’s Folly” debuff. You’ll only gain momentum as the fight goes on, and if you cheese the encounter by ensuring you’re fighting naked clones, this shouldn’t be much trouble at all.
Use a map on the ground near the sacrificial altar to navigate the darkness,
and claim the Umbral Gem at the end of the Faith-Leap Trial.
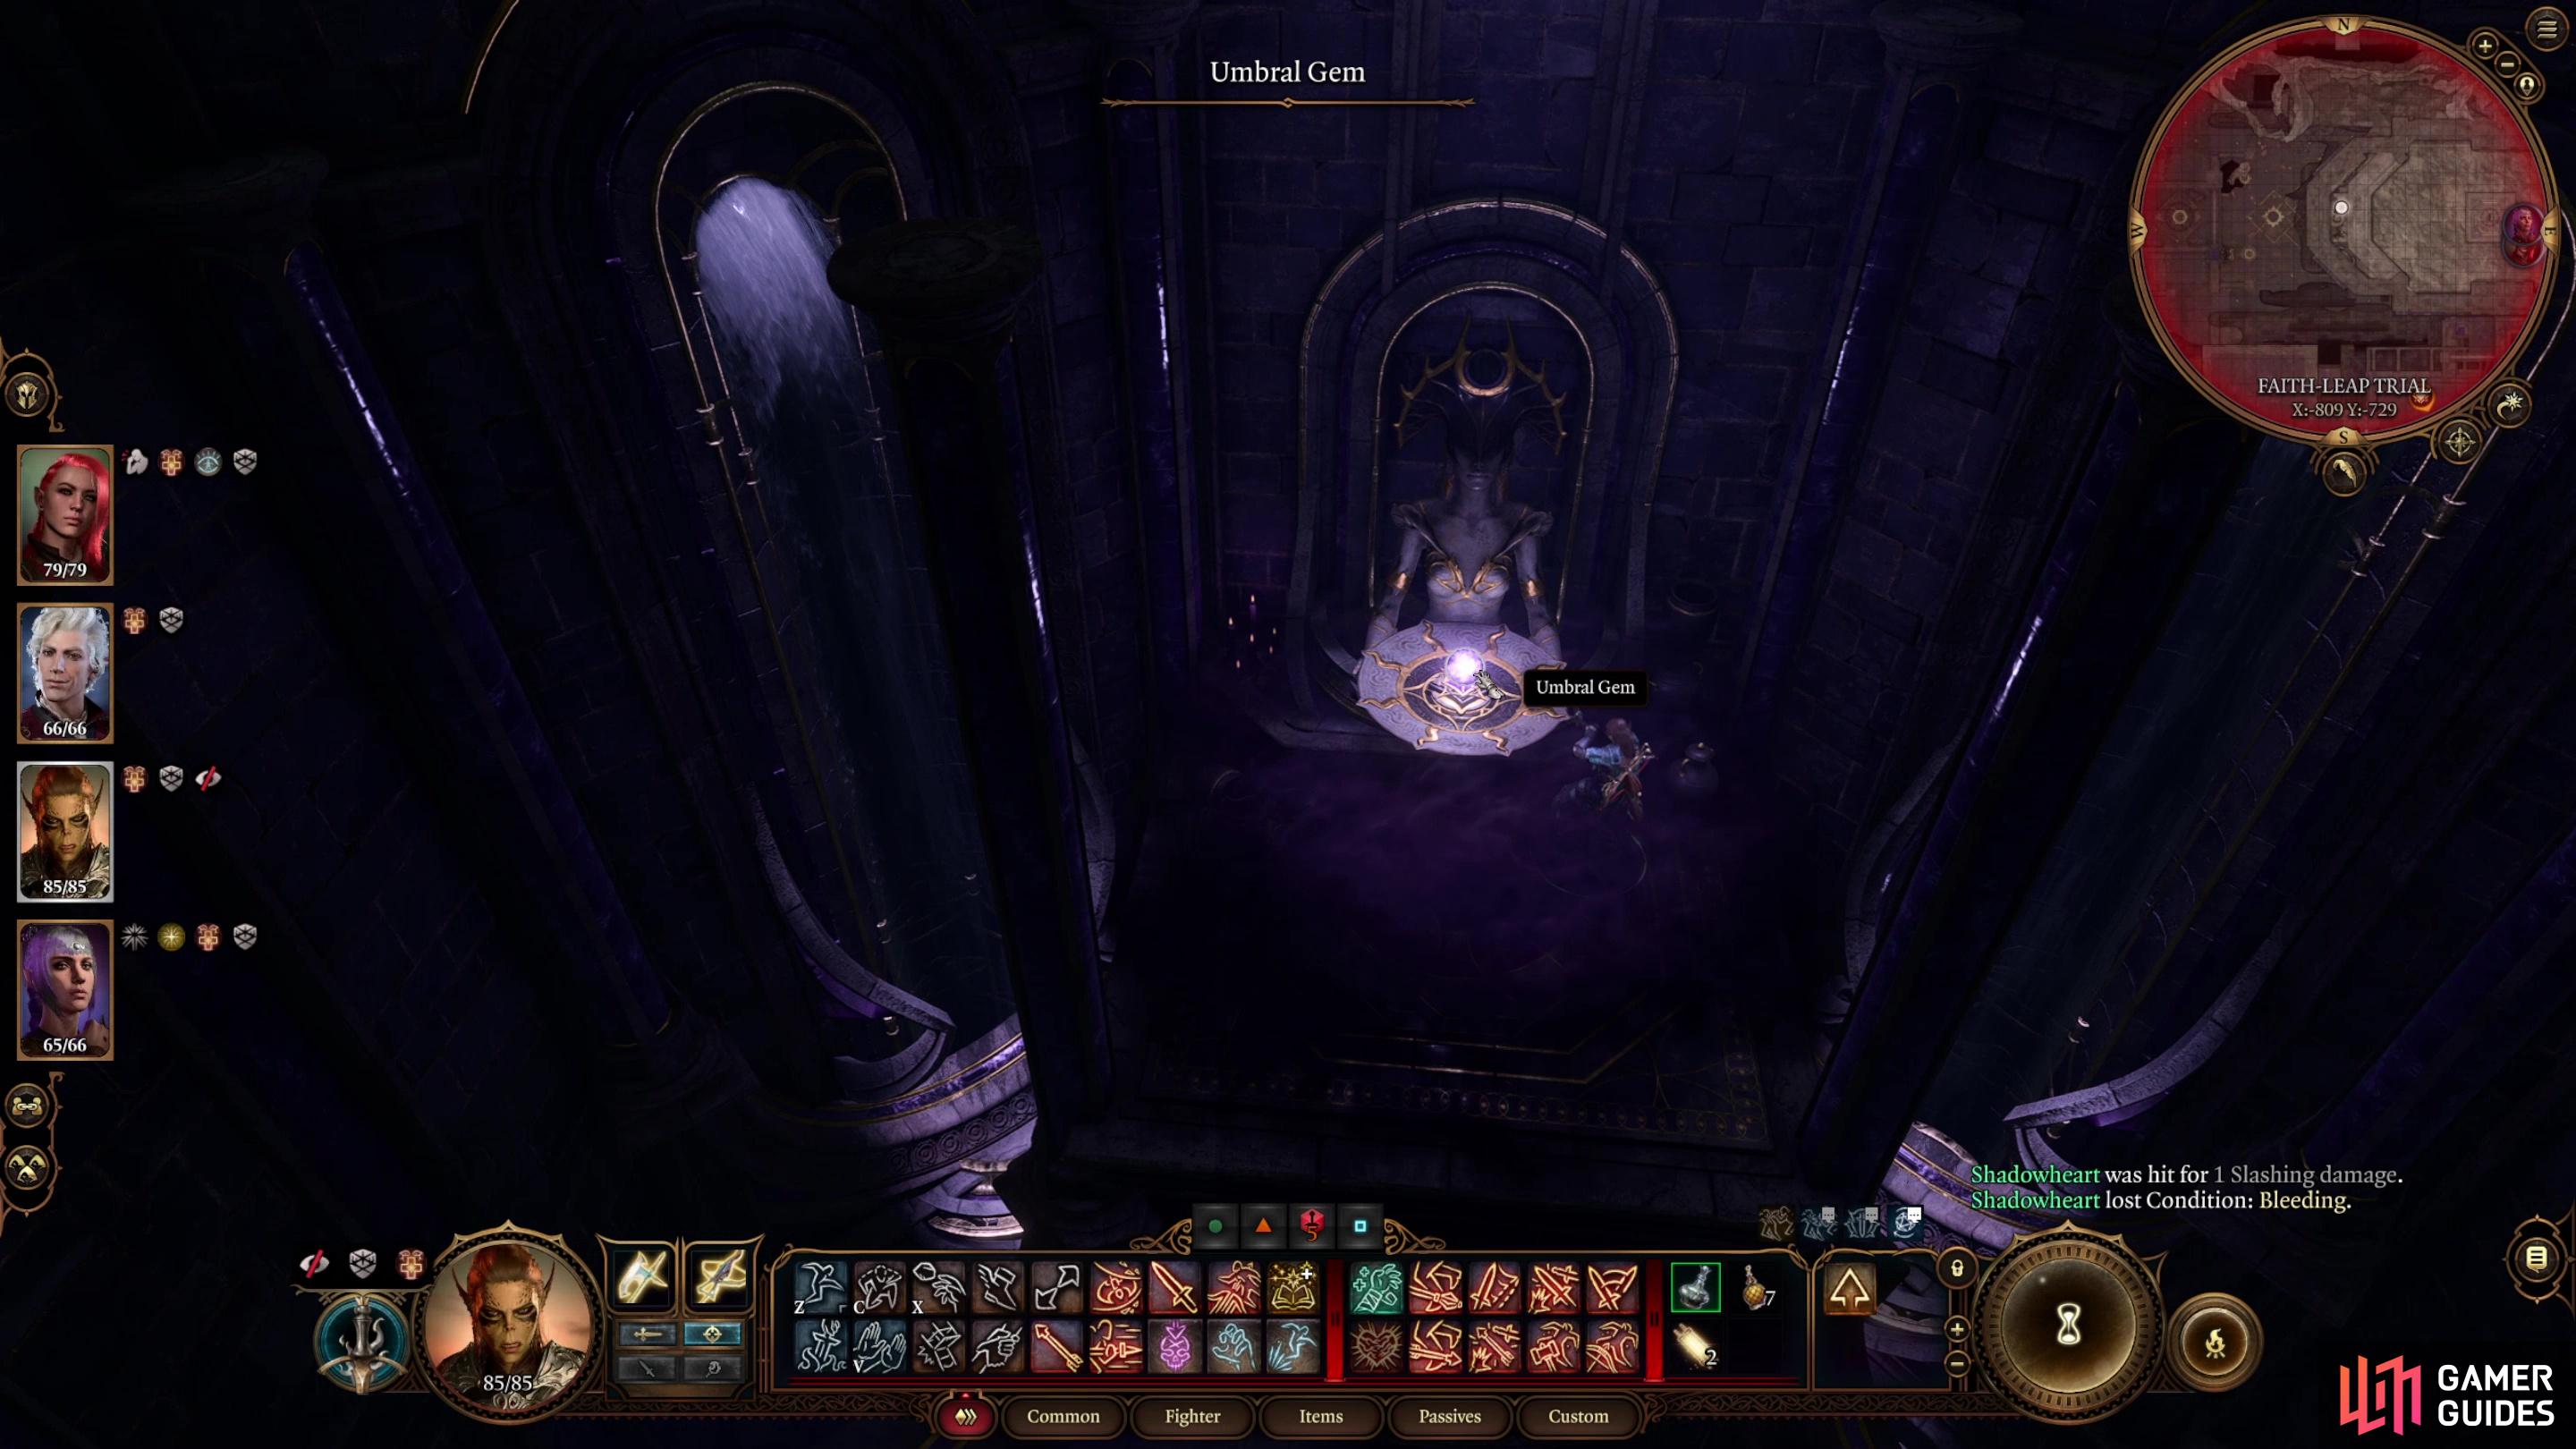
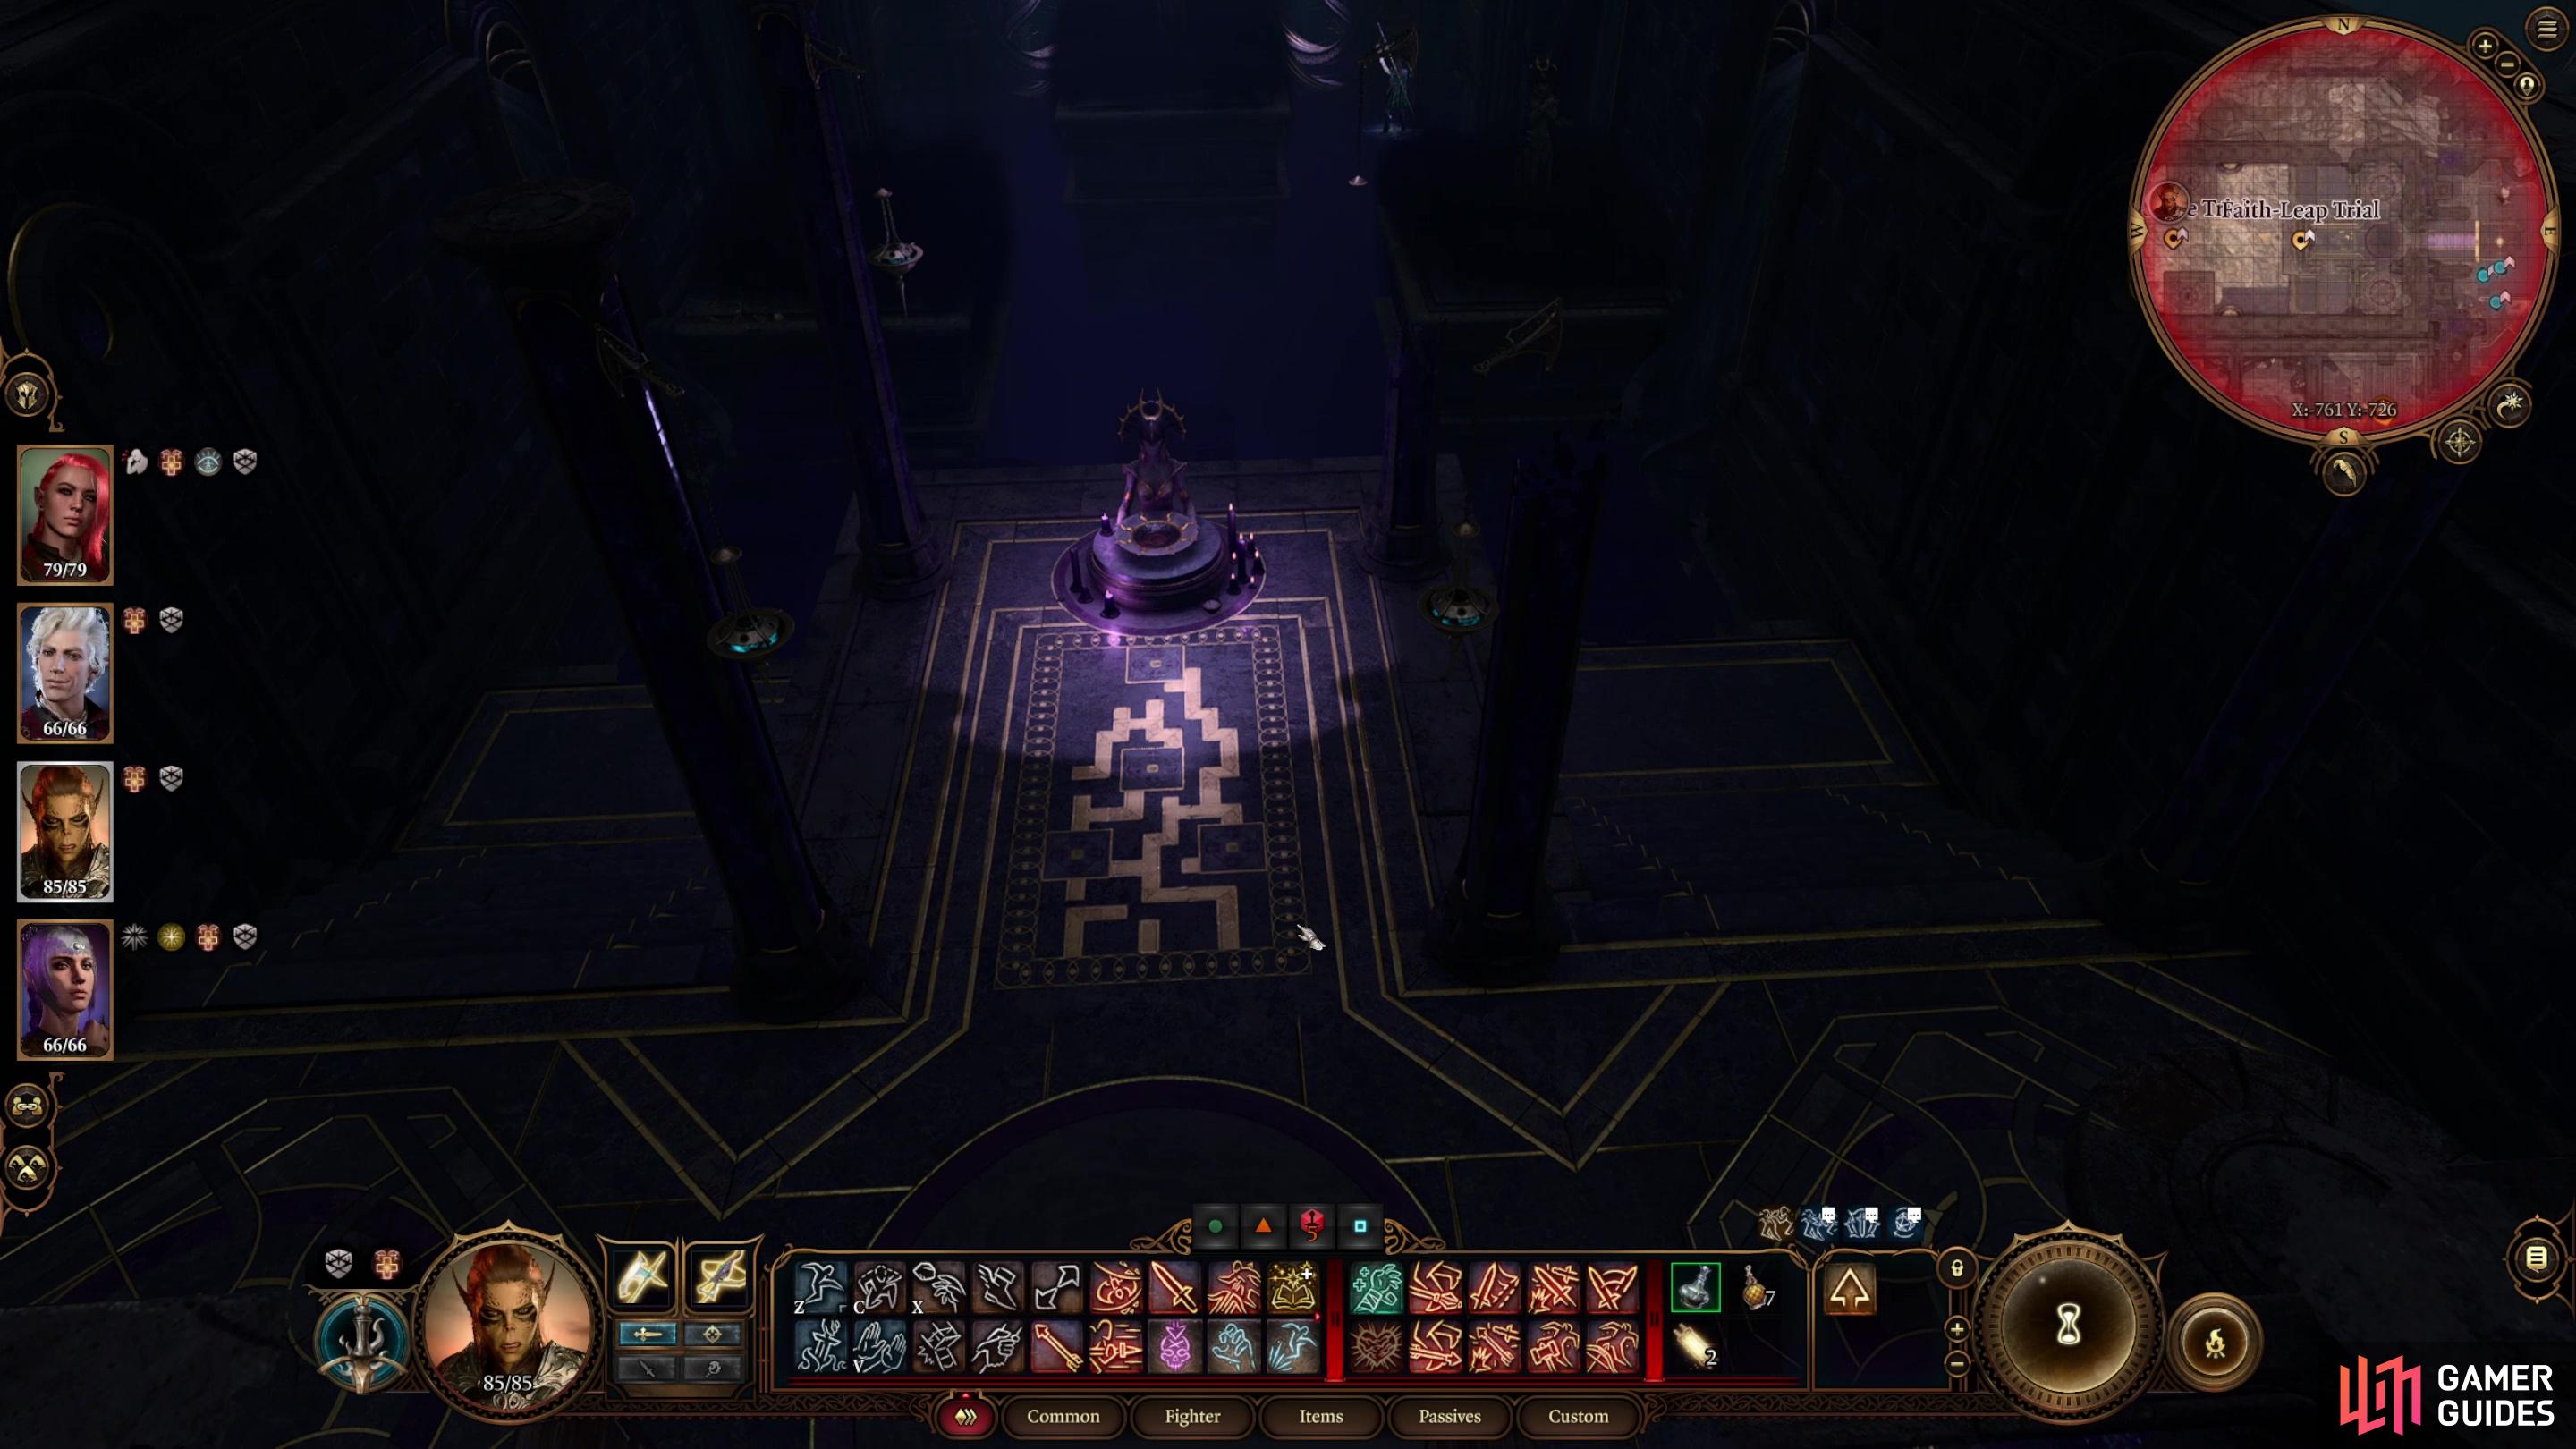
Complete the Faith-Leap Trial
Last and least, the Faith-Leap Trial requires you to navigate a maze. Unlike the Soft-Step Trial, there are no guards, but the route you need to navigate is murky, at best. The trial chamber consists of a giant pit with four ![]() Darkness-enshrouded platforms scattered between the start and the finish. Over this pit is a barely discernible shadowy path that you can just see if you squint… and don’t have a character too close, else the path will vanish. You need to make your way from the blood-hungry altar at the start of the trial to the Umbral Gem at the end. If you fall off the path three times, that character will die, and will be transported back to the start of the puzzle or the last platform they reached. If you leap too far or use magic to traverse too great a distance (Jump,
Darkness-enshrouded platforms scattered between the start and the finish. Over this pit is a barely discernible shadowy path that you can just see if you squint… and don’t have a character too close, else the path will vanish. You need to make your way from the blood-hungry altar at the start of the trial to the Umbral Gem at the end. If you fall off the path three times, that character will die, and will be transported back to the start of the puzzle or the last platform they reached. If you leap too far or use magic to traverse too great a distance (Jump, ![]() Misty Step, etc), it’ll count as falling off the path.
Misty Step, etc), it’ll count as falling off the path.
Fortunately, there’s a map etched into the ground near the altar at the start of the trial. The gold path marks the safe route over the pit, so follow that and you should - with a bit of save/loading - make it across and claim your third Umbral Gem.

(1 of 6) Follow a Displacer Beast and it’ll lead you to an orthon named Yurgir - Raphael’s hated enemy.
The Orthon’s Umbral Gem - Kill Raphael’s Old Enemy
Leave the Leap-Faith Trial chamber and note another chamber to the north, this one with an odd translucent barrier instead of a door. This place is important, but ignore it for now - we’re going to focus on getting the fourth Umbral Gem, even if that means a bit of running about. The Gauntlet of Shar waypoint should make this less painful.
Speaking of which, fast travel back to the Gauntlet of Shar waypoint and from the nearby intersection head east until you’re just up stairs from the door that leads back to the statue of Shar chamber. You’ll find three sets of stairs leading down to the north, the western ones leading back to the Gauntlet of Shar waypoint, the middle ones leading down to a lift powered by Umbral Games (we’ll get to this when we’re ready to move on for good) and the one to the east that leads to where we’re going. Continue east to reach some broken stairs, at the bottom of which is a Displacer Beast. Ignore the magical beast and jump down and the Displacer Beast will run off. We won’t be parted for long.
Just off the stairs you’ll find another intersection. The route south leads to a dead-end, as does the way east, although you can jump across the gap to reach some high ground which may be advantageous soon. Failing that, go north down some stairs, then chase the Displacer Beast east into a chamber. Save before you commit, however, as an encounter with a powerful foe lies ahead, and more importantly, a decision that may significantly impact a companion questline.
If you press forward after the Displacer Beast, an orthon named Yurgir will confront you from high ground. You can talk your way out of a fight by offering to help the orthon complete its contract with Raphael, but ![]() Shadowheart and
Shadowheart and ![]() Astarion will both disapprove of this approach (although the latter can be placated somewhat by promising it’s part of your scheme). If you want to hunt down the last Justiciar, you’ll need to backtrack all the way to the Faith-Leap Trial and climb down a cragged rock opposite the nearby chamber shielded by a translucent barrier. Climb down a second cragged rock to reach a chamber full of bones. Ominous.
Astarion will both disapprove of this approach (although the latter can be placated somewhat by promising it’s part of your scheme). If you want to hunt down the last Justiciar, you’ll need to backtrack all the way to the Faith-Leap Trial and climb down a cragged rock opposite the nearby chamber shielded by a translucent barrier. Climb down a second cragged rock to reach a chamber full of bones. Ominous.
Search the grisly pit and you’ll find the book One Becomes Many, which pretty much spells out what the nature of this last Justiciar is, or rather, has become. Signed by our good pal Raphael. You could also have gained insight into the nature of the rats scurrying about here - sometimes oddly congregating around Sharran shrines - if you made use of ![]() Speak with Animals, but this wasn’t necessary. In any event, interact with the Broken Effigy to summon a rat, and attack it to trigger a horde of rats, which will appear in waves. While these are generally trash mobs, there are Necrotic and Soporific variants, the former of which deal decent damage and the latter of which can put characters to sleep in an area when they are defeated. As one might expect, the rats also appear in great numbers, so any AoEs here are useful, from sweep attacks, to Smokepowder Bombs and
Speak with Animals, but this wasn’t necessary. In any event, interact with the Broken Effigy to summon a rat, and attack it to trigger a horde of rats, which will appear in waves. While these are generally trash mobs, there are Necrotic and Soporific variants, the former of which deal decent damage and the latter of which can put characters to sleep in an area when they are defeated. As one might expect, the rats also appear in great numbers, so any AoEs here are useful, from sweep attacks, to Smokepowder Bombs and ![]() Fireball spells. Defeat all the rats, then the final Justiciar, Lyrthindor will appear. If you’ve come this far, you might as well put him down, too, then return to Yurgir to complete the quest. This approach won’t make Astarion happy, to say the least, but you’ll get to loot the orthon’s chambers, including the Umbral Gem it possessed. It’s not a great reward, but you do get the gear dropped by Lyrthindor as a consolation prize.
Fireball spells. Defeat all the rats, then the final Justiciar, Lyrthindor will appear. If you’ve come this far, you might as well put him down, too, then return to Yurgir to complete the quest. This approach won’t make Astarion happy, to say the least, but you’ll get to loot the orthon’s chambers, including the Umbral Gem it possessed. It’s not a great reward, but you do get the gear dropped by Lyrthindor as a consolation prize.
If you’d rather just kill the orthon, instead, don’t enter its chamber and talk to it. Instead, jump the gap to the east and go up a flight of stairs to find the orthon waiting in ambush along with its minions. You can freely spellbuff, and start the fight with a telling first strike - just avoid fire damage and cold damage, as these devils are immune/resistant. Lightning damage works fine, however. Kill the orthon, its Merregon minions, and its pet Displacer Beast and claim the Umbral Gem Either way, you should now have all four of the devices, and aside from a few last details you should be ready to move on.
Make your way north from Yurgir’s chamber to find a chest on a dais, from which you can loot some ![]() Boots of Brilliance. You can also find some Spider Meat doped with succubus spittle, which has an oddly arousing effect. Licking this vile corpse will cause your companions to have some reservations about your peculiarities (rightfully so), but you’ll gain some experience and, if you picked the Guild Artisan background, you’ll gain the Mating Season Inspiration. Odd… just don’t get greedy and lick it twice, the second taste doesn’t go down as well.
Boots of Brilliance. You can also find some Spider Meat doped with succubus spittle, which has an oddly arousing effect. Licking this vile corpse will cause your companions to have some reservations about your peculiarities (rightfully so), but you’ll gain some experience and, if you picked the Guild Artisan background, you’ll gain the Mating Season Inspiration. Odd… just don’t get greedy and lick it twice, the second taste doesn’t go down as well.
Should you remain greedy for more loot, exit Yurgir’s chamber and head north to reach an apparent dead end, but over to the northwest, at around x=-685, y=-735 you’ll find a series of ledges you can climb down to reach an area just above the skull-filled rat pit where you may have encountered Lyrthindor earlier. From here you can leap across some ledges to the northeast to find a large circular door behind which is a room that contains a broken Mirror of Loss. This shattered specimen doesn’t do much, and aside from some chests there’s not much to find in this room - this is mostly a tease for later.
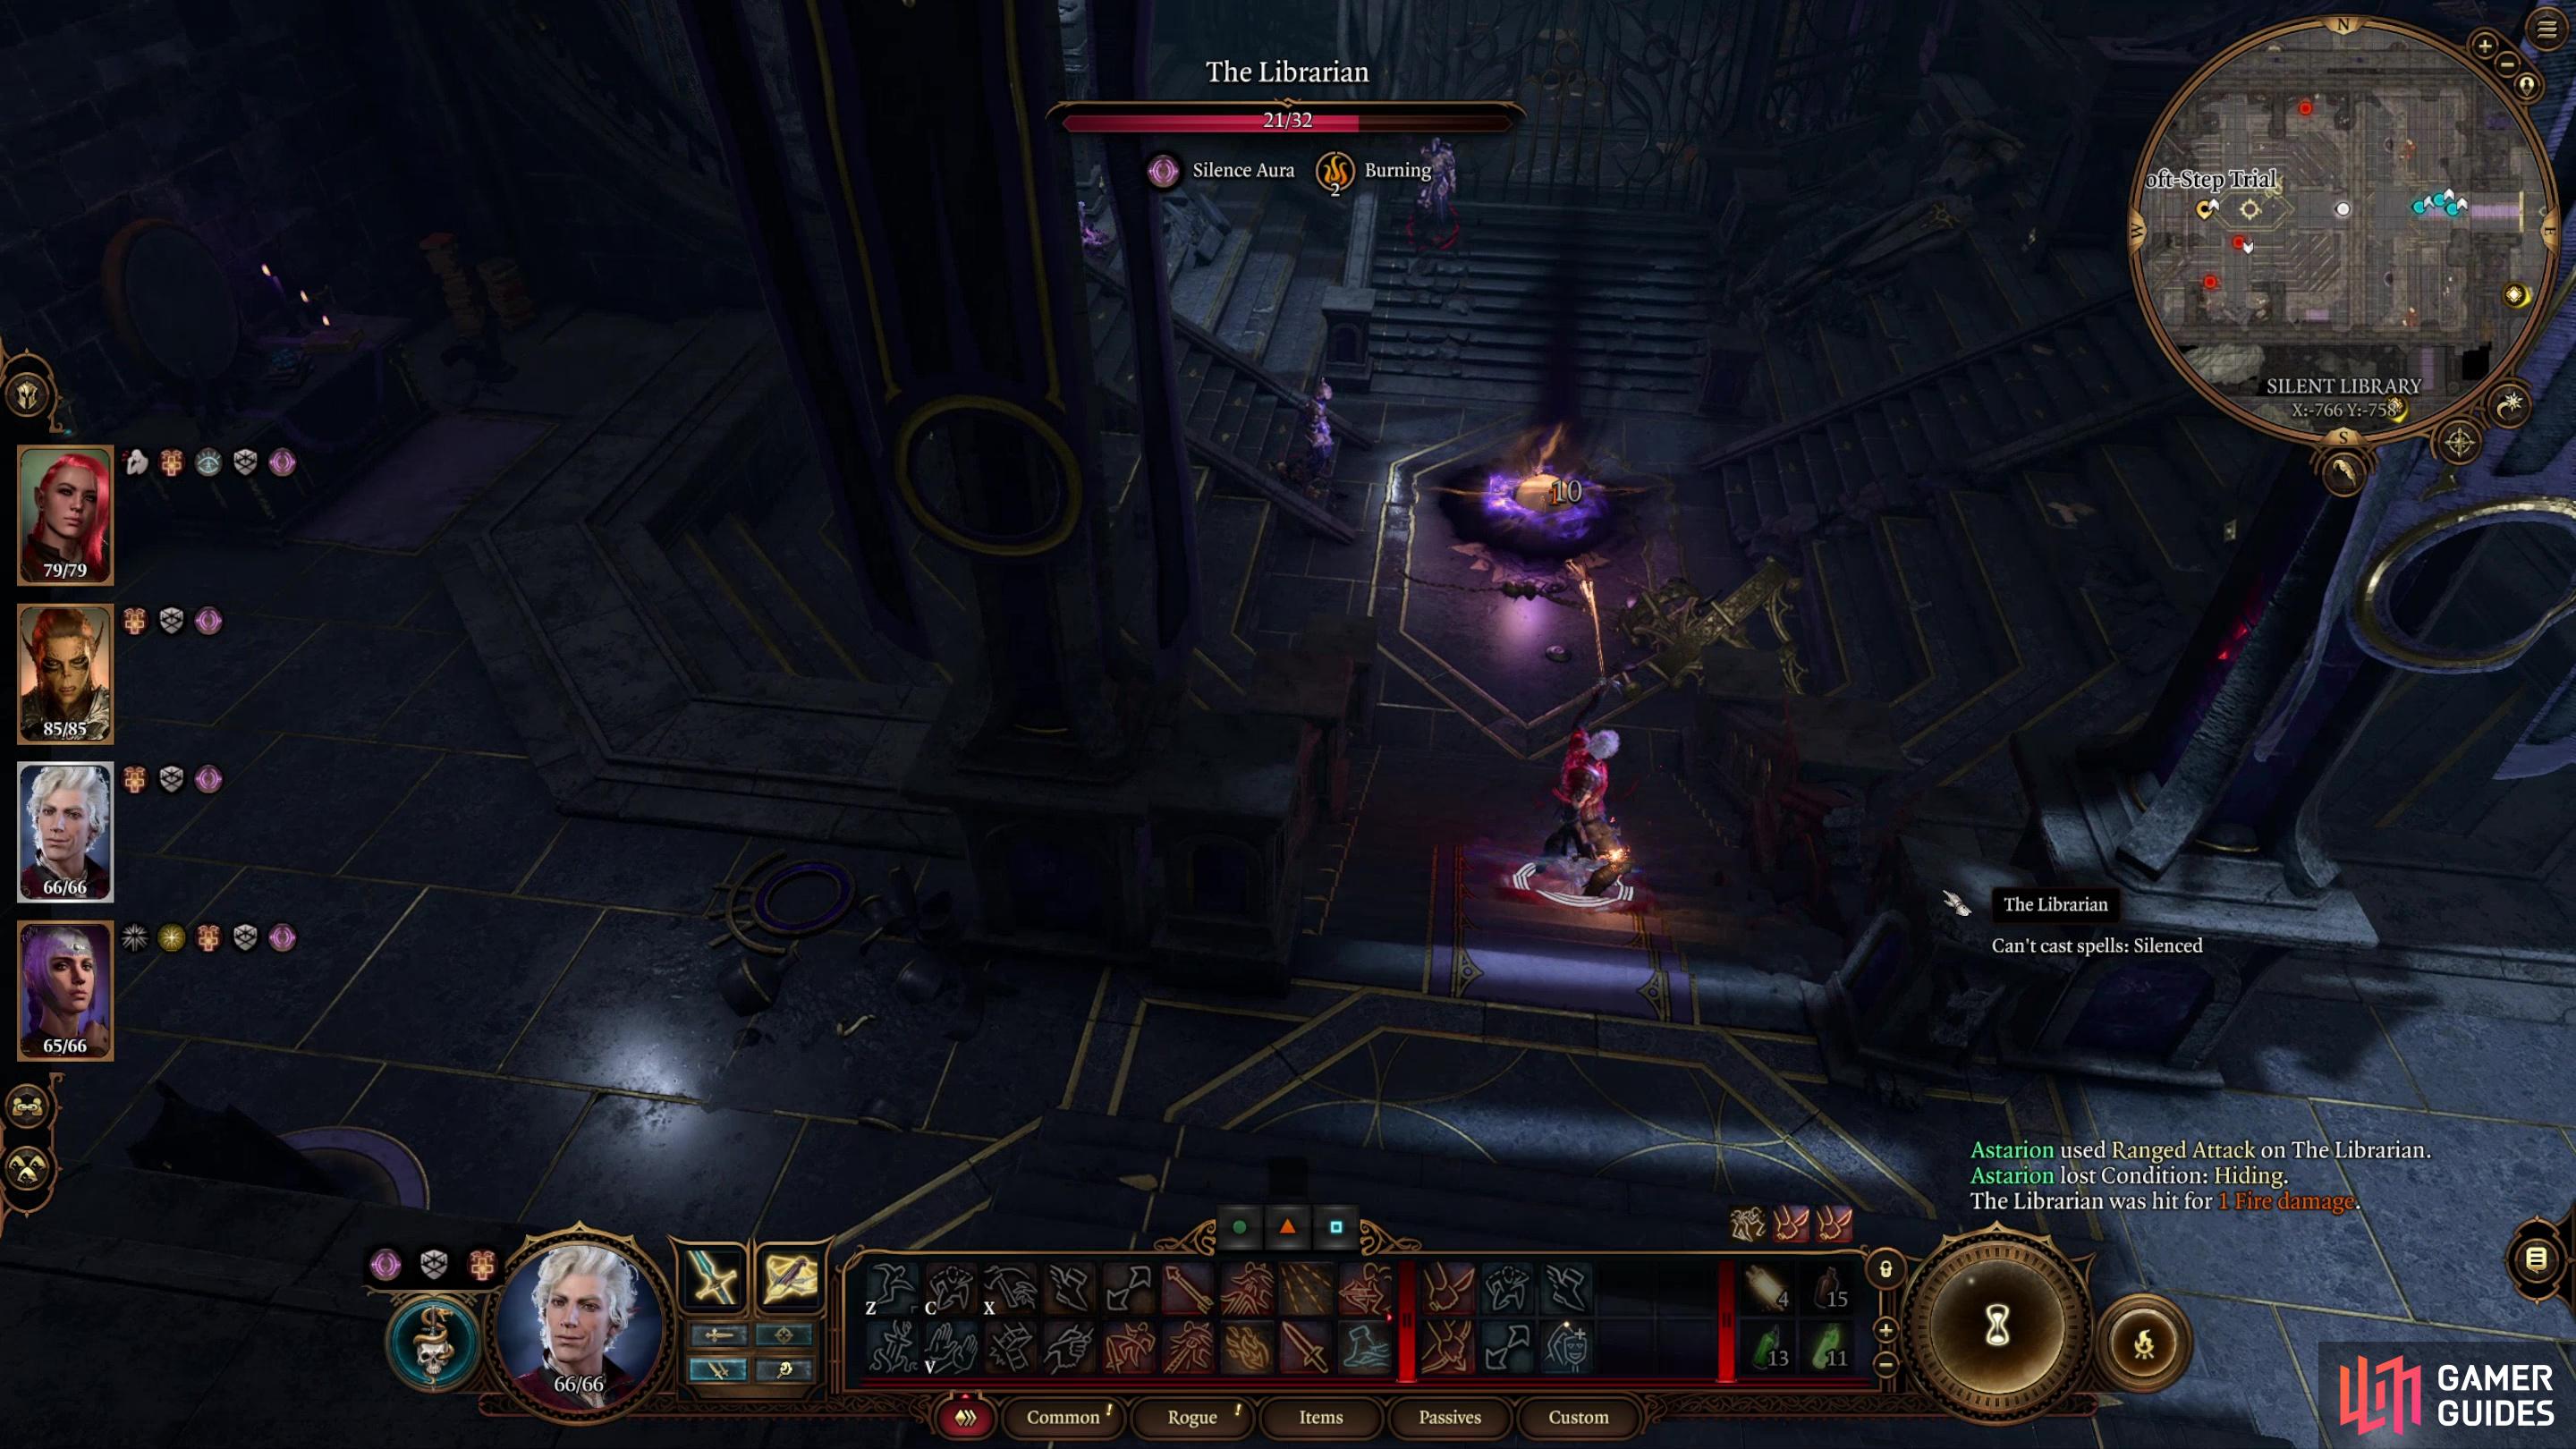
(1 of 4) Clearing the library will become easier once The Librarian and its shushing has ceased.
Get the Spear of Night
Now that you have the four Umbral Gems and have dealt with Raphael’s rival - and by extension advanced or hindered Astarion’s questline - it’s time to do Shadowheart a solid and ensure she has the tool she needs to appease Shar. Fast travel back to the Gauntlet of Shar waypoint, then make your way through until you’re standing just outside the Faith-Leap Trial. From here head south, then go through the doorway to the west, through the translucent barrier. We’ve ignored this room at least once before, but now it’s time to see what’s inside.
It’s a library, as it turns out, and the undead Justiciars inside enjoy the silence befitting such an institution thanks to The Librarian, an orb of darkness in the middle of the room that grants imposes ![]() Silence on the entire area. You won’t be casting any spells with verbal components so long as The Librarian remains intact, but with only 32 Hit Points and very little in the way of defense, it’s probably not long for this world. Smash it, then dispose of the half-dozen or so Justiciars in the library any way you see fit.
Silence on the entire area. You won’t be casting any spells with verbal components so long as The Librarian remains intact, but with only 32 Hit Points and very little in the way of defense, it’s probably not long for this world. Smash it, then dispose of the half-dozen or so Justiciars in the library any way you see fit.
Once the library is clear, make your way west and pick a locked gate [Sleight of Hand 21] to reach a chamber with an altar bearing the “Riddle of the Night” in the middle of it. Be wary of gas traps [Perception 15 | Sleight of Hand 21] and note that the massive Relief of Shar along the western end of the room is not quite as immovable as it may seem at first glance [Perception 15]. We’ve got to solve this “Riddle of the Night”: ”What can silence the Nightsong?”, and if you click on the altar it’s obvious you need to place some book there.
No use fussing about it. Head back east into the larger room and search one of the bookshelves in the northeastern corner of the library (at roughly x=-770, y=-740) to find the tome Teachings of Loss: The Nightsinger. Be wary of traps [Perception 15 | Sleight of Hand 14] as you unburden the bookshelf, then return and lay the book down on the altar. This will cause the Relief of Shar to lower, allowing you to reach another, smaller chamber to the west. What this small chamber lacks in size it makes up for in loot, as you’ll find the Spear of Night and the ![]() Dark Justiciar Half-Plate. In a Gilded Chest nearby you can also find the Dark Justiciar Helmet. Everything Shadowheart needs to ascend in the ranks of the Sharran cult, provided she can appease her mistress with one last act of violence.
Dark Justiciar Half-Plate. In a Gilded Chest nearby you can also find the Dark Justiciar Helmet. Everything Shadowheart needs to ascend in the ranks of the Sharran cult, provided she can appease her mistress with one last act of violence.
How to Reach the Shadowfell
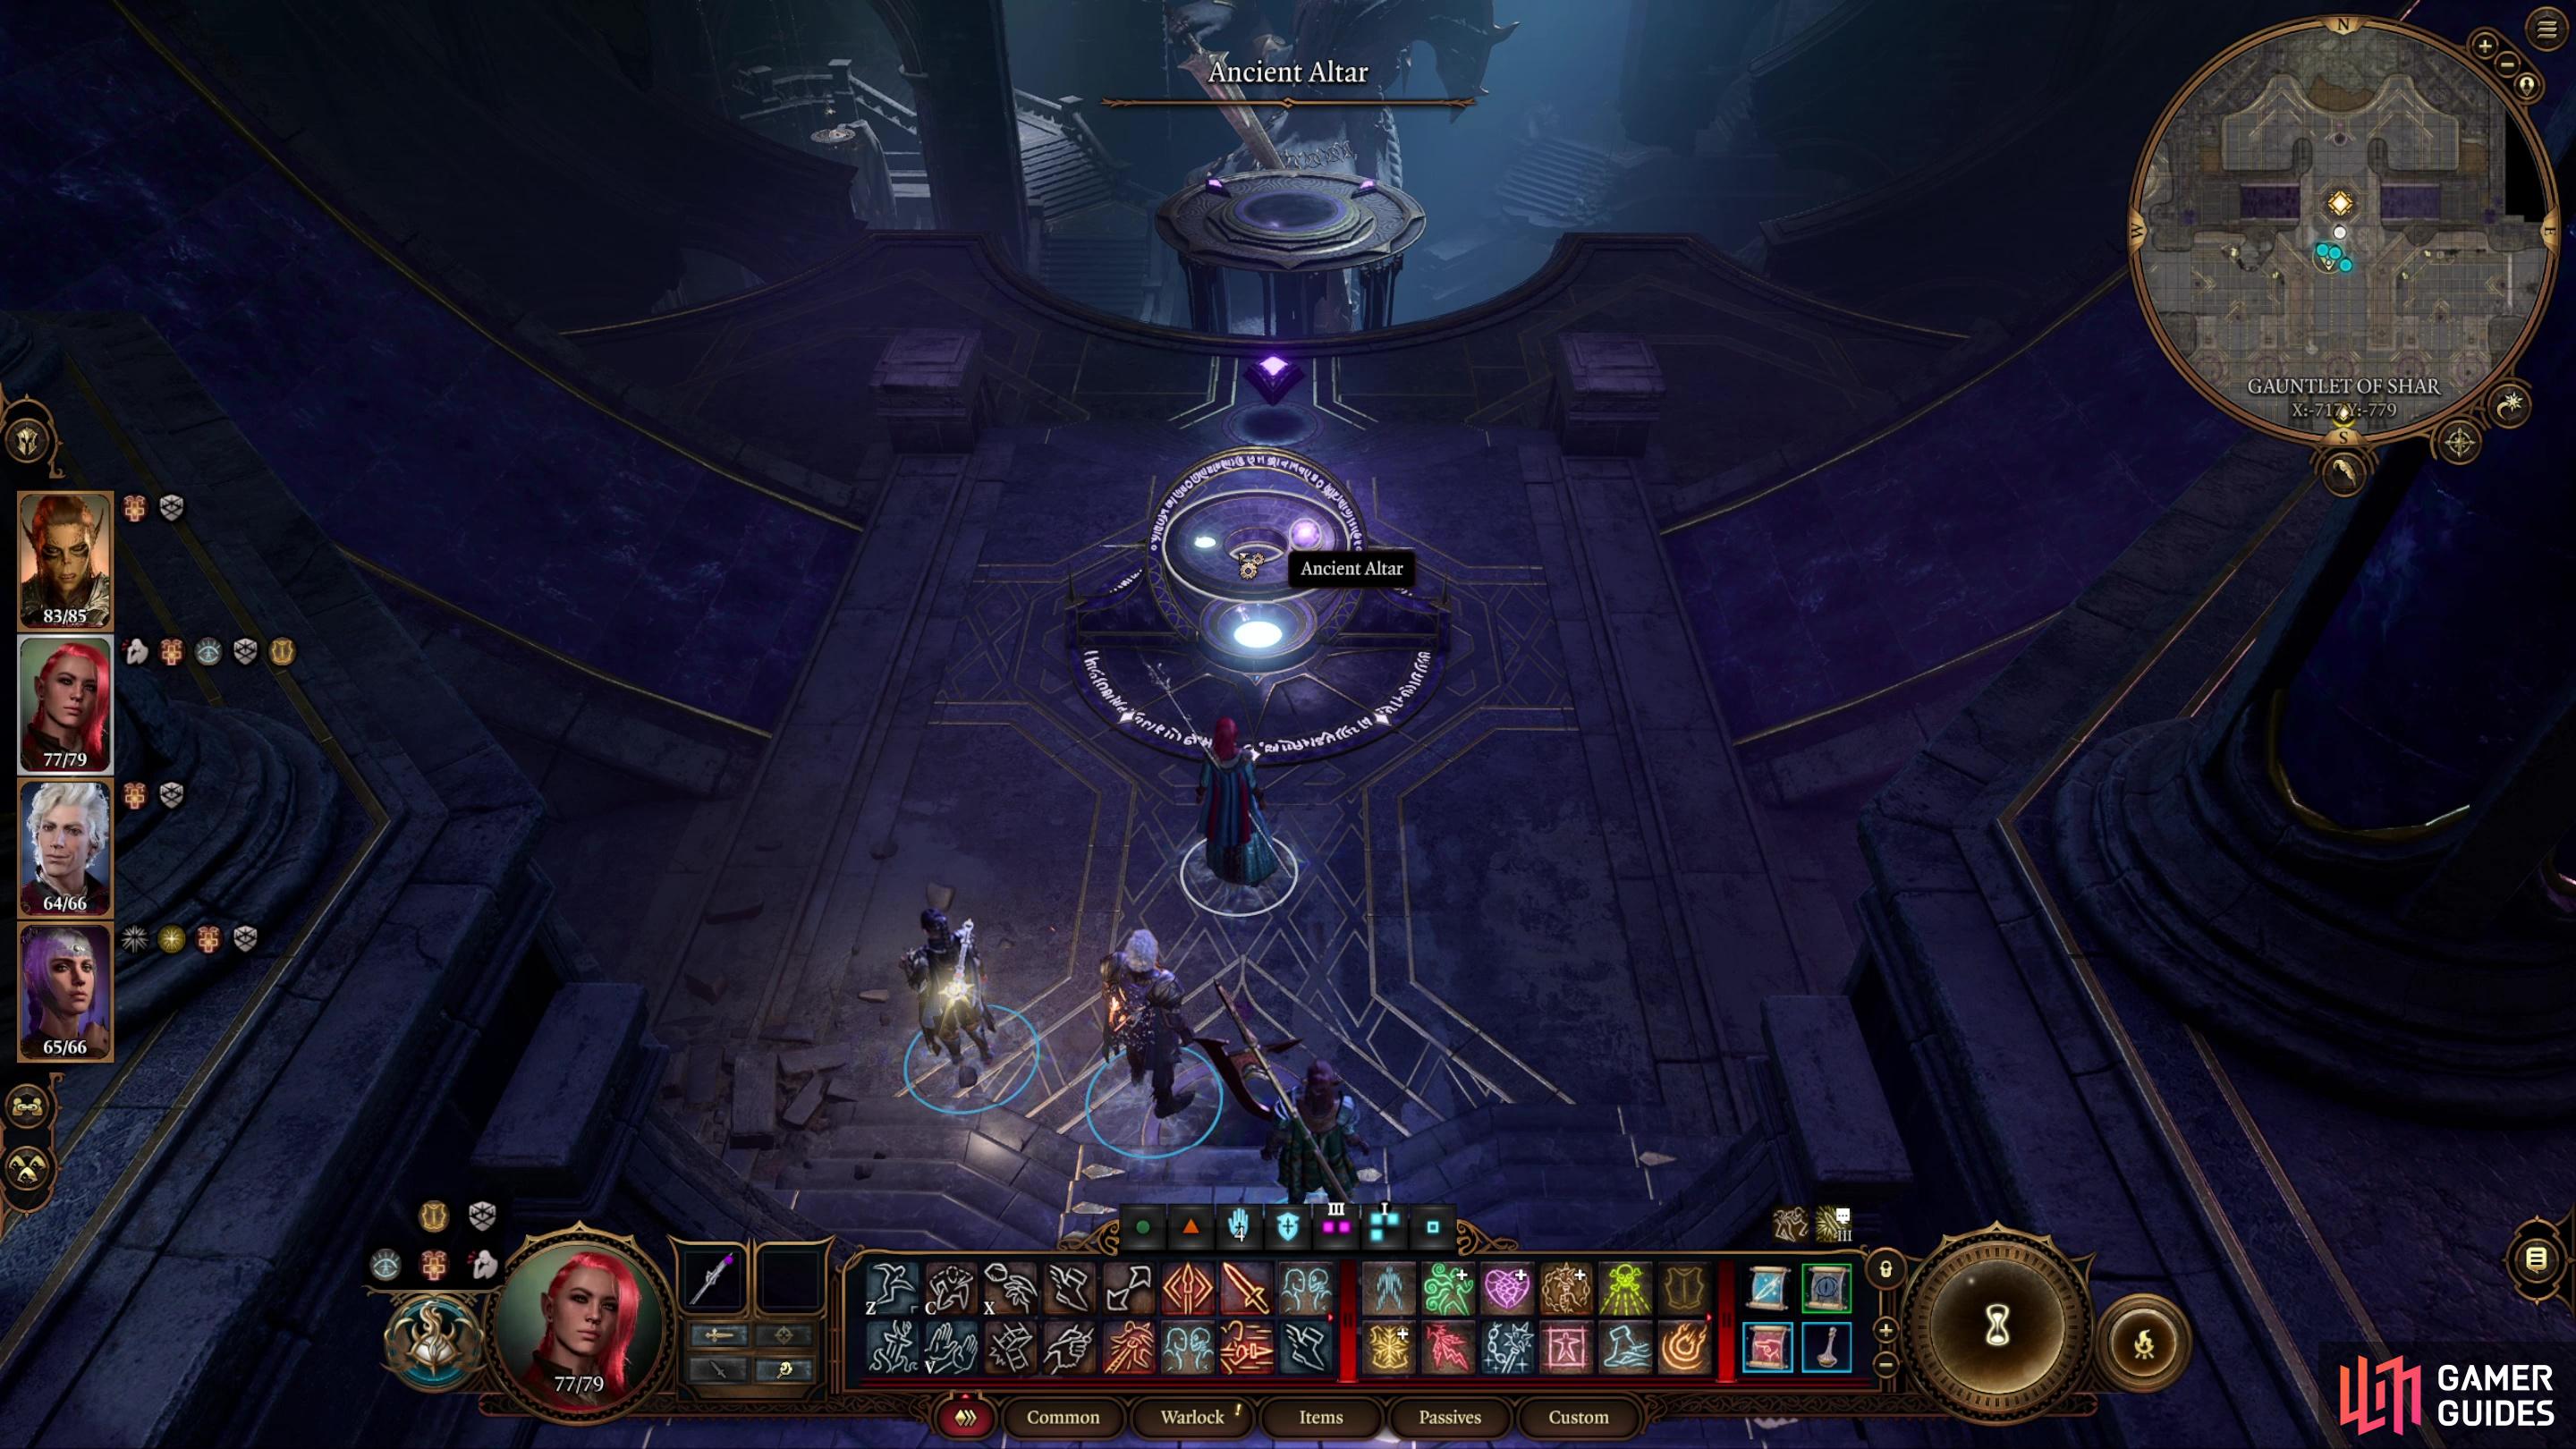
With that, we’re pretty much done (finally!) with the Gauntlet of Shar. Fast travel back to the Gauntlet of Shar waypoint and from there head upstairs to the east until you’re standing near the stairs leading down (south) to the statue of Shar puzzle. Go north down a flight of stairs to find an Ancient Altar, where you can socket one of the Umbral Gems. This will summon a lift that you can ride down to another door, in front of which is another device that requires three Umbral Gems. Socket in all the Umbral Gems you possess, and the door should open, allowing you to advance until you find the entrance to the Shadowfell. You’ll get some chatter with Shadowheart here (avoid reading her mind - Shar is a nark) after which you’ll be able to enter the Shadowfell and find this enigmatic Nightsong.
Now that you’re done with the Gauntlet of Shar, check out the following pages to tidy up Act 2:
No Comments