


Search and Destroy starts immediately after Play it Safe ends. Following Takemura’s meeting with Hanako and your escape from the parade grounds, Takemura will call you and tell you to urgently meet with him… for obvious reasons.
No sense in putting it off, follow the quest trail to the abandoned apartment building where Takemura has taken his prize. Along the way he’ll text you and will very specifically tell you to knock four times. This is actually important, and you’ll be expected to remember it.
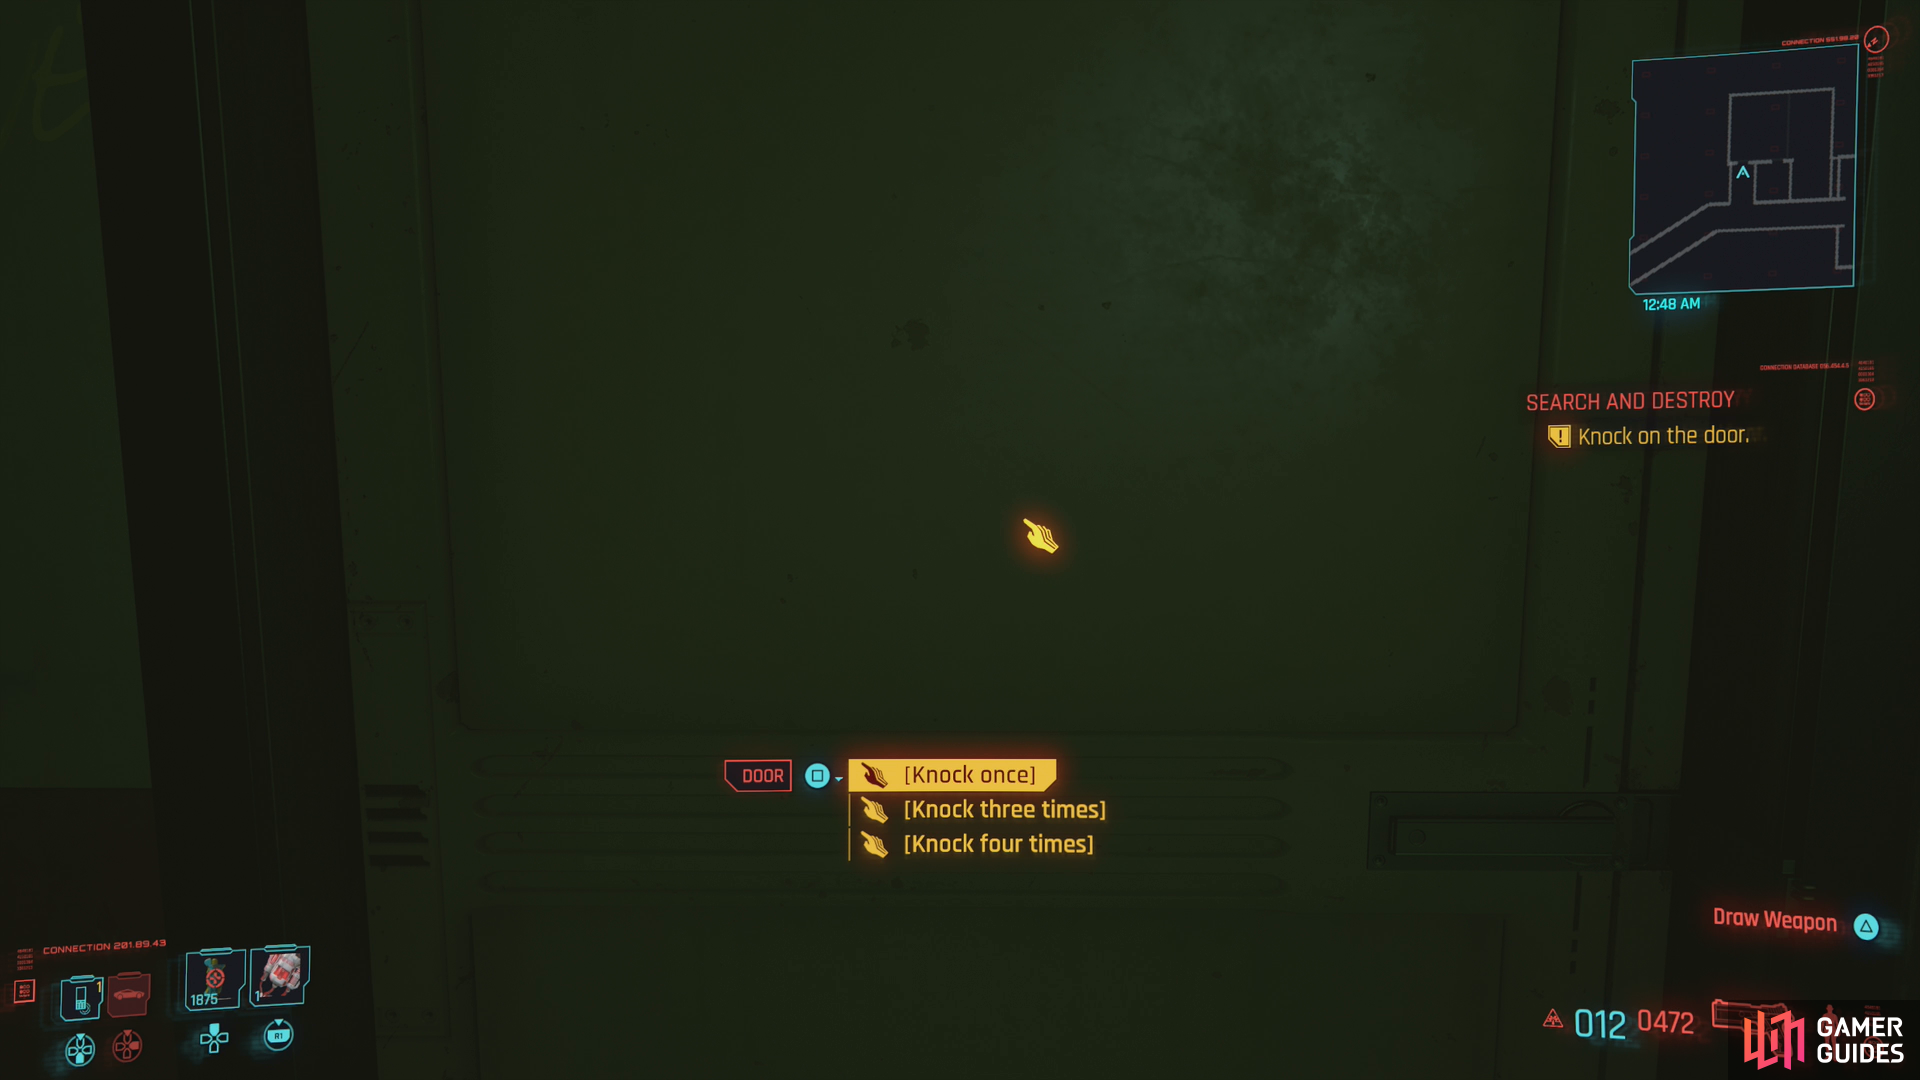
When you get to the apartment, you’ll get a choice with how to knock.

If you fail to knock four times as Takemura told you to, it’ll end poorly for you.
When you arrive, enter the apartment and follow the quest trail until you reach the apartment door, where you’ll get the option to knock one time, three times, or four times. If you don’t follow Takemura’s instructions and knock four times, the paranoid soldier will greet you with death, so best to follow his instructions and pick the option [Knock four times].
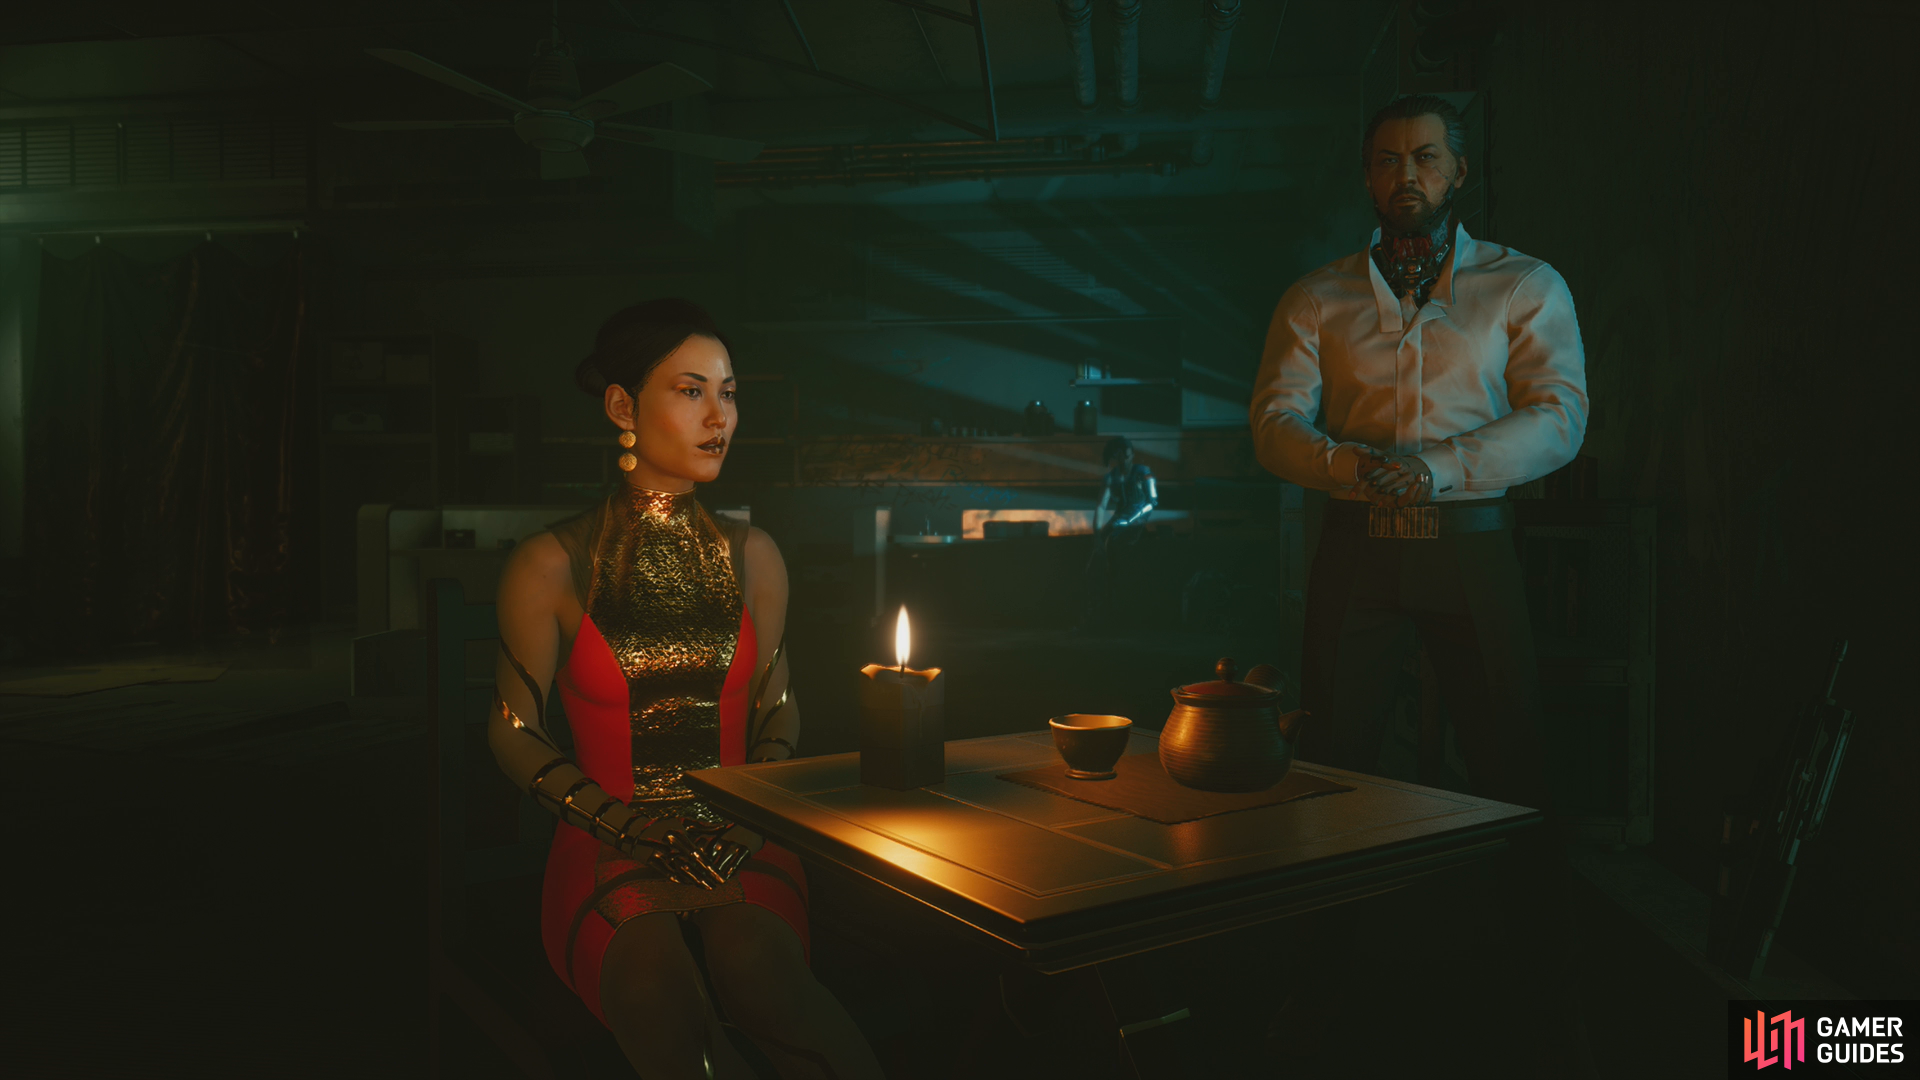
Talk with Takemura, then sit down and talk to Hanako. Before anything is determined, however, you’ll be sent to check out some noises in the hallway. It goes about as well as you might expect.
You’ll come to a short while later, with Johnny exhorting you to flee, while V mentions helping Takemura. Head forward through the lower part of the apartment building and when you see a neon blue cross on the wall you’ll get a chance to make a decision that, while unstated in your objectives, impacts how the story plays out: return to help Takemura, or abandon him and escape.

Escape
If you just want to get out of here, Takemura be damned, head right at the blue cross and basically just follow the quest trail. Along the way you’ll have to fight through a squad of heavily-armed Arasaka Assault Squad Soldiers. There will be several down the ruined rooms after you turn right, but you also need to be wary of some Arasaka goons in a nearby hallway. They normally wouldn’t be an immediate problem, but the walls aren’t entirely whole anymore. There’s also an Arasaka Netrunner blocking your path, who will make prolonged, cover-based firefights difficult.
Stealth, as usual, is handy here, but difficult due to the enemy numbers, density, and the fact that they’re already alerted. Stealth headshots with silenced weapons might be the most you can hope for here, although if your quickhacking ability is good, you can always soften up enemies with stealth quickhacks like Contagion.
We also mustn’t ignore loot: in the room just to the right of the blue cross you can find a container with a legendary drop (for us it was a Sandevistan: Arasaka Software mod) and two Access Points ([Intelligence 3] and [Intelligence 6].
Once you exit the front doors you’ll have another relic malfunction. Johnny will encourage you to keep moving and time will skip forward.
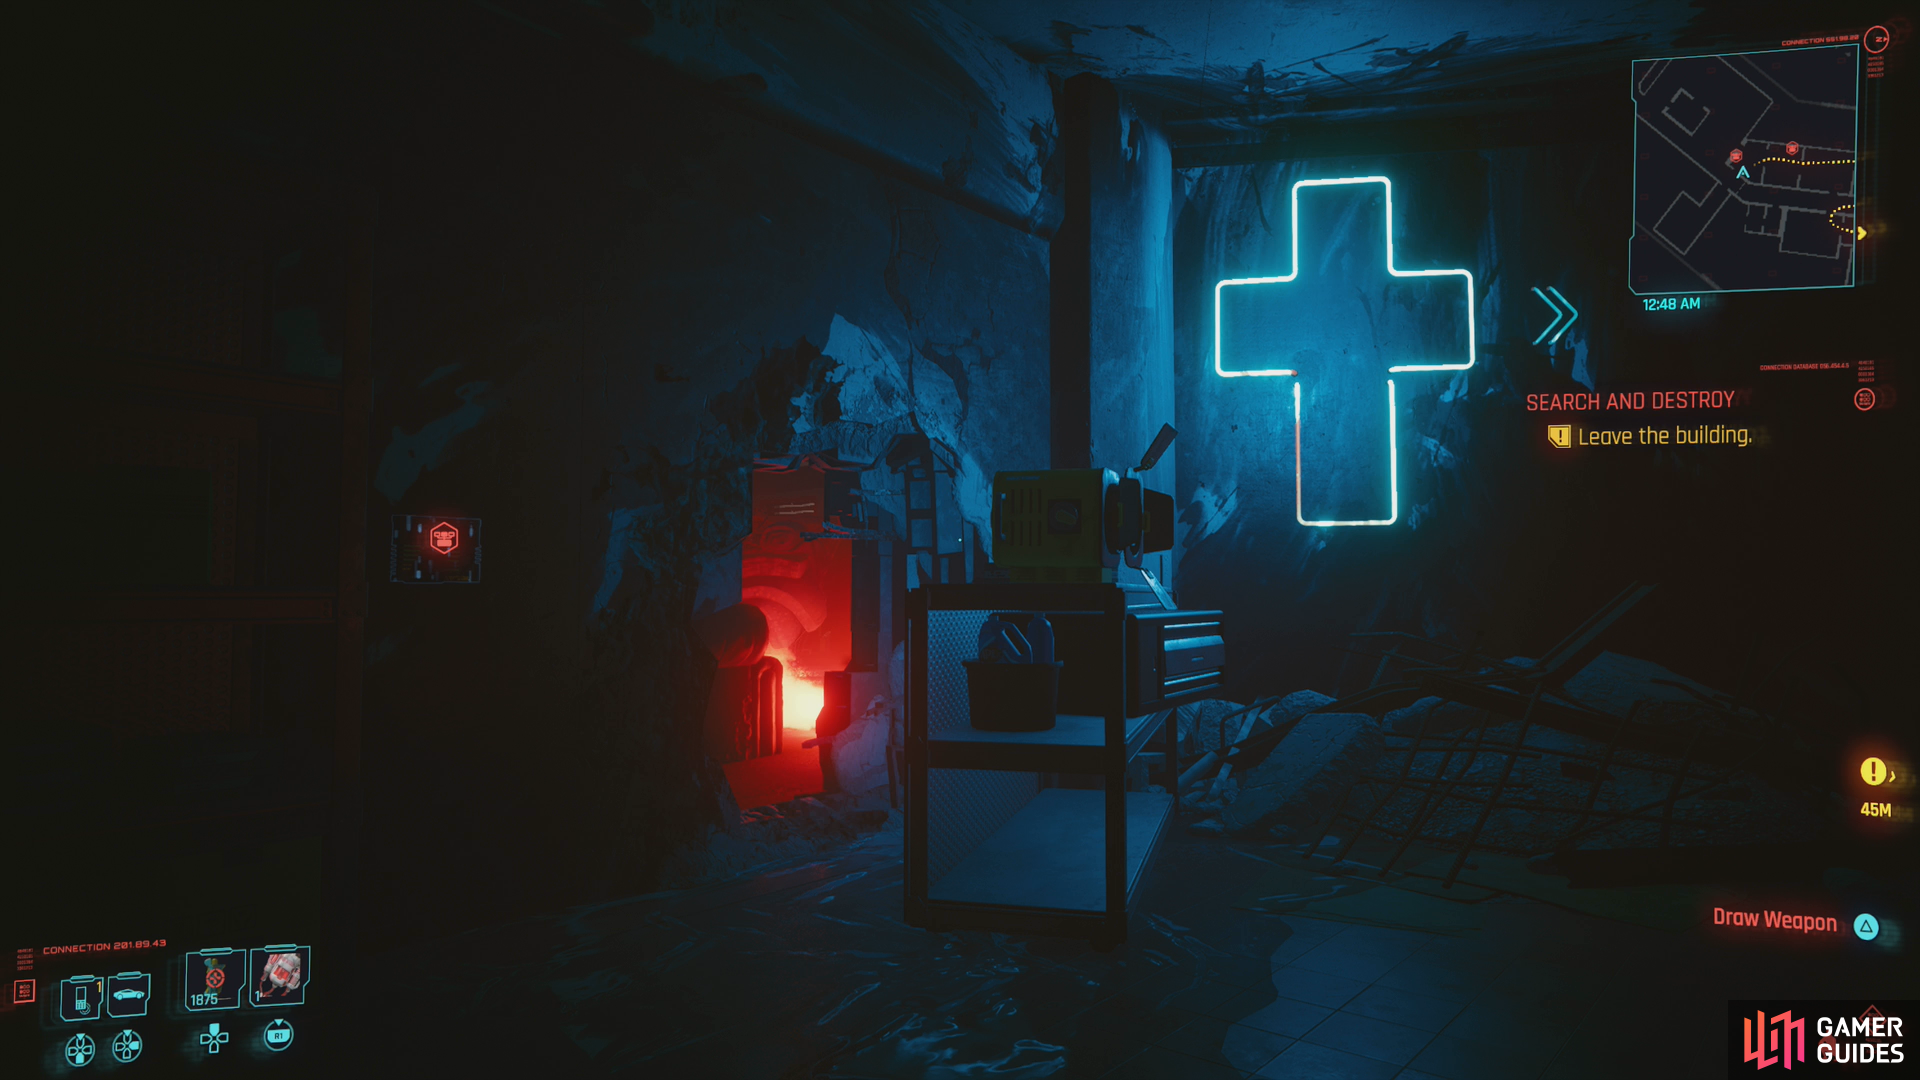
Rescue
If you want to rescue Takemura, go left through a hole in the wall at the neon blue cross (there’s an Access Point [Intelligence 3] on the wall right next to this hole). Be wary when you cross through, however, as there are a ton of Arasaka soldiers beyond this hole. If you end up in combat, expect to be facing off against at least a half dozen of them. Their numbers, obviously, make stealth difficult, although much can be done with the benefit of legendary Ping. They also can’t chase you through the wall, so you can take potshots with a silenced weapon as long as you have a vantage on some unfortunate target. The walls are also thin enough to allow for tech weapons to easily penetrate. Lots of cheap ways to go about dispatching the Arasaka troopers without exposing yourself to much danger.
However you clear it, pass through the large red room and exit into an adjacent hallway, where you’ll find two more Arasaka soldiers. At this point you can either continue across and head upstairs or you can turn right to find some double doors leading outside. Leaving the apartment via these doors functions just as if you exited after going right at the blue cross - you’ll abandon Takemura if you step foot outside.
Go upstairs and dust three Arasaka soldiers in the hallway, then reunite with Takemura in the room where you talked with Hanako. He’ll be engaging in combat with more Arasaka goons, and once they’re dead he’ll tell you that you can escape through some empty rooms “to the right”. Note that, instead of going left at the blue cross, sneaking through an enemy-filled red-lit room and climbing the stairs, if you have double jump (or an equivalent bit of cyberware) you can simply jump back up through the floors you fell through to reunite with Takemura.
Return to the hallway and kill any Arasaka troopers that confront you - they’ll spawn down both sides of the hallway, so don’t bother with subtlety, the time for stealth is over. Follow the quest trail and it’ll lead you through a doorway to the right, then go through some rooms and drop down a hole in the floor. Go downstairs and defeat the last group of Arasaka troopers waiting for you, then exit via some double doors - the Takemura escape route ultimately leads you out the same exit you’d take if you abandoned him, ironically enough.
Once outside you’ll have a relic malfunction, although instead of Johnny, Takemura will encourage you to go into hiding.
Laying Low at the Sunset Motel
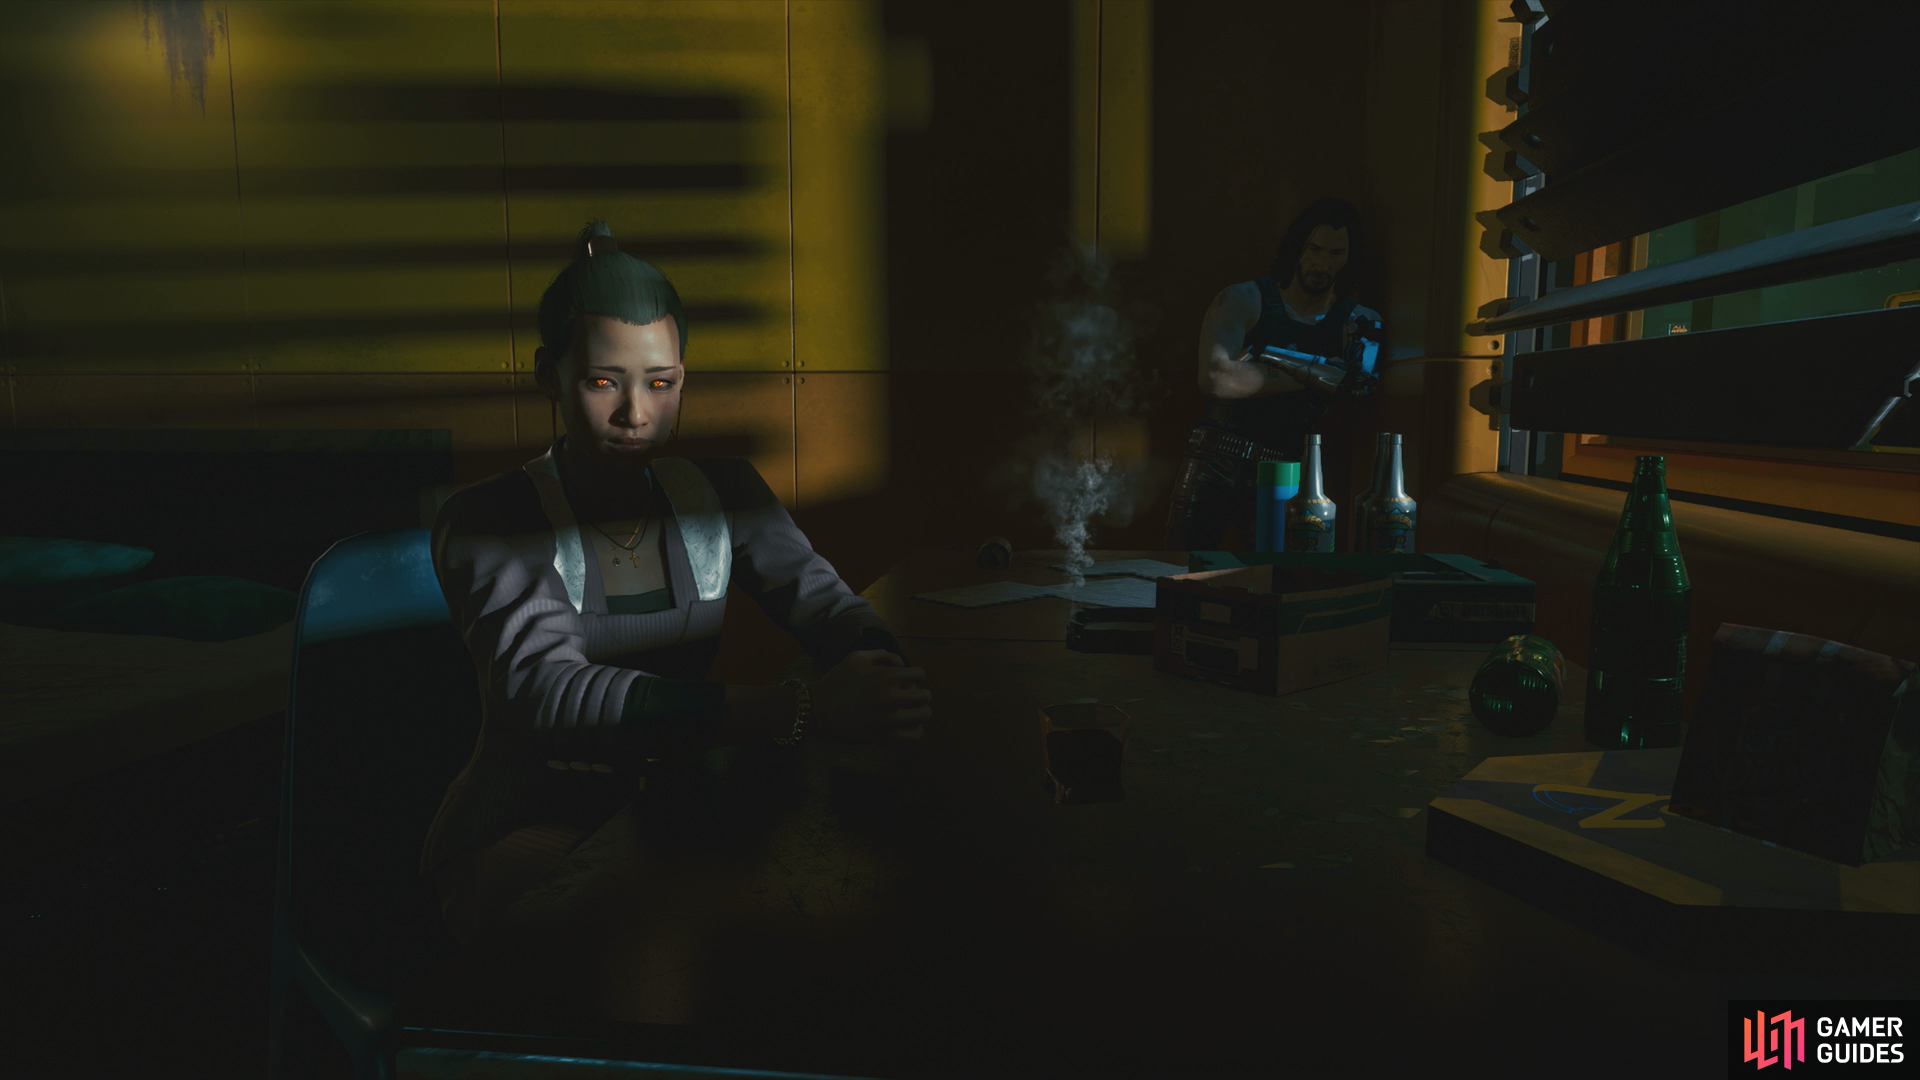
Whether you saved Takemura or not, time will skip forward and when the game resumes you’ll get to listen to Johnny serenade you with complaints. Respond to him how you will, and when there’s a knock at the door open it and you’ll have a chat - by proxy - with Hanako.
After she - or rather, her doll - leaves, exit the motel room to finish this job, and with it Takemura’s questline. The Main Jobs Nocturne Op55N1 and Tapeworm will begin as soon as you exit the motel, and while you’ll be compelled to finish Tapeworm first, Nocturne Op55N1 will lead directly into the endgame quests.
Nocturne Op55N1 is not the final Main Job in the game, but it is the point of no return. There are several possible endings to Cyberpunk, but you’ll have to have completed certain questlines to unlock some of them. Specifically if you want access to every possible ending, you’ll need to complete Panam’s questline (Riders on the Storm, With a Little Help from My Friends and Queen of the Highway), Johnny’s questline (Tapeworm and Chippin’ In and Rogue’s questline (Blistering Love). You also have to make friends with Johnny during Chippin’ In by picking specific dialogue options. Needless to say, a lot of endings run through Tapeworm and following jobs, so you should strongly consider doing those before continuing on towards the end of the story with Nocturne Op55N1.
No Comments