
After the dramatic events at the end of the Dog Eat Dog mission in Phantom Liberty, Hole in the Sky continues on from it. Now, you’re in a race against time to save the President who has crash-landed somewhere in Dogtown. Read below for a full walkthrough for the Hole in the Sky mission in the Cyberpunk expansion, Phantom Liberty.

Hello, Ms. President!
How to complete all Hole In the Sky Objectives
If you find yourself caught out at a specific objective, you can use these quick links to jump to the section you need:
Go to the Crash Site
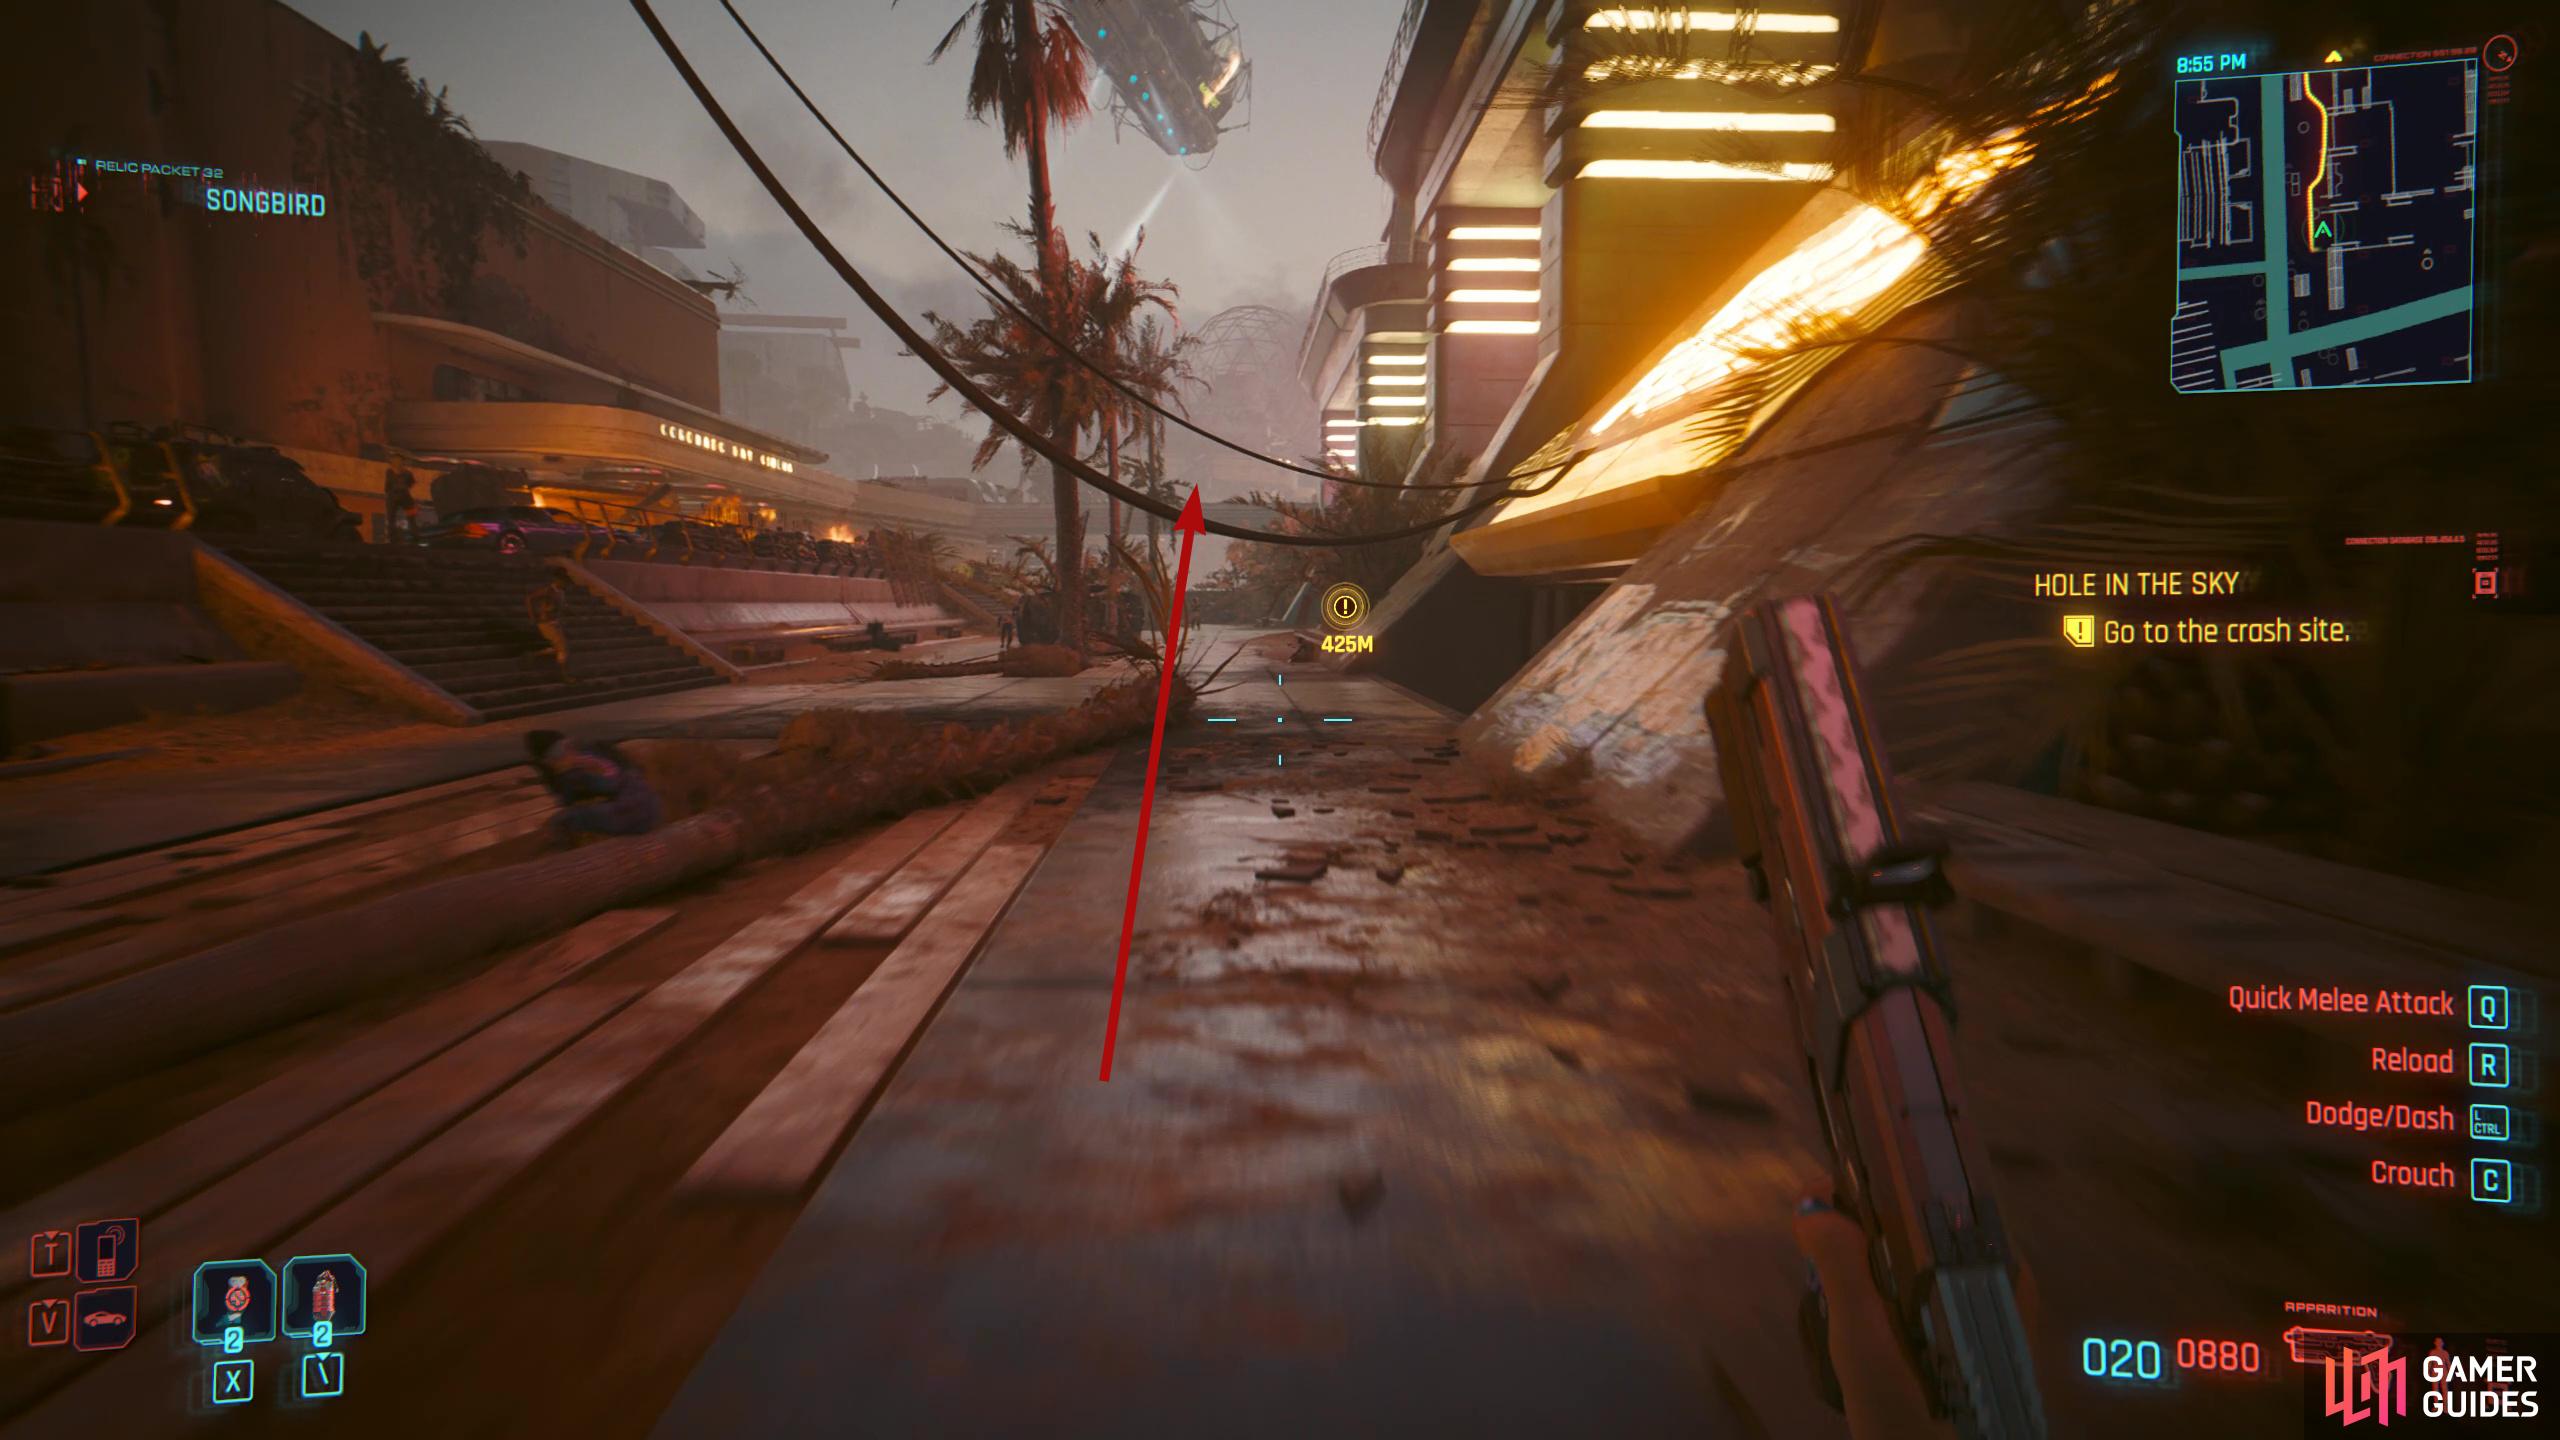
You’ll start off this mission on the streets of Dogtown. Although Songbird makes it sound like it’s the worst place on earth, it isn’t nearly that bad, although it sure isn’t pretty. You can pretty much run through the area unhindered providing you don’t go into a hostile area. From the start, Songbird will contact you, and tell you that she placed the President in a safe room on the plane before she ejected herself out of it.
After choosing your response to her (it doesn’t have any impact), she’ll tell you the plan is to extract the President and head to an apartment on Kress Street. Although she tells you to hurry, you can look around the area first if you want, and nothing will happen. When you’re ready to progress, follow the road west/southwest, and you’ll see multiple vehicles and aircraft heading in the same direction. You can’t do anything to them right now (I tried), so keep heading west/southwest until you reach the objective.
Follow the road until you get approximately 70M away from your objective.
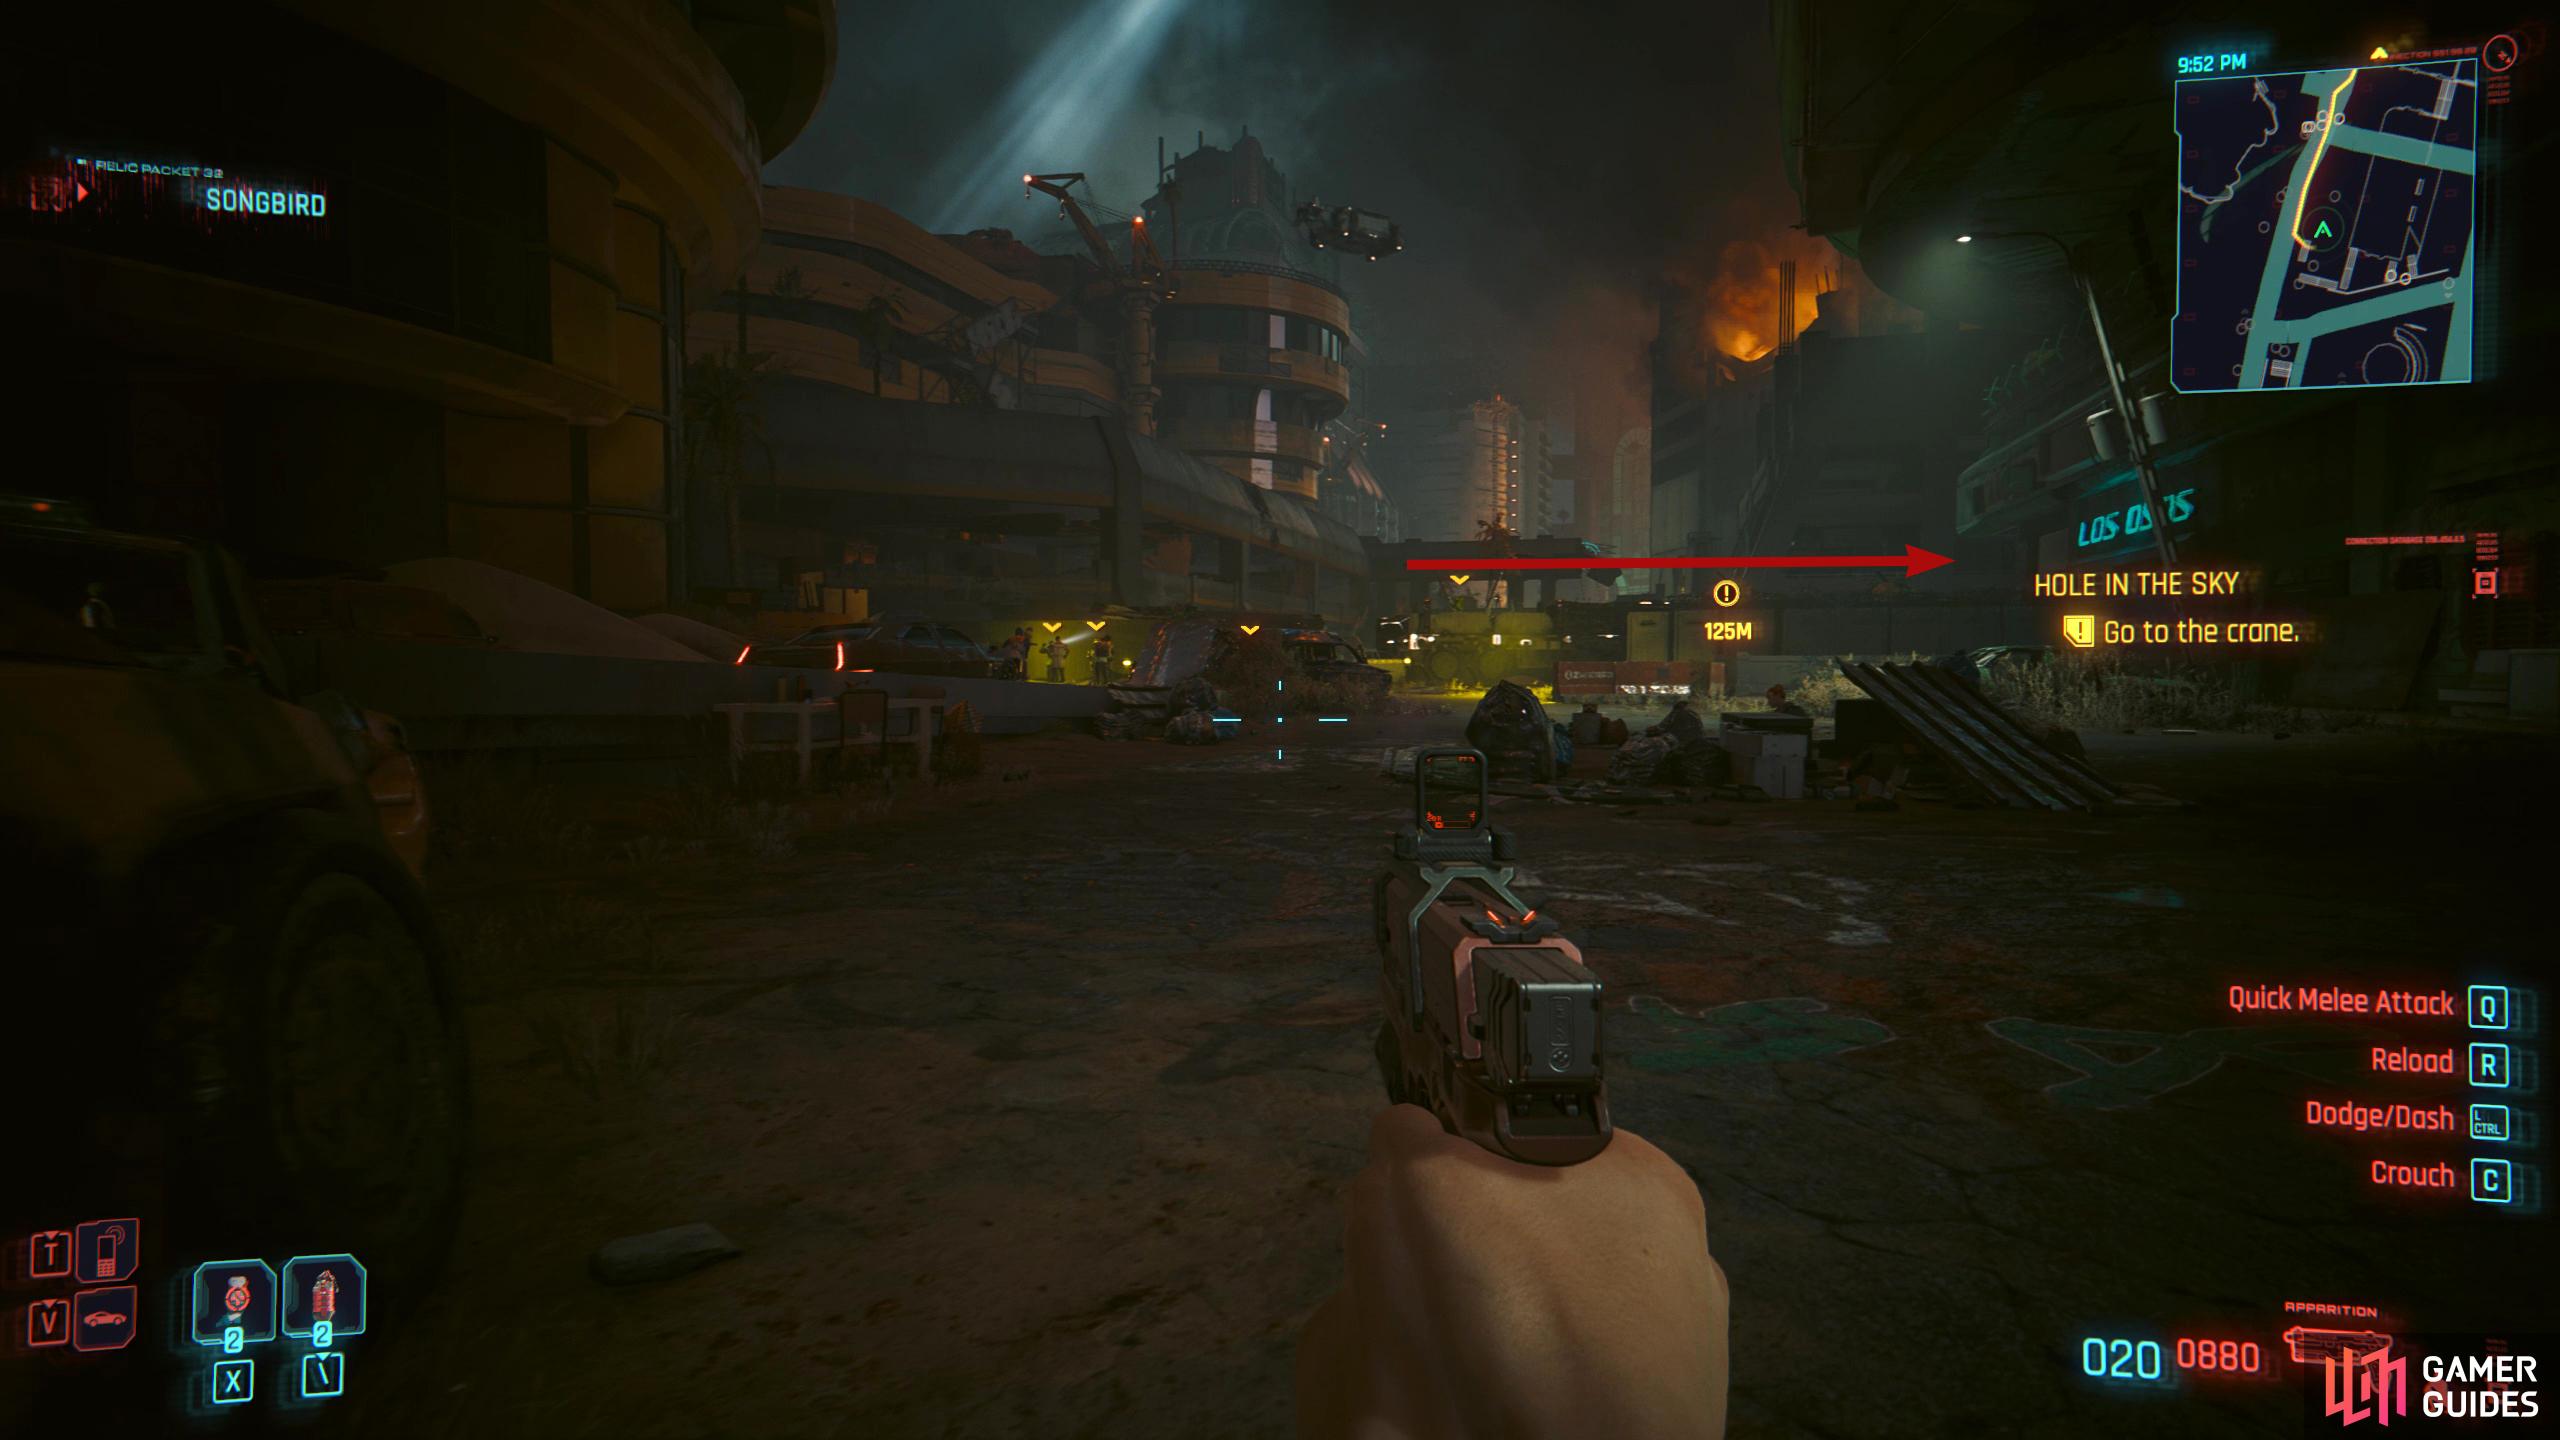
Then head into the building on the right to bypass the guards.
Go to the Crane
When you get about 60-70M away from the objective, enter the building on your right from the back to avoid the enemies on the street. This area is hostile, so be on your guard. Follow the path around the corner, but be careful of the enemy there. Ideally, you want to take the enemies out here in stealth otherwise you’ll have a whole army on you. If you slowly creep toward the guy while hugging the right wall, you should be okay. When you get close, grab him, and throw him in the dumpster.
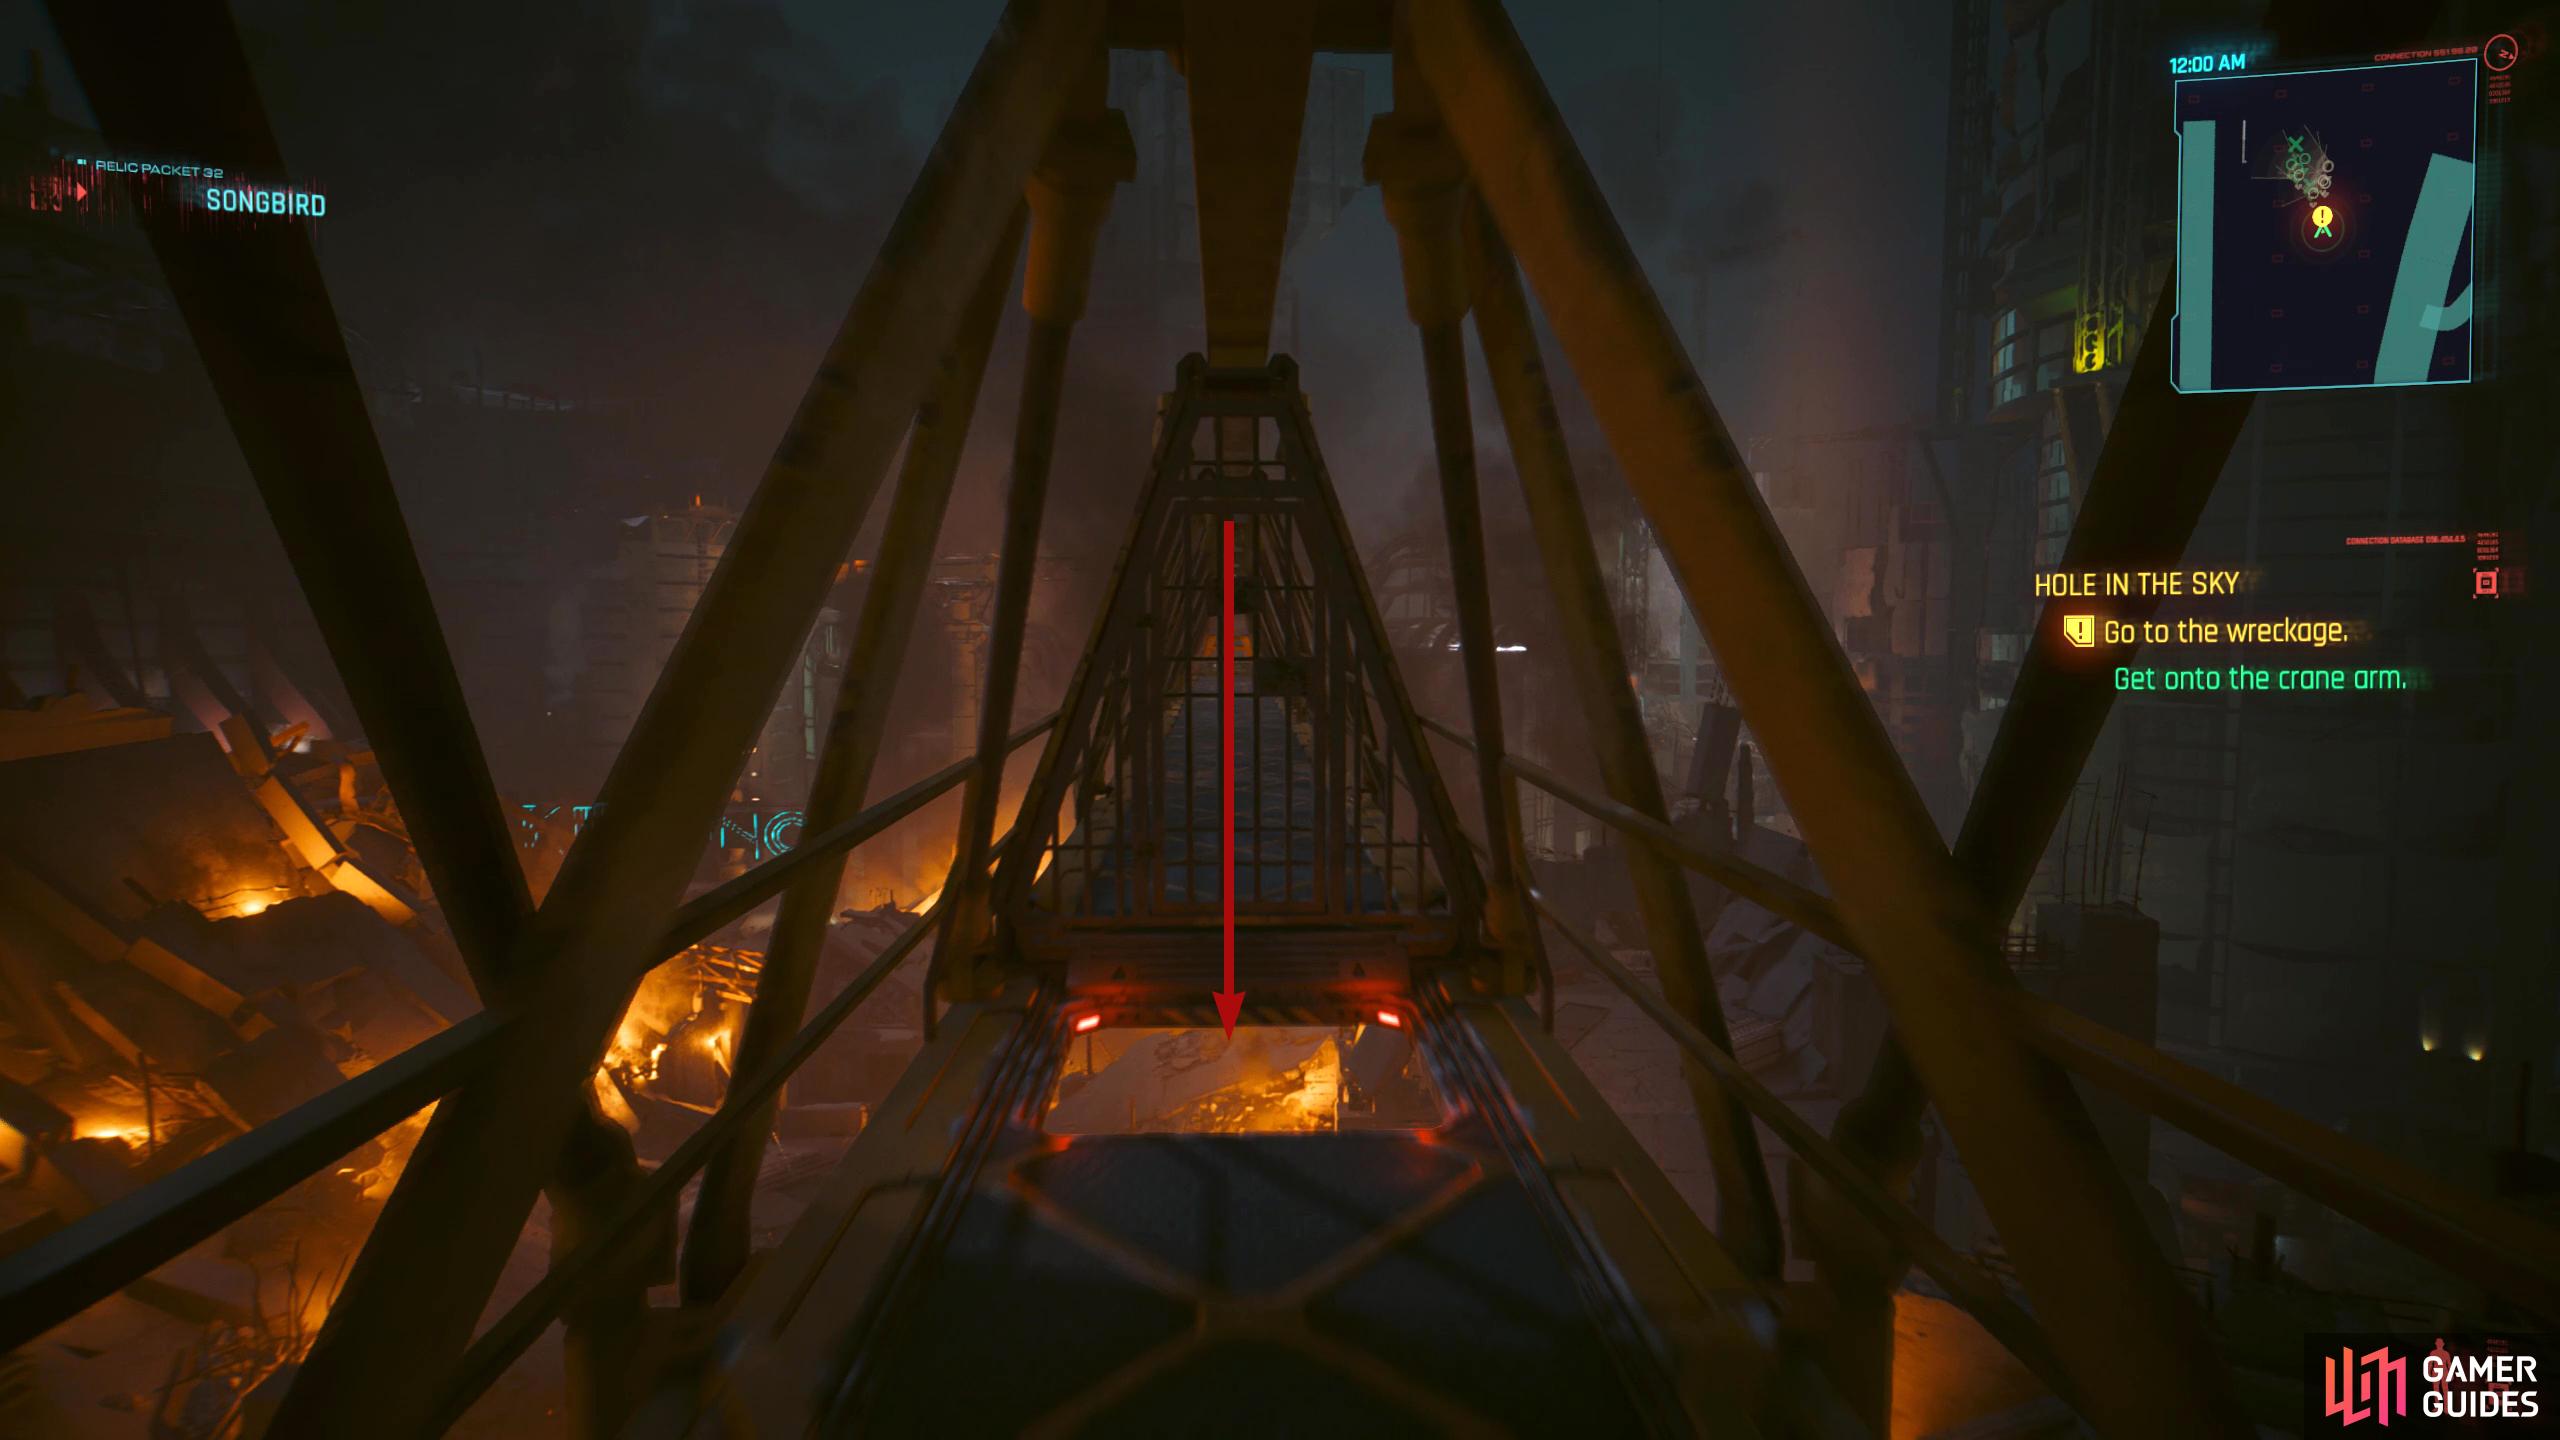
Continue following the path and go over the makeshift bridge while keeping an eye on your surroundings for other guards. There is one in the other building who can spot you for example, so stay low, and use the environment to avoid detection. As you reach the end of the path, Songbird will mention to you to scale the scaffolding. This isn’t the one on your left, but the one to your right.
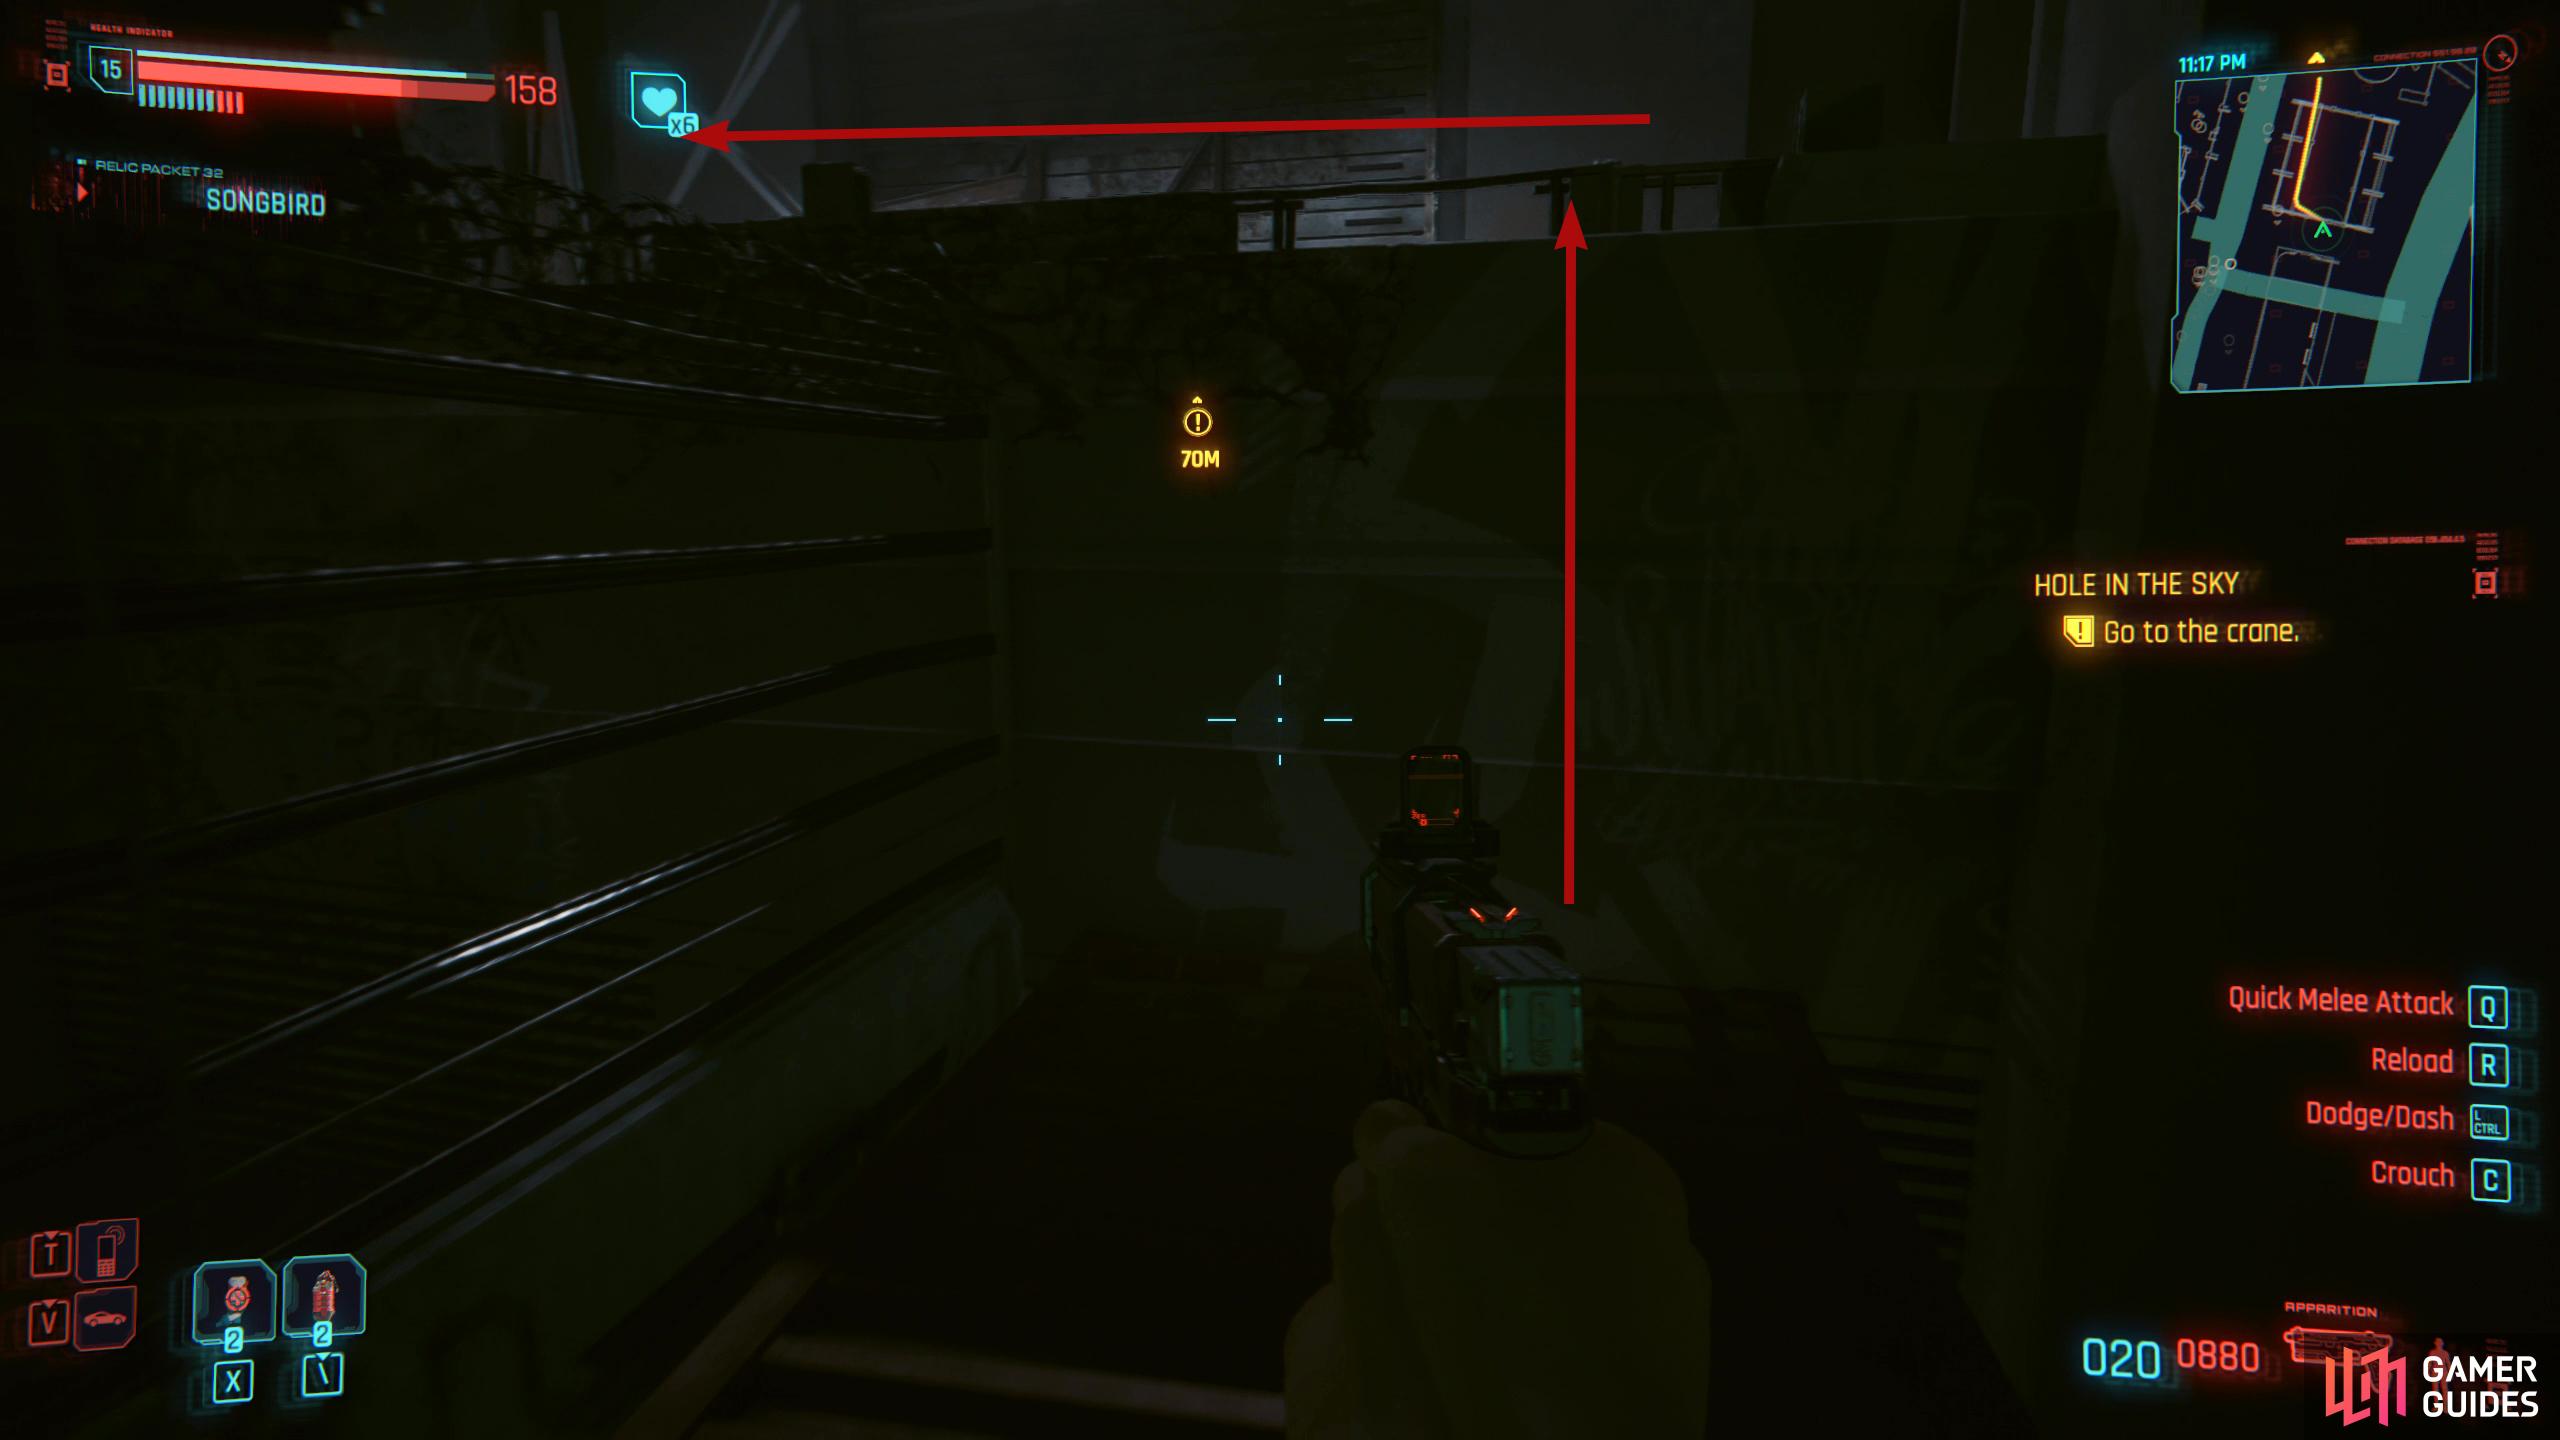
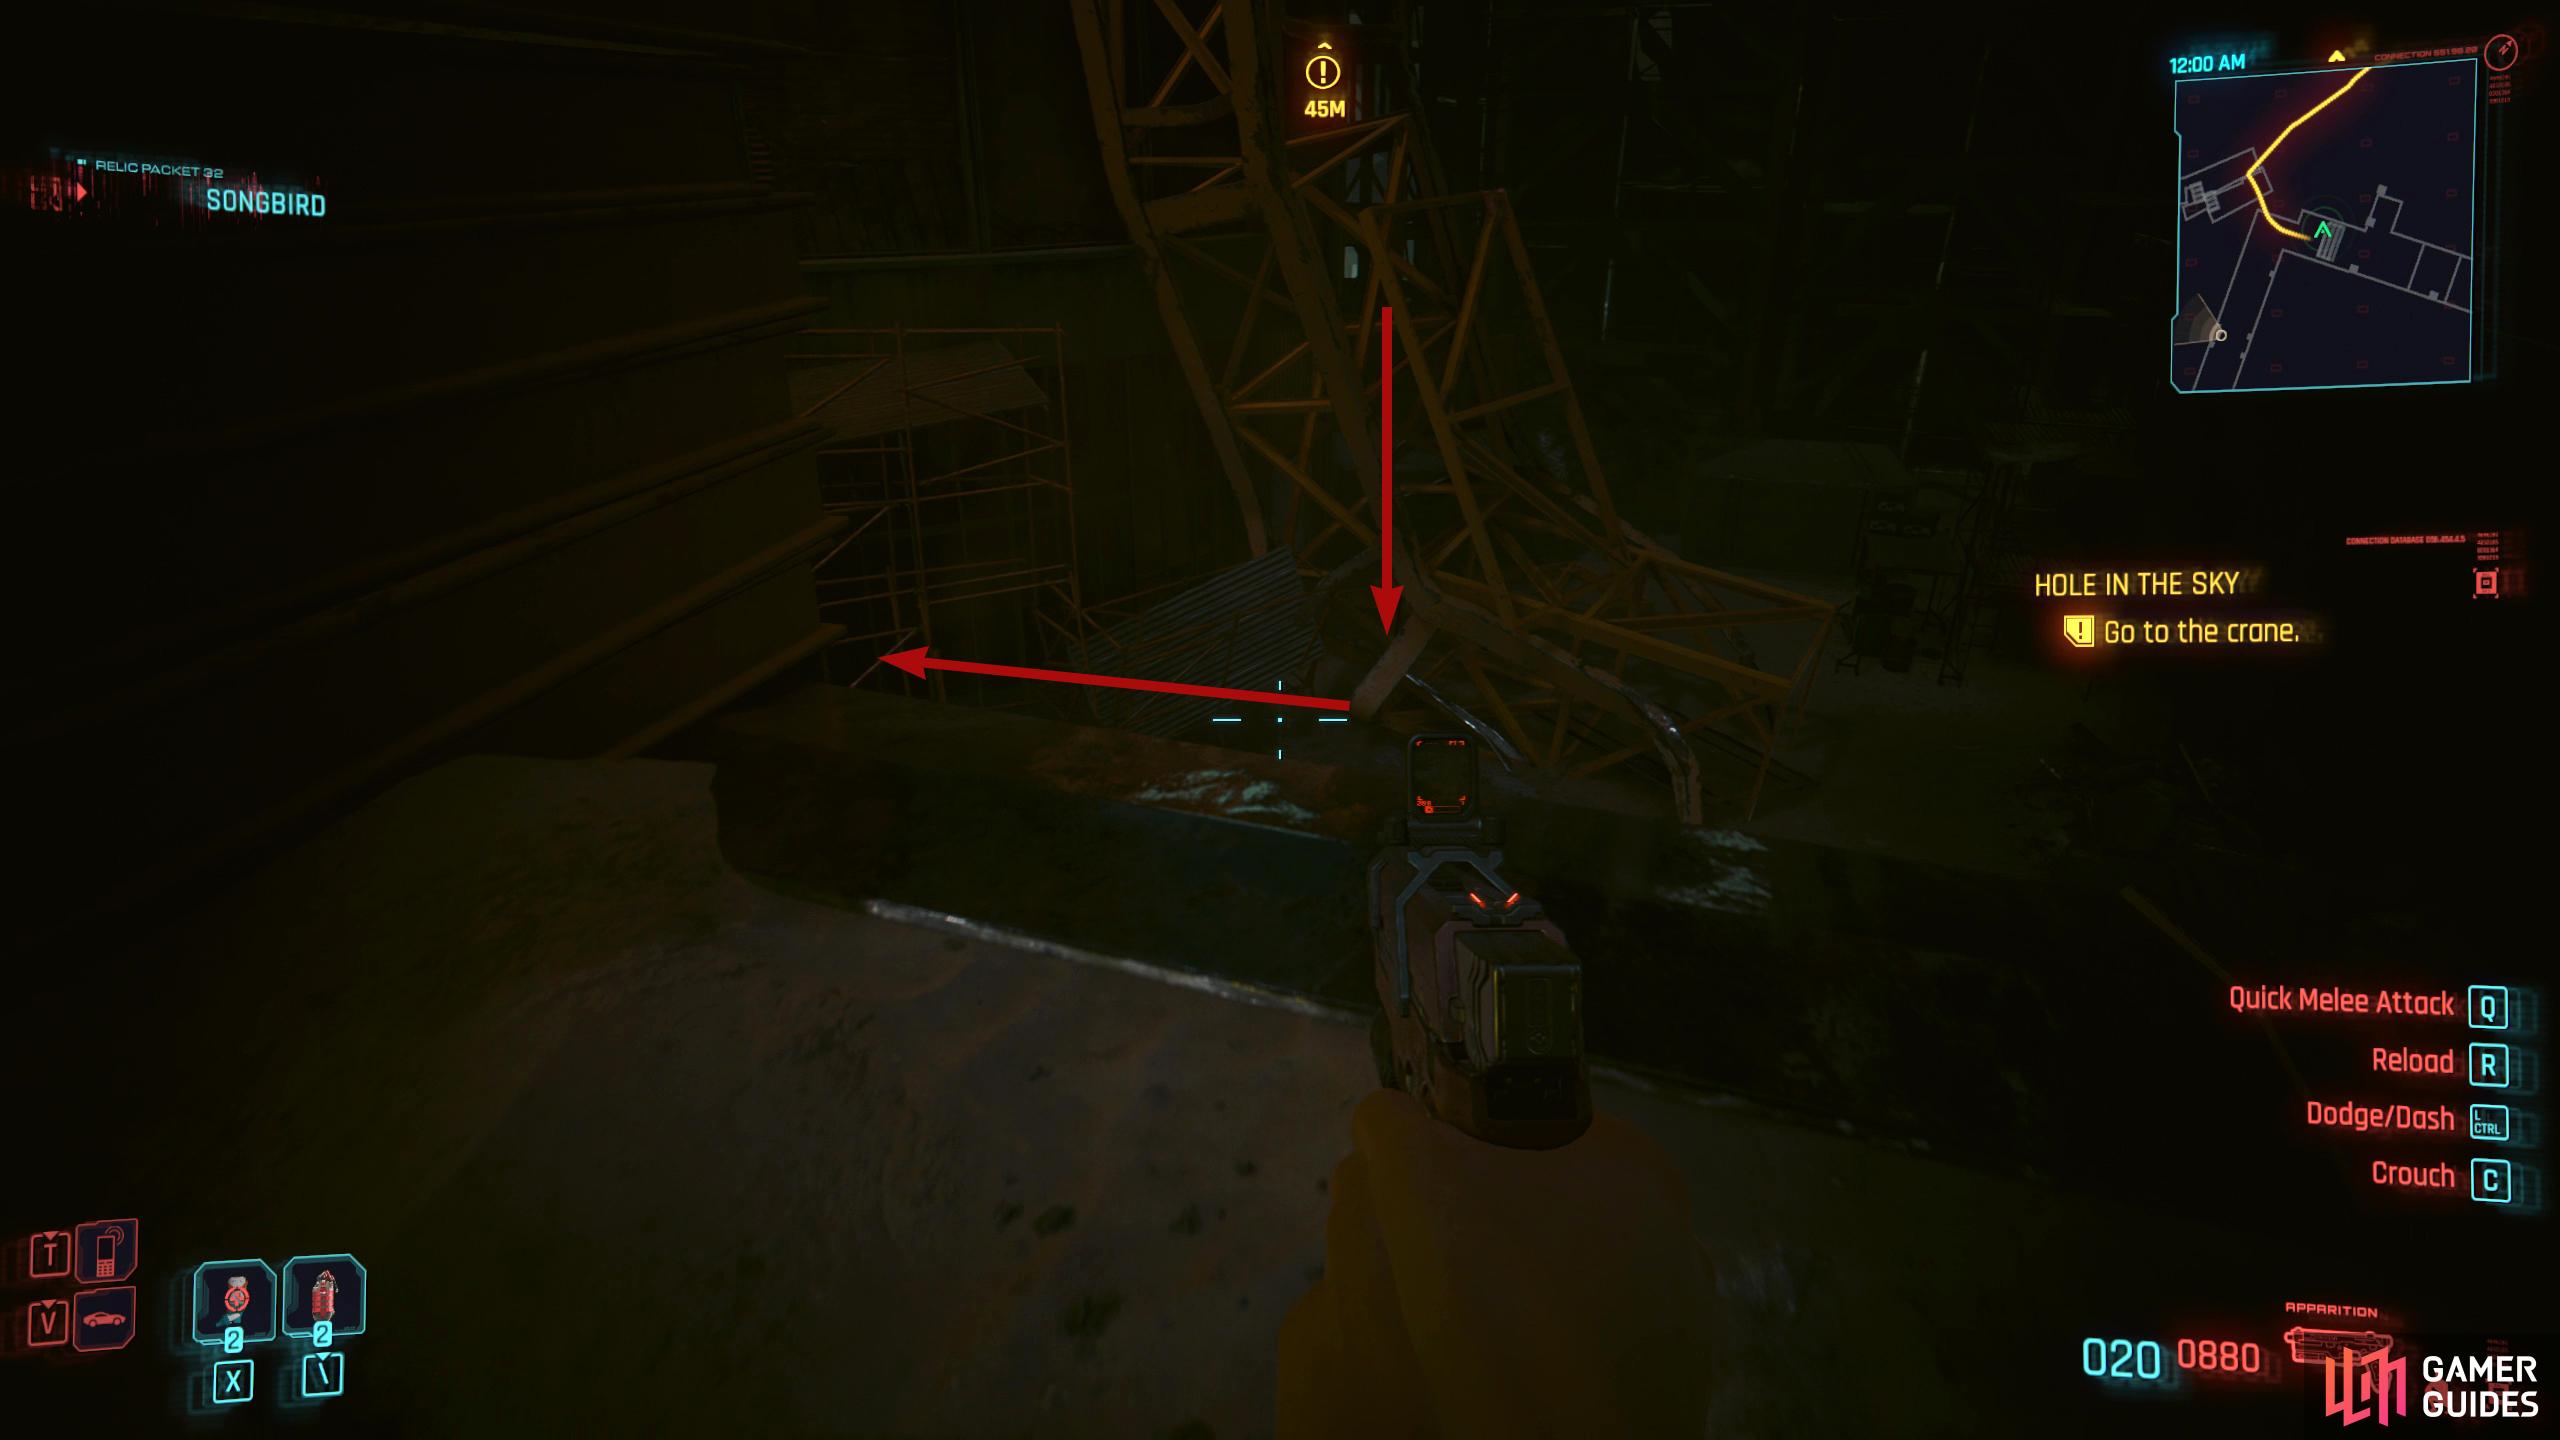
Drop to the floor below, and pick up the loot to your right before going up the stairs to your left. As you approach the stairs, the area will become hostile again. Make your way up to the top, climb the stack of pallets to reach the ledge of the building, and head up the small set of stairs to your right. Now, jump up, grab the grate hanging out of the crane, and follow it to the end where you’ll find another set of stairs. Climb up the ladder and Songbird will speak to you for a bit. You’ll have a dialogue option, but it won’t have any impact, and then she’ll tell you to hop on to the Crane Arm.
Go to the Wreckage
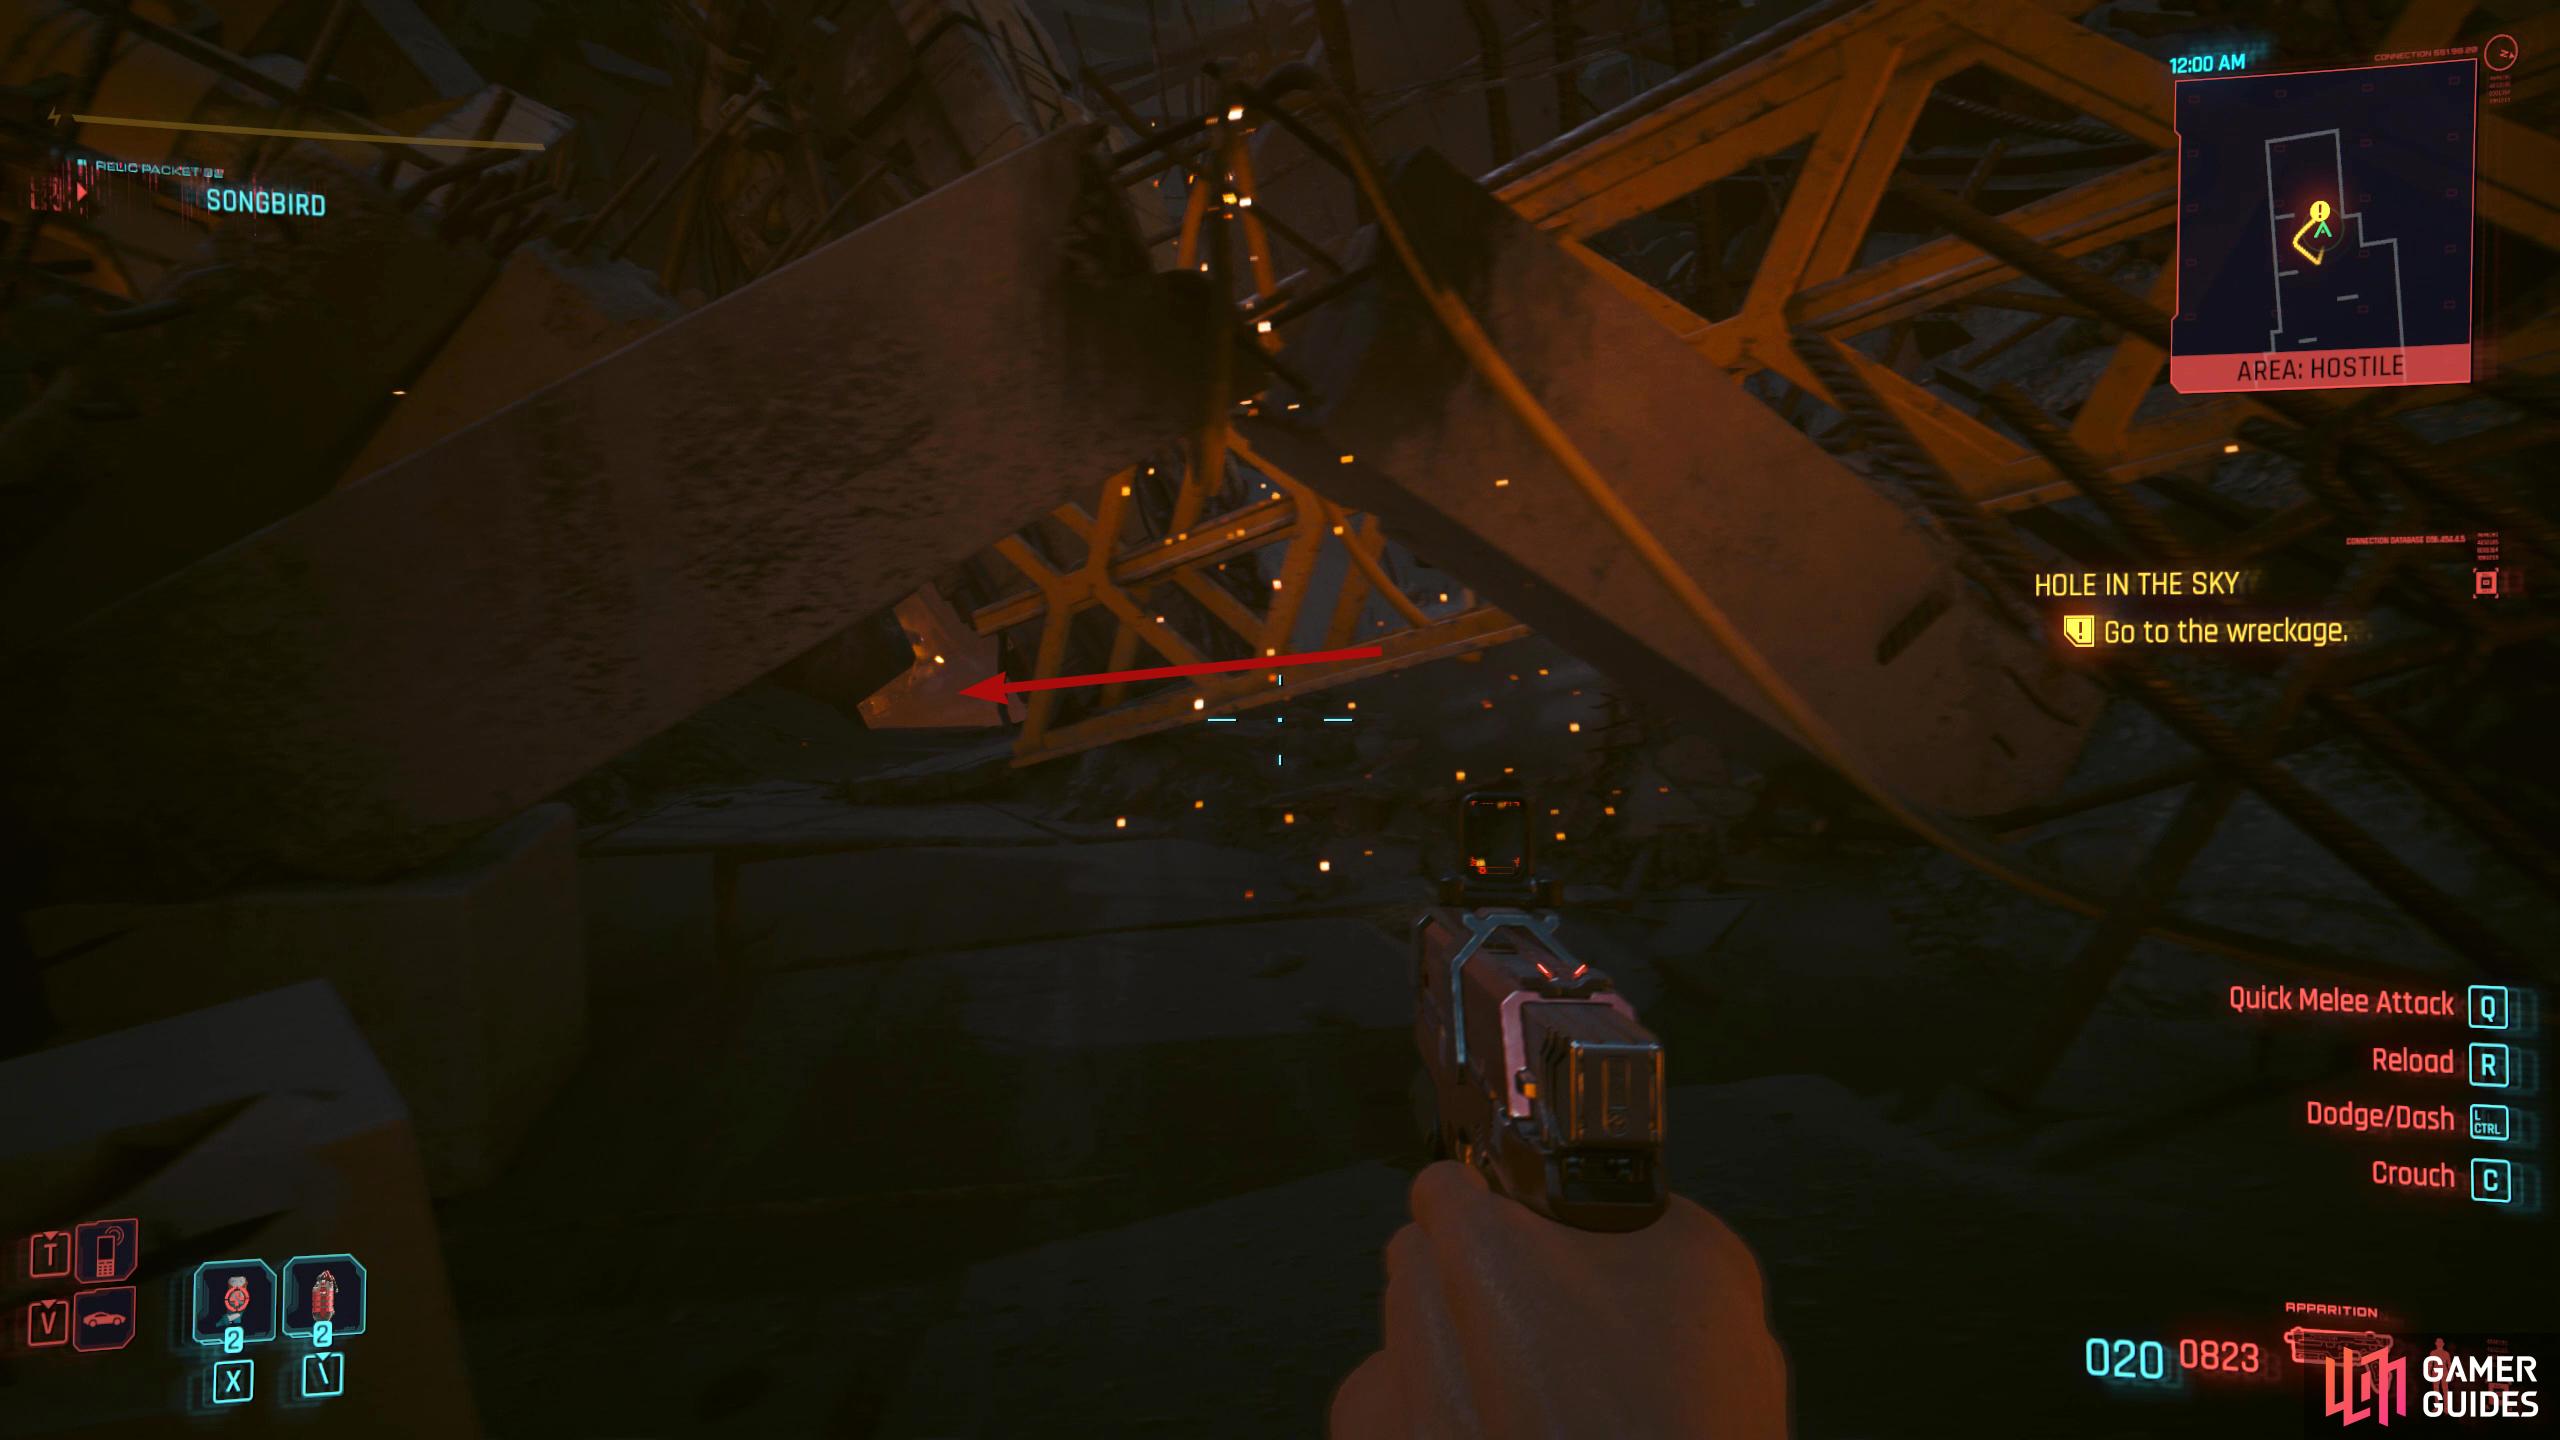
Go up the ladder to your right, walk halfway up, and drop through the hole to the floor below. Now, you’ll have a huge battle on your hands. There are a lot of enemies here, and the safest spot to deal with them is arguably where you are, but be aware of the enemies who’ll try to flank you, or throw grenades your way to get you out of cover.
Obviously there isn’t a perfect way to do this part as there are too many variables from your difficulty to your playstyle, but we recommend using a Sniper for headshots if you have one, a Shotgun for the flankers, and using your grenades freely as they are infinite now. If you use quickhacks, Weapon Glitch is great, especially for the flankers, and Overheat/Synapse Burnout is all good. Slowly take down the enemies, and when you’re done, head forward and drop into the crater.
There will be some more enemies at the end of the path, so use the nearby pillars and walls for cover. Defeat them, and head forward some more where you’ll find the enemies fighting against the President’s robots. Use this distraction to get a few free kills before taking out the rest. Keep edging forward, use the cover provided, and start whittling down the enemy. When they’re defeated, head forward under the broken pillar, and into the next area.
Did you think that was it? Well, you were wrong. There are even more enemies here, although if you’re sneaky, you can take some of them out with stealth. Head right, take out the guards, and head into the building. As you head around the corner, another two enemies will be in your way. If you can, sneak around to take them out, but most likely, you’ll get spotted, and if you are, shoot them in the face. Once they’re dealt with, make a dash to the plane where you’ll find the President, Rosalind Myers.
(1 of 3) Head under the broken pillar to the next area where you’ll find some more enemies.
Find Rosalind Myers
Head to the opposite end of the plane while picking up the loot along the way, and interact with the door for a short scene. You can punch her if you want as it won’t matter, then you’ll have five seconds to tell her who you are. Select any option, and she’ll apologize for hitting you. Now, all you have to do is defend her against the incoming enemies.
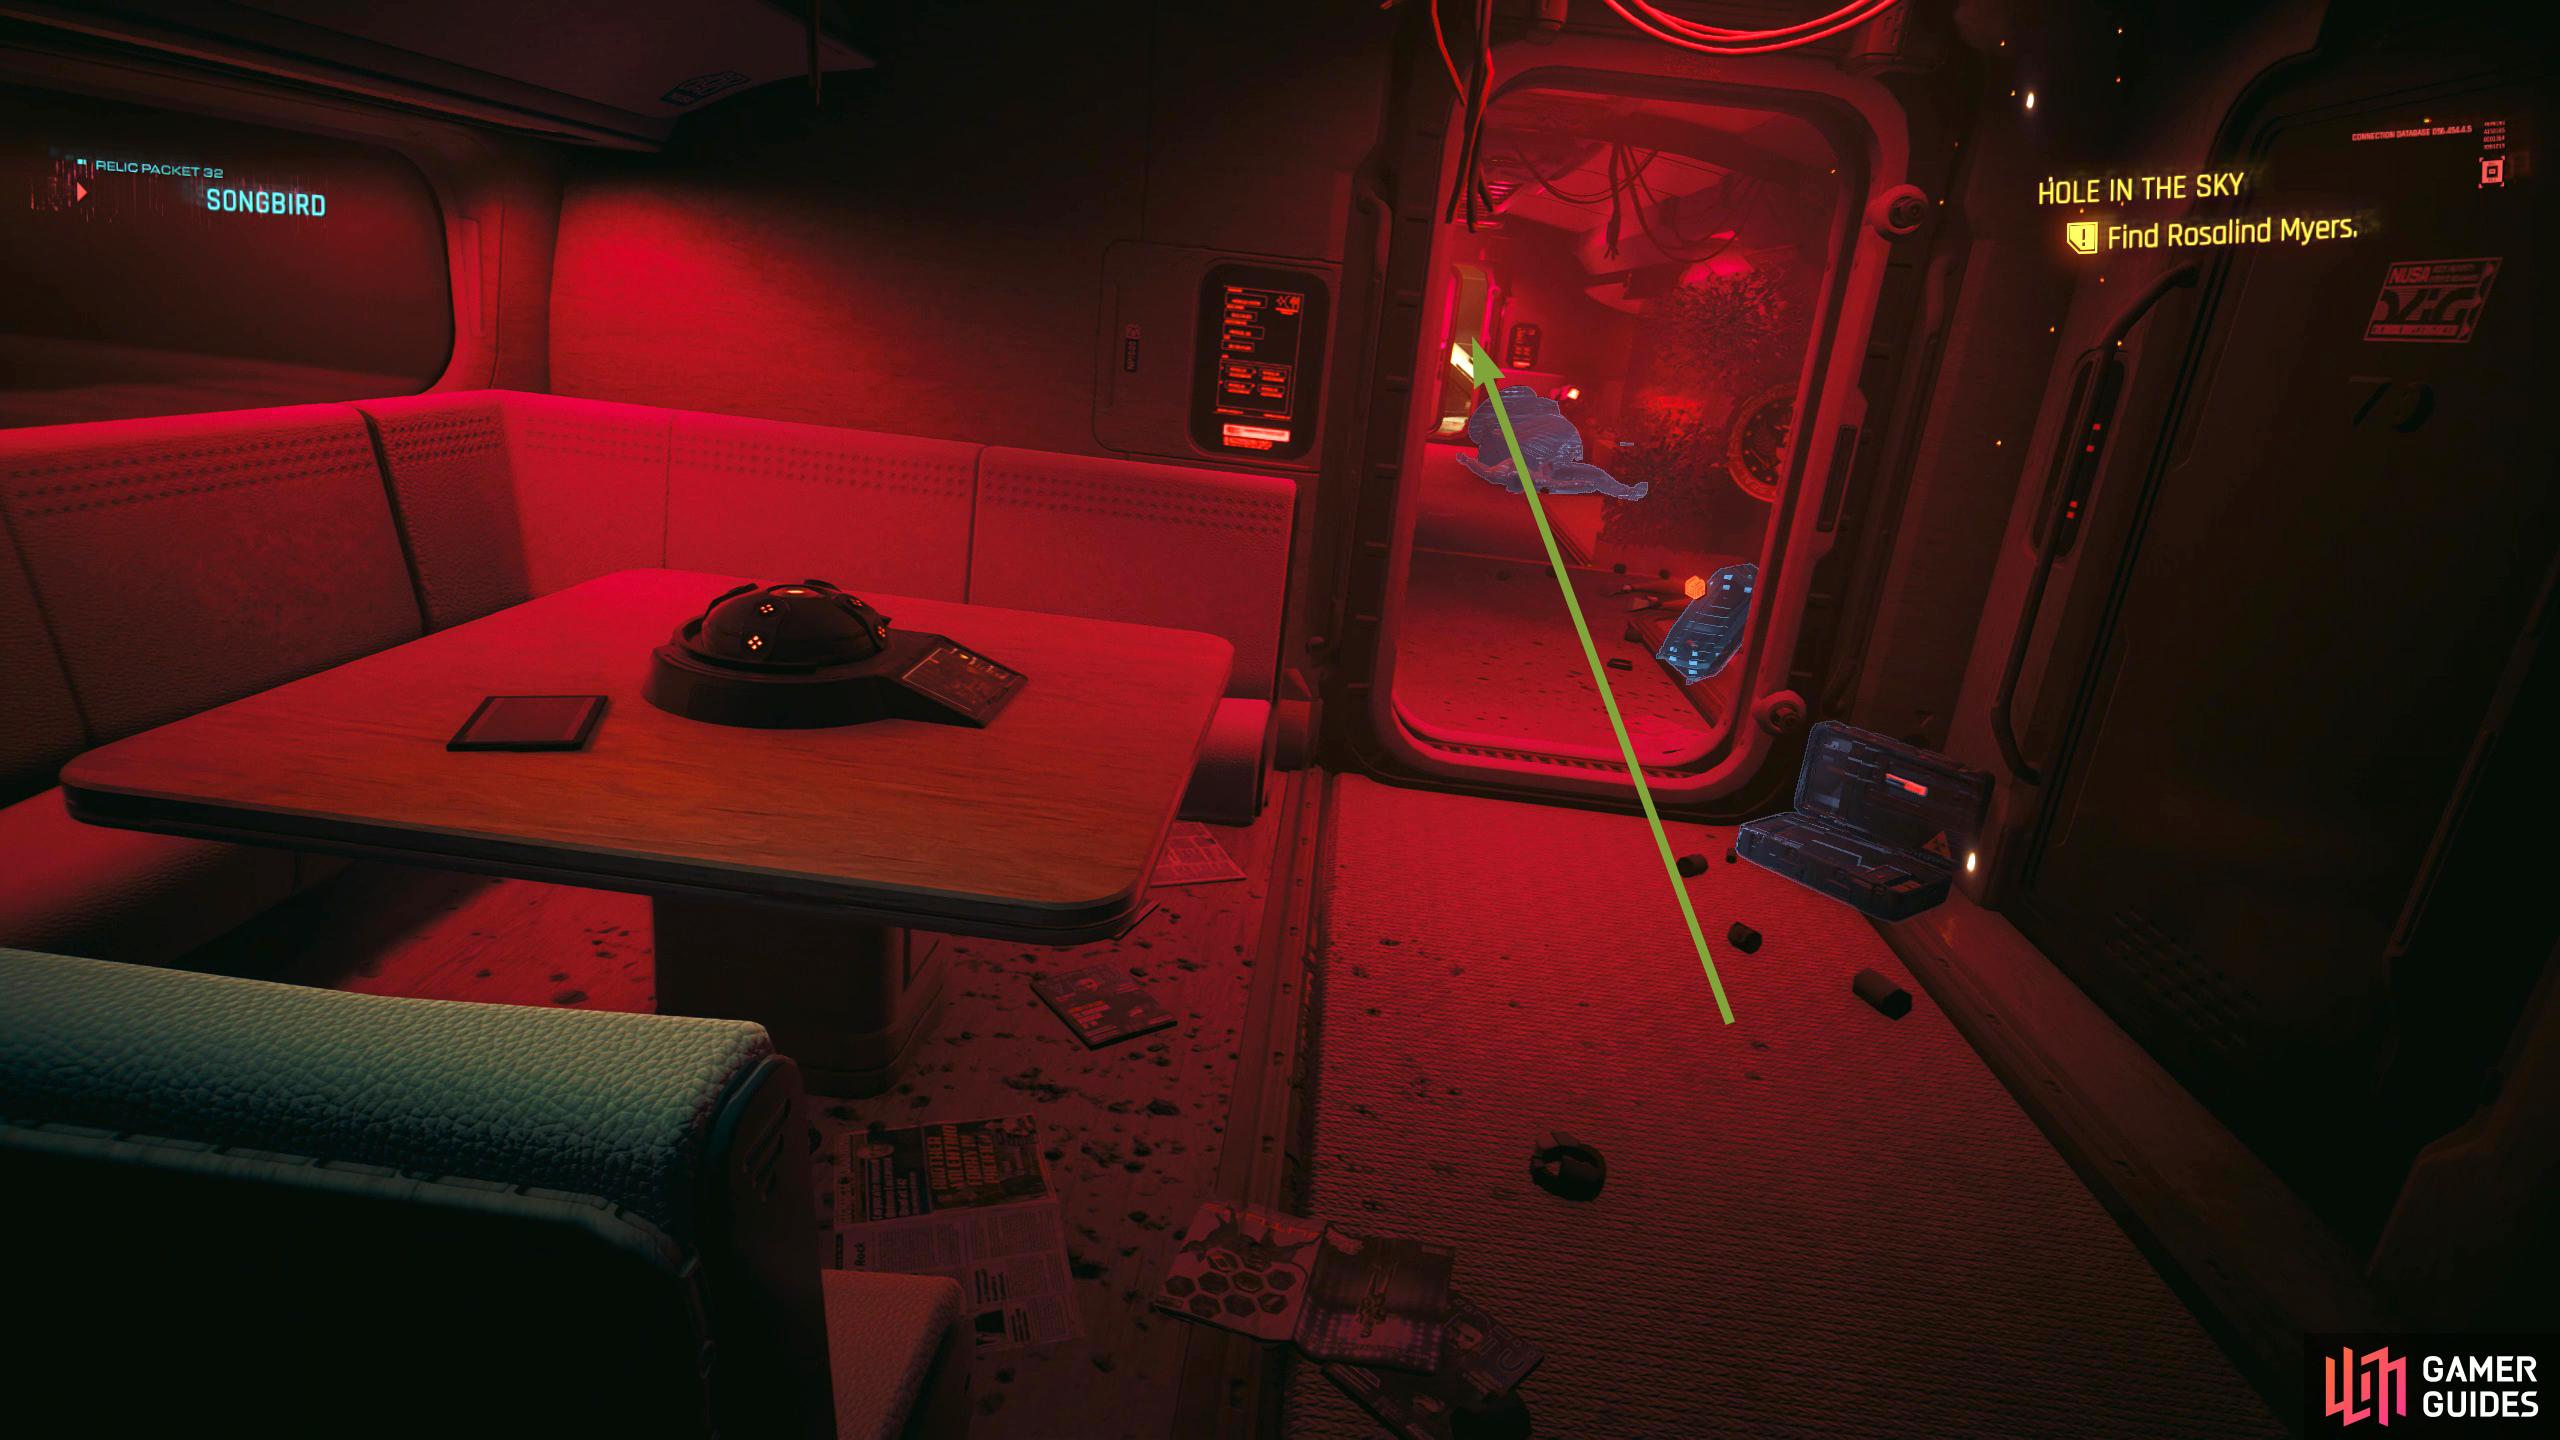
When you enter the plane, head to the other end and interact with the door.
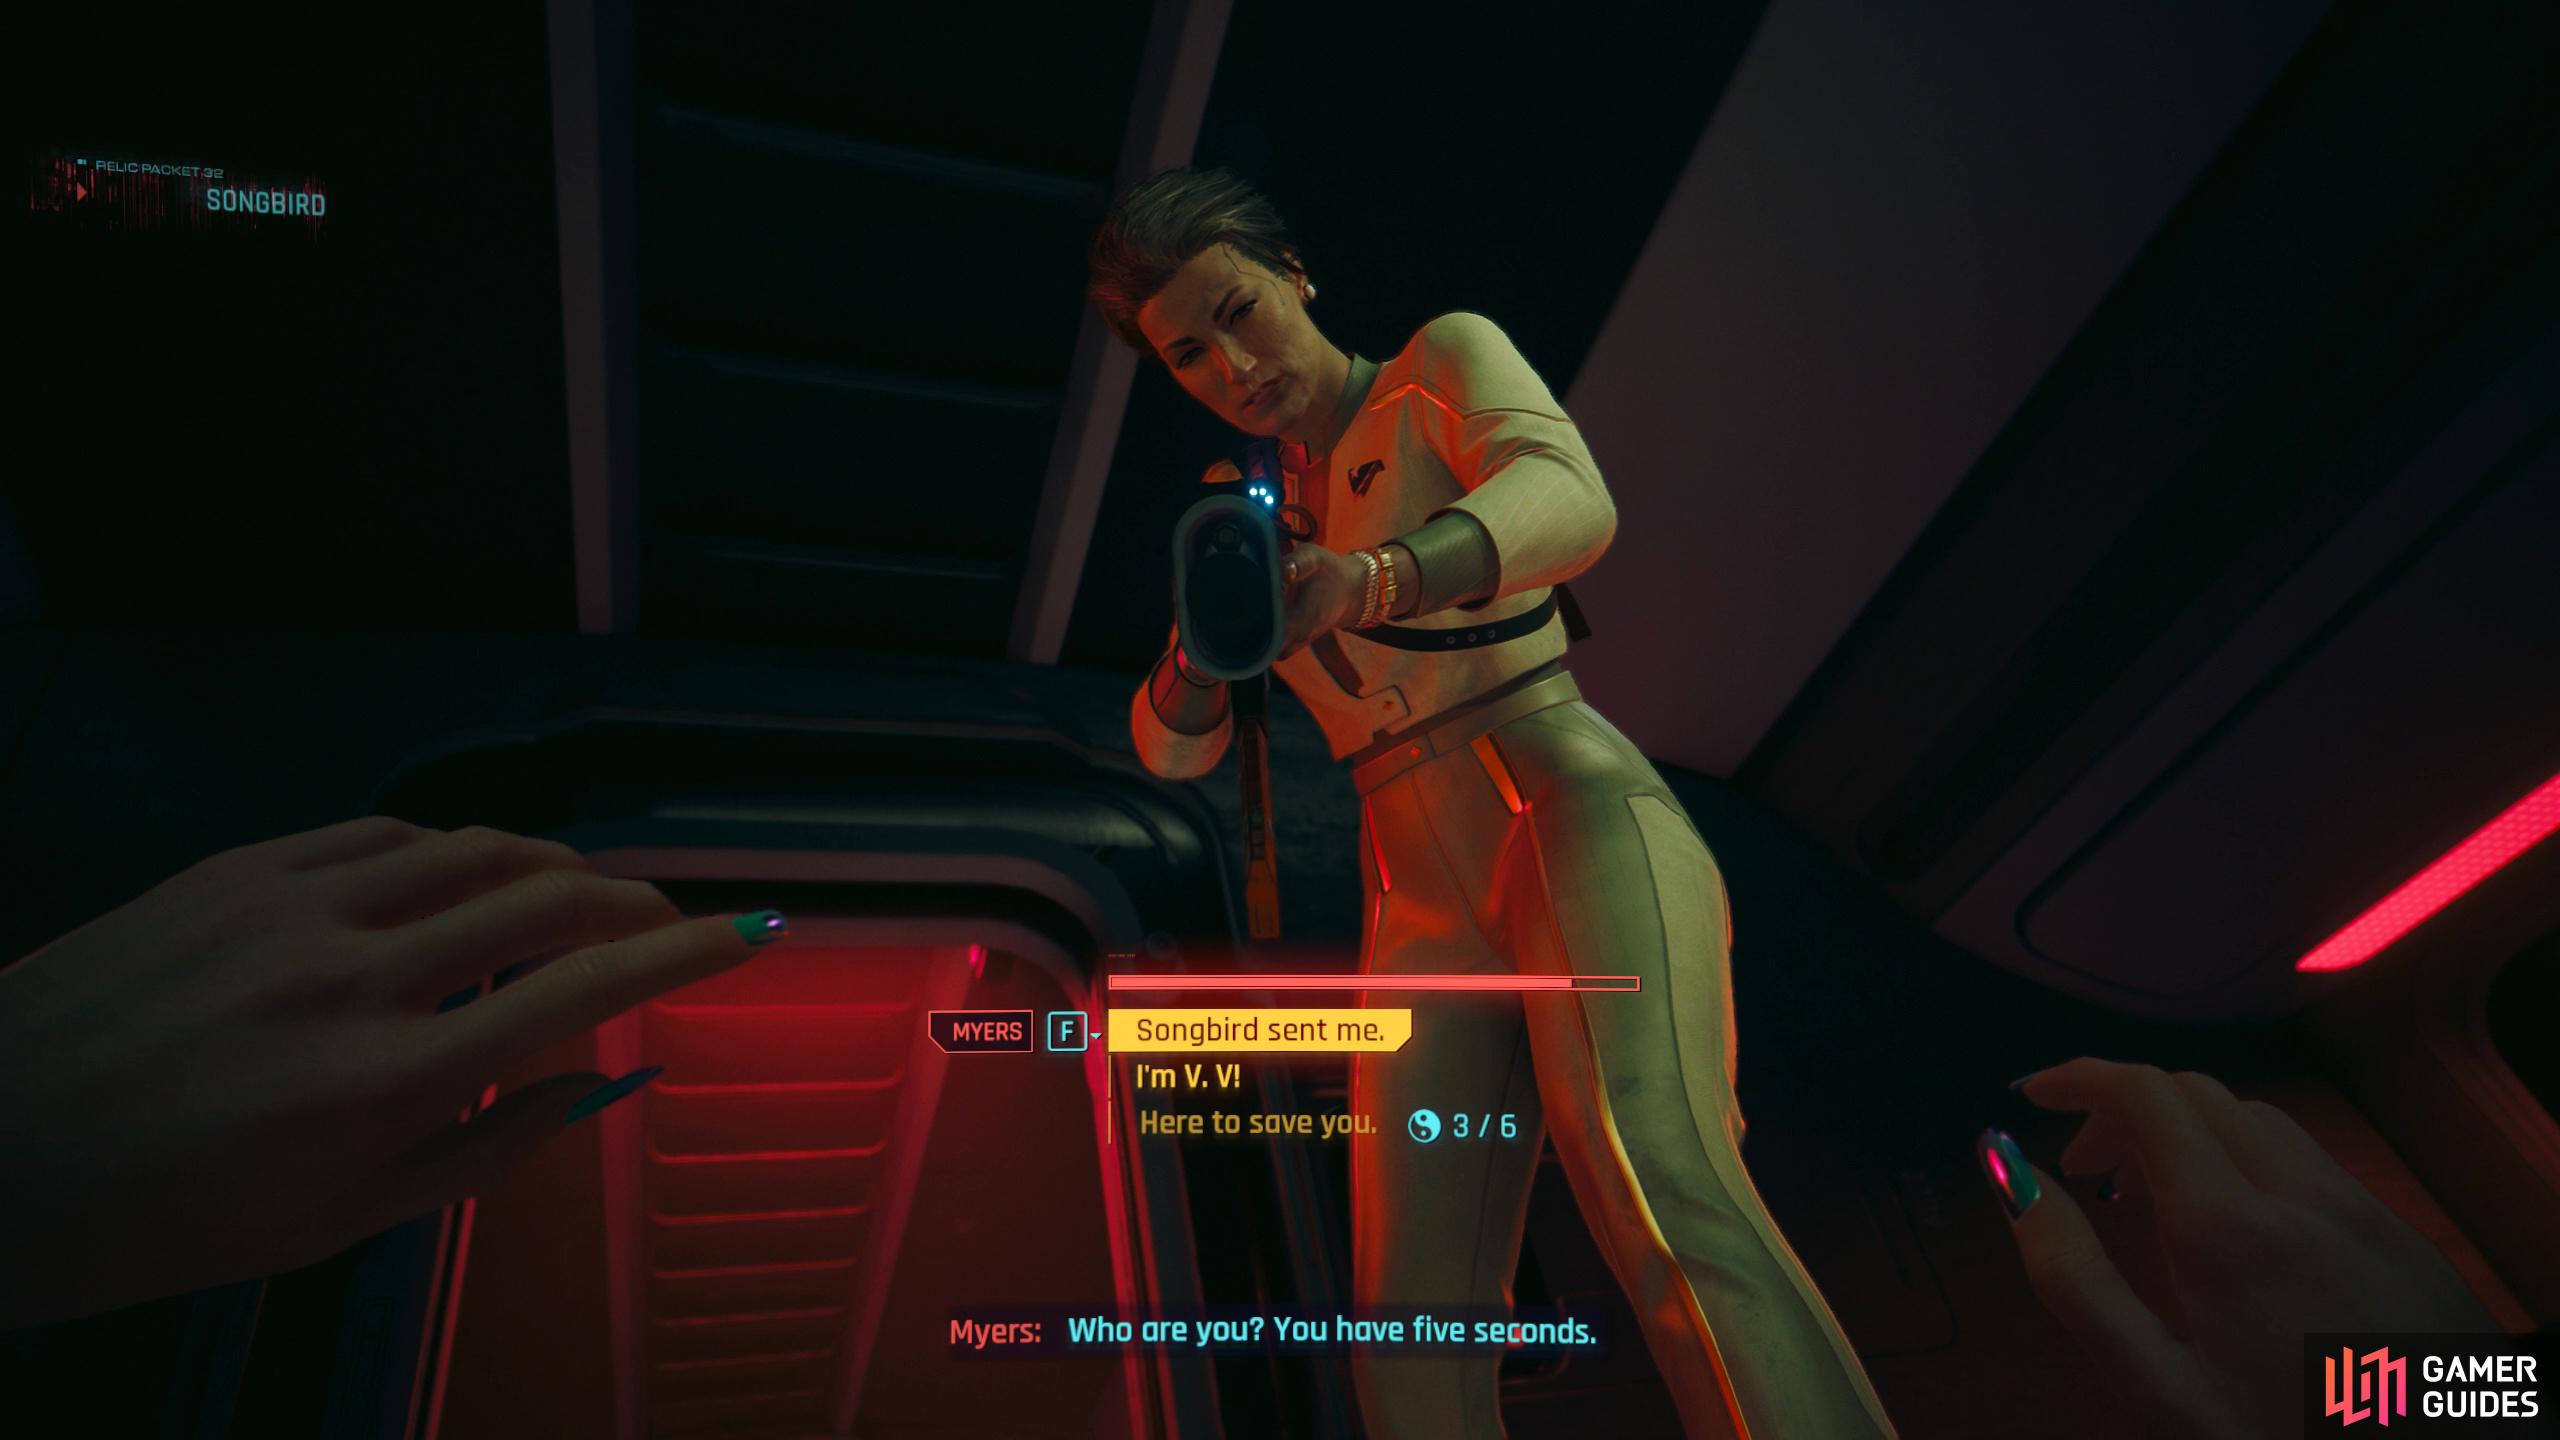
Punch her if you want, then tell her you’re V although the other options will work.
Defeat the Attackers
This segment is fairly difficult, especially on the higher difficulties. You need to defeat all the attackers before you can escape with Myers. The best way to do this is to stay on the plane and use it as cover while taking them out. Be warned, that the enemies can, and will approach the door, so make sure you keep your shotgun loaded. If you have the Technical Ability at 9, you can open the other door to the left end of the plane which gives you two places to shoot them from.
Don’t worry too much about Myers as she can’t die, but make sure you stay above 100 health as there are a lot of hard-hitting enemies out there. One of such is the Barghest Mech who hits like a truck as well as numerous enemies who wield Heavy Machine Guns. While you get pinned down by them, other easier, but still deadly enemies will slowly push the door.
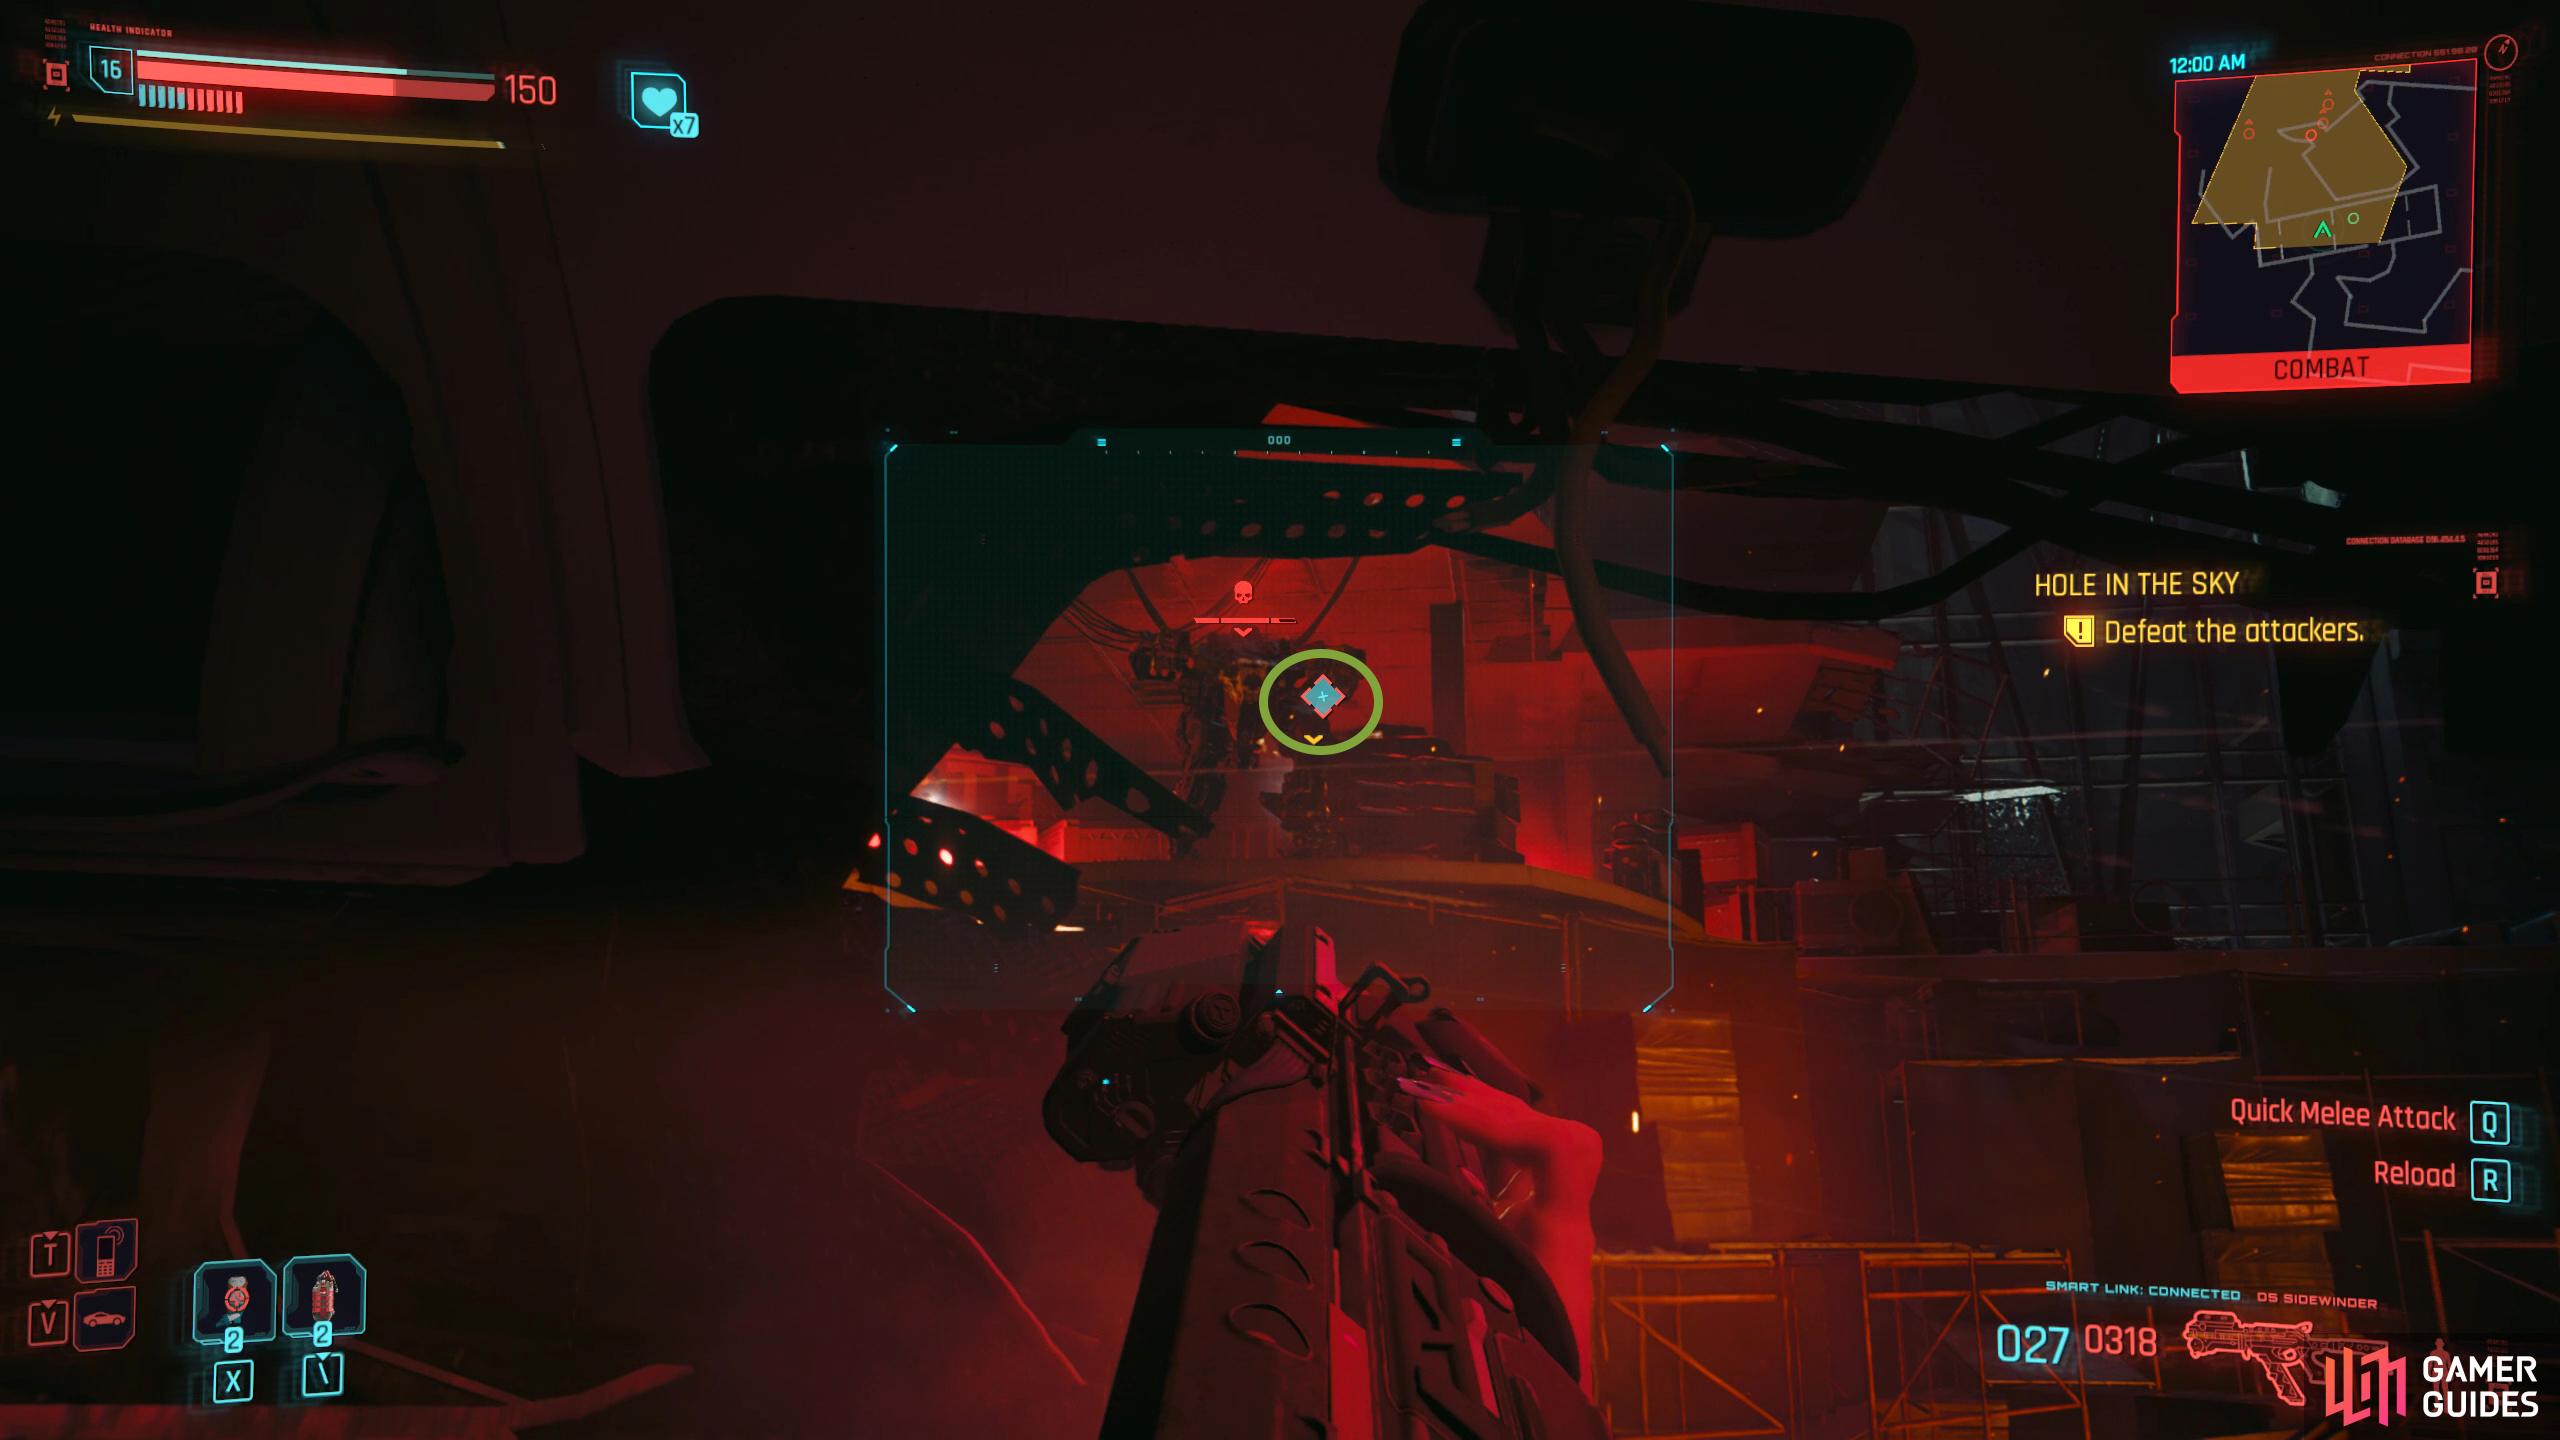
(1 of 3) The Barghest Mech is the hardest part of this battle. Stay on the plane, and use it as cover.
What you want to do is focus on taking down the mech, and when you get pushed, retreat a bit, and take care of them, then head back. Due to the Barghest Mech being well, a… mech, it’ll be weak to the Short Circuit quickhack, and EMP grenades which you can equip in the menu. Other than that, use Weapon Glitch on the mech before shooting it, so it reduces the amount of damage you take. If you took the Vulnerability Analytics Relic ability, shoot at the small red diamonds that appear for critical damage. Finally, if you have a sniper, now would be a good time to use it, and start shooting at the enemies’ heads. A well-placed headshot can instantly defeat some weaker enemies.
To keep it short, stay in the plane, take out the mech first, followed by the HMG enemies next to it, and when you get pushed, retreat, and take them out. Rinse and repeat this, and you should have no problems. One last thing, you could gamble and take one of the HMG’s, but you may get killed in doing so. Once you’ve defeated every enemy, the quest will finish, and the Spider and the Fly mission will immediately begin.
No Comments