
One of the new features that comes with Cyberpunk’s new expansion, Phantom Liberty, is the Relic Skill tree. This tree has new skills never seen before in Cyberpunk which offers you a whole host of new abilities to play with. Unlike normal skill points, these are earned by completing Phantom Liberty story missions and finding hidden militech machines in Dogtown, the new area that comes with the expansion. Read below to find out where you can find all the Militech Relic Skill Point machines also known as restricted data terminals.
In Phantom Liberty, you can earn Relic Skill Points by connecting to the Militech Data Terminals hidden around Dogtown.
What are Relic Skill Points?
In Phantom Liberty, a new skill tree was added called “Relic”. As you start your journey in Dogtown, you’ll get the Relic skill tree from the first story mission as well as three skill points specifically for the Relic Tree. There are 15 skill points in total with six of them coming from story missions. The other nine are hidden around Dogtown in the form of a restricted data terminal.
Militech Relic Skill Point Terminals
As you get near a Relic Point machine, you’ll hear a faint beeping sound that gets louder the closer you get to it. There are nine abilities in total, with three of them costing three points each while the remaining six cost just one. Due to there being 15 points in total, you can get every ability in the tree, some of which are very strong.
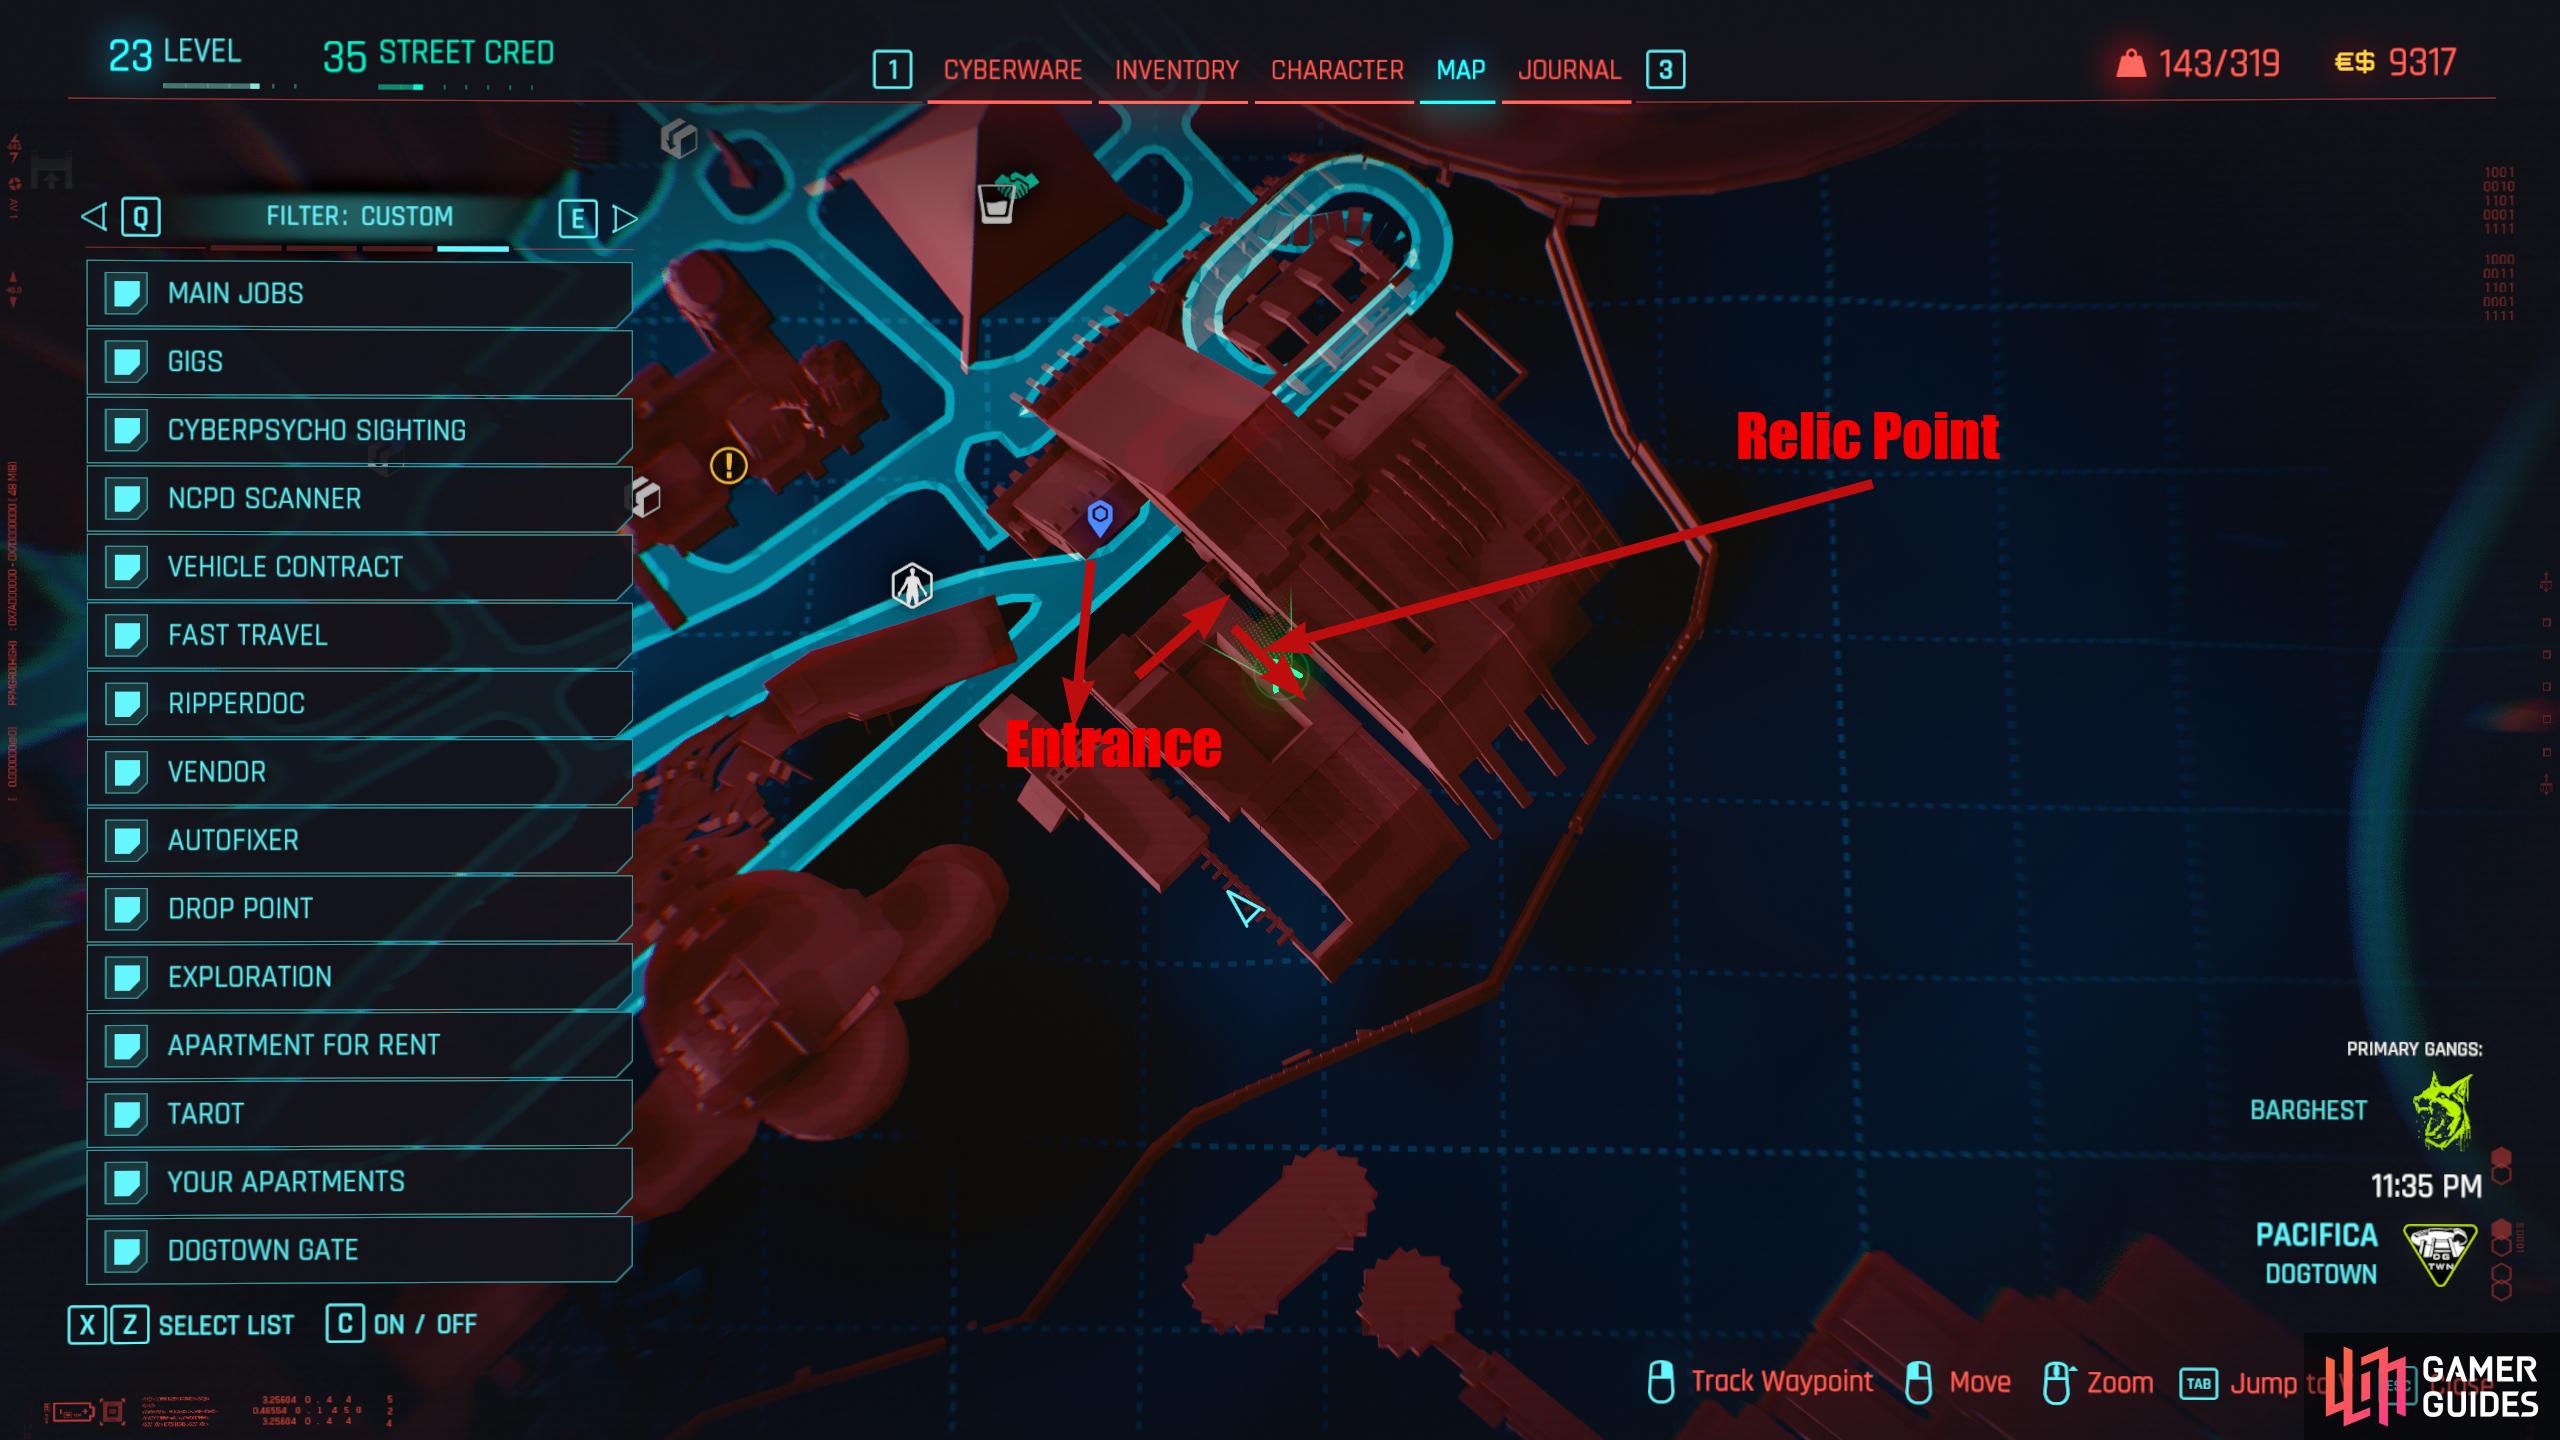
Relic Skill Point Location 1: Metro Stadium
Make your way through the Metro Stadium entrance which is situated in the northeast of Dogtown, and proceed straight on until you reach the open area with the statues in the middle. Head through the door on your left (with the Hate Your Meat sign above it), and follow the path all the way until you reach a place with cars on the floor to your right. Now, go up the stairs, and the following set above the vending machines. Here will be some more steps with some shelving with a gap in it. Go through the gap to find the Relic Point.
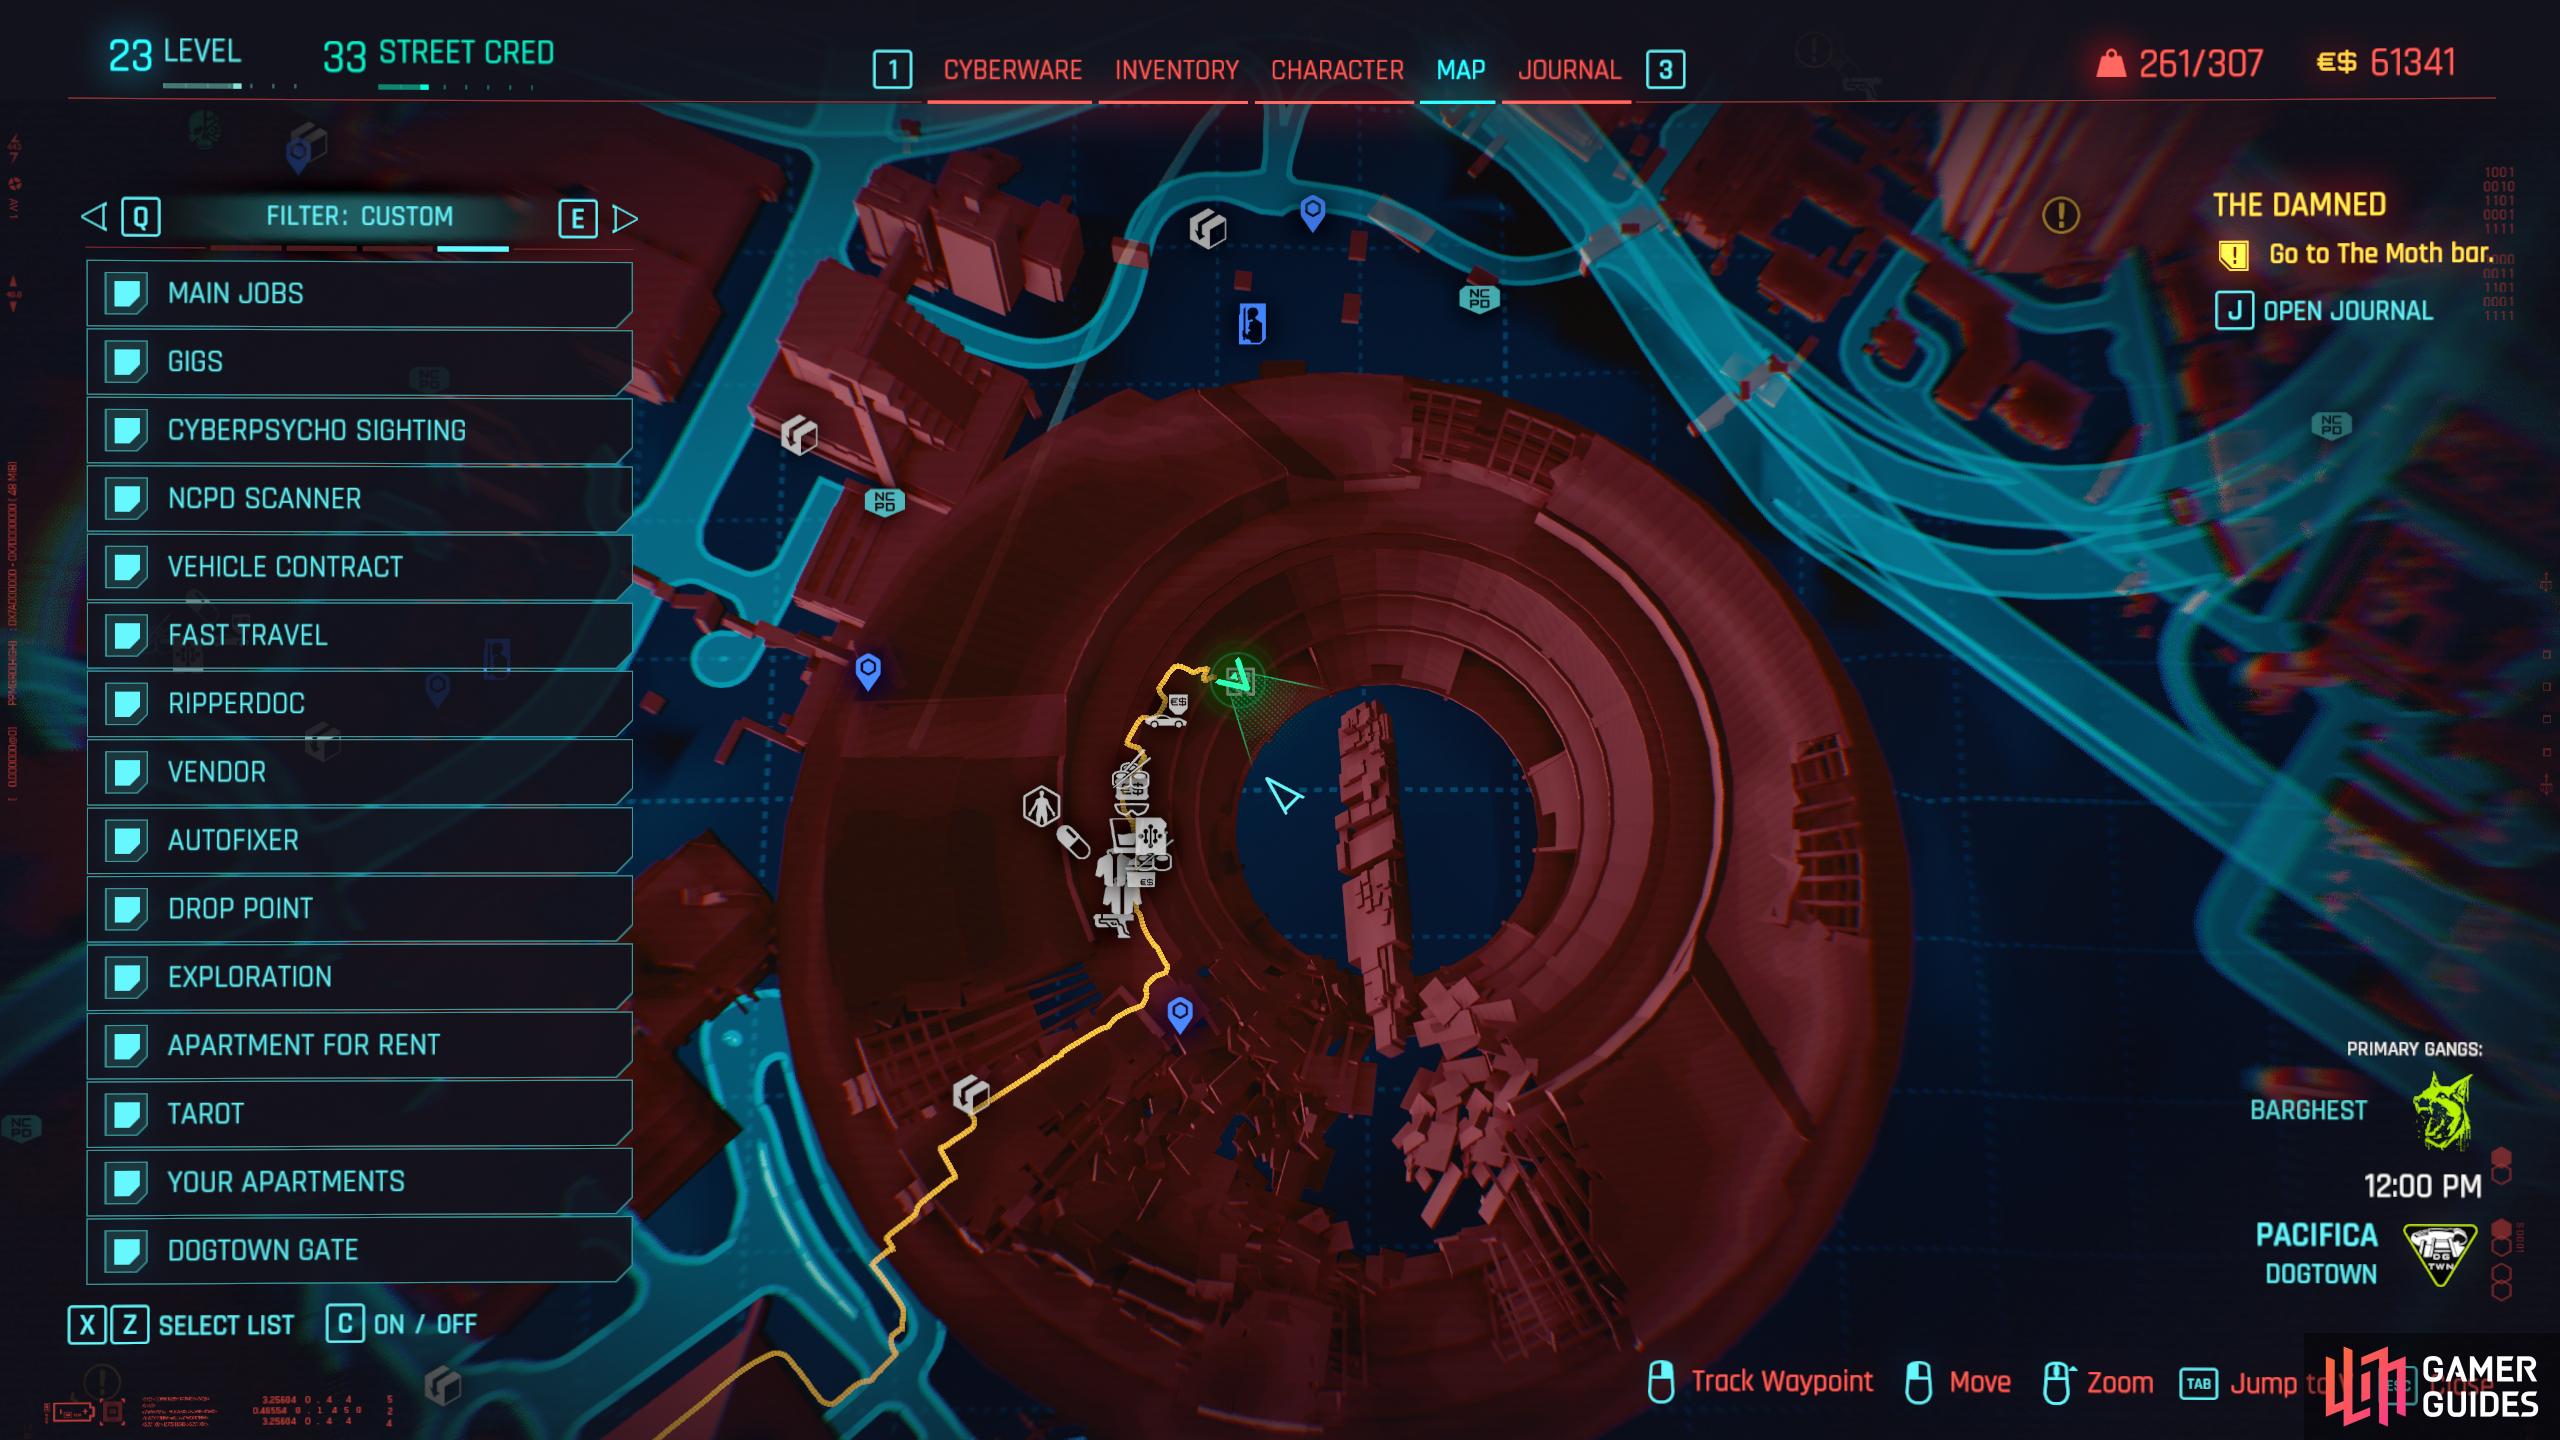
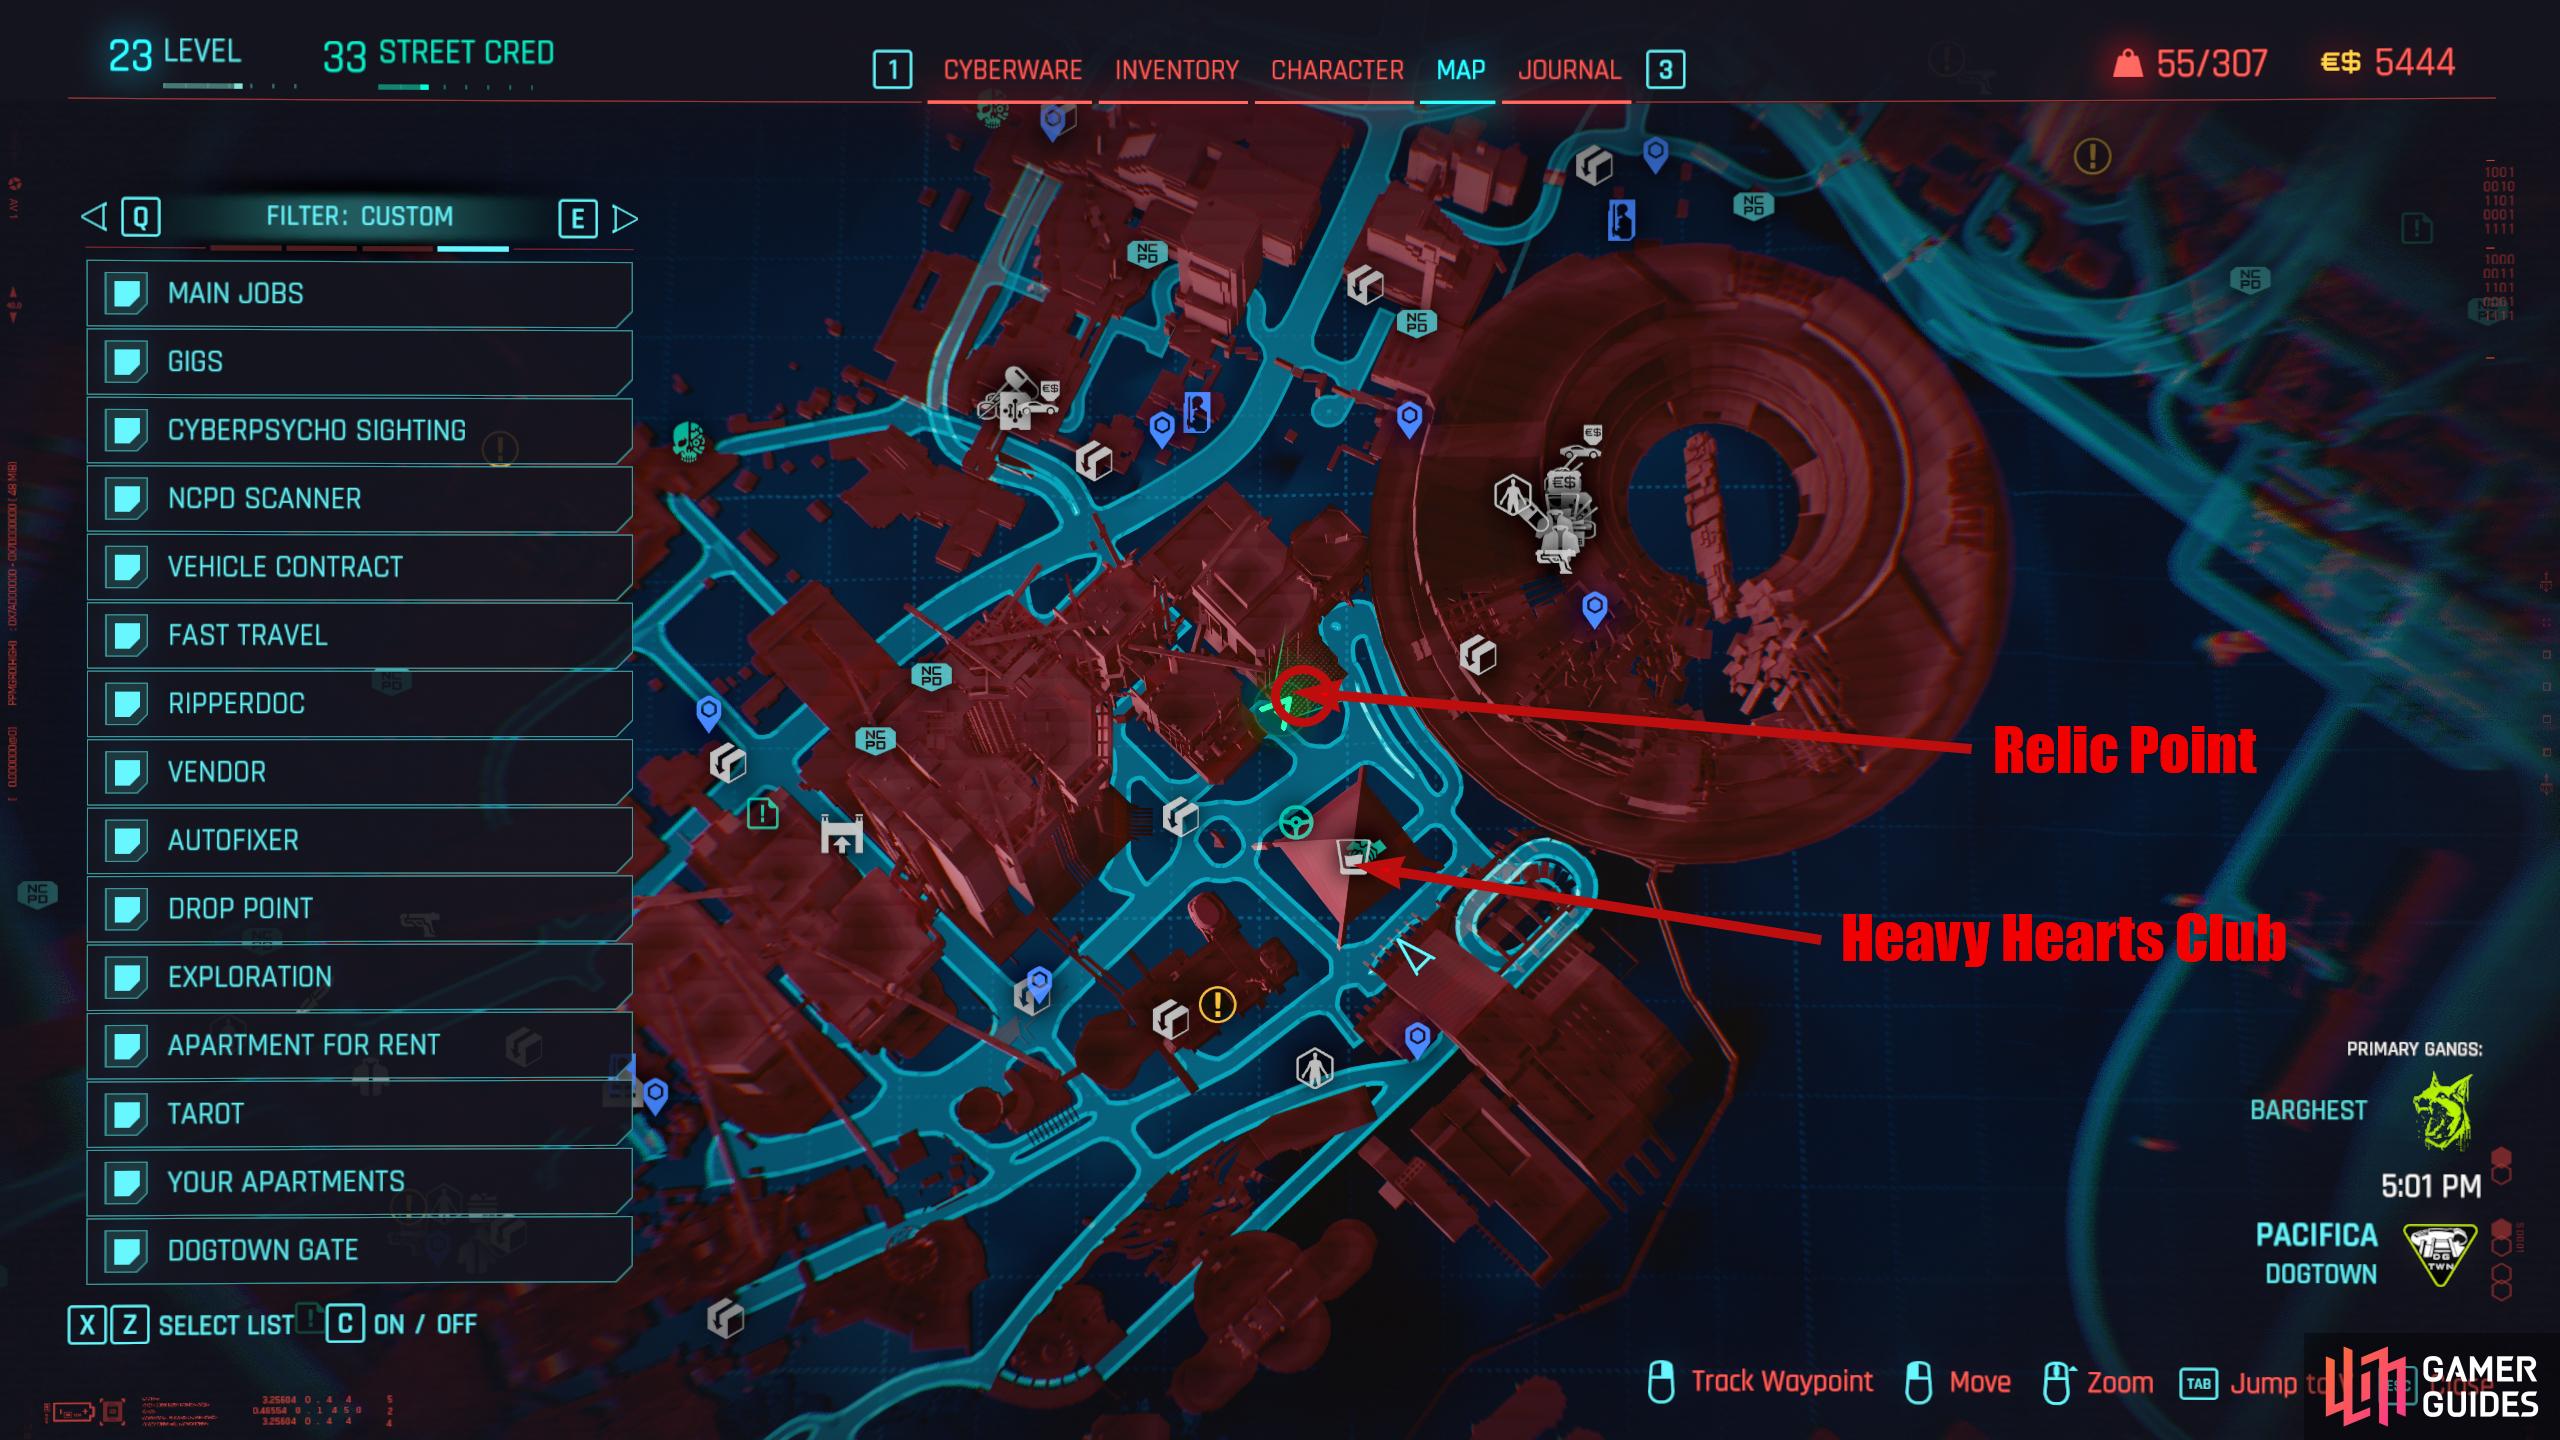
Relic Skill Point Location 2: Northwest of The Heavy Hearts Club
This Relic Point is tricky to find. From the entrance of The Heavy Hearts Club, turn behind you to see flames coming out of a building. The Relic Point is on the building to the right of it. Turn right, and you’ll notice a bridge starting at the club leading to the dilapidated building to the right of the flames; you want to get on here. Now, there are numerous ways to get up here, you can use a double jump near anything climbable like scaffolding, etc.
The easiest way is to go up the stairs near the club until you reach the bridge. When you reach the bridge, follow it to the dilapidated building and head left at the intersection. Follow the path around the corner where you’ll find some pedestrians sitting on a couch and a skull graffiti on the wall behind them. Walk through the gap next to them, and you’ll find the Relic Point to your right. You can bypass this by going up the stairs at the end of the bridge near the building.
(1 of 3) This skill point can be found on the second floor of the dilapidated building opposite The Heavy Hearts Club.
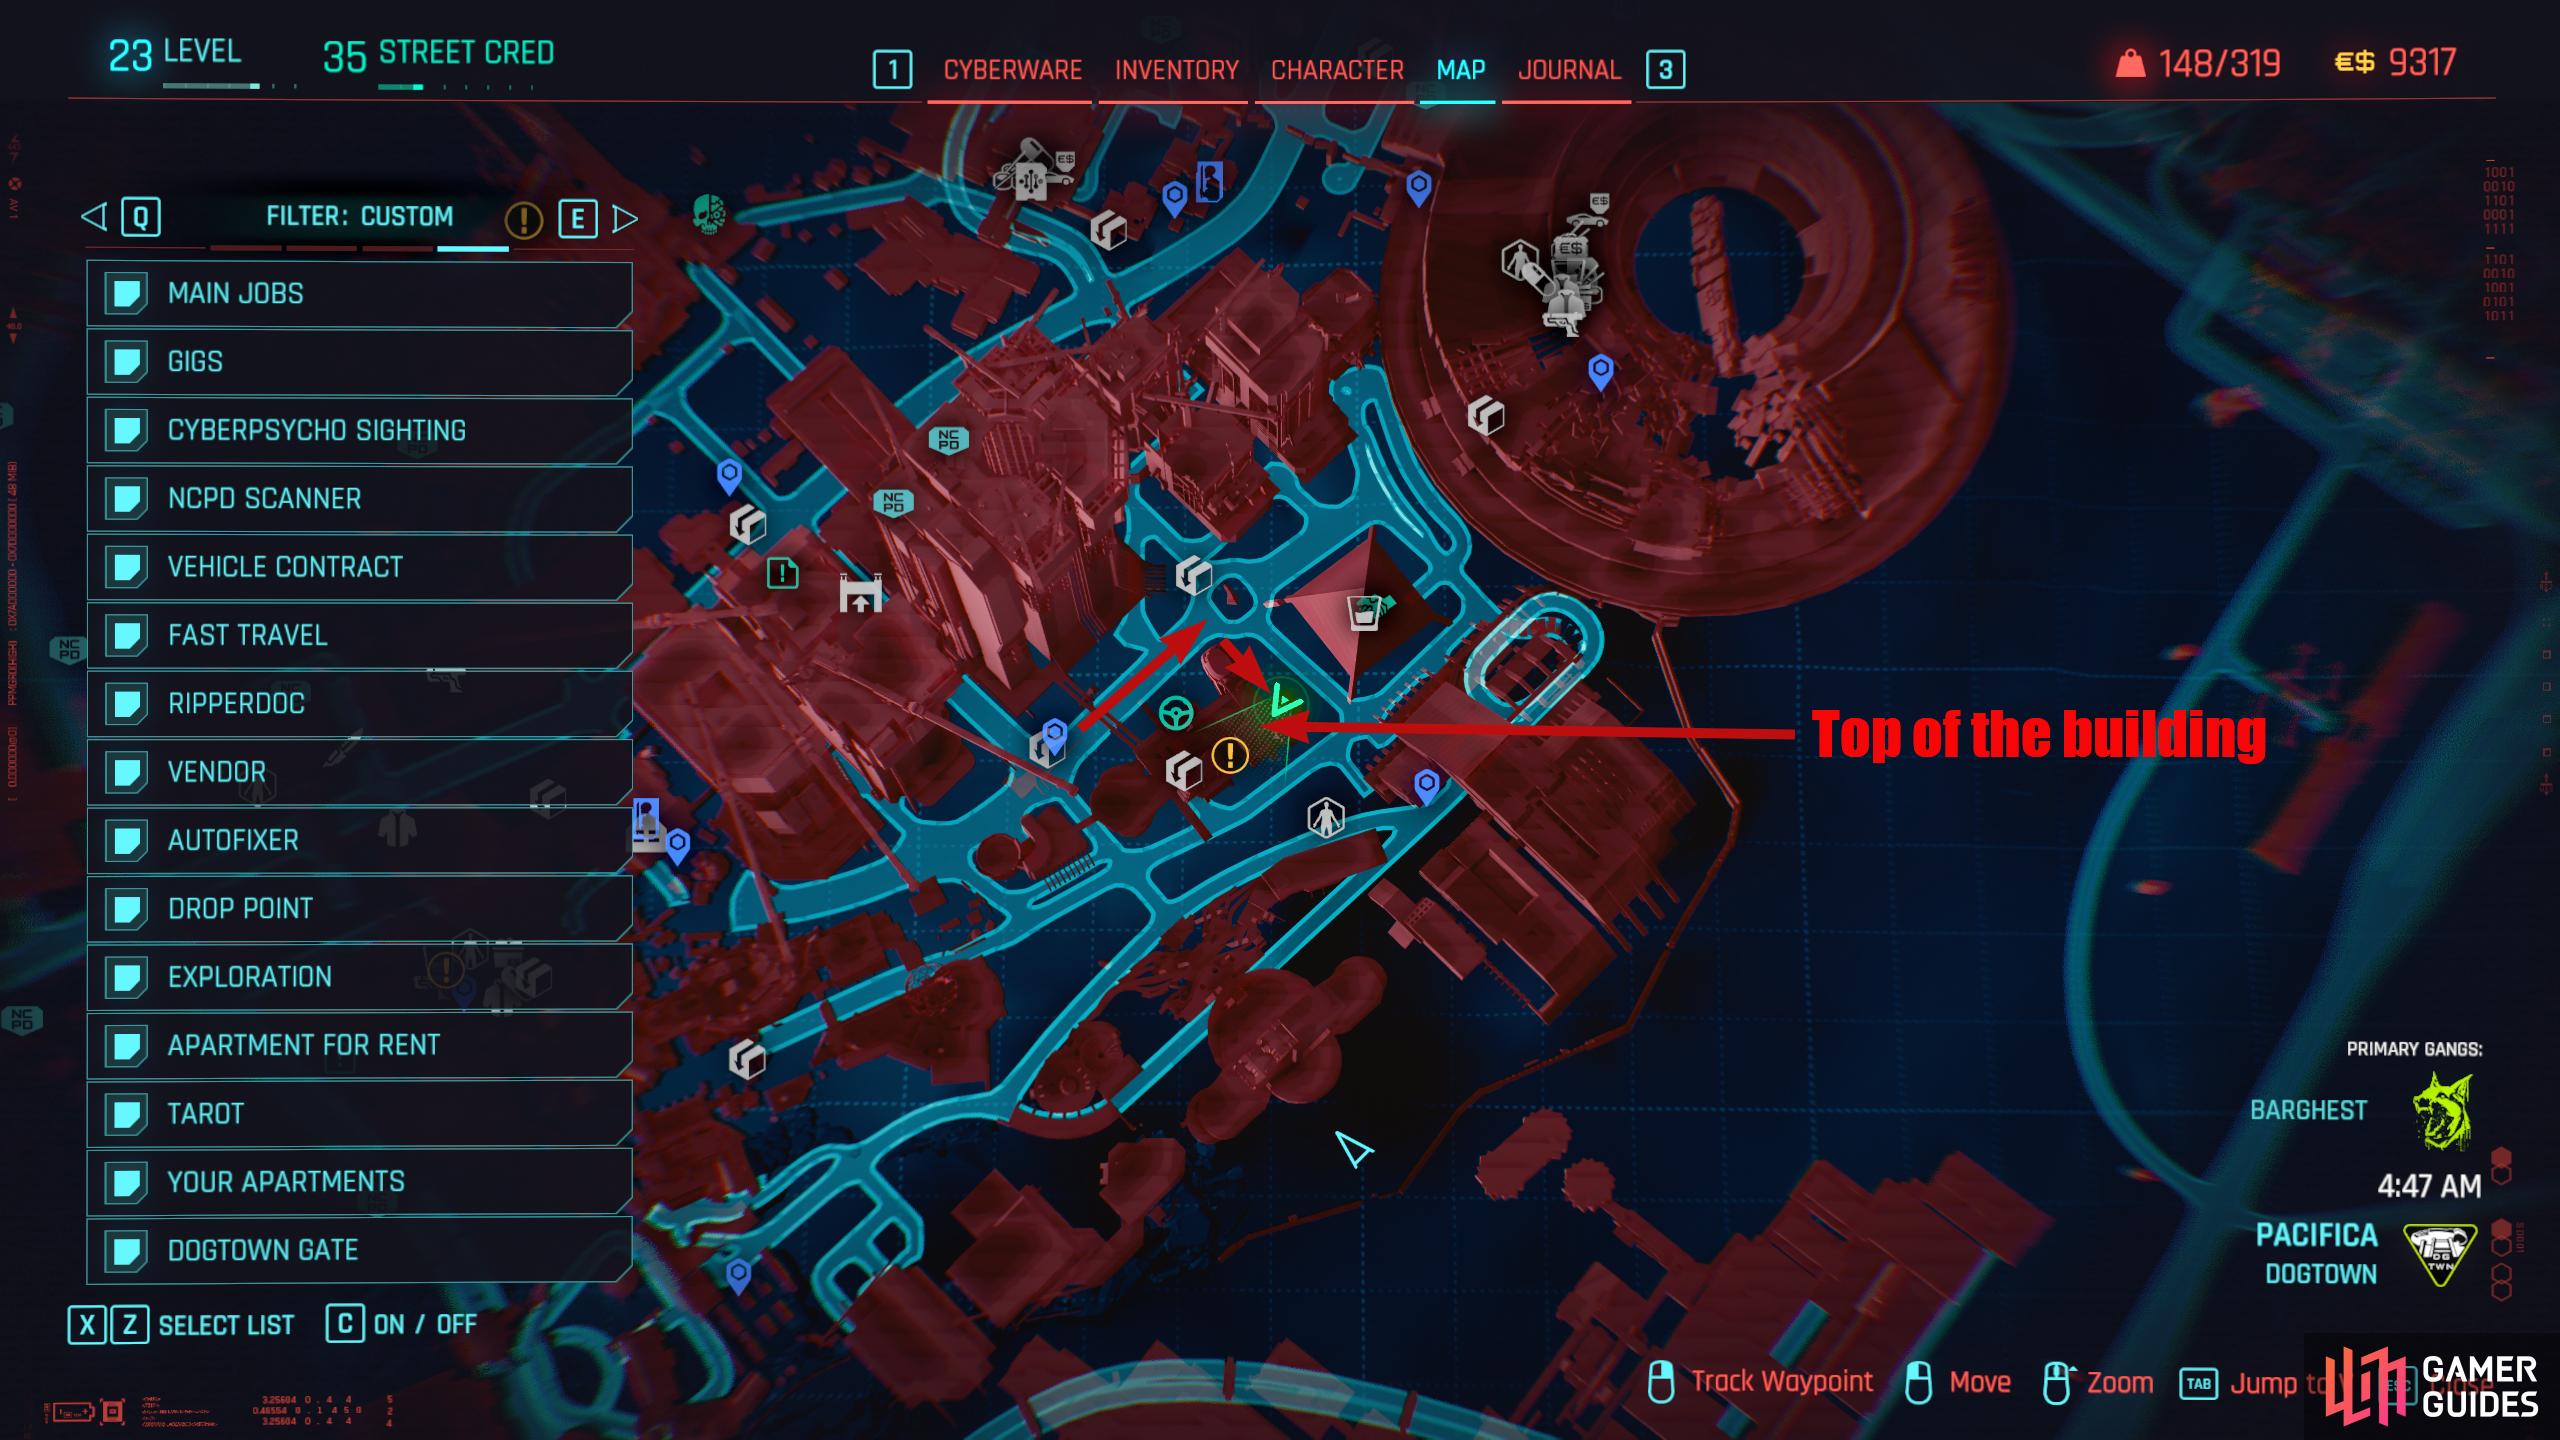
Relic Skill Point Location 3: Terra Cognita
Travel to the Terra Cognita Fast Travel which is situated in the west of Dogtown. Head up the stairs west of the Fast Travel and enter Terra Cognita. Proceed forward, and you’ll see a building with a large Massdriver sign above it. The Relic Point is inside the building, on the top floor, but as this is a “Increased Criminal Activity” area, it will be full of enemies, and a boss which will give you an iconic weapon for completing it. Fortunately, you can get in and get the Relic Point without alerting anyone.
Head to the west side of the building to find some scaffolding, and climb to the top of it. Jump on the path then jump over to the bridge. To your right will be an entrance to the place, but there will be an enemy or two up here and some laser mines that can be disarmed. Make your way along the path northwest while taking care of the enemies (stealth) and avoiding the Arasaka Drone (boss) flying above. Go into the first room on the left (avoid/take care of the enemies), and about halfway down. The Relic Point will be against the wall, on your right.
Relic Skill Point Location 4: Luxor High Wellness Spa
Travel to Luxor High Wellness Spa Fast Travel situated southwest of Metro Station. When you get there, look to your southeast to find a large building (Old Technics). The Relic Point is on the bottom floor, but once again, this is a High Criminal Activity area that has a ton of enemies and a boss who will reward you with an iconic weapon upon completion. If you do try to clear out the area, we recommend heading to the roof with a sniper, you can take out 90% of the enemies including the boss up here. There is also an uncontested airdrop on the roof which will give you a bunch of loot.
I digress, head south from the fast travel toward the building, and you’ll find an entrance to your right, in between the building sticking out to the right of it. Now, there’s not really an easy way to get to this Relic Point, and you’re better off clearing the area first, but if you fancy a challenge, you can try and stealth your way through here. This guide won’t mention any enemies as they move around and there are way too many of them, so when following the directions, bear in mind that an enemy, camera, or turret may spot you.
Enter the building after dealing with any enemies guarding the entrance, and head across the room, and up the stairs (camera above the stairs). Go through the doorway, and out the other side to a large open room. Make your way across the room while dealing with the enemies, and you’ll find a security turret. Turn right at the turret, and walk forward until you see a floor light to your left (camera on pillar to your right). The Relic Point will be leaning against the pillar obscured by the darkness.
(1 of 5) From Luxor High Fast Travel, head south and enter the building to the northeast.
Relic Skill Point Location 5: Montezuma’s Hotel Casino
This Relic Point requires a little parkour. It can be found on top of the dilapidated extension of Montezuma’s Hotel Casino. The nearest Fast Travel is the Golden Pacific. Make your way/teleport there, and follow the road northeast until you see the large pyramid (Heavy Heart’s Club) in front of you. To your right will be some scaffolding. Climb it, and take the path southeast, and you’ll see a green building with half the tower missing.
Head around the left side of the building to find a scaffold/metal steps. Use them to boost you over to the roof of the building. When you reach the roof, climb the green crane-like machine to the top, then jump on the roof to your right. The Relic Point will be at the top of the stairs to the right, but make sure you disarm any mines first before getting it.
(1 of 5) From the Golden Pacific Fast Travel, follow the road northeast until you see the pyramid.
Relic Skill Point Location 6: Kress Street Apartment
This is a nice easy one to find. Head back to your Dogtown Apartment in Kress Street, and head to the ground floor. Exit the elevator and look in the corner to your right to find the Relic Point. You can reach this area on foot, so if you’re on the ground floor already, just head to the apartment elevator, and you’ll find it in the corner.
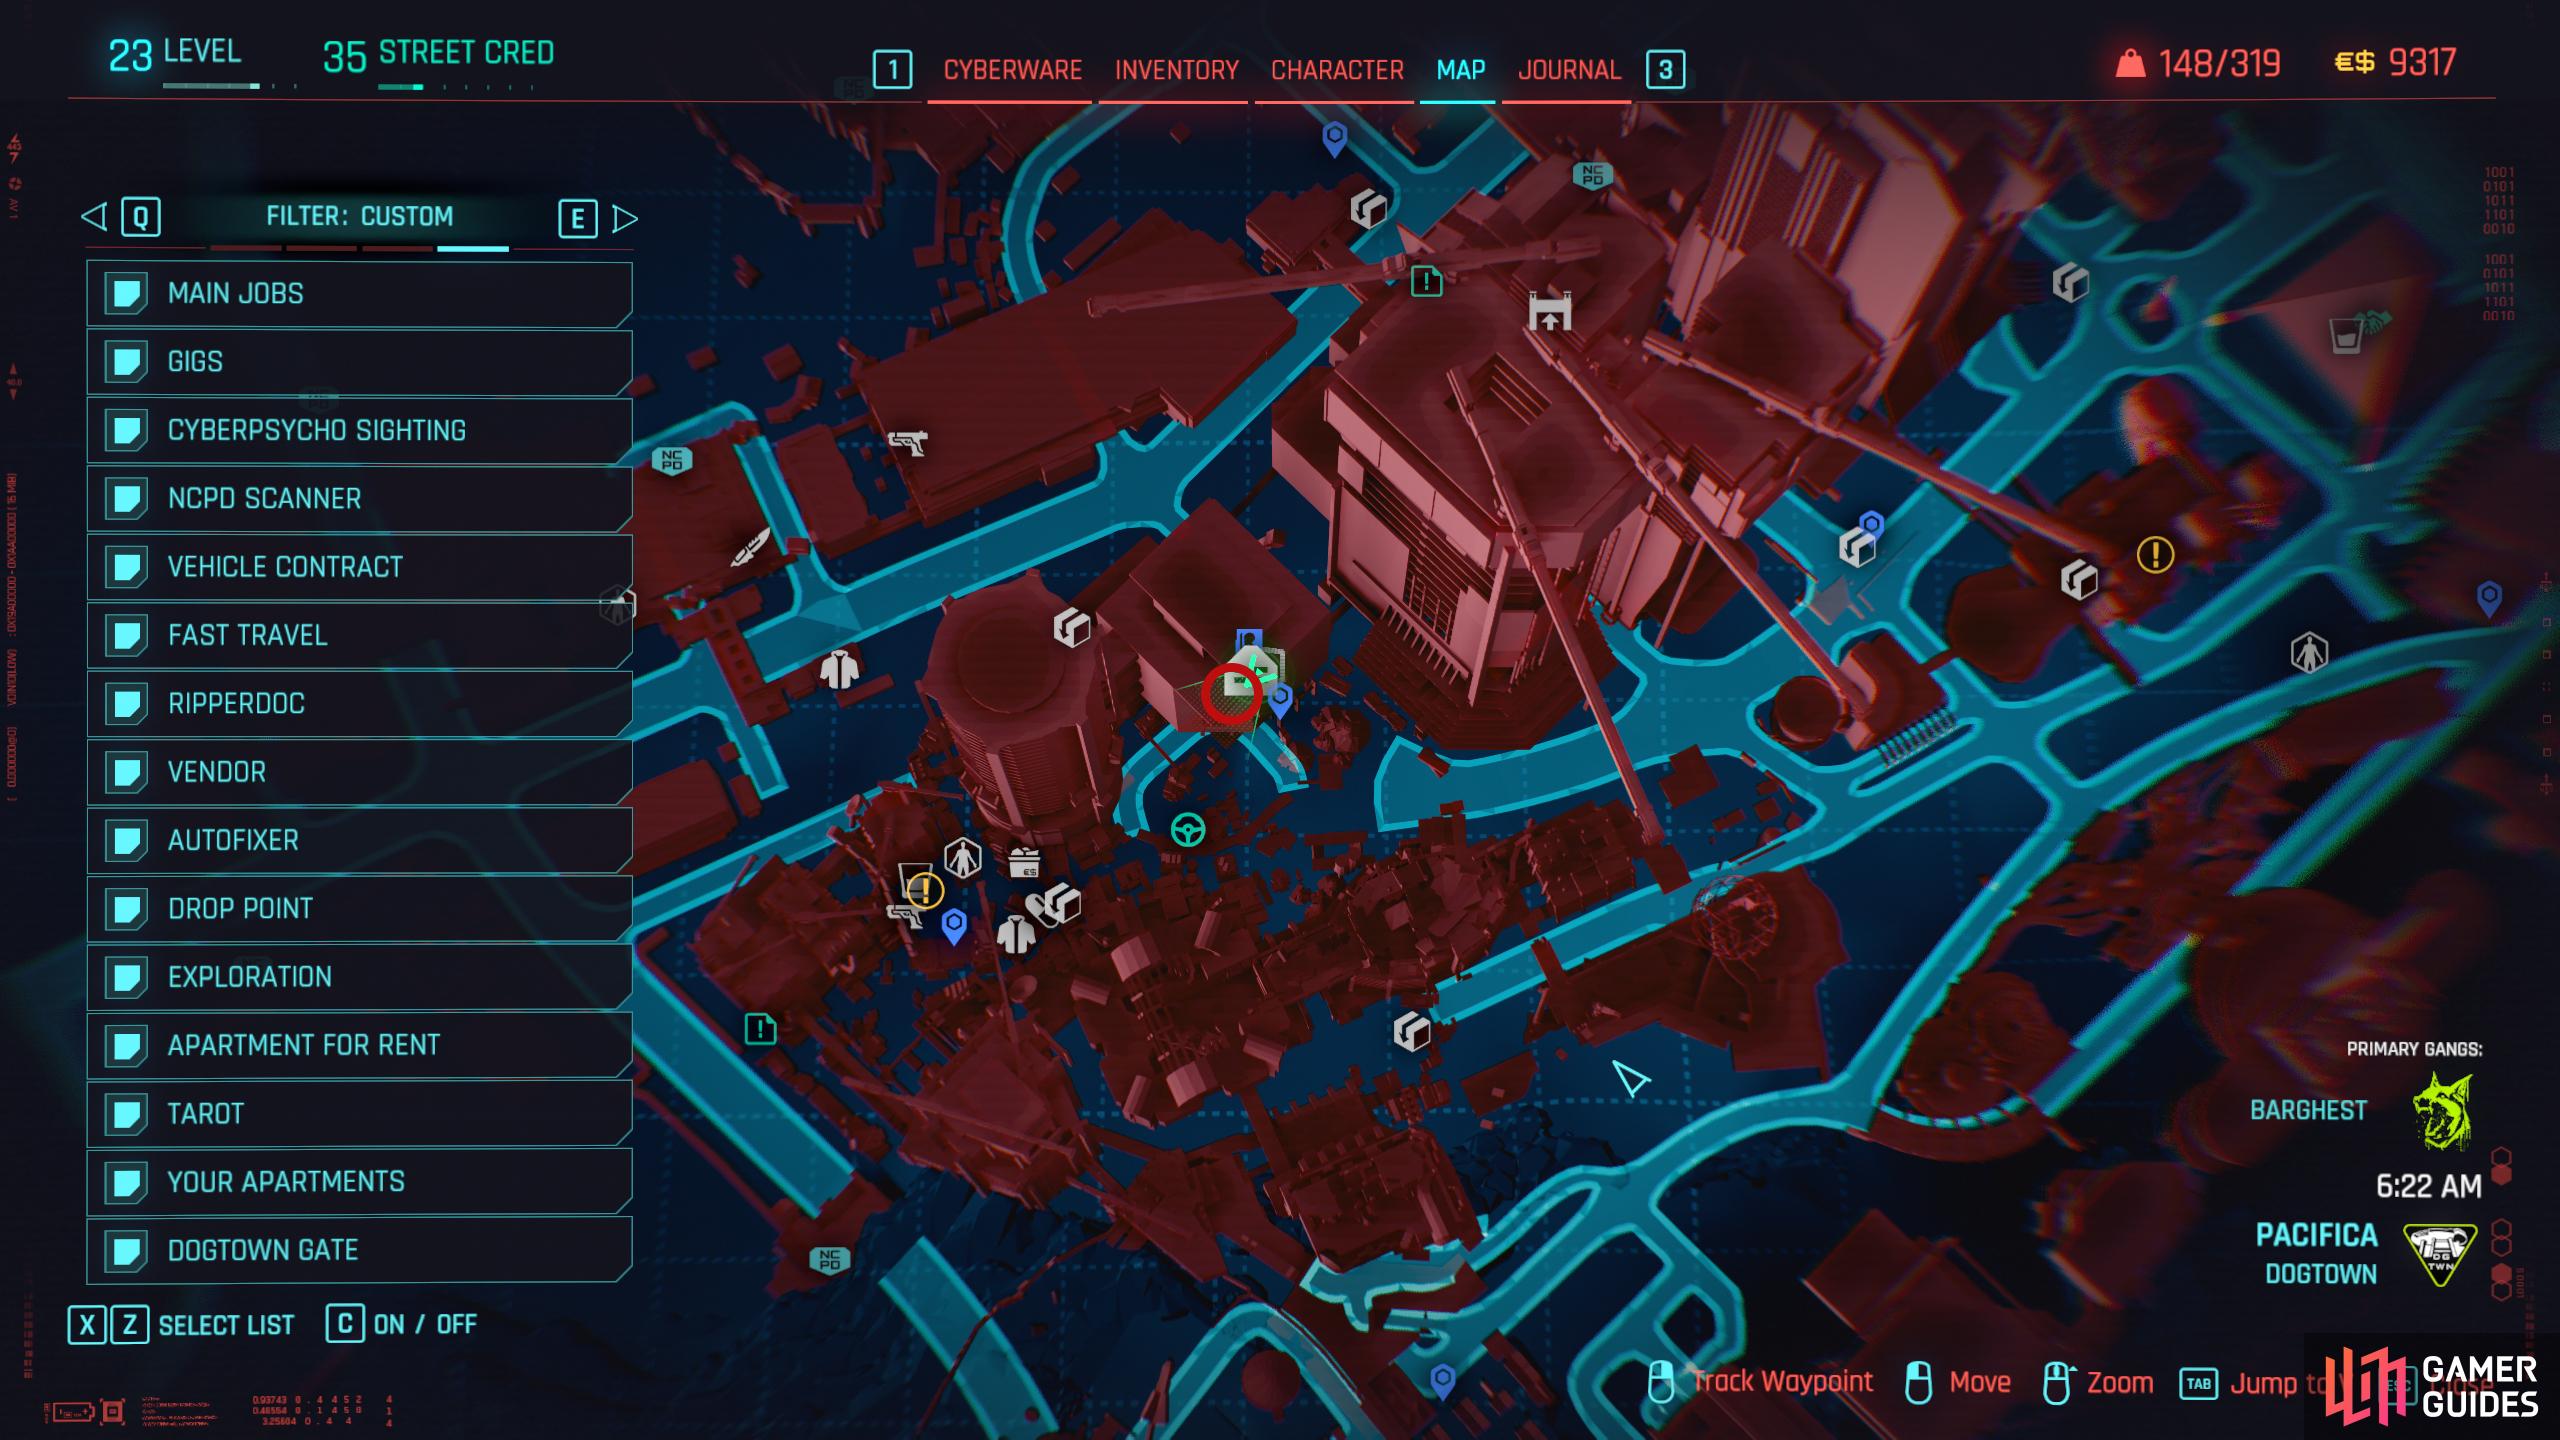
This Relic Point can be found on the ground floor outside your Dogtown Apartment.
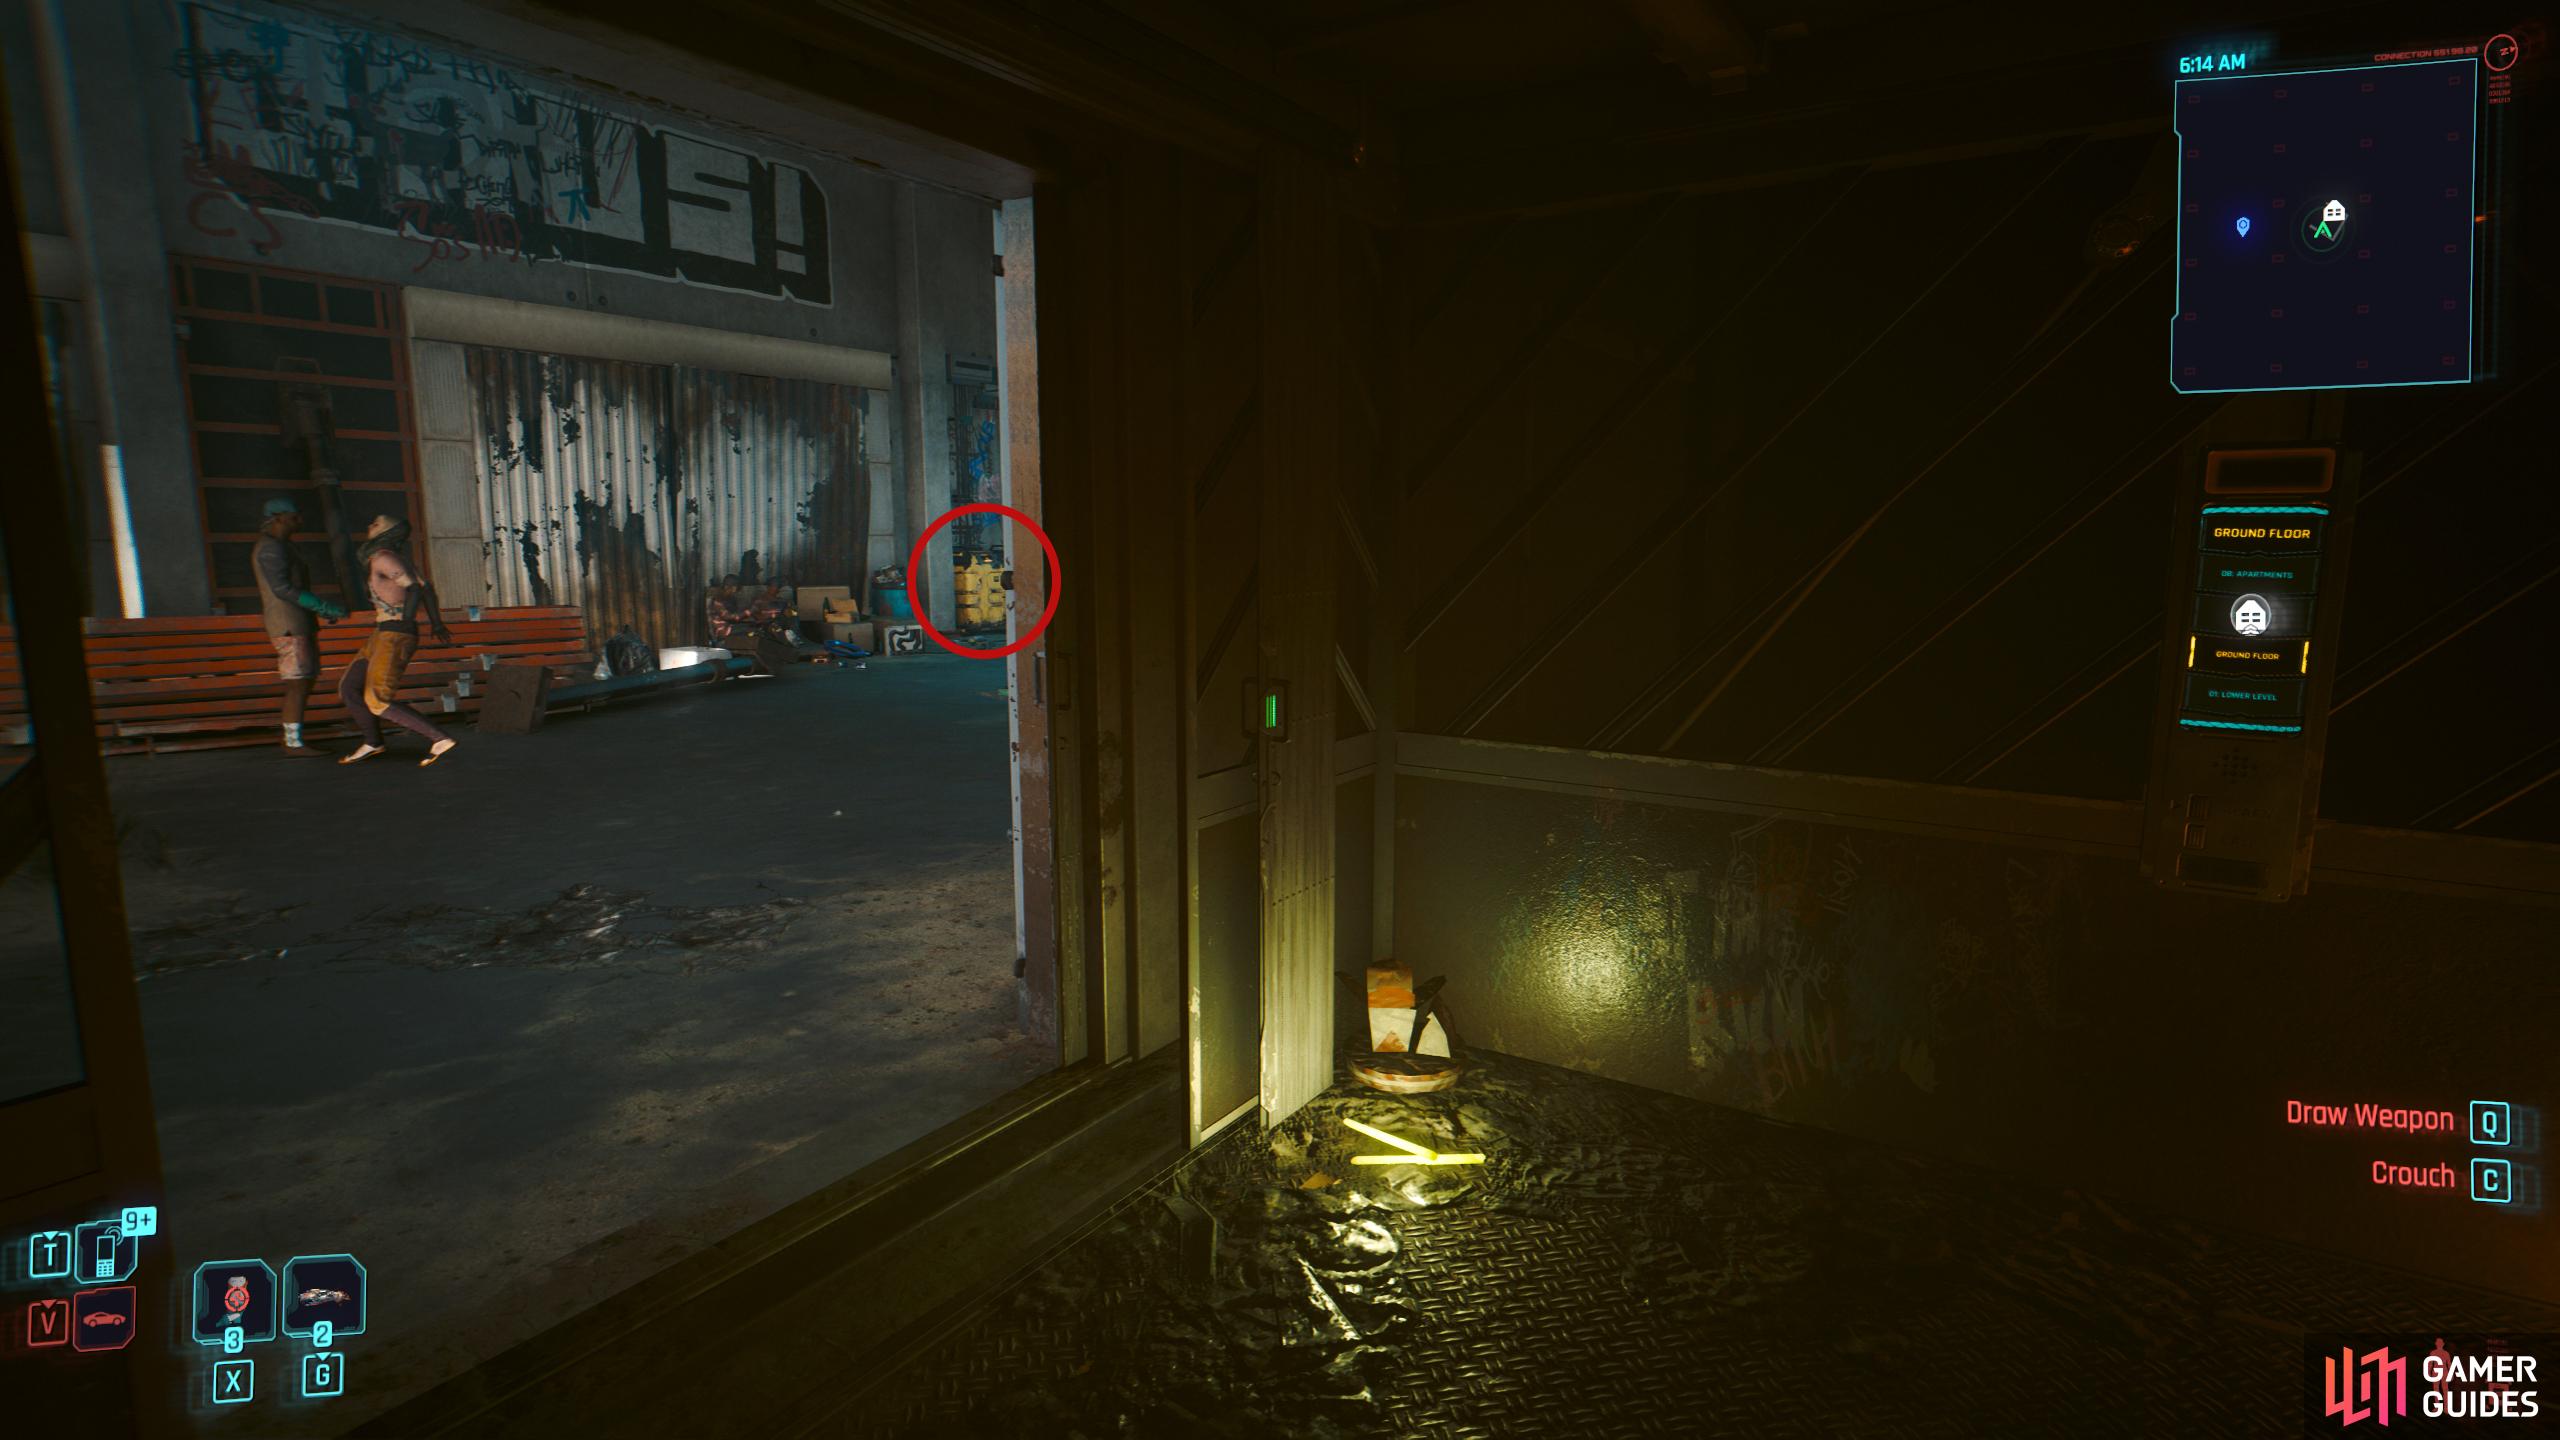
Take the elevator down to the ground floor, exit and head right to find the Relic Point.
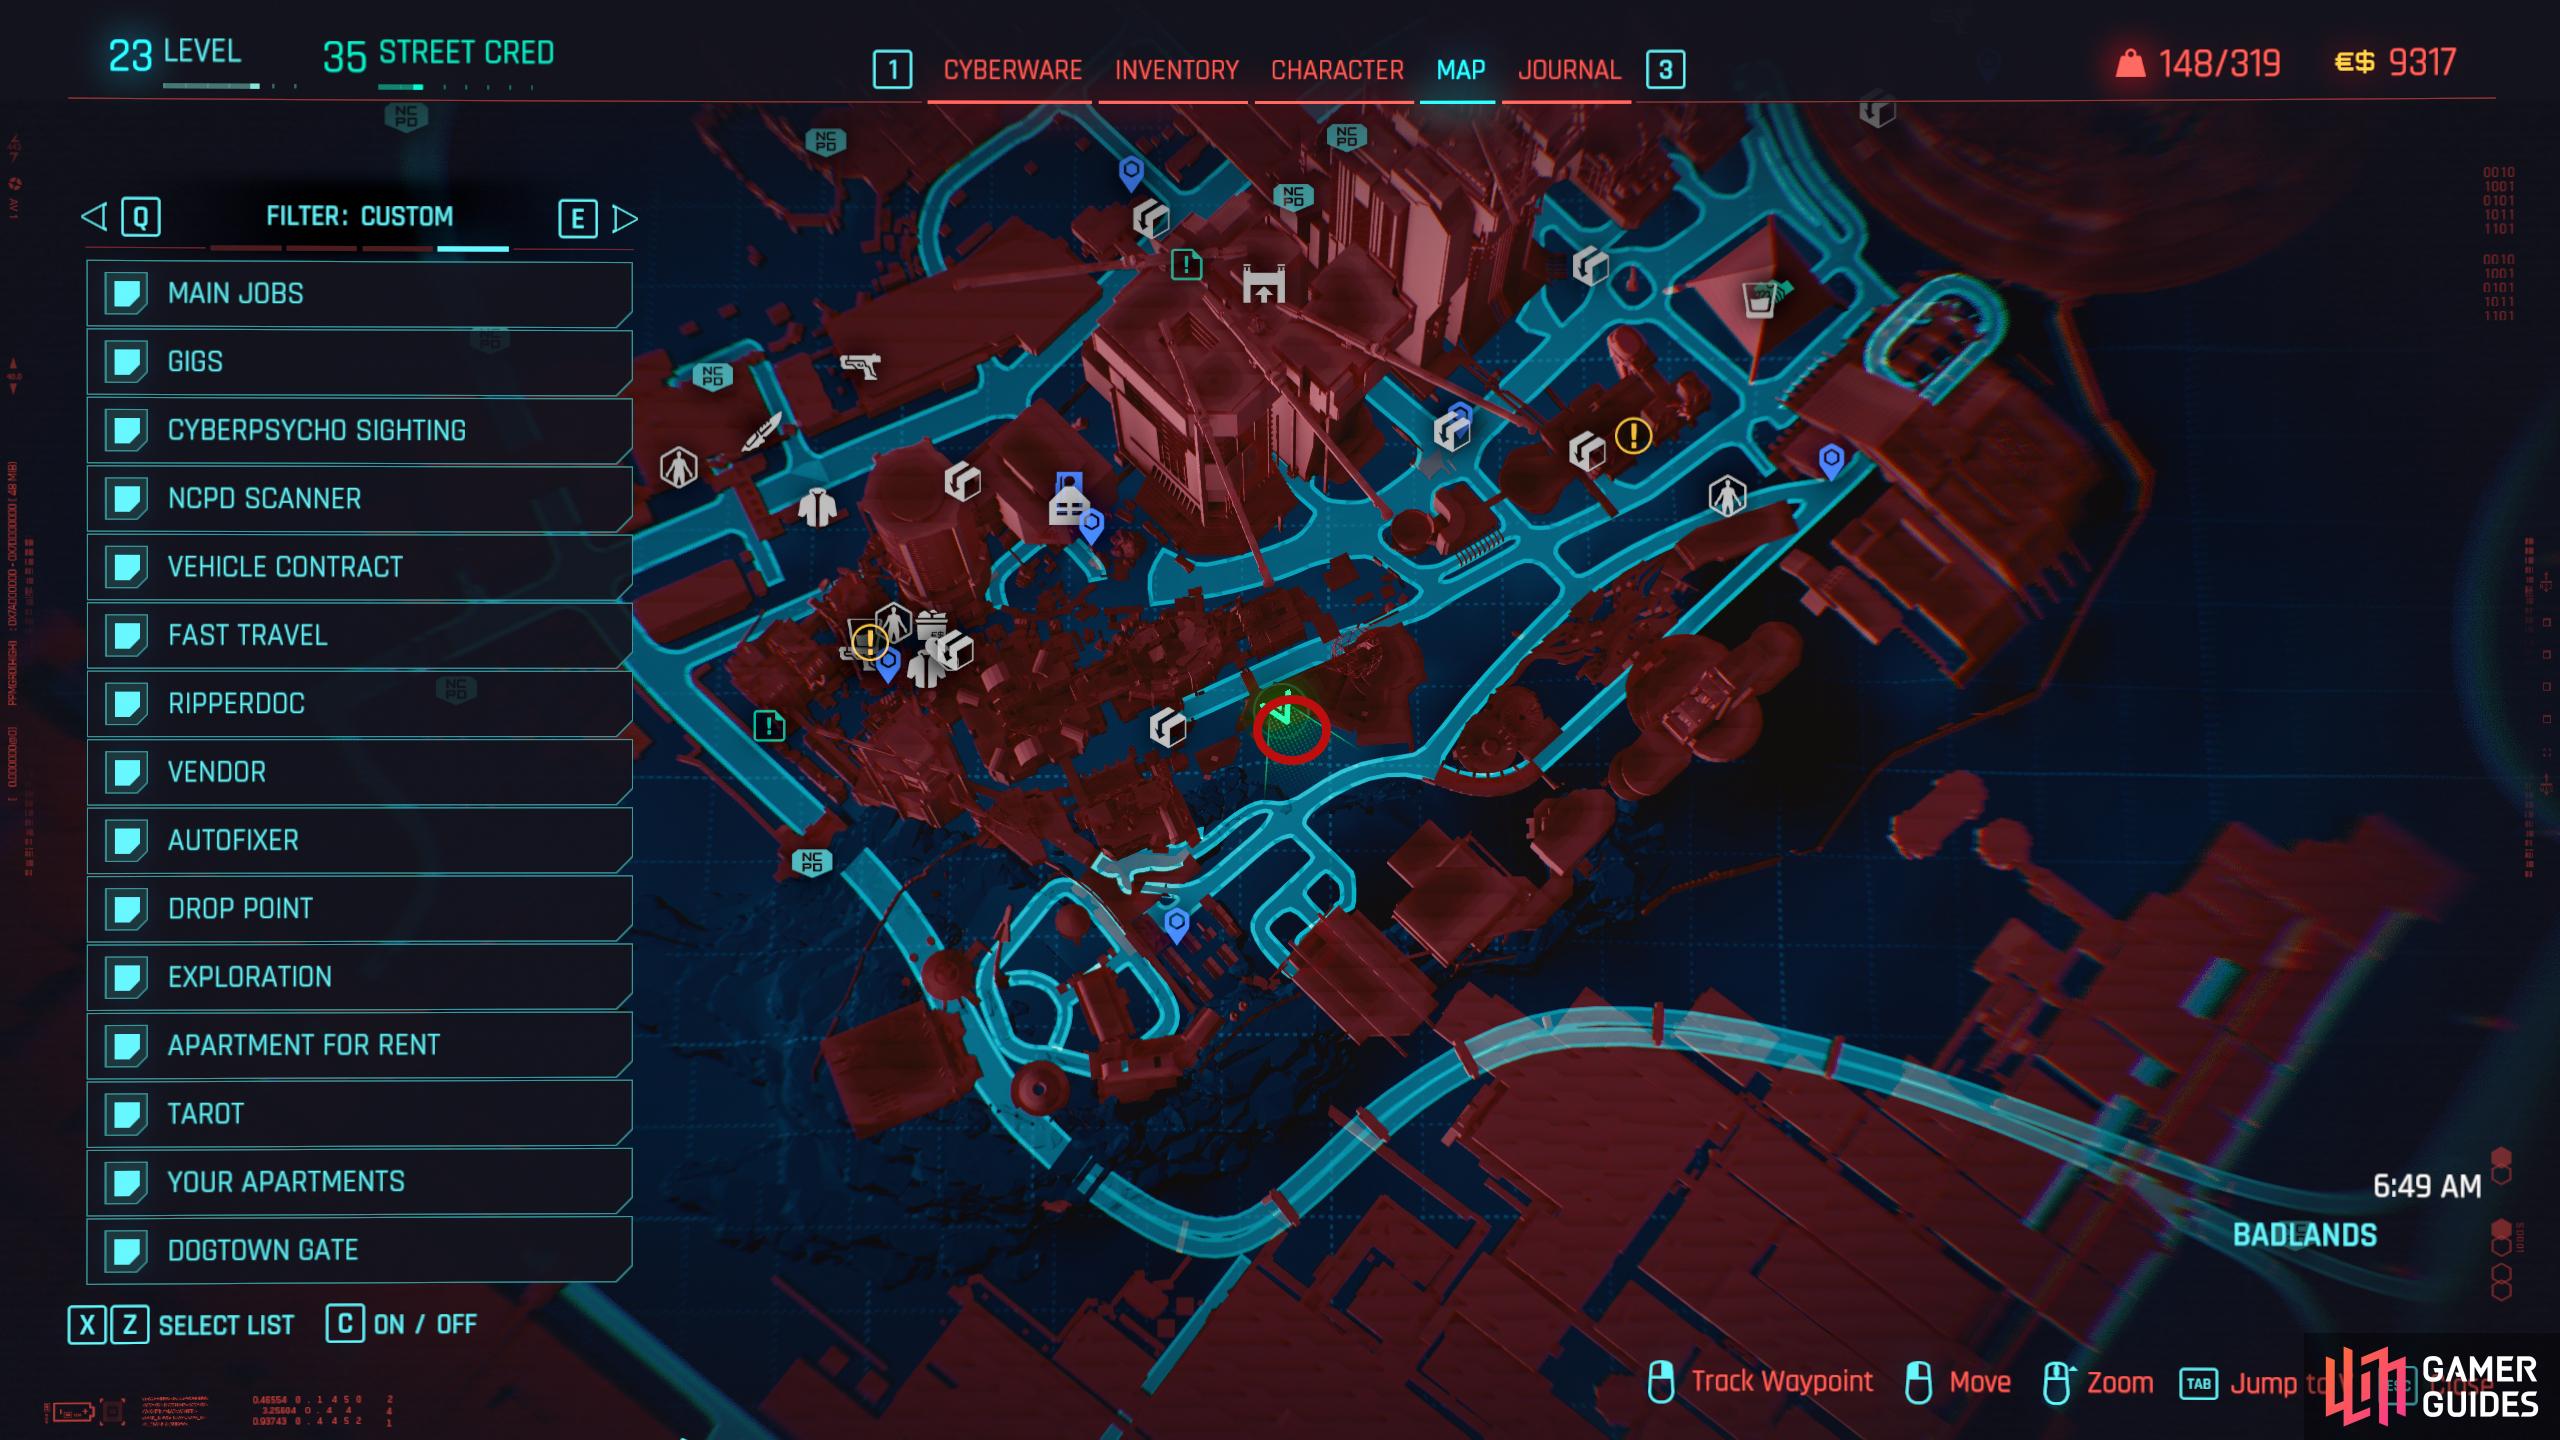
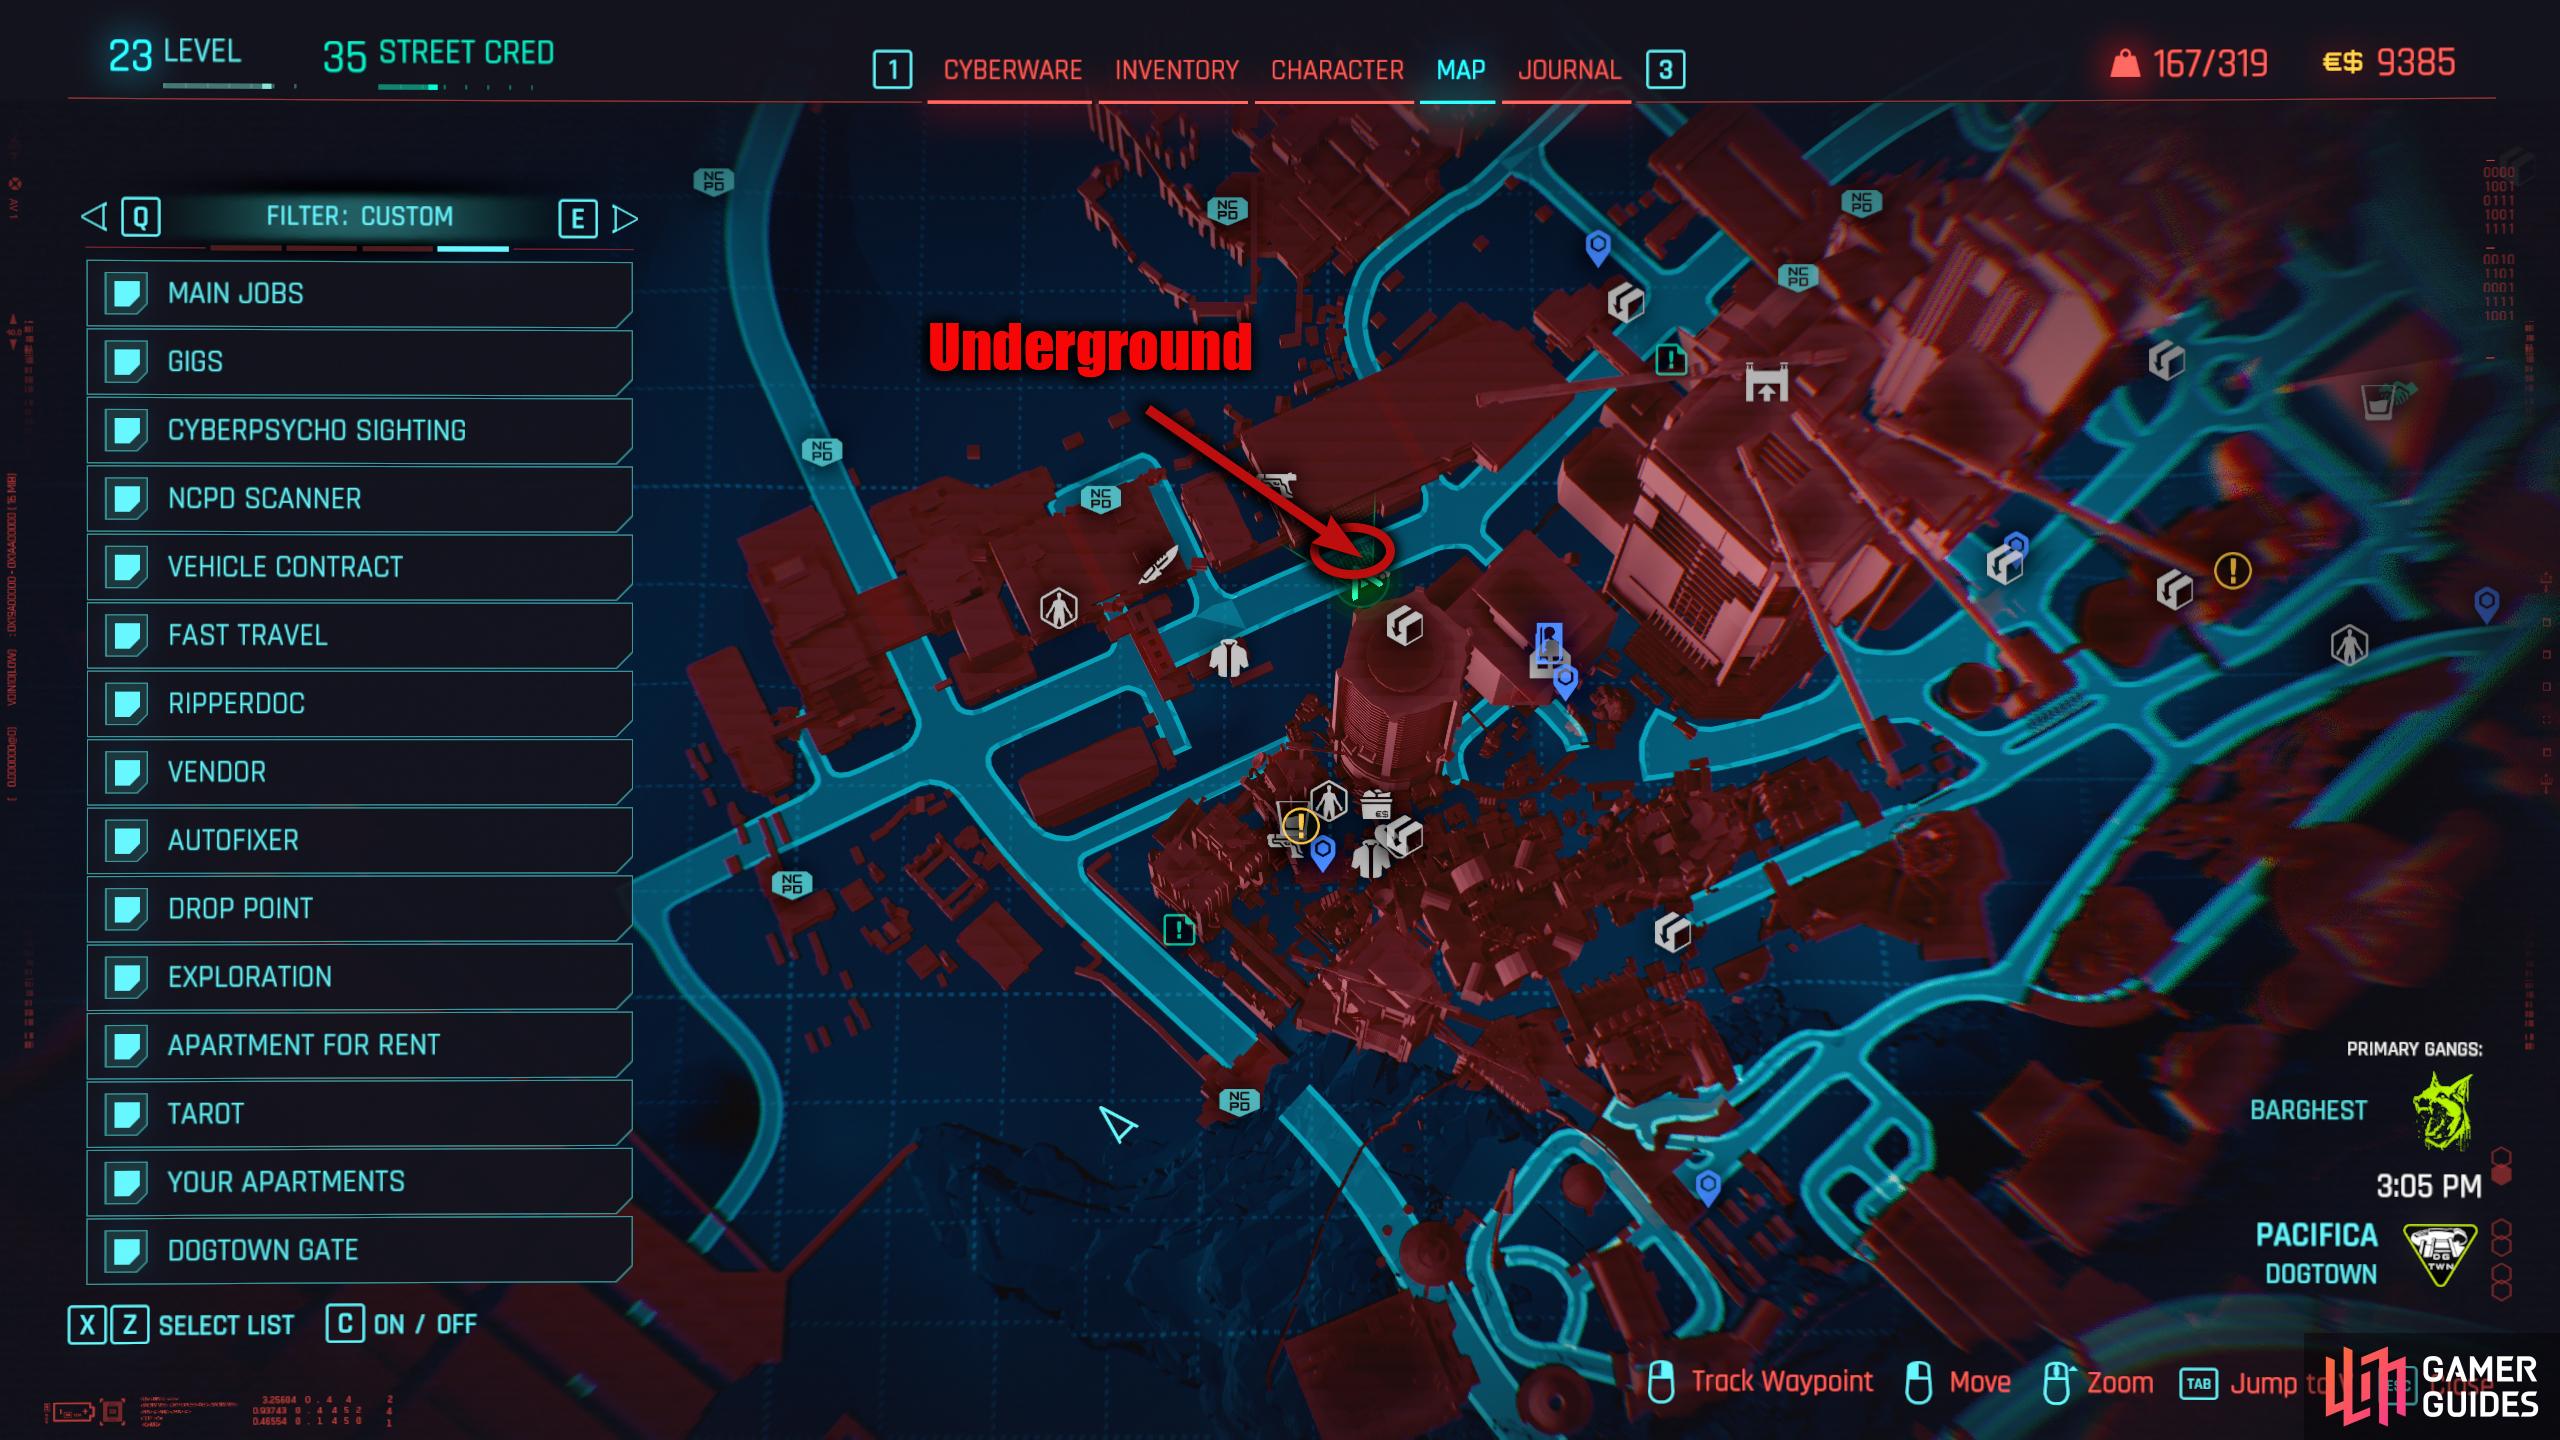
Relic Skill Point Location 7: Derelict Car Park
From the Terra Cognita Fast Travel, head northeast and go up the ramp then head right, past the Akebon building. Follow the road and head toward the large metallic ball-like structure. Just before the structure are some stairs leading down. Take them to the bottom and go down the ramp leading down into a tunnel to the east. Exit the tunnel and immediately head left to find the Relic Point sitting next to a metal gate to the left.
Relic Skill Point Location 8: Longshore Stacks Stronghold
This is another tough Relic Point to get as you’ll need to sneak/fight through an entire High Criminal Activity area. Travel to the Longshore Stacks Fast Travel and head east through the area. Keep following the path until you reach an area where you’ll see green Aurochs banners hanging off a building, and a choice to head up the overpass or head underneath it. Choose the latter as the High Criminal Activity area is underneath the overpass.
If you head up the overpass and enter the darkened area to your left you can find a way into the area bypassing a lot of the enemies at the entrance. You will need at least 9 in the Body tree to move a dumpster, revealing a gap in the fence. The fence can be found on the right side of the darkened green area, in between the containers. Once again, this is a hostile area full of enemies, turrets, traps, and cameras, so we will not cover all of these in the guide. Expect to find one or more of the above at every corner, so make sure you’re quick saving regularly.
This guide will use the path of least resistance, but if you’re fighting your way in, you can ignore the stealthy parts. From the opening you created in the fence, drop to the platform below, but be careful of the camera on the wall to your left, and the enemy who patrols the platform. Follow the platform to the left and you’ll see a couple of containers. The top one has an enemy in it, and the bottom has a turret.
Hack the turret, and head through the bottom container which will take you into the building. This area has several enemies, and a camera on the right wall. Navigate your way forward and drop to the floor below where you’ll find a tunnel leading underground. Follow the tunnel, taking the enemies out along the way. Eventually, you’ll enter a large room with a lot of enemies, a camera, and a couple of turrets. The easiest way to deal with this room is to hack and take control of one of the turrets on the far wall and attack the enemies with it. If you want to stay stealthy, you’ll have to destroy the turrets instead.
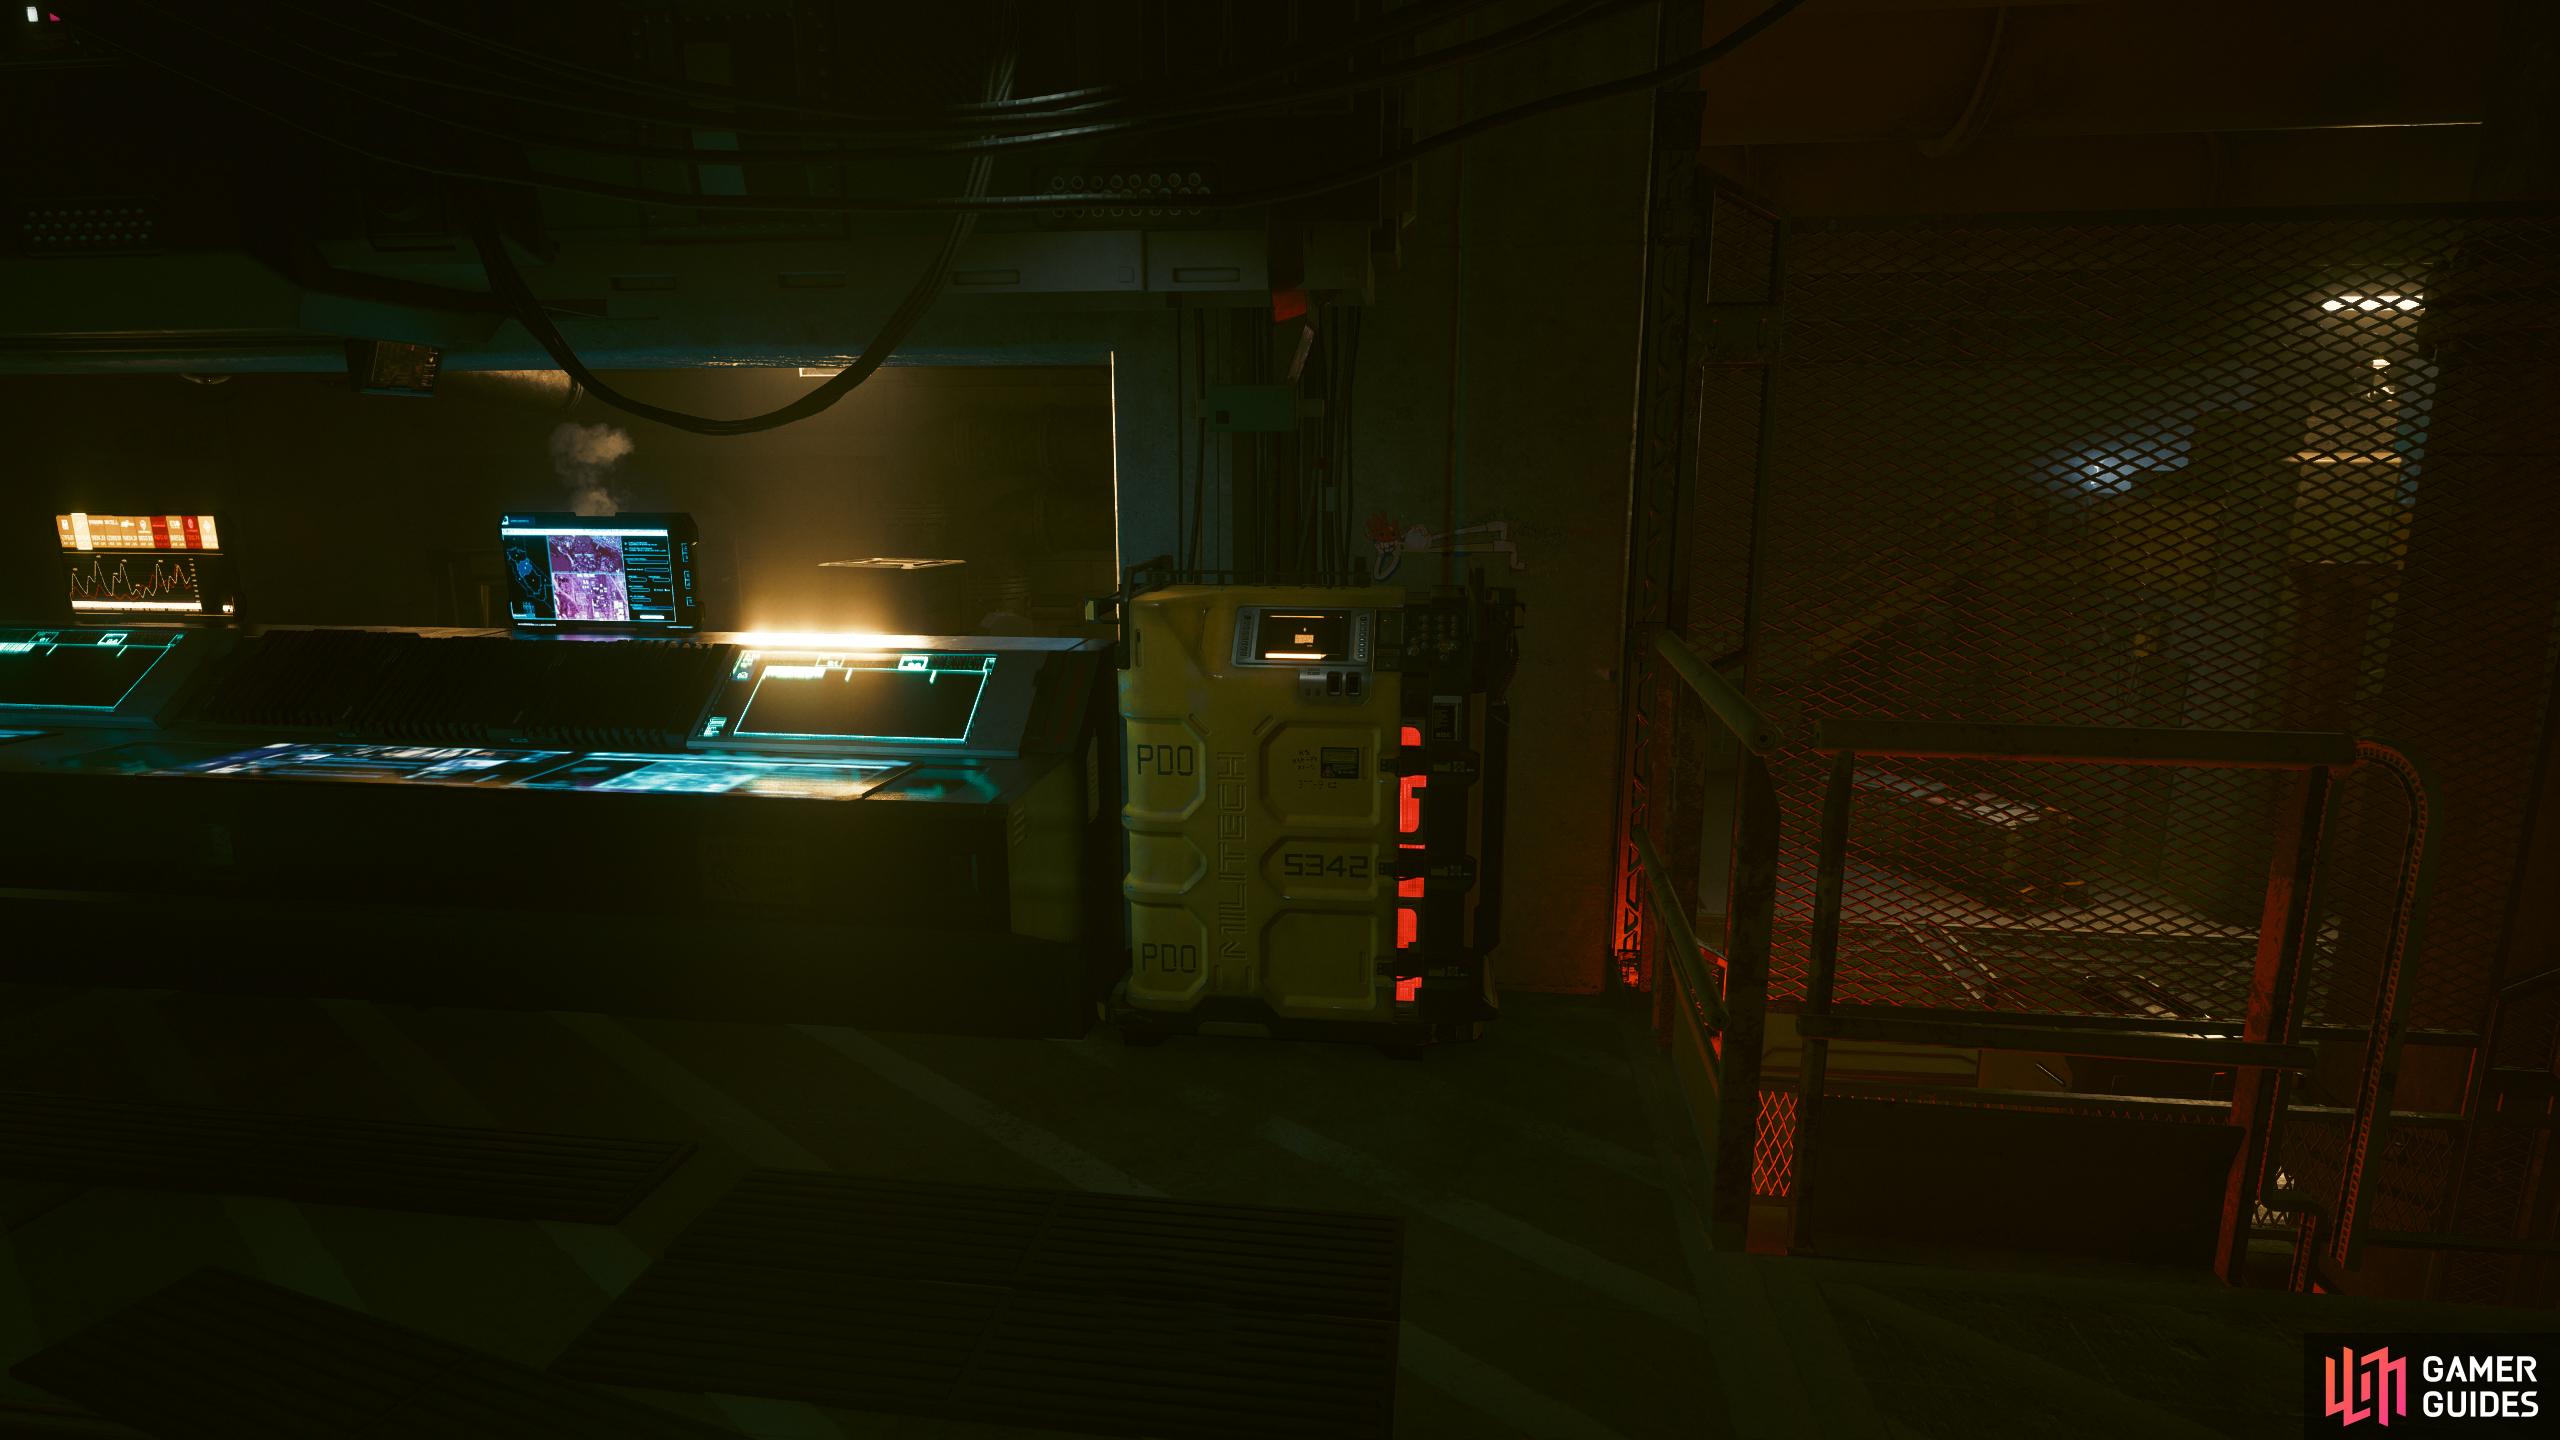
Now, if you’re purely here for the Relic Point, you can hack the camera and turn it off then sneak to the doorway on your left where you’ll find the Relic Point next to the computer system on the right.

(1 of 4) Go forward, disabling the turret in the bottom container, and head into the building.
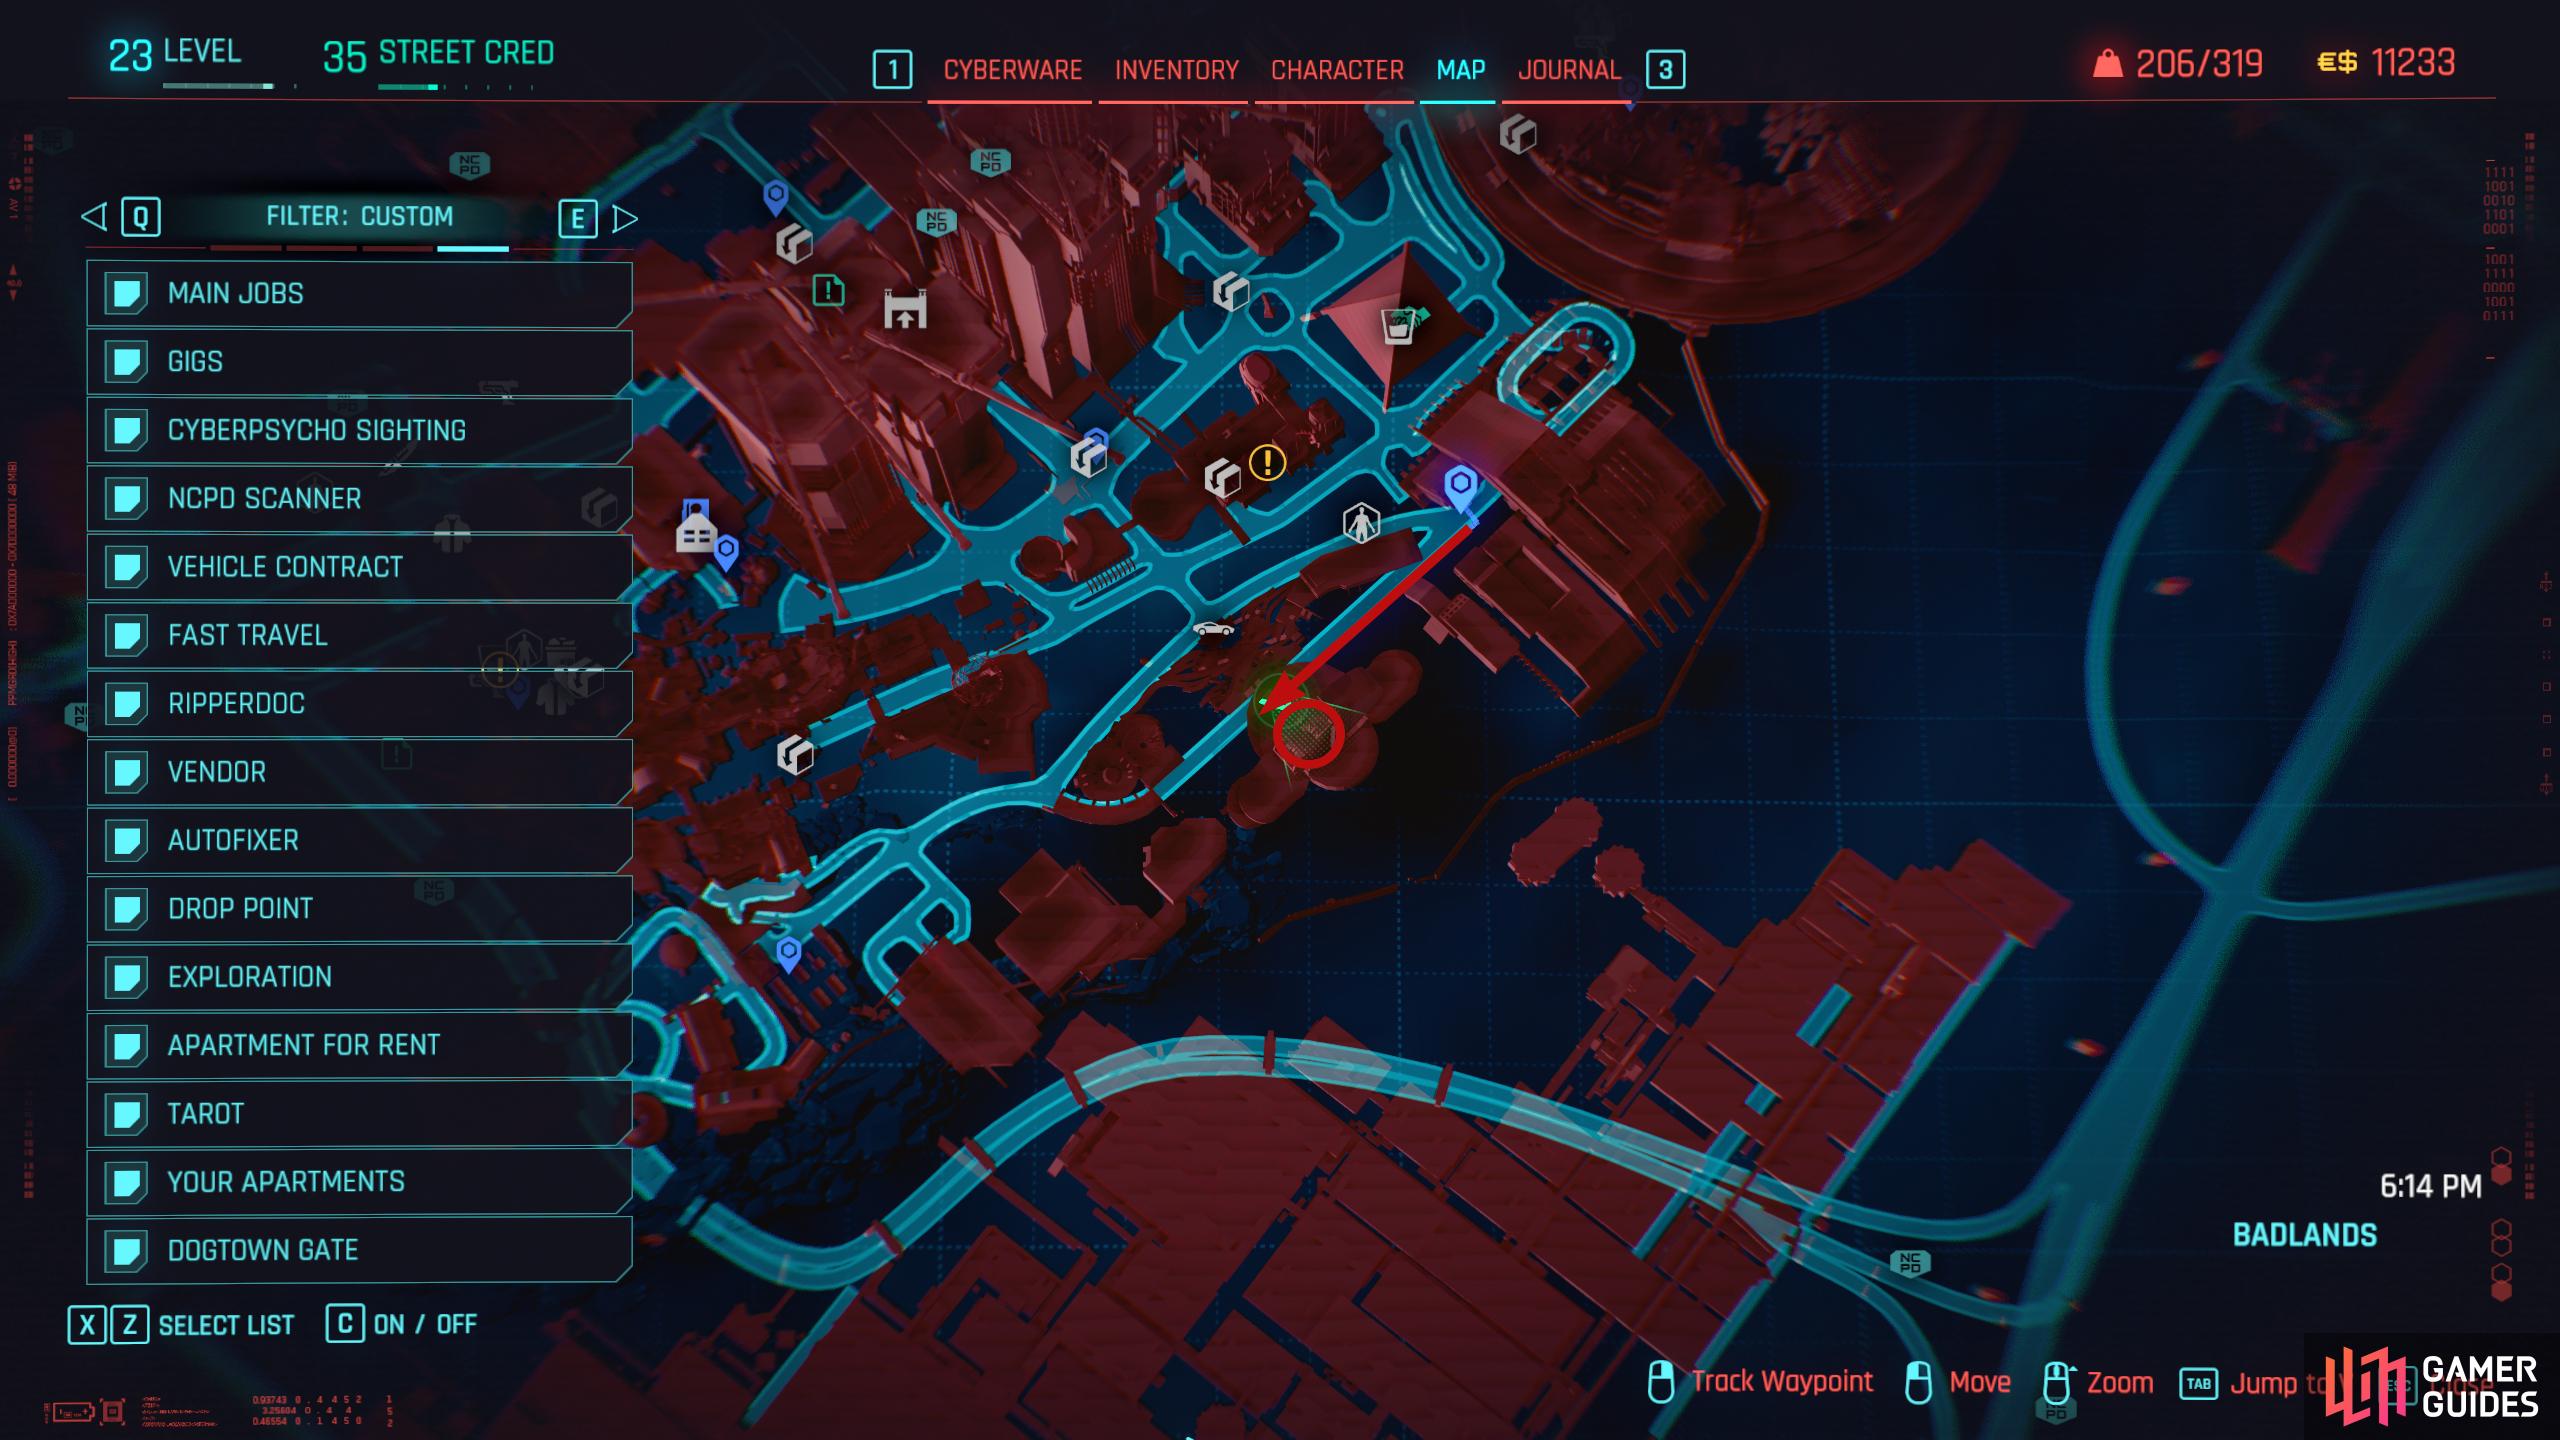
Relic Skill Point Location 9: South Voodoo Hideout
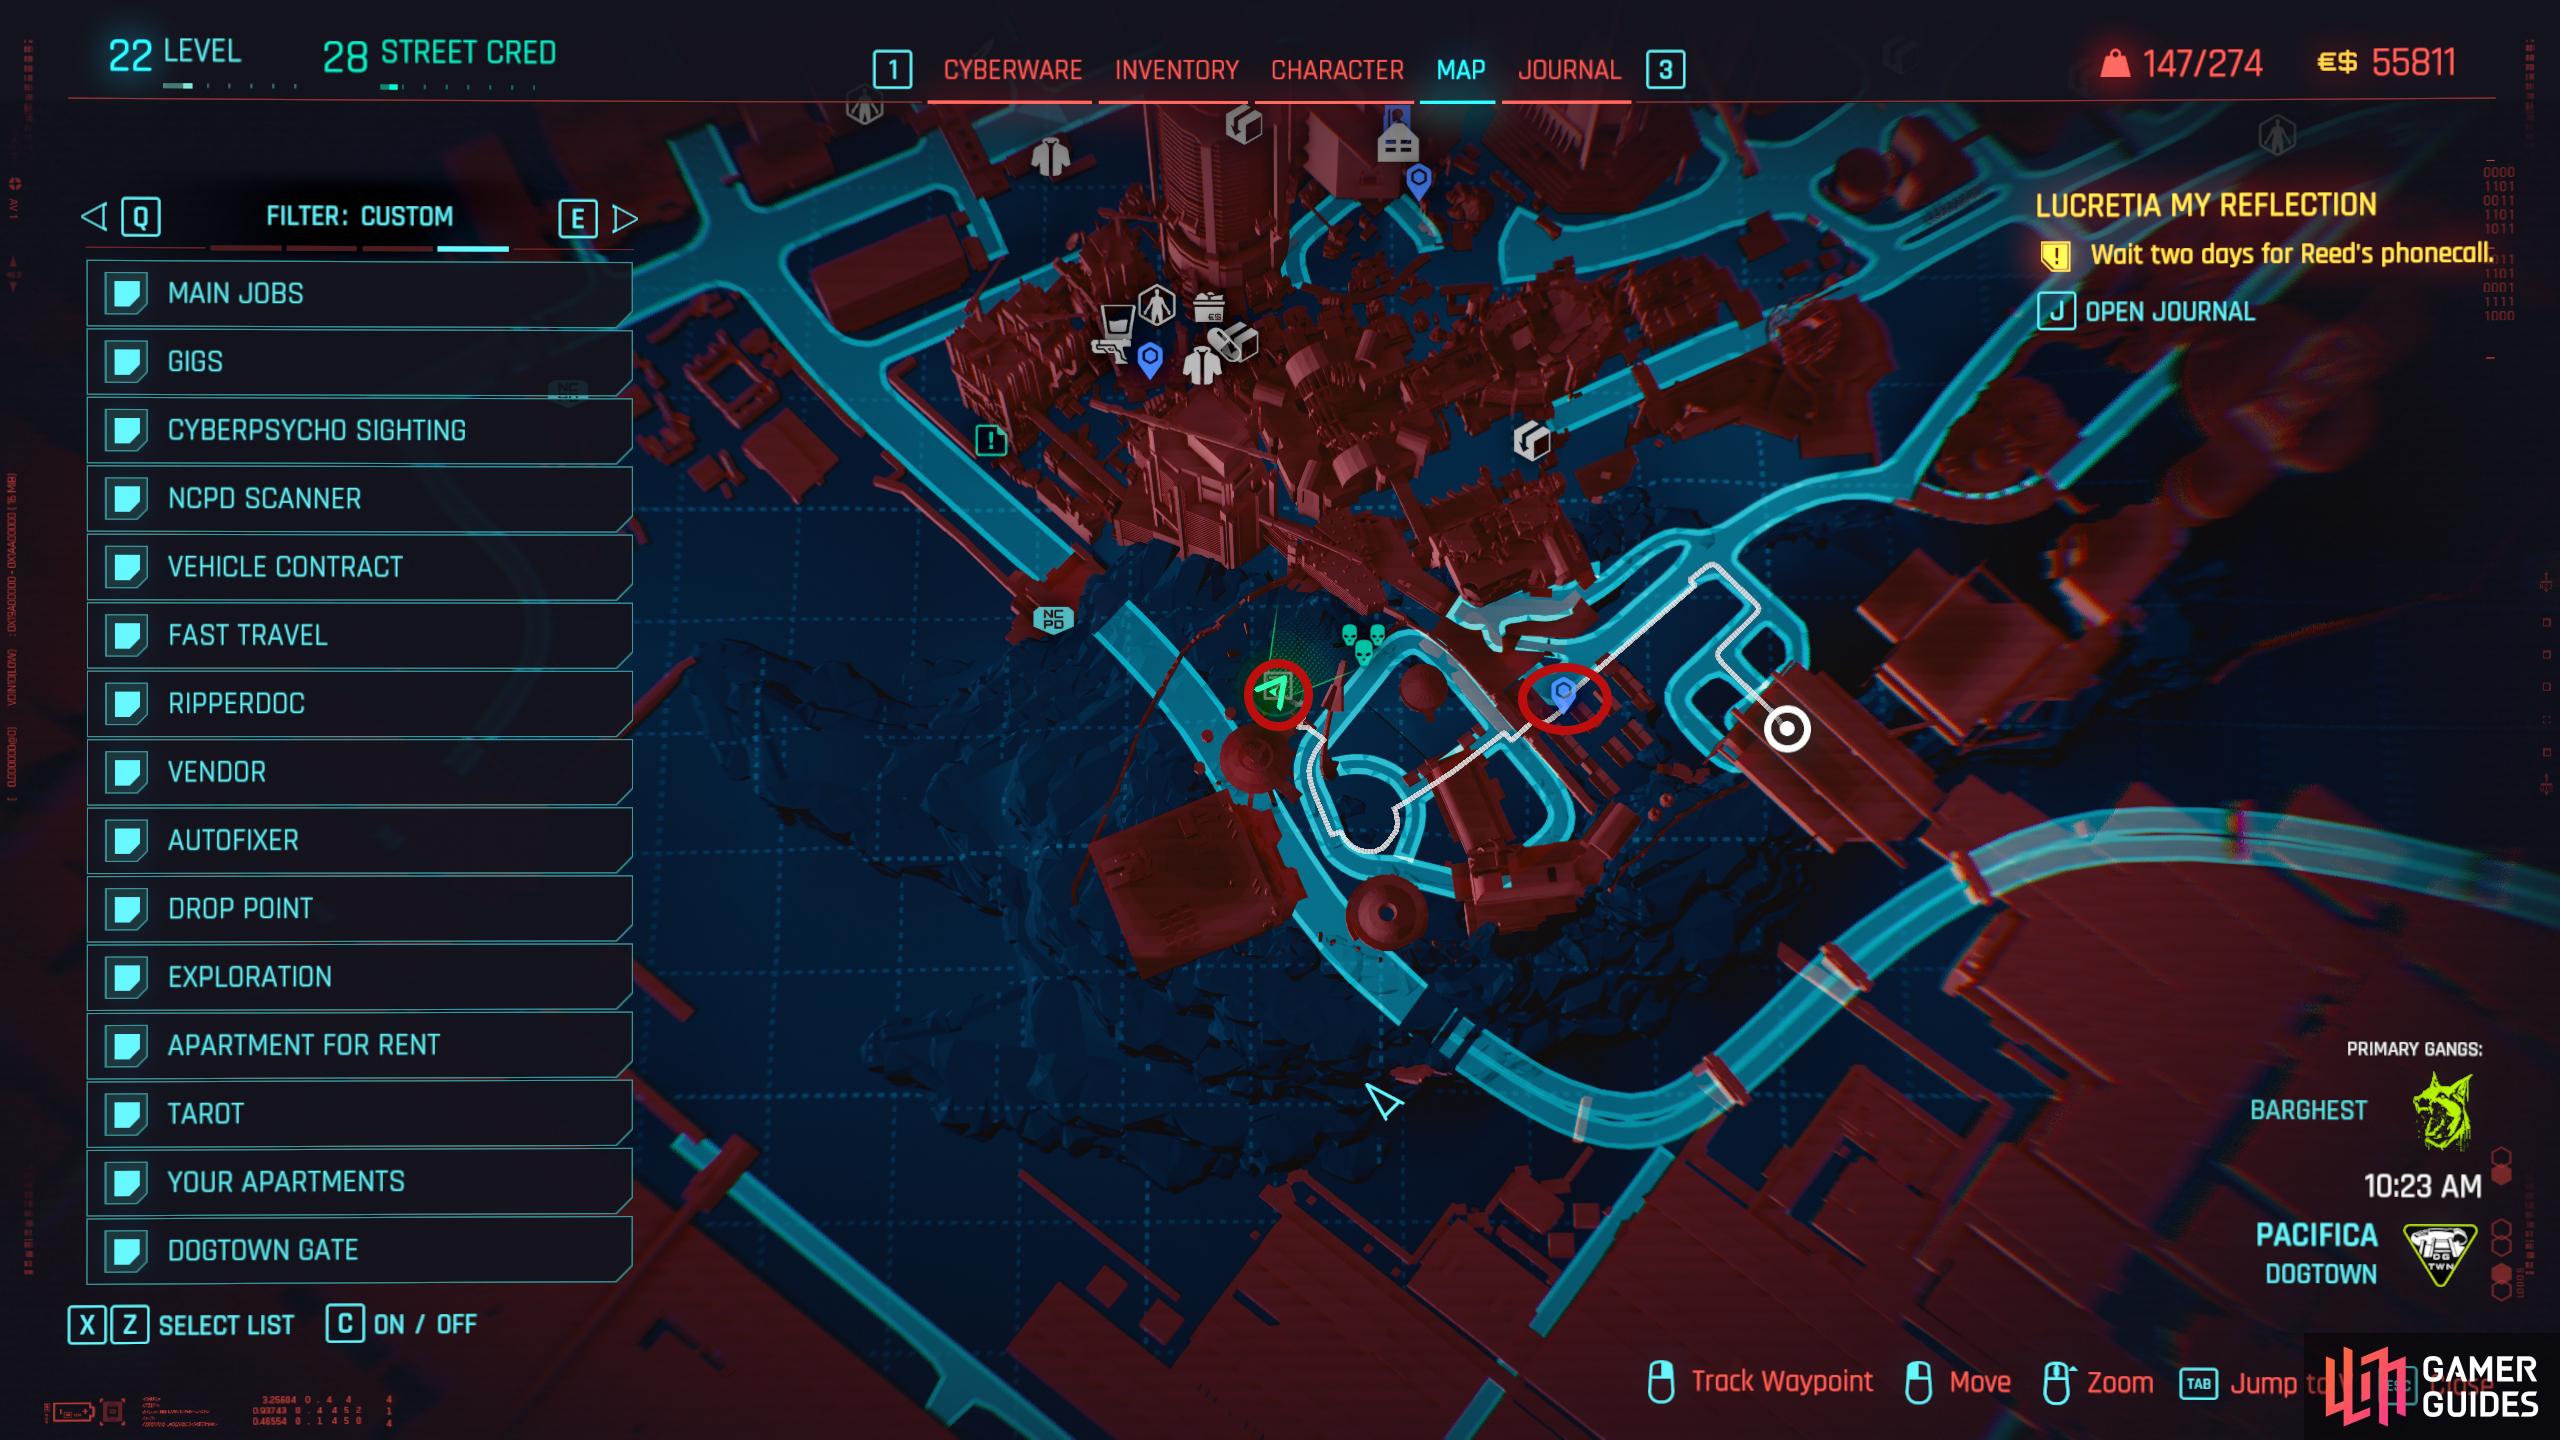
Fast Travel to the Luxor High Wellness Spa Fast Travel and follow the road southwest 250m. The Relic Point will be behind a barricade opposite the stairs on your left. You’ll know you’re in the right place as there are some enemies right next to it.
Relic Skill Point Location 10-12
The first three Relic Points you’ll get when you first unlock the skill tree during the first mission of Phantom Liberty.
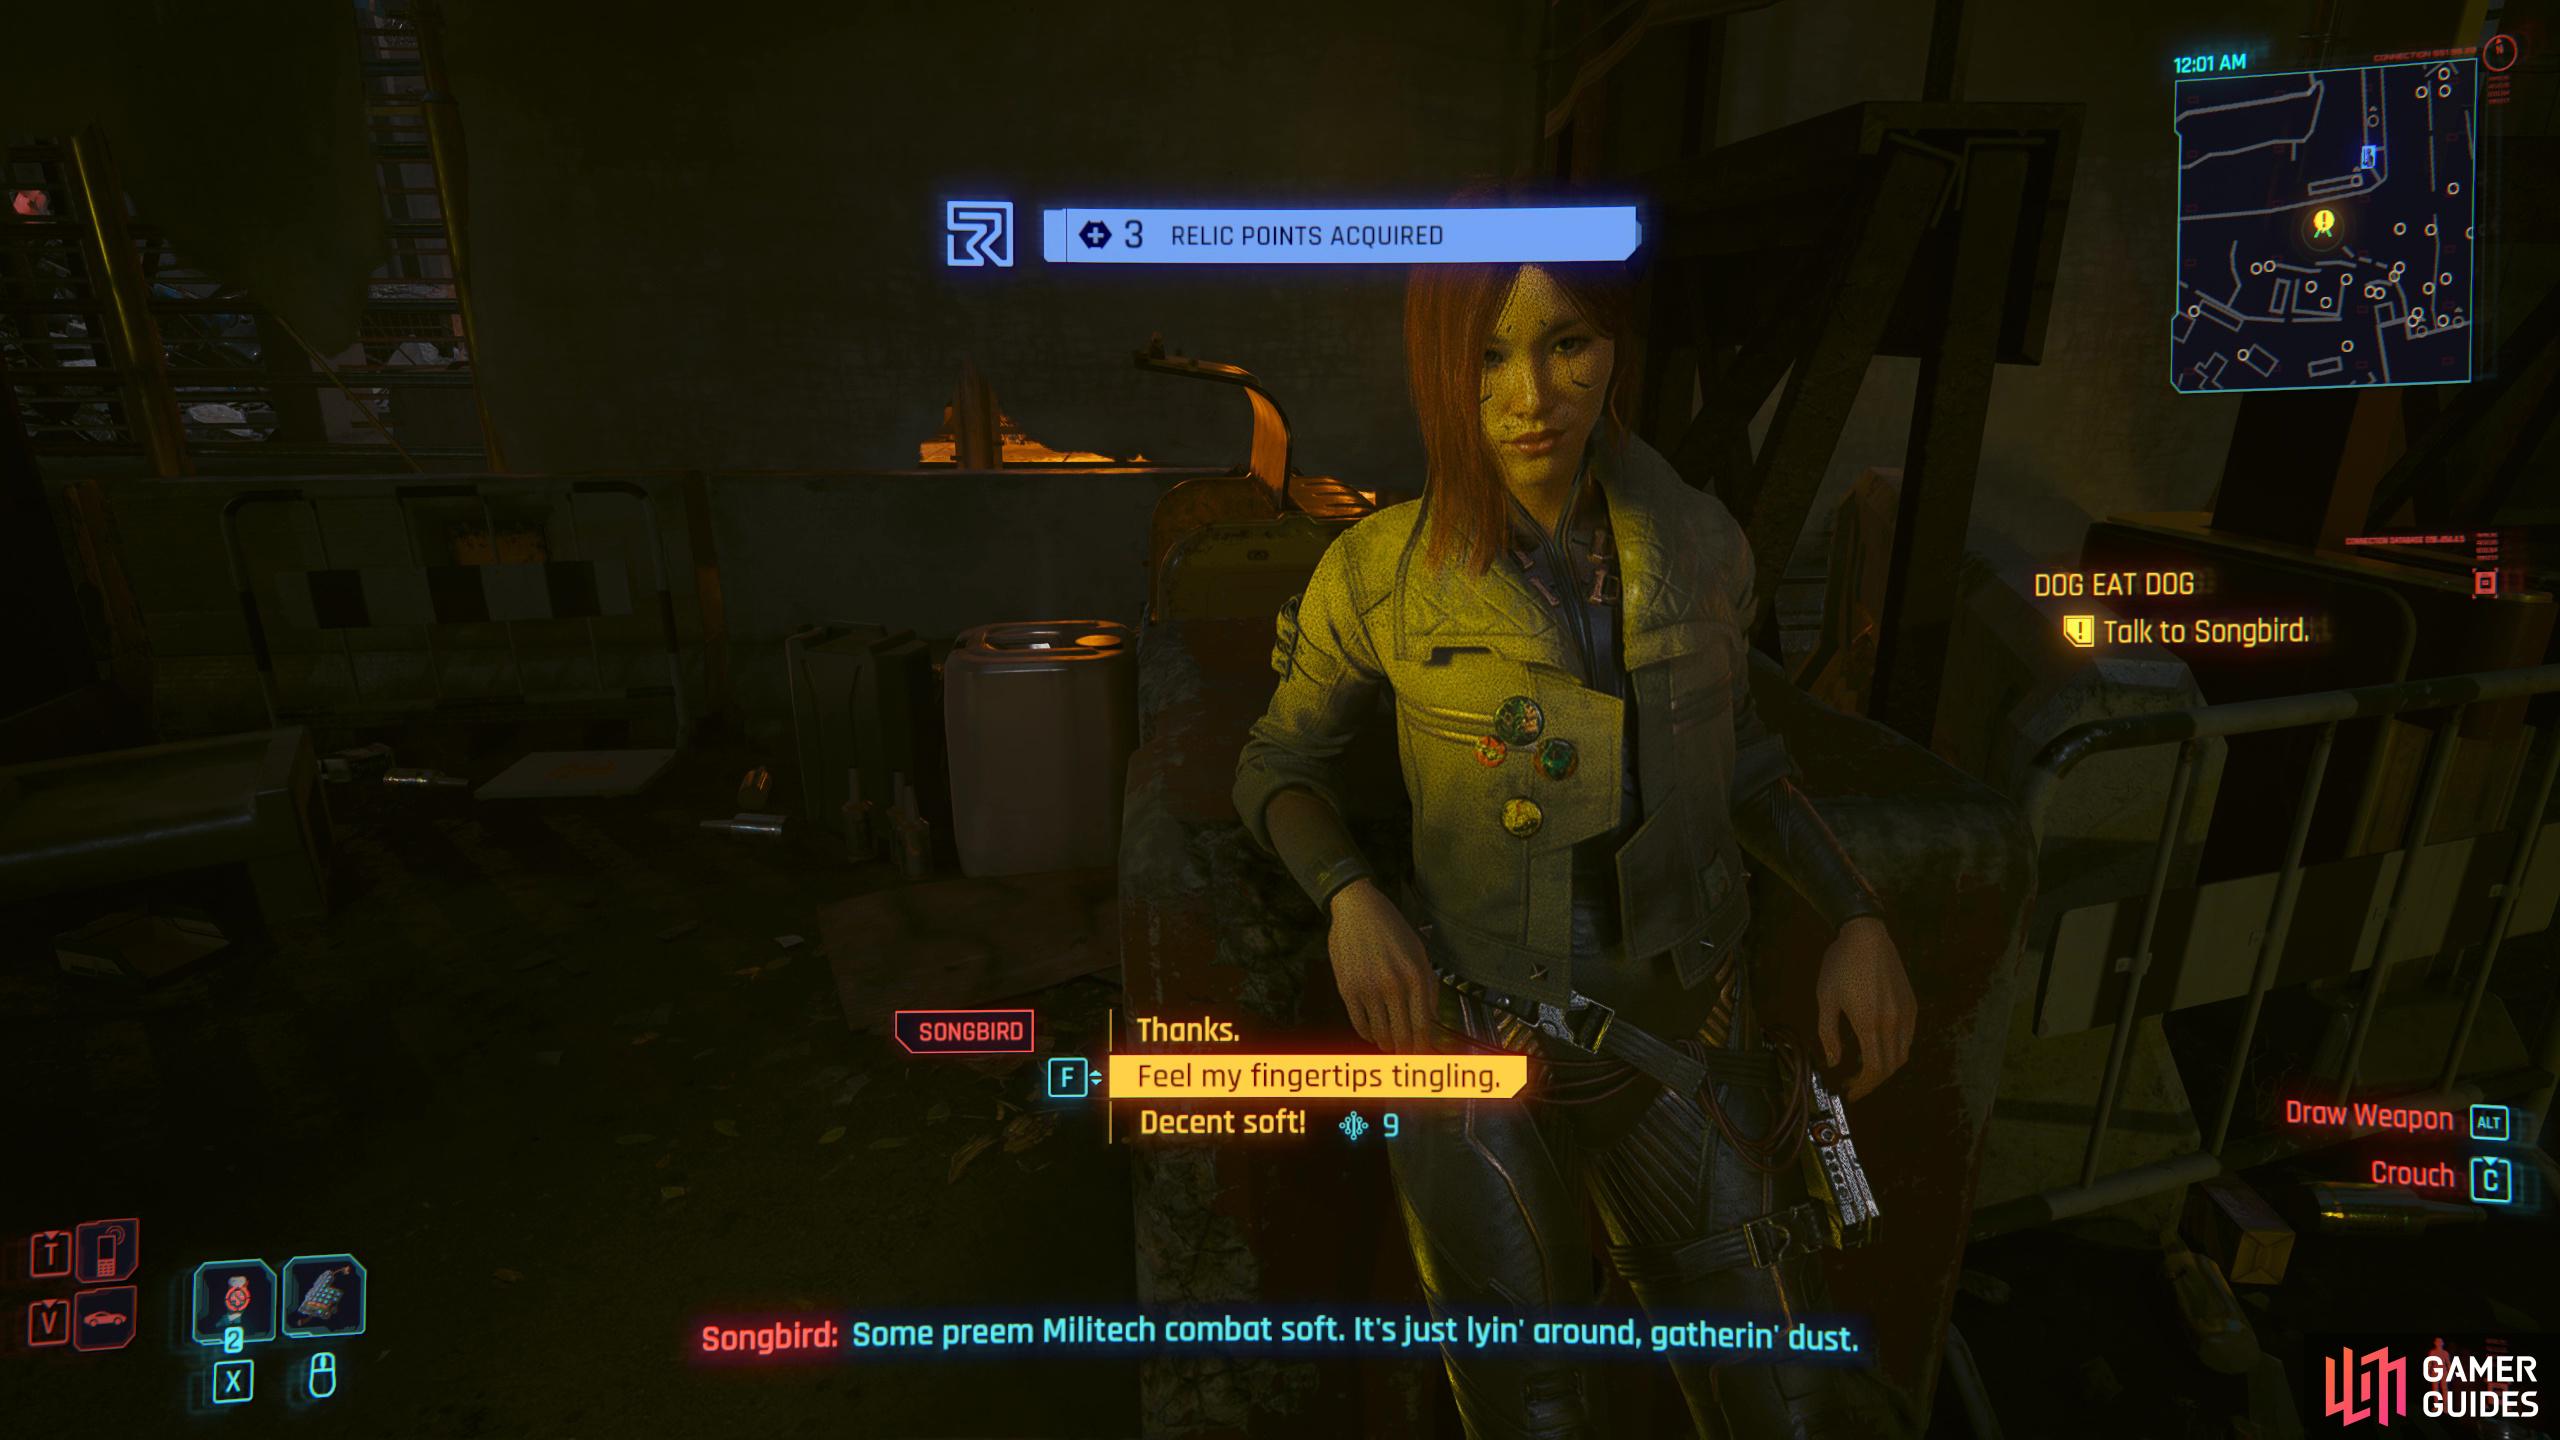
You’ll get three Relic Points when you unlock the tree during the first mission of Phantom Liberty.
Relic Skill Point Location 13-15
You’ll get another three points during the Phantom Liberty story mission “Firestarter”.
No Comments