
Some jobs are easier to start than complete, and the side job Voodoo Treasure is a prime example. Netrunners tend to know their own, especially ones with prominent exploits… even if they don’t get along. That being the case, it should be no surprise that the netrunner twins - Aurore and Aymeric - know of Slider, and an observant V can discover the location of the deceased Voodoo Boy’s stash. This page will cover how to learn about Slider’s stash, and how to find it in Cyberpunk 2077 Phantom Liberty.
How to Start Voodoo Treasure
You’ll encounter Slider during the main job The Damned, and suffice to say, his encounter with V and Reed will leave him worse for wear. Later, during the main job I’ve Seen That Face Before you’ll sneak into the trunk of the car of the netrunner twins. Your goal is to commandeer the vehicle and steer it to where Reed and Alex are waiting, but you can eavesdrop on them by picking the following dialog options:
- ”Hold on, wanna eavesdrop.”
- ”It’s ok, chill.”
- ”Gimme a sec!”
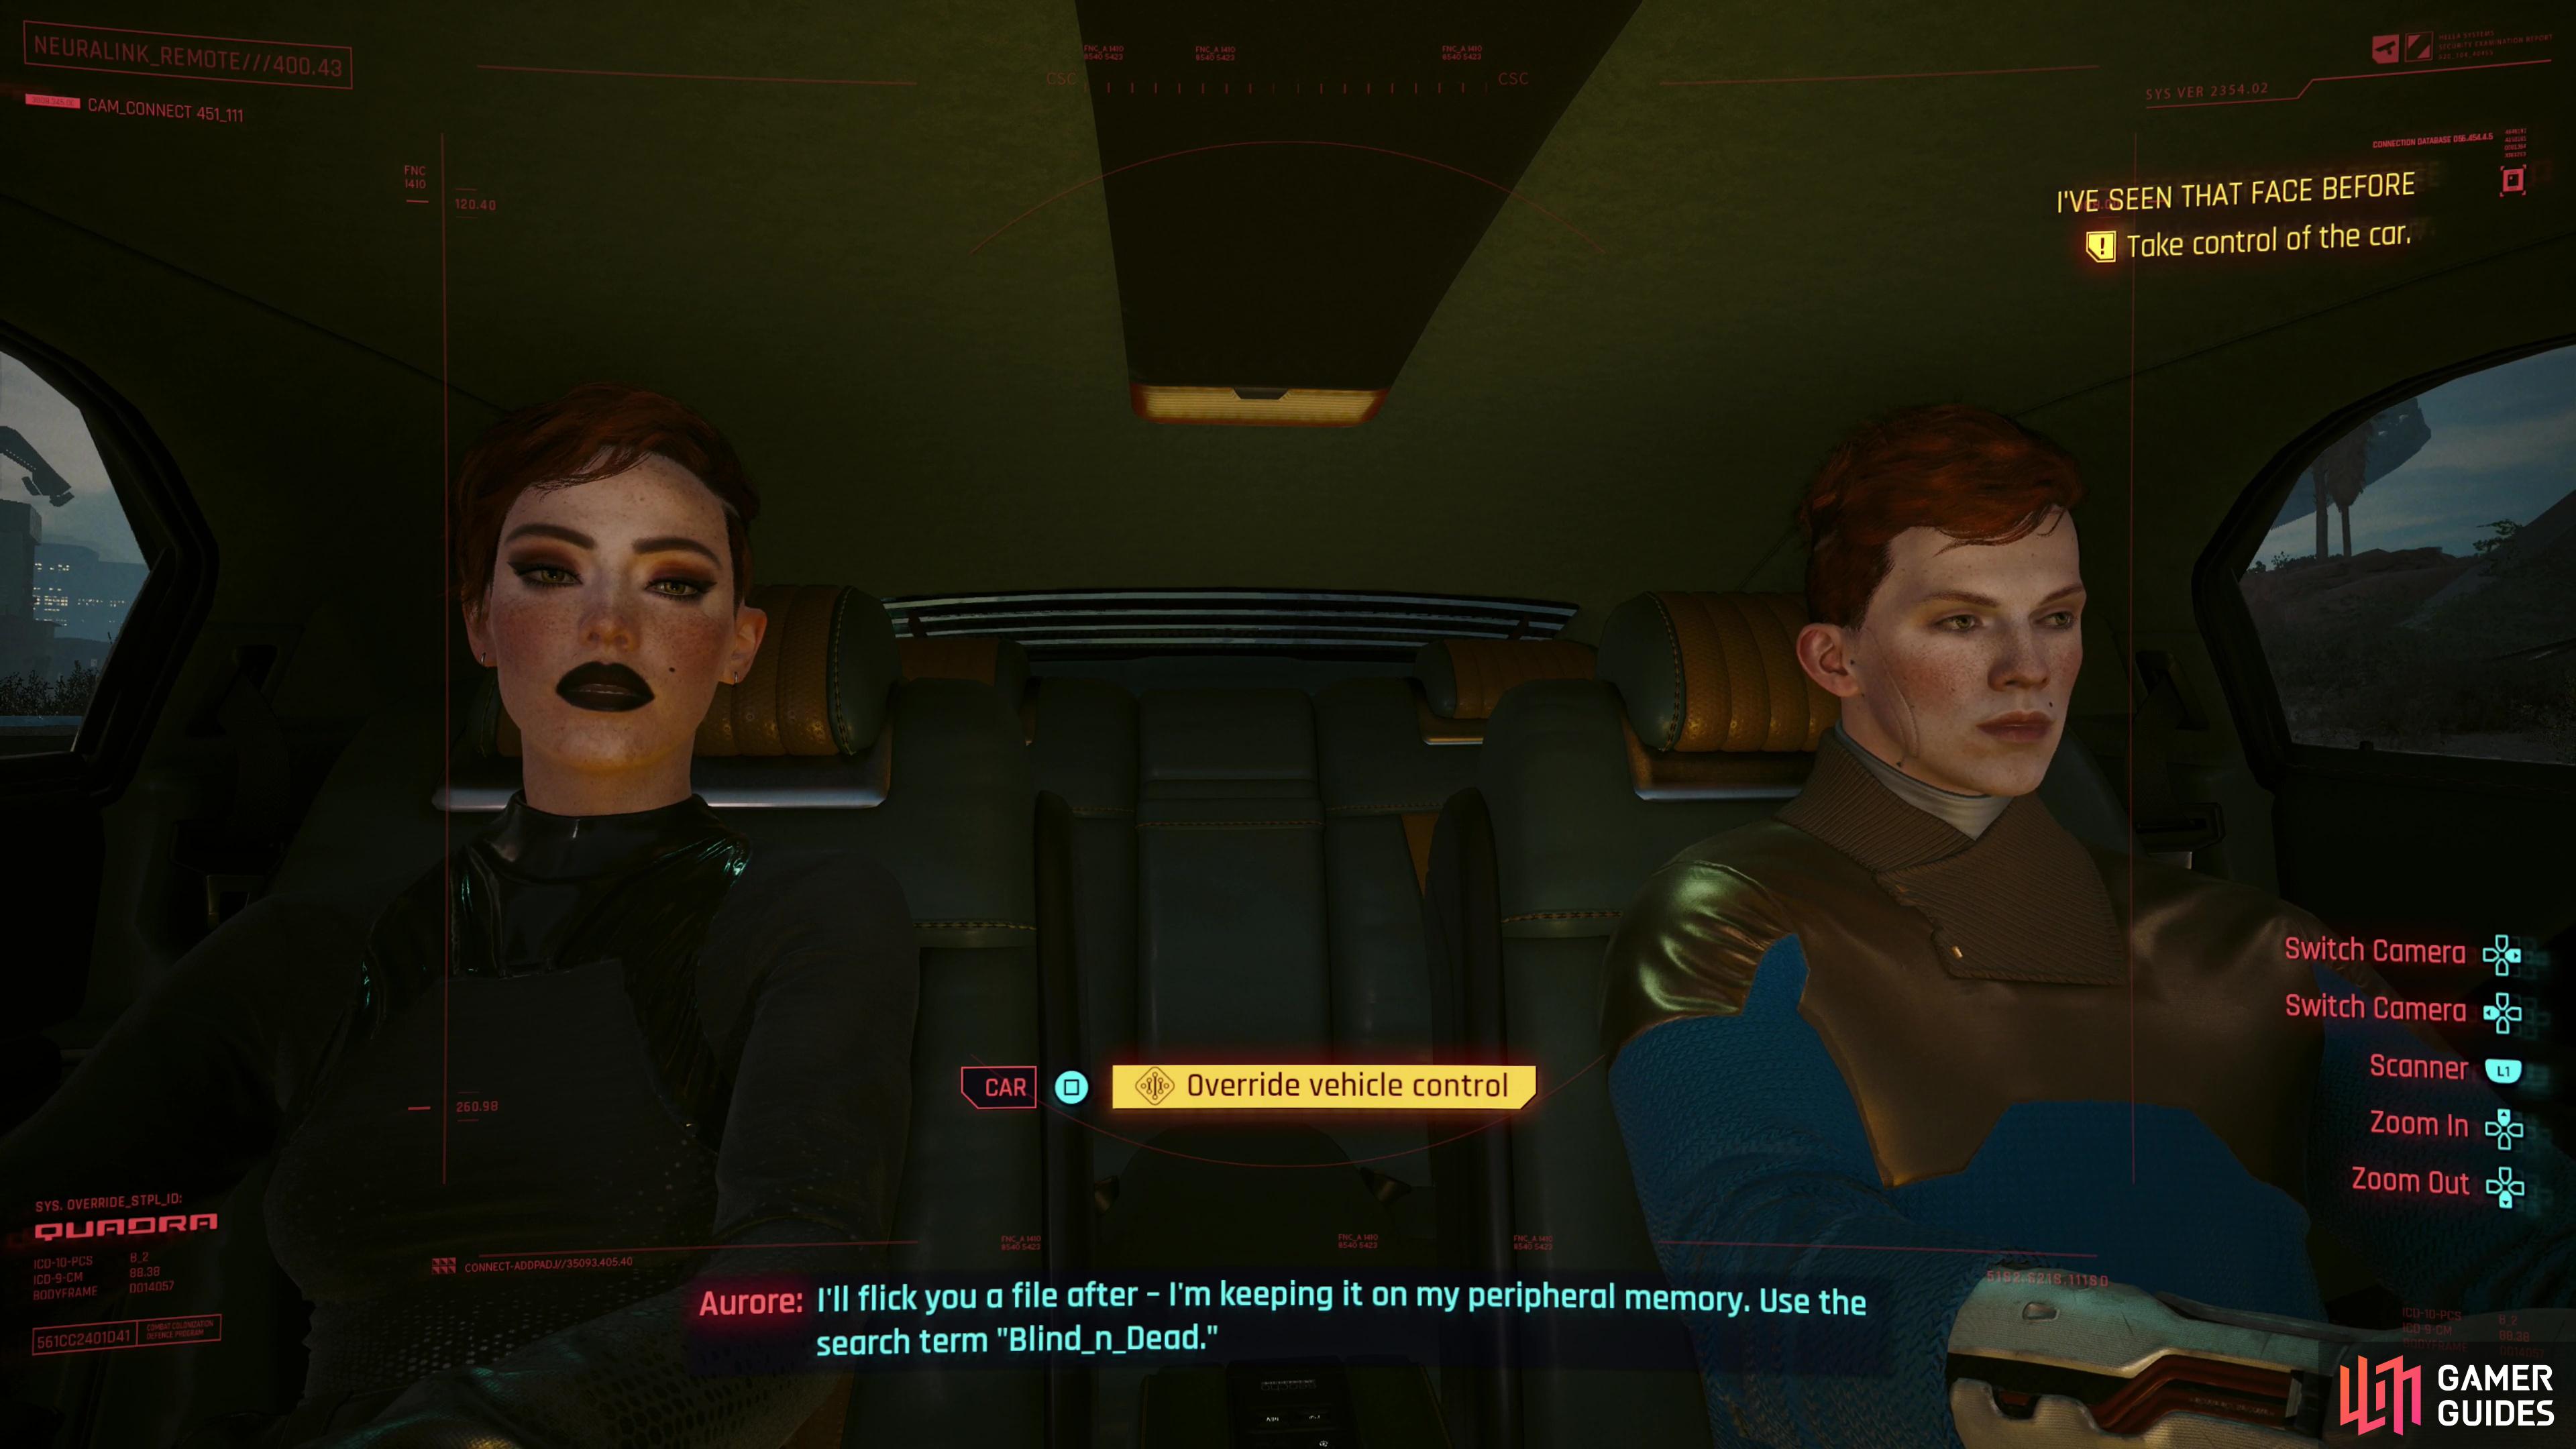
Eavesdrop on the netrunner twins during the main job “I’ve Seen That Face Before” to learn about a file called “Blind_n_Dead”,

then after the twins get FIA’d, jack into Aurore and download the “Blind_n_Dead” file to unlock the side job “Voodoo Treasure”.
Reed will protest, but if you persist you’ll eventually hear Aurore mention a file called “Blind_n_Dead” - you must get this info if you want to start the side job Voodoo Treasure later. Waiting to get this info from the twins will delay your takeover of their vehicle, which will make a following timed segment more difficult, but if you hack the vehicle to calibrate its ICE you’ll have more time, making the added difficulty somewhat moot (pick the option [Intelligence 15] “ICE here - clearly optimizable.”) to do this.
The quest will start later after you take the twins to Reed and Alex, after which you’ll have to jack into Aurore’s corpse. Be sure to choose the option Search file - Blind_n_Dead while doing this before picking the yellow quest option, as this is what will finally trigger the quest to unlock. That said, you won’t actually be able to make progress on this job until you finish the main job Firestarter.
How to Find Strider’s Stash Beneath the Needle
Complete the aforementioned main job Firestarter, completing either Songbird’s Route or Reed’s Route, as you prefer. Once you’re done you’ll finally be left to explore Dogtown again - the first time you’ve had freedom since I’ve Seen That Face Before.
First up, make your way to the Needle, an obelisk in the middle of the road west of the pyramid from which Mr. Hands lords over Dogtown. Failing that, just take the main road leading away from the Stadium and you should find it. You want to be under this landmark, and you can do that by heading up to it and dropping through the triangular panes of glass surrounding the Needle… or you can just follow the quest trail, which should lead you there (note that this is also where the Gig: Heaviest of Hearts can be started.
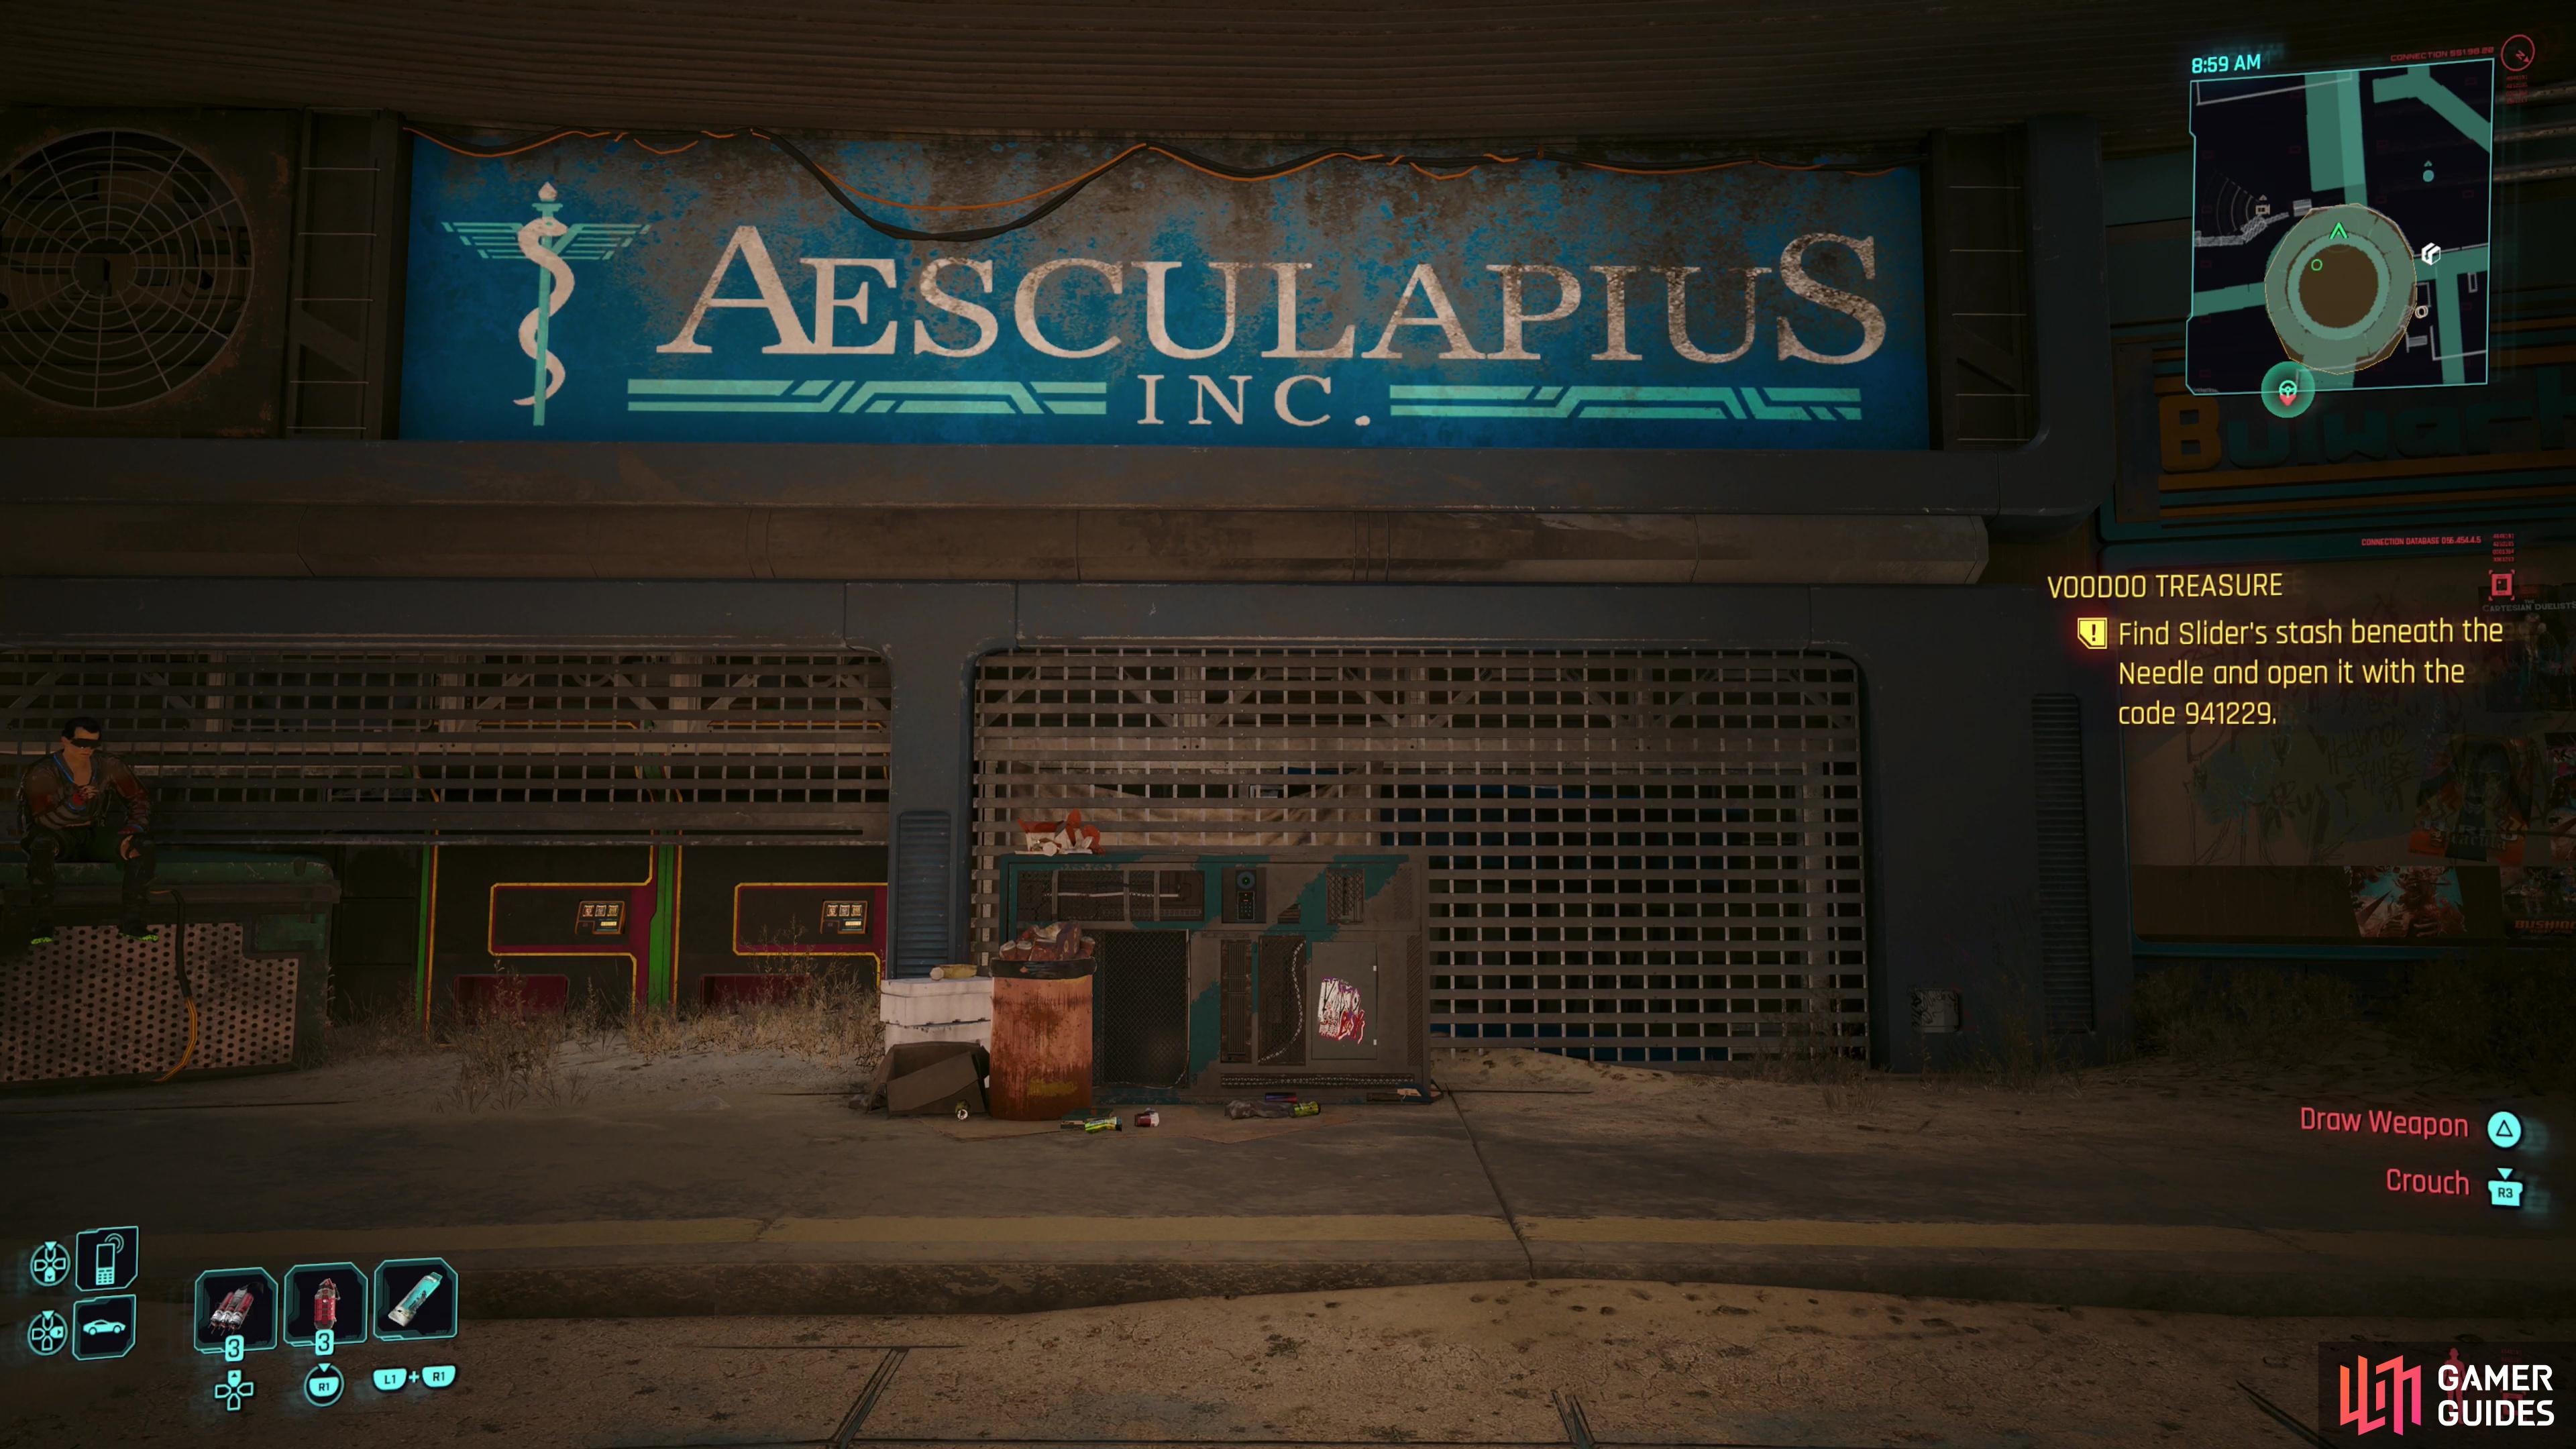
Once there, a search area should pop up on your minimap. Search the walls surrounding the base of the Needle until you find a blue sign with the words “Aesculapius Inc” in it, under which is a vending machine… sorry, a “Spontaneous Craving Satisfaction Machine”. Examine the front of this toppled-over vending machine (not sorry) to find a number pad. Interact with it and enter the code 941229, then the keypad will change to the “Open” command. Press it again to open a panel on the machine, revealing a bag containing the iconic power pistol Rook, the Second Installment shard, and 8,000 €$. Merely opening the panel will complete the job, but… you might as well plunder the stash. Not like Sliders needs those goodies anymore.
No Comments