


This quest will automatically begin after you finish your origin story, but before you can make too much progress, Jackie will offer you the opportunity to make use of a training simulation he acquired. This comes highly recommended, and the details will be covered in the page Practice Makes Perfect.
How to Complete The Rescue in Cyberpunk 2077
Whether you partake in the tutorial or not, exit the car and follow Jackie to an elevator (perhaps stopping to search for loot) where you’ll get a call from T-Bug. Answer it for some details on your job, then follow Jackie to a door when the elevator stops. Scan the door by holding down [L1], aim at it, then press [Square] to open the door via your “Remote Deactivation” quickhack.
Once inside, note that this is a hostile area - a warning that any enemies will attack on sight. Loot the room, then follow Jackie into another room, where you’ll need to confirm that a corpse on an operating table isn’t who you’re looking for. After that, go through the door Jackie is standing near, and as you do he’ll warn you that enemies are ahead.
Sneak by pressing [Circle] and approach the enemy’s rear, pressing [Square] when you’re close, followed by either [Square] to kill the enemy, or [Triangle] to perform a nonlethal takedown. Whichever you do is irrelevant, gameplay-wise. There aren’t any no-kills bonuses, or penalties for murdering your way through this quest, so your choice is pure roleplay.
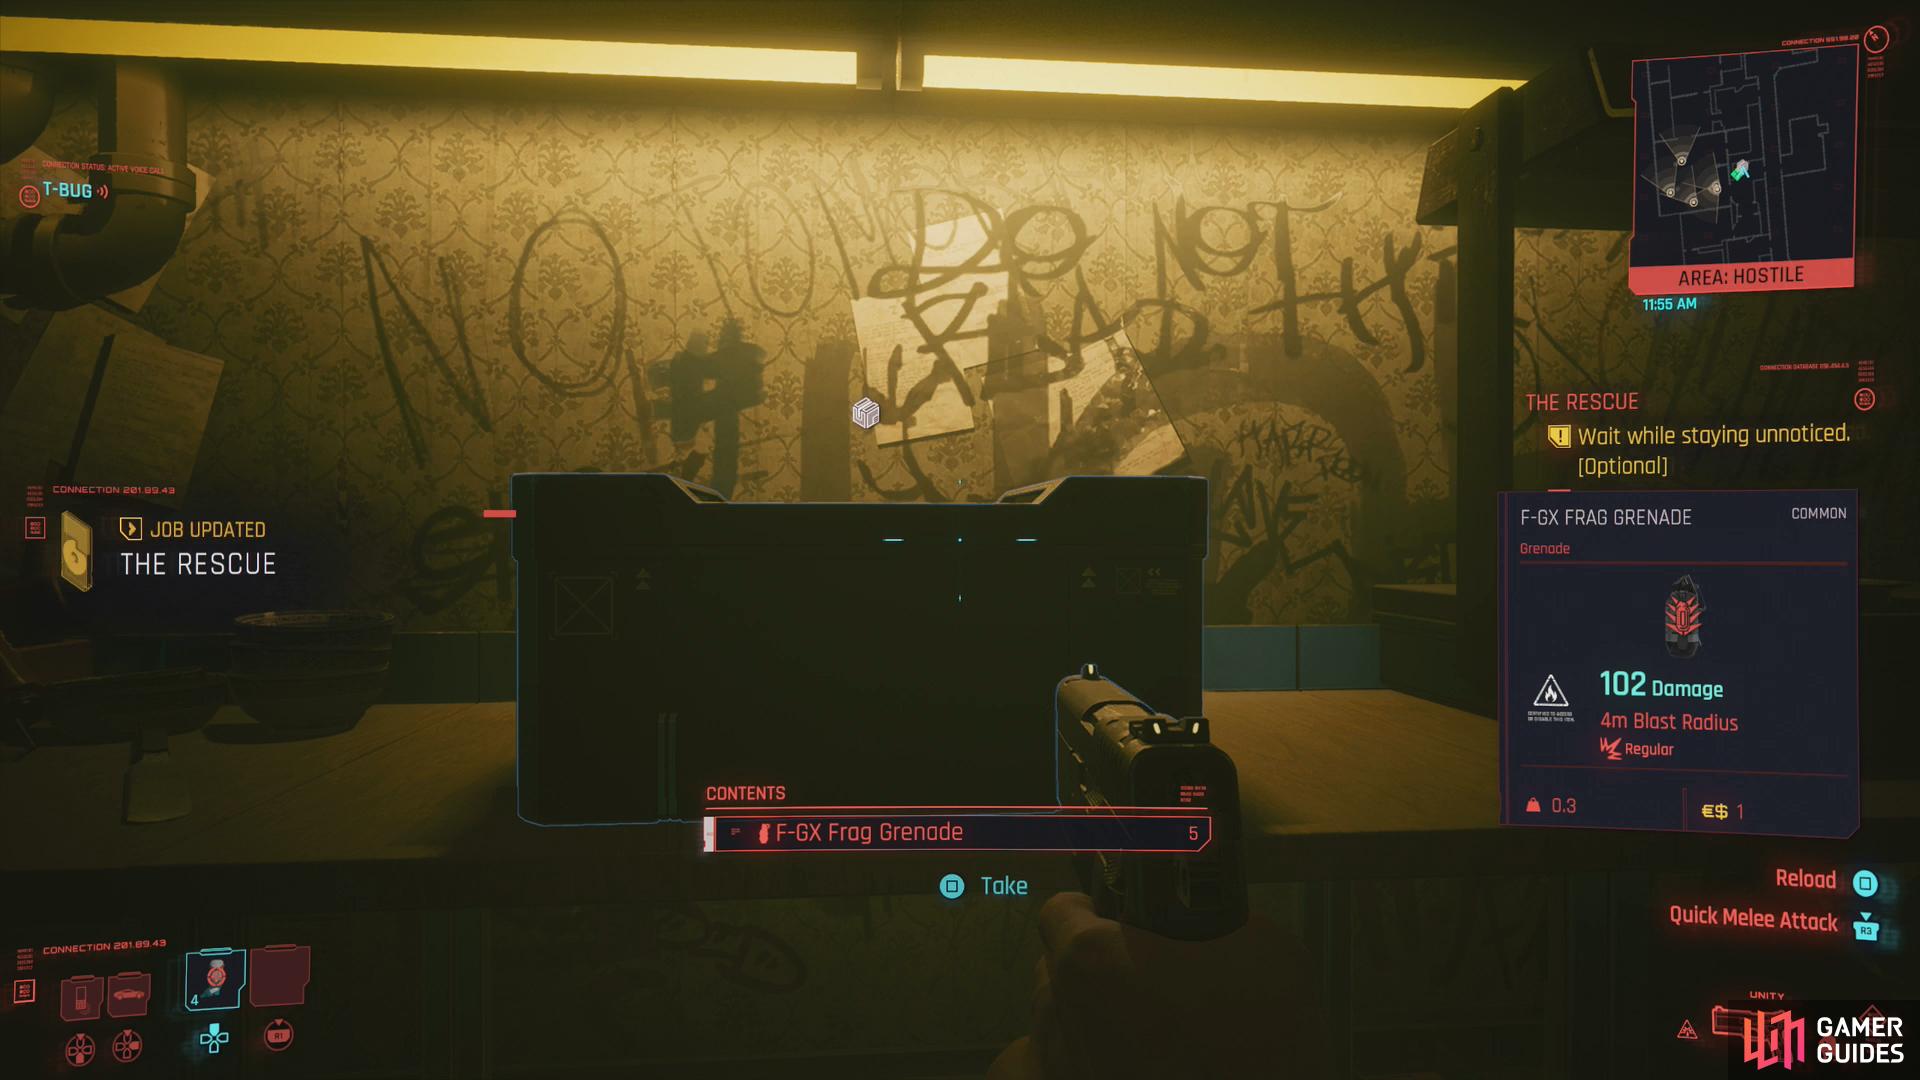
Grab some grenades,

then wait for some thugs to move, making easy targets of themselves in the process.
Exit a door near the thug you took down, turn a corner to your left, then note an open doorway to the left, beyond which many enemies lurk. There are a total of five foes in there, and whether you want to go in guns blazing or use stealth is up to you. Just keep in mind that the skills you use to dispatch your foes will be the ones that get XP - if you kill a foe with handguns, you’ll gain Hanguns XP, if you perform stealth takedowns you’ll gain Stealth XP, and so on. While worth keeping in mind for later, this isn’t a limiting factor, as there are unlimited opportunities to earn XP throughout the game.
Before you start firing, search the area near Jackie to find several F-GX Frag Grenades, which will provide even more options for disposing of your foes. Once done, turn around and wait, as the two thugs near the door will exit into the hallway and kindly put their backs to you. With an invitation like that, how can you refuse? Sneak over to one of the goons and Jackie will take care of the other. Just like that, you’re down to three foes.

With the two near the door gone, the three remaining foes should be easy enough to dispatch via stealth, if you wish. Just be sure to scan the room and use the “Distract Enemies” quickhack if necessary to set them up. Grenades and gunfire also work, if you’re not inclined towards stealth.
However you do it, clear the first room, then head through a hole in the wall to find a more heavily-armed foe. If you got into a firefight earlier, you’ll have to dispatch this new foe in open conflict, as well. Get behind cover and T-Bug will hack some shutters, which you can run through to flank the brute, shooting through a window while Jackie rushes from your original position. If you maintained secrecy, however, you can just wait for the brute to move from behind the desk and stroll over to some lockers, where he can be easily dispatched via a stealth takedown.
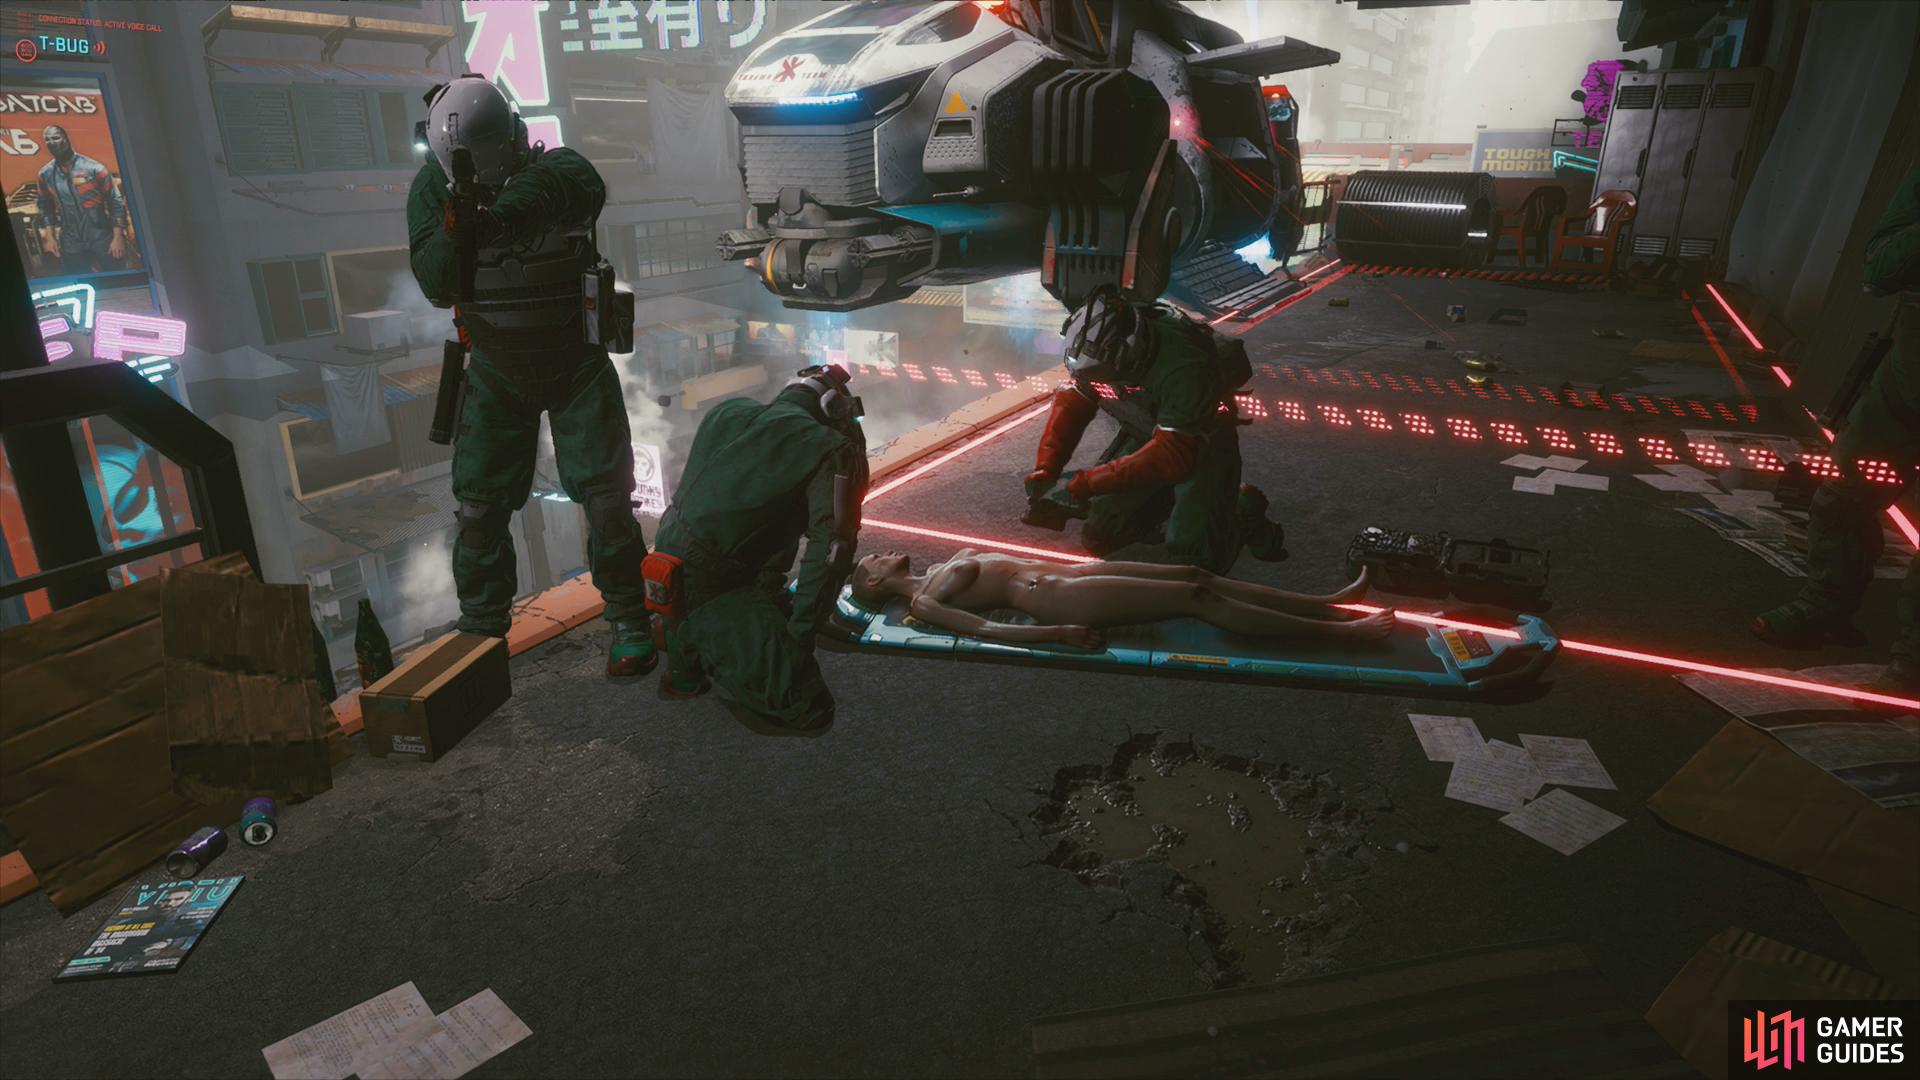
Put down all the thugs, then head through the doorway the brute guarded, then turn right through another door to find some bodies in a tub. Check the bodies, follow T-Bug’s instructions, confirm your target, then carry the woman outside, where you’ll be warmly greeted by a Trauma Team squad. And just like that, you’re done.
Head back inside and follow Jackie to an elevator. Once there, hold [Down] on the D-Pad to bring up your phone and call “Wakako Okada”. After some chatter you’ll be back in the garage; get in the car and Jackie will drive you home. On the way you’ll get into a firefight with some pursuers (this is more scripted than a legitimate threat), Jackie will smooth-talk an NCPD Officer, and you’ll witness a show of force.
After Jackie drops you off, ride an elevator up and enter your apartment. The only thing of note that’ll happen on the way is T-Bug will call and refer you to a netrunner who has a gift for you, starting the Side Job The Gift. Something worth taking care of… tomorrow. Once in your apartment, check out your stash if you wish, then go to bed to finish up this quest.
When you wake up, the quest The Ripperdoc will begin.
No Comments