


This job becomes available after completing The Information and The Pickup, both of which are preparatory jobs for this one. Before you commit to this job, be sure you’re ready to go - this job might not require much out of you, skill-wise (you can avoid or stealth-kill your way through it, best case scenario), but it is long, involved, and you’ll be deprived of most of your gear throughout its duration.
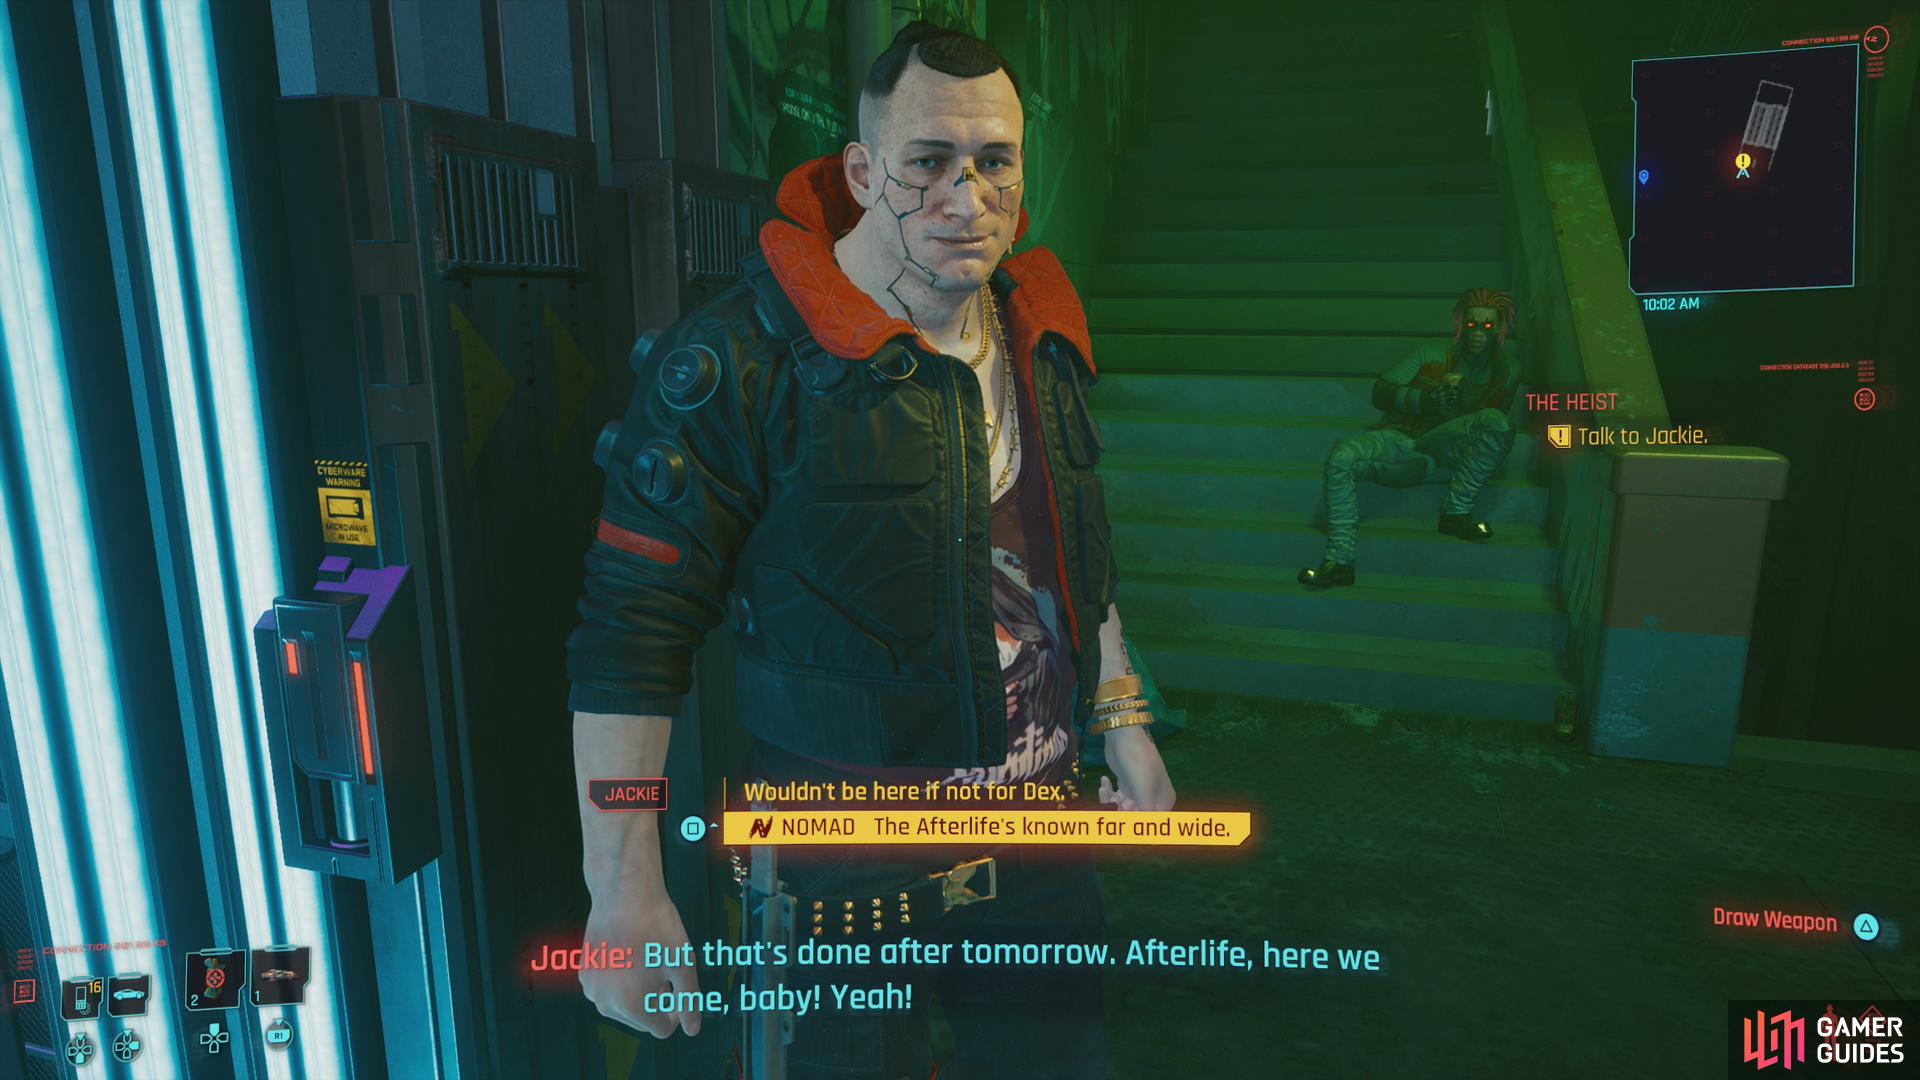
Meet up with Jackie outside Afterlife - Nomads will get the opportunity to pick a unique dialogue choice here.
Head inside and the crew will discuss the upcoming job.
Meet at Afterlife
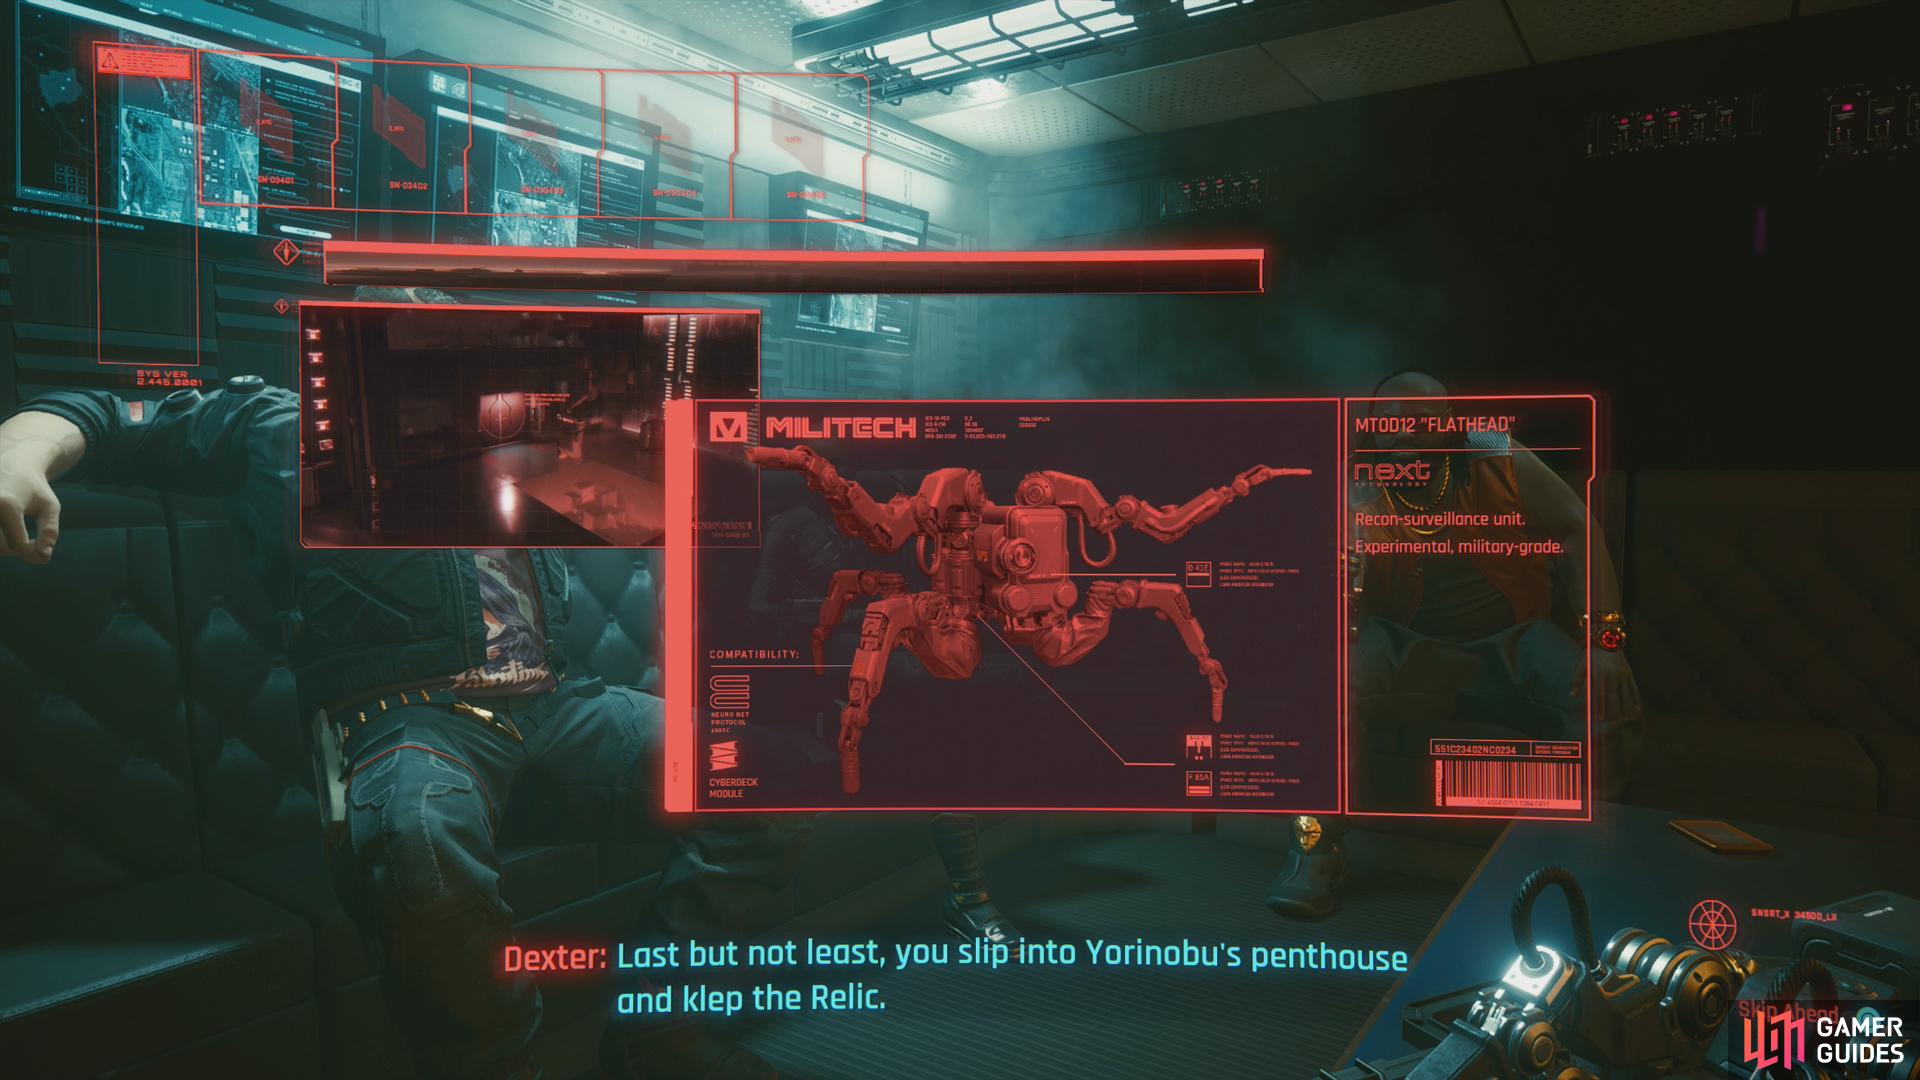
When you’re ready, head to Afterlife along the southern end of Watson, chat with Jackie, head inside and get some drinks, then go meet up with Dex. Here you’ll go over the heist, and there’s a lot to discuss here, with raising your share of the heist from 30% to 35% and narking on Evelyn being the two standout choices here. Surprisingly, nothing really comes from it in the long run, so respond how you will and take in the details.
After Dex and T-Bug leave, you’ll be left alone with Jackie. This is the point of no return. Pick the option [Stand] “Something I gotta take care of first.” to postpone the job, otherwise pick [Stand] “Let’s go.” to start. Once started, you’re not going to be able to do much else, in-game, for a while, so be sure you’re ready.
Konpeki Plaza Hotel
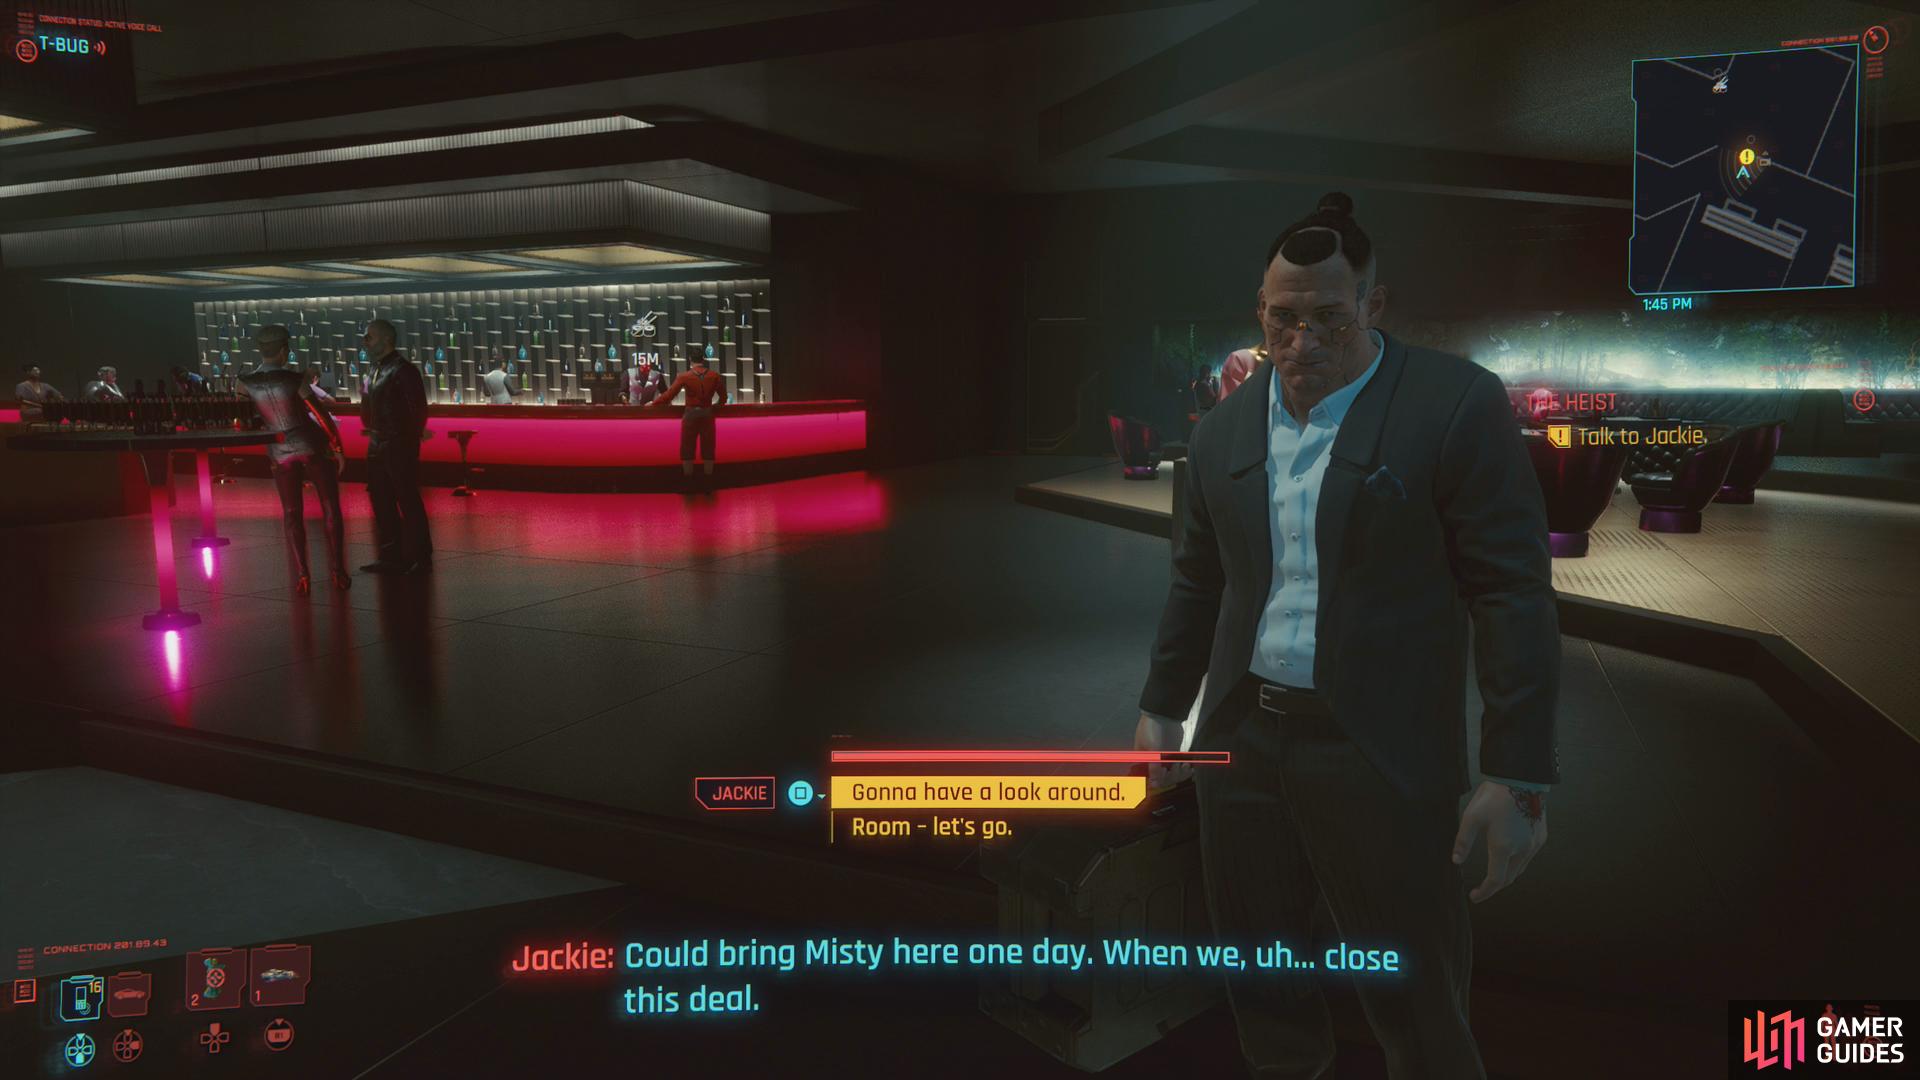
Start the job and time will skip ahead until you and Jack - wearing swanky suits - are entering the Delamain rented for the job. Chat with Jack and… the car… and answer a call from T-Bug when you get it and do what she asks. When you arrive, disarm and exit the Delamain, enter the hotel, talk your way past security and an incident with the receptionist, then follow Jackie through the hotel. Nothing you say (or don’t say) really matters, but you can decide to take a detour to explore the bar if you want to see Hideo Kojima’s cameo.
You’ll need to help the Flathead navigate by sending into various ducts,
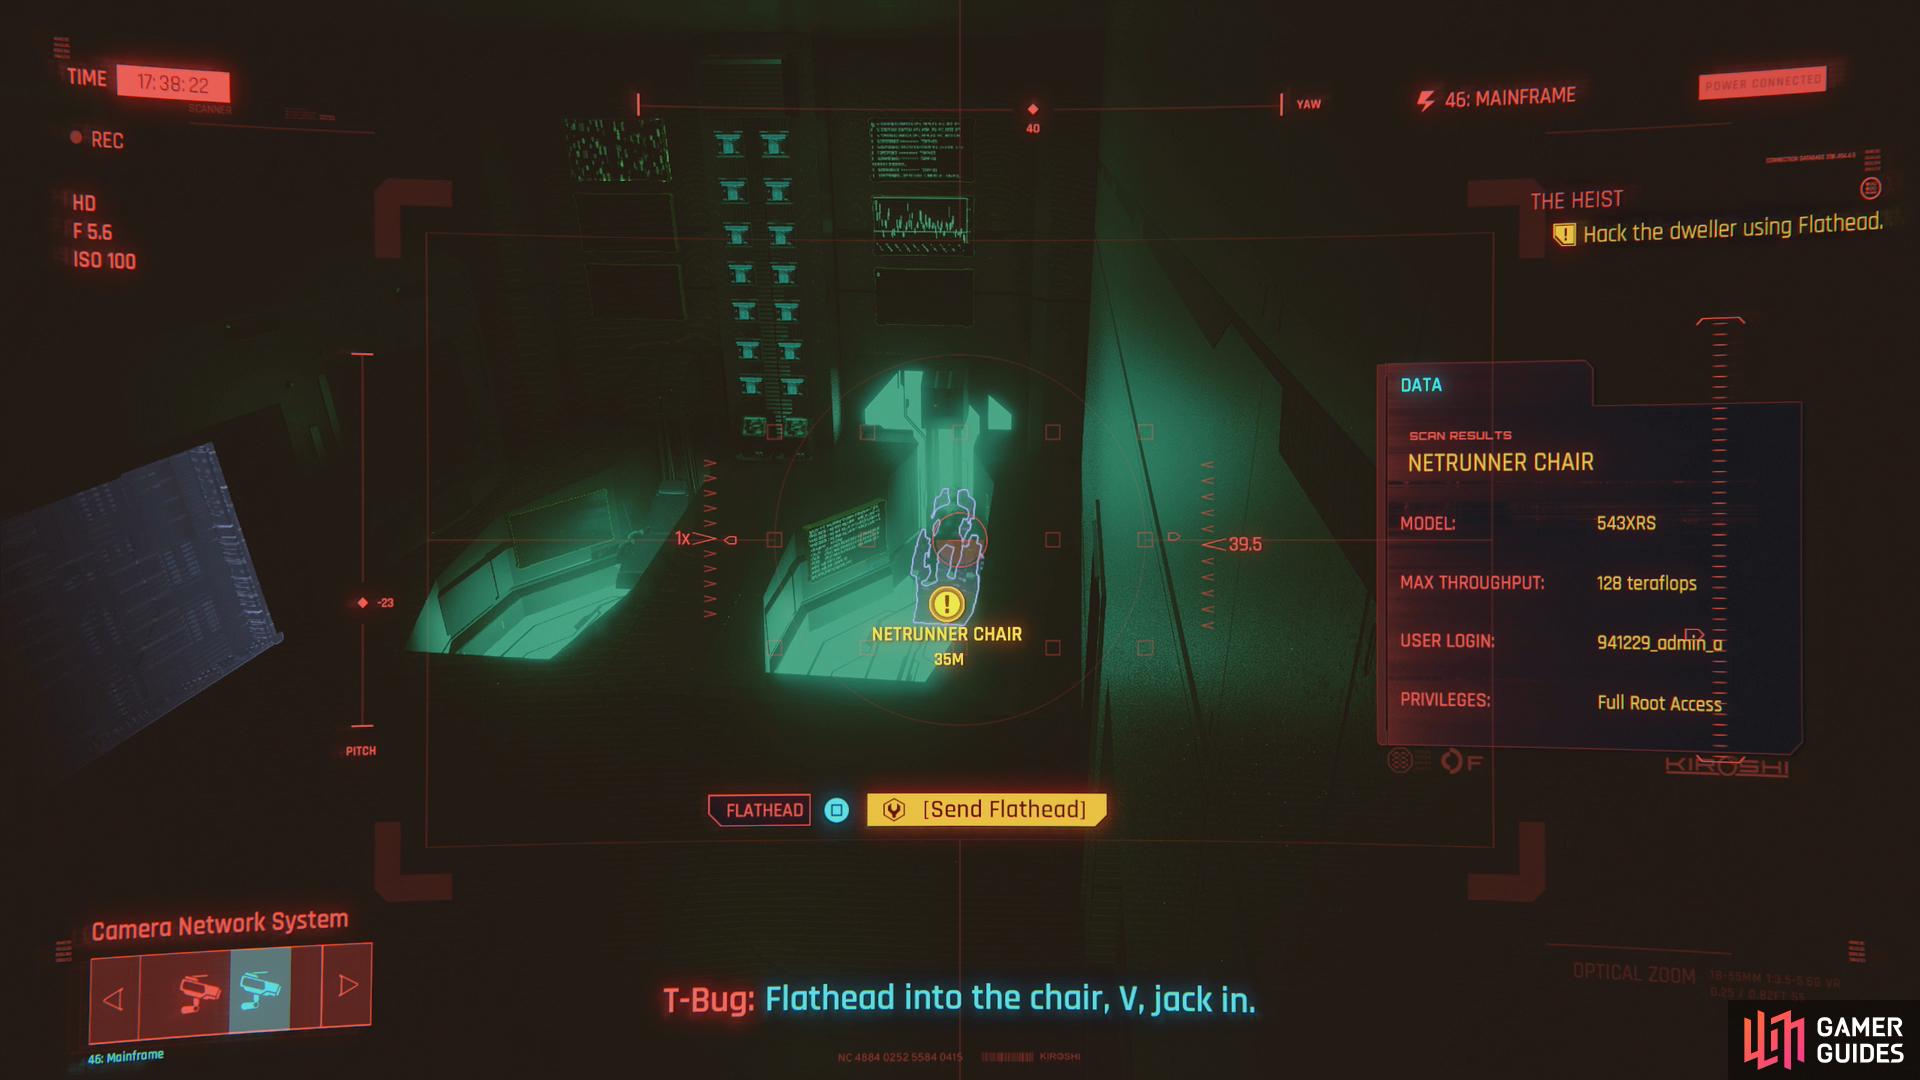
and ultimately incapacitate the dweller.
Guiding the Flathead
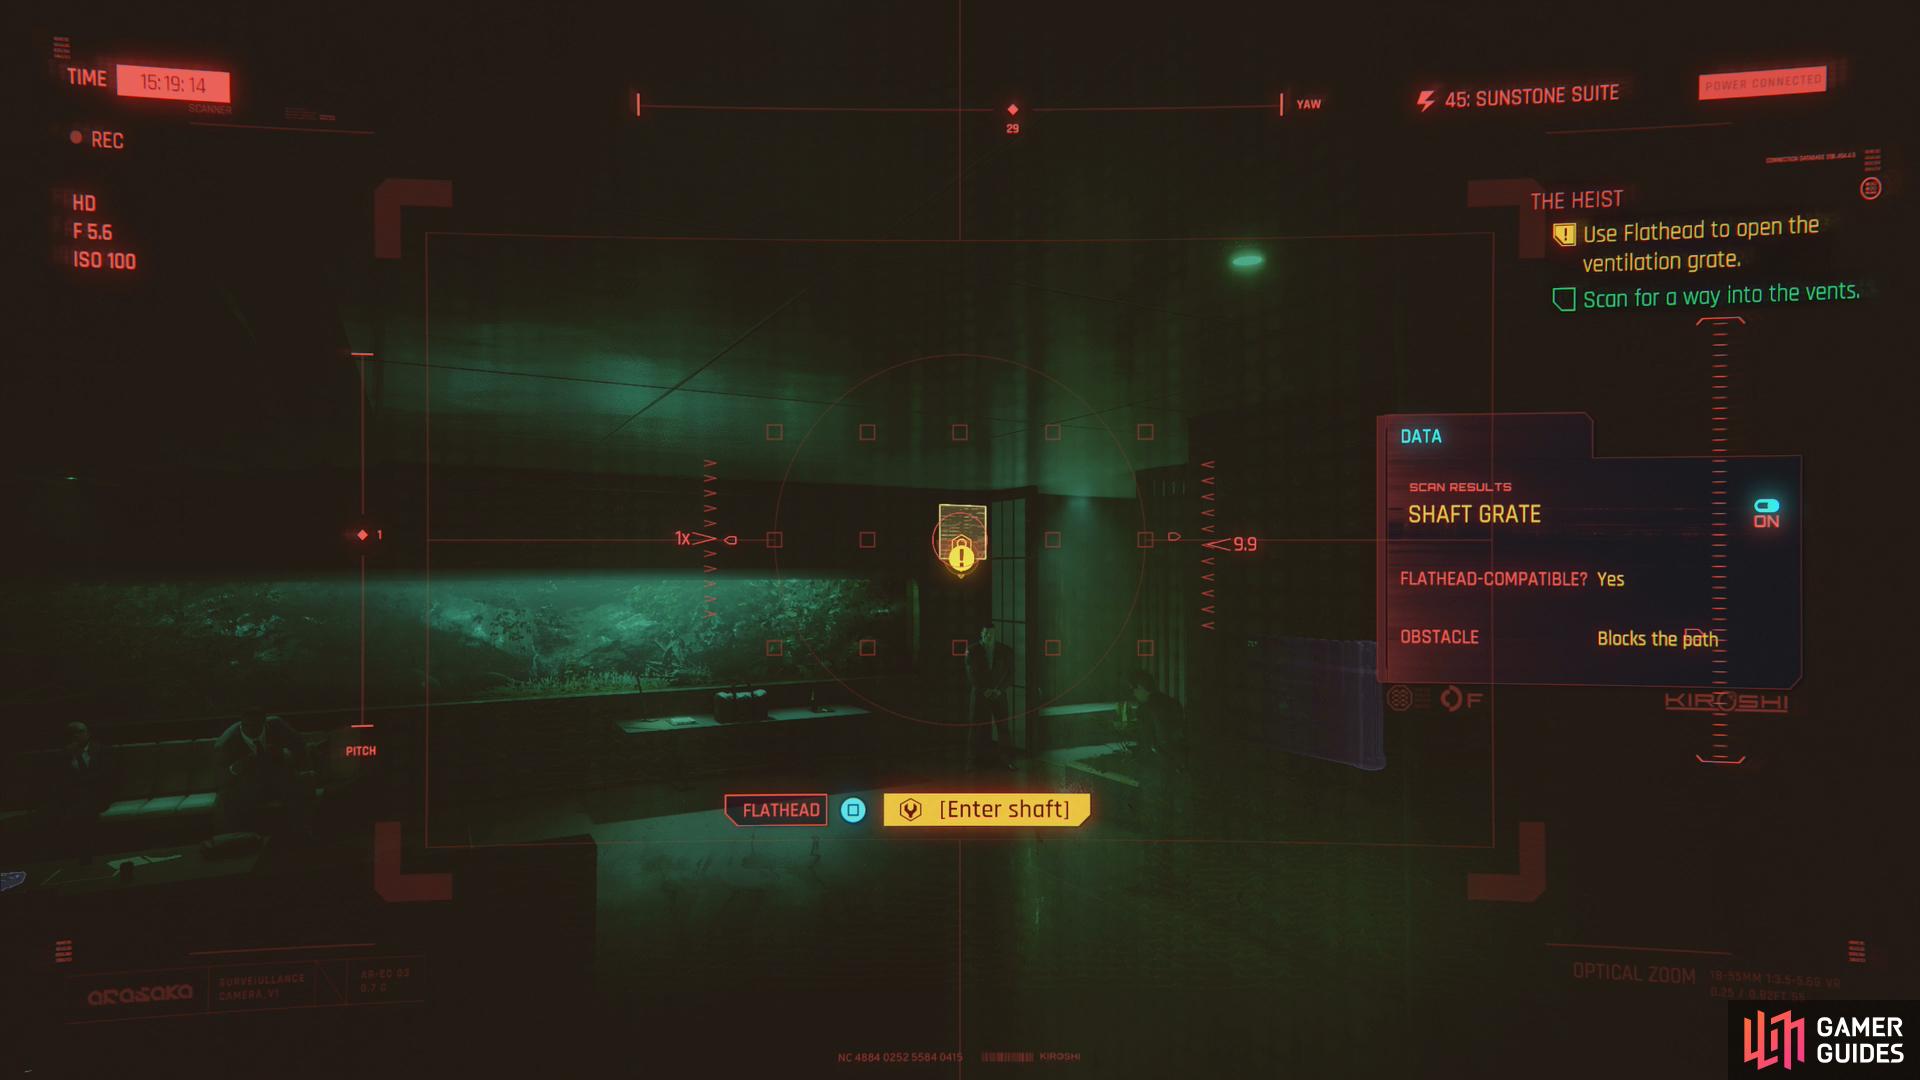
After the bar - whether you stop there or not - follow Jackie or the yellow quest trail to an elevator and ride up to your room. When you arrive, T-Bug will give you some instructions. Scan for a shaft in the corner of the room, near the floor by the window and the Flathead will be deployed, then take the control shard from Jackie.
What follows is a scanning sequence where you have to guide the Flathead:
-
In the first room, just scan a shaft to the upper right, above a guard standing near a terrarium. Once done, press [Square] to command the Flathead to enter the shaft.
-
In the second room you’ll find housekeeping - in the form of two maids - in your way. Scan the shaft near the floor by the window in the lower left corner, right next to the maid cleaning said window, then scan a Terrarium Cooling Unit on the ground just below and to the right of the terrarium. Sic the Flathead on the Terrarium Cooling Unit, and when the maids are out of the way, direct the Flathead into the shaft.
-
Third room is cake, just direct the Flathead into the shaft on the opposite end of the room.
-
In the fourth room, scan the door and sic the Flathead on it. After that fails, scan a CCTV Access Point on the ground to the left of the door and command the Flathead to jack in.
-
Press [Right] or [Left] to swap to the camera in the fifth room. If you have Intelligence 4 you can suggest neutralizing the Dweller, otherwise T-Bug will be the brains. Inconsequential, either way. Scan a shaft to the lower left, then toggle back to the previous room’s camera.
-
Back in the fourth room, scan a shaft on the floor to the right of the door and have the Flathead crawl through it, then switch back to the fifth room’s camera.
-
Sic the Flathead on the Dweller.
After all that you’ll be back in your room. T-Bug needs time, and V could use a nap. Sit on the couch to move to the next phase of the heist.
Steal the Biochip
When V comes to, Jackie will be babbling, followed by an update from T-Bug. We’re back in business. Leave the room and follow Jackie to the elevator, then ride up to the penthouse.
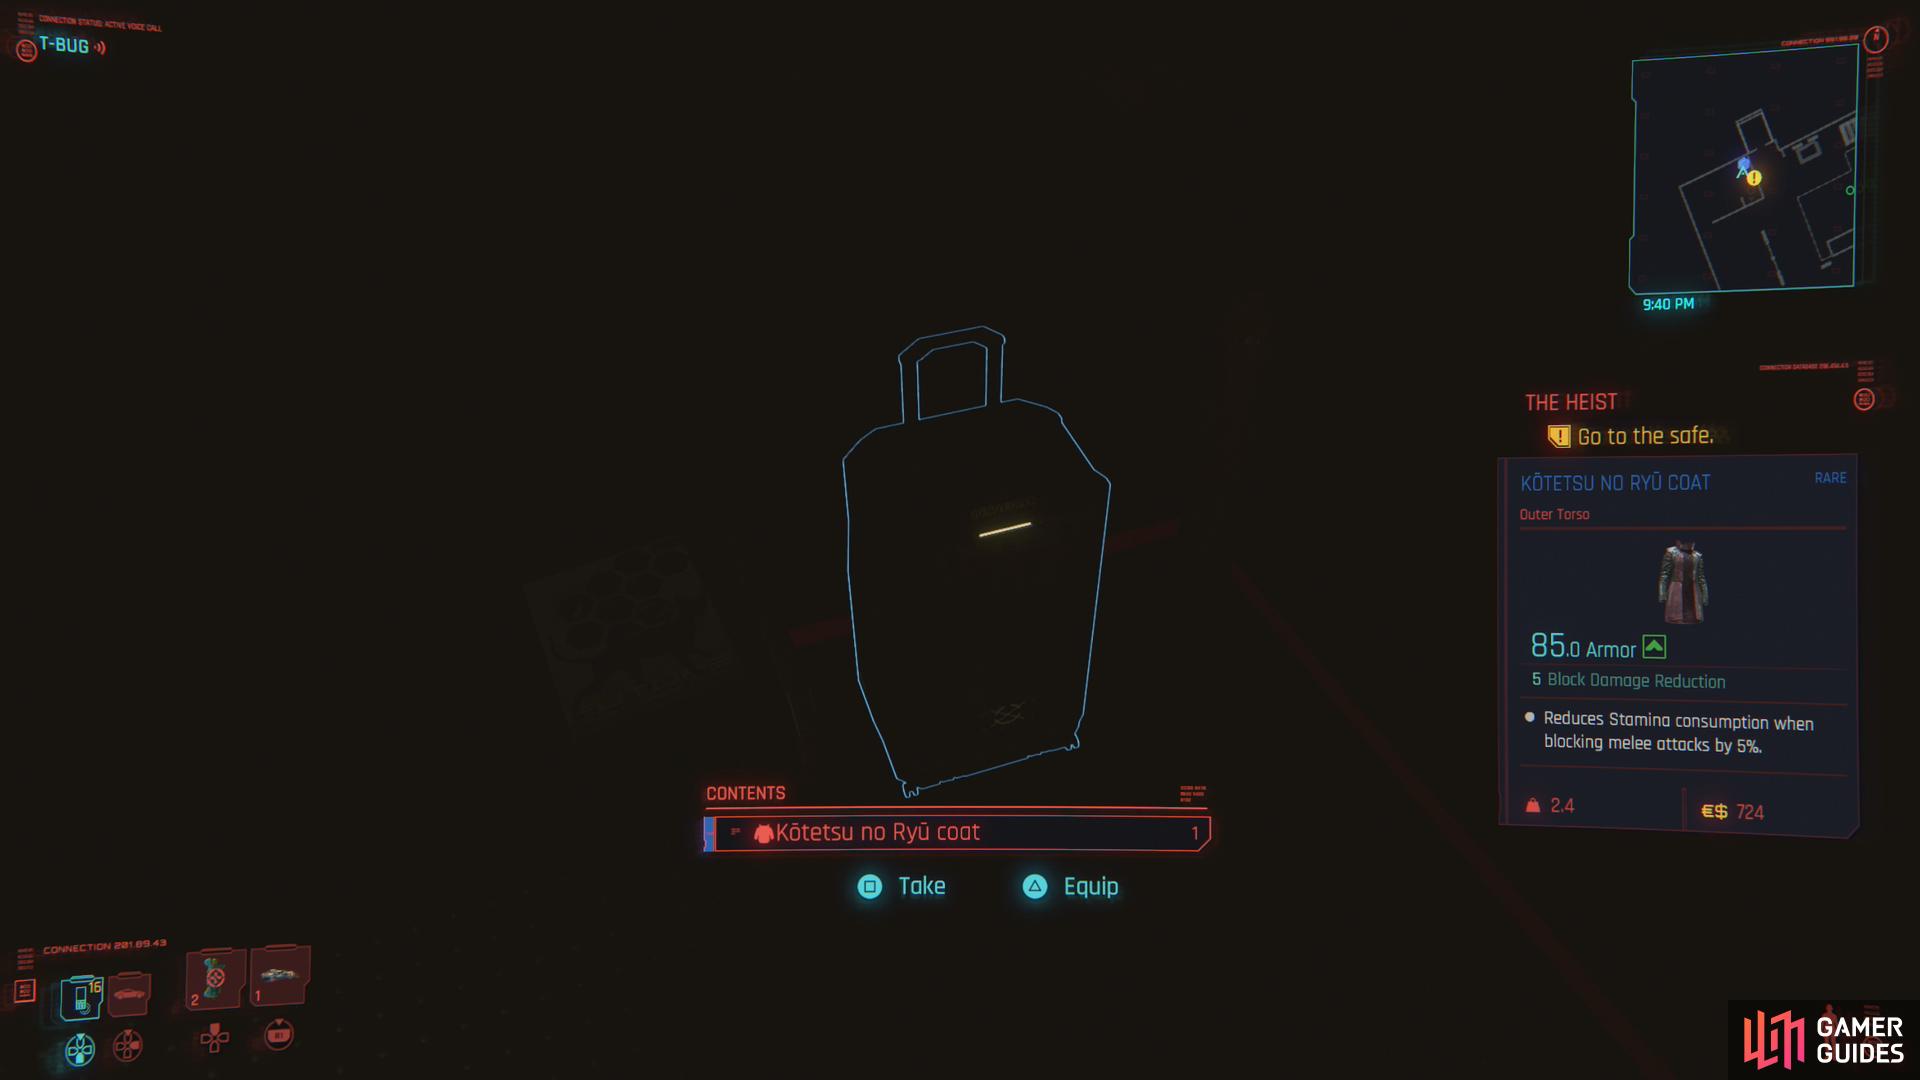
Once in the penthouse, ignore T-Bug’s demand for speed. There’s some loot to be had. From the elevator, enter the door to the right and search the very, very dark corner to find the Kotetsu No Ryu Coat
Head over to the window, turn left, then head into the bedroom. You should remember this from your Evelyn braindance. Search the table to the right of the bed to find Kongou, an iconic pistol. Hard to overstate how valuable this is, because you were previously unarmed - this opens up some more tactical options should things go awry. Which of course, they won’t, right?
Return to the elevator and head left this time, past an iguana habitat (amusing if you’re a Nomad) and go up some stairs to find another suitcase, this one containing Yorinobu’s Slacks and Yorinobu’s Formal Shirt. Unique, even if they’re not very good armor.
With all that looted, you can now pretend you’re actually pressed for time and join Jackie in the corner of the penthouse. Jack into the box containing the biochip and things will get complicated. Hide inside the pillar in the middle of the room and things will get a lot, lot more complicated.
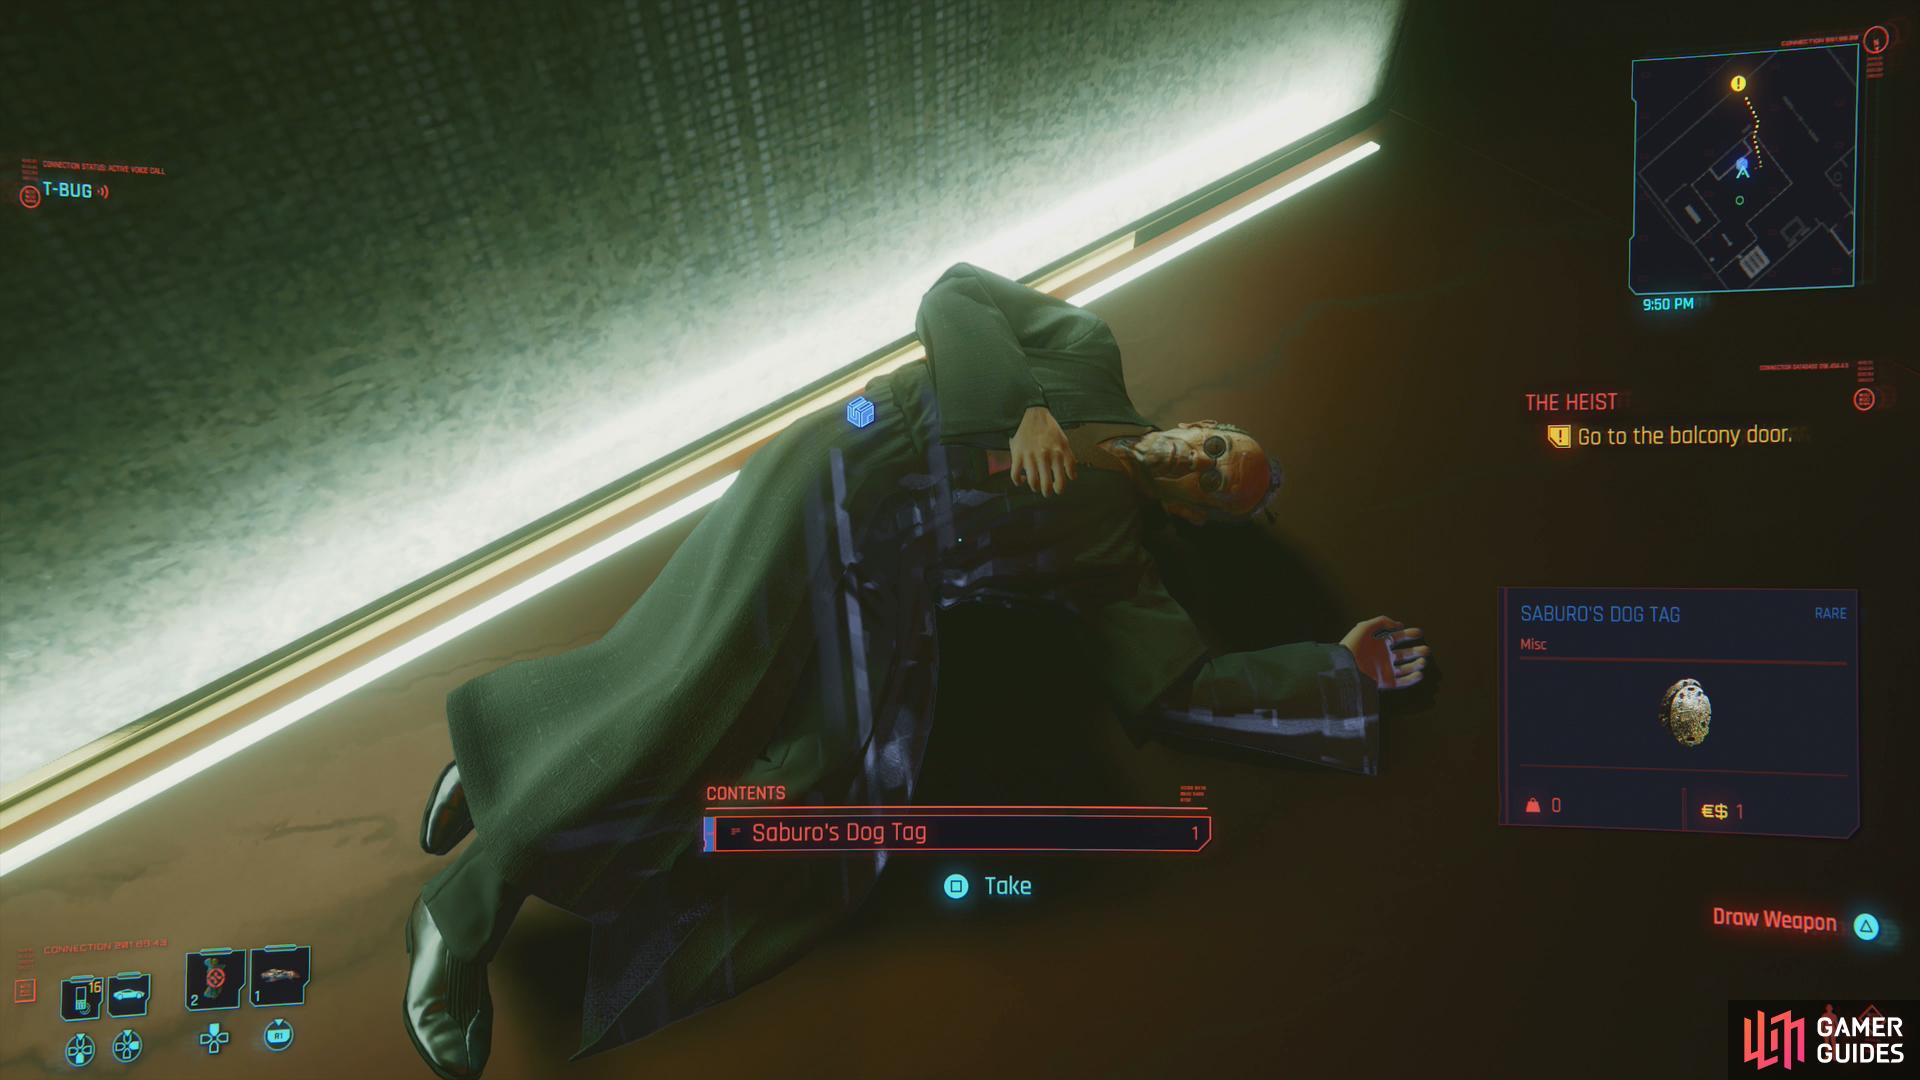
(1 of 3) You can loot Saburo’s body to obtain Saburo’s Dog Tags, for what use they are.
The Escape
When everybody leaves, exit the pillar and T-Bug, Jackie and V will all freak out. Loot Saburo for Saburo’s Dog Tag if you wish, then head over to the glass balcony door behind the pillar you hid in. T-Bug will get it open for you, after which, ignore it. Head back into the penthouse and head upstairs to find another glass door you can use to exit outside.
Go upstairs to reach the AV landing pad and be sure to sneak as you reach the roof, as two of Saburo’s Bodyguards are lurking up here. Wait for them to get done talking and they’ll separate, conveniently turning their backs to you so you can easily perform a takedown on them both. Once done, loot them for some more firepower (likely two Masamunes of various quality) then search the AV in the middle of the roof. Sadly, there’s no escape to be found here, but you can nab Satori, an iconic katanal.
Return back to the penthouse and go through the balcony door behind the pillar you hid in earlier. Once outside turn left, then left again around a corner and sidle along a narrow ledge towards a ladder, bailing when you get interrupted. After your fall, Jackie will announce more complications, although he’ll also provide a temporary solution.
Get up and go through a door and you’ll find yourself, finally, at the combat portion of this job. Head around a corner, past a pool, down some stairs and through a bar to find two guards down some more stairs. Neither should be facing you, so it should be a simple matter to sneak up on them and take them out. If you didn’t grab the gun from Yorinobu’s penthouse or from Saboru’s bodyguards on the roof, or the katana from Saboru’s AV, you won’t have any other option.
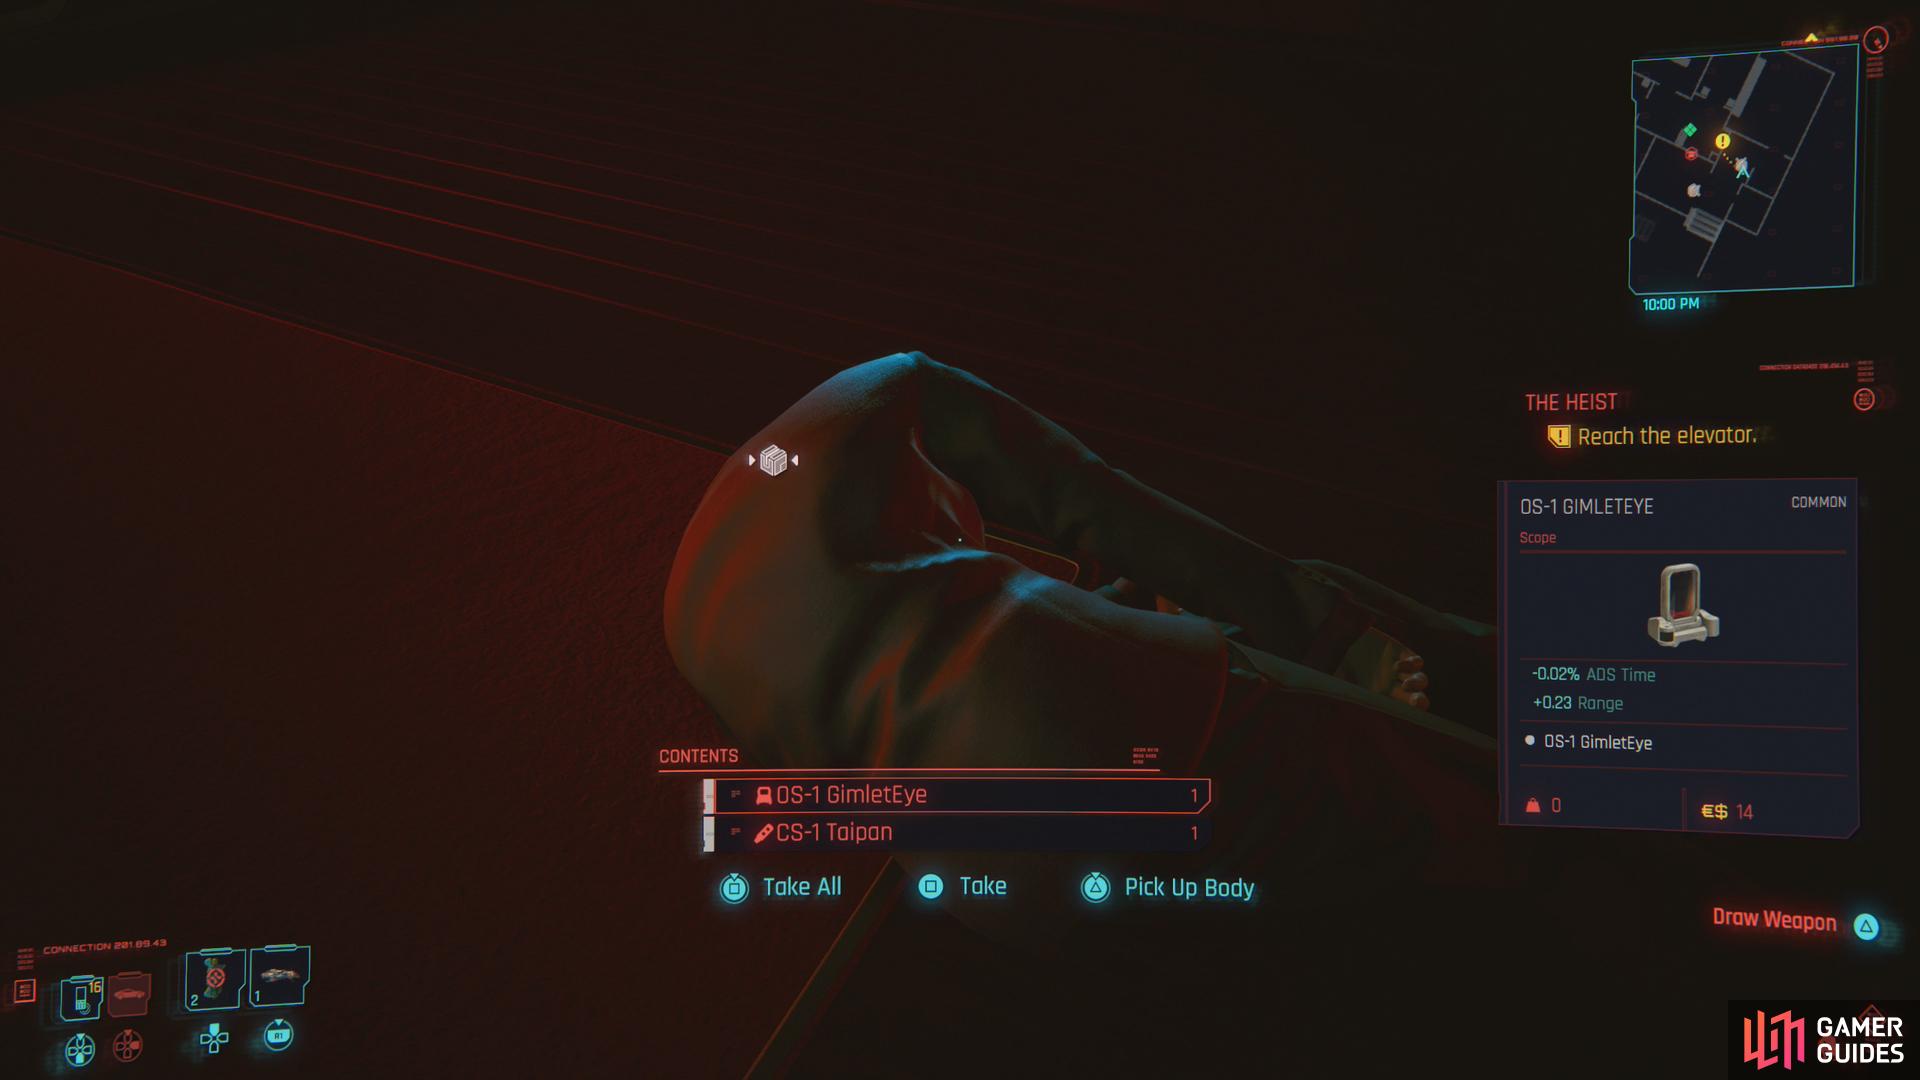
(1 of 4) Stealthily eliminate the first two guards and they’ll yield some weapon mods - including silencers.
Even if you’re not keen on stealth, it’s not a bad idea here, and once you take down these first two guards you can loot them to acquire their guns and some mods for them - likely including a scope and silencer. If your build and aim are up to the task, a silenced weapon makes for a fine way to take down enemies from afar, but you do have to be a bit wary of Jackie - he’s somewhat unreliable when it comes to stealth, especially when bullets start flying.
Take down the guards, do what you will about mods, then loot the room to the left, especially being sure to hit the Access Point (Intelligence 4) on the wall. When you’re ready, follow Jackie through a door to the left to find a guard and an enemy Netrunner. Hide, wait for them to stop talking, and when the Netrunner walks off get out of cover and disable a camera. With the camera gone it should be a simple matter for you to sneak up on both the guard and the Netrunner and take them down. Shoot the camera with a silenced weapon afterwards to keep it honest.
Once clear, advance down the hall, but when you near a corner, be wary, as two guards will come from the left. Preemptively seek out cover, and when the guards stop moving, peek out, hack a monitor behind them and use it to distract one. Quickly sneak out and take them both down, then turn left around the corner they came from and go through a door to the right to reach an office.
Next bit is somewhat tricky. Turn right and make your way into the room ahead and two guards will come from a door to the far right. You need to keep cover between yourself and them at all times to avoid detection - an easy task if you know they’re coming, as you can just press on into the larger room and hide behind a long planter, wait for them to walk past, then follow them into the office and take them out.
Continue through the door at the far right end of the room, take down two more guards, pass through two glass doors, then dispatch a third guard at a fork. At the fork you can continue straight into a room, where two guards will join you (entering via another door to the left) while down the hall to the right you can find another Access Point (Intelligence 4). Going down the hallway to the left will get you closer to your objective - the elevator, but there are also more guards down that way, including a security camera at the corner. Use monitors to lure the guards in the room across the hall to their doom, but be wary of leaving bodies behind. Patrolling guards in distant hallways can see you and the bodies you leave in your wake. Translucent glass, it turns out, isn’t much of a visual barrier.
Once you’ve cleaned up the room across the hall (and looted the Access Point, if you have the Intelligence) head down the hallway to the left. Hack or shoot a camera near the entrance to the elevator and be wary of a guard down another hallway to the left. Approach the elevator only to find it out of commission, then head down the hallway to the left and drop the guard patrolling here.
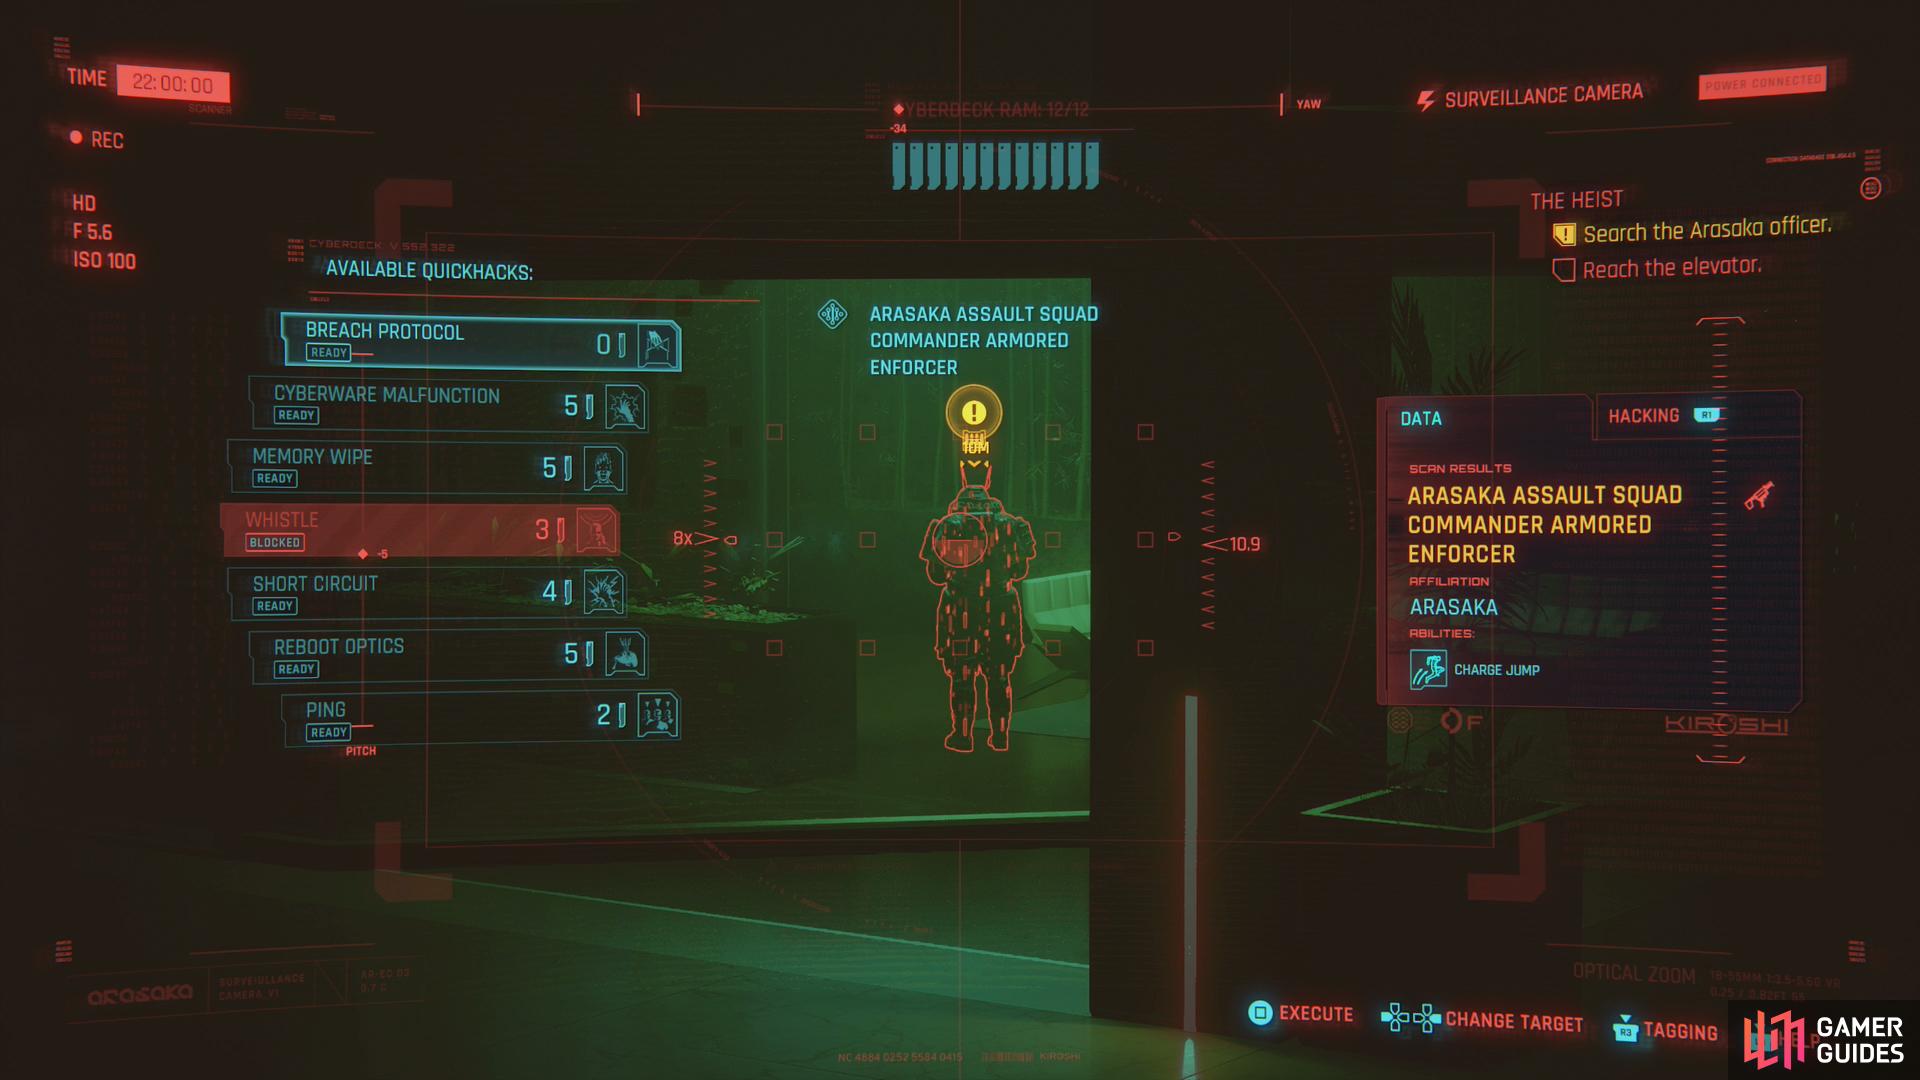
(1 of 5) Take control of the camera near the elevator and tag your enemies - including the Arasaka commander.
Further down the hallway you’ll find an elevator at another corner. Unfortunately, two guards await here, along with a camera. Take control of the camera and use it to scan your foes, including a third, heavily armed “Arasaka Assault Squad Commander Armored Enforcer”. Quite a name. All you need to know is he’s a heavy; maybe not quite Adam Smasher heavy, but probably more than you want to tangle with, considering your limited gear.
If you haven’t alerted any of the enemies here, this should be cake, as the Arasaka commander is in a room by himself, and the other two guards shouldn’t detect you entering and dispatching the heavy. Once he’s down, use a monitor by the guard under the camera to distract him, sneak up on the other guard and take him down, then quickly hurry over to the guard distracted by the monitor and perform a takedown over the table he’s behind - trying to sneak around it will likely just get you detected.
When all the guards are down, search the commander for his Personal Access Token (among other loot) then hit the elevator and ride down to the lobby. You’re not quite out of trouble yet - but you’re close. Once off the elevator, head right to get behind a desk - and a guard. Snuff him, and if you have an Intelligence score of 4 or higher you can jack into the computer on the desk to score some eddies.
When you’re done with the guard and his computer, hack a camera off in the distance and use it to scan two more guards near the entrance. Mark them, and a second camera, then return to V and shoot out both cameras with a silenced weapon, or deactivate them with a quickhack. Advance towards the front doors and look out for a third camera, disable it, then take out the two guards by whatever means you see fit. Their routes overlap visually with each other often and they don’t seem prone to distraction, but there’s an awful lot of cover you can hide behind.
Reach the lobby, then turn right and head down another elevator and ride it down to the parking garage. More enemies await you here, but don’t waste your time fighting them - run to the Delamain. Once you’re inside you’ll be safe enough… until a hostile aircraft locks onto you.
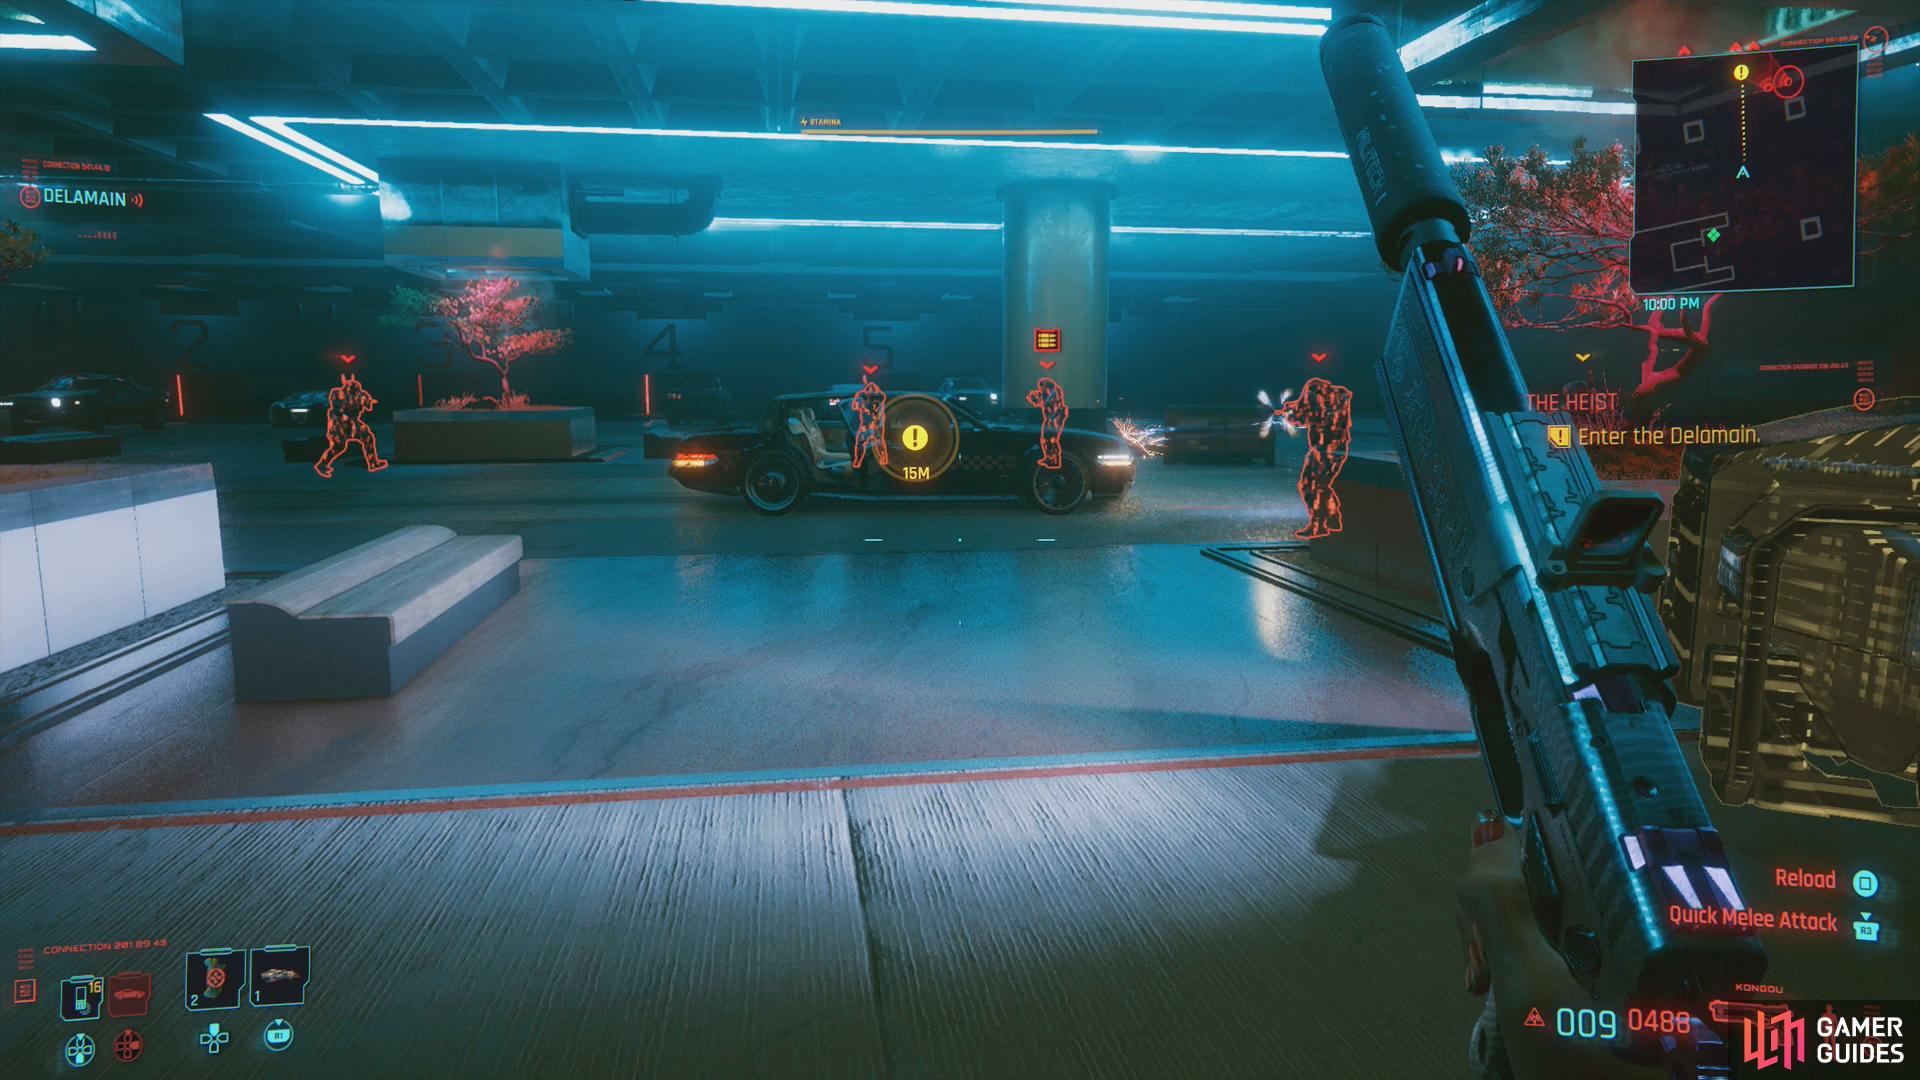
(1 of 4) Don’t waste time fighting the guards in the parking garage - if you can make it to the Delamain, you’ll be safe.
Boss: Arasaka Octant
This is a pretty easy fight, as far as boss battles go. You’ll be chased by an Arasaka Octant, a heavy drone that has trouble doing much damage to you, thanks to the Delamain, while you should have little trouble hitting it. It’s joined by two smaller drones. Just keep firing at the Arasaka Octant until you lose it amidst the buildings, and while it’s gone, take out the smaller drones. When the Arasaka Octant returns, shoot it out of the sky.
After the boss has been blown out of the sky, Jackie will talk to you and make a job-related request. After you acquiescence, some time will pass and you’ll need to make another Jackie-related choice (see spoilers, below).
You’ll get three choices where to send Jackie’s body. If you pick the option ”Take him home, to his family.” it’ll unlock a side job later on, whereas the other two options don’t. There are no benefits to the other two options, so sending him to his family is clearly the best option.
Make your decision, then exit the Delamain and follow the yellow quest marker into the hotel and up to Dexter DeShawn’s room. V and Dex will discuss the fallout from the Konpeki Plaza job before you’re sent to the bathroom to clean up. Head inside and make whatever choices you will while looking in the mirror, then leave the bathroom to find out that Dex has already come to a conclusion about what actions he needs to take to give himself the best chance at survival.
This ends The Heist. The main job Love Like Fire will immediately begin. Stealing the relic will also unlock the trophy/achievement The Lovers.


No Comments