
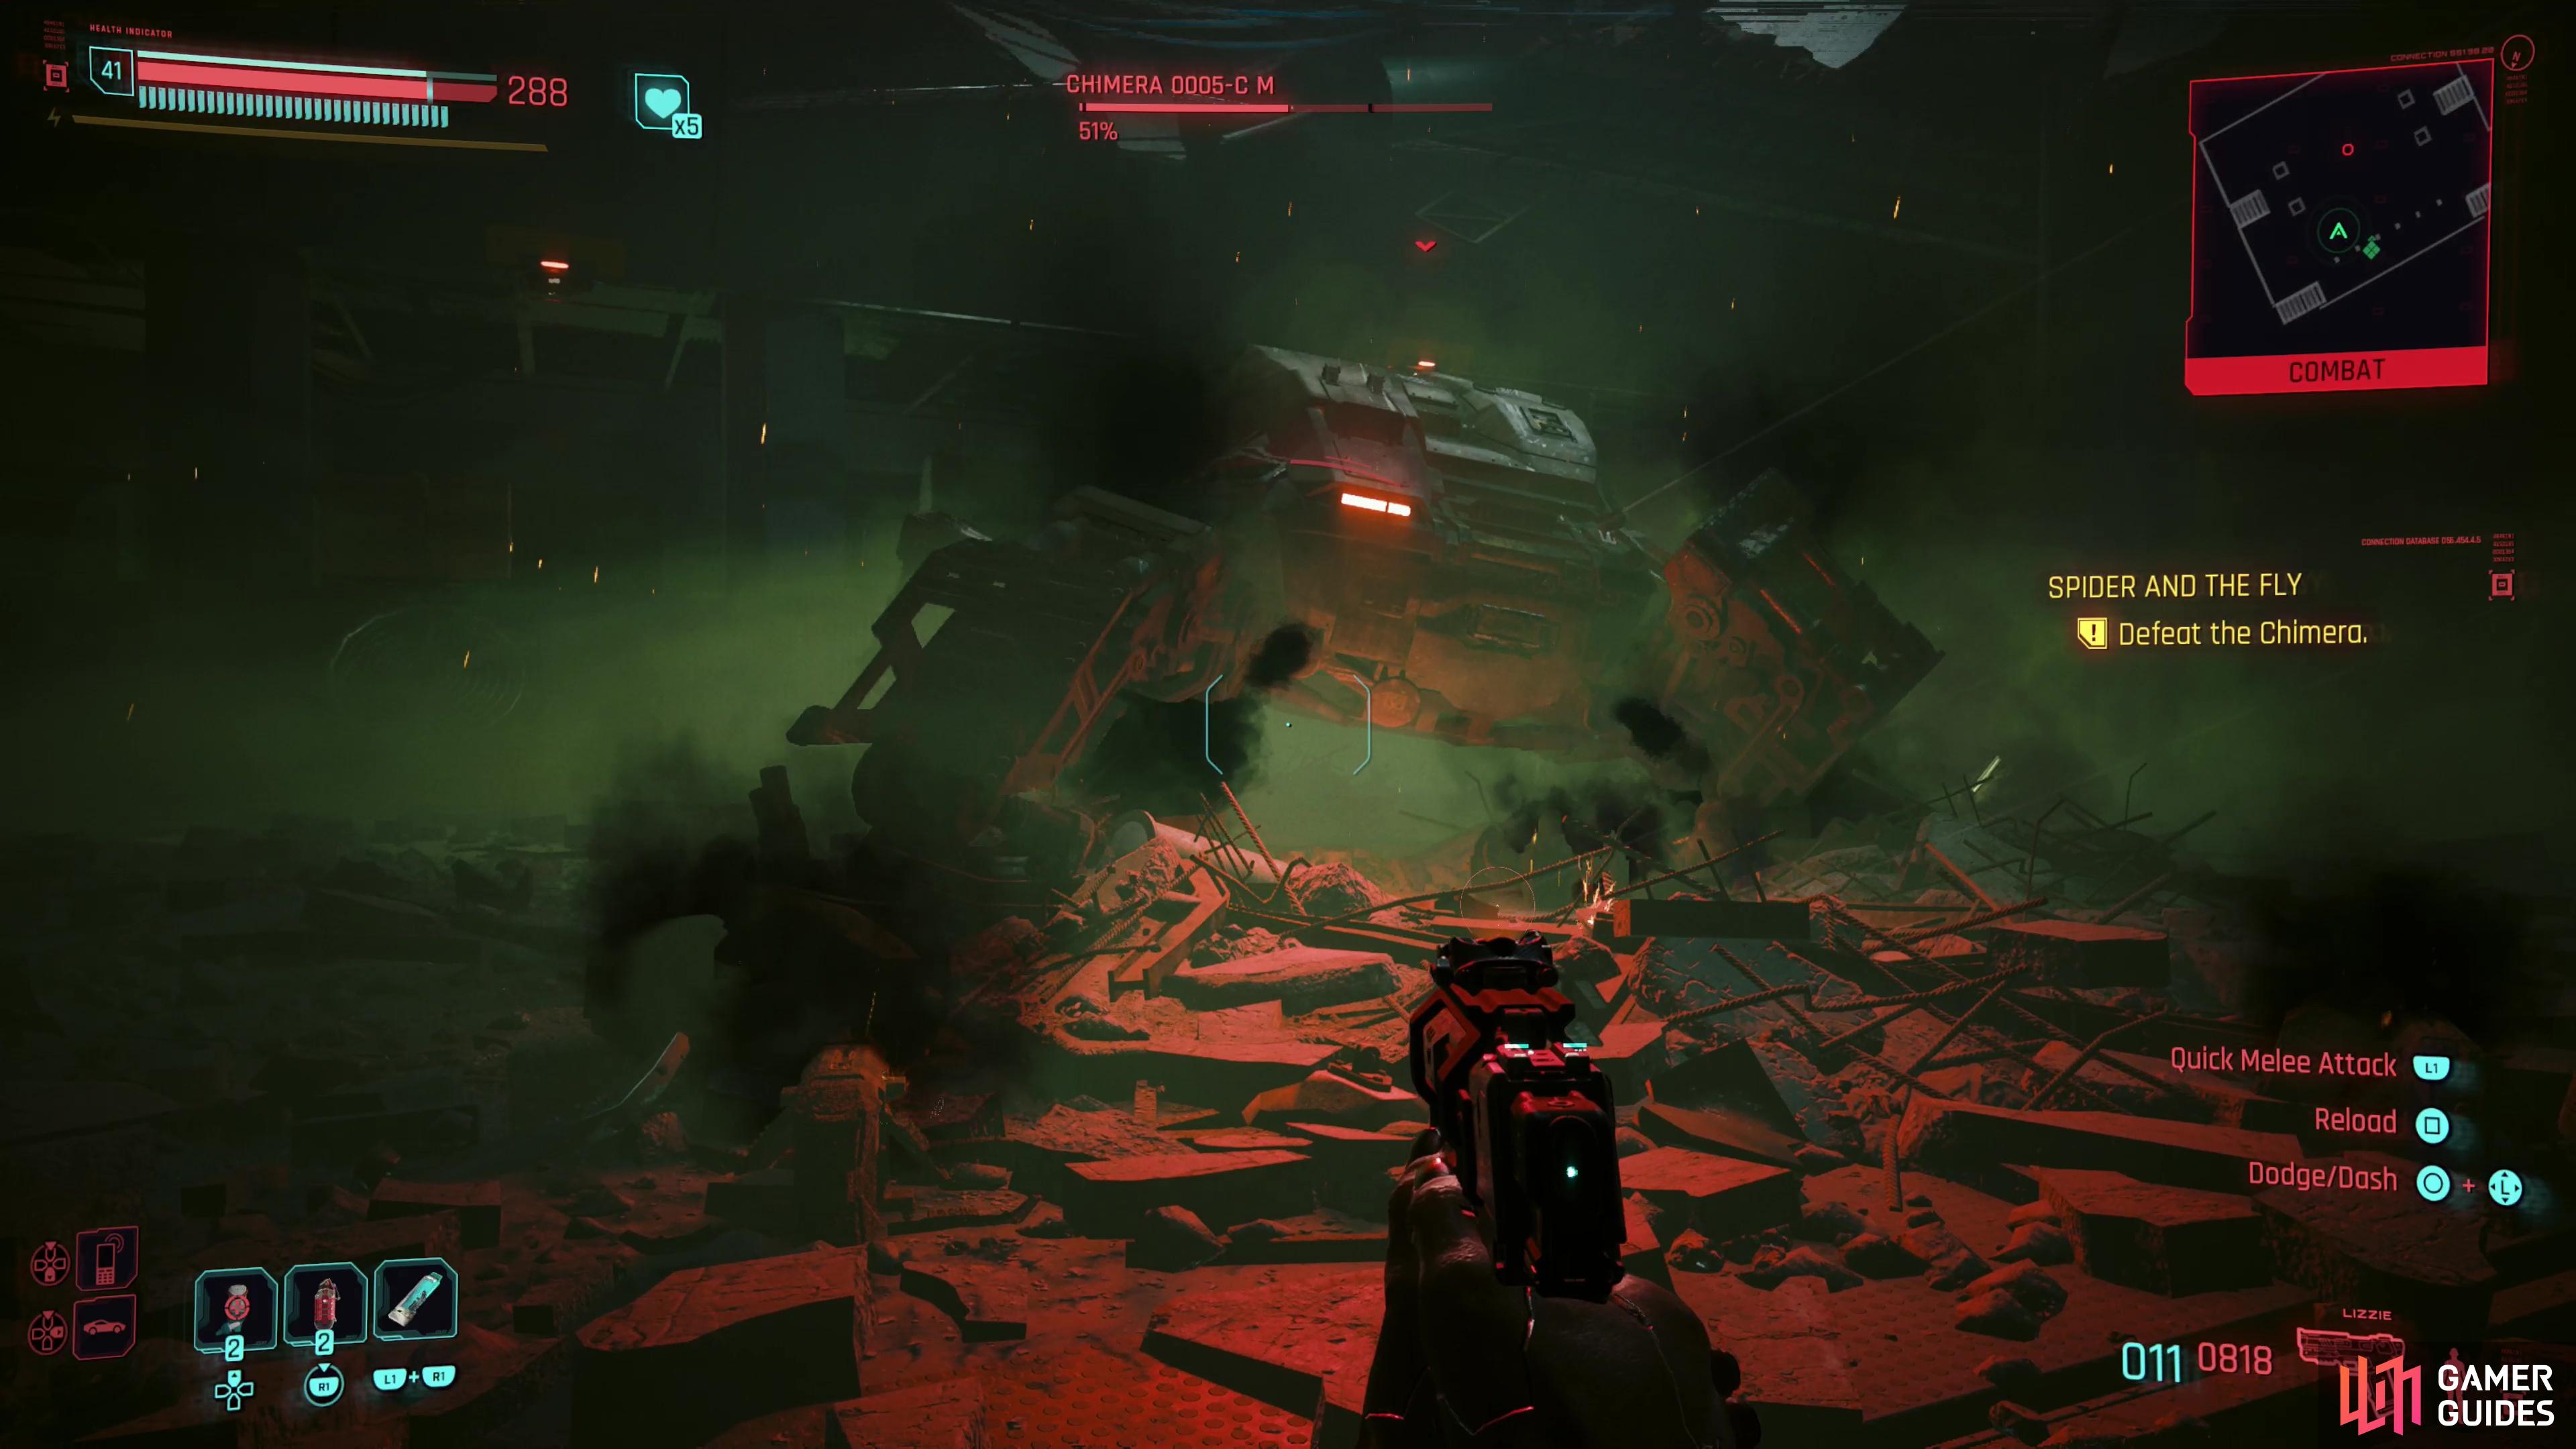
Reaching Presiden Myers was only the start of your troubles, as Hansen’s BARGHEST troops have been on hot pursuit ever since. Just when it looked like Songbird had bought you some reprieve by commandeering a Militech mech - the Chimera - she apparently lost control of the device and the rampaging mech became an even greater threat than Hansen’s private army. On this page we’ll discuss how to defeat the Chimera in Cyberpunk 2077: Phantom Liberty.
Chimera Boss Fight - Tips and Strategies
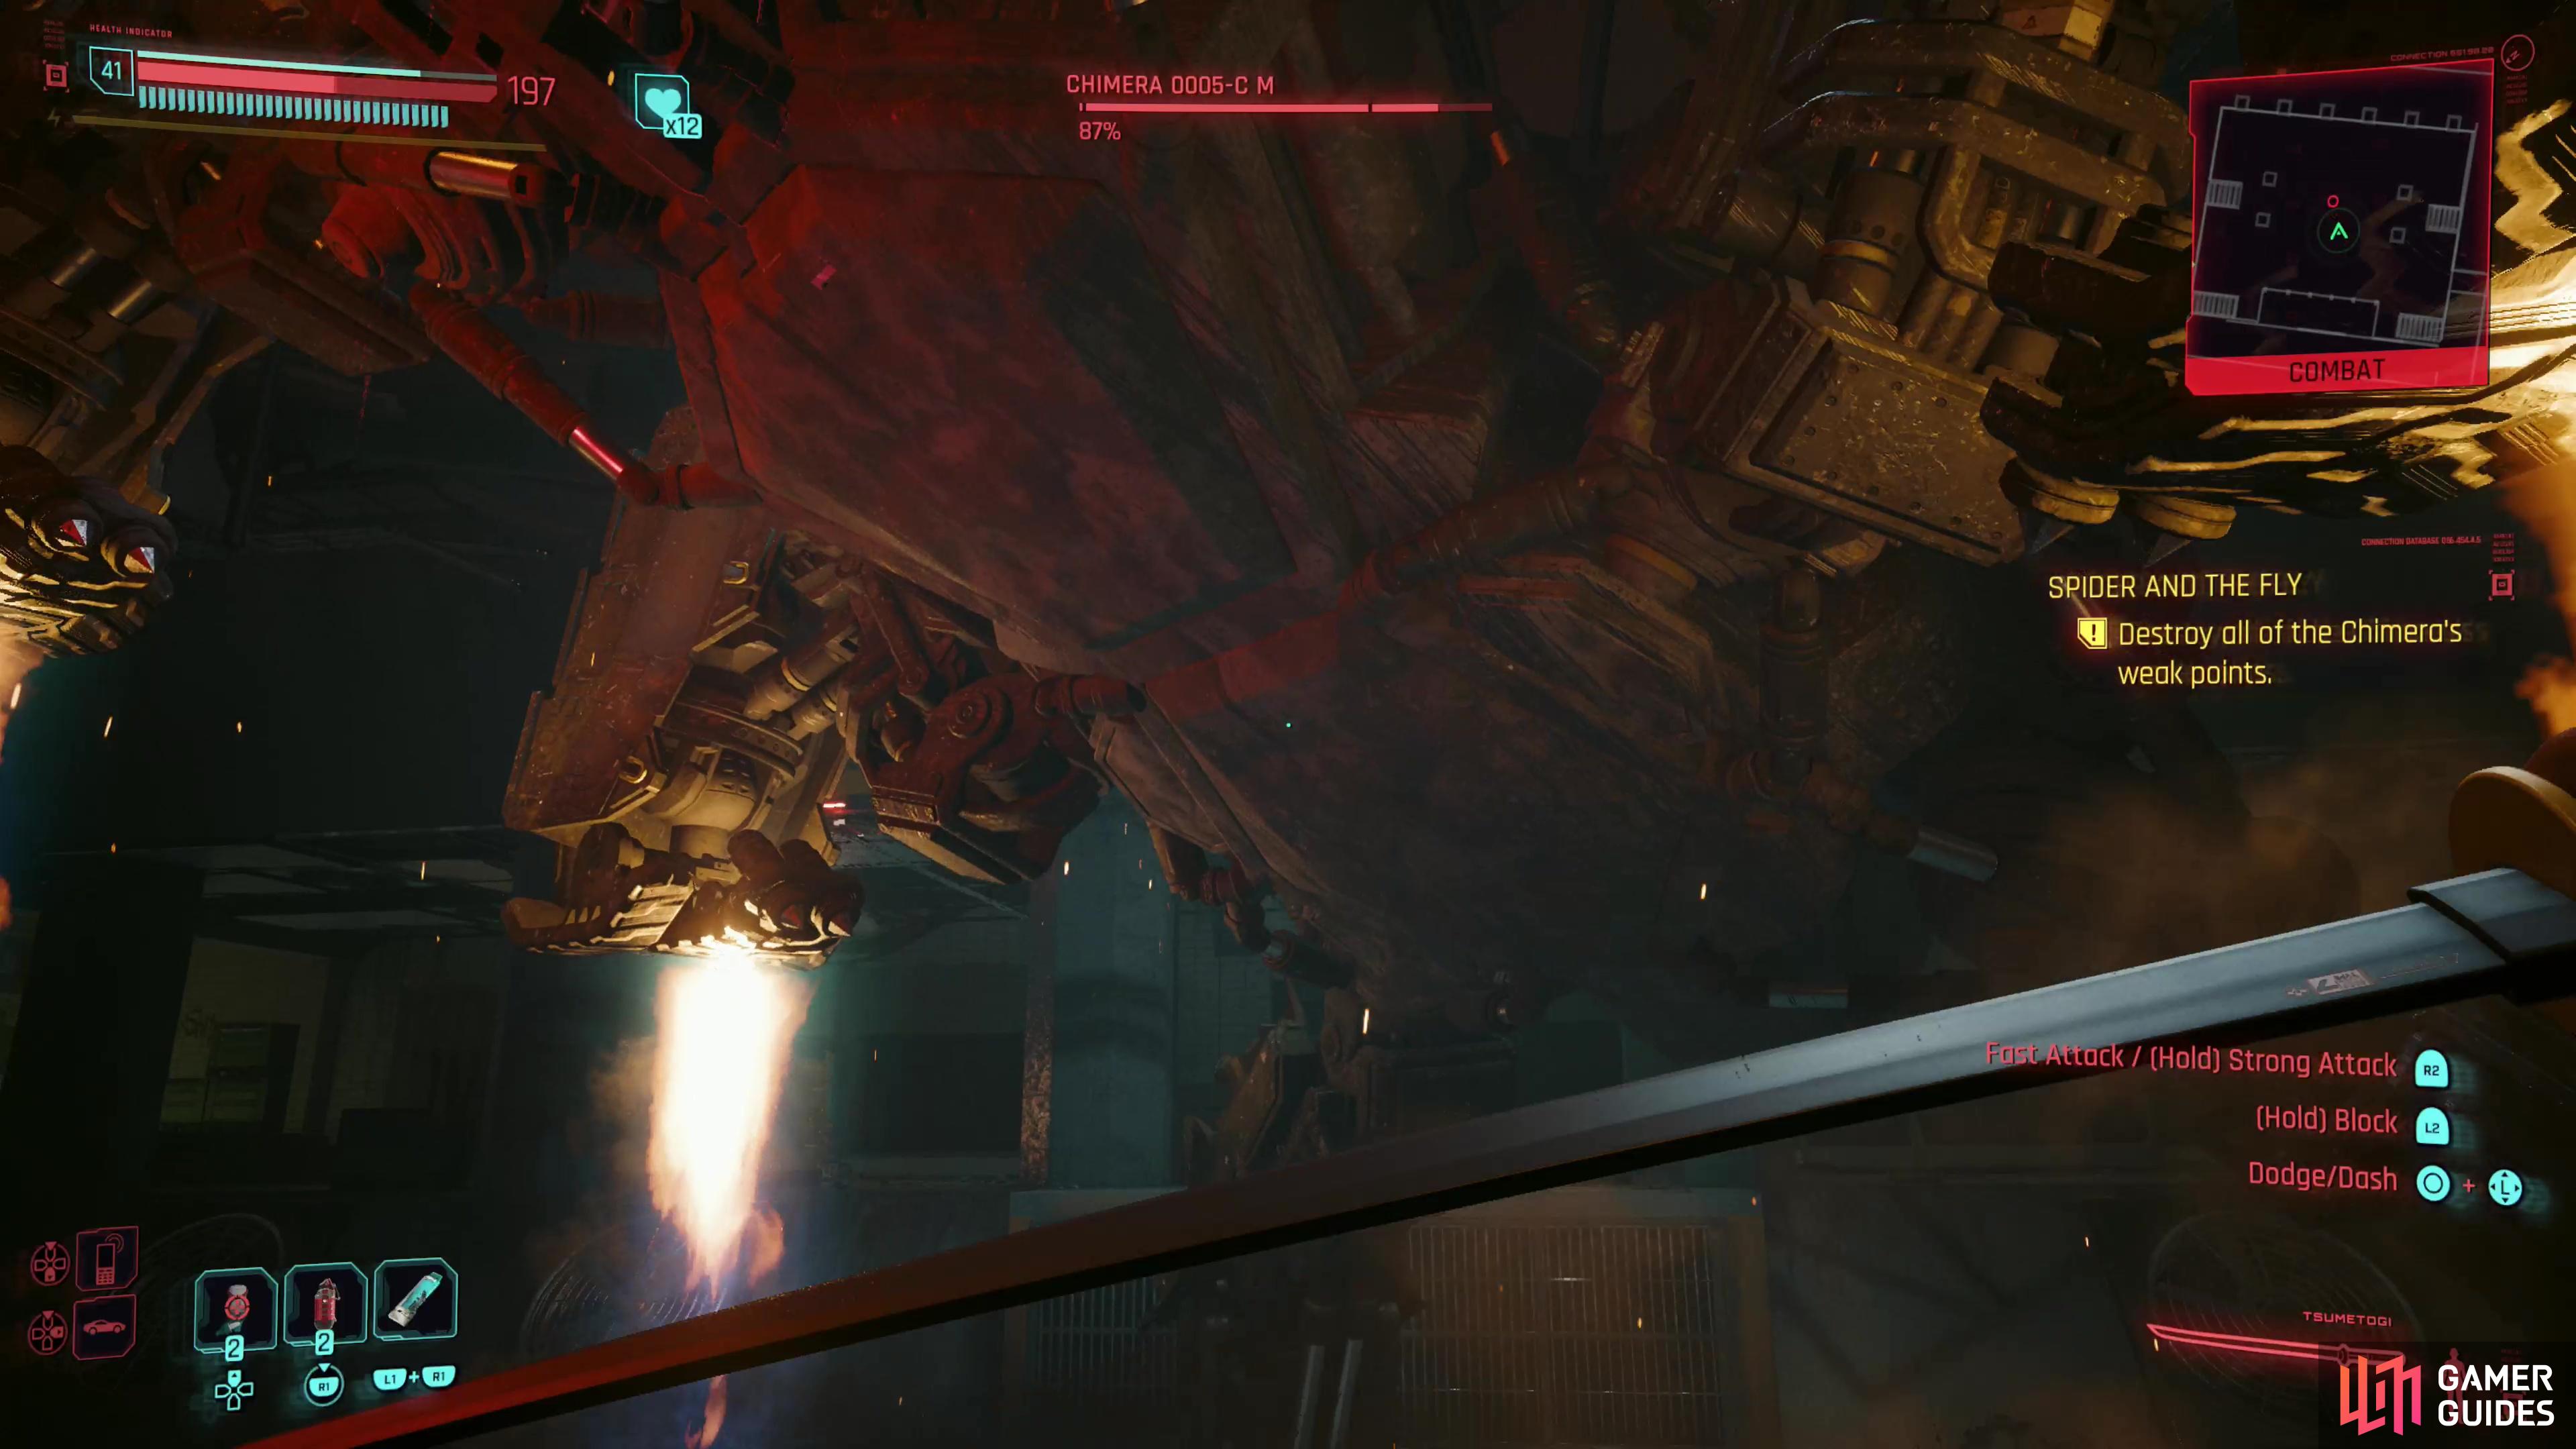
As soon as you recover from your pursuit, you’ll find that the mech, despite being mothballed for years and having half a building collapsed on it, is still combat ready. You’ll end up fighting in a two-story room, and the attacks the mech will bring to bear vary significantly depending on where and how you choose to fight it. As ludicrous as it seems, melee is a viable option in this fight, and it’s pretty darn effective during the first phase. That said, ranged combat is perhaps the more natural response to this hulking monstrosity, and we generally had an easier time with this boss while fighting from afar. If you engage in melee you’ll need to stay on the ground floor to come to grips with your massive nemesis, but if your fighting preferences afford you the luxury of range, head upstairs, as you’ll find more cover. With that out of the way, let’s check out these mech’s moveset.
Chimera Attacks
While definitely a massive machine, the Chimera prefers to rely on its array of armaments rather than leverage its bulk, and against enemies at a distance it has no choice but to indulge in such weaponry. Throughout the fight, Meyers will do her best to call out the Chimera’s attacks, giving you time to react, and your options generally boil down to taking cover or dashing. If you don’t have dash unlocked (Reflexes 9) this battle becomes much more of a slugfest, and you’ll need to be able to counter the damage you’ll end up taking by other means - high Armor, Health Freak (Technical Ability), Adrenaline Rush (Body), Overclock (Intelligence), etc., especially if you engage in melee.
While rarely used, the Chimera has two stomp attacks it’ll use against pests in melee.
- Stomp: An attack you’ll only see if you try to tangle with the Chimera in melee, the Chimera will stomp with its legs. You’d think it’d be more inclined to do this, considering how stompy it was during the chase sequence, but even if you stay close to the Chimera it’ll rarely use these attacks. There are two variants, a somewhat quick stomp with two legs and a lengthier stomp where the Chimera goes airborne momentarily via some jets in its legs before slamming down into the ground.
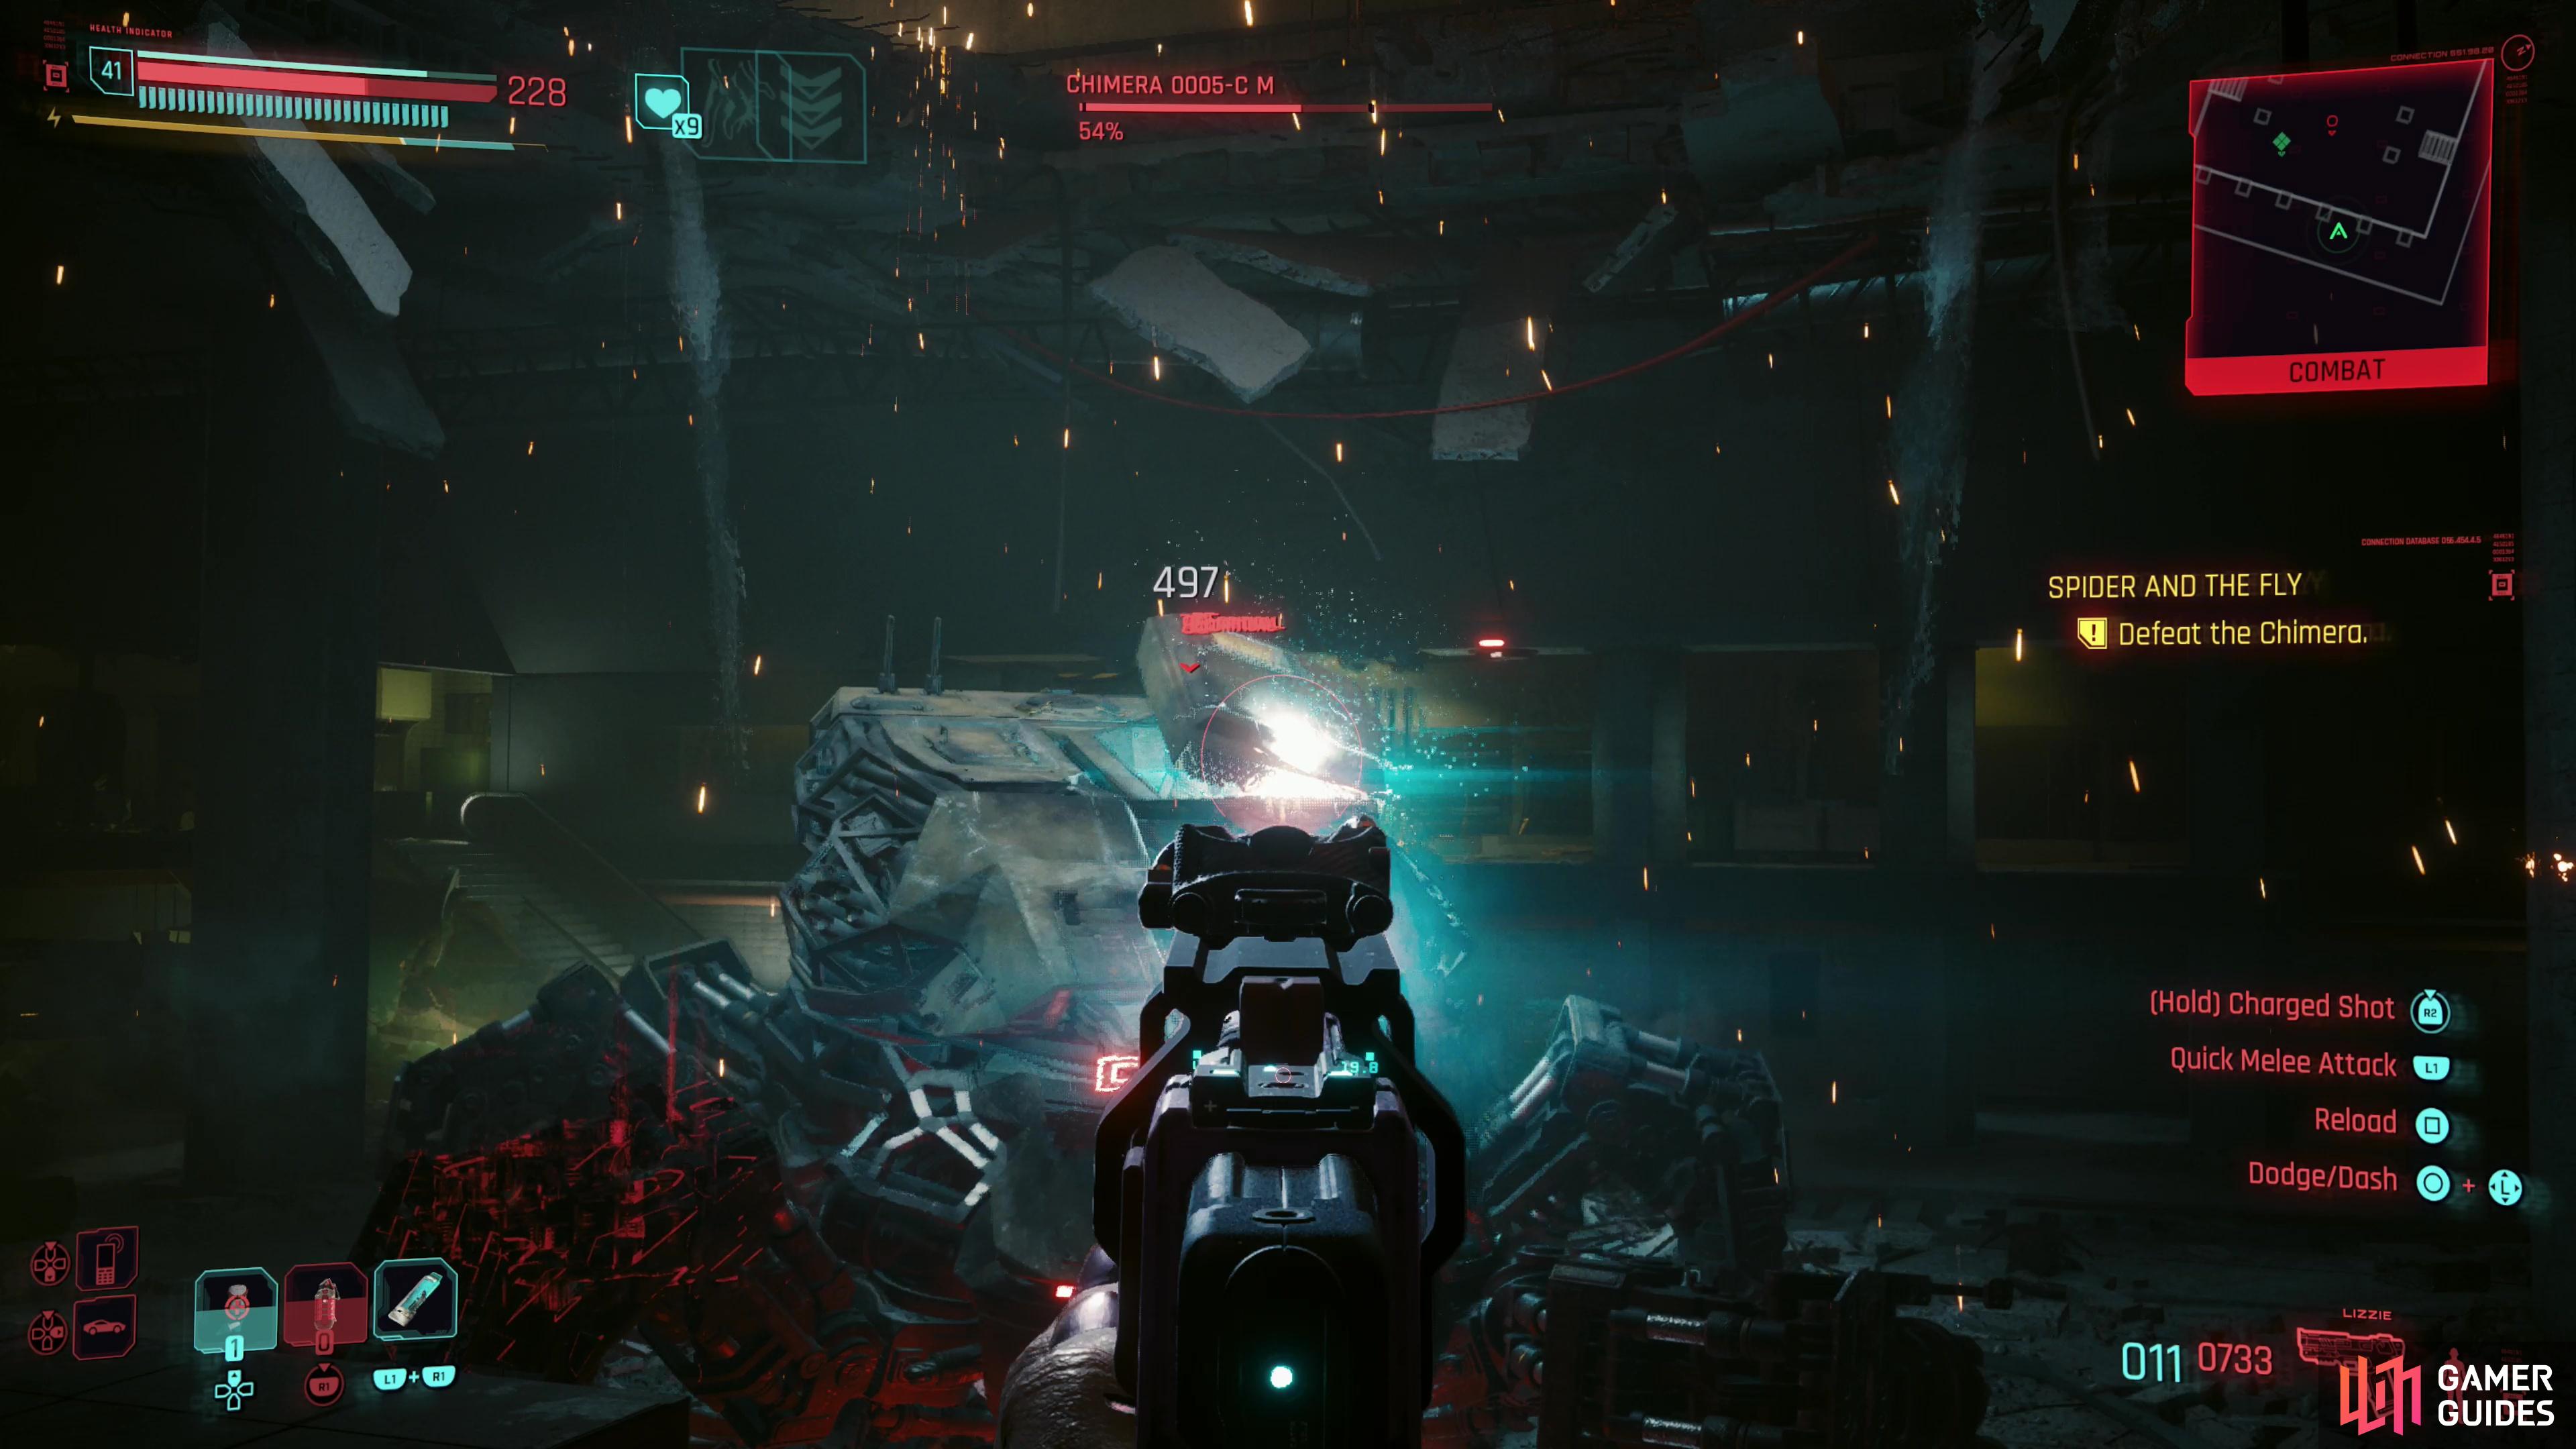
The Chimera’s main cannon isn’t just for show, but it’s not exactly worrying, either, shooting shells that you have ample opportunity to dodge and only deal moderate damage.
- Cannon Shot: The Chimera’s main cannon is, surprisingly, one of its weaker attacks. It can use this weapon against enemies on either the ground floor or second floor, each time creating a red reticle on the ground that indicates the cannon’s target - normally in front of you. It’ll track you as you move, but there’s a delay between the end of its tracking phase and shell actually impacting. If you’re circle strafing, you’re probably going to take some splash damage, but if you dash or sprint you should have little trouble dodging this attack. Each shell only deals moderate damage, but once the Chimera opts to start firing its main cannon it’ll do so repeatedly, obliging you to keep moving.
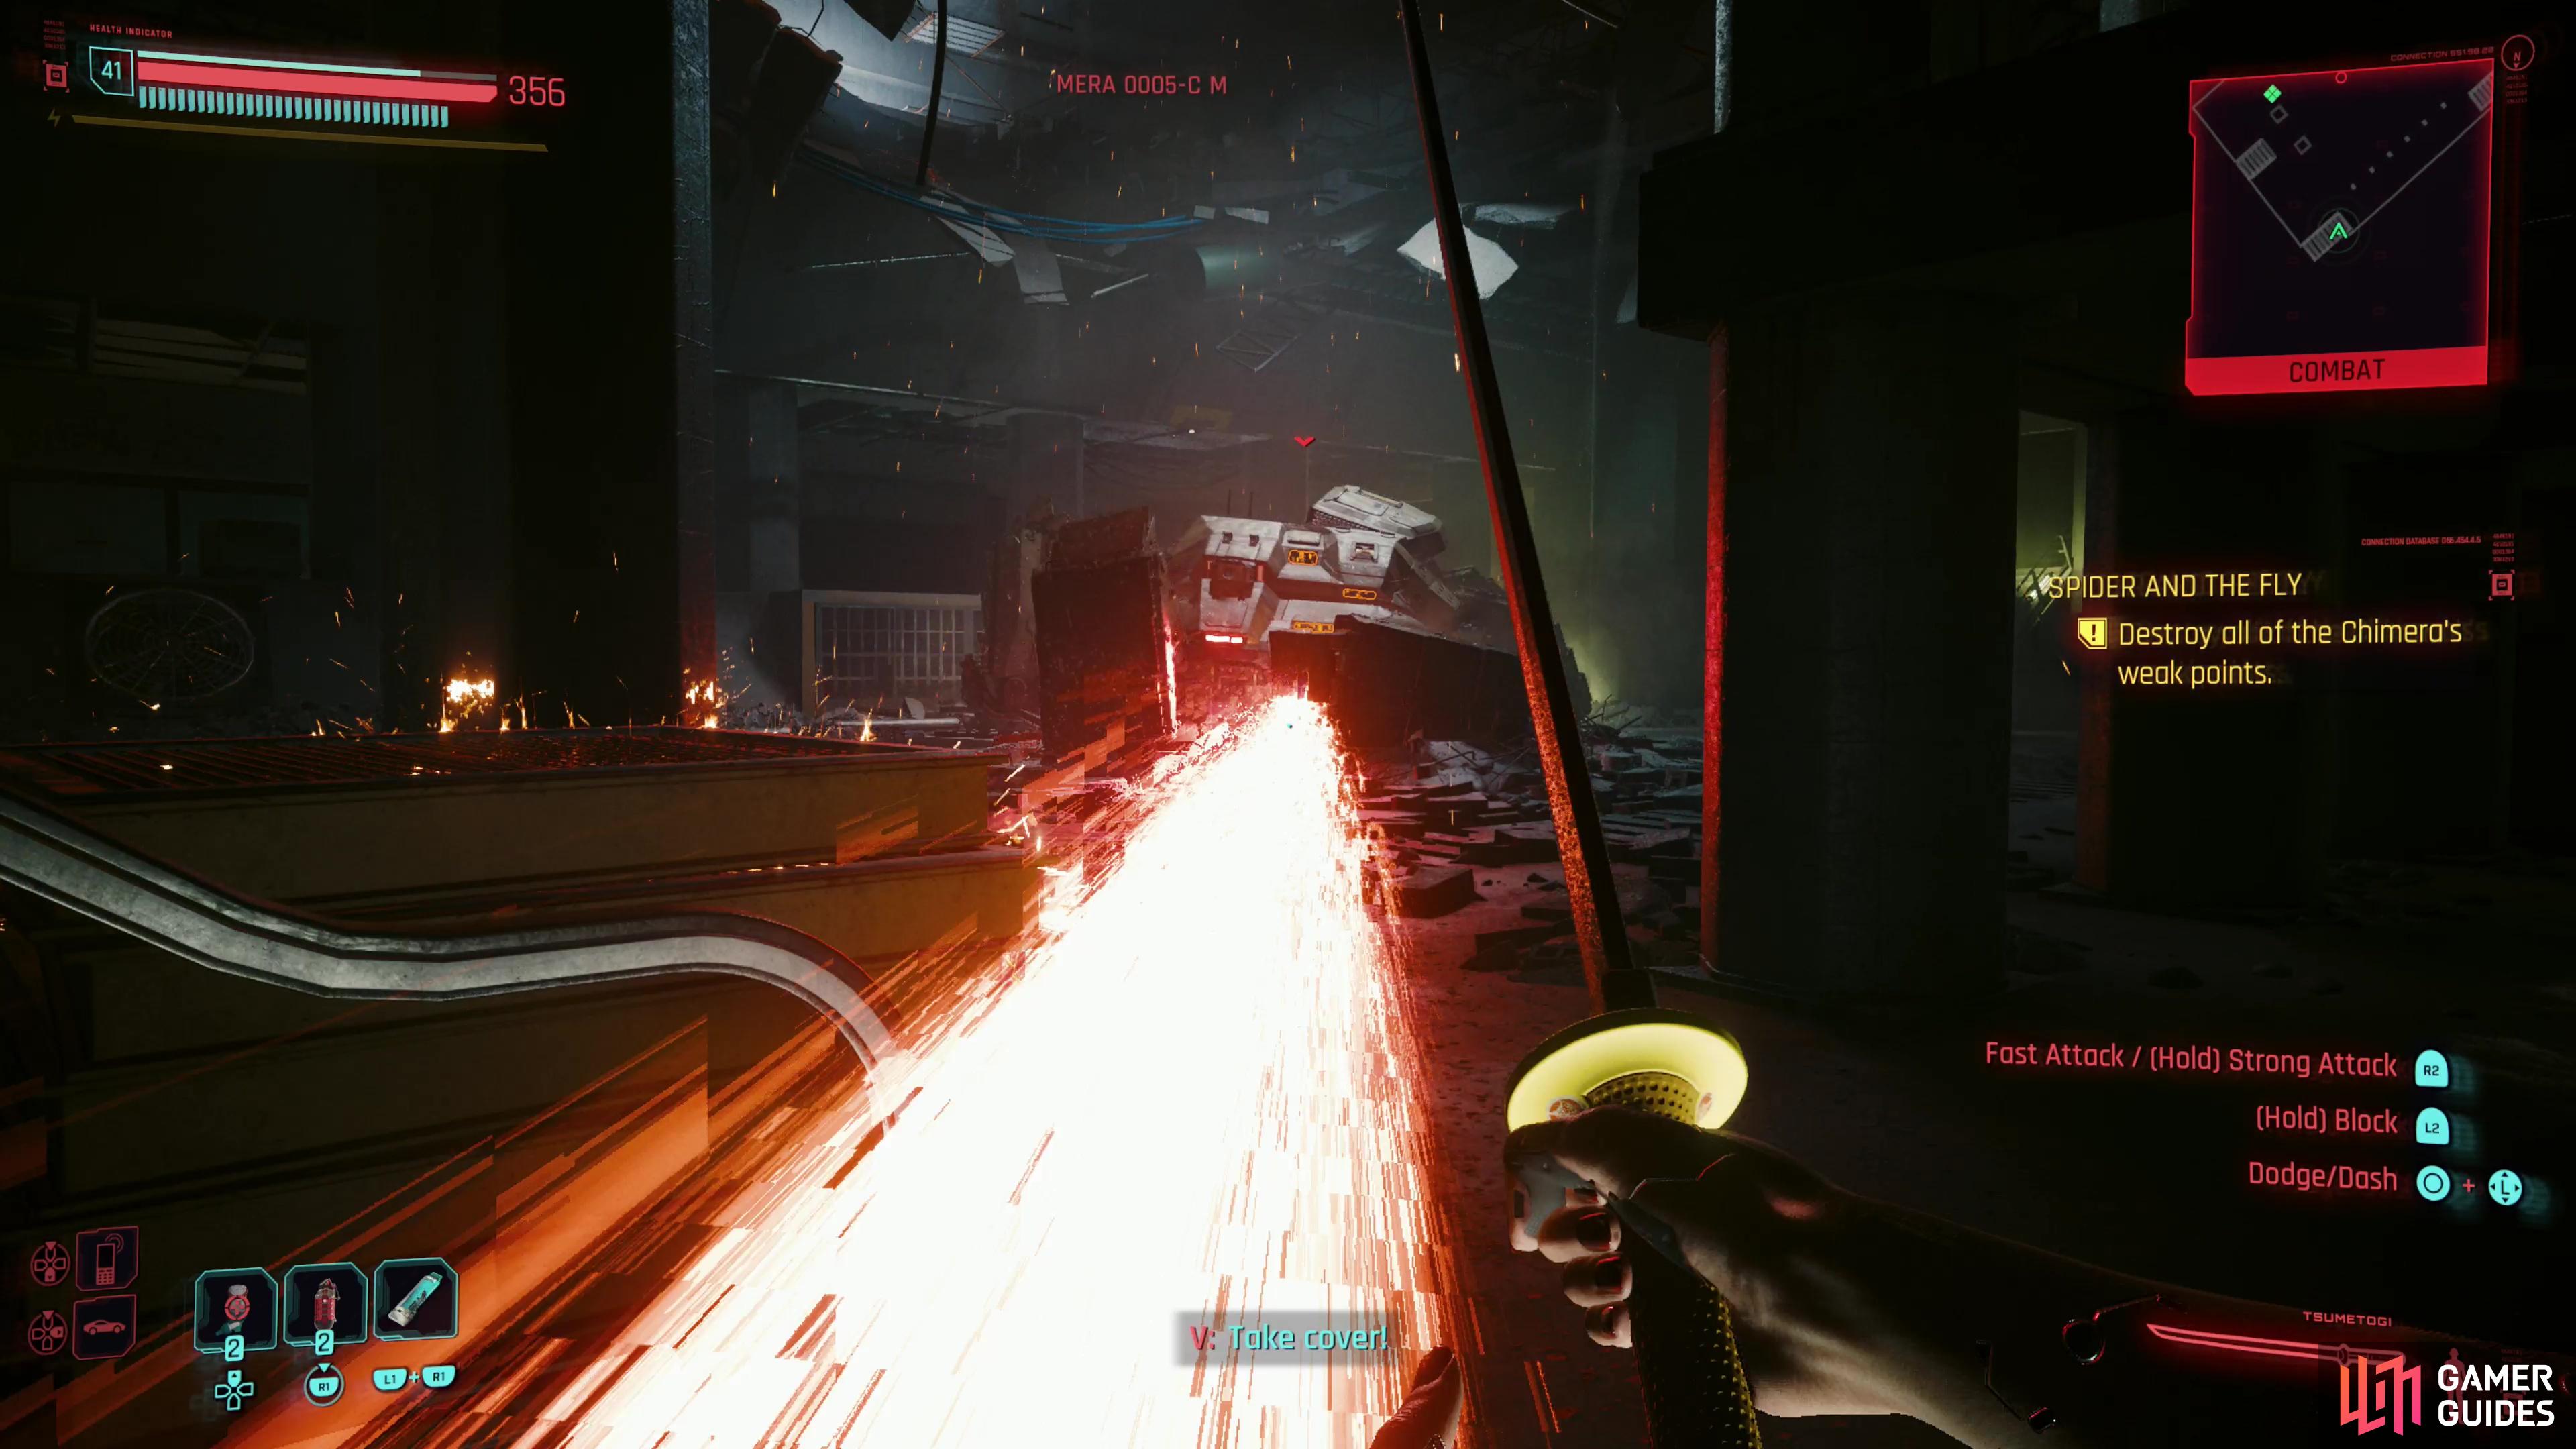
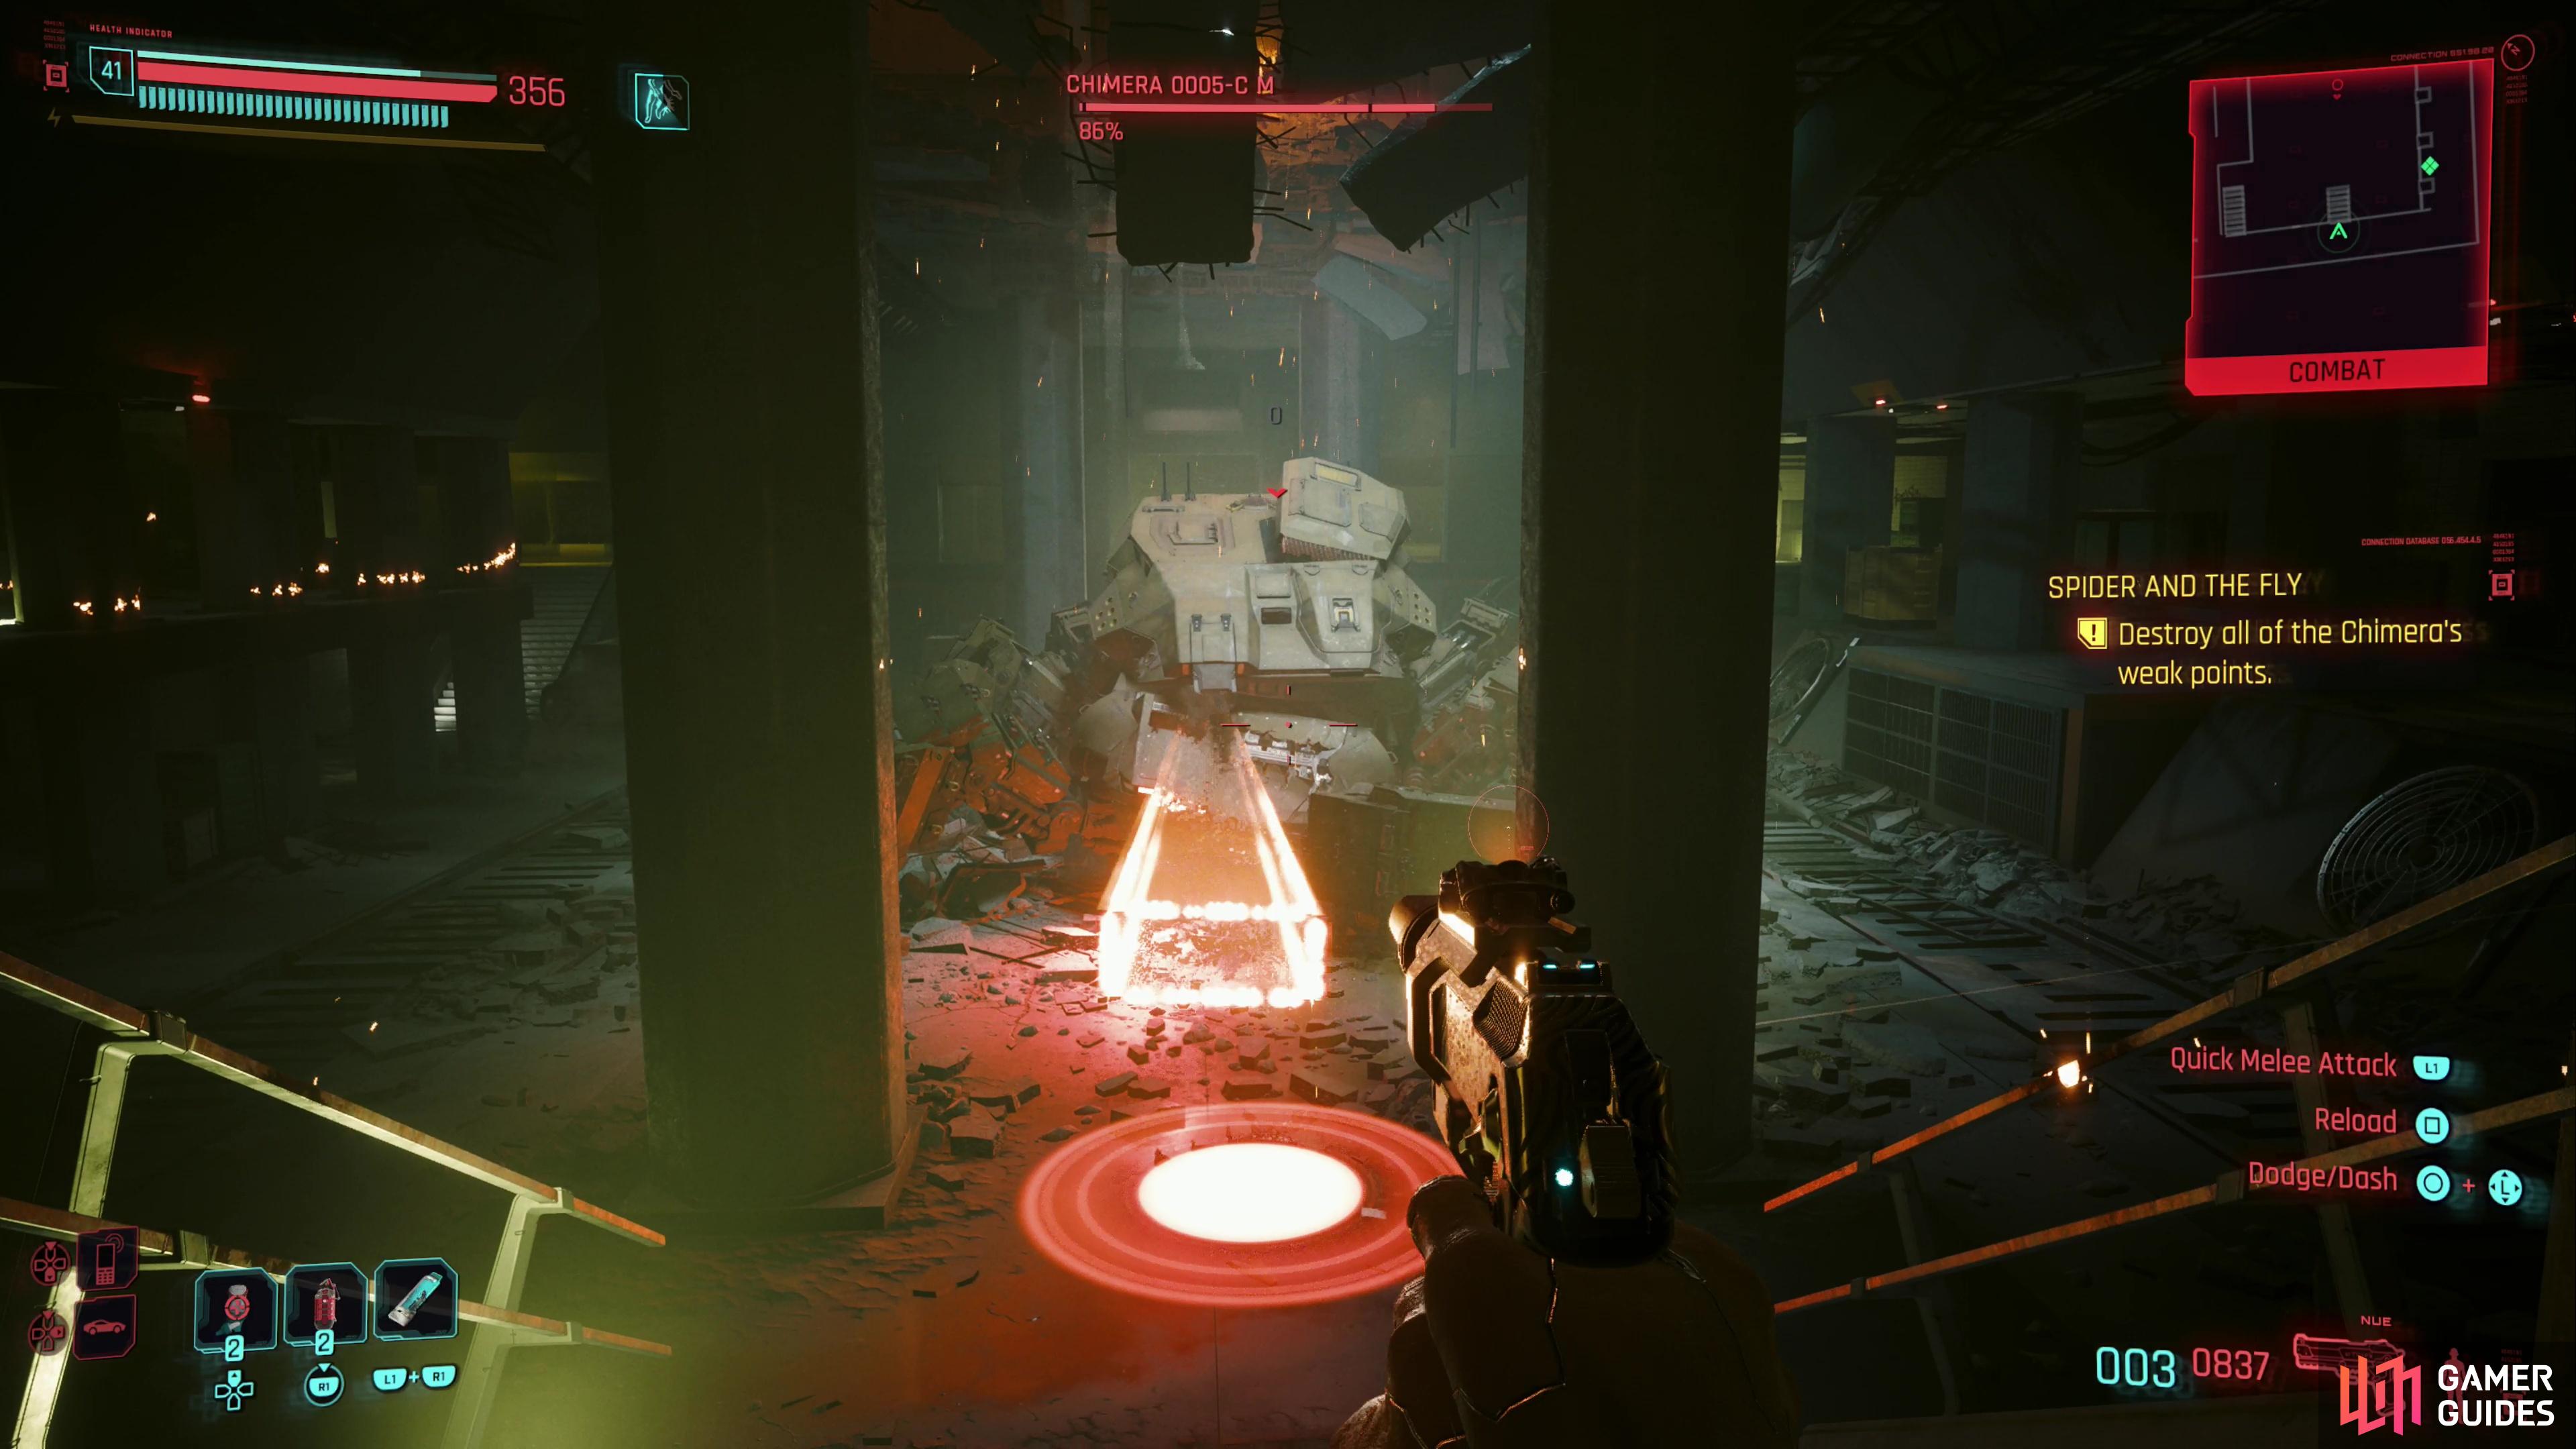
The Chimera’s Beam Sweep attack deals heavy damage, but you can dash through or take cover to avoid it.
- Beam Sweep: You witnessed this attack at least once during the chase sequence, on the escalator. The Chimera hasn’t lost the ability to fire off this beam attack, and it’ll sweep across the room, dealing heavy damage (expect to lose at least one-third of your health if you get hit, on normal difficulty) if it hits. Fortunately V and Meyers will usually call this out ahead of time and the beam can’t destroy cover, so if you hide behind something you’ll be fine. You can also dash through it, if you time it correctly.
The Chimera’s top-mounted turret will spew a barrage of lead at you - get on the ground floor and start circling it to mitigate damage.
-
Turret Barrage: Another attack you saw during the chase sequence, the Chimera will spew a stream of hot lead from its massive top-mounted turret. This barrage will last for a while and the Chimera will track you as it fires. Worse, this attack chews through cover, and taking sustained fire for any significant length of time will deal massive damage. Abandon any thoughts of counterattacking during this assault and focus on dodging or sprinting away from the turret fire - you can circle the machine faster than it can turn, but you have to be on the ground floor to do this, making it one of the few attacks it’s safer to deal with up close.
-
Missile Storm: This attack comes in two forms, depending on where you are. If you’re on the ground floor, the Chimera will continuously fire a stream of missiles into the air, which seek you out in constant succession, dealing moderate damage if they land. If you’re on the second floor, the Chimera will fire several missiles in a cluster, which arc up before sweeping down at you in a line. In the former case, your best bet is to just keep moving like with the Turret Barrage attack, while in the latter case you’re better off waiting until each row of missiles moves in and dashing to the side.
A rare attack, the Chimera will discharge toxic gas, obliging you to vacate the ground floor.
- Toxic Gas: A rare attack that’ll only affect the ground floor, if you’re a ranged character sticking to the upper levels, you probably won’t ever see it. The Chimera will crouch down and emit dark green gas (the universal sign of “something odiferous and bad!) which suffocates the entire lower floor, dealing damage over time. It’s not tremendous damage, especially with limited exposure, but it’s painful enough to give you incentive to head upstairs.
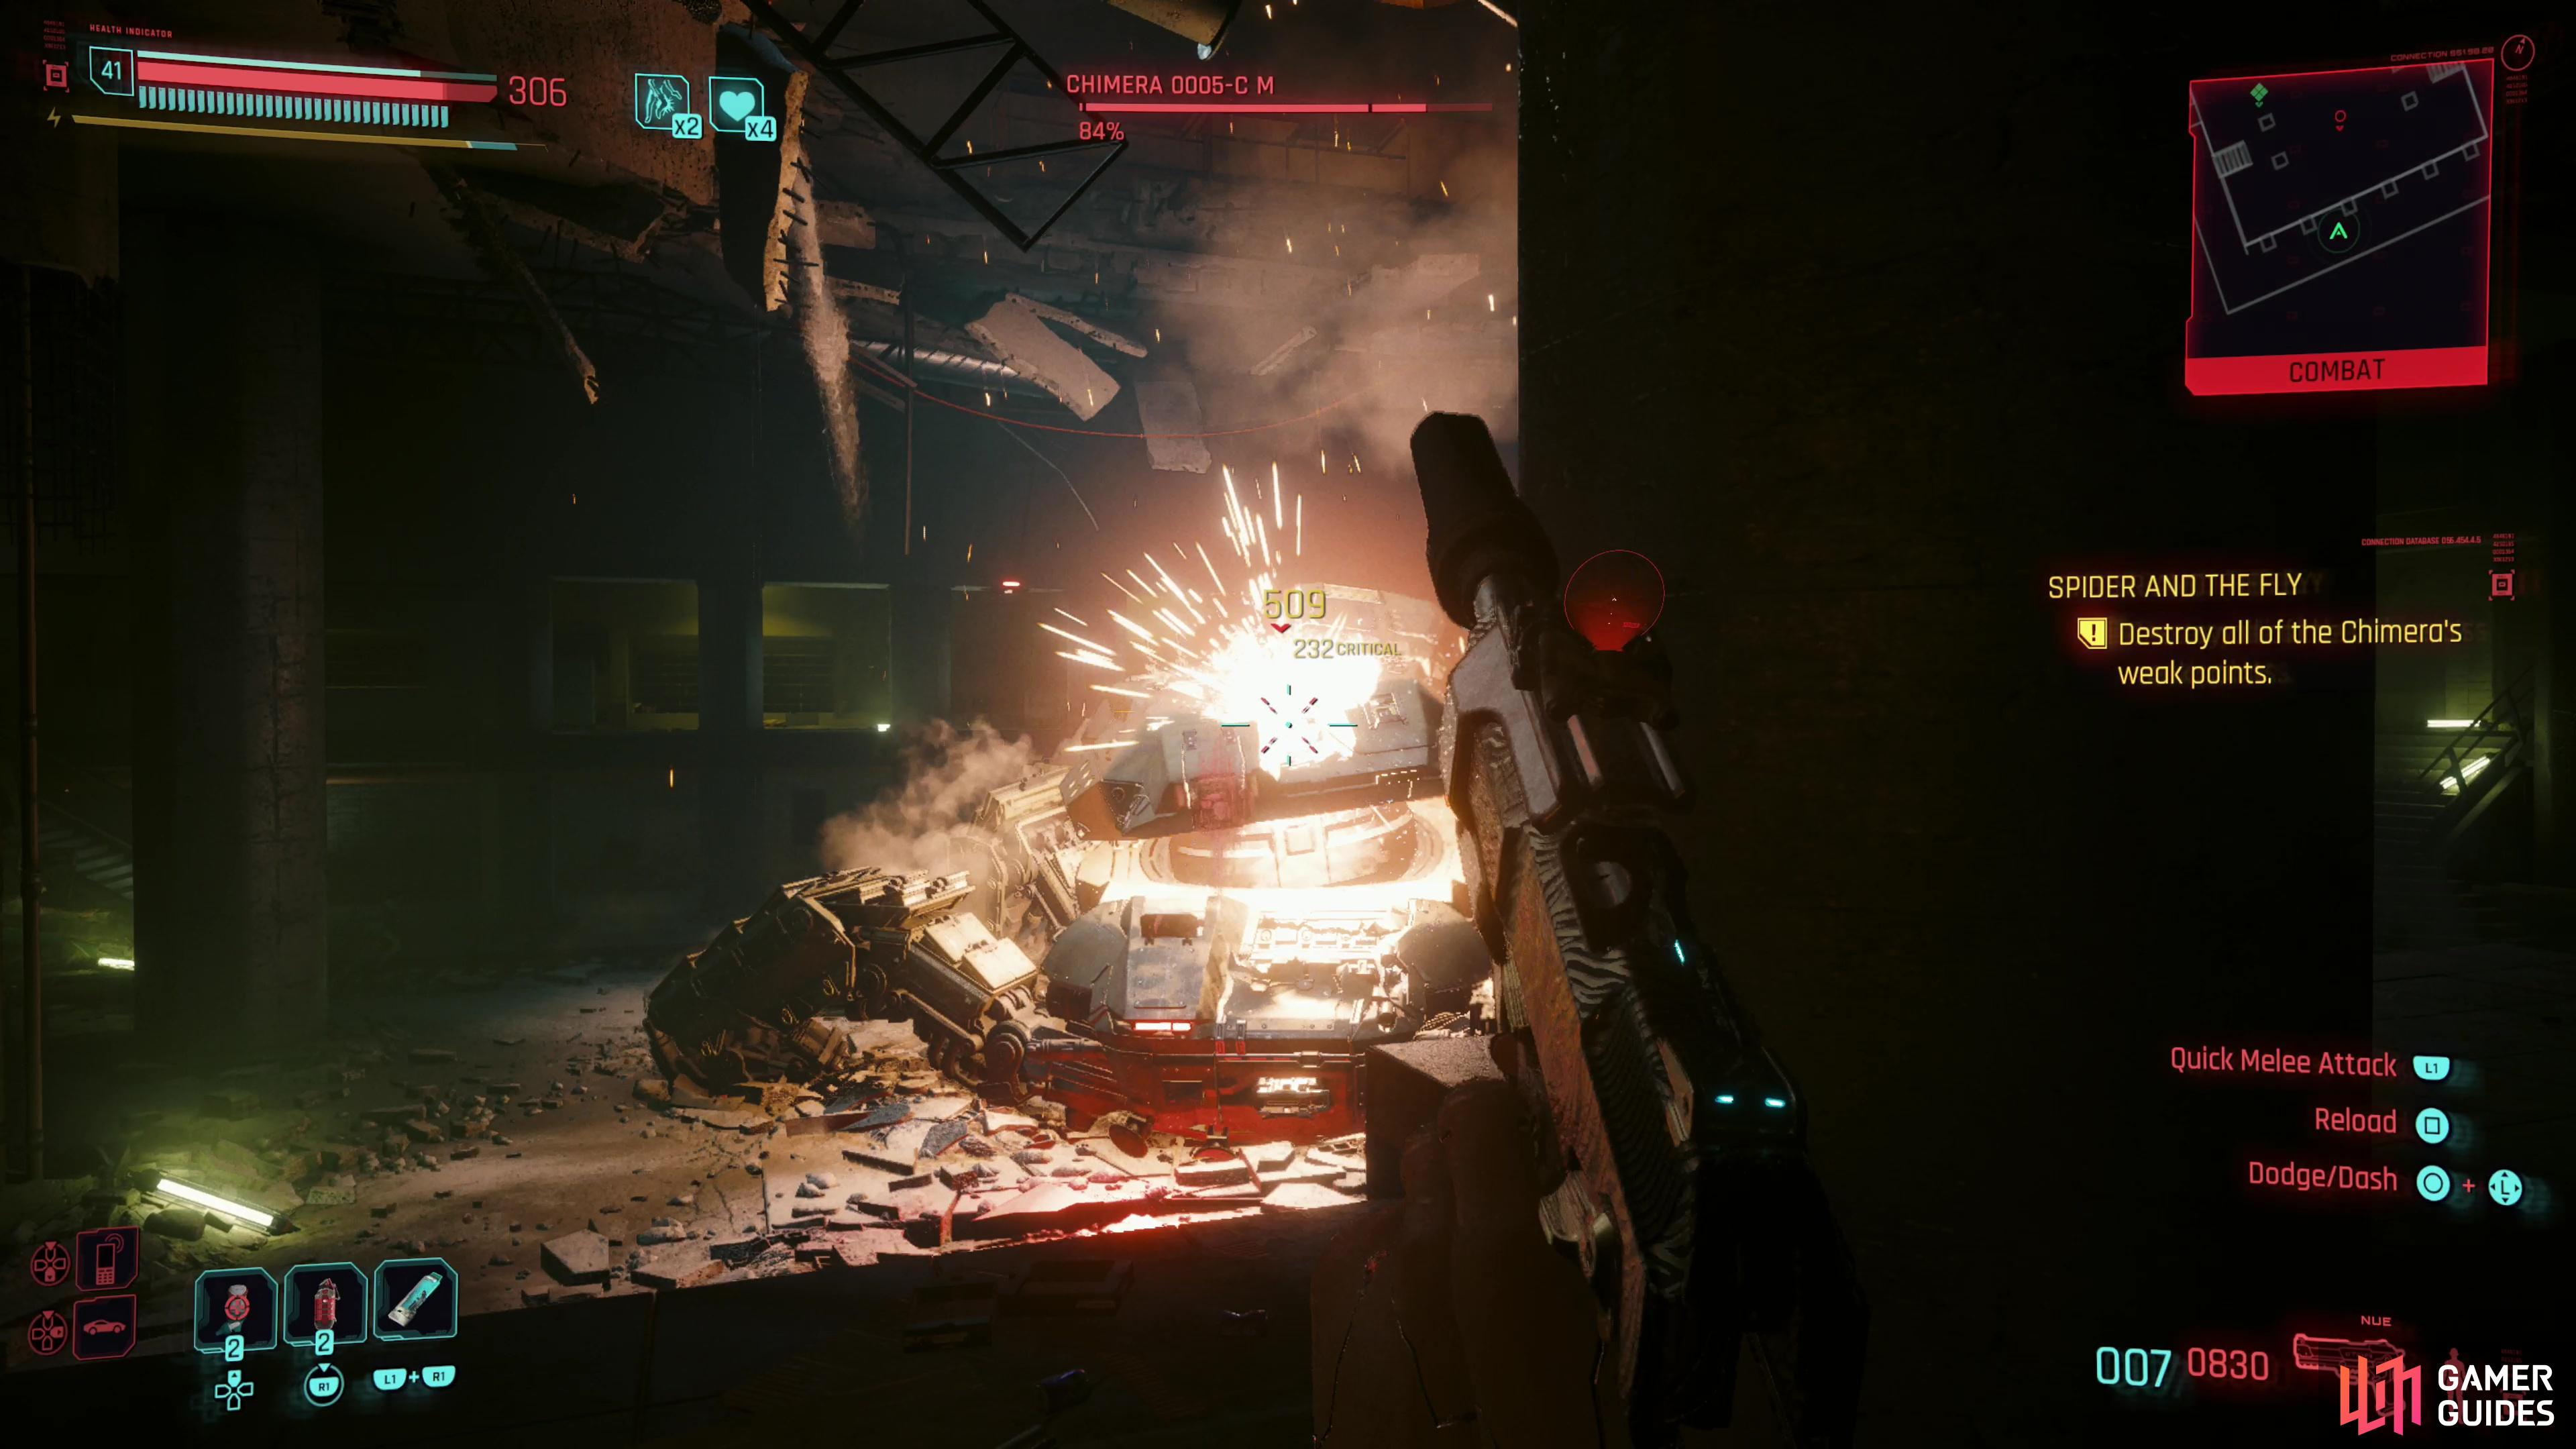
During the first phase of fight you’ll be incentivized to target weakpoints that appear on the Chimera’s hull.
Destroy All the Chimera’s Weak Points - Chimera Boss Fight Phase 1
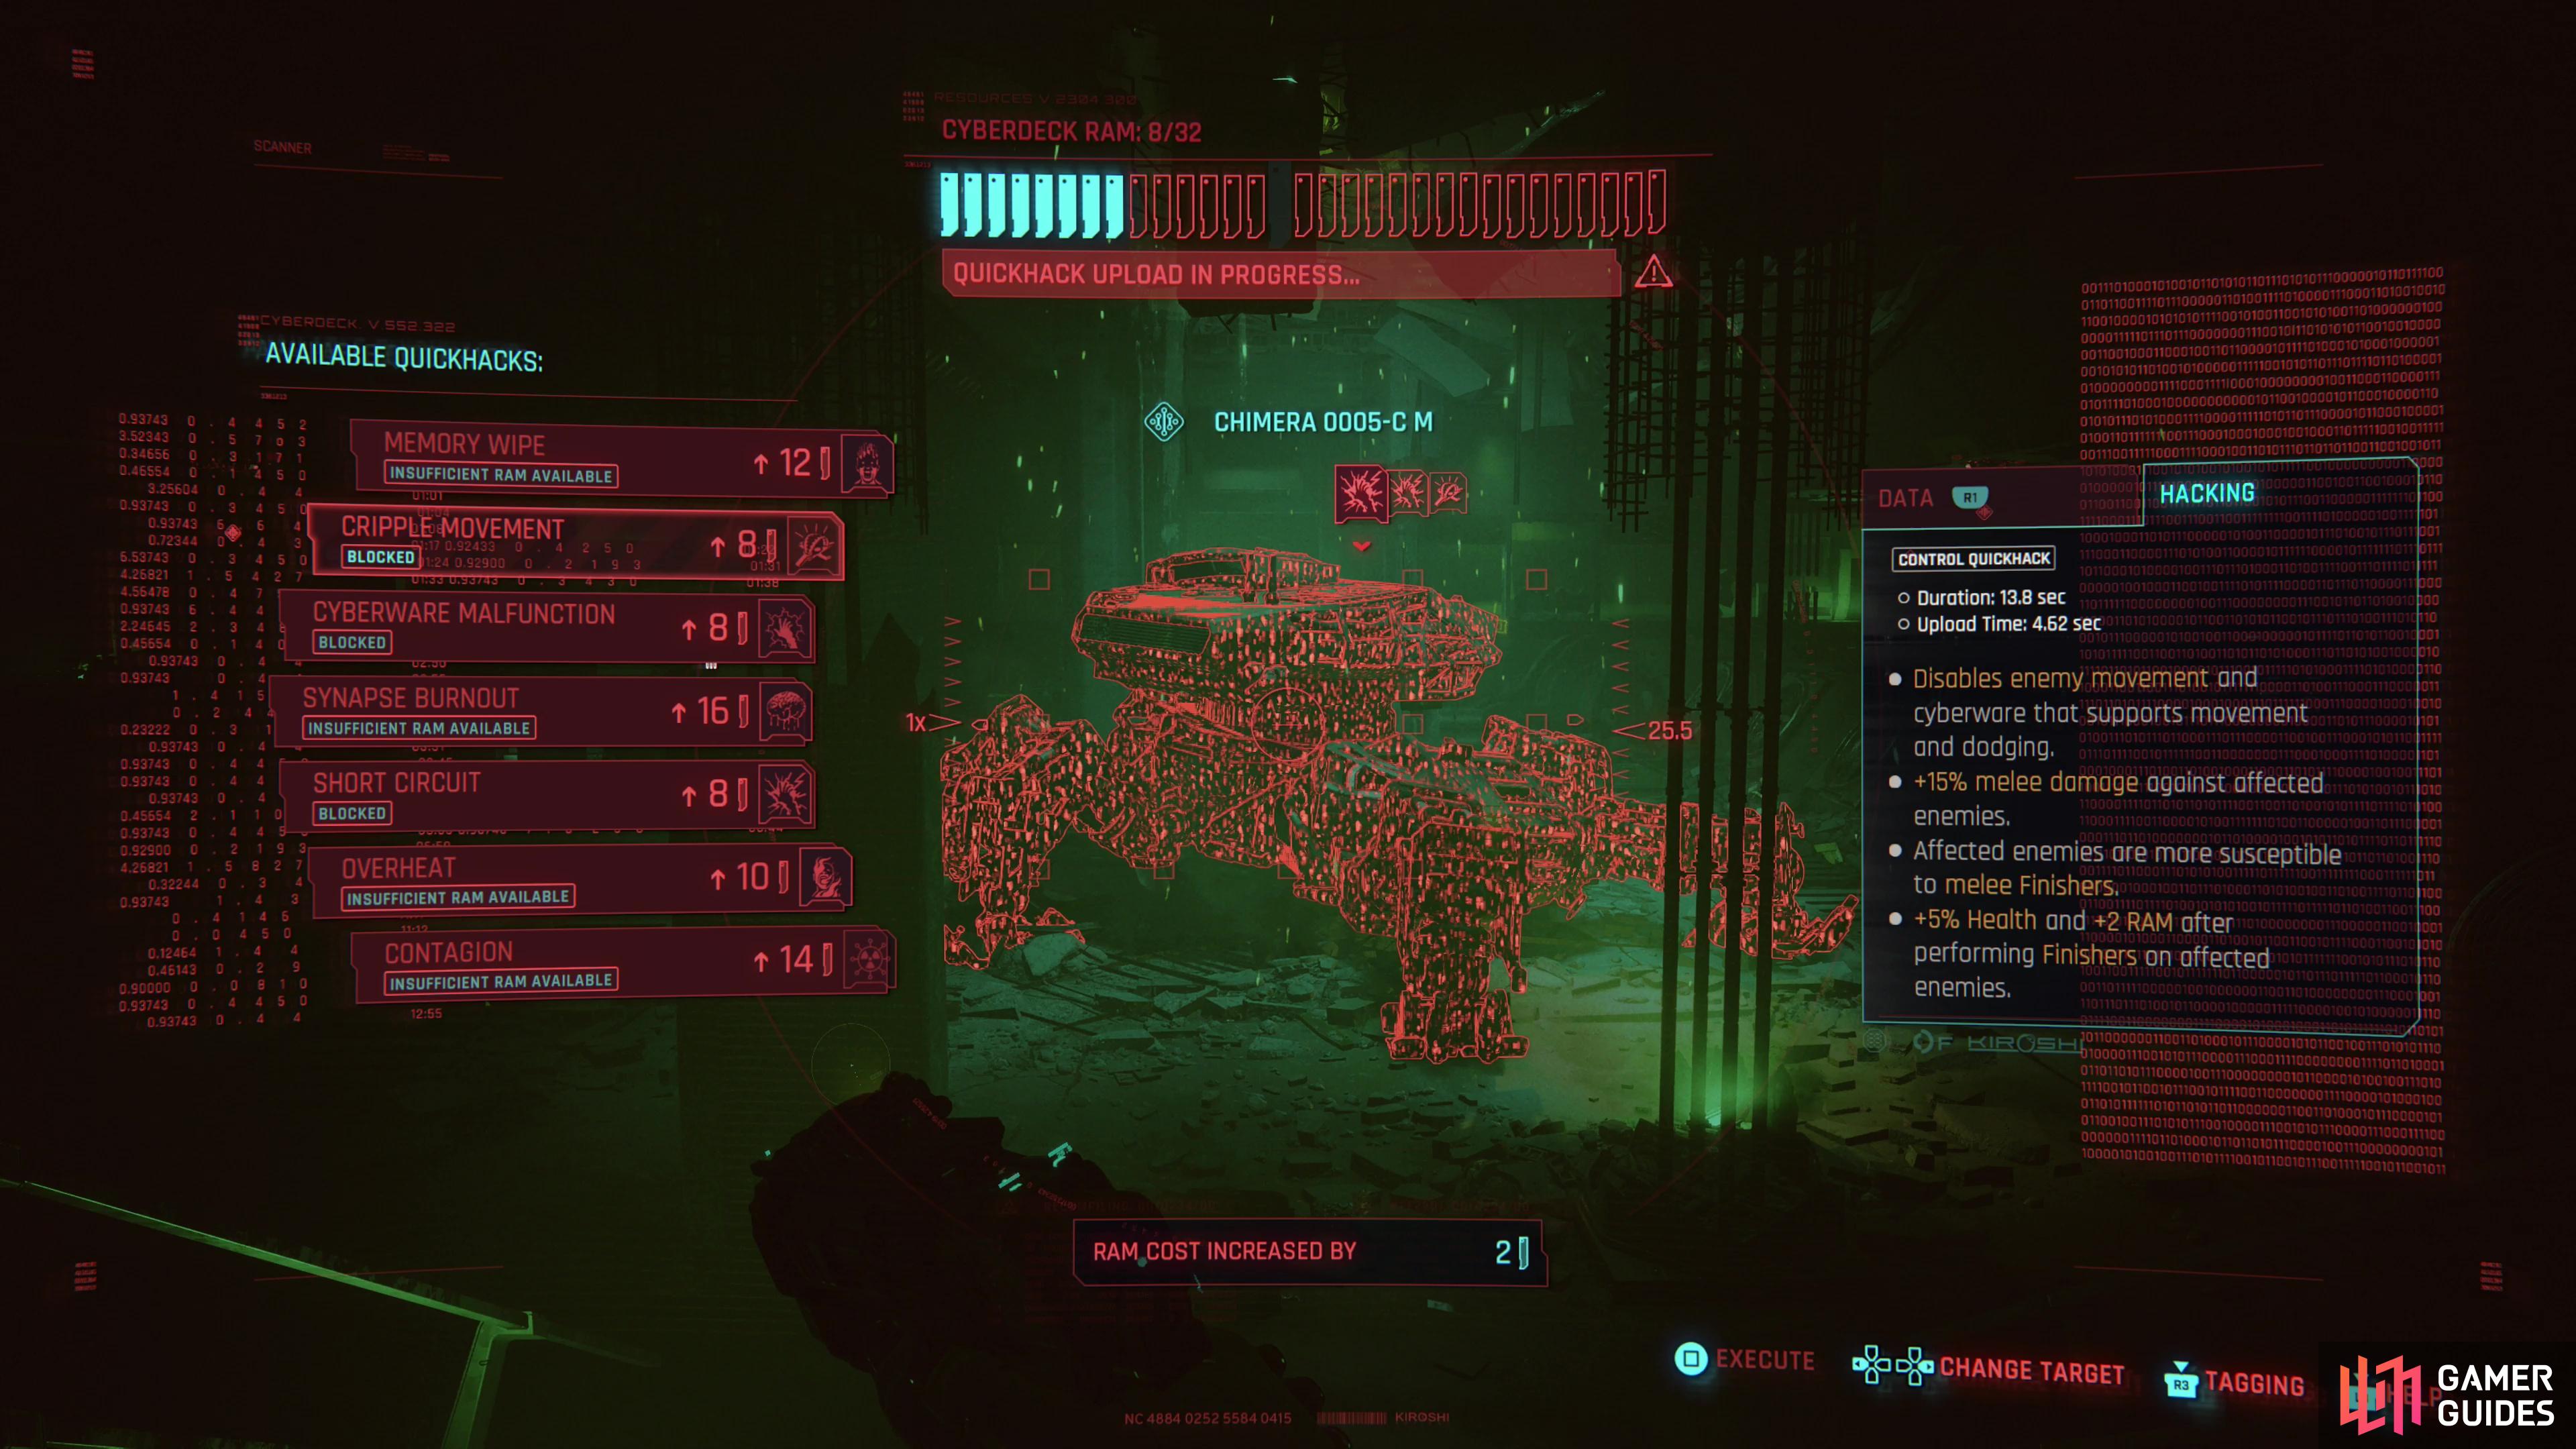
The first phase of the fight is pretty simple - the boss has a segmented health bar, with a split at the 70% mark. Your goal in this first phase is to knock off the first 30% of the Chimera’s health bar, and you’ll be aided in this by the appearance of various weakpoints across the mech’s hull. These smallish rectangular weakspots glow orange after scanning the mech and can remain visible for quite a while, and although they’re quite receptive to damage, each one is easily destroyed, so you won’t be chipping off chunks of the boss’s health bar by concentrating fire in any one spot. Some of these can be hard to reach with melee weapons, but Meyers will contribute from afar - a luxury she has, considering the Chimera doesn’t aggro her often. This is a fine time to get used to the boss’s attacks as you circle around and hunt for weakpoints. Don’t feel obligated to chase down weakpoints - it speeds things up, but there are many ways to skin this giant metal cat. In general, there’s no good reason to refrain from pelting the Chimera with Short Circuit quickhacks and tossing grenades whenever your RAM/cooldowns allow. Once the boss’s health hits 70%, an intermediate phase will begin.
The Chimera’s drones are surprisingly easy to dispatch with melee attacks,
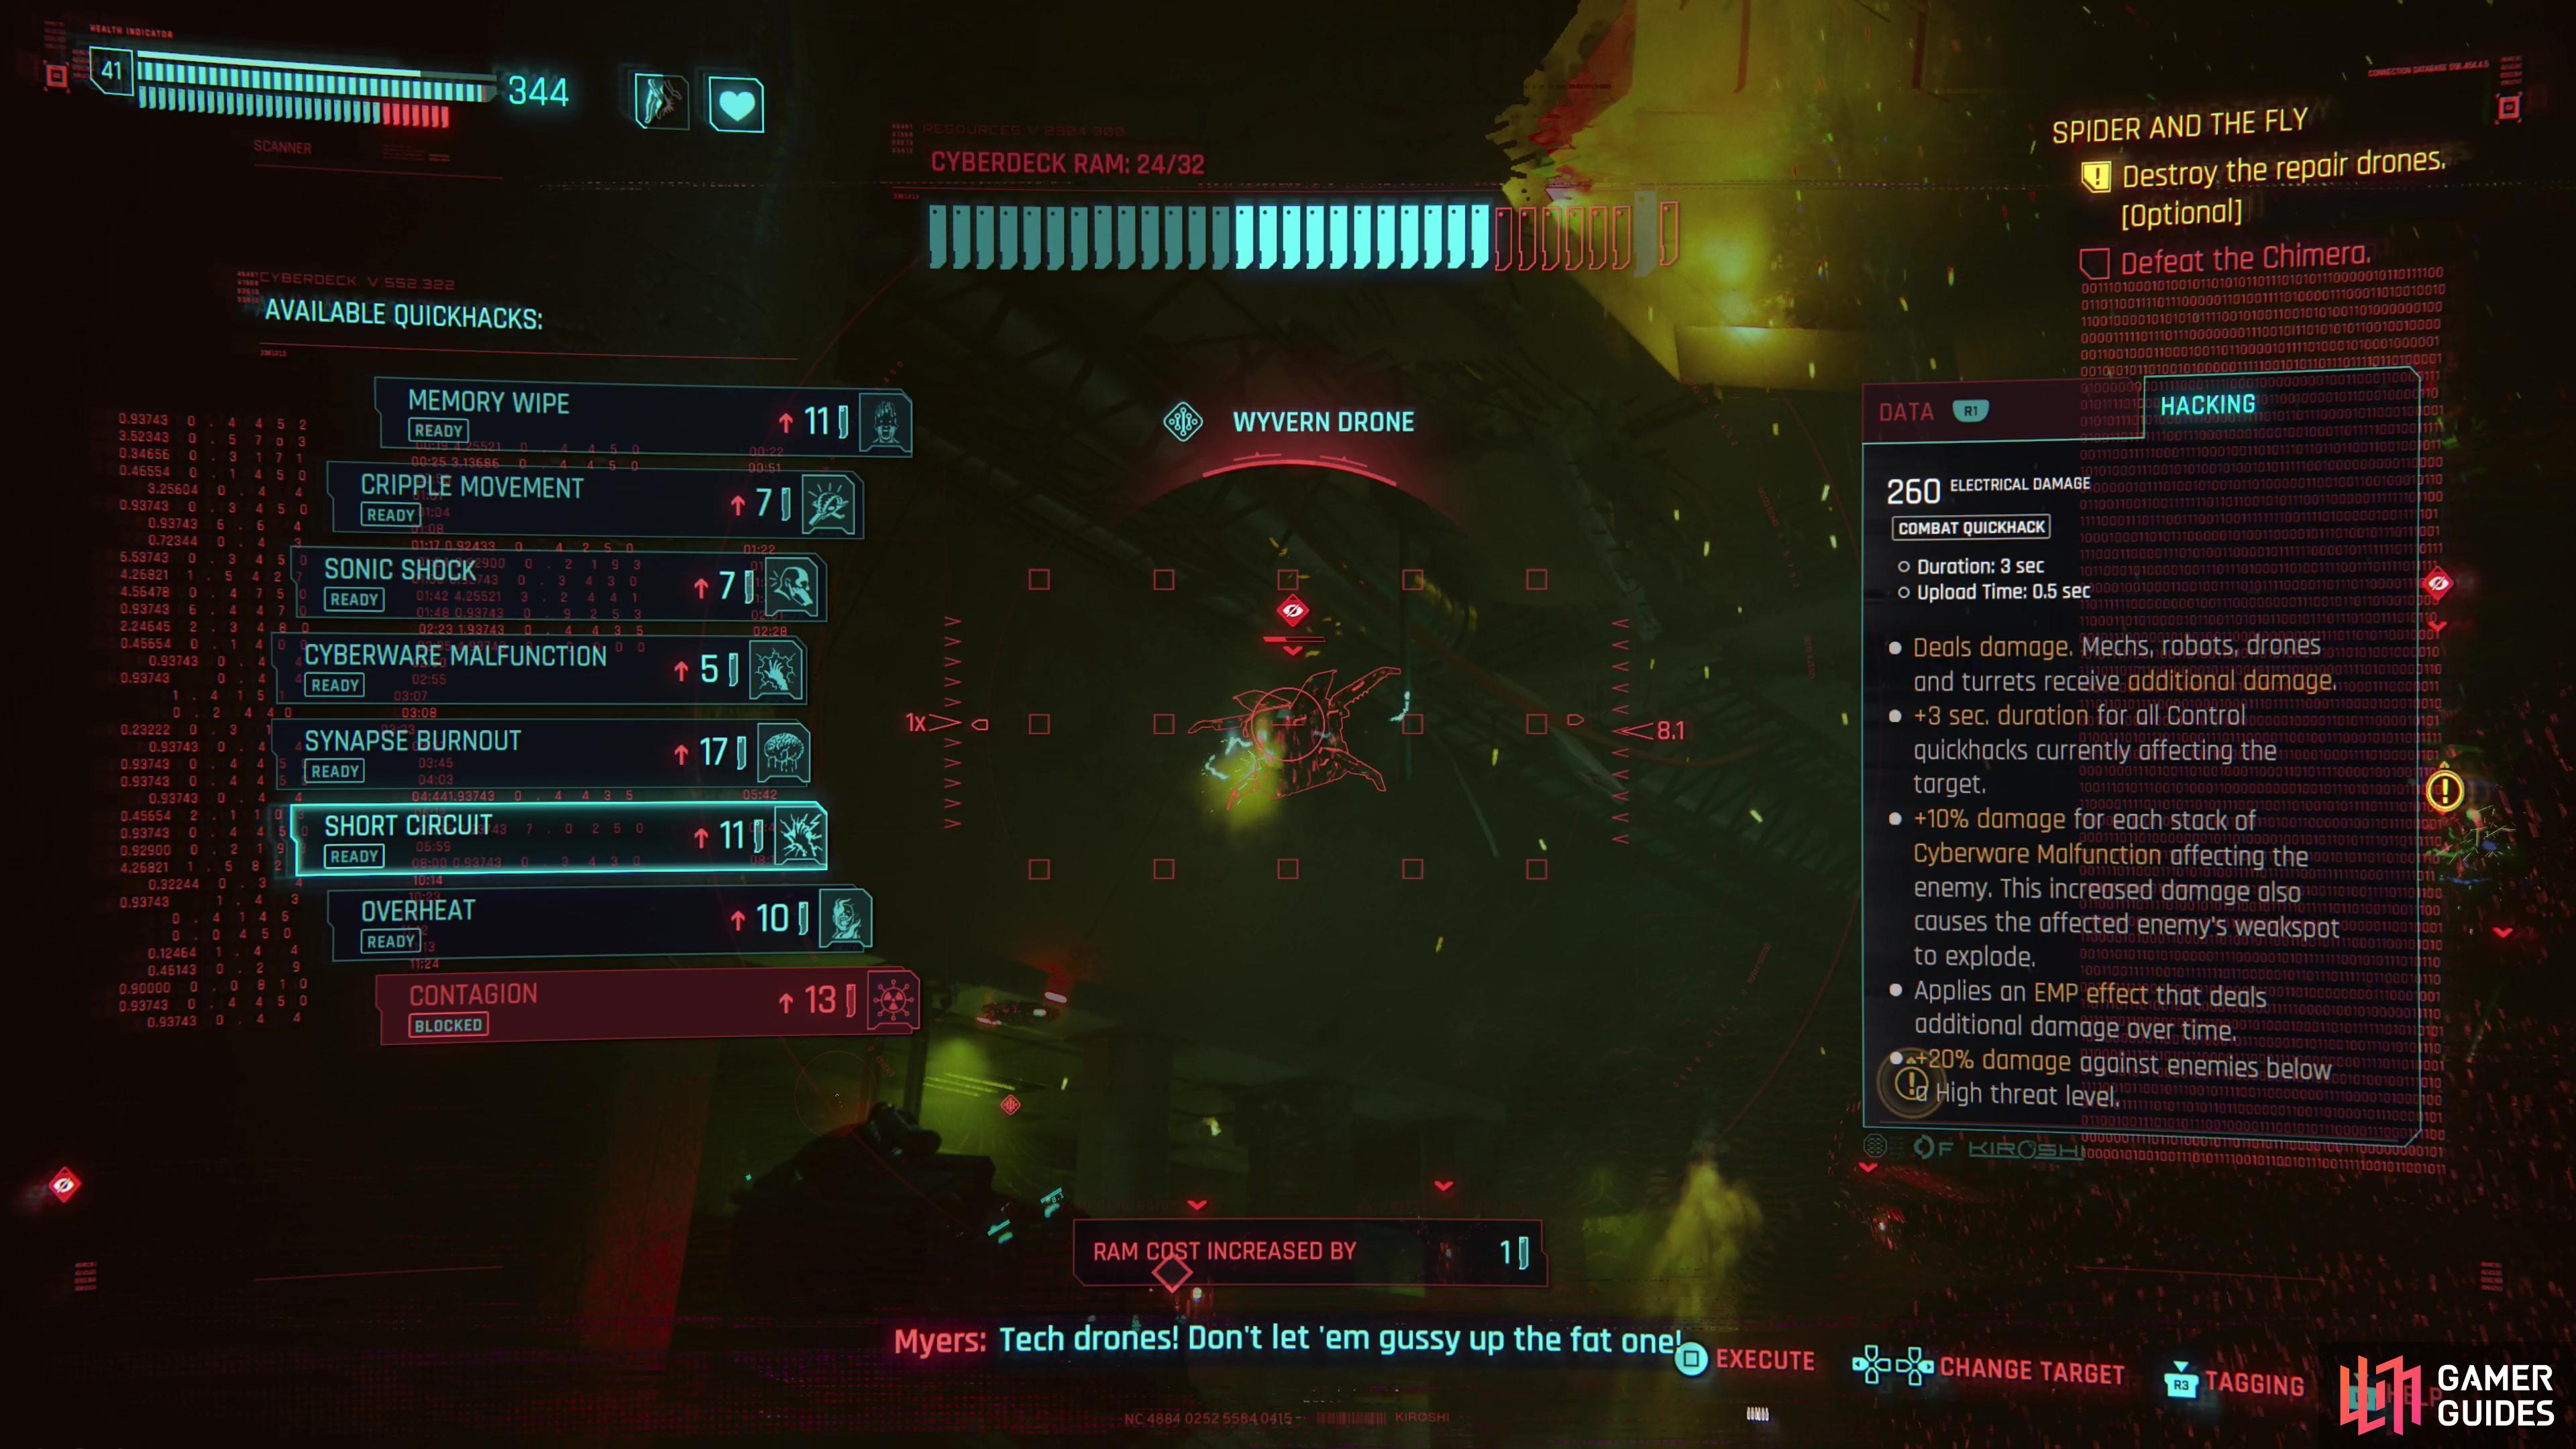
but good ol’ Short Circuit works wonders, as well.
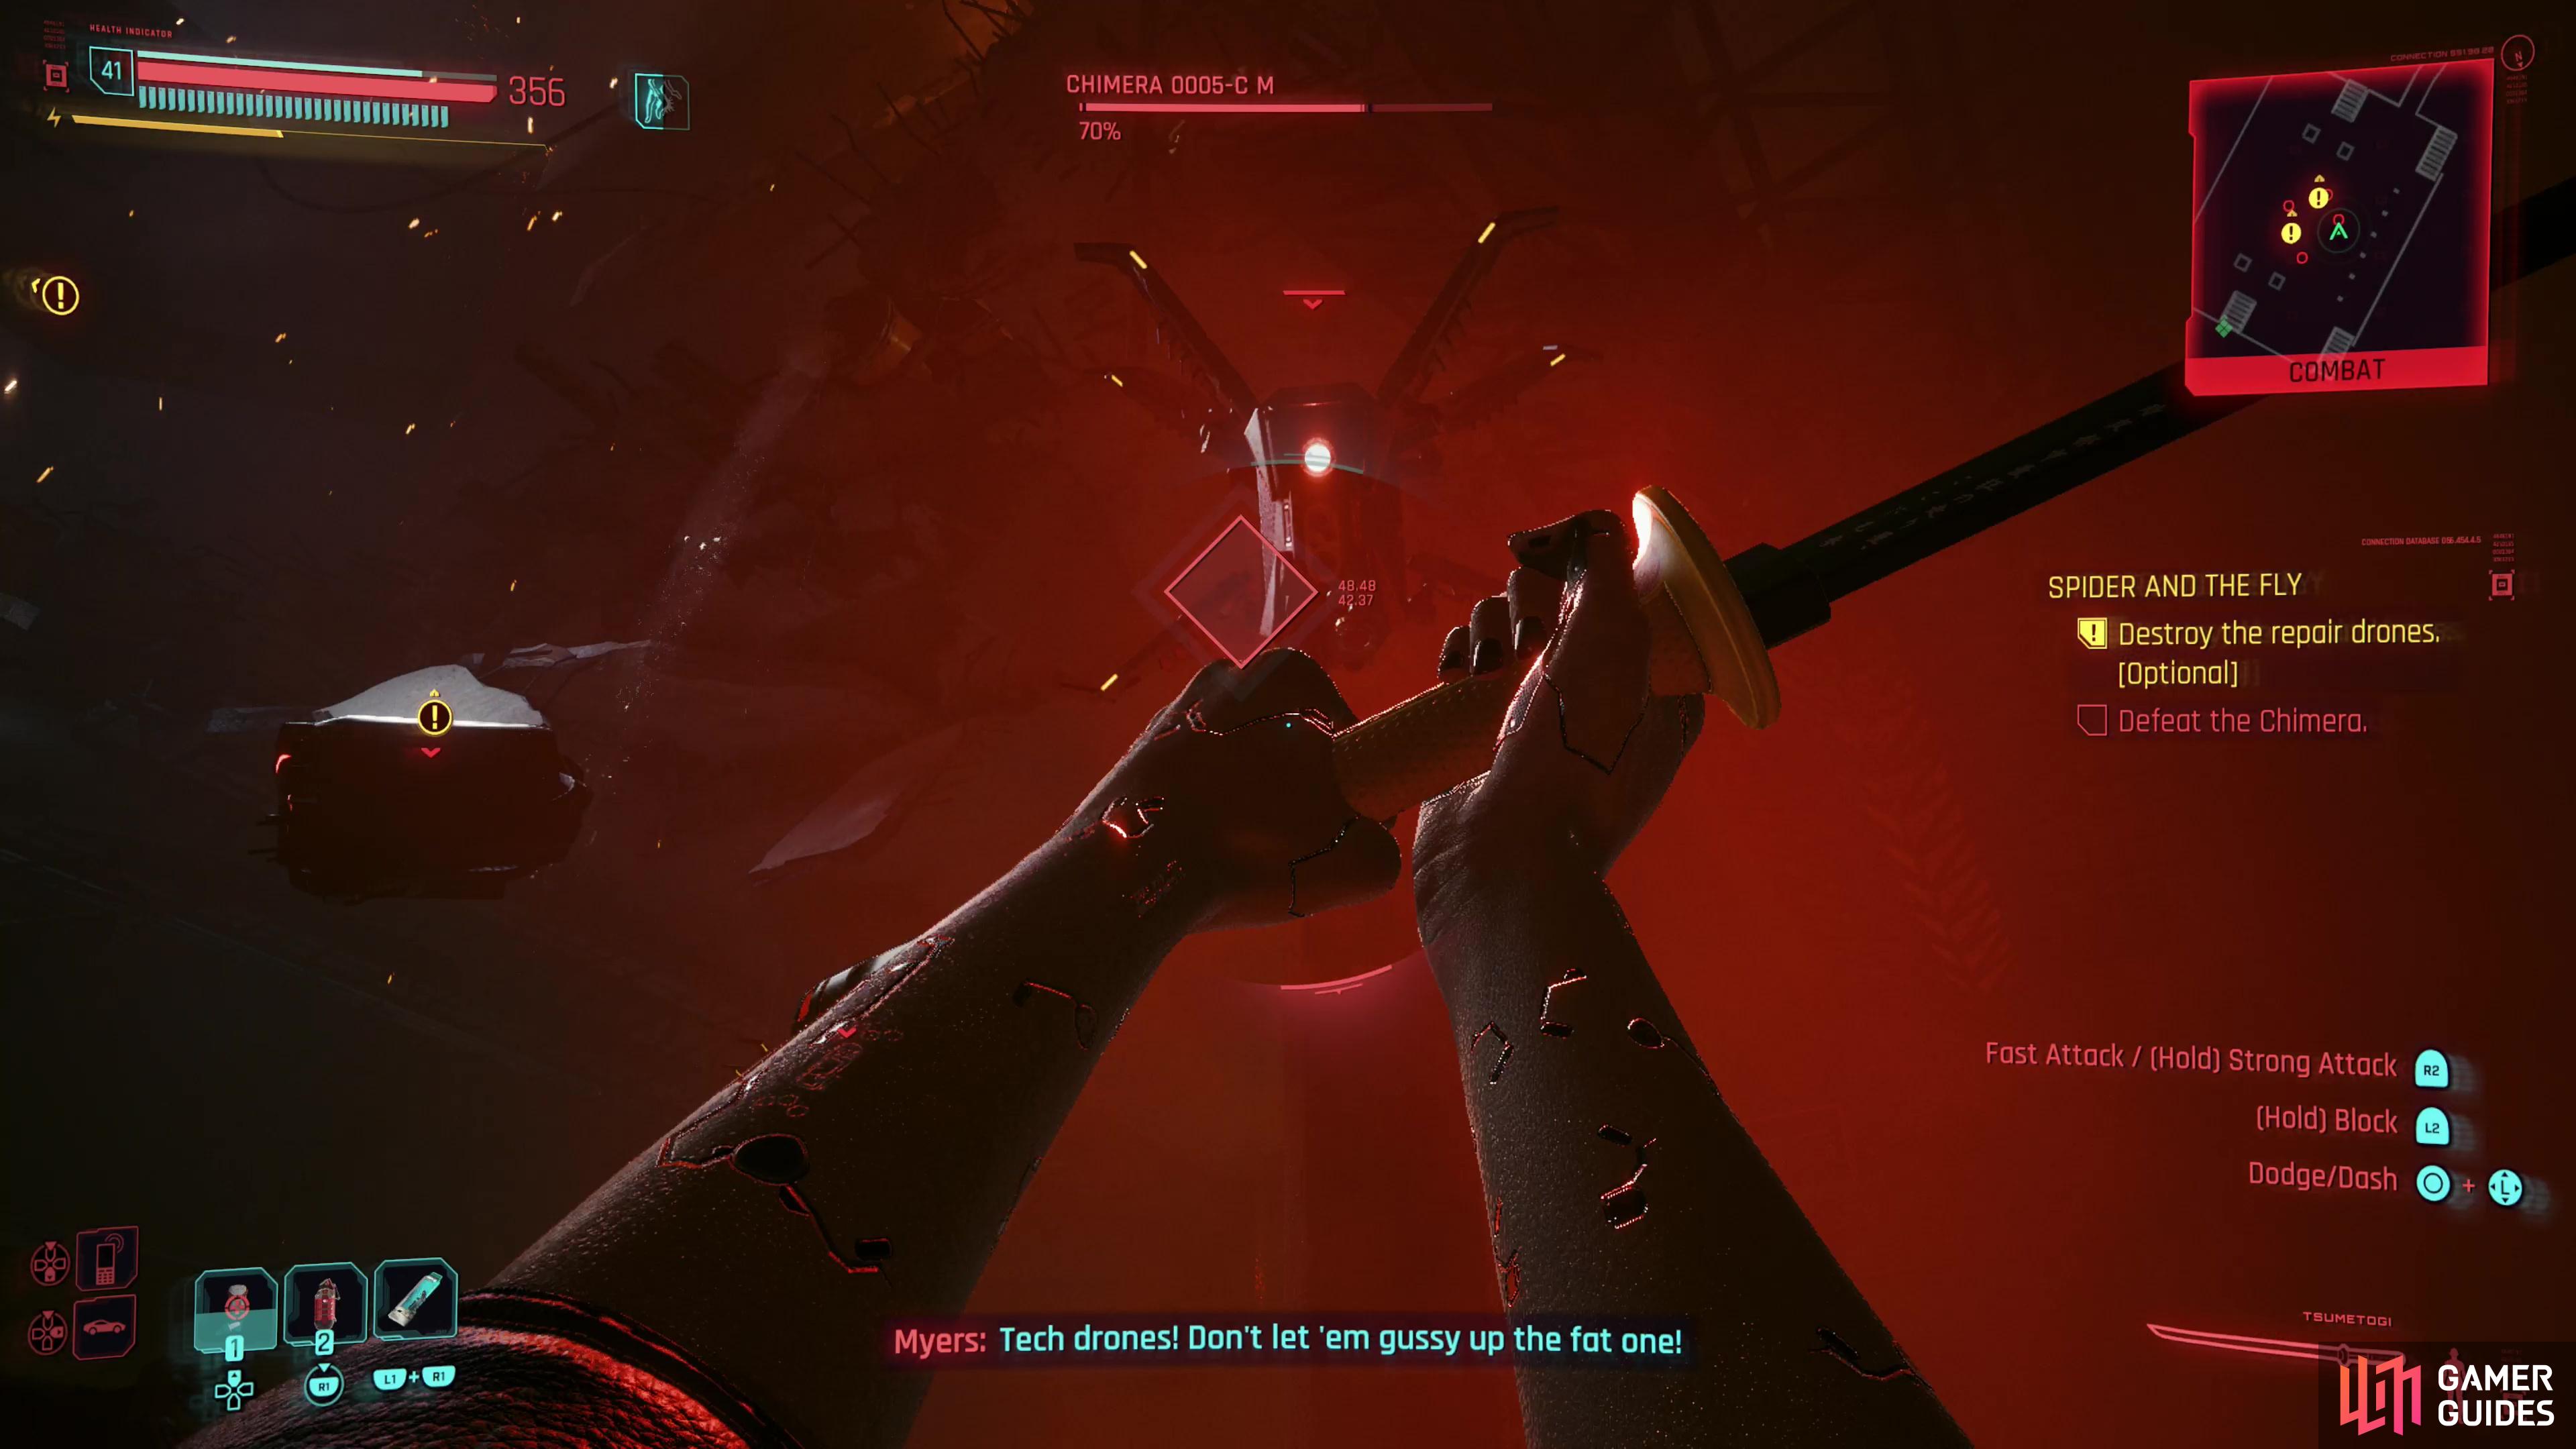
Destroy the Repair Drones
Not technically phase 2 yet, once reduced to 70% of its health, the Chimera will fall down and dispatch a squadron of drones to assist it. Two “Griffin Drones” will repair the Chimera, while a half dozen other “Wyvern Drones” will attack. The Wyvern Drones aren’t terribly powerful and none of the drones have a lot of health, but if you get distracted chasing down attack Wyvern Drones, the Griffin Drones will be free to heal the Chimera. Focus on the Griffin Drones first - melee is surprisingly effective, as most of the drones won’t fly out of melee range. Failing that, concentrated gunfire (burst fire weapons, shotgunts, etc.,) and the good old Short Circuit quickhack all work well. When both Griffin Drones are down, the Chimera will attack again, this time starting phase 2.
Charged tech weapons can deal significant damage to the Chimera,
as can Short Circuit quickhacks.
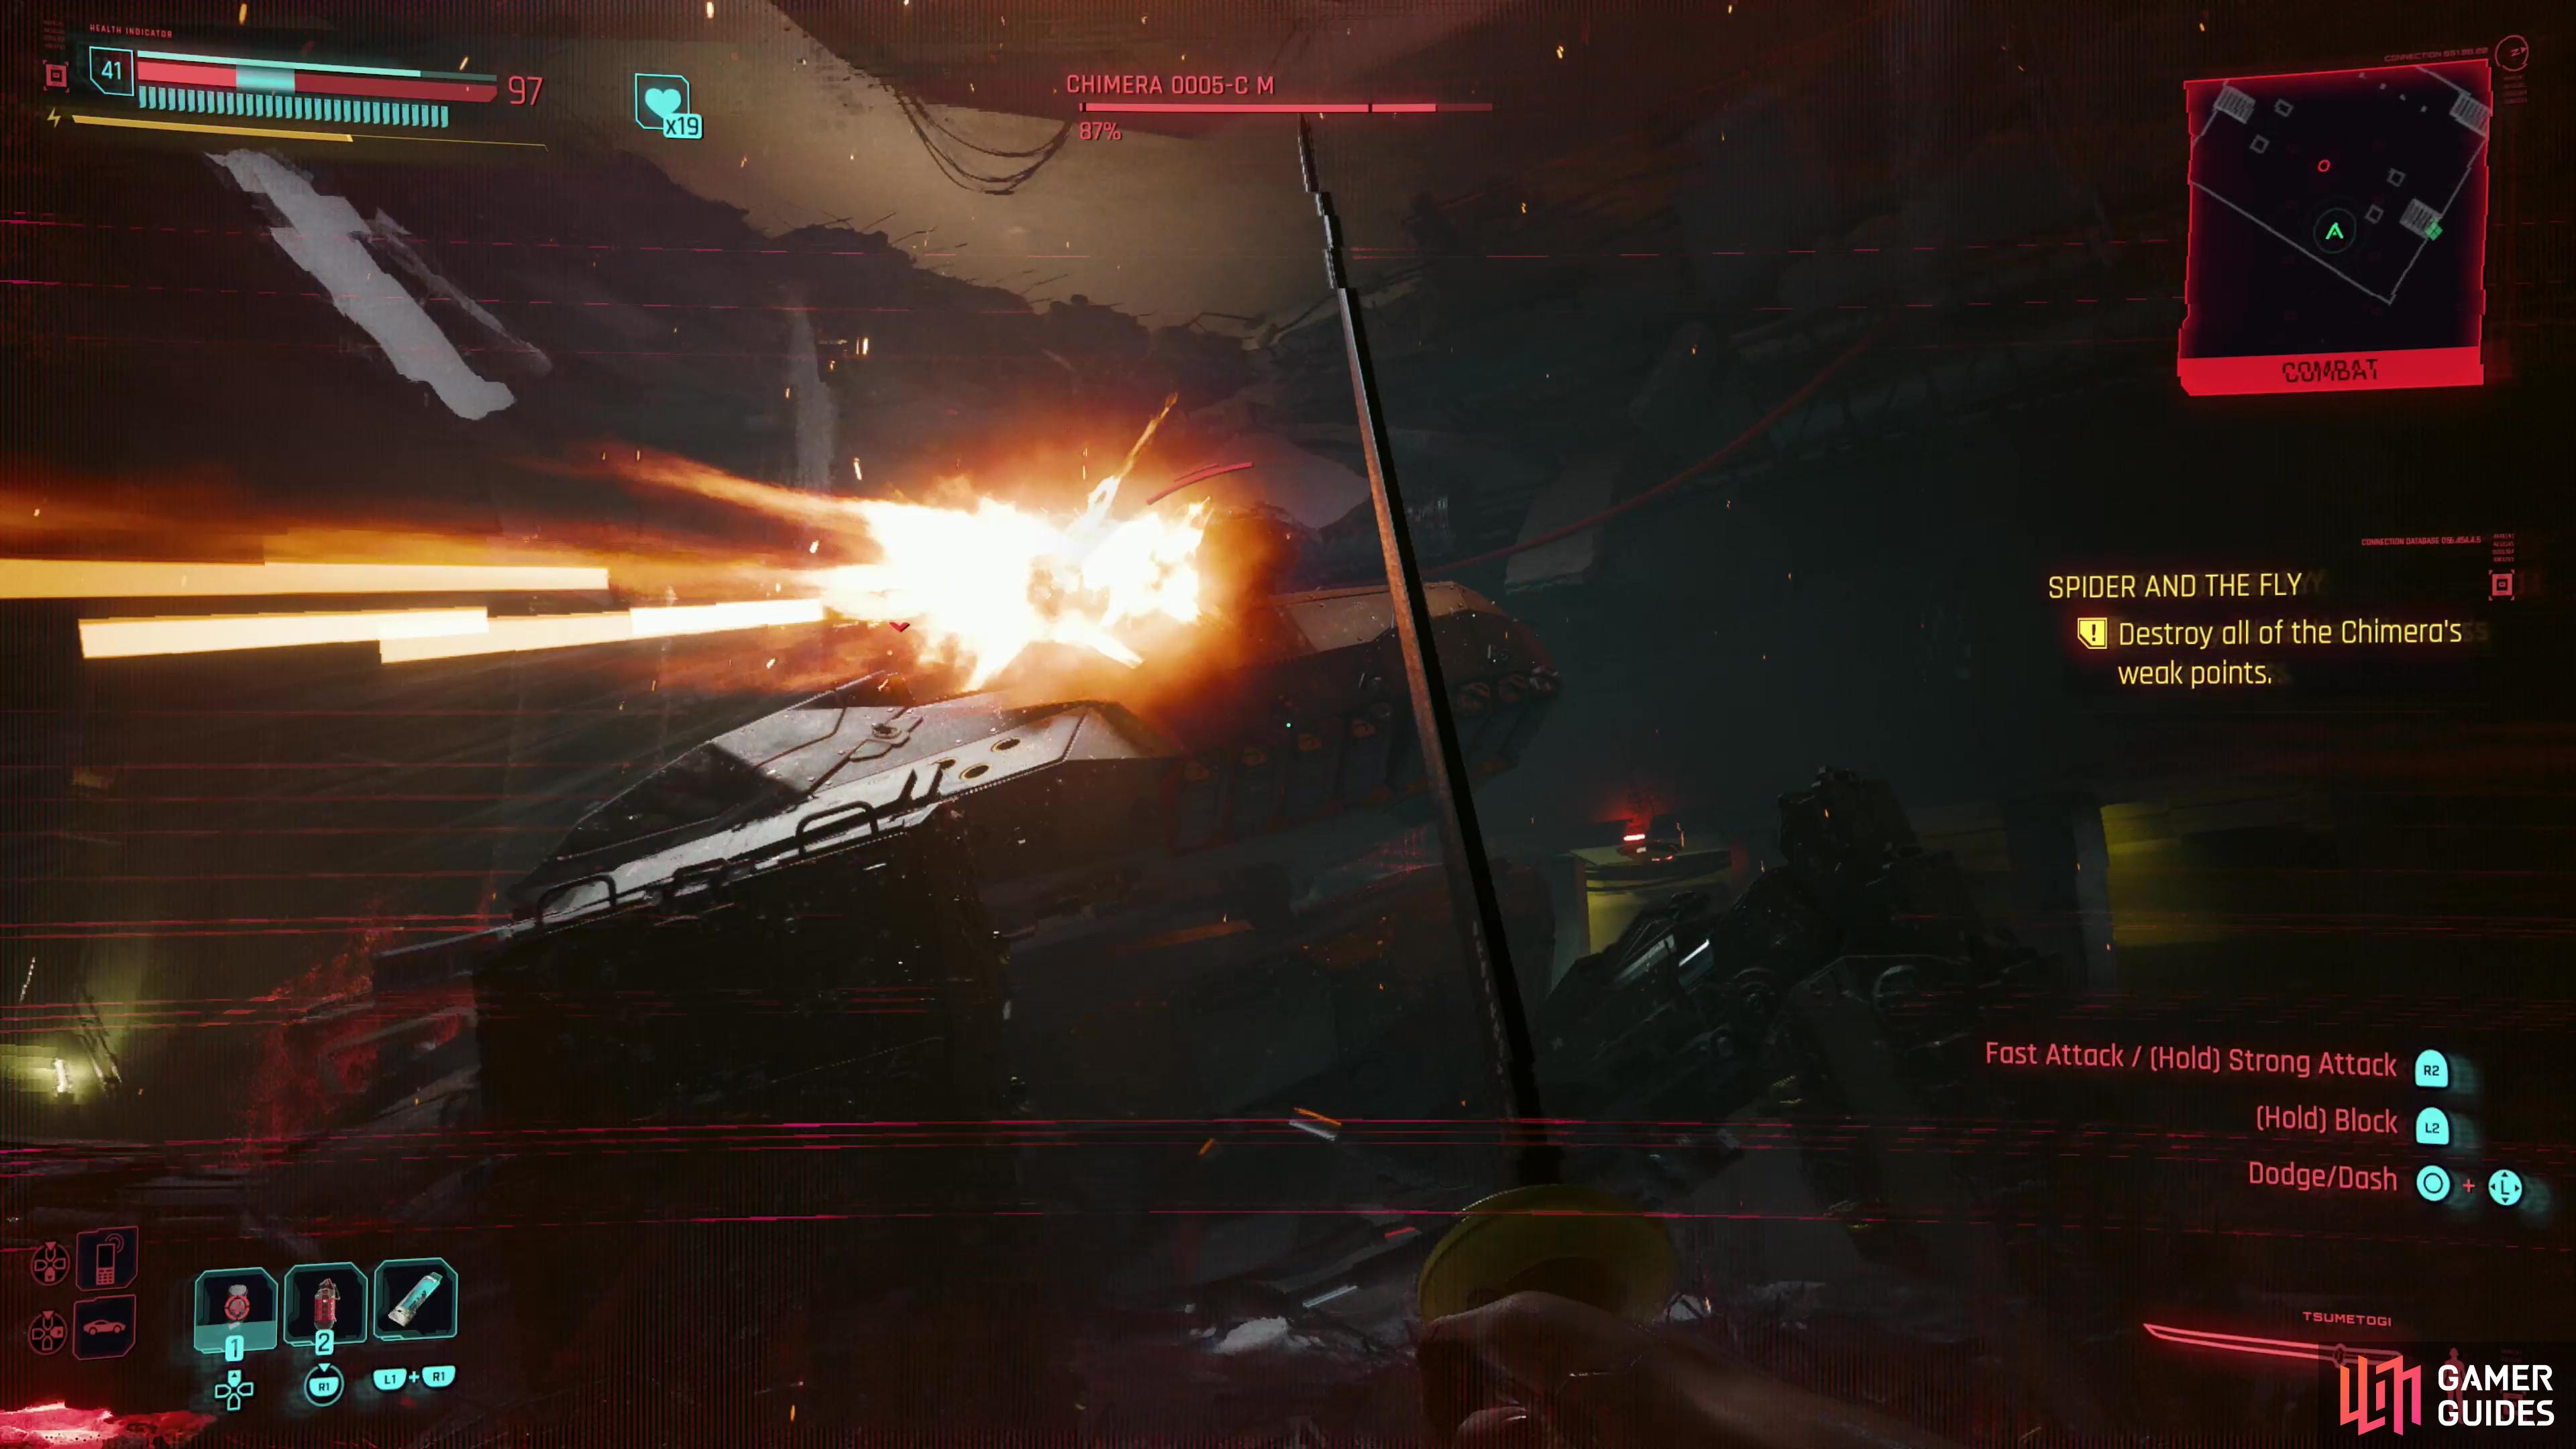
Defeat the Chimera - Chimera Boss Phase 2
Phase 2 is much like the first phase, save that this time there are no weakpoints to speed things up, and you’ve got at least 70% of the boss’s health bar to deplete (perhaps more, depending if the Griffin Drones were able to heal the Chimera. The Chimera will perform all the same attacks at more or less the same frequency, so the fight isn’t any harder than before, you’ve just gotta deal more damage and the longer the fight goes on, the less cover you’ll have to hide behind.
Pumping lead into the mech will whittle its health down, but it’s a sturdy foe, so you shouldn’t leave any damage on the table. We found that charged shots with tech weapons did respectable damage per burst (we were using Lizzie, an iconic tech pistol you can find in Lizzie’s Bar any time after Automatic Love, or failing that, it can be purchased from the weapon vendor in the Dogtown stadium), and it prevented us from over-committing, offensively, giving us ample opportunity to dodge between attacks. Depending on your build, quickhacks may also be incredibly effective - with a Tetratronic Rippler cyberdeck and two ranks of Embedded Exploit we were able to debuff with boss with any disposable control/covert quickhack, then load up a queue of Short Circuit, ending with another control/covert quickhack to further boost damage. Doing this, each Short Circuit shaved off 5% of the Chimera’s health, and an Overload-fueled barrage could make significant progress.
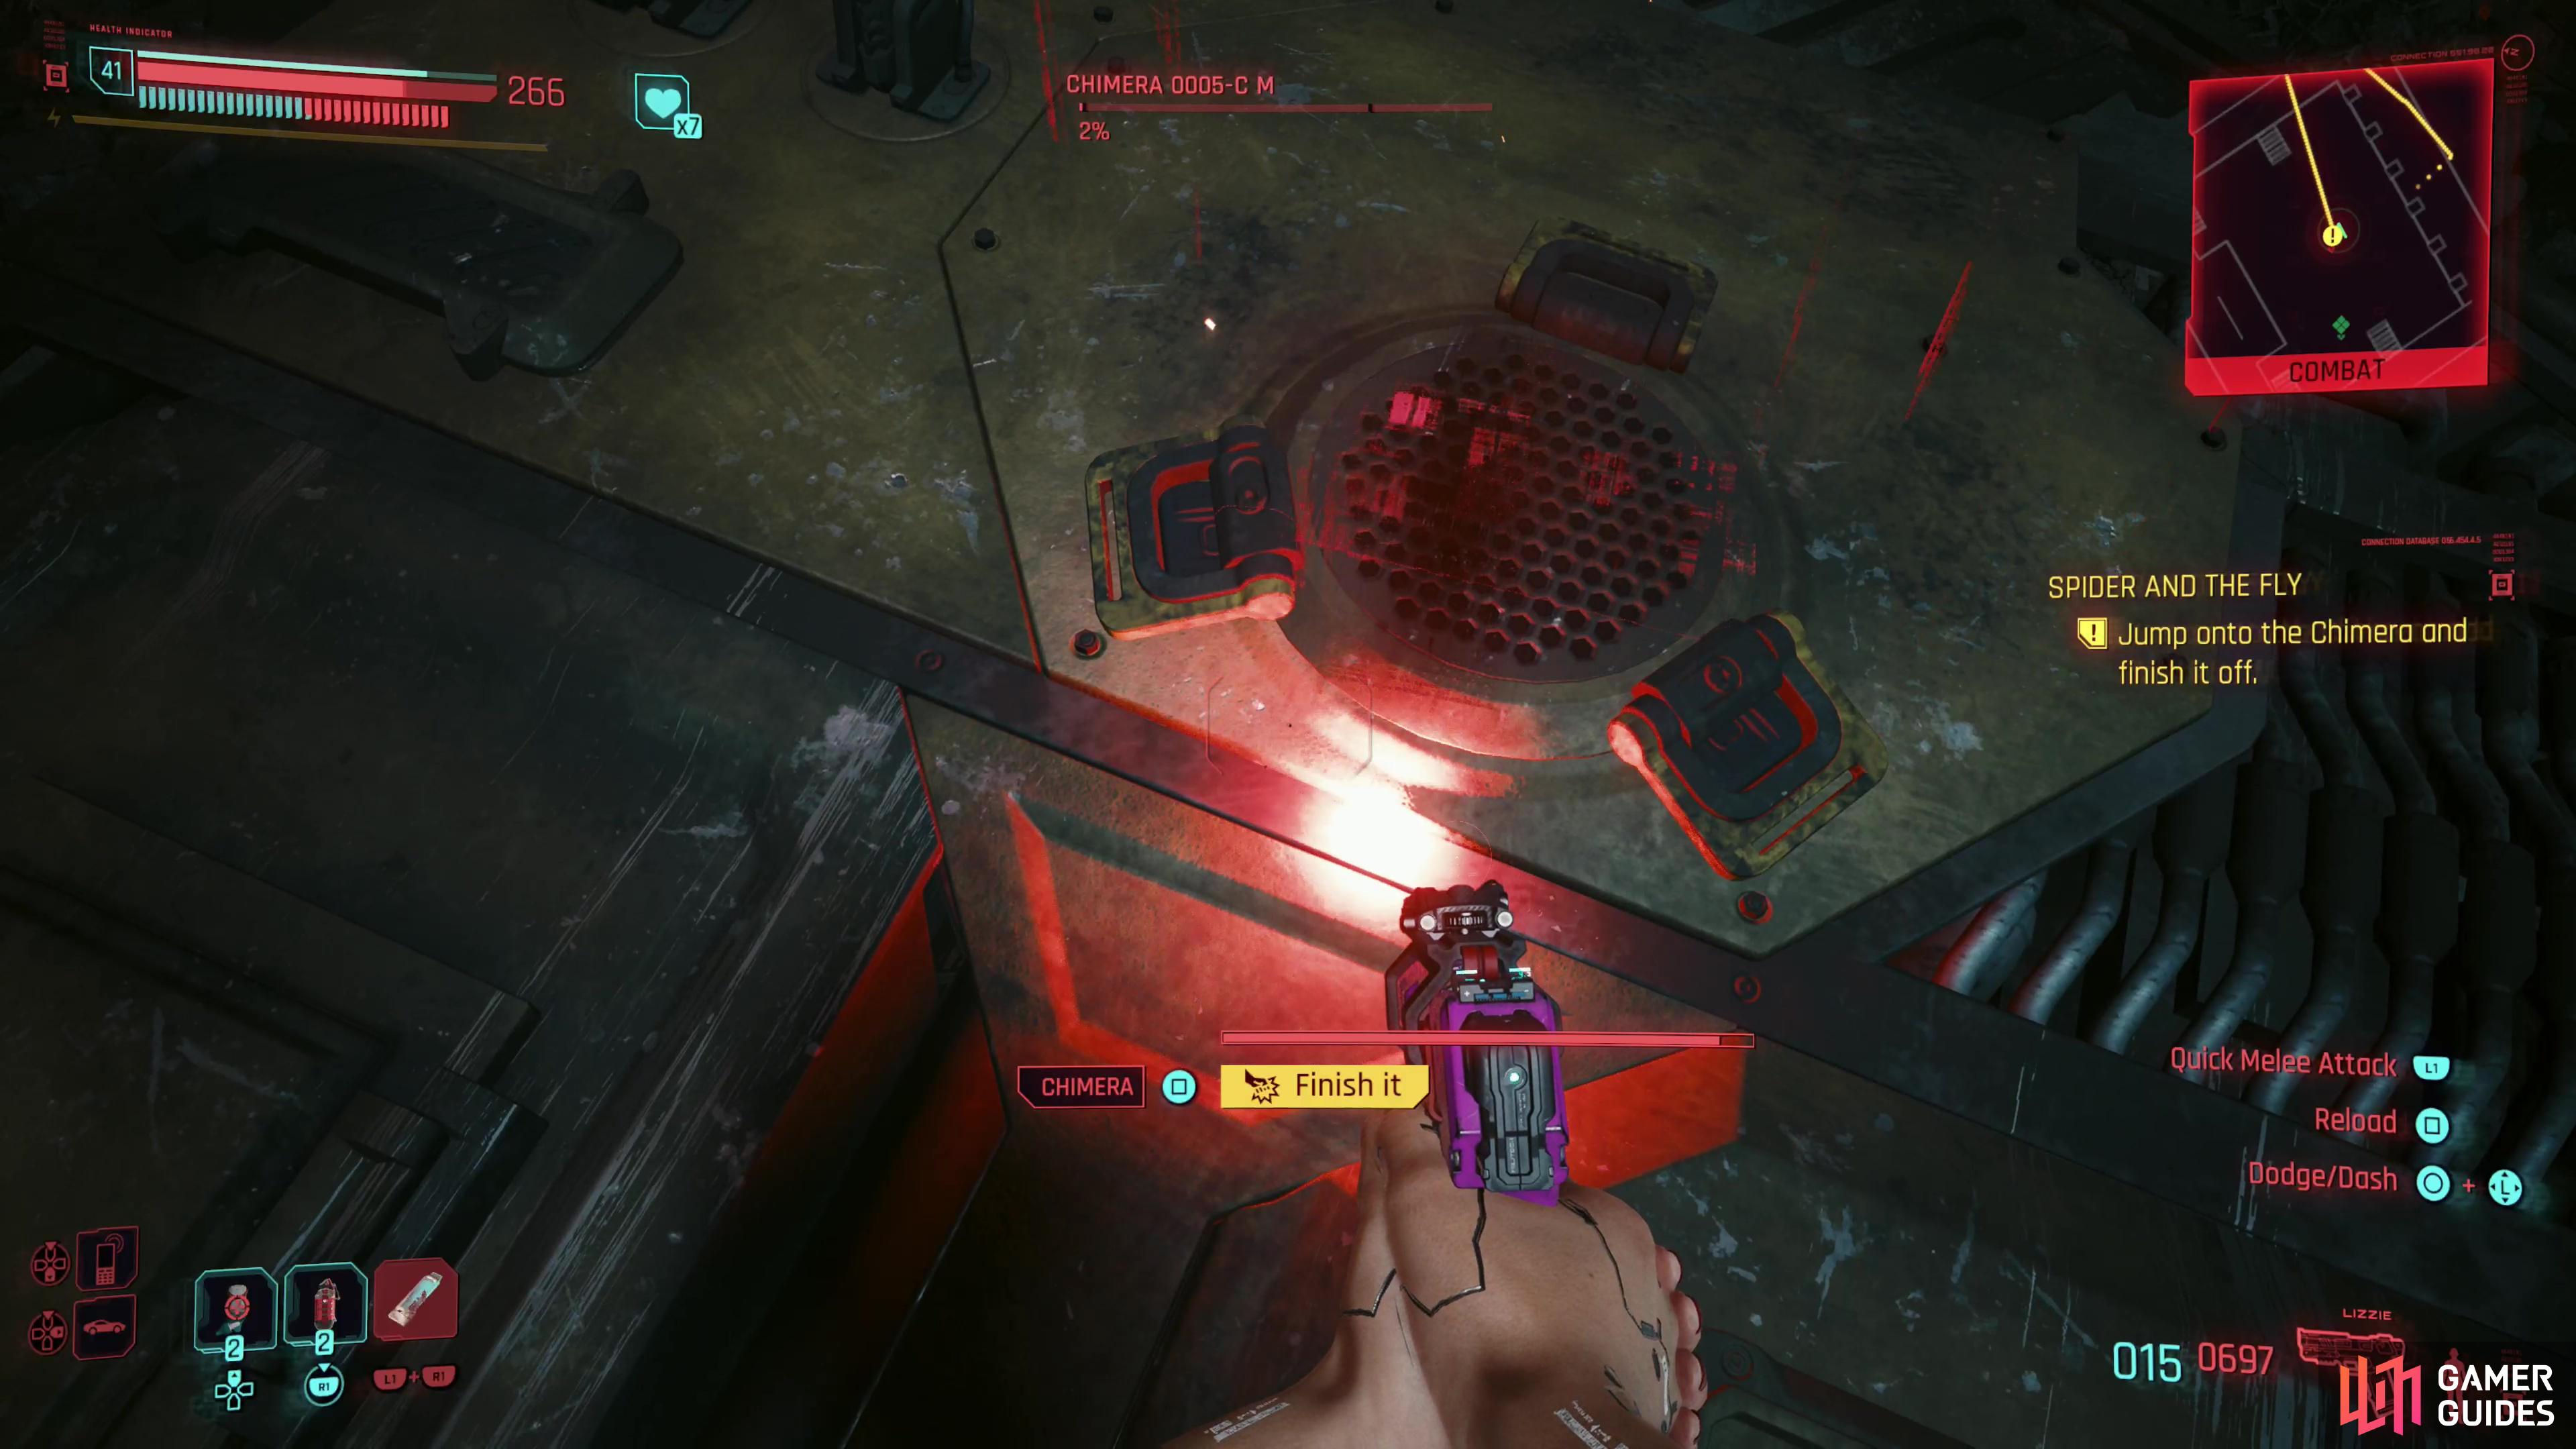
Reduce the Chimera’s health to 2%, then jump on its top and finish it off.
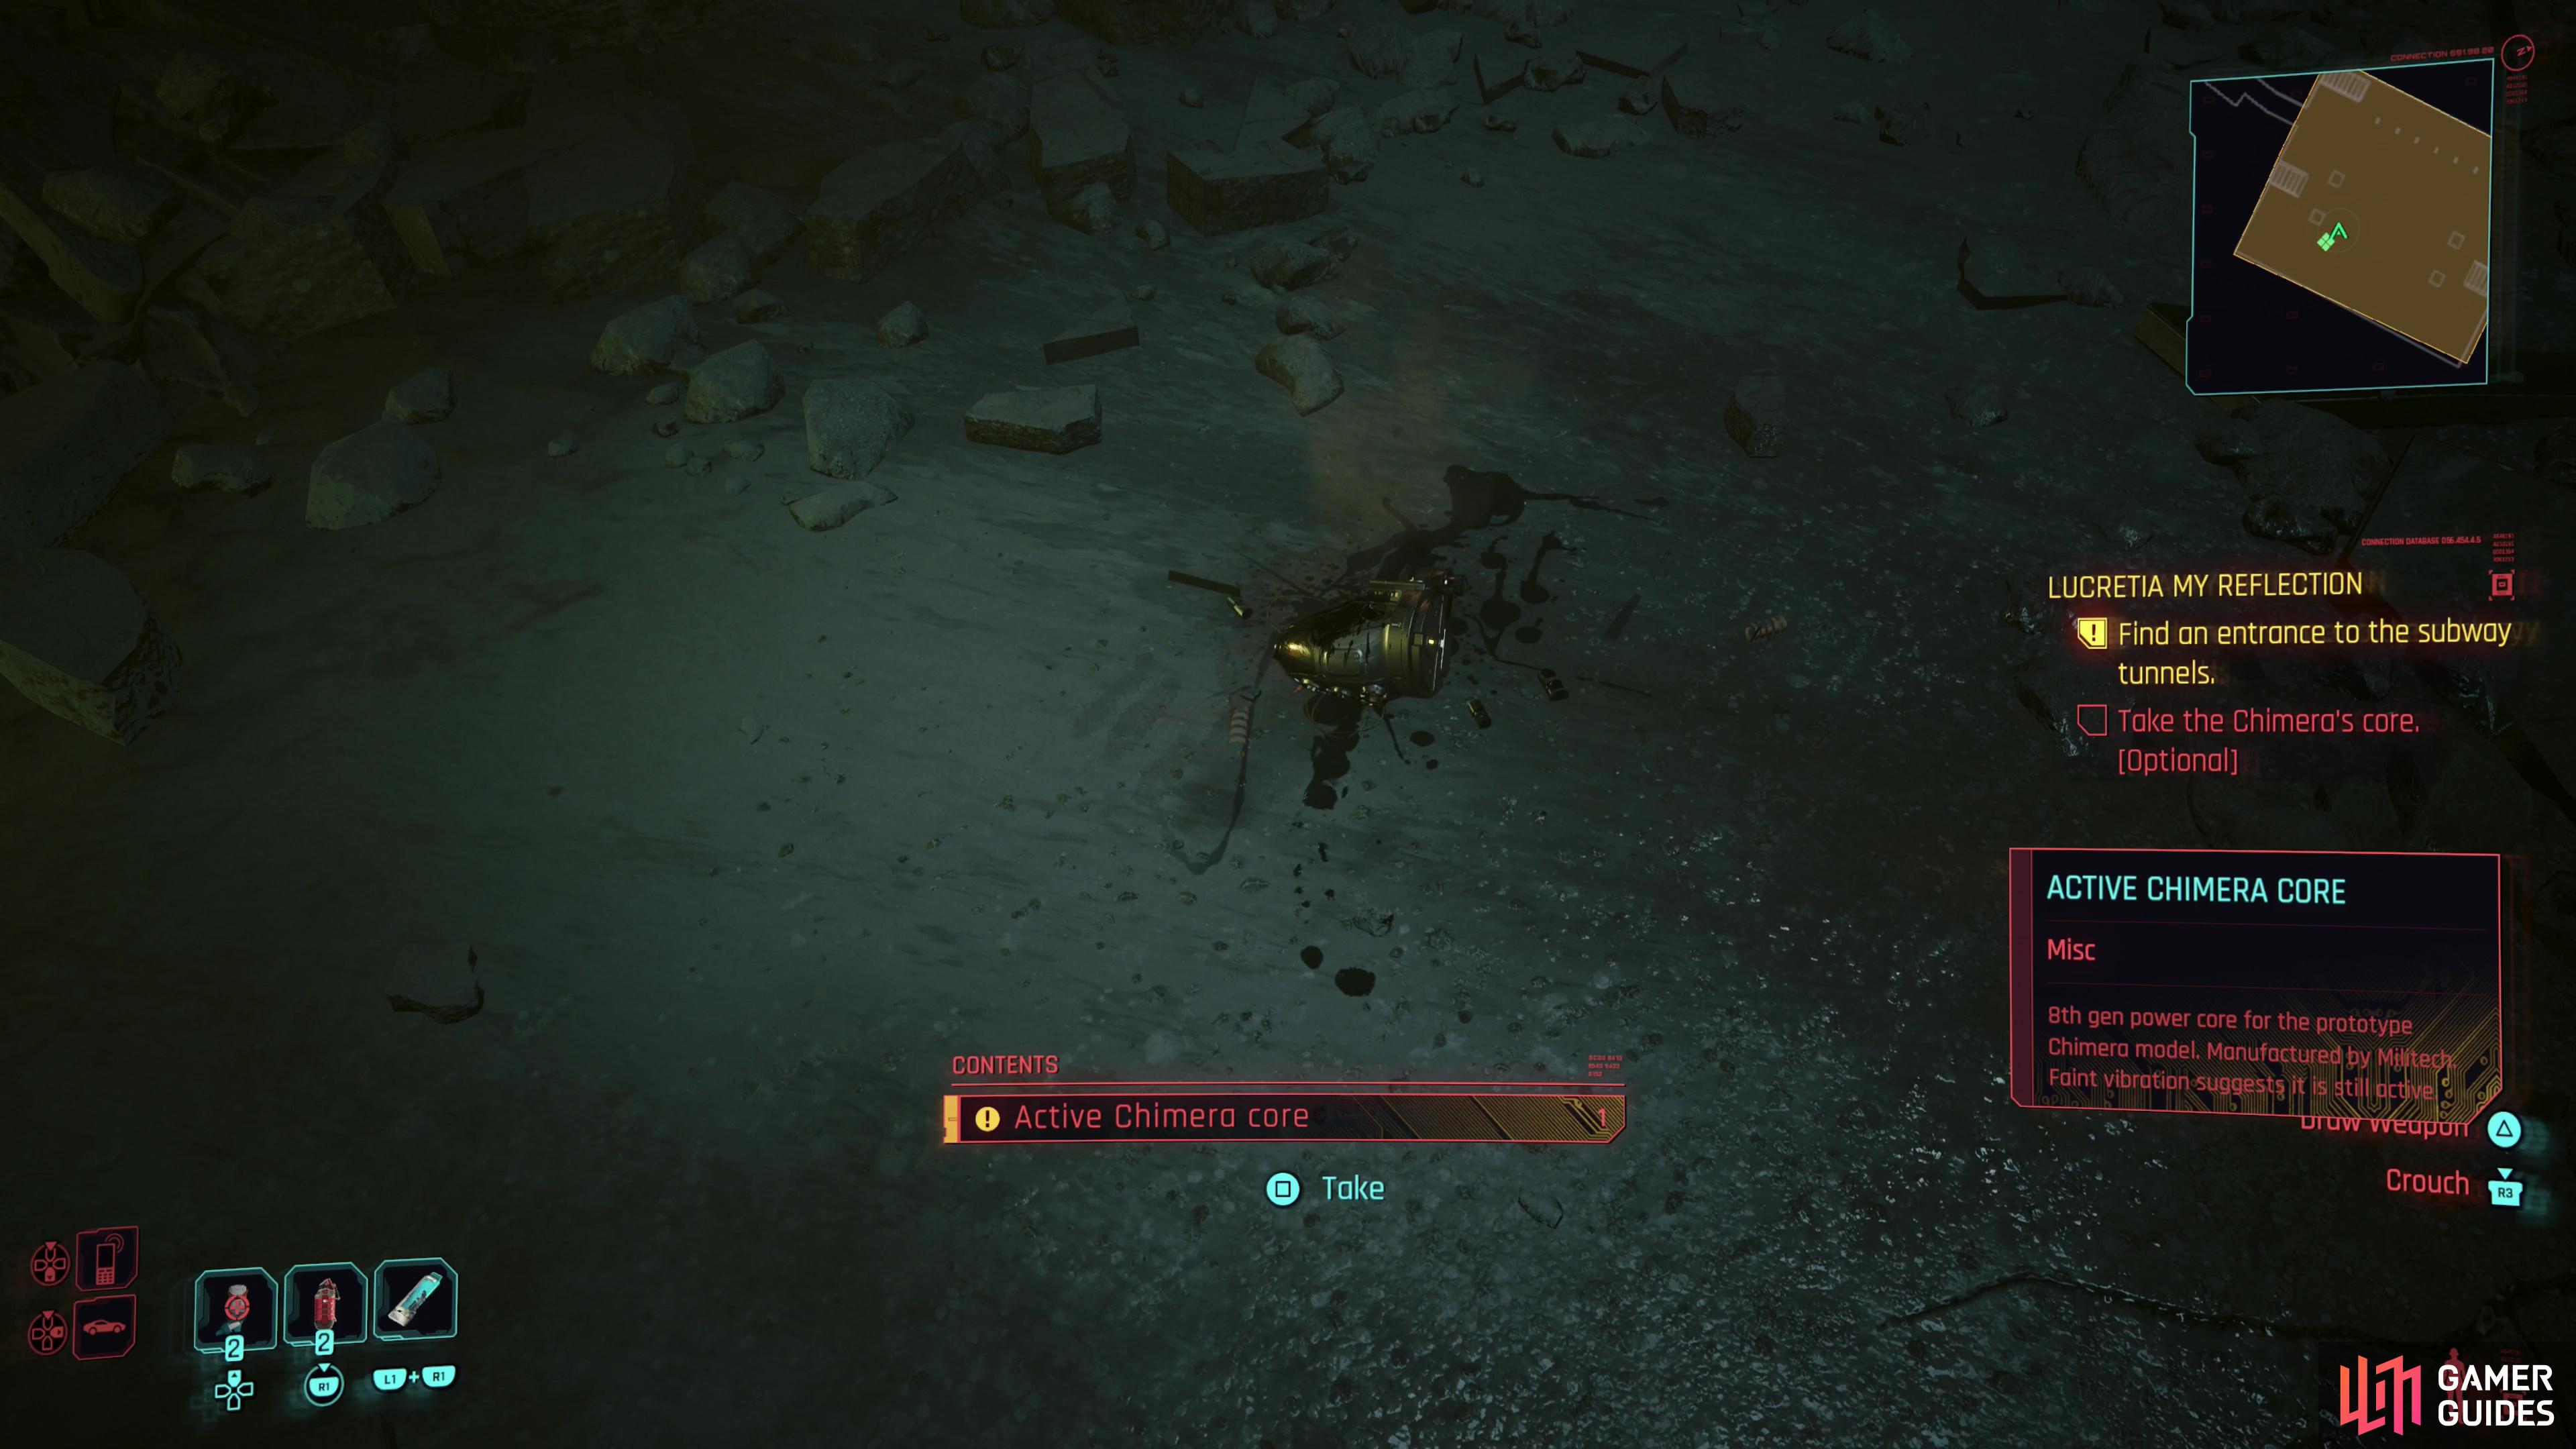
Be sure to claim the Active Chimera Core after the fight.
Dodge when you must and lay into the Chimera between its attacks. Anything that packs a punch without requiring sustained fire is ideal. Once the Chimera’s health falls to 2% you’ll be tasked with leaping onto the mech’s back and finishing it off, which is merely a matter of pressing the dialog button prompt when it appears. After some teamwork with the Prez, the mech will fall and the next quest [Lucretia My Reflection] will begin. Be sure to grab the Active Chimera Core that the mech leaves behind - it’ll be useful later.
No Comments