
Your first main job in Cyberpunk: Phantom Liberty begins with a phone call from So Mi, aka Songbird who says she knows about your problem and can save your life, great! But as always, nothing good comes for free, and she’ll need your help. Before she can do that though, she wants you to head to the “swollen appendix” in Night City called Dogtown.
Songbird will lead you to Dogtown where she requires your help. Are you too late?
Go to the Dogtown Border
Depending on whether you started Phantom Liberty from the menu, or you’re carrying on with your original character, some things will change. The former will have you receive a phone call from So Mi instantly while the latter requires you to complete the mission “Transmission” which is a little way into Act 2.
Whatever way you start the expansion, Songbird will tell you to head to Dogtown’s main gate where she’ll contact you again, so do just that. Make your way to the Stadium Parking Fast Travel which is situated in the center of Night City. As you approach the main gate, you’ll see that there are way too many Barghest (Dogtown Military Faction) to fight your way in, so look for Songbird. Follow the fence toward the main gate, and turn right as soon as you can. Walk a bit further, and your relic will begin to play up.
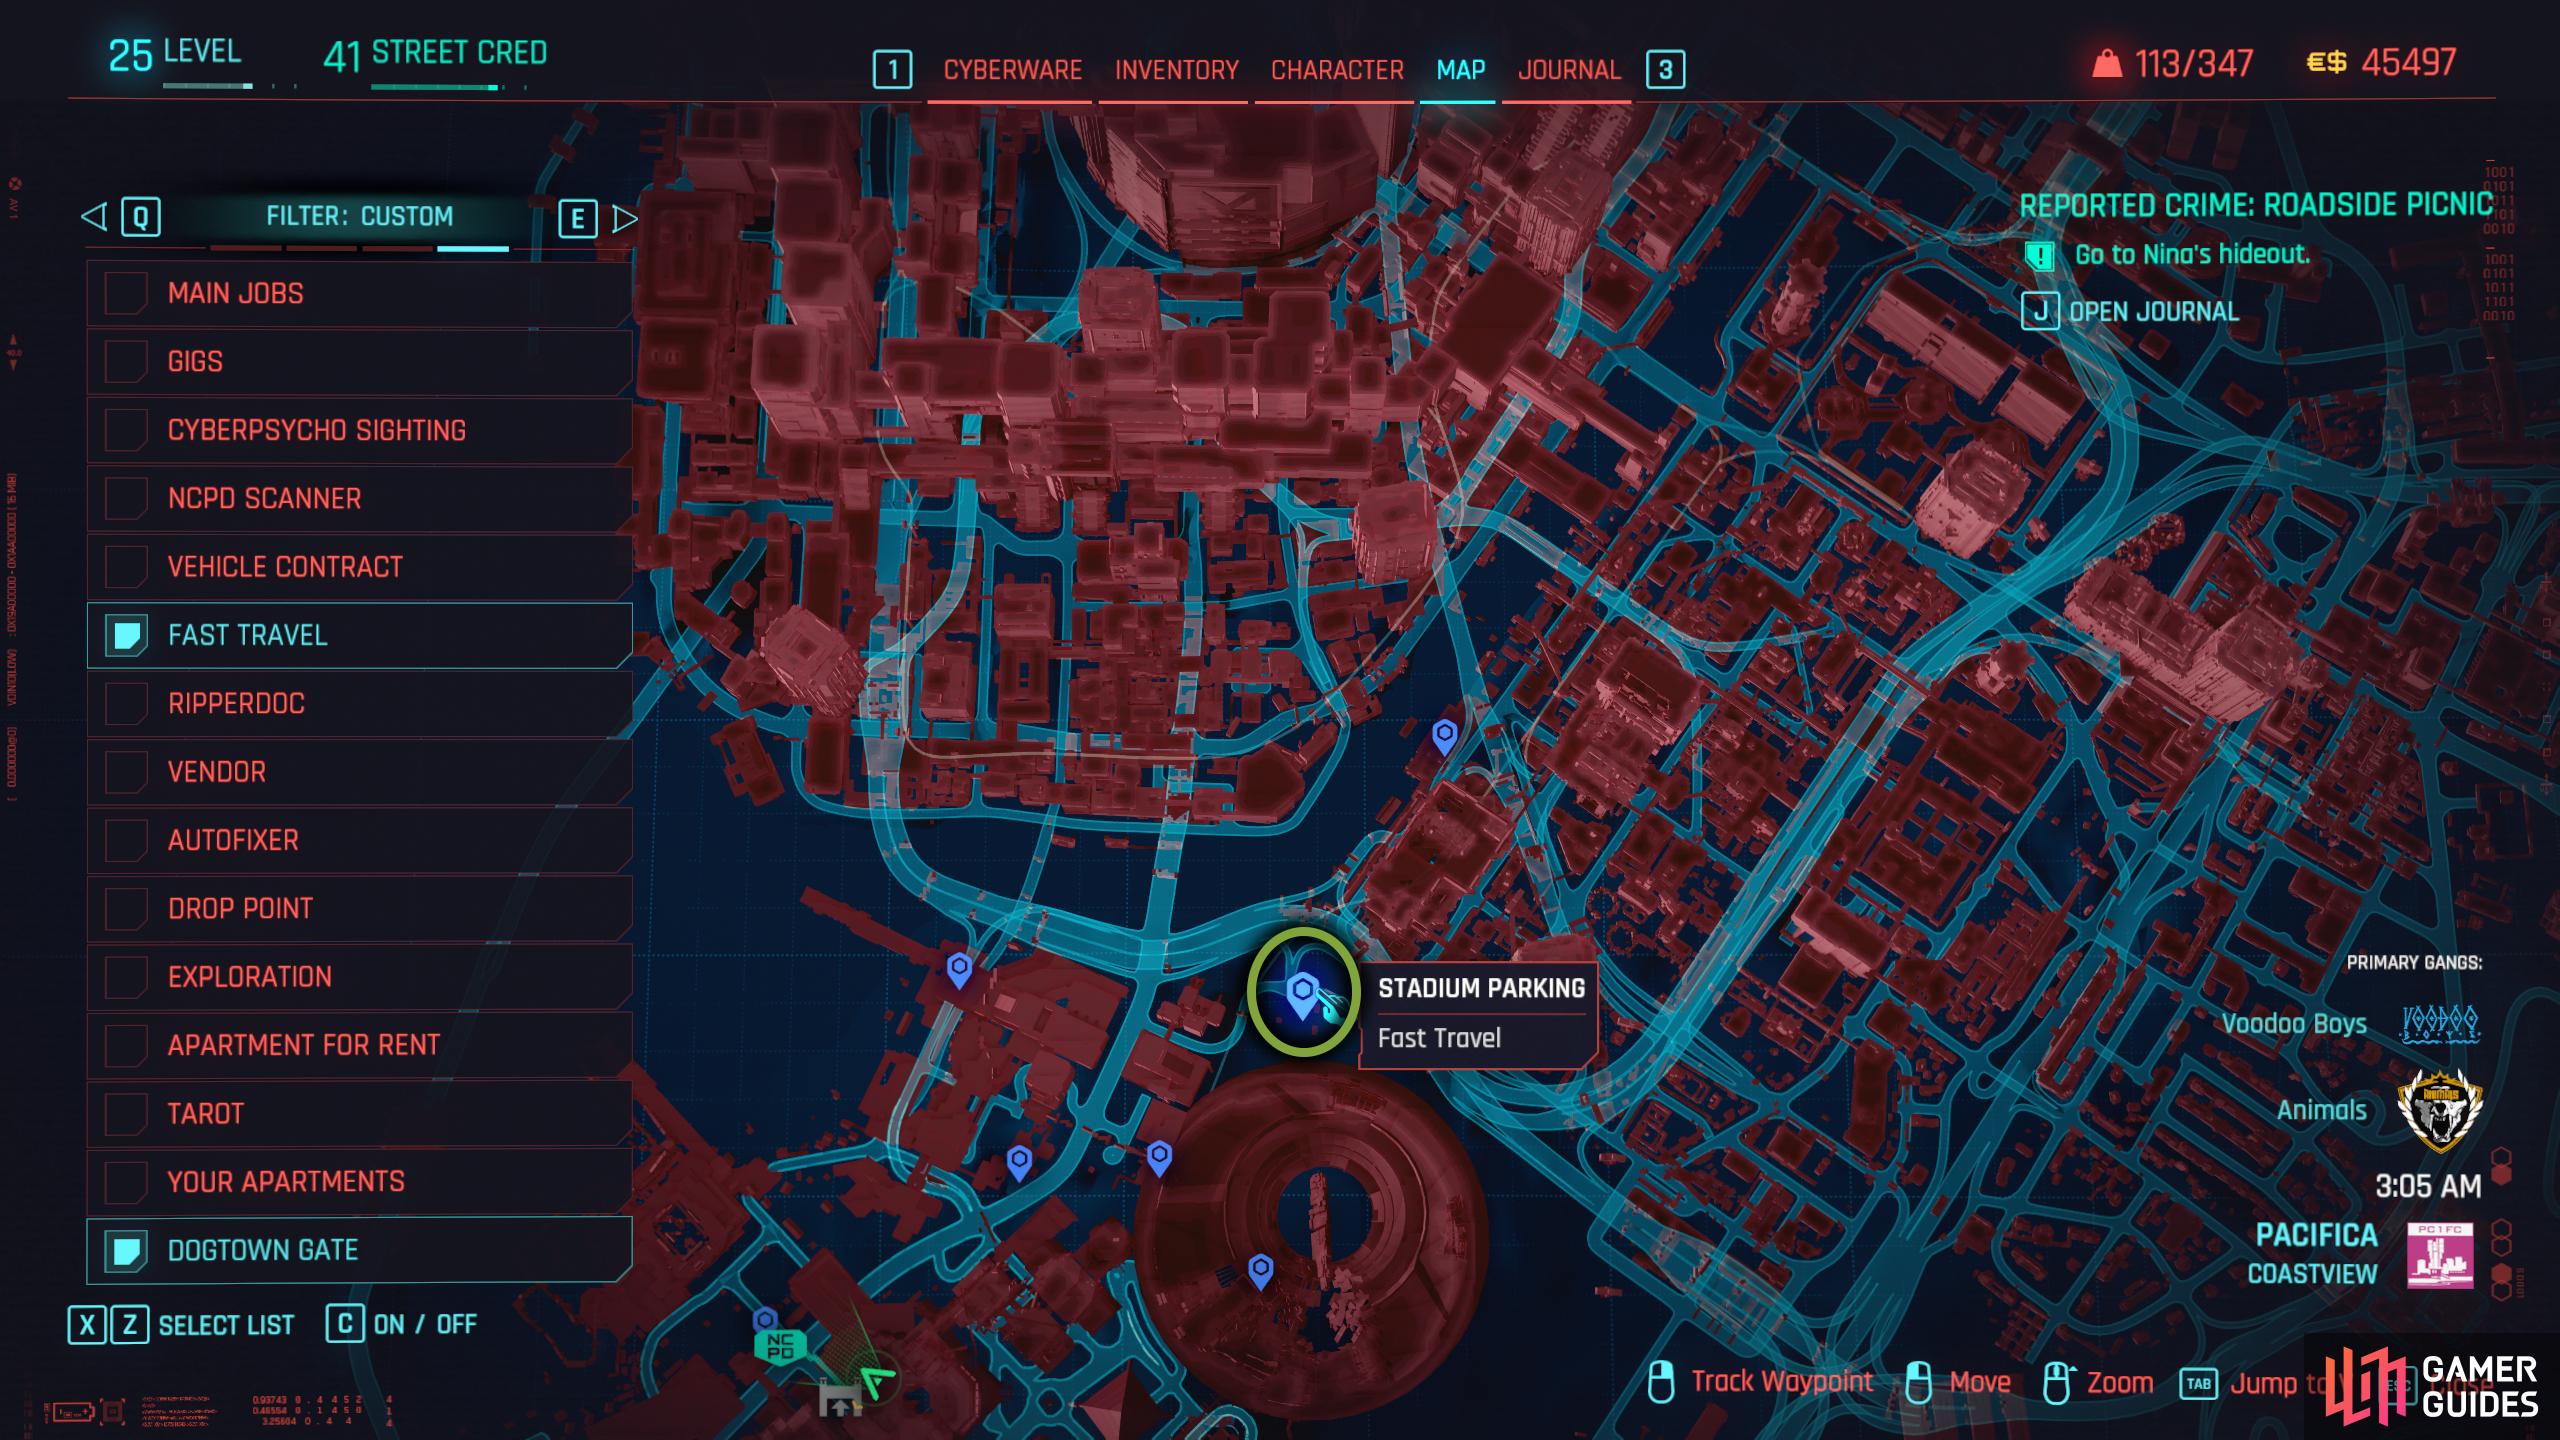
Make your way to the Stadium Fast Travel.
When you get there, head forward then right to find So Mi, aka Songbird.
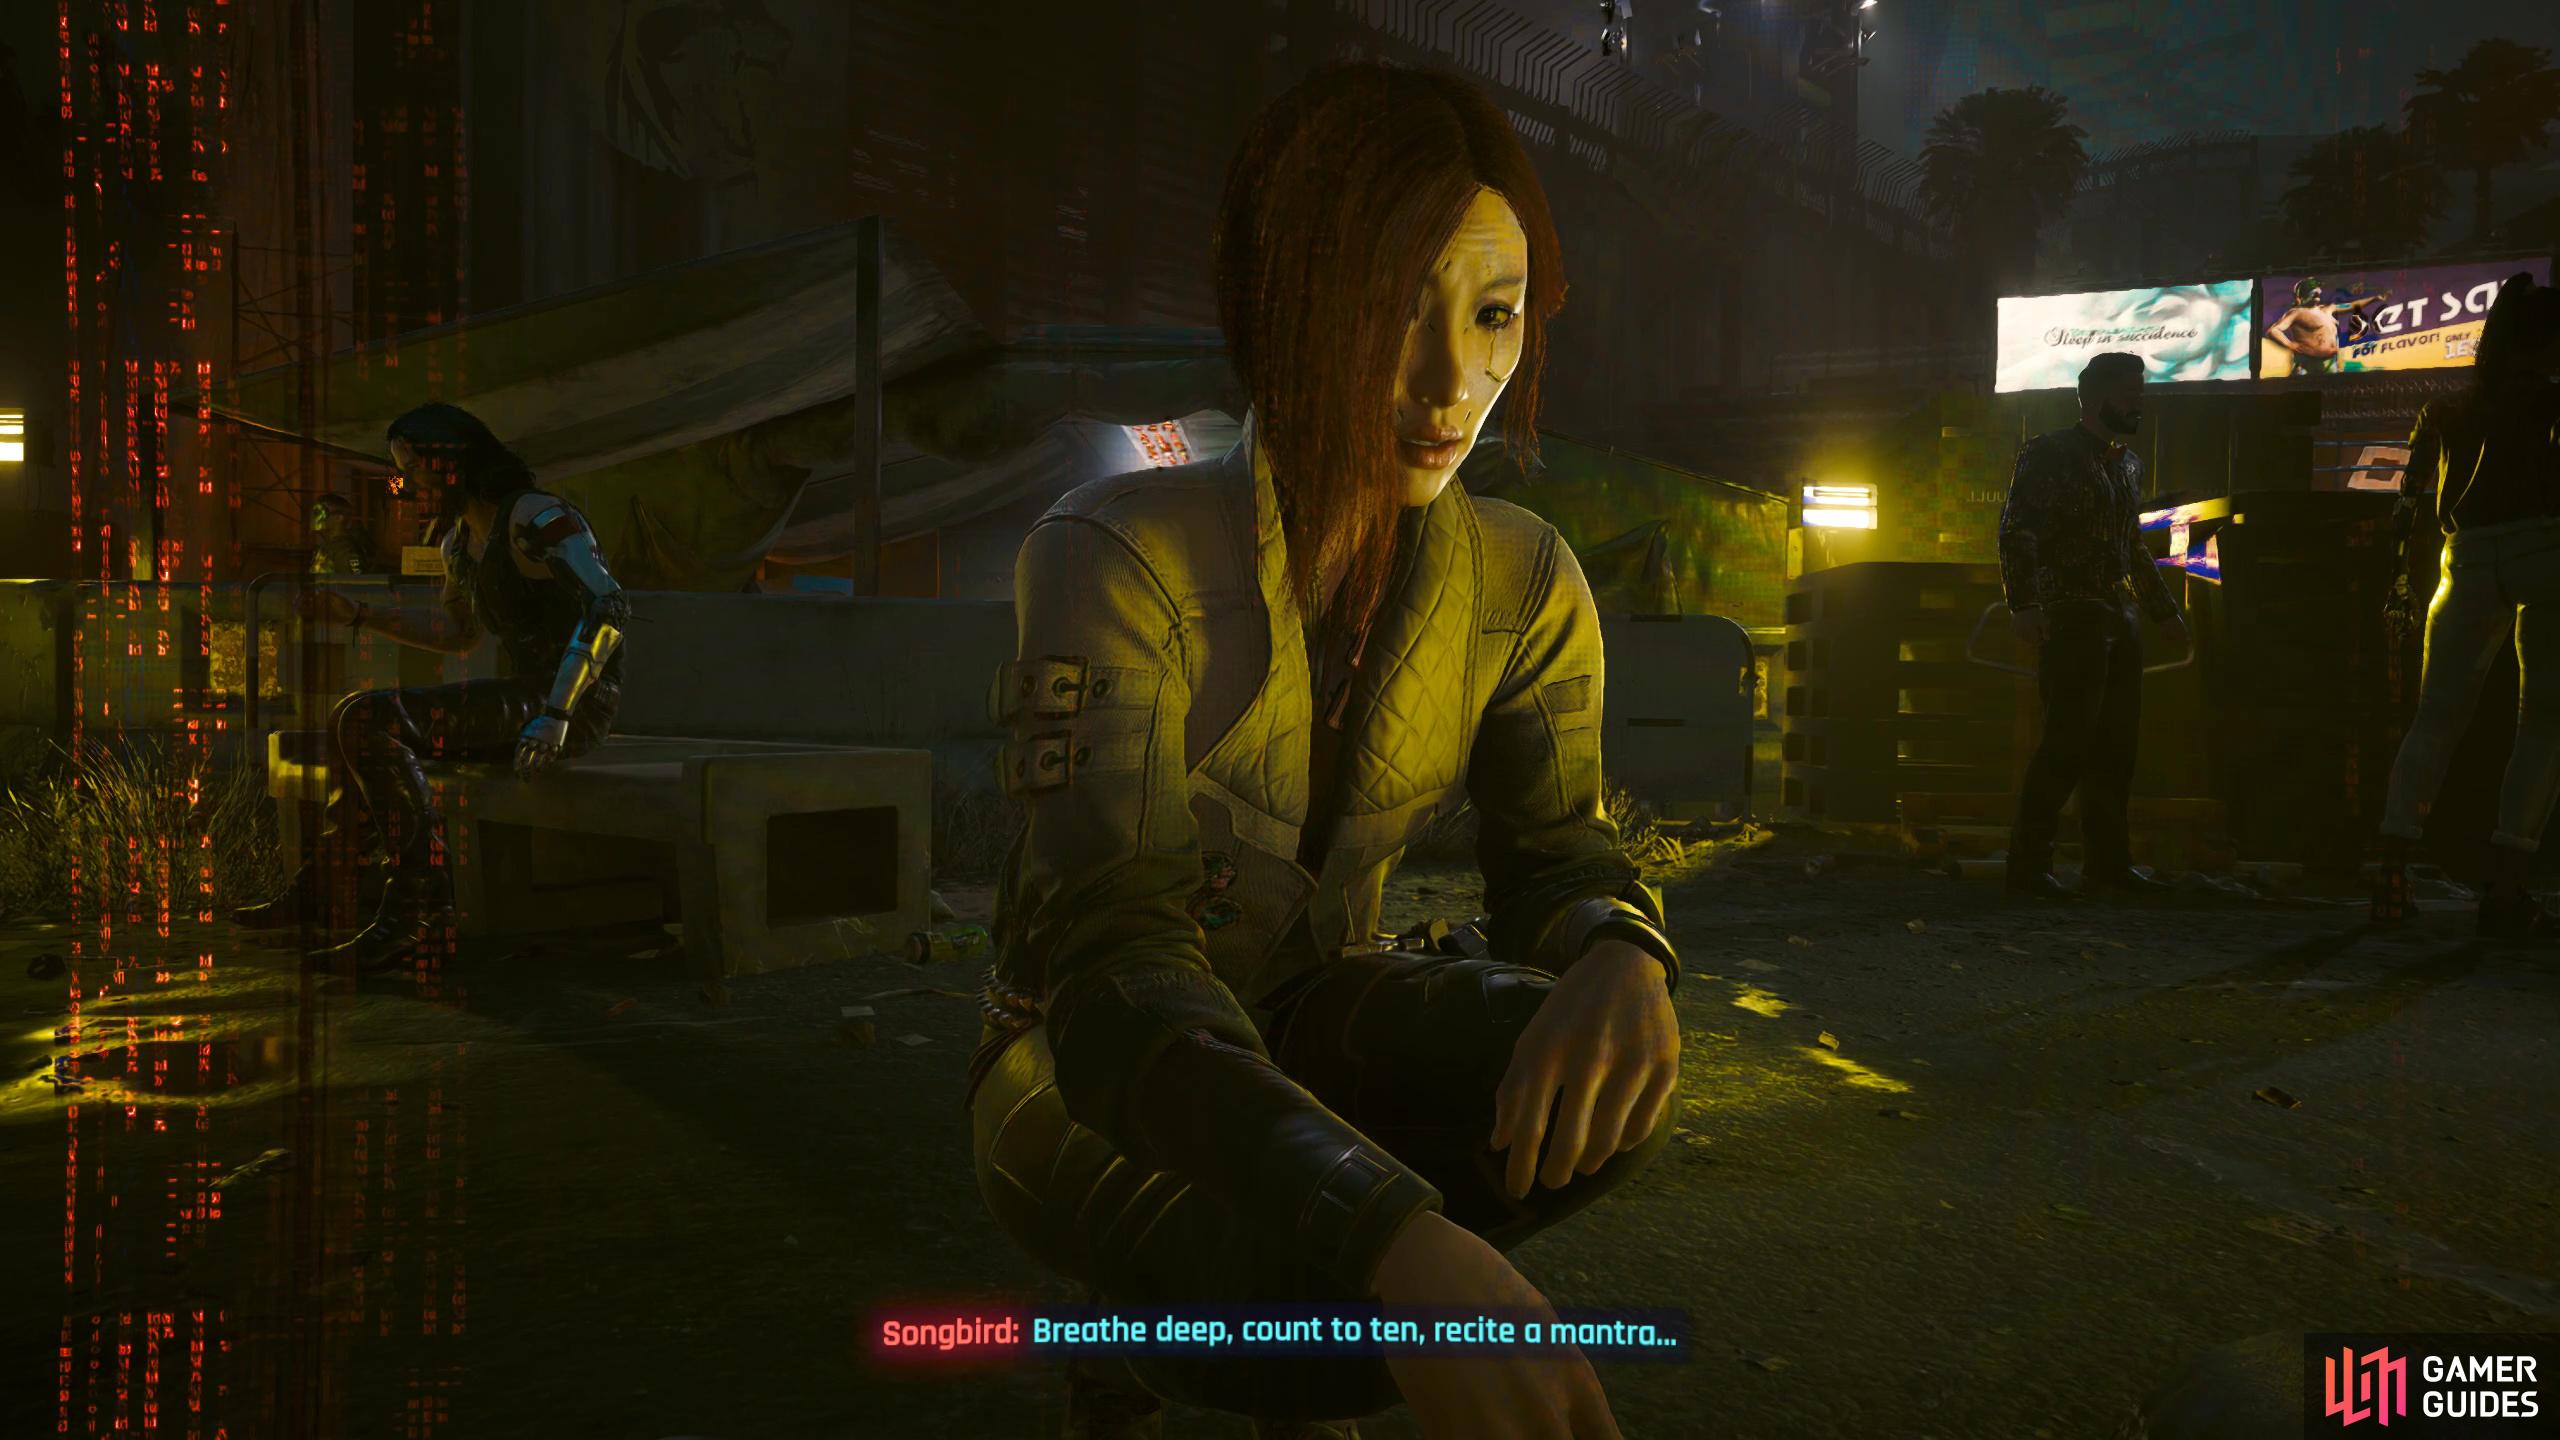
When you come to, you’ll meet Songbird in person, well, not as a person, but more of the way that you see Johnny. Although she’s not a construct like Johnny, she is a Netrunner and a very good one at that. Naturally Johnny will have some complaints about the situation before Songbird mutes him for your safety. You’ll find out that she’s aboard the Space Force One plane, and that she’s sitting across from the president of the New United States of America (NUSA), Rosalind Myers.
The reason she’s contacted you is because the plane that she’s on has been hacked, and all the comms are jammed except your relic. According to the trajectory, the plane is going to land in Dogtown, and you’re the only contact they have on the ground. She’ll tell you that the plane will likely survive the crash, but she fears how the President will fare surviving in Dogtown, which is where you come in.
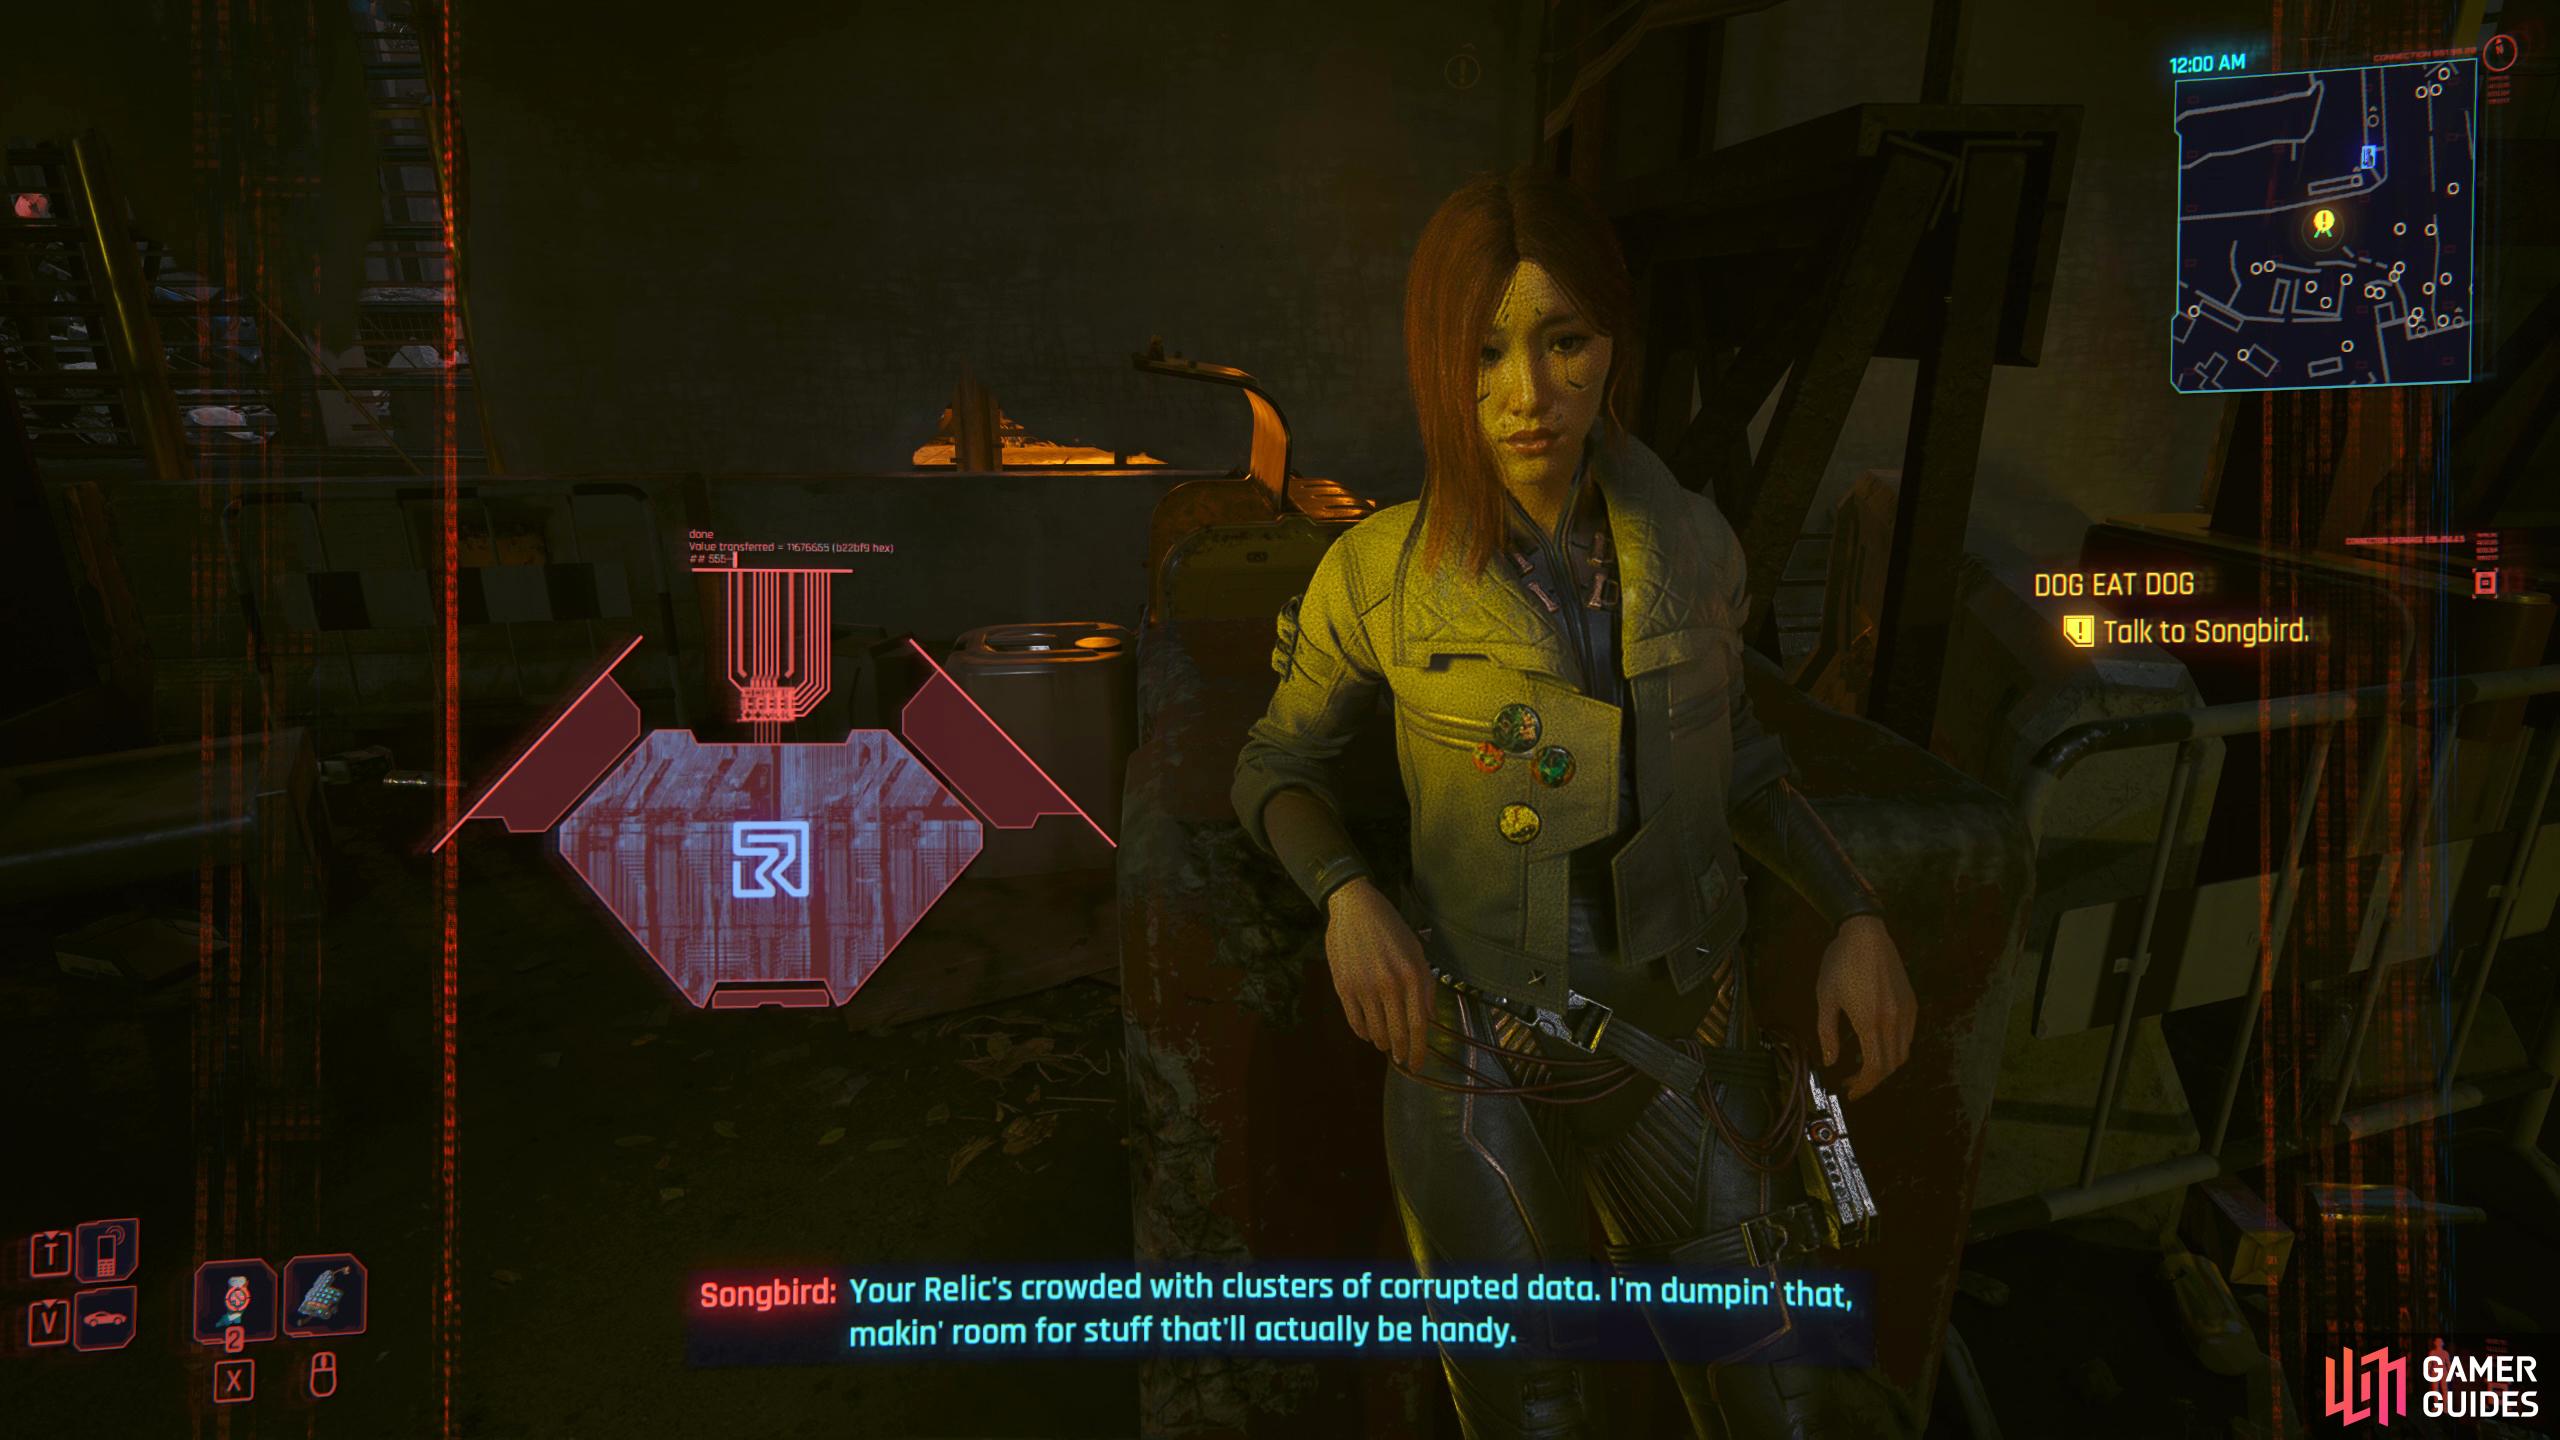
Talking to Songbird will unlock a new skill tree aptly named “Relic”.
After you get through your trust issues, Songbird will tell you that she can cure you, once and for all. Seems too good to be true, but it’s not like you have any other choice. To prove that she’s not playing you, she’ll give you the new Relic Skill Tree and three skill points for it. If you’re not sure what skill to get first (you can get all eventually), head to the link above which should help you choose the best fit for your playstyle.
Find the Entrance to the Old Parking Garage / Enter the Restricted Area
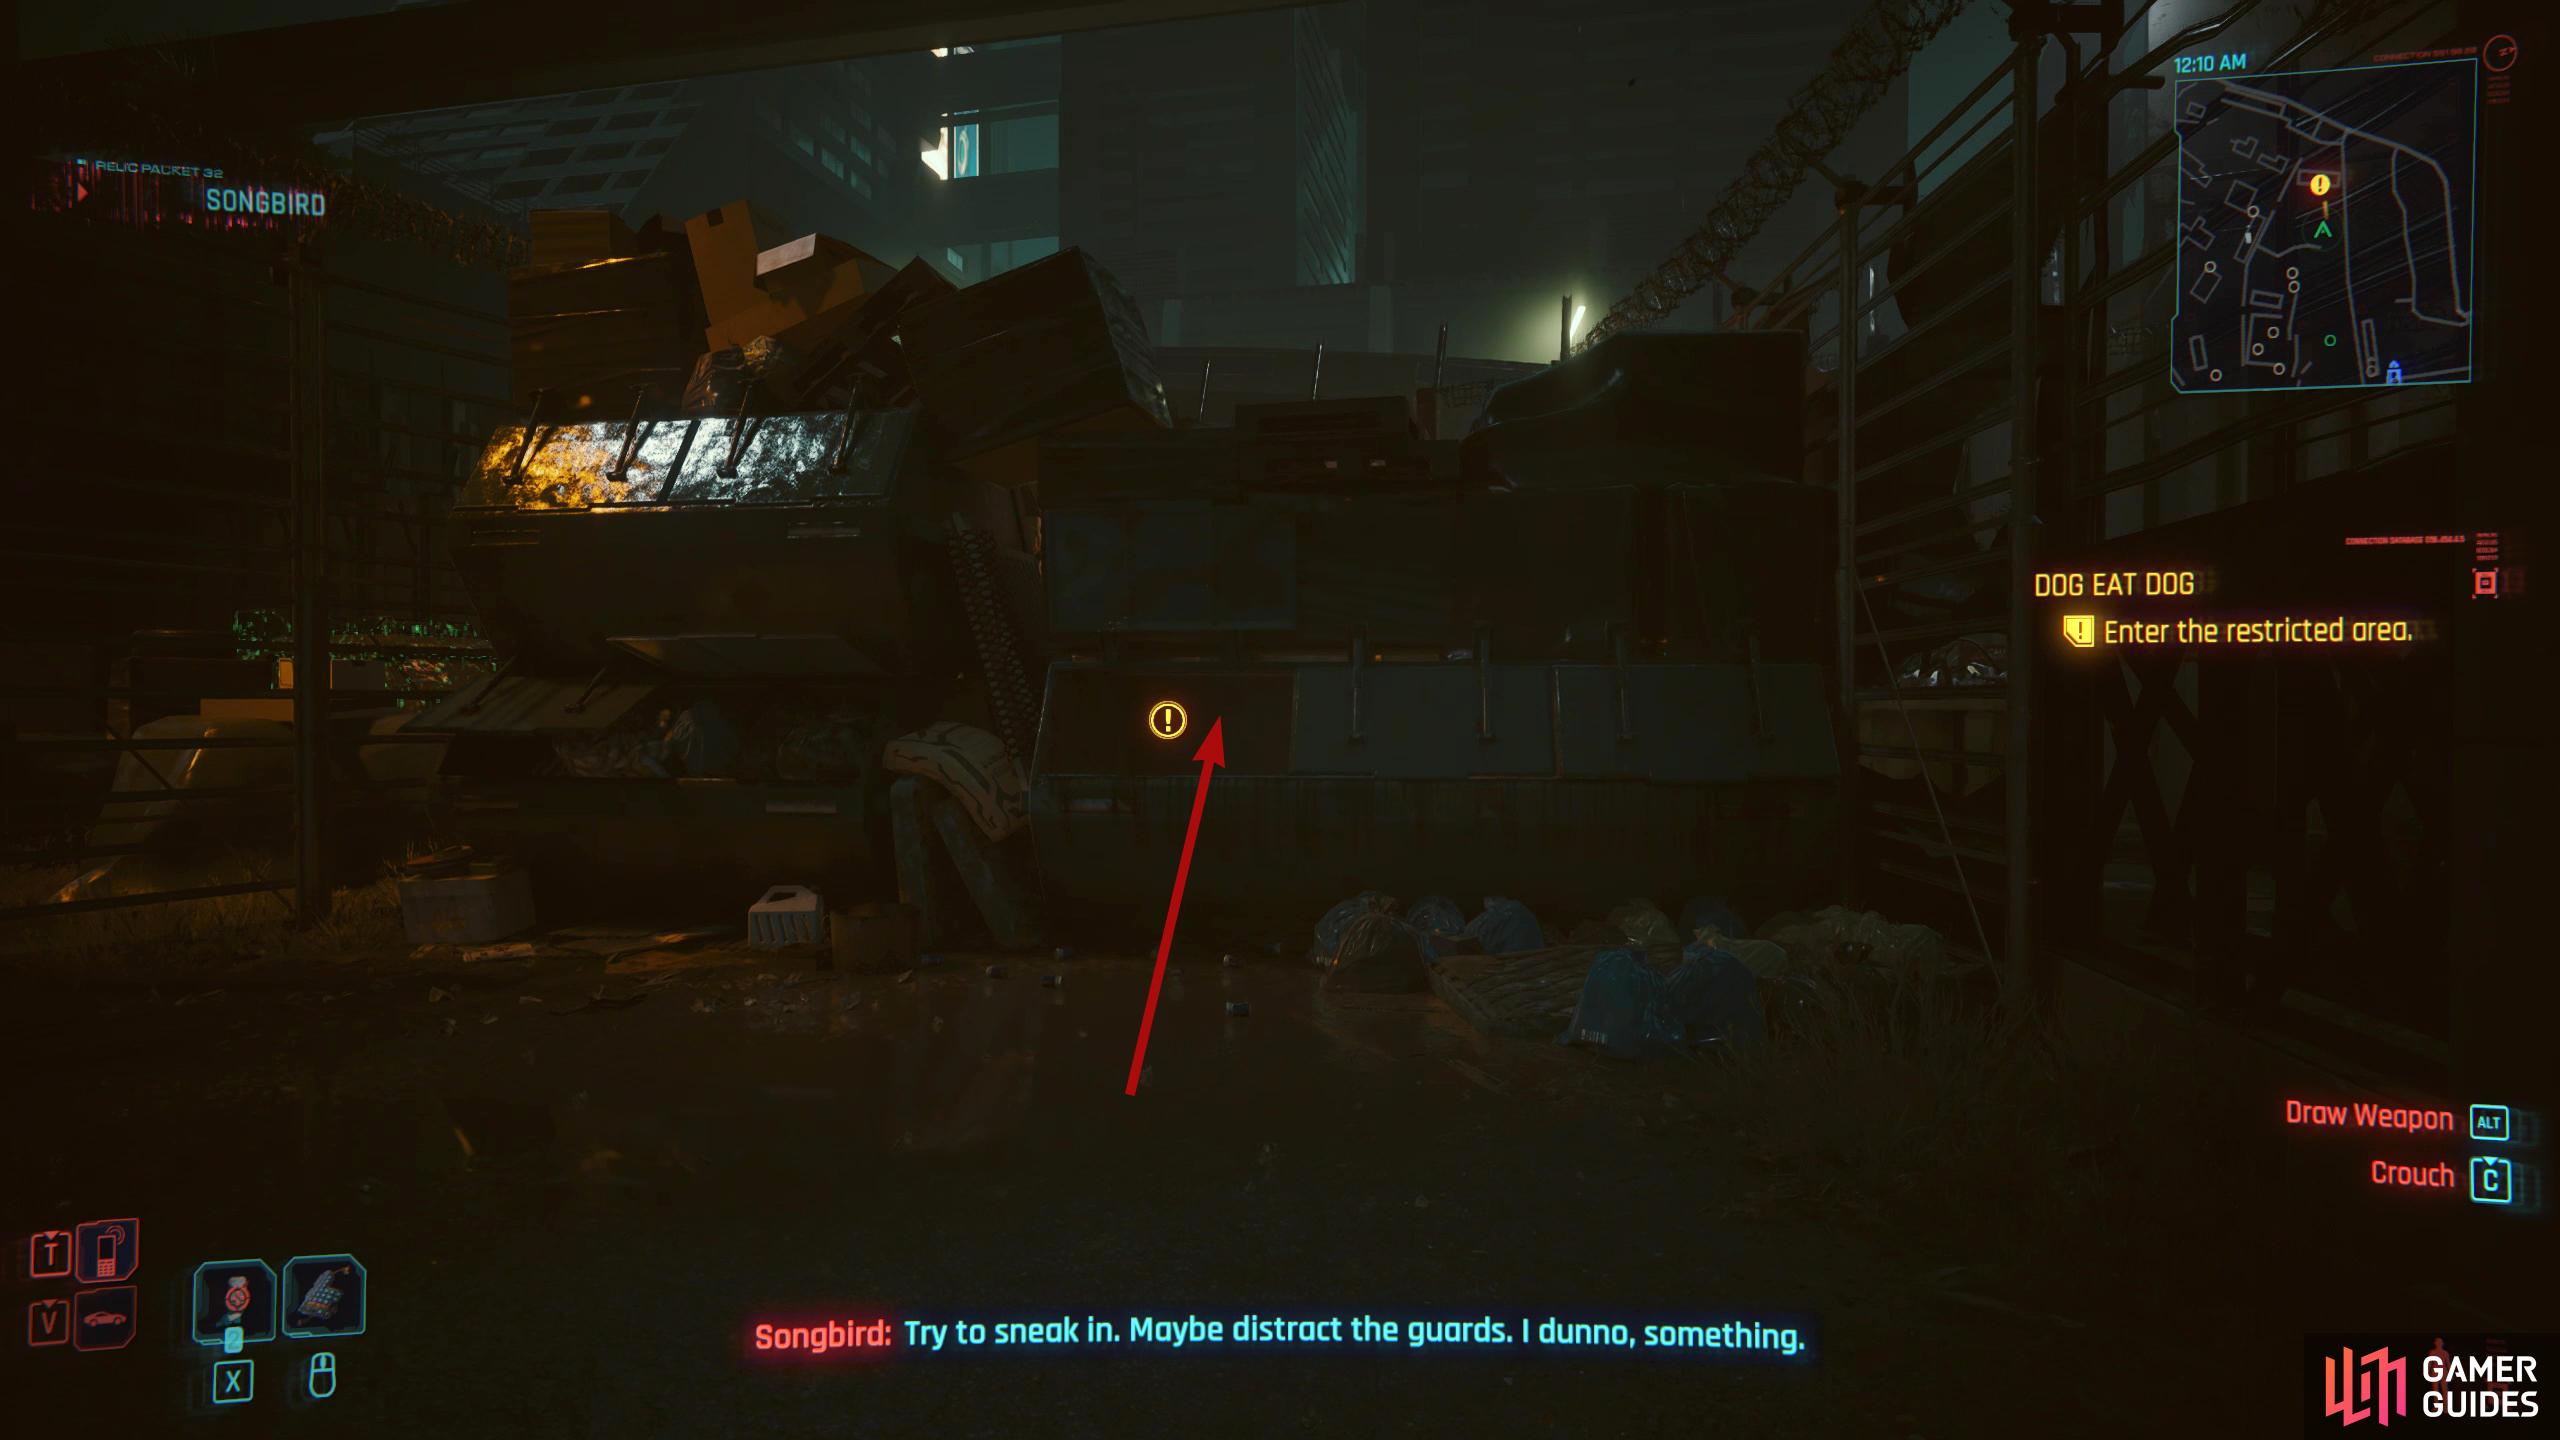
When the conversation is over, you’ll need to find a quiet way into Dogtown. Songbird will lead you to the alley where the parking garage is, but you’ll need to get in yourself. Around the corner, you’ll find the parking garage, and now you’ll need to enter the restricted area discreetly. Head over to the dumpster to your right and interact with it to pass through to the other side.
This area is hostile, and you really don’t want to get caught here, so stay crouched (stealth) as you make your way through the area. Proceed forward, grab the guy in front of you then place him in the nearby dumpster, and collect the shard on the crate to your left. Continue forward, and you’ll have two guards, one in front of you who is inspecting the crates, and a patrol to your left. Wait for the patrol to go then sneak behind him into the garage to his right.
Where is the Access Point in Dog Eat Dog?
Quite a few of you seem to be having issues locating the Access Point in Dog Eat Dog. Follow the directions below and save yourself some scrabbling around the dark.
Go to the Underground Garage / Find an Access Point
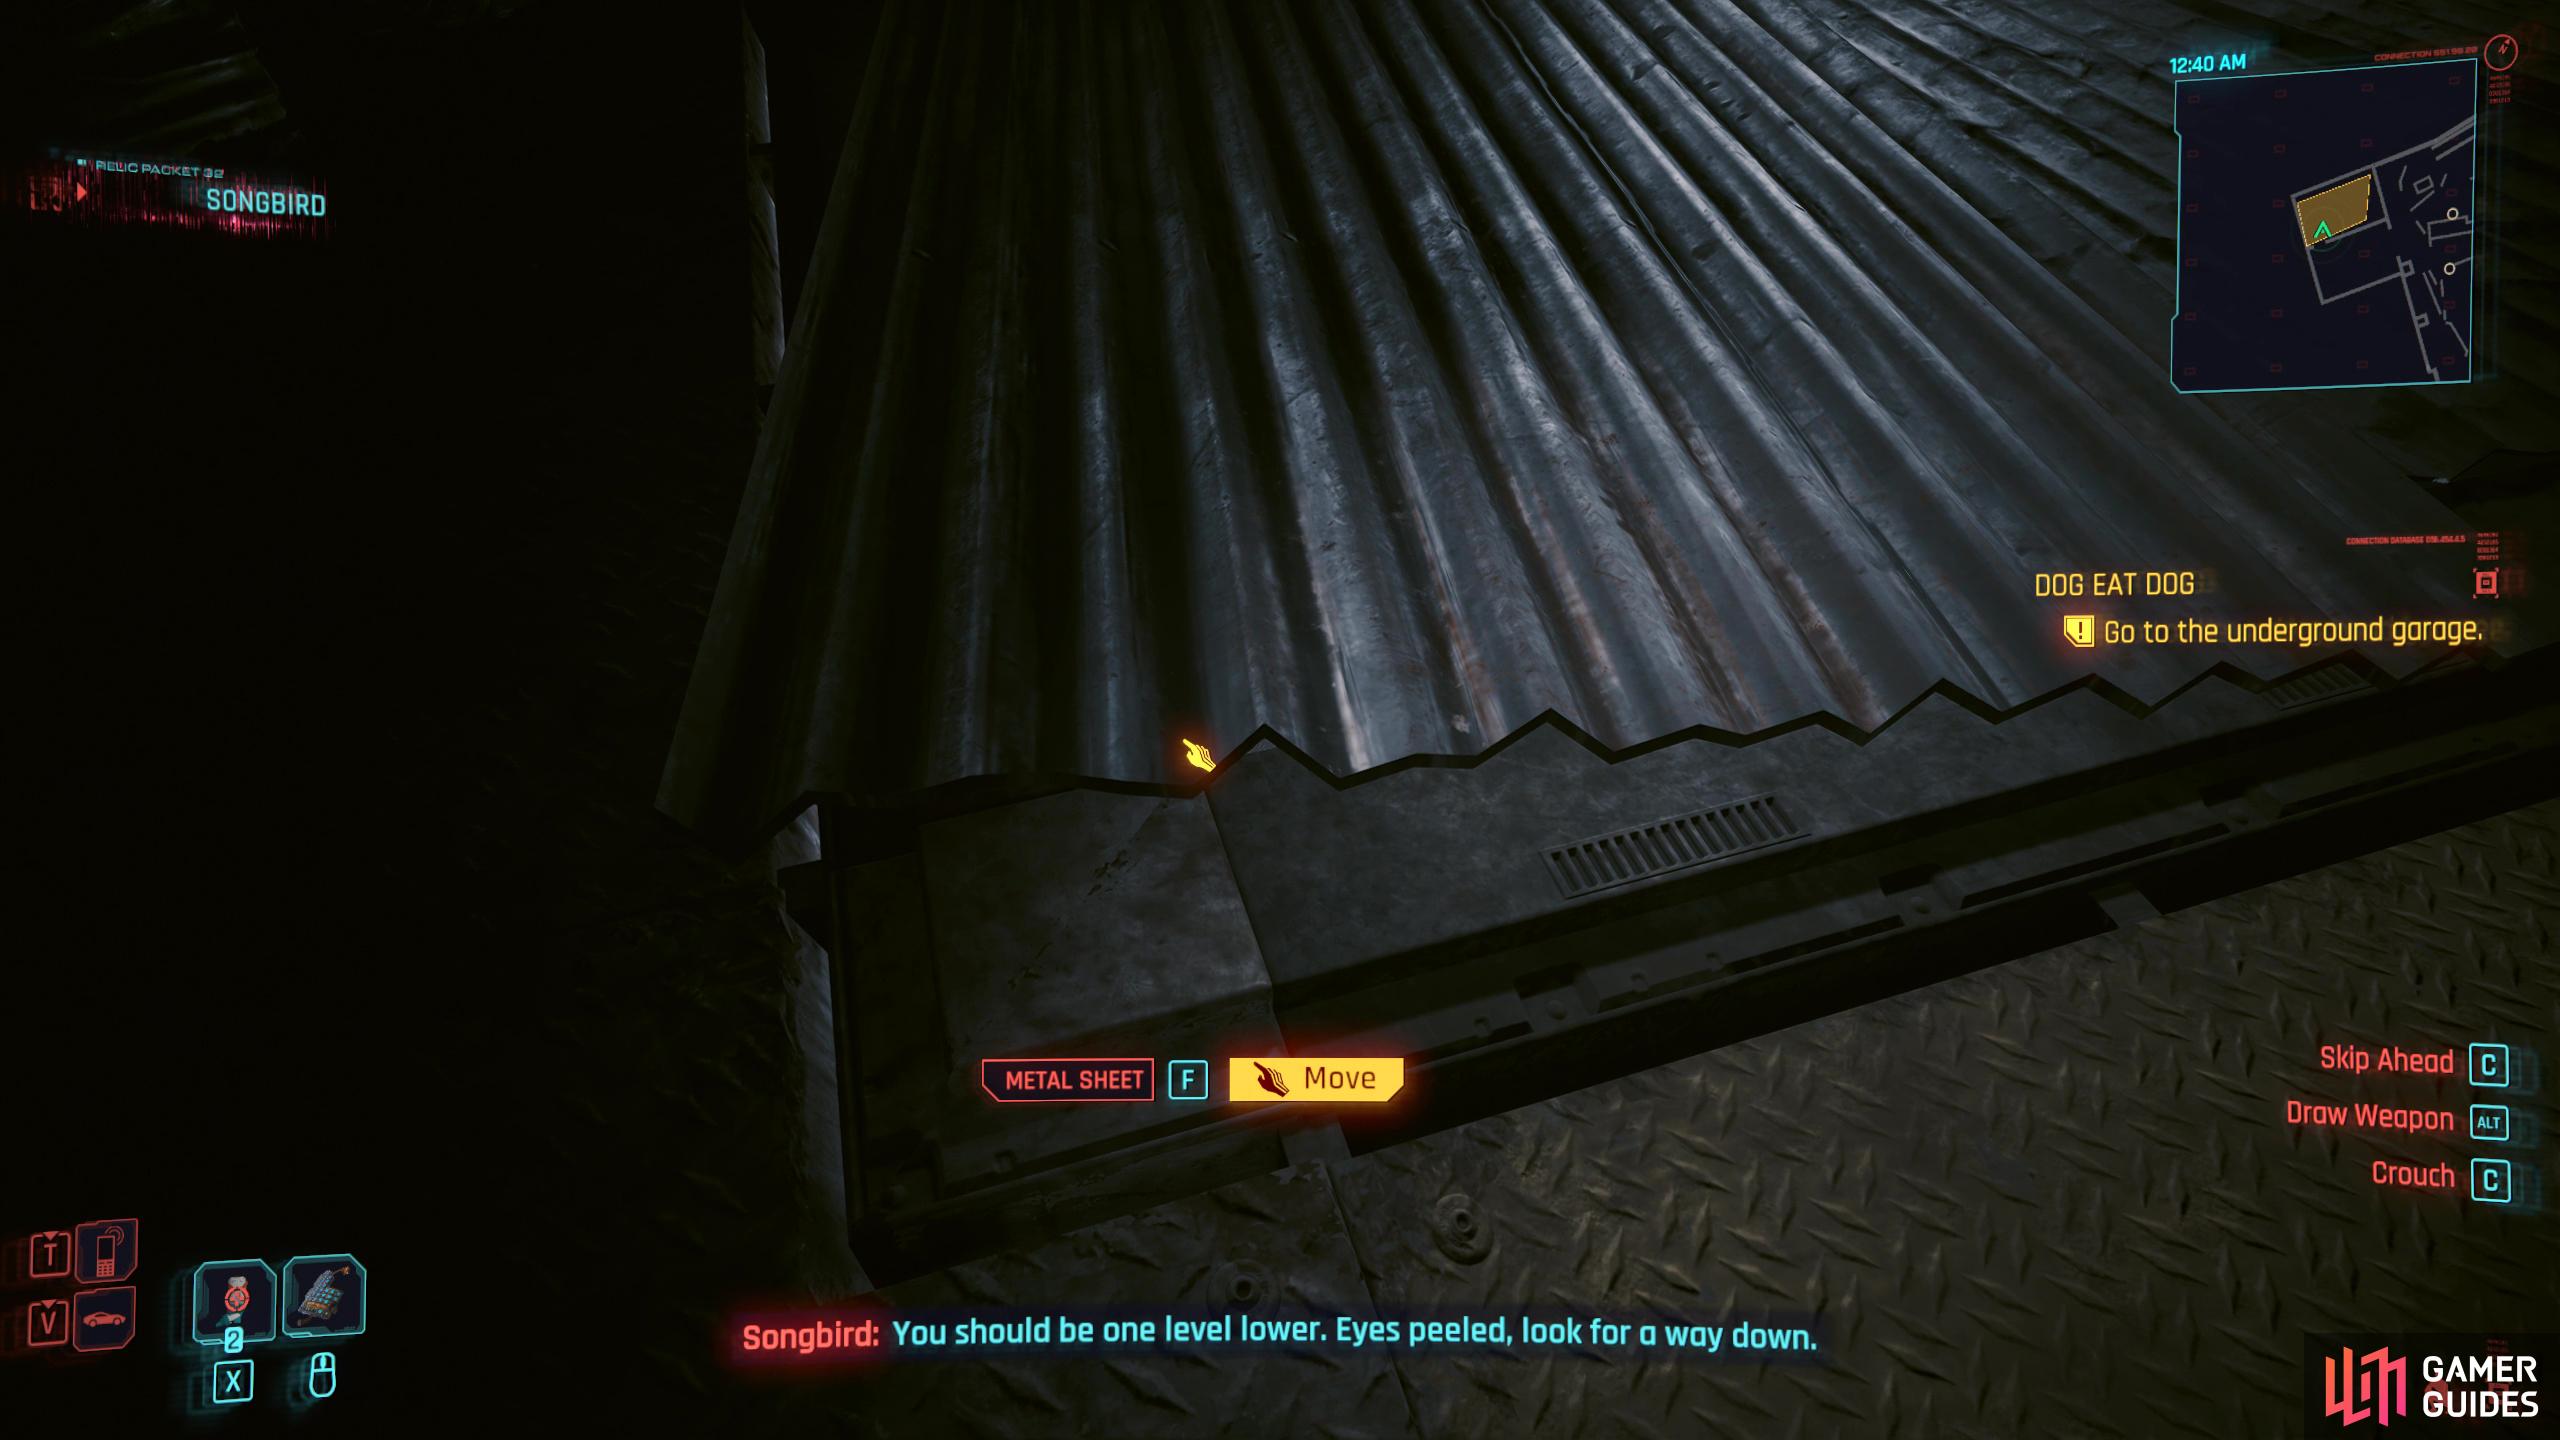
Now that you’re in the garage, you will close the shutter behind yourself, so you don’t need to worry about the guards in the previous area. Head through the gap to your right and interact with the metal sheets on the floor to move them. Drop to the lower level, and you will need to find an access point. It’s quite dark in here, and no, you can’t use a flashlight! Now, drop to the floor, head up the stairs, and go through the doorway (there are some components the other way). Follow the path, looting the stuff along the way, and collect the shard on the floor in front of you.
To the right of the shard are some stairs, go down them and follow the narrow path around the corner. At the bottom of the stairs, turn left to find the access point and turn it on. We have light! Head back to the bottom of the stairs, and go the other way now then climb up to the floor above. Straight in front of you, on your left, you’ll find the access point that Songbird told you to find. Interact with it for a short scene, and head into the next room where you’ll find a moving platform that Songbird will get working; stand on it and talk to Songbird while the platform takes you where you need to go.
(1 of 4) In the next room, head to the right, move the metal sheets in the center of the room, and drop below.
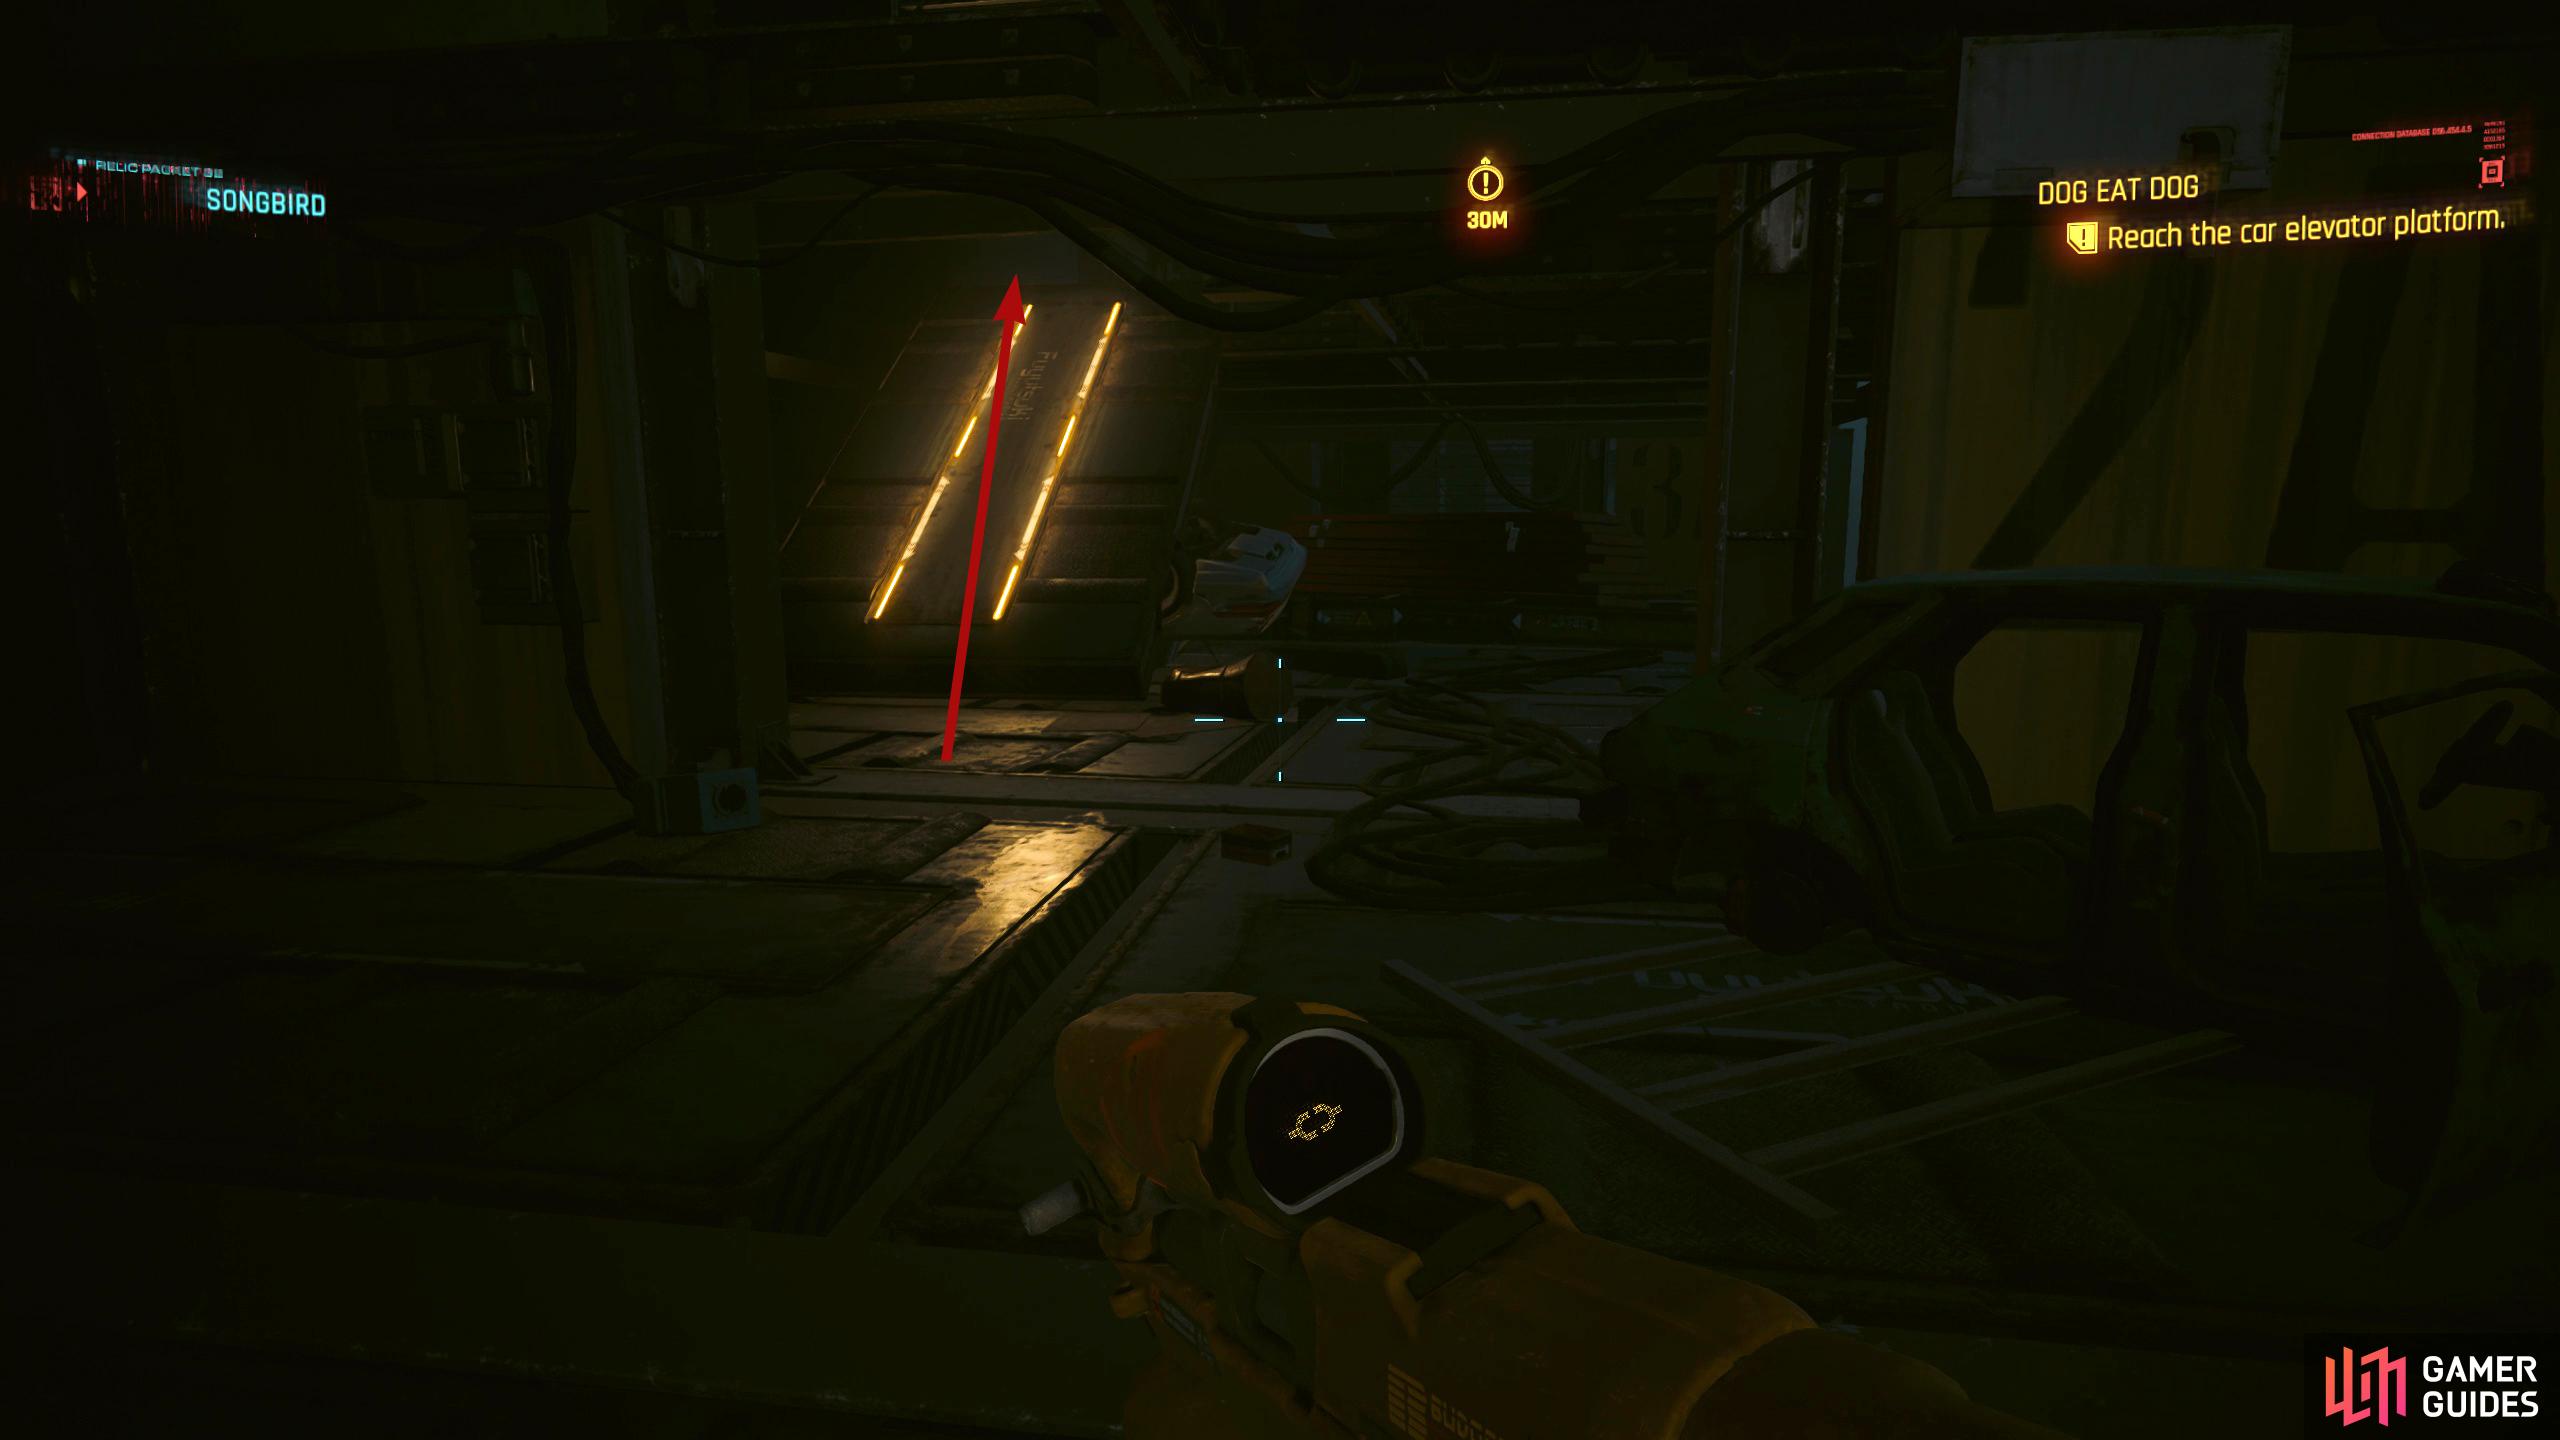
Reach the Car Elevator Platform
When you reach the next area, head through the doorway and make your way to the upper level by jumping on the car in front. Before going forward, head the other way to find a car with some loot in the trunk. We got a Perk Shard (not sure if it’s random or not) and some dollars and other loot from it.
This whole area has lots of loot off the beaten path, some of it useless, some decent. We won’t tell you where to get this, but if you want it, try climbing/jumping on various platforms to get to it. When you’re ready, head back the way you came, and drop to the floor below to find a ramp you can go up. Progress forward, and climb the beam onto the car to reach the next floor where you’ll find the car elevator.
(1 of 4) Before heading up the ramp, jump up to the floor above and head the opposite direction.
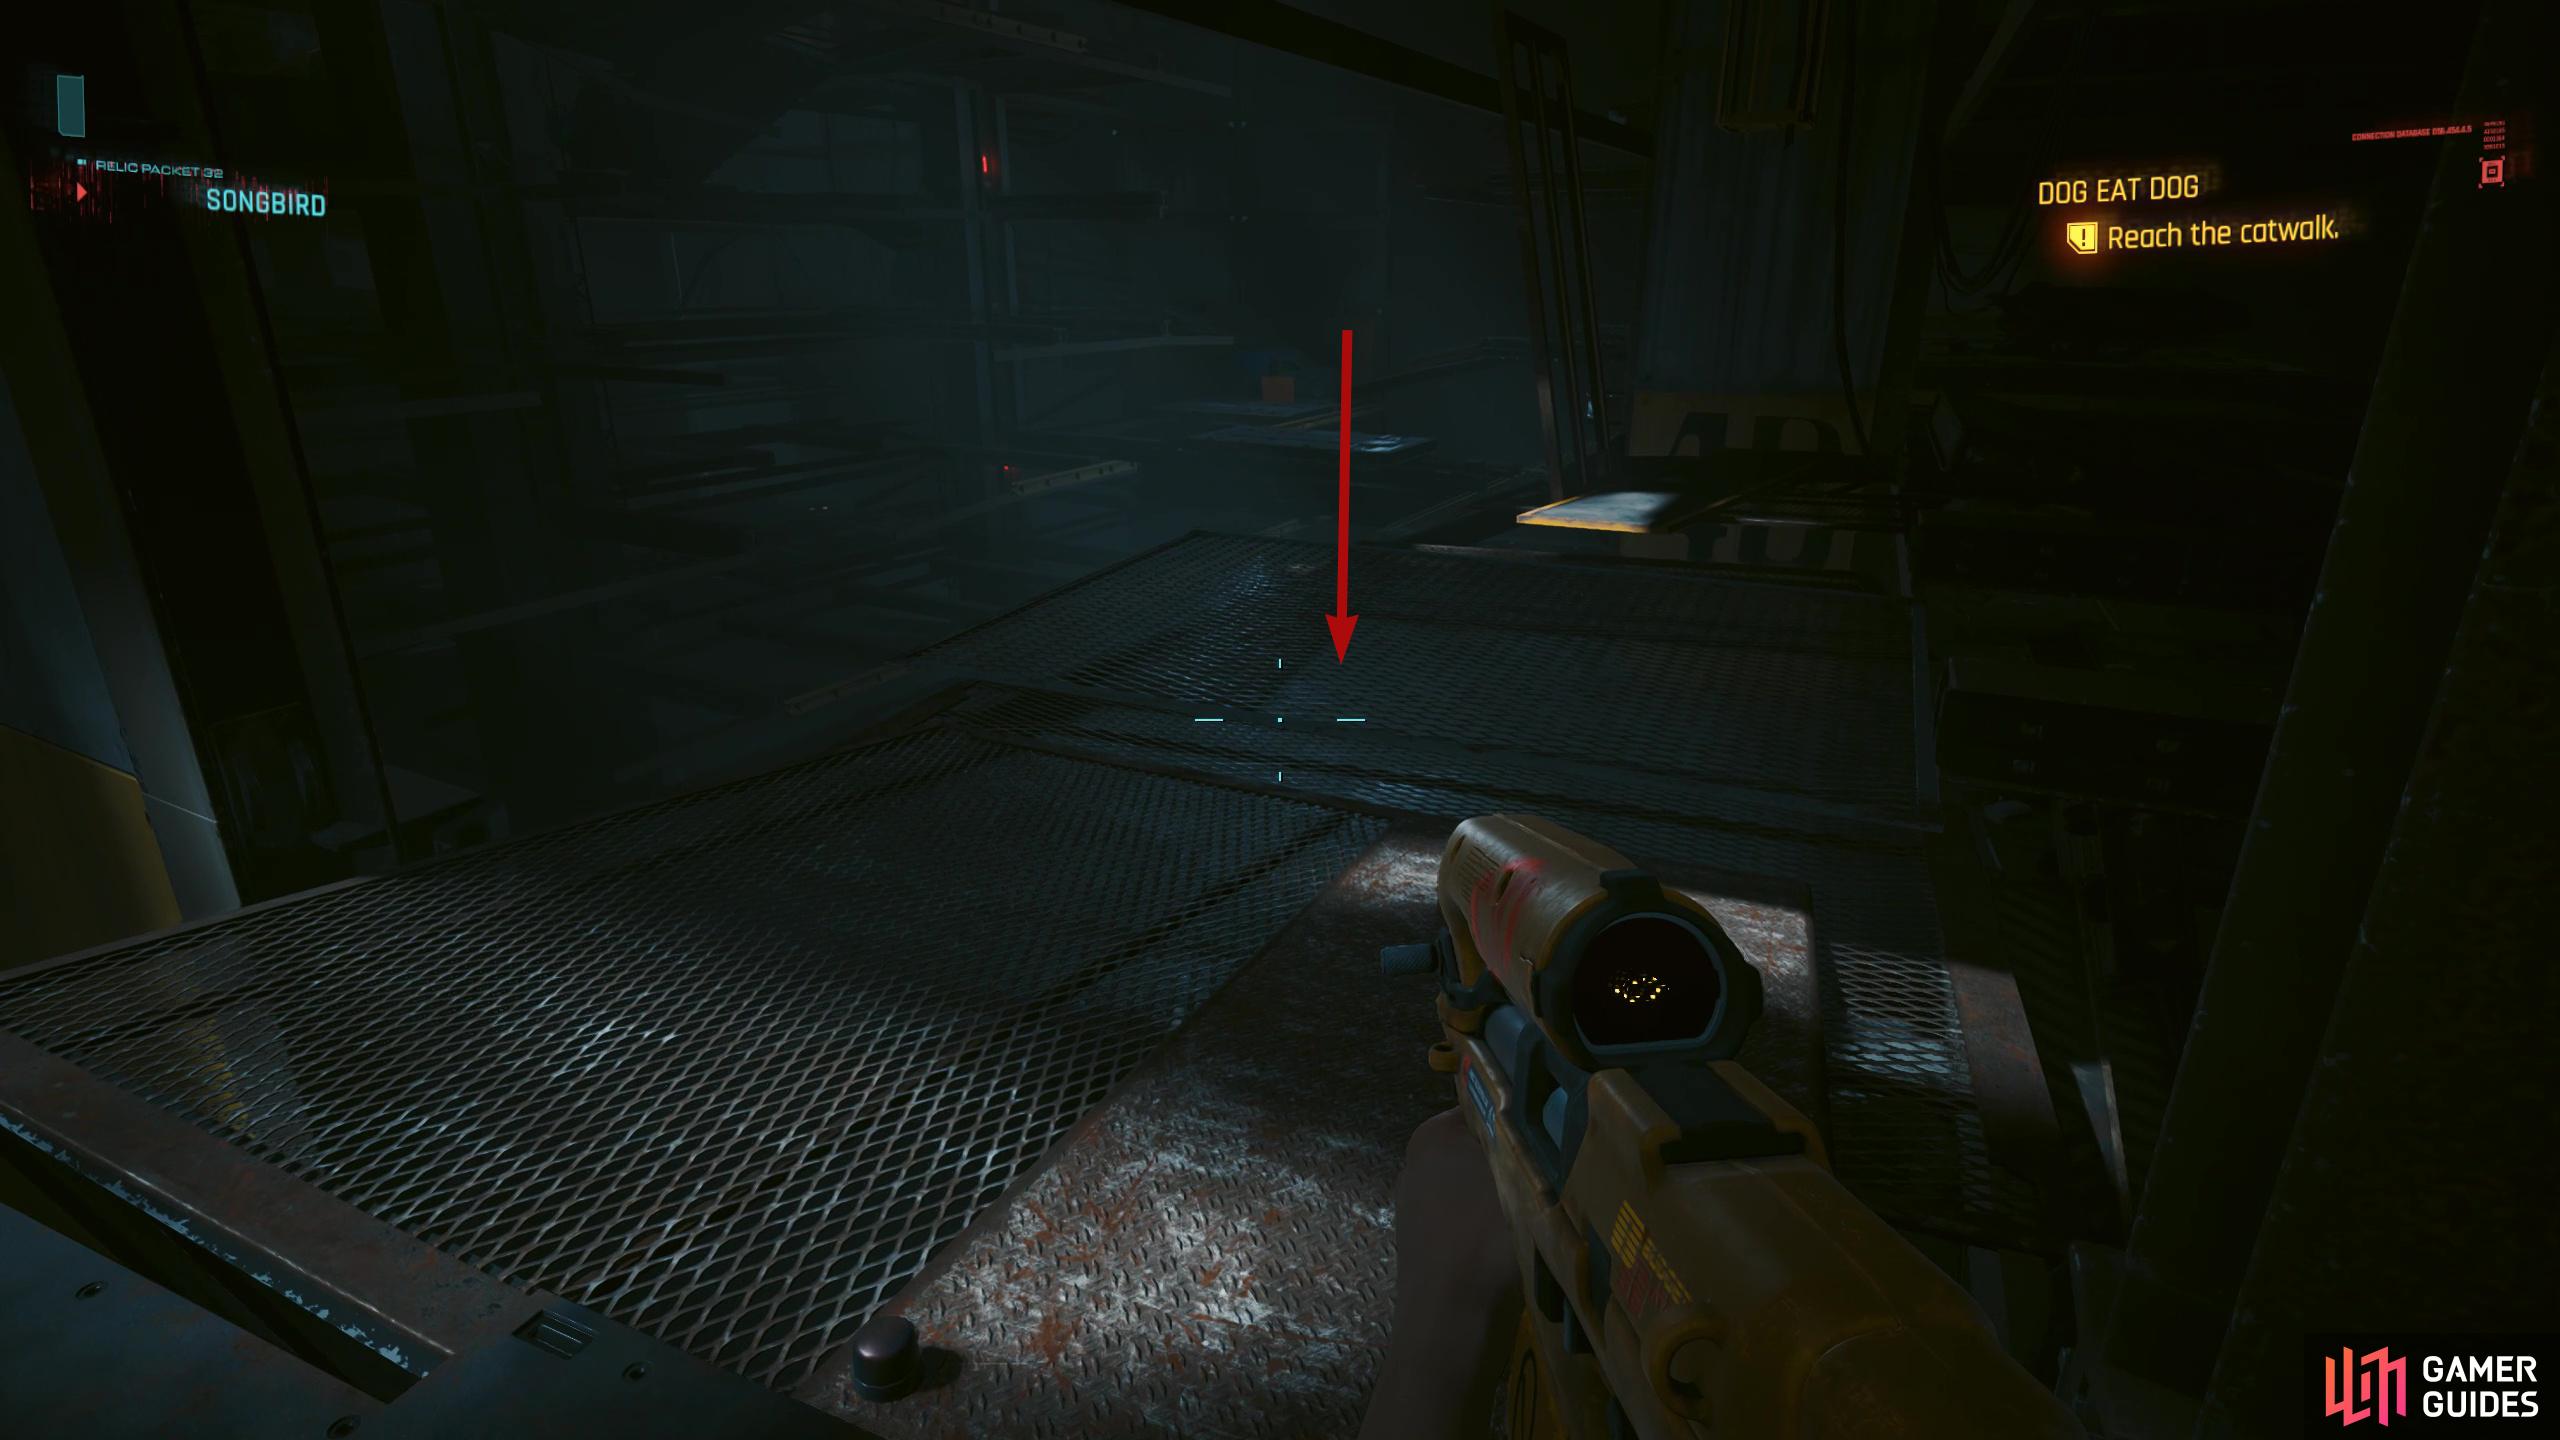
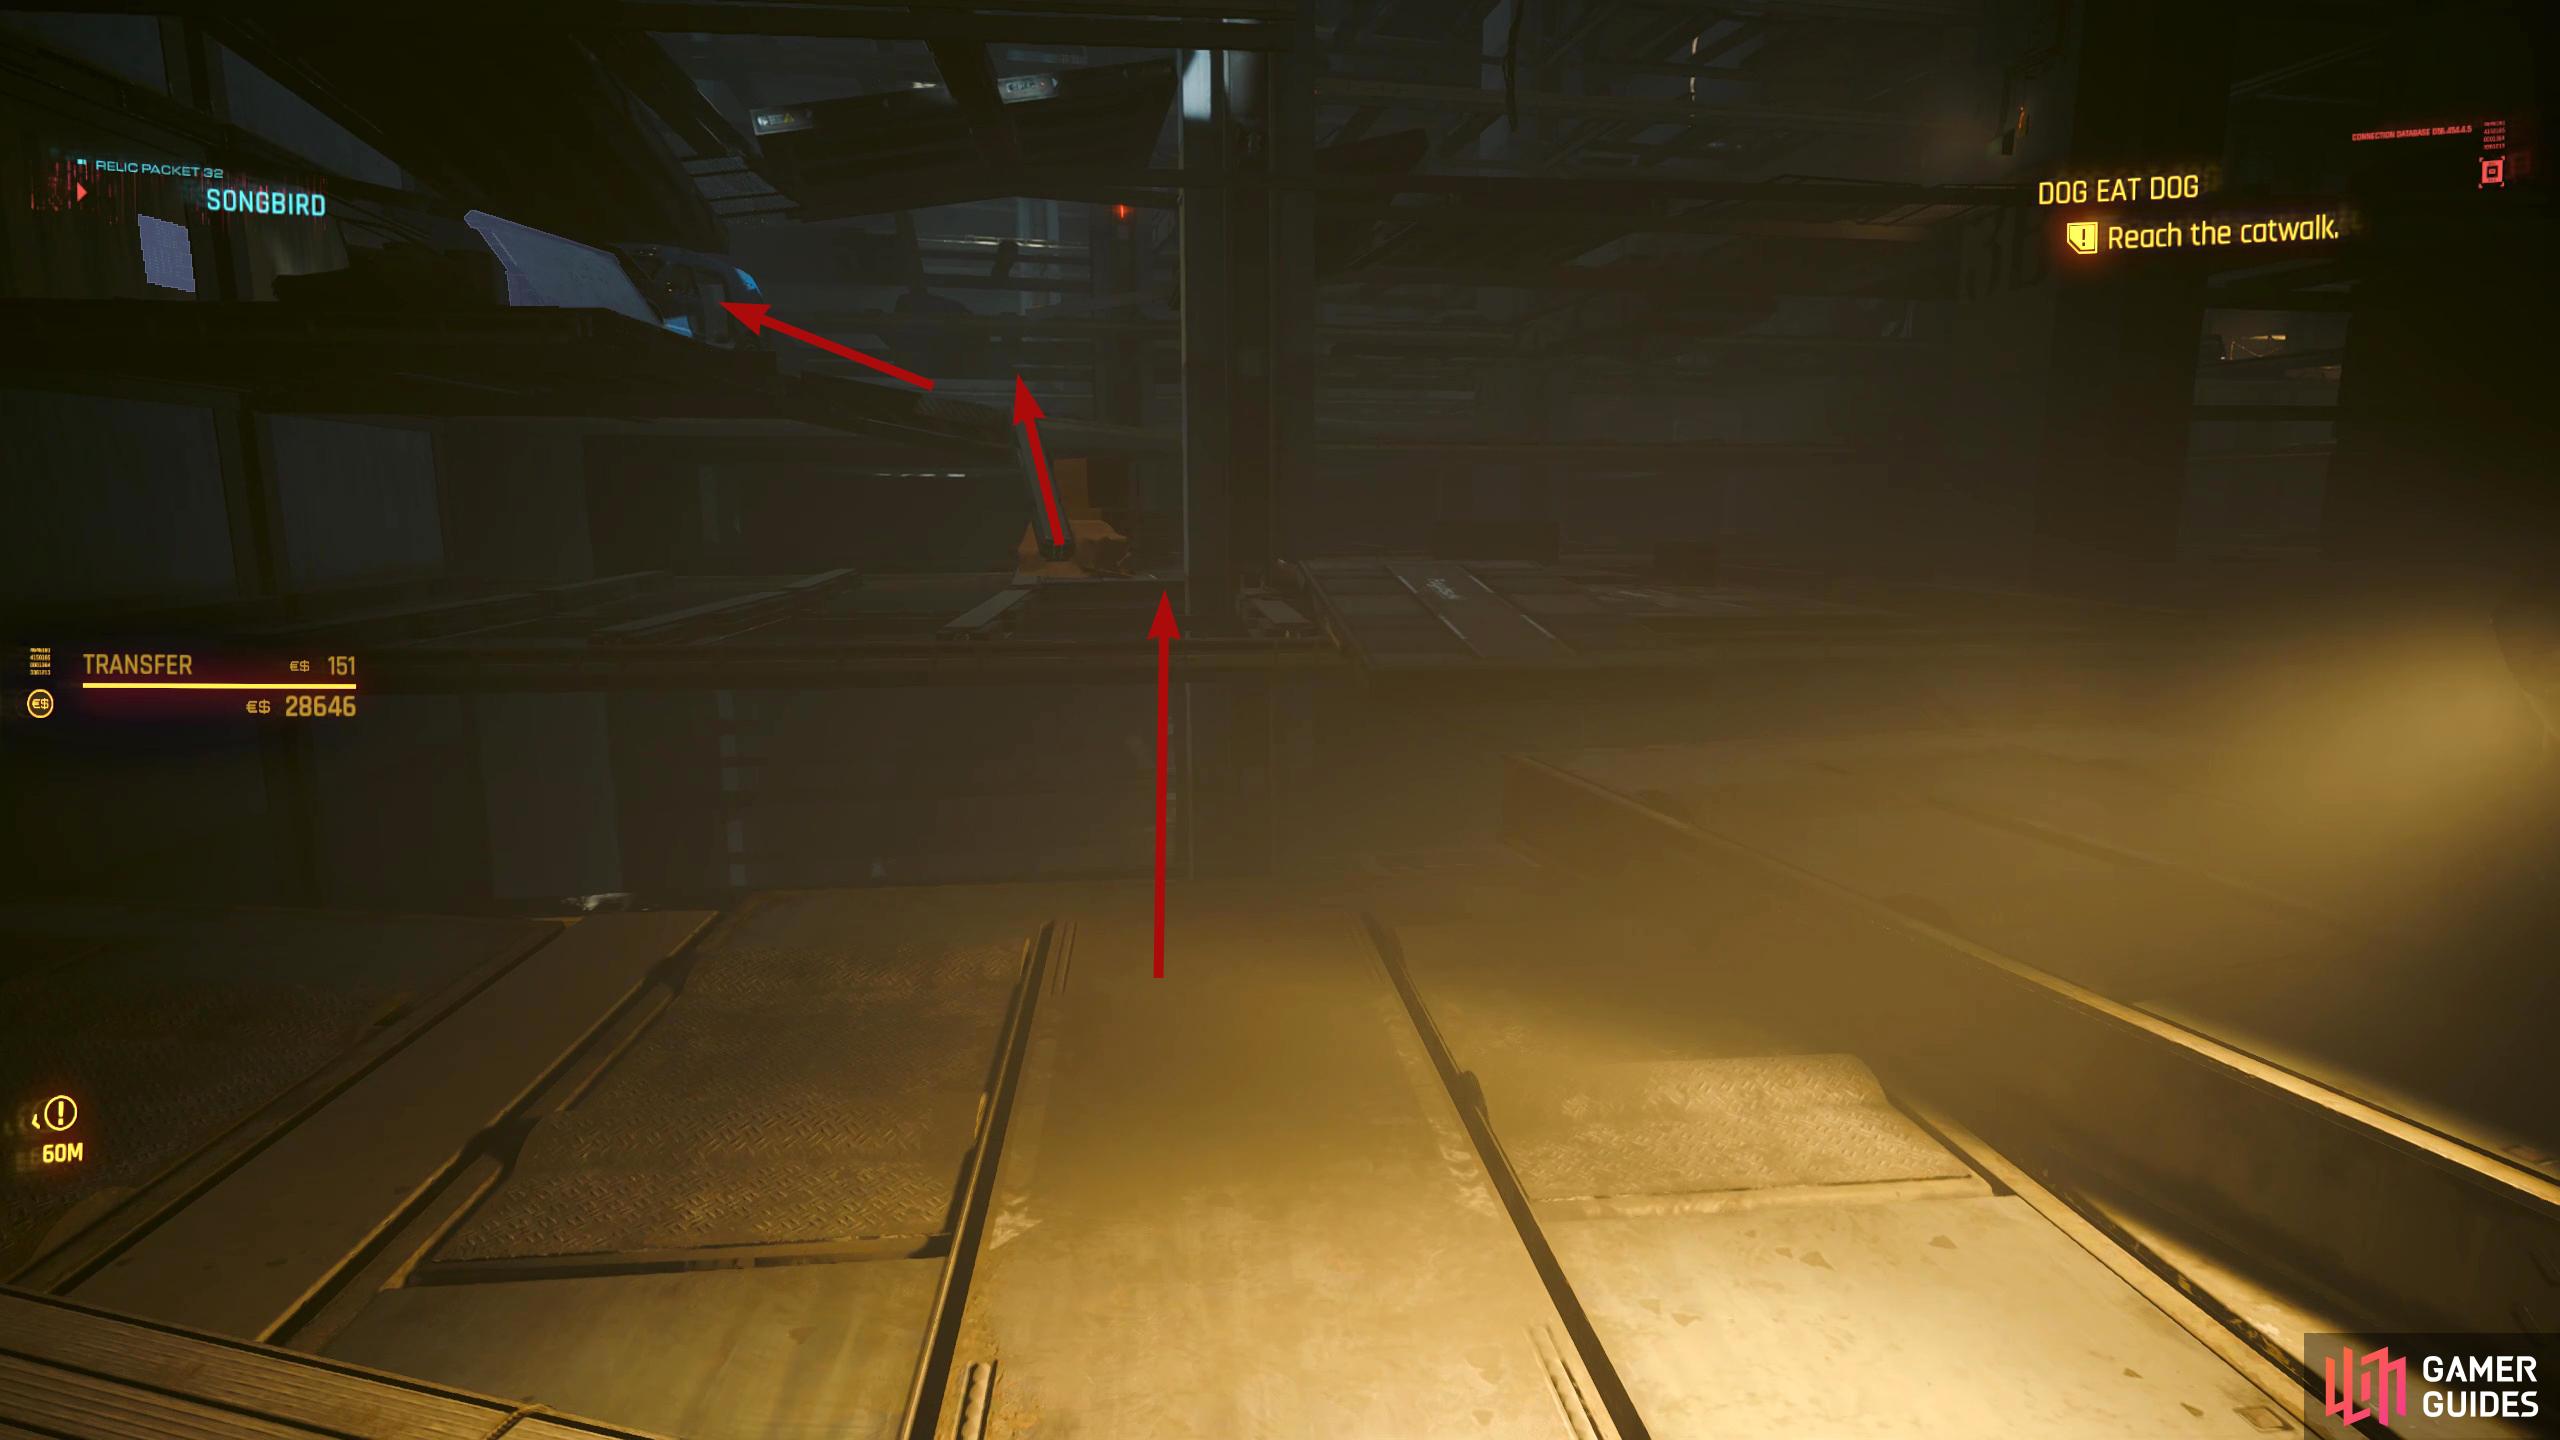
Reach the Catwalk
Jump on it, and head into the next room. Before you head in, the grate in front of you will drop if you stand on it, so jump over to the metal plank with yellow paint to avoid this. If you do fall, which the game intends, walk forward to the right, and loot the nearby van while picking up the shard in the back of it. Continue forward, and you’ll see an upturned car to the next floor. Instead of heading that way, look right, and you’ll find a metal plate sticking out to the other side, run and jump onto it then head left up the beam to the next floor.
To your left will be a blue van with a shard, and some loot in the back. Use the yellow crates to the right of the van to reach the upper level, and follow the path to the left. Keep moving forward, and you’ll find a switch you can interact with providing you have at least 9 in Technical (we had 8) which we assume would give you power. From here, you can jump around the area to find all sorts of loot, but when you’re ready to progress, jump across the platforms toward the objective and go up the upturned car you spotted earlier.
At the top, stand on the platform with the yellow lights, and Songbird will control the other one to your left to move toward you. When it gets in line with you, use it to reach the other side. Jump on the van to the right and head up the ramp with yellow lights to the next floor. Turn left, and climb up to the next floor then follow the path up to the left. Before going up the next ramp, there’s some loot and a shard on the floor to the right of it.
When you reach the top, you can push a car platform over if you have 10 Body. It will be in front of the car with the headlights on. All this does is save you some time, so if you don’t have 10 Body, simply head in the opposite direction. When you reach the pillar, turn right and some platforms will light up which you can jump across to make it to the other side. On the other side, you’ll see some more platforms with lights on them, this is the correct way to go, but before you do, jump up on the small platform to your right, and then up again to find a blue van. Open the trunk to find some more loot (this had a Cyberware Capacity Shard for us).
Get on top of the van, and jump across to the platforms to the right of it (objective direction). When you land, a platform will light up, stand on it, and jump up to the next level. Now follow the catwalk to the end where you’ll reach the end of the place.
(1 of 7) Instead of going up the car, jump across the platforms and go up the beam to the floor above.
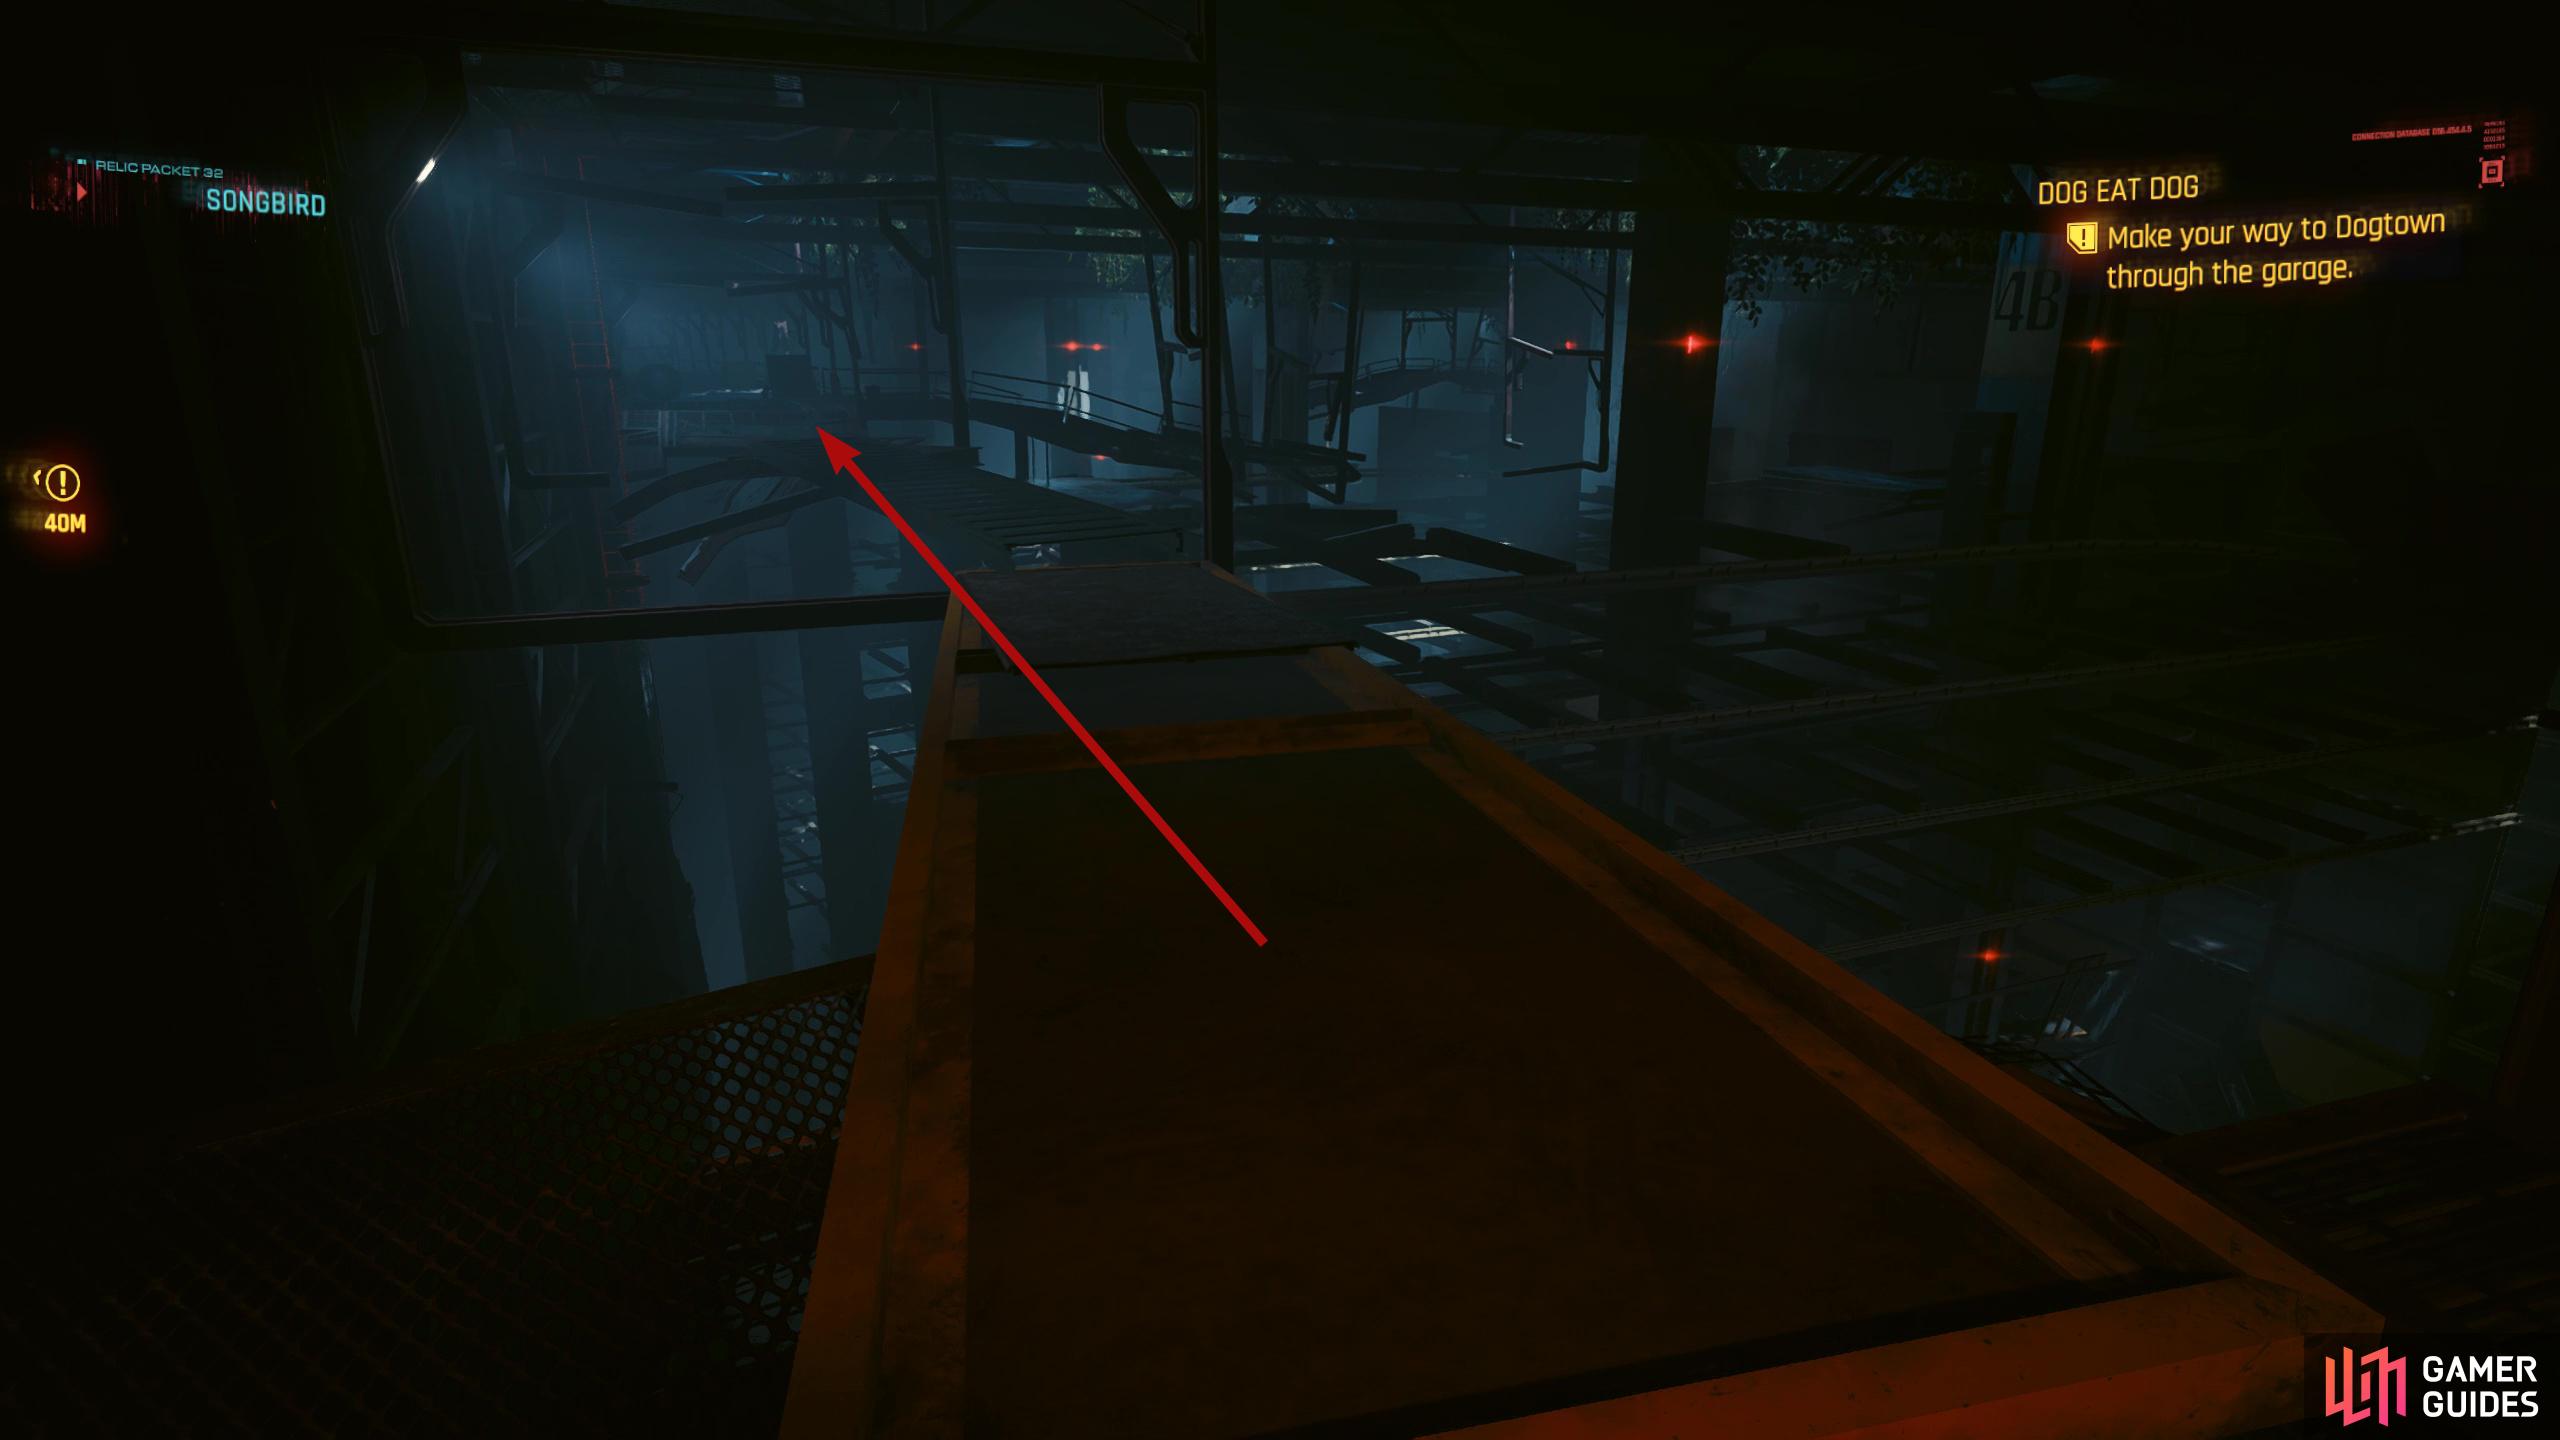
Make Your Way to Dogtown Through the Garage
Before you head through, there’s some loot to get. Turn right, and follow the platforms until you reach a large jump. You can jump this provided you have double jump, otherwise, you’ll need to navigate your way over by using the path to your right. Continue down to the end, and you’ll find some loot on the bench to your left. Head back the way you came until you reach the large gap again. This time, jump across to the ladder, and you’ll grab it when you get close to it. Climb it to the top, and you’ll find a small room with some more loot.
To the left of the chest on the floor is a hole, drop to the floor below, and head back to where Songbird went. This time go through the red hallway, but go left instead of right as there is a ladder at the end leading to the floor below. Follow the path to find some more loot and a shard. Go back up the ladder, and follow the path that Songbird went to then go up the next ladder.
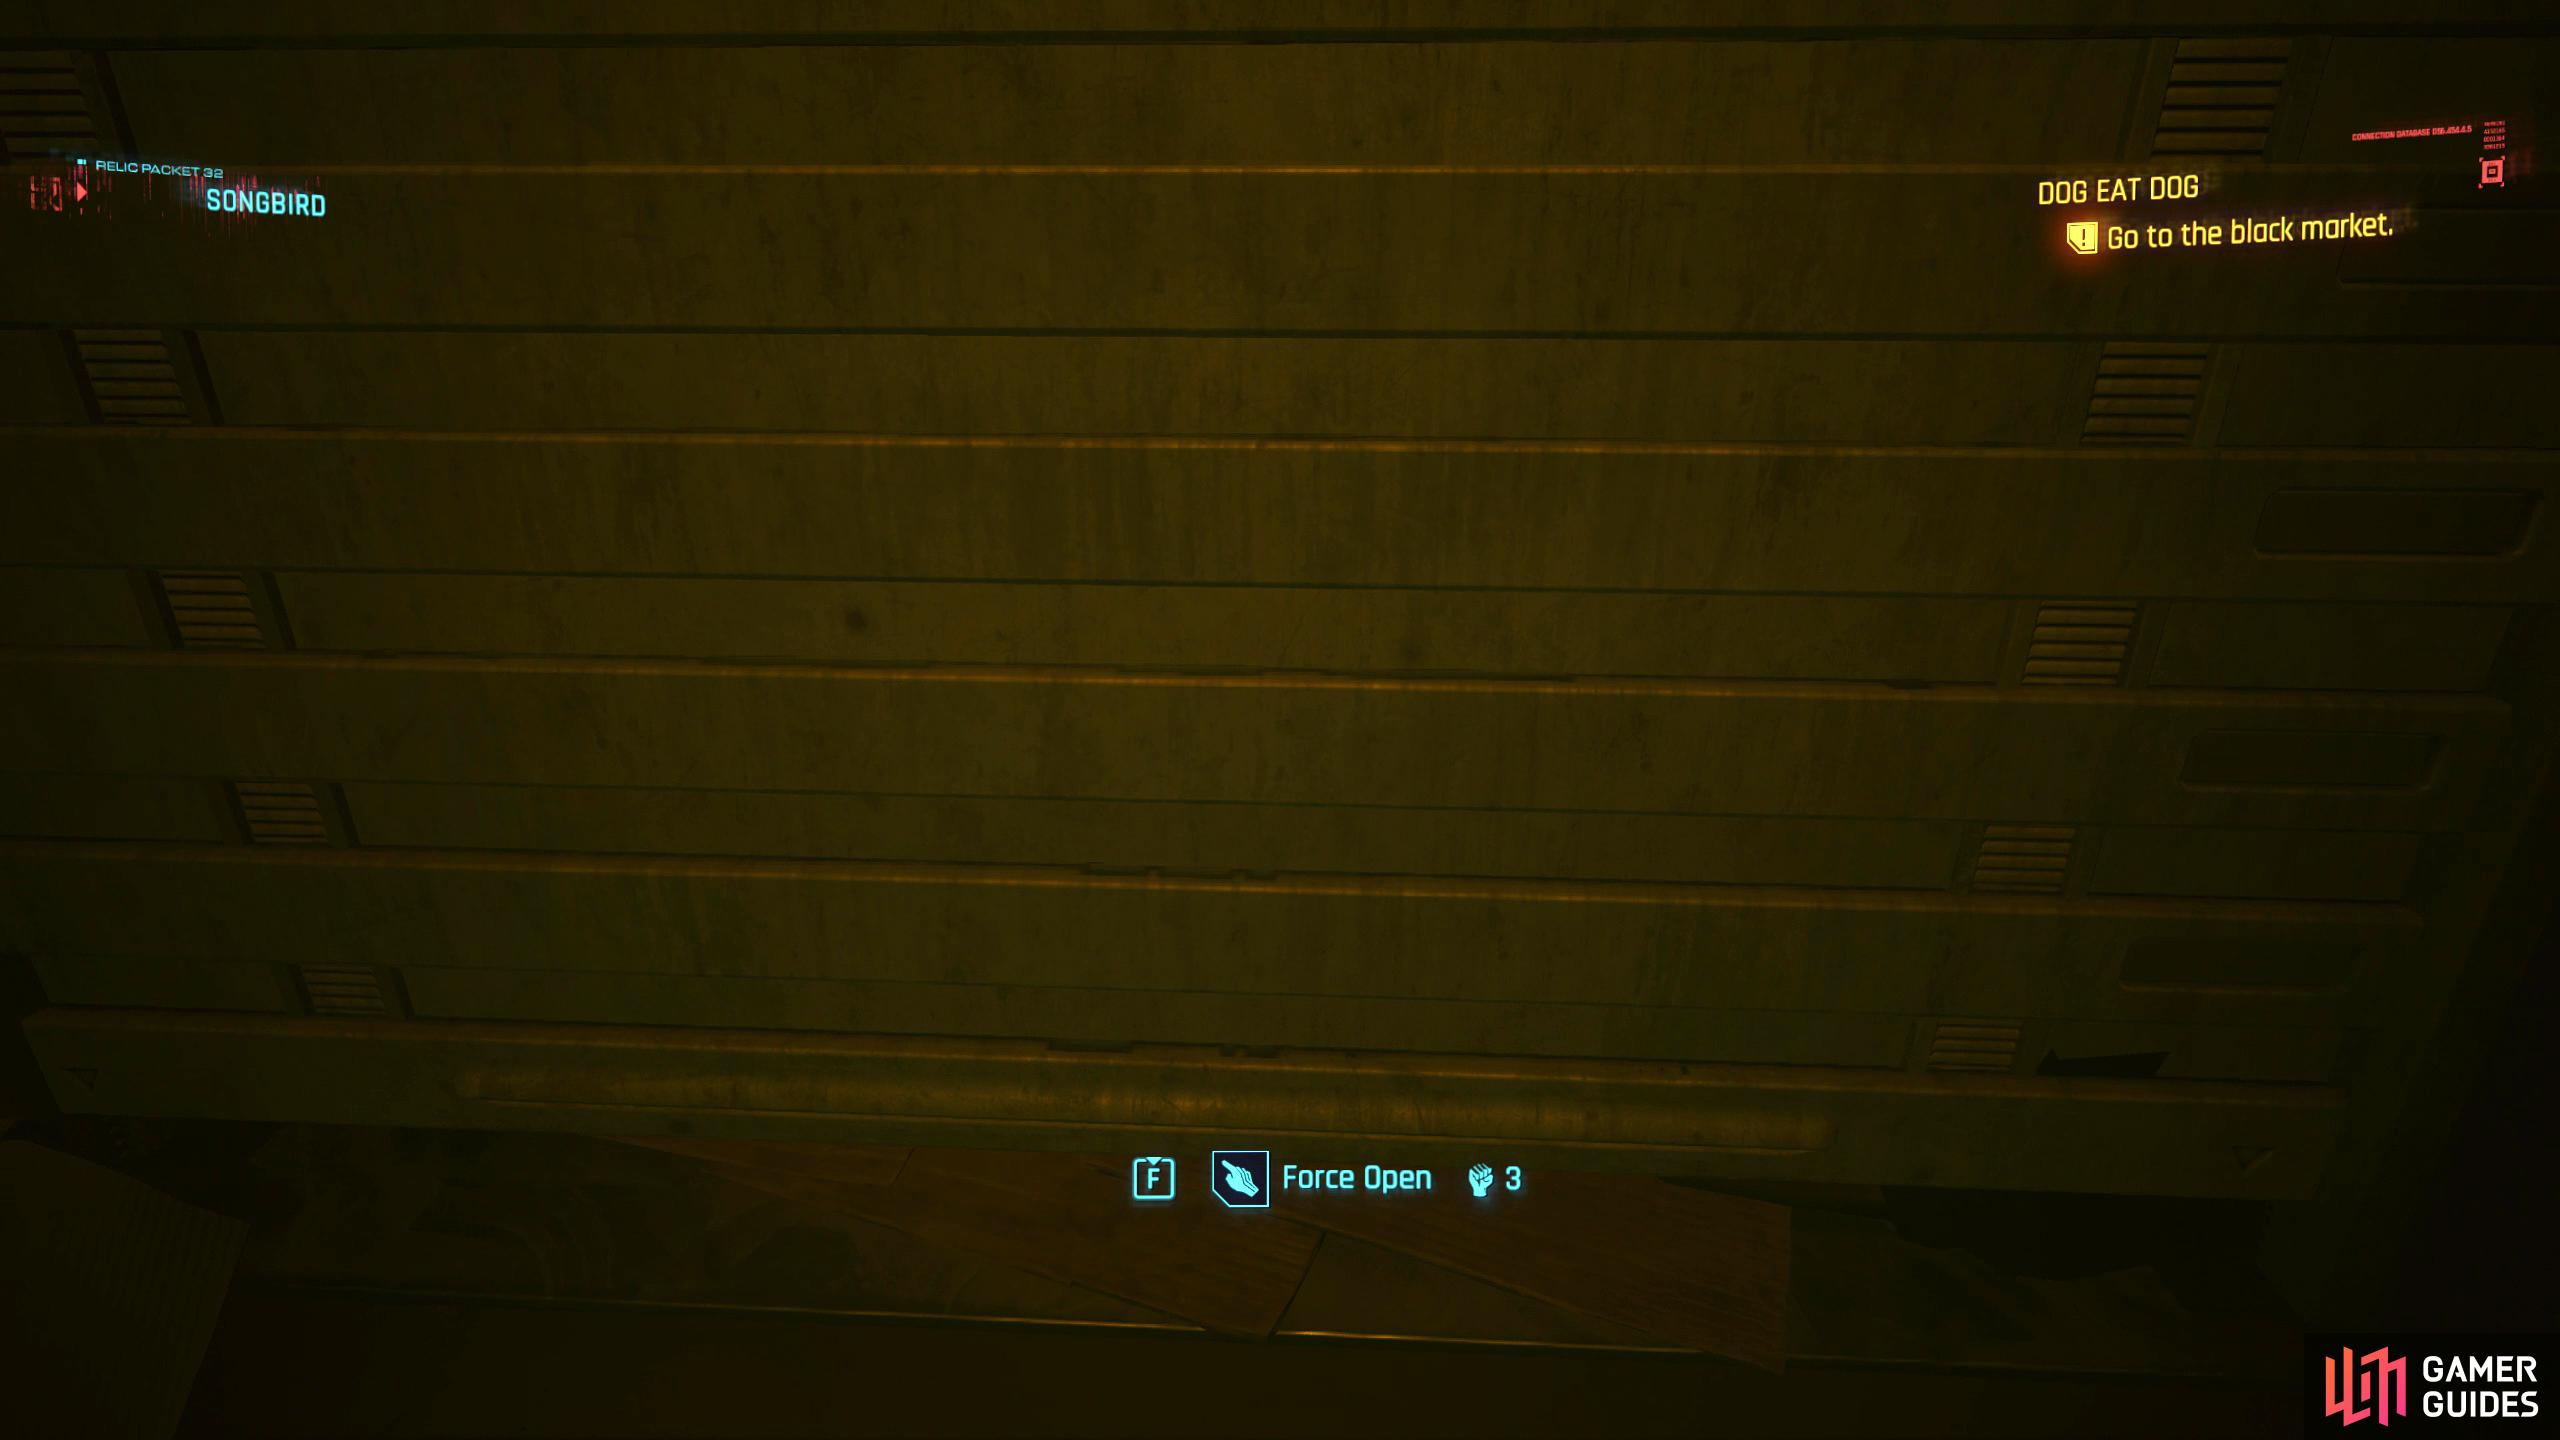
Now, you can go left (the right way), or if you have 6 Body, force open the door to the right. This room contains a bunch of loot and a computer at the front of the room where you can read some messages. Head back out, and go left of the ladder where you’ll find a closed door until Songbird opens it for you. Follow the dimly lit hallway, and head out the other side into a large open room. Continue forward while staying to the left, and you’ll find a crawlspace to your right indicated with a small red light.
Follow this through to find some loot then climb up the ramp to the right. There’s nothing in this room other than a computer you can search for some lore. When you’re ready, head toward the objective while picking up the shard to your right, then head in the elevator. As you approach the elevator, you’ll have a quick response to make, select the bottom option if you’re a badass, otherwise pick the top option to find out more about Kurt Hansen who’s an important character in Phantom Liberty.
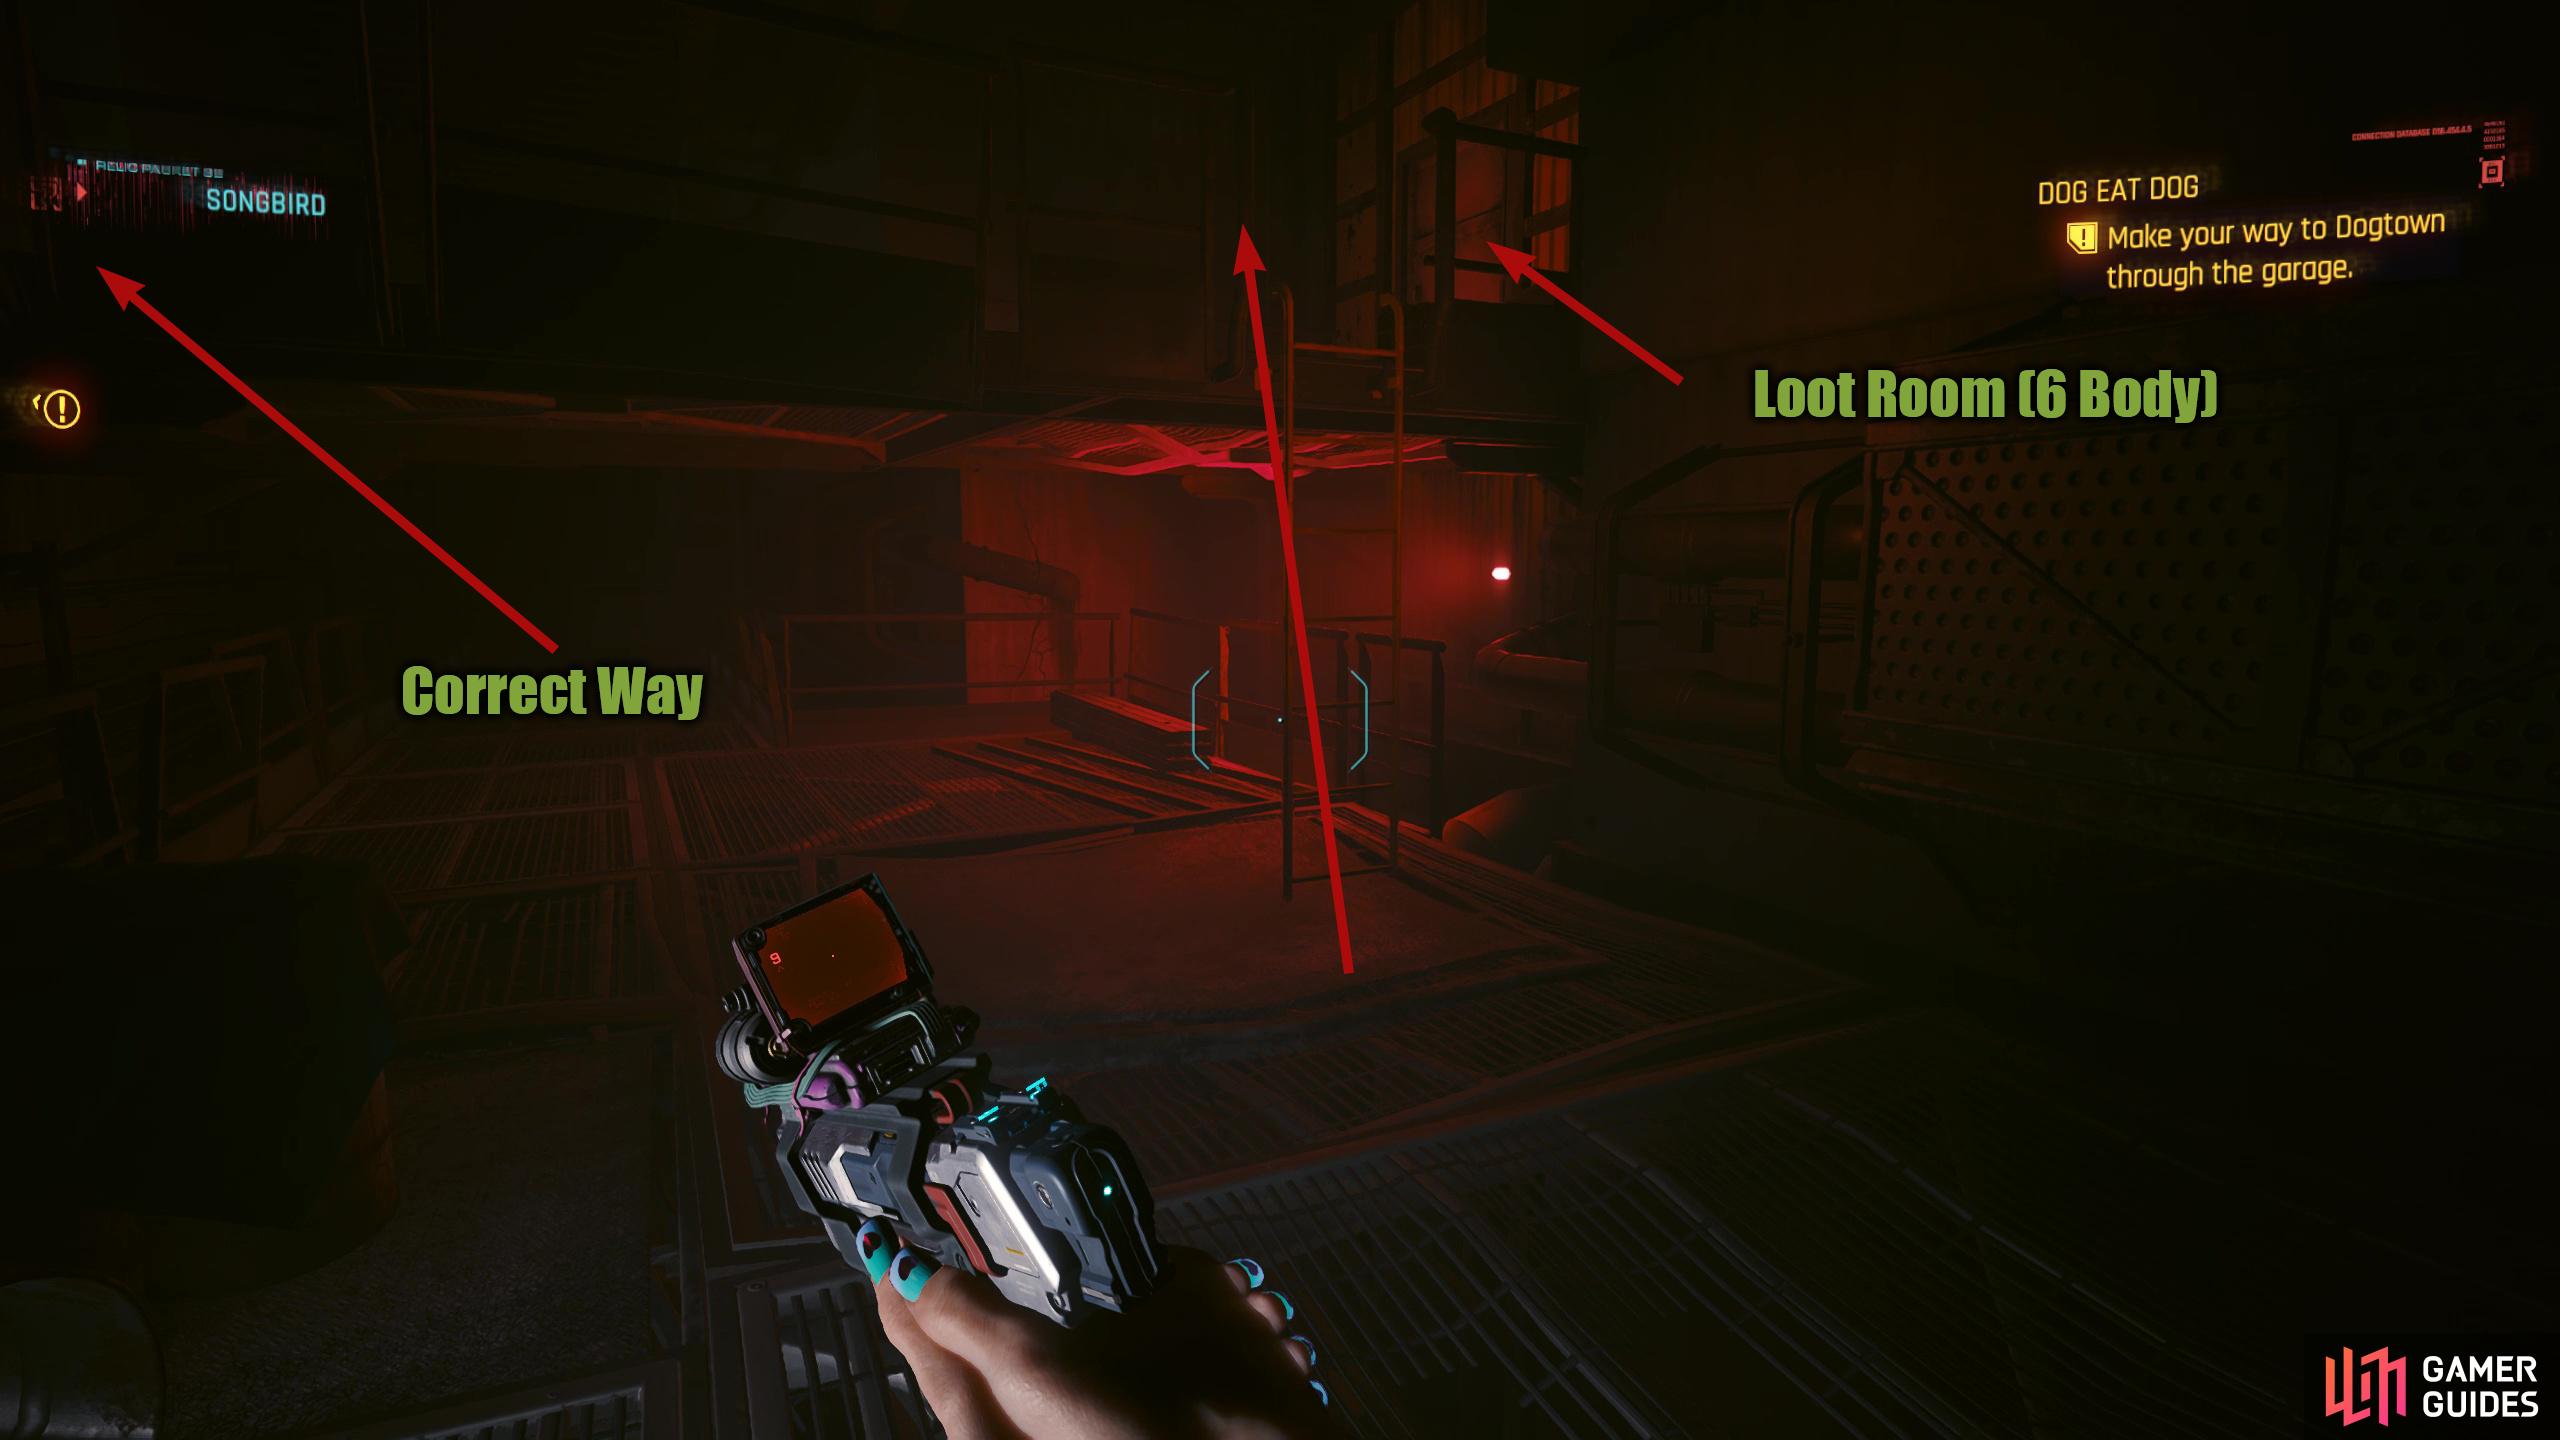
(1 of 3) Go up the ladder at the end of the catwalk, and either enter the door on the right (6 Body) or progress further by heading left.
Go to the Black Market
Hit the Stadium floor in the elevator and when it eventually reaches the top, exit it and head through the shutter to the right which requires 3 Body. Go through the doorway to your left and head right under the stairs to find a small hole leading to some more loot. Now, go up the stairs you just passed under, and head into the black market.
(1 of 8) When the elevator reaches the top, follow the path, and go under the shutter.
Go to the Construction Site
This is the black market, check out the shops if you want as there are some new items to purchase. Herold, the weapons merchant, has a few iconic weapons for sale if you need one. When you’re ready, head through the market toward the objective then head out to the balcony to talk to Songbird. After the conversation, make your way to the end of the strip, and exit via the doors. Here, you’ll see a bunch of containers, if you check inside the blue one, you’ll find some loot by the door.
Proceed forward, looting everything in your path, and go through the door at the end. In the next area, head up the two flights of stairs and drop to the left to find some loot and a terminal to hack for some extra loot. There is also a gate you can get through which requires Technical 9, but it’s just a shortcut (you can come through this way). When you’re done looting, climb back up, and head into the next area. At the end of the path, pick up the loot, and head up the ladder.
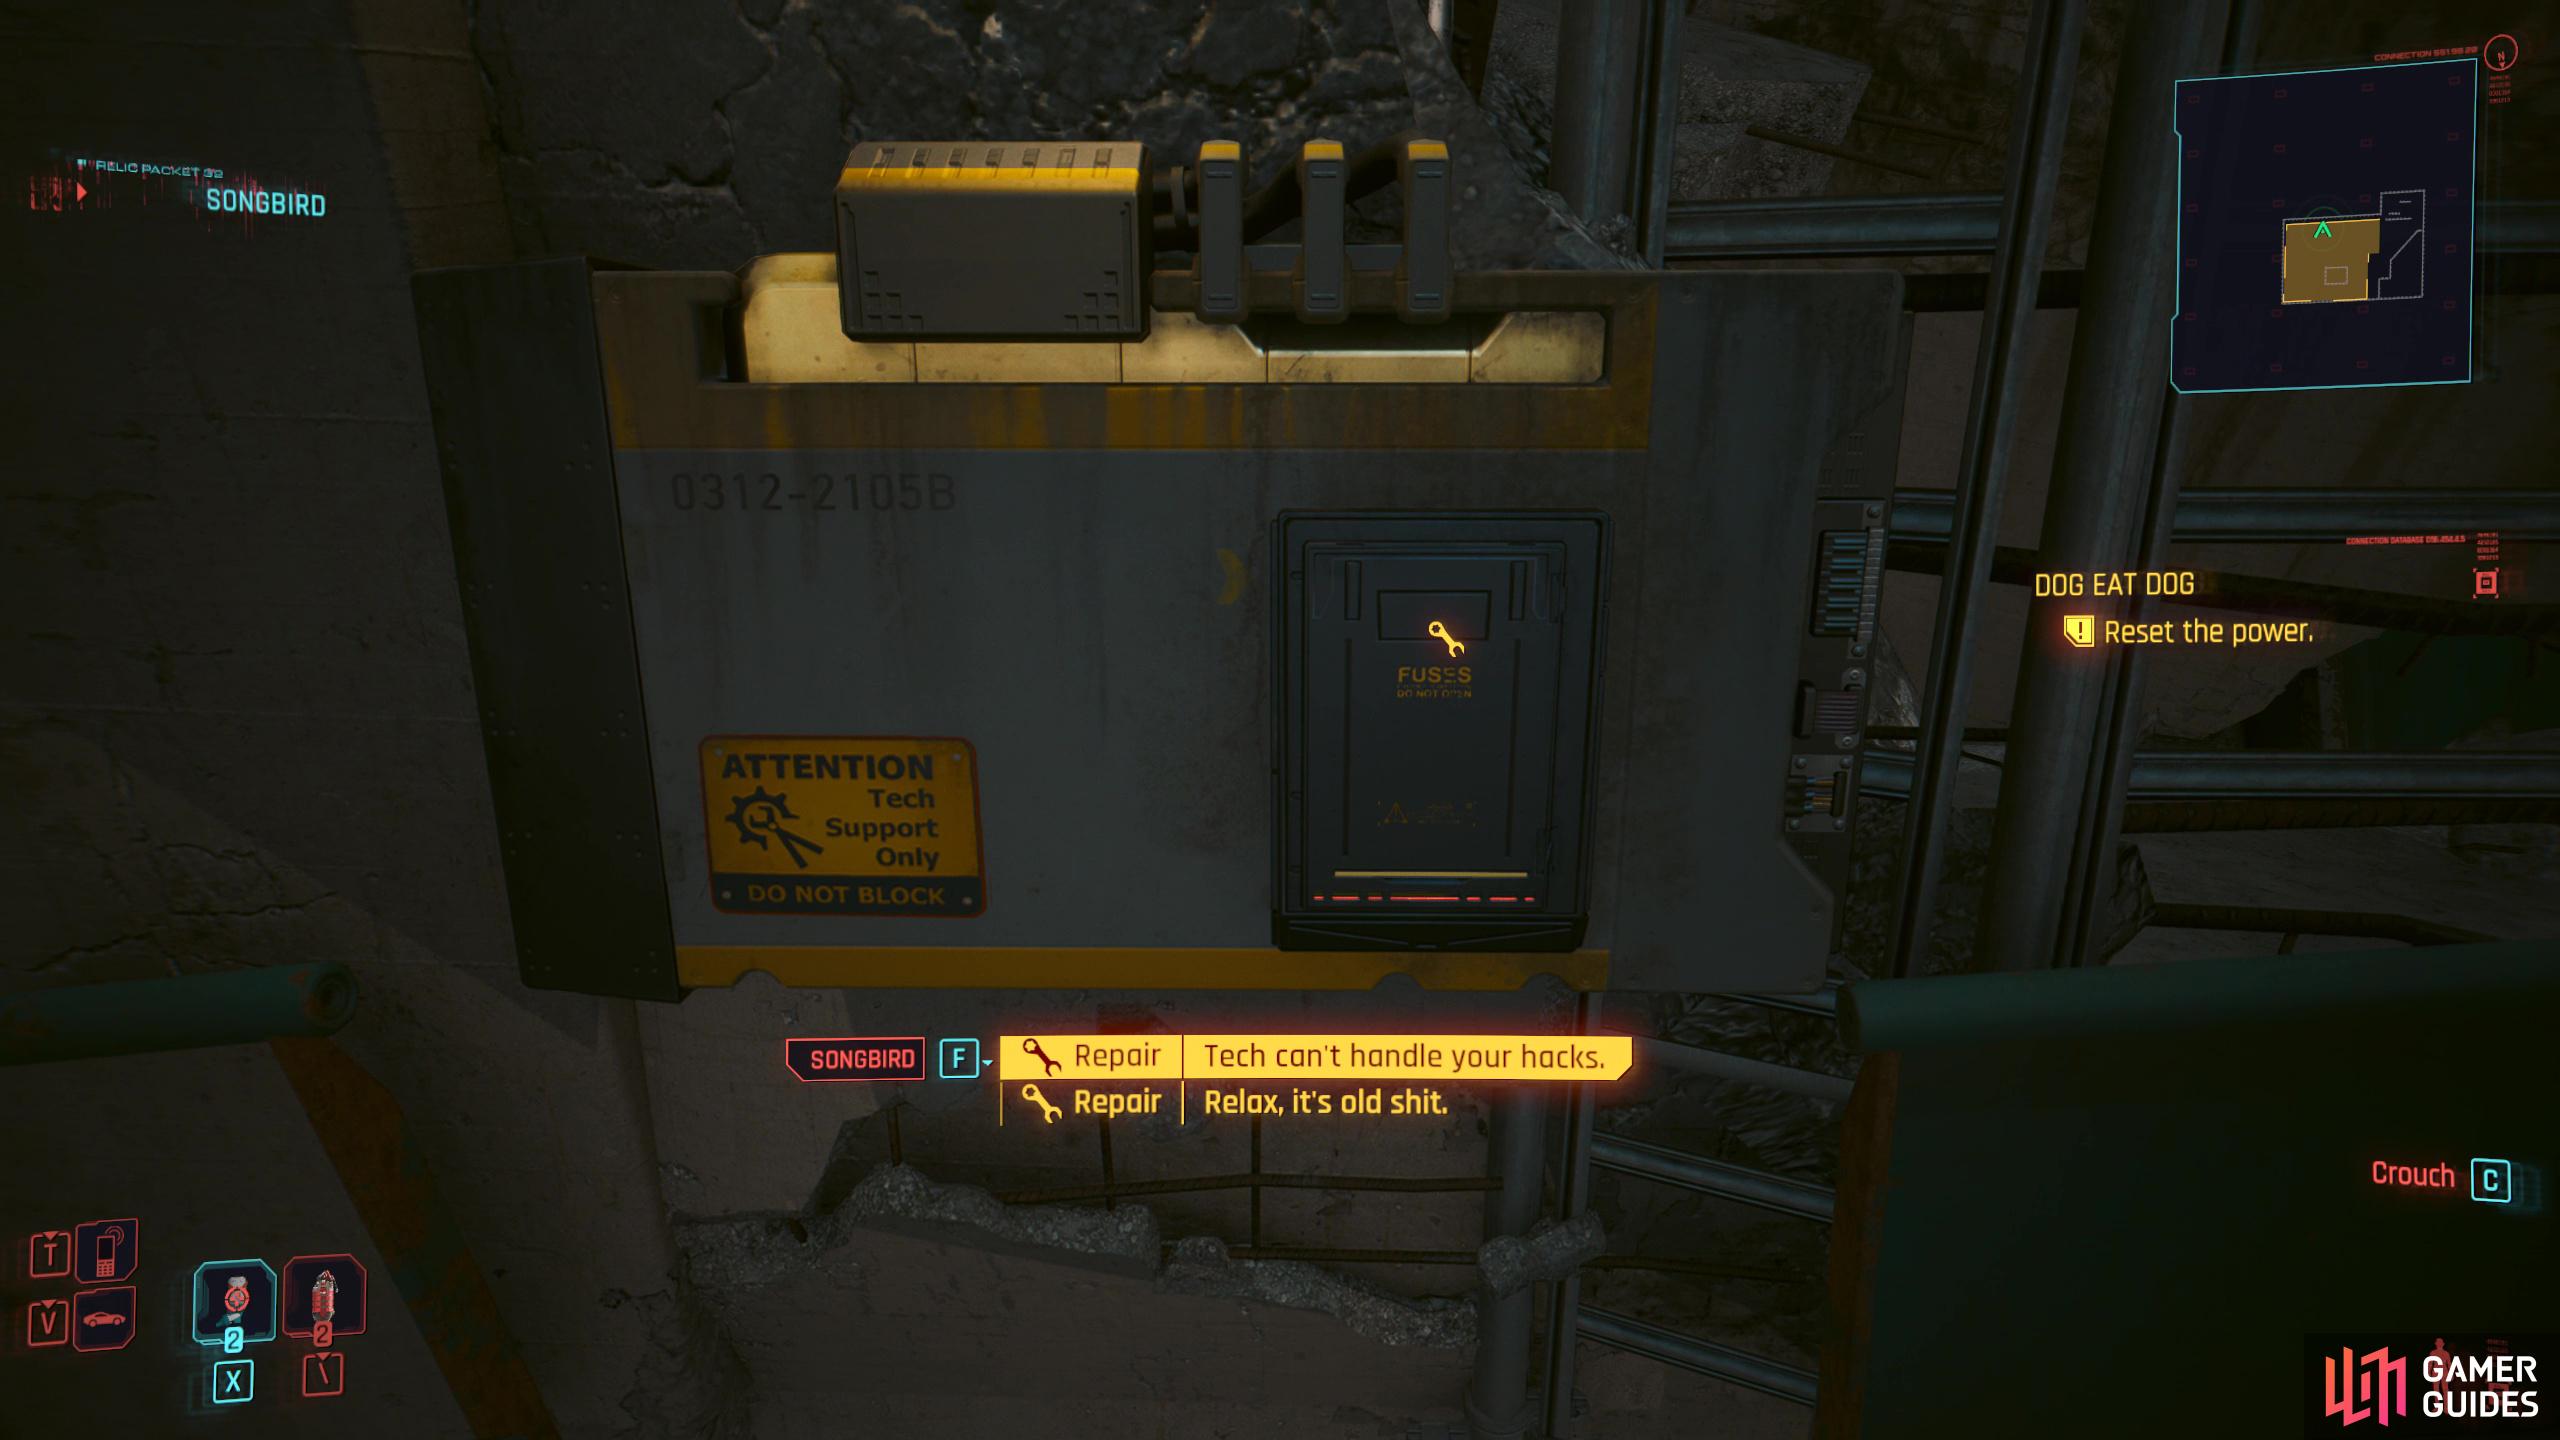
(1 of 6) Repair the fuse box to get the elevator working. You can find it to the left of the elevator.
Songbird will hack the elevator, but it’ll short-circuit, so you’ll need to reset the power. Fortunately, there is a fuse box to the left of it; repair it, jump on the elevator, and select the roof. Once the elevator reaches the roof, head left, and follow the path up. Make your way through the dilapidated building and jump across the small gap before heading up even further.
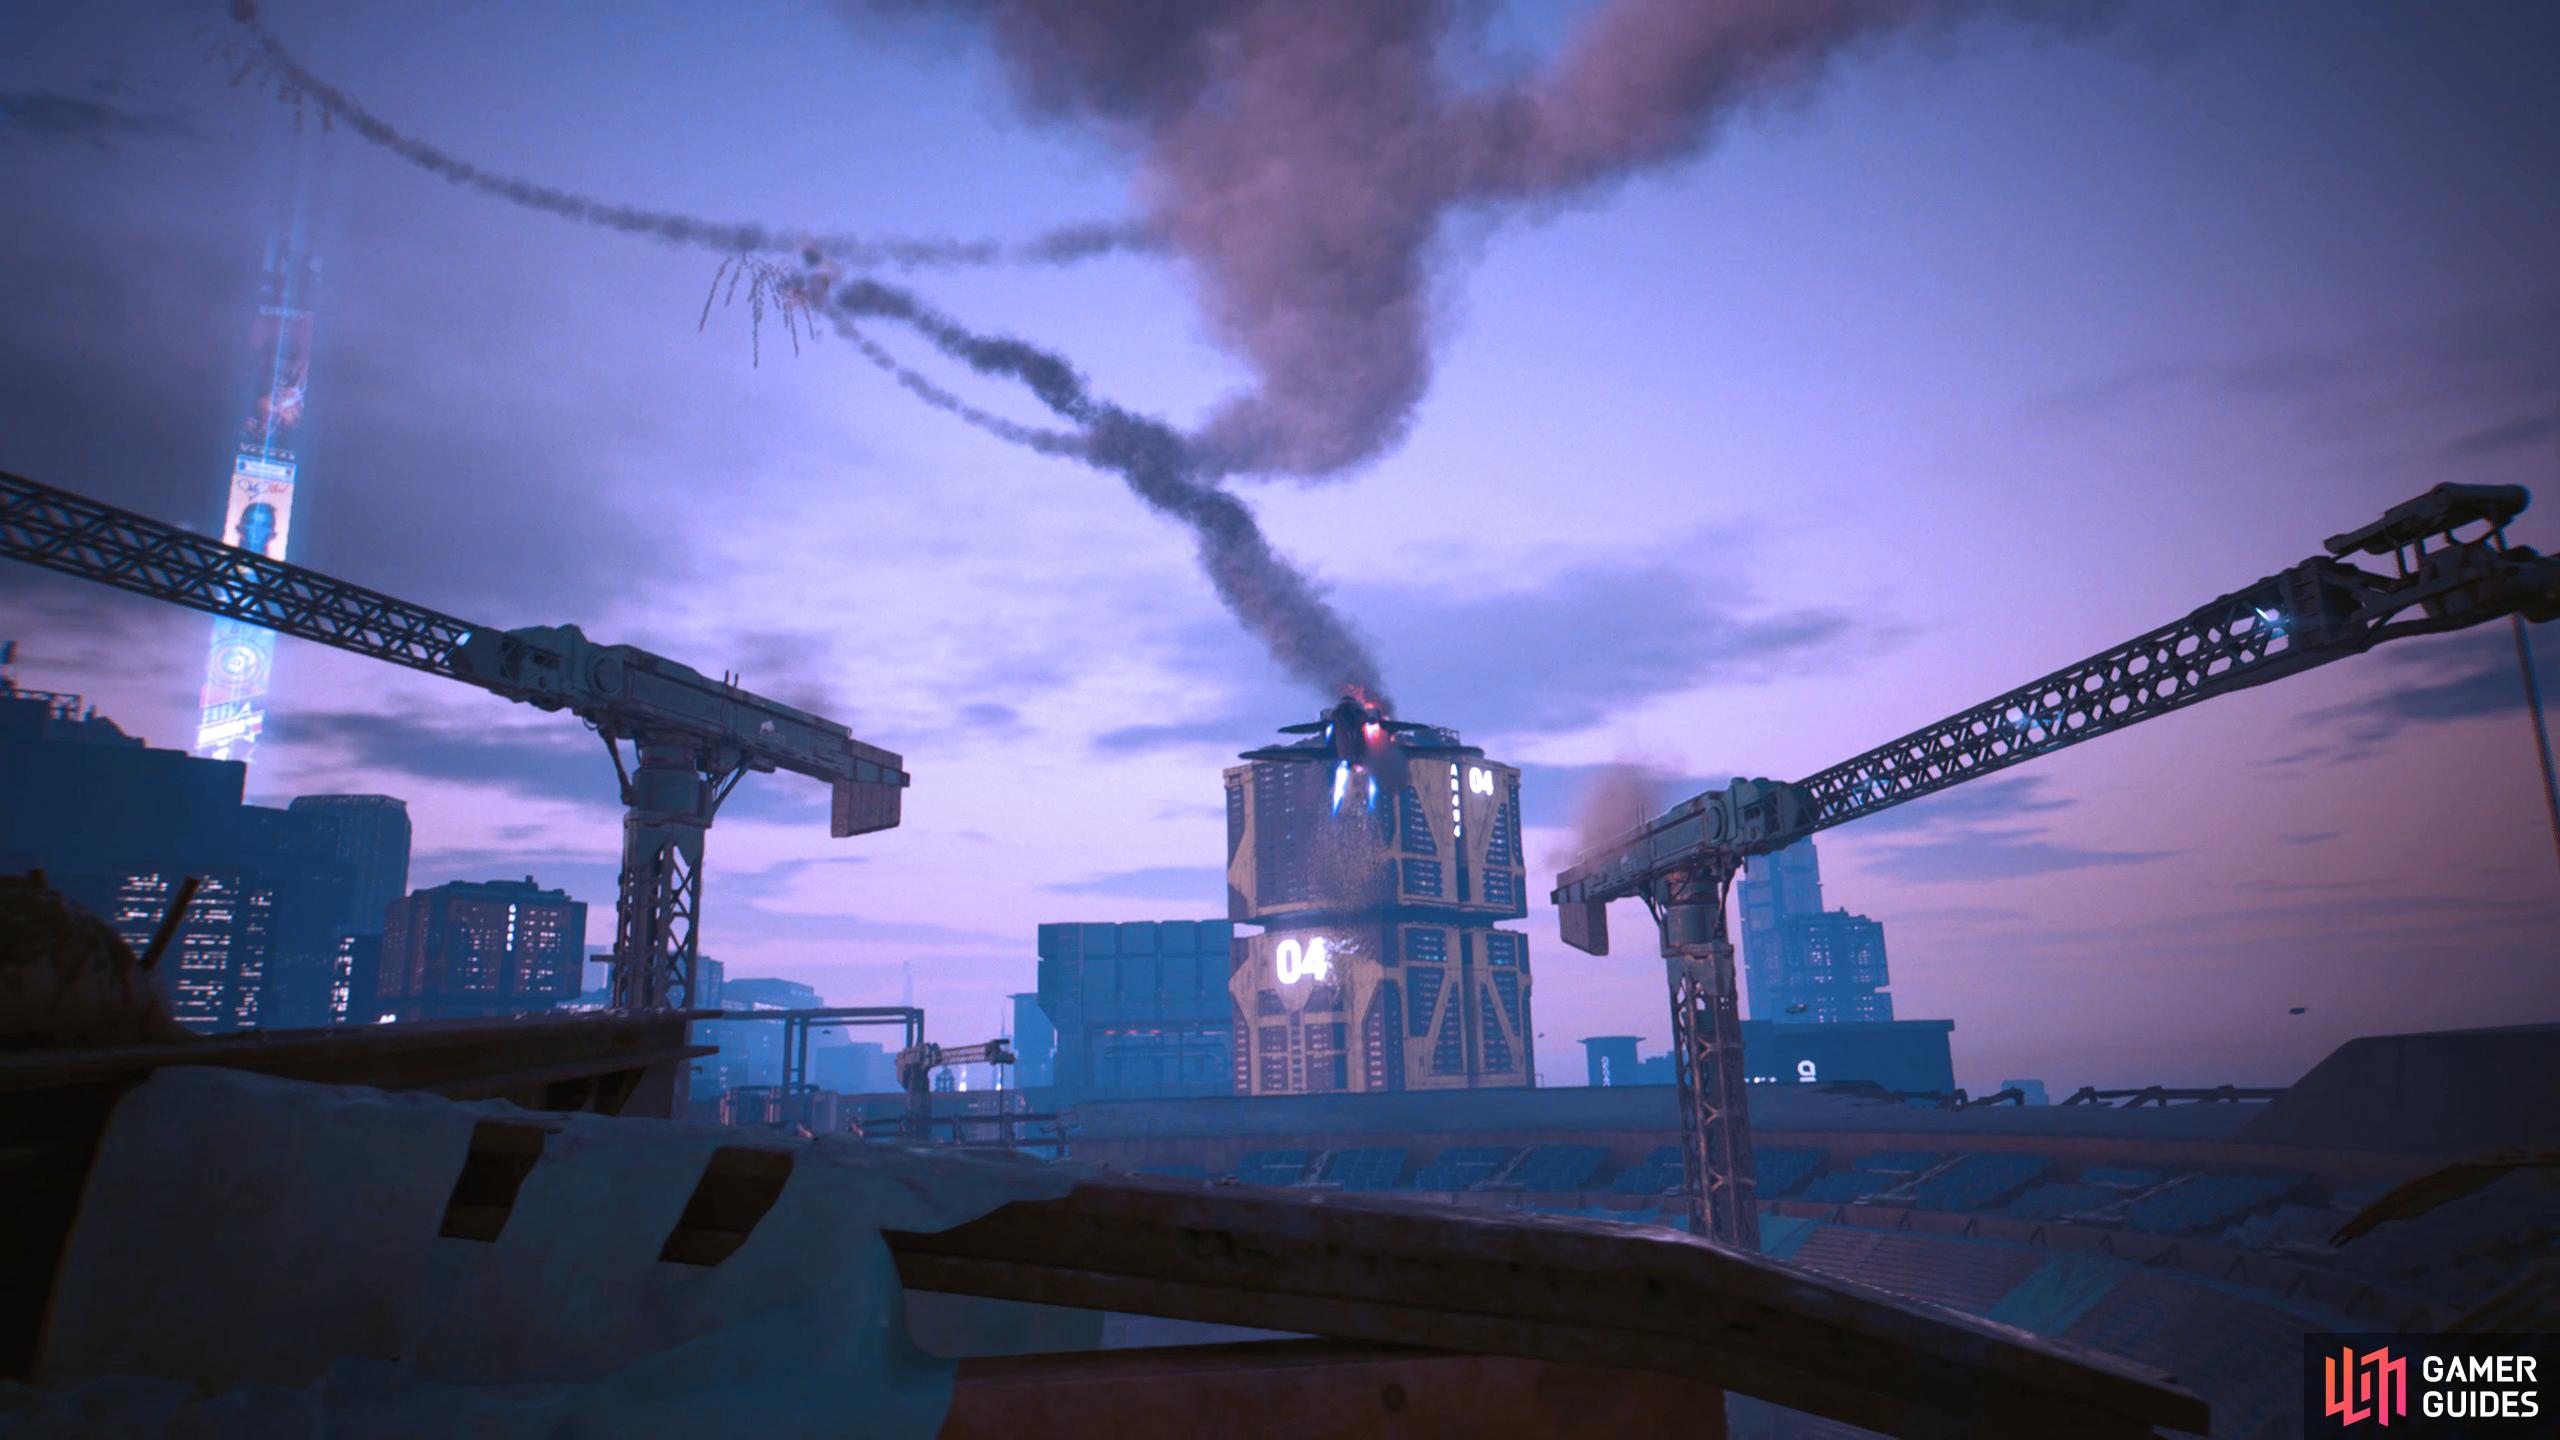
Eventually, you’ll reach the top, and Songbird will walk over to the edge of the building. She’ll point into the sky to show you the plane before missiles come from nowhere and take them down. Songbird will disappear, the plane will fly past you, and you’ll be knocked to the floor. When you get back to your feet, jump down the chute, and the mission will end.
No Comments