
Once you reach the later stages of Clive’s adventure in Final Fantasy 16, you’ll want to take on the challenging Chronolith Trials. The first of these (but you can complete them in any order), is The Hand of Hyperion, ![]() The Phoenix’s trial, and will require you to master
The Phoenix’s trial, and will require you to master ![]() Phoenix Shift and other abilities to complete it. This page will go over how to complete this Trial and obtain your reward.
Phoenix Shift and other abilities to complete it. This page will go over how to complete this Trial and obtain your reward.
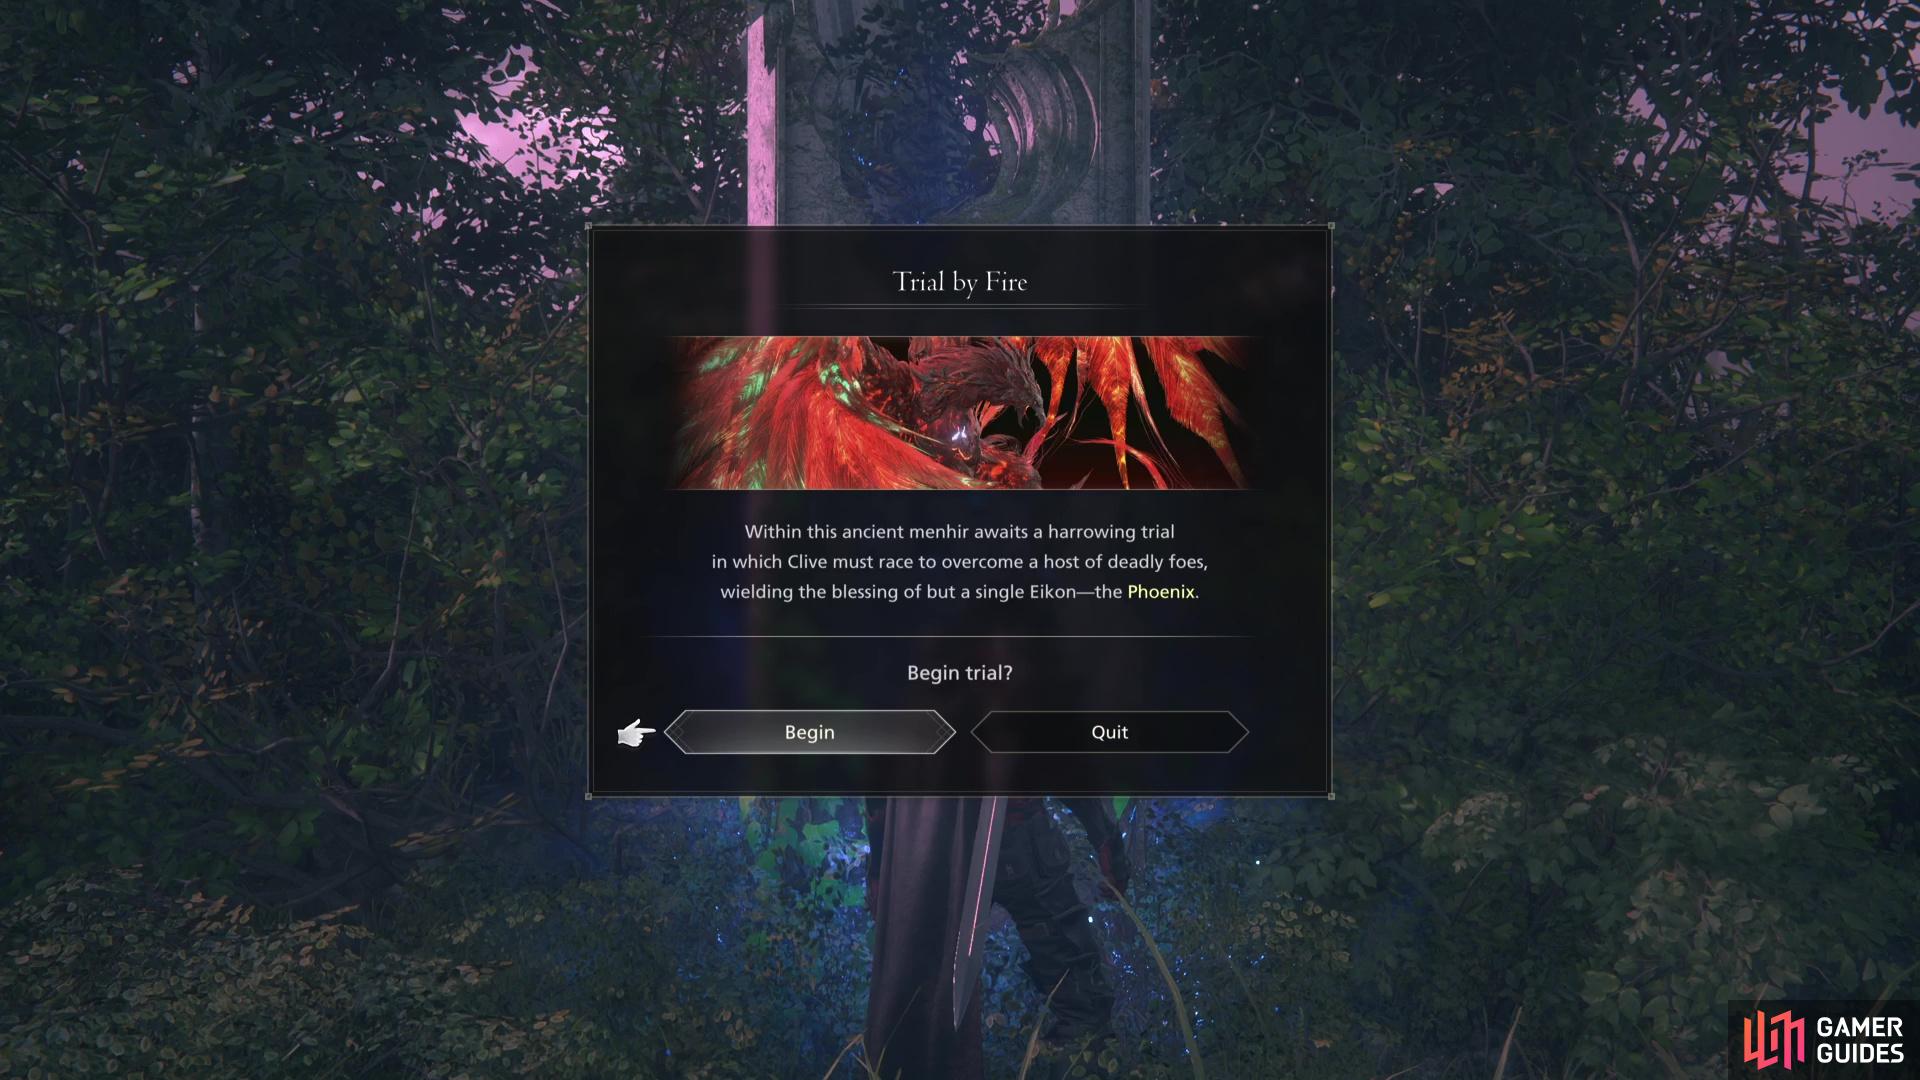
Trial by Fire is the Phoenix Chronolith Trial in Final Fantasy 16.
Where to Find The Hand of Hyperion Chronolith in FF16
The Chronolith you’re looking to find for the Phoenix trial is The Hand of Hyperion. Head to the Imperial Province of Rosaria and go to the ![]() Martha’s Rest
Martha’s Rest ![]() Obelisk. From here, make your way out of the north exit and into Greensheaves, then go east and as the path beging to thin, you’ll spot the Chronolith on your right.
Obelisk. From here, make your way out of the north exit and into Greensheaves, then go east and as the path beging to thin, you’ll spot the Chronolith on your right.
As always, be sure to make sure you save your game and prepare fully before accessing the trial; you won’t be able to learn/unlearn any abilities once the trial begins but you will be able to change your equipment.
Phoenix Chronolith Trial Preparation
As with all of the Chronolith Trials, you’ll want to make sure you’re fully prepared before entering, and there are a few common preparations across all of the trials. To begin with, you’ll have a much easier time if you progress the Main Quest to the final one where all of the final Side Quests open up.
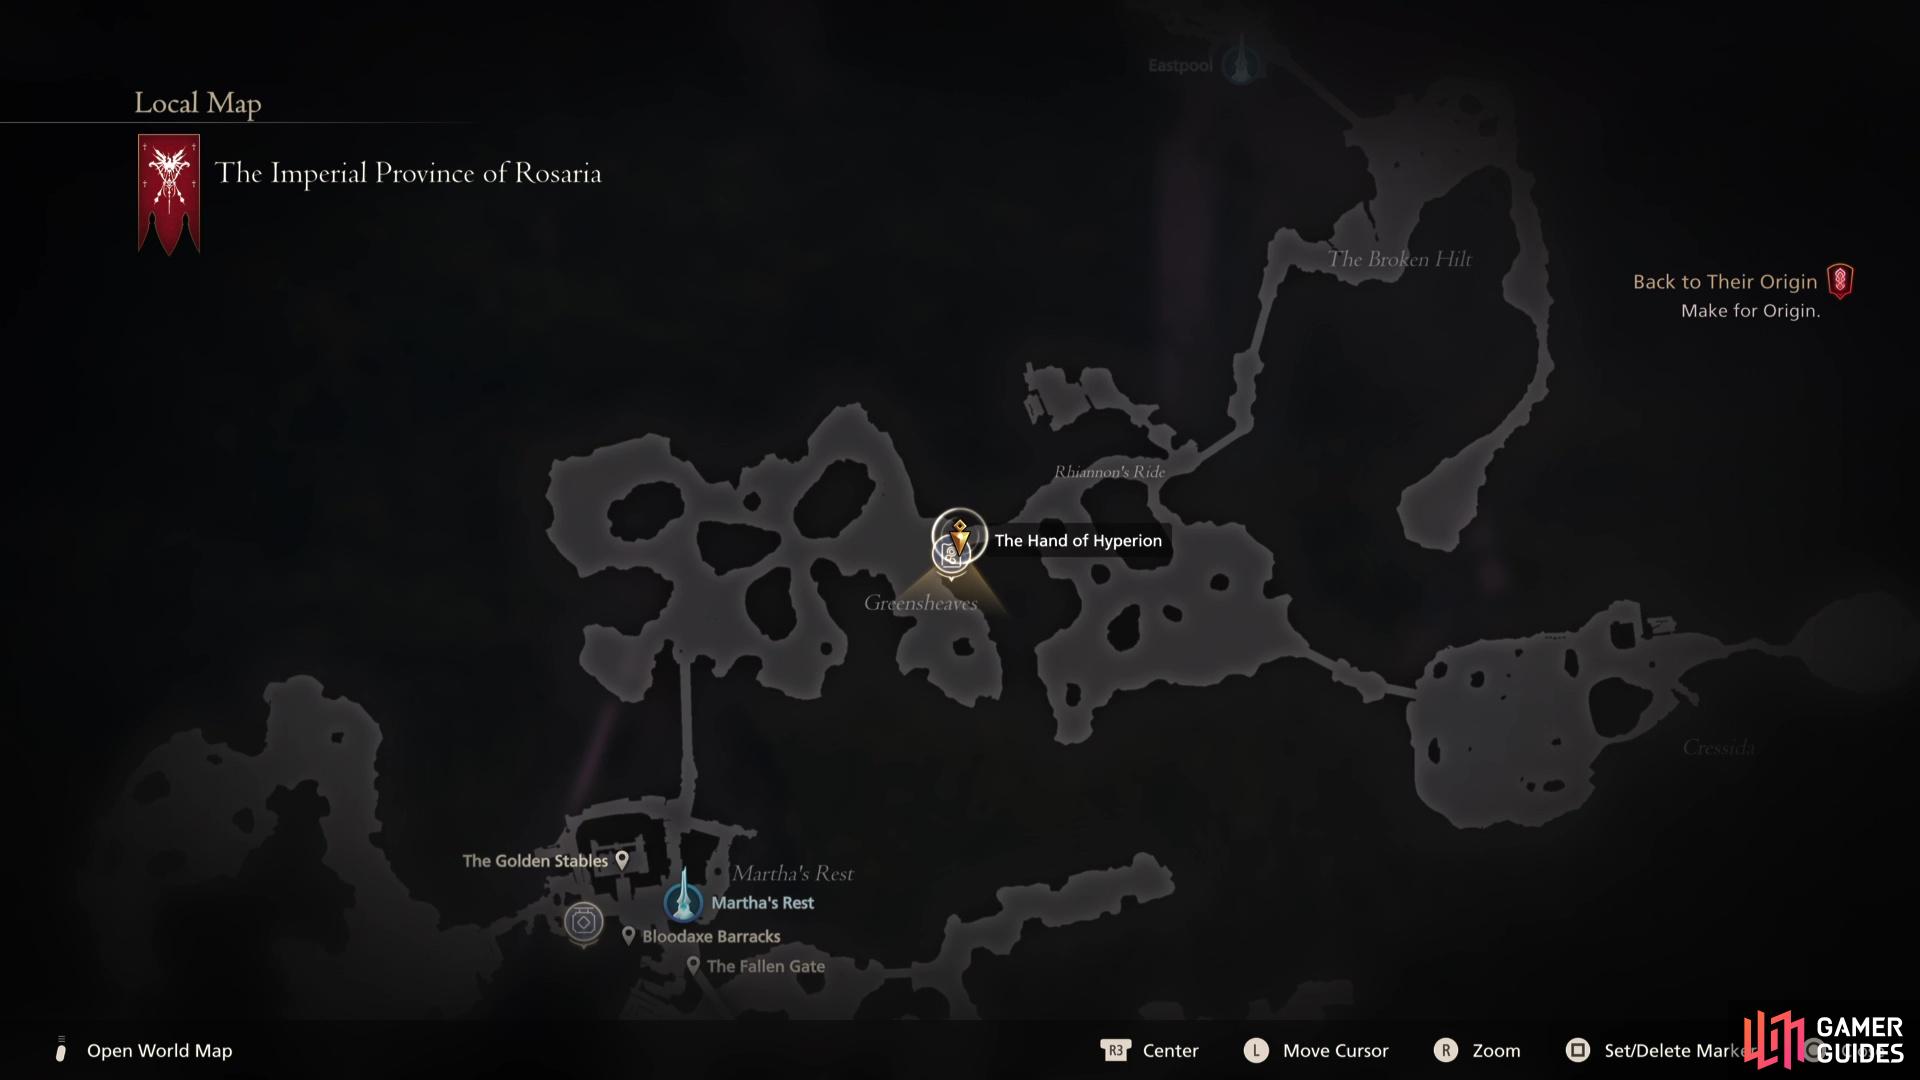
Head to the Greensheaves in Rosaria to find the Chronolith
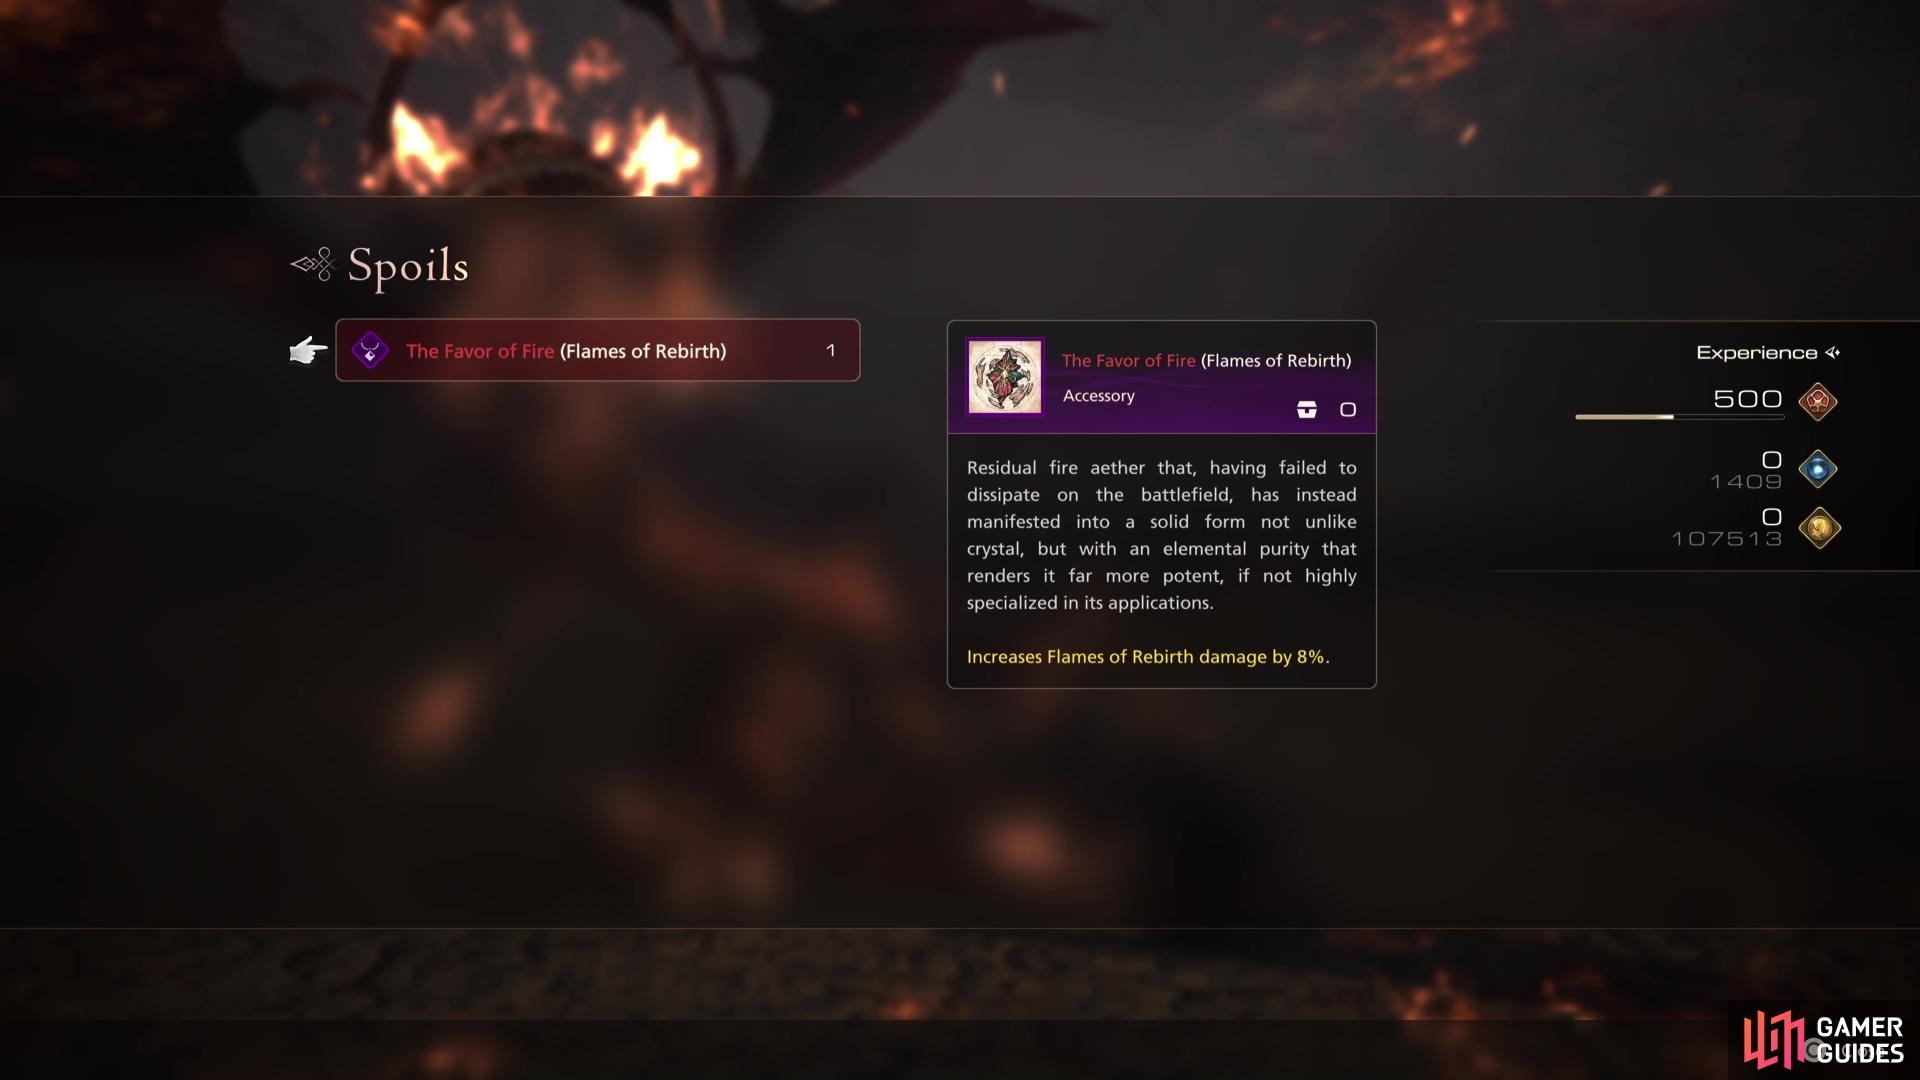
you will obtain a powerful accessory for completing the trial.
Equipment
With this step done, you’ll be able to complete Blacksmith’s Blues IV and obtain the recipe for the Gotterdammerung, the most powerful weapon in Final Fantasy XVI (at least for your first playthrough). You’ll also be able to get your hands on all of the accessories that you should equip for each of these trials. With that in mind, we suggest the following equipment loadout:
| Name | Slot | Description | Location |
|---|---|---|---|
| Weapon | +375 Attack + Stagger | Complete the Blacksmith’s Blues IV Side Quest to obtain the recipe and then craft it. | |
| Belt | +95 Defense, +32 HP | Crafted from the recipe obtained from the Blacksmith’s Blues III Side Quest. | |
| Vambraces | +94 Defense, +50 HP | Reward for completing the Where There’s a Will Side Quest. | |
| Accessory 1 | Increases attack and alters |
Reward for 85 Renown at the Patron of Whispers. | |
| Stage Ability Accessory | Accessory 2 | – | Multiple |
| Stage Ability Accessory | Accessory 3 | – | Multiple |
As mentioned above, having the Gotterdammerung will make life a lot easier, as will having the best armor. For your Vambraces, you can opt for ![]() The Sons of Ouroboros instead; the difference is slightly more Defense at the expense of more HP.
The Sons of Ouroboros instead; the difference is slightly more Defense at the expense of more HP.
The ![]() Berserker Ring is a fantastic Accessory that alters and powers up your Precision Dodge, but if you don’t like the animation, opt for the Genji Gloves instead as they offer a flat 5% damage increase to all damage Clive outputs.
Berserker Ring is a fantastic Accessory that alters and powers up your Precision Dodge, but if you don’t like the animation, opt for the Genji Gloves instead as they offer a flat 5% damage increase to all damage Clive outputs.
The final two Accessories should be rotated around to the abilities you have access to for each stage, as this will make life a lot easier to complete some of the Battle Techniques and increase your time. You can find a list of Phoenix accessories in the table below:
Phoenix Accessories List
| Name | Description | Location |
|---|---|---|
| Increases |
Chest during the Headwind Main Quest | |
| Increases |
Chest during the Headwind Main Quest | |
| Increases |
Dropped from the boss in the Headwind Main Quest | |
| Reduces Heatwave’s cooldown time by 2.7 seconds | Purchased at the Hideaway during the Righting Wrongs Main Quest | |
| Reduces |
Dropped from the boss in the !Crystal’s Curse Main Quest | |
| Reduces |
Reward for completing The Weight of Command Side Quest | |
| The Breath of Fire (Scarlet Cyclone) | Reduces |
Reward for completing the Trading Places II Side Quest |
| The Favor of Fire (Flames of Rebirth) | Increases |
Reward for completing the Phoenix Chronolith Trial |
Stage 1 Walkthrough

Stage 1 will give you the Rising Flames and Scarlet Cyclone abilities.
| Ability | Suggested Accessory |
|---|---|
When it comes to the Chronolith Trials, Stage 1 is where you should be looking to build up the majority of your time bonuses, since you’ll be facing the easiest enemies. Be sure you equip the two suggested accessories above before you begin.
When it comes to the Battle Technique Bonuses for Phoenix, Double Shift is perhaps the toughest as it requires you to make use of Shift Shots on aerial enemies at least twice, an attack that most players won’t use too much. Beyond this, the other bonuses shouldn’t be too much trouble to achieve during each of the stages.
Shift Combo is the simplest of the lot: simply use Phoenix Shift and follow it up with a regular four-hit combo. A Precision Dodge should come naturally as you play through the stage and avoid any attacking enemies. Whereas Ability Finish and Multi Burst just requires you to finish an enemy off with an Eikonic Ability and use 10 ![]() Magic Bursts respectively.
Magic Bursts respectively.
Rising Finish can be a tricky Battle Technique Bonus to pull off, depending on the enemy. You’ll need to use Rising Flames on an enemy and then finish them off while they’re in the air, this is obviously a lot easier to perform against the lesser enemies. Collateral Cyclone, on the other hand, is much simpler as you just need to make sure you hit at least two enemies when you use the ability.
Stage 1-1
This stage begins with a wave of Firebound ![]() Orcs, simple enemies that should cause little trouble to you. Begin the battle by using Phoenix Shift followed by a four-hit combo and then use Scarlet Cyclone when you’re in the middle of them. That should be pretty much that when it comes to defeating them and you should lose no HP here.
Orcs, simple enemies that should cause little trouble to you. Begin the battle by using Phoenix Shift followed by a four-hit combo and then use Scarlet Cyclone when you’re in the middle of them. That should be pretty much that when it comes to defeating them and you should lose no HP here.

Use !Phoenix Shift followed by a combo for a time bonus

the Wivre is a difficult enemy to dodge.
Stage 1-2
The second part of Stage 1 is against a group of Firebound ![]() Scorpions and two Firebound
Scorpions and two Firebound ![]() Vultures. This doesn’t play out too differently from the previous part, but you’ll want to ensure you deal with those Vultures first as they will attack you off-screen and drain your HP a little. Once again, Scarlet Cyclone is great here as you’ll find the wave grouped up early on.
Vultures. This doesn’t play out too differently from the previous part, but you’ll want to ensure you deal with those Vultures first as they will attack you off-screen and drain your HP a little. Once again, Scarlet Cyclone is great here as you’ll find the wave grouped up early on.
Stage 1-3
The final part of Stage 1 is up against a Firebound Wivre, an Elite enemy with a Stagger gauge. Wivres do attack fast, so keep that in mind and look to bait Precision Dodges where possible. If you’ve managed to save up some ![]() Limit Break ahead of this battle, be sure to use it once you Stagger the Wivre to get this stage over a lot quicker. Outside of this, the Wivre shouldn’t cause you too many problems so look to try and prevent getting hit in this battle.
Limit Break ahead of this battle, be sure to use it once you Stagger the Wivre to get this stage over a lot quicker. Outside of this, the Wivre shouldn’t cause you too many problems so look to try and prevent getting hit in this battle.
Stage 2 Walkthrough

You will gain the Heatwave ability for Stage 2.
| Ability | Suggested Accessory |
|---|---|
You’ll come across more Elite enemies in Stage 2, so the possibility of getting hit more increases and you’ll need to start making more effective use of your Limit Break. You will lose Rising Flames for this Stage, but gain Heatwave in its place; this is effective for its ability to counter projectiles.
As for the Battle Technique Bonuses, there’s only one new one for you to consider - Heatwave Counter. To achieve this bonus, you will need to perform said counter, done by using the ability just in front of a projectile. This will dispel it and shoot back four slashes at your target.
Stage 2-1
This is one of the toughest parts of the Phoenix Trial - the Firebound Guardian is always a challenging encounter whenever you come up against its enemy type. Focus on dealing with the Firebound Hunters first but keep an eye on the Guardian as it will lunge and shoot orbs at you in the process.
You will have many Guardians throughout your adventure, but check out our Hunt strategy on Severian to learn more about the attacks you can expect from the Firebound Guardian. Do make sure you score a Heatwave Counter whenever it uses its Thunder Balls to obtain the bonus and deal heavy Stagger damage to it.
This is one of the few battles in the Trial where you may lose the most of your HP from, so don’t be shy to use Limit Break to restore some HP if needed.
Stage 2-2
A simple part after the challenging first: you’re up against a group of Firebound Crabs accompanied by three Firebound Nodes. The Crabs should pose little threat, and Scarlet Cyclone should deal with them but the Nodes can catch you out if you’re not careful. They’ll let out electrical bursts if left alone which can catch you off-guard and deal precious damage.

Stage 2-3
The final part of Stage 2 is another challenging one up against two Firebound ![]() Hornets and a Firebound Cannonier. The Hornets should go down quickly, and are perfect for the Double Shift Battle Technique Bonus, but the Cannonier is a tricky customer.
Hornets and a Firebound Cannonier. The Hornets should go down quickly, and are perfect for the Double Shift Battle Technique Bonus, but the Cannonier is a tricky customer.
You’ll have faced one before in the Main Quest during the Crystal’s Curse and he maintains many of his attacks here. Keep locked on at all times, and look to use Precision Dodge to create openings for yourself. It’s better to save your Eikonic Abilities for when you Stagger it so that you hopefully deal with it in one phase and move on.
Stage 3 Walkthrough

Stage 3 adds the powerful Flames of Rebirth.
| Ability | Suggested Accessory |
|---|---|
Stage 3 gives you many challenging encounters and more dangers on how your HP can be depleted. If you’re hurting from the previous battle, don’t be afraid to start Stage 3 with a Limit Break and look to recover some of it. You’ll lose Scarlet Cyclone for this Stage, but in its place you’ll obtain the powerful Flames of Rebirth, another attack that can restore some precious HP.
Once again, there’s only one new Battle Technique Bonus for you to worry about, and it’s simple to achieve. Flames of Punishment simply requires you to ensure you hit at least two enemies when using Flames of Rebirth and with it’s large Area-of-Effect (AoE), it’s difficult to avoid hitting more than one.
Stage 3-1
The first part of Stage 3 is a group of Firebound Bugs and a tricky Firebound Mousse. Begin the encounter by using Phoenix Shift into the middle of the group and then use Flames of Rebirth; this should leave you with just the Mousse to contend with while also restoring some HP.
Like the Flan Prince Hunt, it uses its bendy arms to try and attack you, but this is also a great opportunity to use a Precision Dodge to create an opening. This Mousse will also use Firaga, which is perfect for you to use a Heatwave Counter against and drain that Stagger gauge.
Stage 3-2
This second part is a bit of a breather before the difficult final part, but don’t take it too casually. Despite there being no Elite enemies here, the Firebound ![]() Dragonets will launch fireballs at you from range and they will strike you while you’re attacking the Revenants so make the Dragonets your main focus. The rest of the enemies should fall easily once they’re out of the way.
Dragonets will launch fireballs at you from range and they will strike you while you’re attacking the Revenants so make the Dragonets your main focus. The rest of the enemies should fall easily once they’re out of the way.

Stage 3-3
Outside of the Final Stage, this is the most difficult part of the Phoenix Trial and where many runs go to die. Undertakers are tough enough on their own, but add a Lich to the battle and things become a bit chaotic. The first thing you should do though, is focus on that Lich.
Keep close to the Lich, use Precision Dodge where possible and use Flames of Rebirth from the start; this will deal a large chunk of damage to it and you can hopefully drive it to Stagger shortly after and finish it off. You’ll need to keep aware of your surroundings though as the Undertaker will continue to charge at you which will deal heavy damage if you’re caught in it.
Once you’re left alone with the Undertaker, if your time is in a good place (2:30+), you can play a bit more cautiously in the hopes of keeping more HP for the Final Stage.
Final Stage - Firebound Plague Strategy

The Final Stage is against a Firebound Plague.
| Ability | Suggested Accessory |
|---|---|
As with all Chronolith Trials, the Final Stage is a single boss battle without any possibility for more Battle Technique Bonuses. This means that the time you banked leading up to it is all you have and can make the difference between success and failure. You lose Heatwave from the previous stage and regain Rising Flames, a useful damage ability to have here.
When it comes to final bosses for Chronolith Trials, the Firebound Plague isn’t too tough an encounter, and possibly easier than some of the encounters in the earlier stages. You will have fought a few ![]() Ahriman by now, especially the Hunt earlier in the Main Quest and you can expect the same level and type of attacks here.
Ahriman by now, especially the Hunt earlier in the Main Quest and you can expect the same level and type of attacks here.
Be sure to begin with a Flames of Rebirth: it will deal massive damage to the Firebound Plague and if you have the cooldown accessory equipped, it should be available again come Stagger time. Be liberal with your usage of Rising Flames; there’s no sense in sitting on it with the time against you.
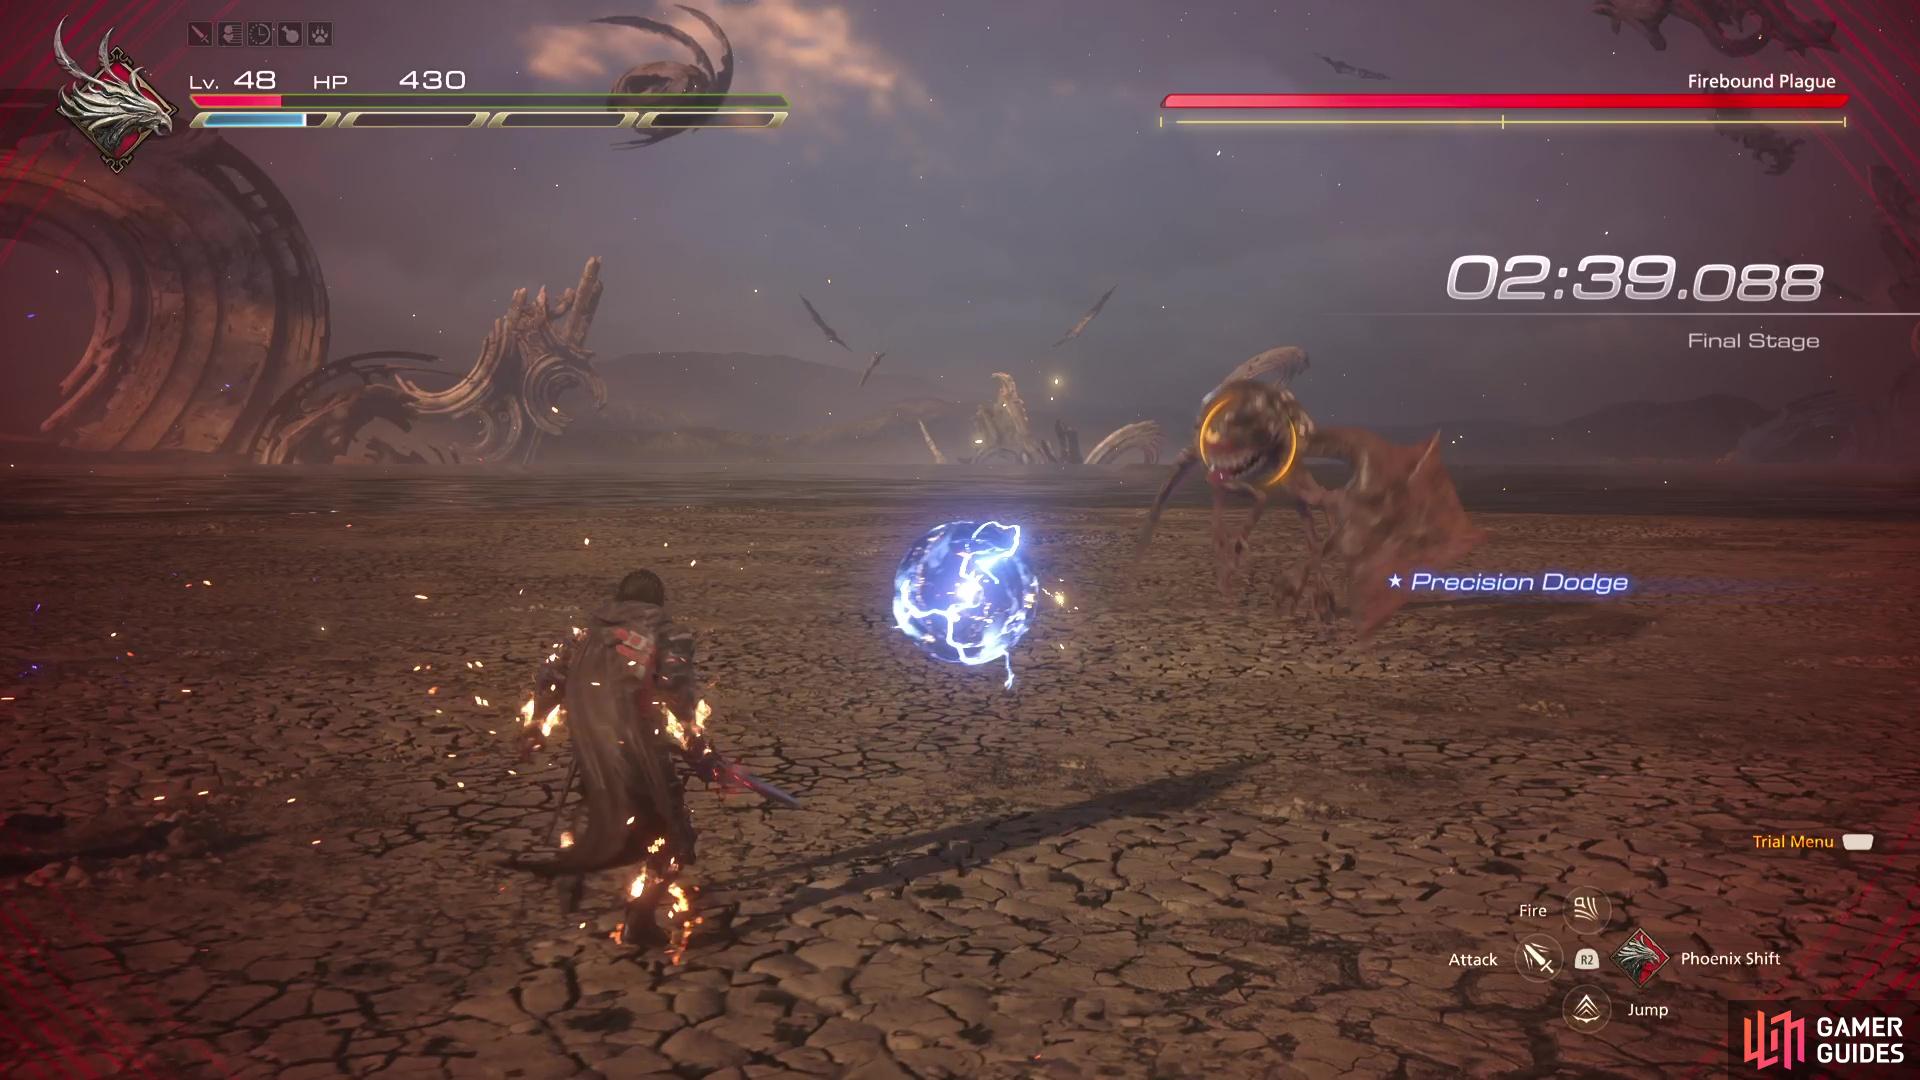
The signature attack for the Firebound Plague is Quake - this will see numerous orange marks appear on the ground that will then explode so keep an eye on your ground and then dodge away from them. Keep in mind that the Firebound Plague will be tossing electrical orbs at you while this attack is happening.
Defeating the Firebound Plague should take you around two Stagger phases, which you’ll only need around 1:50 in time if you’re aggressive enough. Once the Firebound Plague is finally defeated, you’ll complete the trial and obtain the The Favor of Fire (Flames of Rebirth), a powerful Accessory that increases the damage of it by 8%. You’ll also unlock The Final Trial by Fire at the ![]() Arete Stone in
Arete Stone in ![]() The Hideaway, a more challenging version of the trial you just completed (with no real rewards)!
The Hideaway, a more challenging version of the trial you just completed (with no real rewards)!
More Final Fantasy 16 Chronolith Trials
If you’re looking for help on any of the other Chronolith Trials, check out our pages below:
- Where to Find All Chronolith Trials
- How to Complete the Garuda Trial by Wind Chronolith Trial
- How to Complete the Titan Trial by Earth Chronolith Trial
- How to Complete the Ramuh: Trial by Thunder - Chronolith Trial in FF16
- How to Complete the Bahamut Trial by Light Chronolith Trial
- How to Complete the Shiva Trial by Ice Chronolith Trial
- How to Complete the Odin Trial by Darkness Chronolith Trial
No Comments