
Another day, another dungeon. After securing a ship from Clive’s estranged uncle, Jill and Clive will sail to ![]() Mt. Drustanus, a volcanic isle that houses the Mothercrystal,
Mt. Drustanus, a volcanic isle that houses the Mothercrystal, ![]() Drake’s Breath. Located in
Drake’s Breath. Located in ![]() The Iron Kingdom after being stolen from Rosaria, Jill and Clive also have some personal scores they can settle here; defunct political animus on Clive’s part and a more personal grudge against the Crusaders motivating Jill. This page will walk you through the main quest Fire and Ice in Final Fantasy XVI while providing details on how to find accessories like
The Iron Kingdom after being stolen from Rosaria, Jill and Clive also have some personal scores they can settle here; defunct political animus on Clive’s part and a more personal grudge against the Crusaders motivating Jill. This page will walk you through the main quest Fire and Ice in Final Fantasy XVI while providing details on how to find accessories like ![]() The Breath of Wind (Aerial Blast) and Mythril Wristlets and strategies for defeating bosses like the Akashic Minotaur, the Akashic Morbol and the Red Mousse.
The Breath of Wind (Aerial Blast) and Mythril Wristlets and strategies for defeating bosses like the Akashic Minotaur, the Akashic Morbol and the Red Mousse.
Enemies at Mt. Drustanus
| Enemies in this Area |
|---|
| Akashic Hornets |
| Akashic Minotaur |
| Akashic Morbol |
| Akashic Thorns |
| Akashic Worgen |
Items at Mt. Drustanus
| Items in This Area |
|---|
| Spools of |
From where you disembark, head up several flights of stairs and cross some rickety walkways until you find your first item along the path, 3x Pinches of Magicked Ash, then continue forward through a door to find your first foes - several Akashic Thorns and some Akashic Hornets. Cull them - they’re nothing more than blue-glowing variants of trash mobs you’ve already disposed of before - then go through some closed doors and continue upstairs to score another item (3x Spools of Steelsilk). Keep ascending the linear stairs to encounter some Akashic Worgen, which guard yet another item (5x Chunks of Wyrrite) and, more importantly, another door.
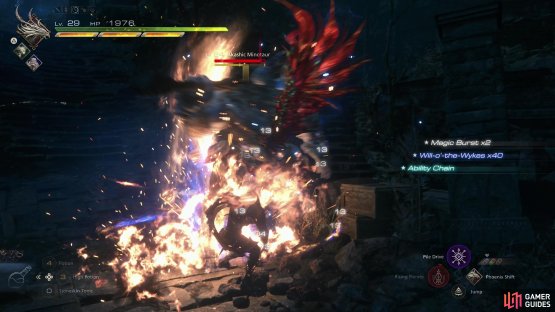
(1 of 2) Defeat the rather uninspiring !Akashic Minotaur,


Defeat the rather uninspiring !Akashic Minotaur, (left), then loot a chest to score The Breath of the Wind (Aerial Blast) accessory. (right)
How to Defeat the Akashic Minotaur - FF16 Fire and Ice Main Quest Walkthrough
Open this door to find the first substantial enemy in this dungeon - an Akashic Minotaur. Substantial in this case doesn’t mean challenging or interesting, rather… durable. It can take a lot of damage and you’ll probably have to push through two stagger sessions to put it down, but it has the same three attacks as the ones did during The Hunter and the Hunted; an overhead slam and horizontal sweep with its club and a charge attack being the standouts. With even rudimentary skill at dodging, these shouldn’t be able to hit you, and even without that, ![]() Will-o’-the-Wykes will absorb the Akashic Minotaur’s attacks just fine.
Will-o’-the-Wykes will absorb the Akashic Minotaur’s attacks just fine.
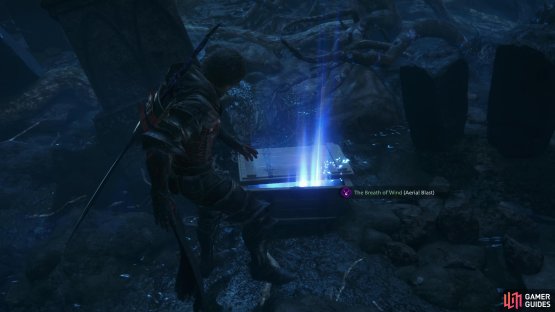
Defeat your foe, then continue upstairs to find a landing on which you can nab a Potion and 4x Sharp Fangs. Be sure to also search for a chest wherein you’ll find The Breath of Wind (![]() Aerial Blast), an accessory which reduces the cooldown time of Aerial Blast by a whopping 11 seconds. Great for fans of tornadoes everywhere. When you’re ready, push open another set of doors to enter a suspiciously large area…
Aerial Blast), an accessory which reduces the cooldown time of Aerial Blast by a whopping 11 seconds. Great for fans of tornadoes everywhere. When you’re ready, push open another set of doors to enter a suspiciously large area…
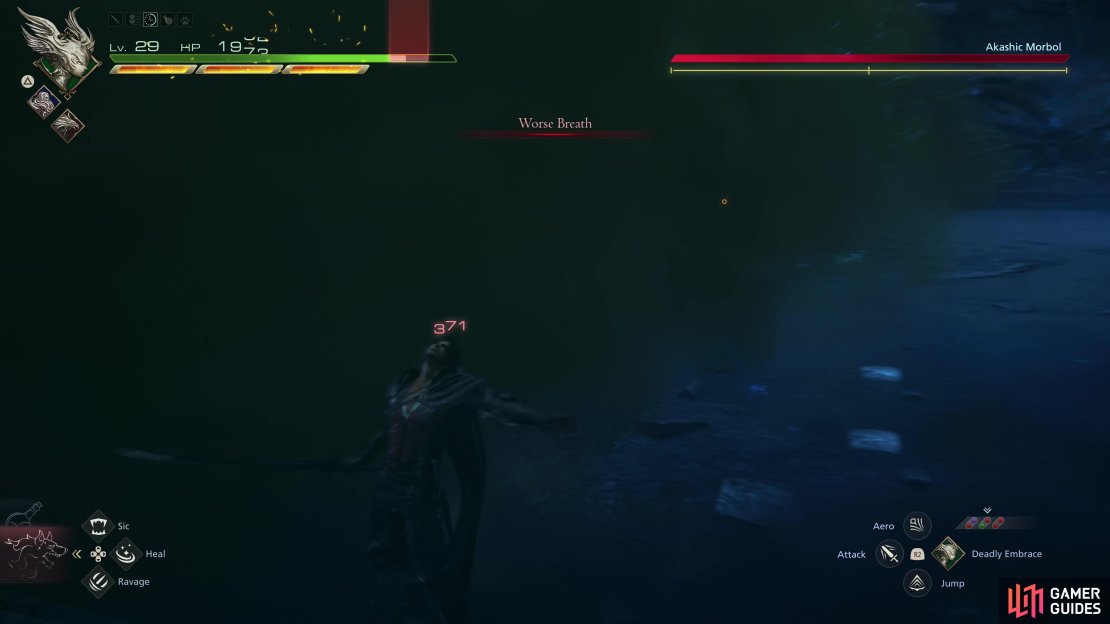
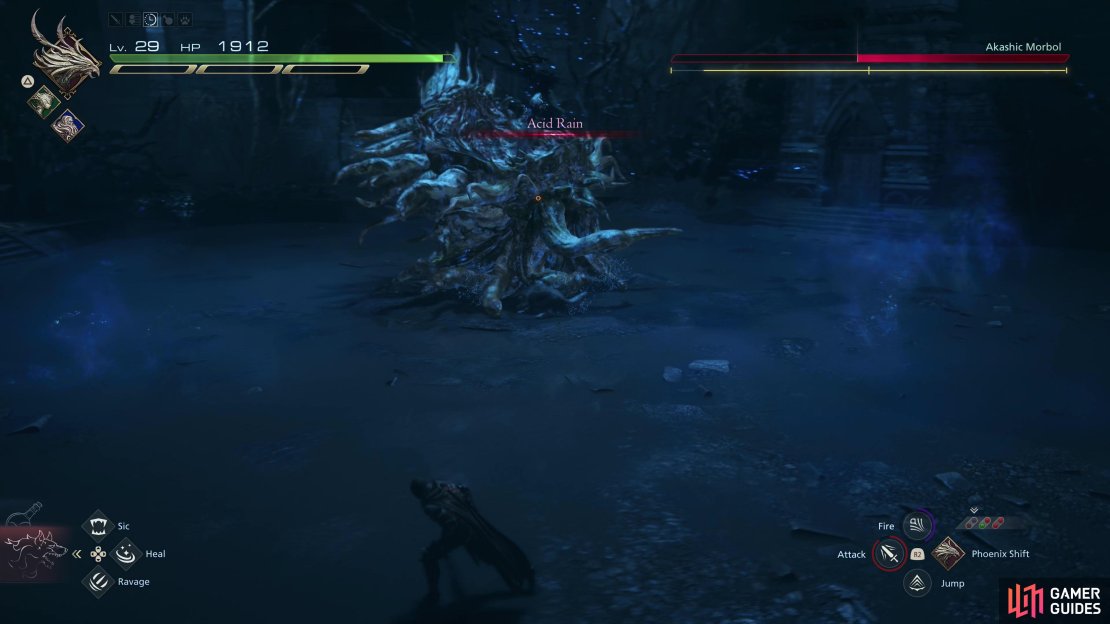
(1 of 3) The !Akashic Morbol’s version of Bad Breath - Worst Breath - sweeps across the battlefield.
How to Defeat the Akashic Morbol - FF16 Fire and Ice Main Quest Walkthrough
After a scene, Clive’s experience will unveil a new variant of an old - but likely still familiar - foe. Your friendly Morbol is back, but this particular strain has gone Akashic, and unlike the Akashic Minotaur you just thrashed, this one has plenty of new attacks, or old attacks that function differently, to be worth in-depth discussion.
Many familiar attacks are back, including Tentacle Slam and Tentacle Sweep, and getting in close to the Akashic Morbol is, with few exceptions, generally not a bad idea. The Akashic Morbol also has the familiar Acid Spit attack, which it uses to spit globs of toxin into the air. Even if the toxic deluge doesn’t strike you directly, they will leave behind putrescent puddles on the ground that serve as area-denial. This will limit your mobility, which can make the Akashic Morbol’s other attacks trickier to evade… a greater concern against this foe, as its attacks are generally more difficult to dodge than the original Morbol’s was.
Bad Breath also makes a return, but since Akashic influence makes everything better, this time it’s creatively called “Worse Breath”. There has to be a “Worst Breath” out there somewhere, right? Anywho, this is very similar to Bad Breath from the original Morbol, except the Akashic Morbol will spin while emitting this lethal stench, first lurching to its right before exhaling and spinning to its left - it always seems to ultimately move counterclockwise while doing this, so don’t get complacent thinking the attack will move in a straight line like Bad Breath did.
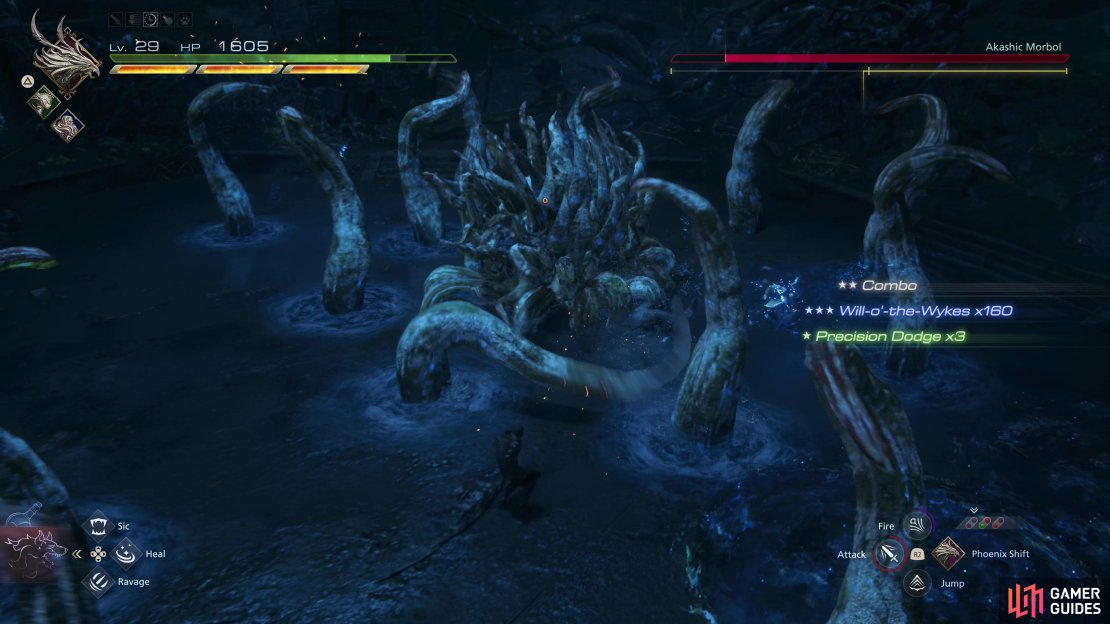
The worst new attack featured by this critter is its ability to deploy its tentacles under the ground and raise them in various spots throughout the battlefield, including in a ring around itself. The Akashic Morbol won’t do much during this attack, but all its tentacles will try to slam nearby targets, so you’ll have to dodge towards gaps in the attack’s coverage and settle for ranged damage. If you have Will-o’-the-Wykes and some gumption, you can try to find a spot near the Akashic Morbol with only one tentacle within reach and punish the otherwise occupied plant with lengthier attacks like ![]() Gouge that can be tricky to get the most out of in normal circumstances.
Gouge that can be tricky to get the most out of in normal circumstances.
We suggest remaining close to the Morbol, using snappy Eikonic Abilities like ![]() Rising Flames and
Rising Flames and ![]() Pile Drive to deal damage and whittle down its Will Gauge. Be close and ready with
Pile Drive to deal damage and whittle down its Will Gauge. Be close and ready with ![]() Deadly Embrace when its Will Gauge is half empty to buy yourself more time, then hit it with Gouge or other high-Stagger abilities to nearly deplete the Will Gauge, during which time you can really pile on the pain.
Deadly Embrace when its Will Gauge is half empty to buy yourself more time, then hit it with Gouge or other high-Stagger abilities to nearly deplete the Will Gauge, during which time you can really pile on the pain.
As with the original Morbol, once injured the Akashic Morbol will add more attacks to its repertoire, including the familiar Putrid Cloud and Wild Rage. These haven’t changed, but Wild Rage is now preceded by a new attack, Acid Rain, which is identical to Acid Spit save that it shoots out more projectiles, hence making Wild Rage more difficult to dodge without taking damage from the toxic puddles left behind by Acid Rain. Using Will-o’-the-Wykes here is a good safety measure in case you can’t escape any of the Akashic Morbol’s charges.
For a more detailed guide, check out the page How to Beat the Akashic Morbol in FF16. Whatever resources you peruse, once the beast is dead some scenes will play and you’ll find yourself inside Mt. Drustanus.
| Enemies in this Area |
|---|
| Bomb |
| Dragonet |
| Flame Lizard |
| Red Mousse |
| Salamander |
| Scarlet Scorpion |
| Items in This Area |
|---|
| 3x |
| 10x |
| 10x |


(1 of 2) After defeating the Akashic Morbol you’ll find a fork in the path,
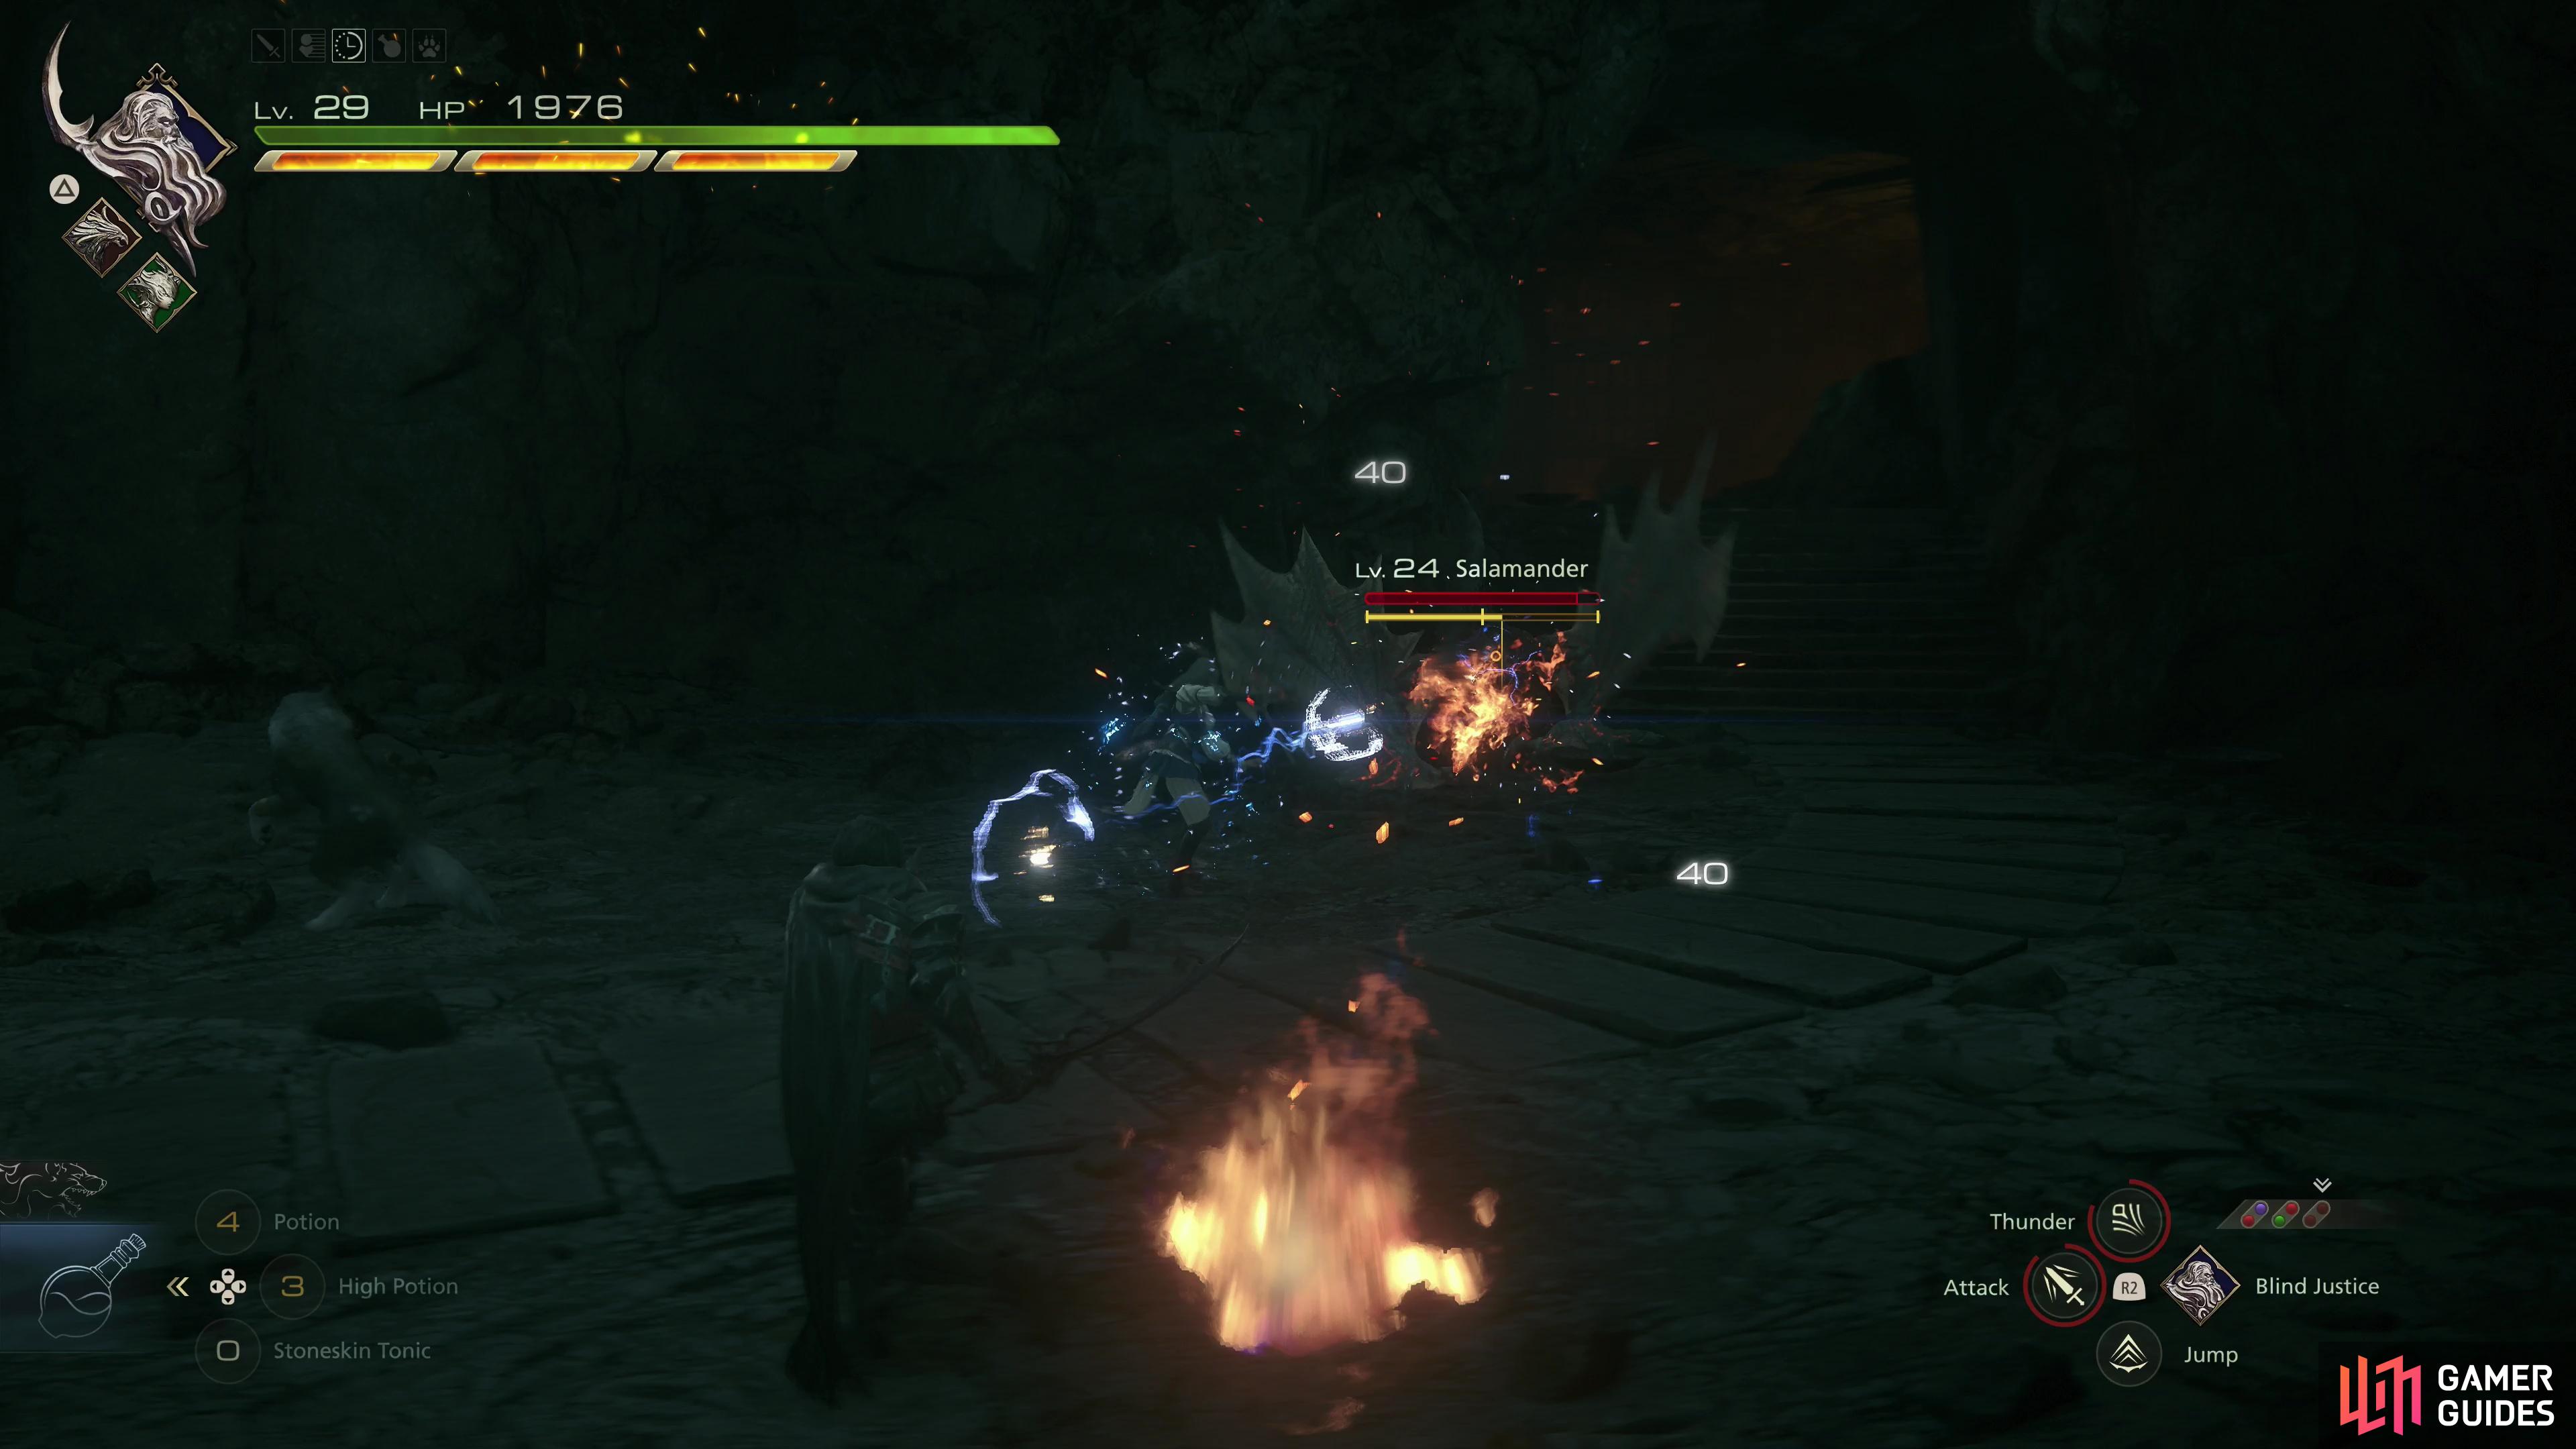
After defeating the Akashic Morbol you’ll find a fork in the path, (left), one of which leads to a Salamander, a variant of the Aevis/Wyvern that exclusively attacks with fire breath. (right)
Once back in control, follow the linear path ahead up some stairs and across a bridge, grabbing the obligatory post-boss curatives (High Potion and Potion) as you go. Cross the bridge and kill four Scarlet Scorpions - palette-swaps of foes you’ve fought before, then note that you’re at a fork. To your left, a ramp leads up to a cliff while the path ahead passes under an open portcullis.
Rarely has there been a more superficial illusion of choice - both paths link up ahead at a partially raised portcullis. If you go through the first portcullis you’ll fight a Salamander (a variant of the Aevis/![]() Wyvern that almost exclusively spits fireball and breathes gouts of flame) which will be joined by Scarlet Scorpions when it’s injured, while if you go up the path to the left you’ll climb a ledge and squeeze through a gap to reach a chamber occupied by more Scarlet Scorpions and Dragonets. Along the former path you’ll find a Potion while the latter path yields some 3x Bloody Hides and a Potion.
Wyvern that almost exclusively spits fireball and breathes gouts of flame) which will be joined by Scarlet Scorpions when it’s injured, while if you go up the path to the left you’ll climb a ledge and squeeze through a gap to reach a chamber occupied by more Scarlet Scorpions and Dragonets. Along the former path you’ll find a Potion while the latter path yields some 3x Bloody Hides and a Potion.
Pick your poison, then pass under the gate, snagging another Potion as you go before reaching another, far more dangerous bridge. Brave the heat to trigger a scene, after which you’ll be across. Venture into a cavern ahead to encounter some Scarlet Scorpions and a pair of Bombs, and once they’re defeated the path forks again - you can continue left through a gate, or go right down a walkway… oh, wait, the path behind the gate has collapsed. To the right it is, then!
Head down the linear path to the right, jumping gaps and claiming a Potion and High Potion as you go. Almost like they’re trying to heal us up for something… Drop off a ledge (no way back, nothing fishy here) and continue forward to encounter a miniboss. Surprising!
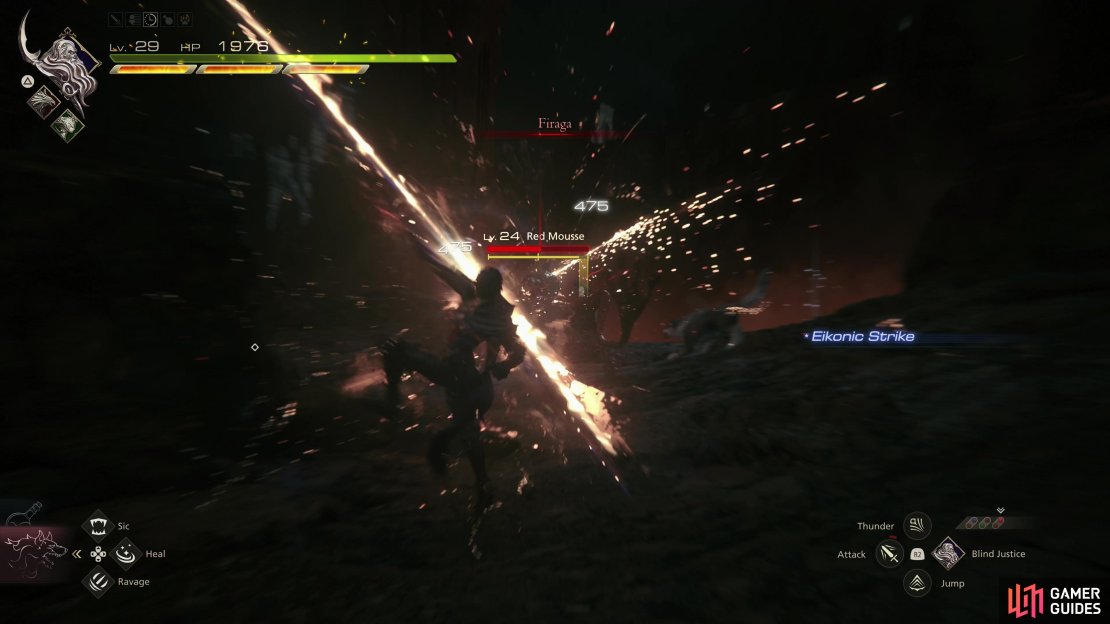


(1 of 3) Counter the Red Mousse’s Firaga with Heatwave,
How to Defeat the Red Mousse - FF16 Fire and Ice Main Quest Walkthrough
Blocking the way forward is a Red Mousse, a slime monster which for some reason Final Fantasy tends to name after desserts. This variant is, unsurprisingly, a fire elemental, and an incredibly aggressive foe given its gelatinous nature. It’ll leap at you, lash at you with its tentacles (when it draws them around itself for a moment, be wary as it’ll unleash two violent spinning attacks) and shoots the odd Firaga at you. This latter spell is your opening, as it can be easily countered with ![]() Heatwave, which will just about deplete half the Red Mousse’s Will Gauge. A bit more pressure will see it at 50%, and if you follow up with Gouge you should all but stagger it, allowing you to score big damage. That’s basically the routine - Heatwave-counter Firaga, Deadly Embrace when it’s at 50% Will Gauge, Gouge, punish. The rest is just chip damage and delaying for Firaga.
Heatwave, which will just about deplete half the Red Mousse’s Will Gauge. A bit more pressure will see it at 50%, and if you follow up with Gouge you should all but stagger it, allowing you to score big damage. That’s basically the routine - Heatwave-counter Firaga, Deadly Embrace when it’s at 50% Will Gauge, Gouge, punish. The rest is just chip damage and delaying for Firaga.
Defeat the Red Mousse and search around for a chest, wherein you’ll find some ![]() Mythril Wristlets, a rare gear upgrade. Equip them, grab a Potion, then look over to the ominous arena-shaped island ahead. What, oh what, could be waiting for us over there?
Mythril Wristlets, a rare gear upgrade. Equip them, grab a Potion, then look over to the ominous arena-shaped island ahead. What, oh what, could be waiting for us over there?


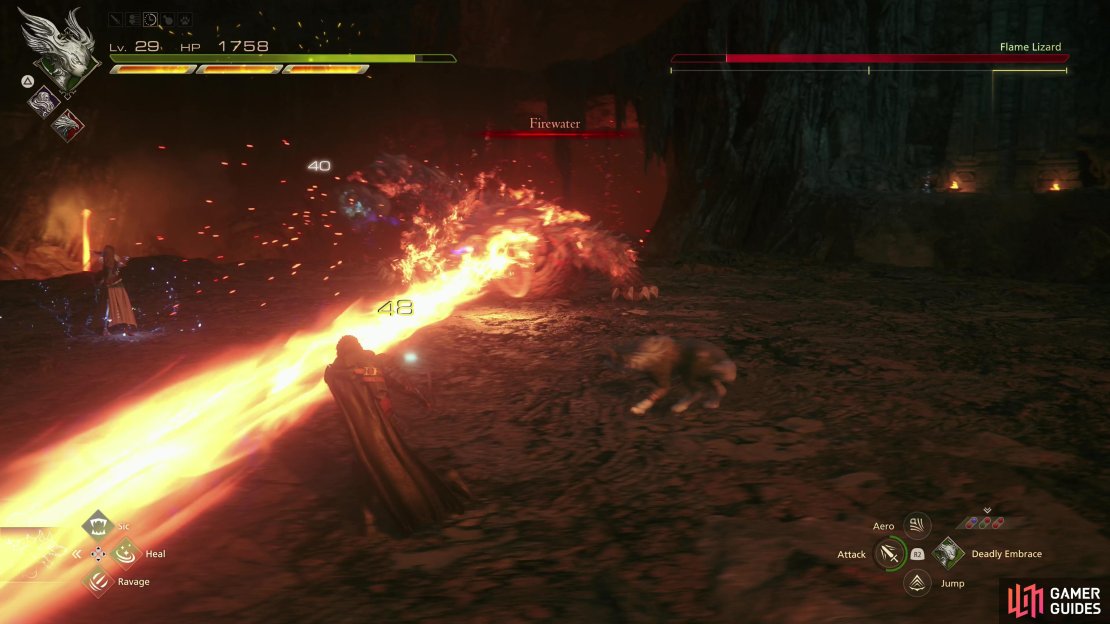
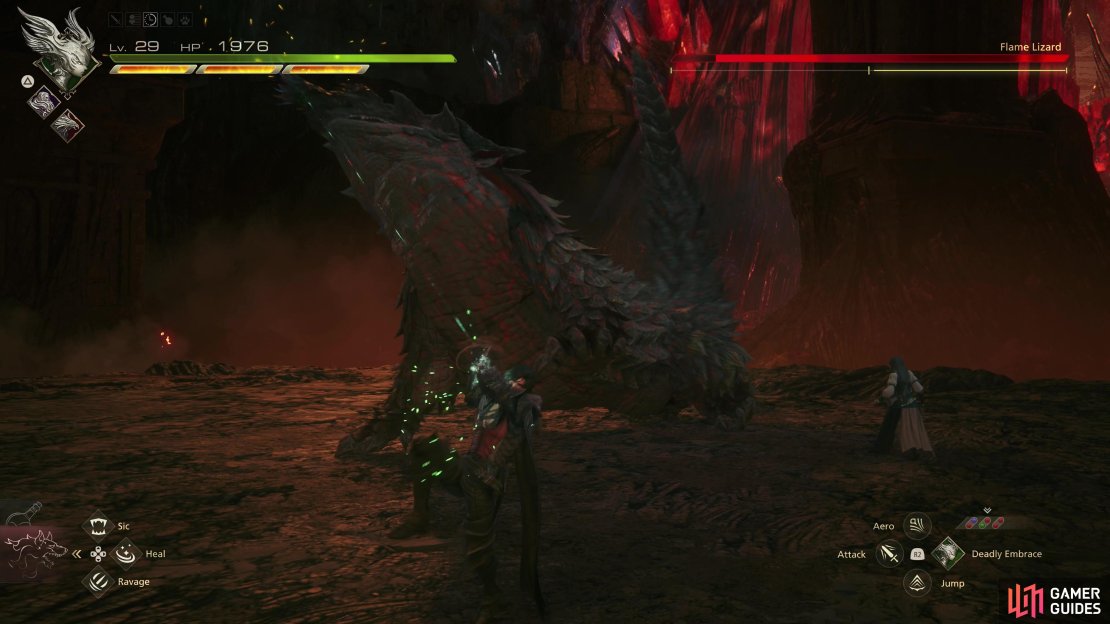
(1 of 5) When pressed, the Flame Lizard will use Incense to indicate that a flurry of offense is incoming.
How to Defeat the Flame Lizard - FF16 Fire and Ice Main Quest Walkthrough
An armored lizard with a penchant for fiery places, the Flame Lizard is the first truly new boss you’ll encounter on this quest. It’s surprisingly mobile and inclined towards melee combat, but it’s not so dangerous a foe that you should shy away from trading with it. Its primary attacks - at least at the start of the battle, consist of a variety of claw swipes, tail lashes and body checks, most of which are pretty easy to see coming and, consequently, dodge. Performing precision counters will deal fair damage to the enemy’s Will Gauge, and while the boss is generally too aggressive to rely on abilities like Gouge or Ignition, faster abilities like Rising Flames and Pile Drive are easy enough to sneak, in however.
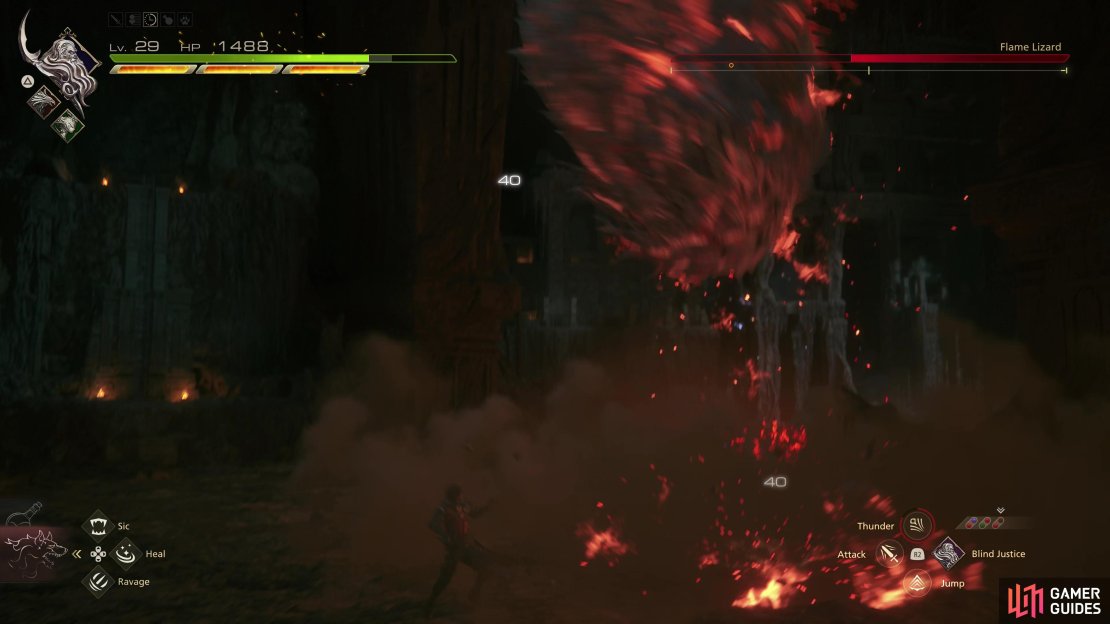
Periodically the Flame Lizard will use its Incense ability, shrouding itself in flames and launching a more determined offensive. It’ll retain some of its normal attacks during this phase, but it’ll also add barrel rolls (somewhat tricky to dodge, since you need to clear the length of the beast) and it’ll roll up into a ball and start smashing into the ground. It’ll initially perform three of these smashes in a row, but can add more as its health depletes. While incensed, the Flame Lizard will also use its Firewater attack, which shoots a beam of fire horizontally across the battlefield - quite easy to dodge, just be wary as it’ll start shooting more of these beams in sequence when its health is low.
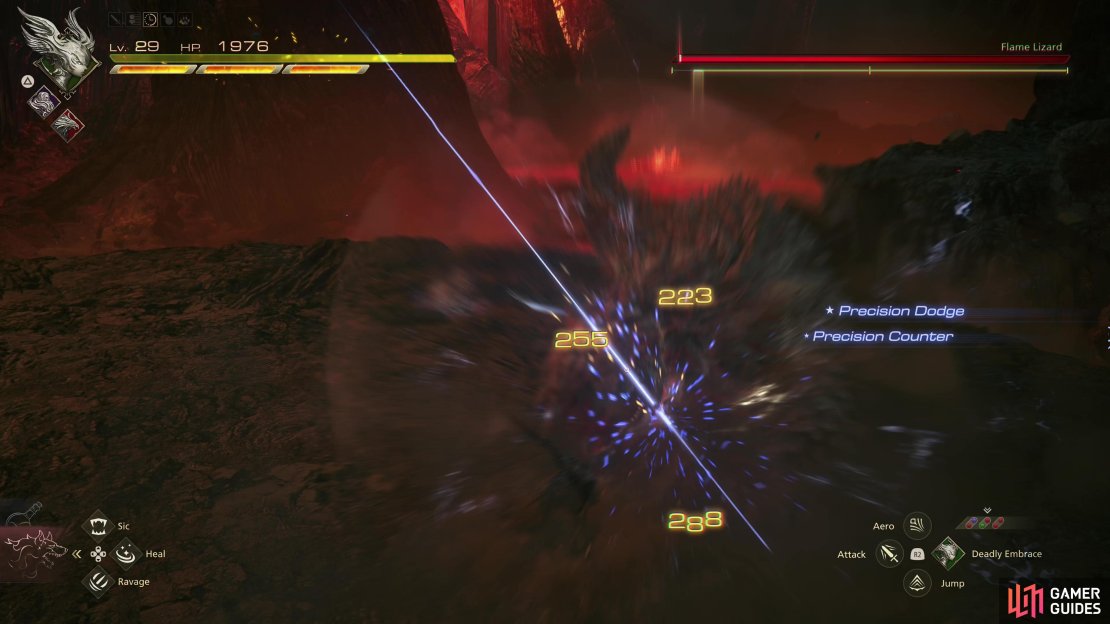
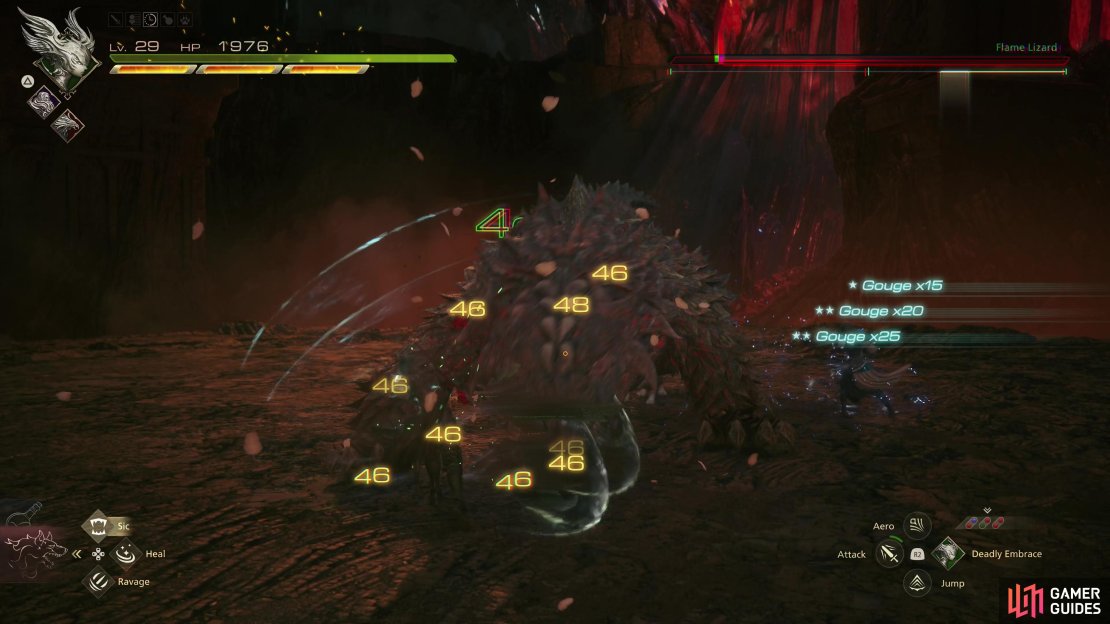
(1 of 3) Most of the Flame Lizard’s attacks are easy to dodge and counter, dealing a fair bit of stagger damage.
The general strategy for this boss isn’t all that different from most others you’ve faced. There are no projectiles to counter with Heatwave, so you’ll have to whittle down your opponent’s Will Gauge in melee, using Phoenix Strikes, precision counters and quick abilities to expedite matters. Once the Will Gauge is halfway empty, use Deadly Embrace and Gouge to work through most of the second half of the Will Gauge, and when staggered, punish.
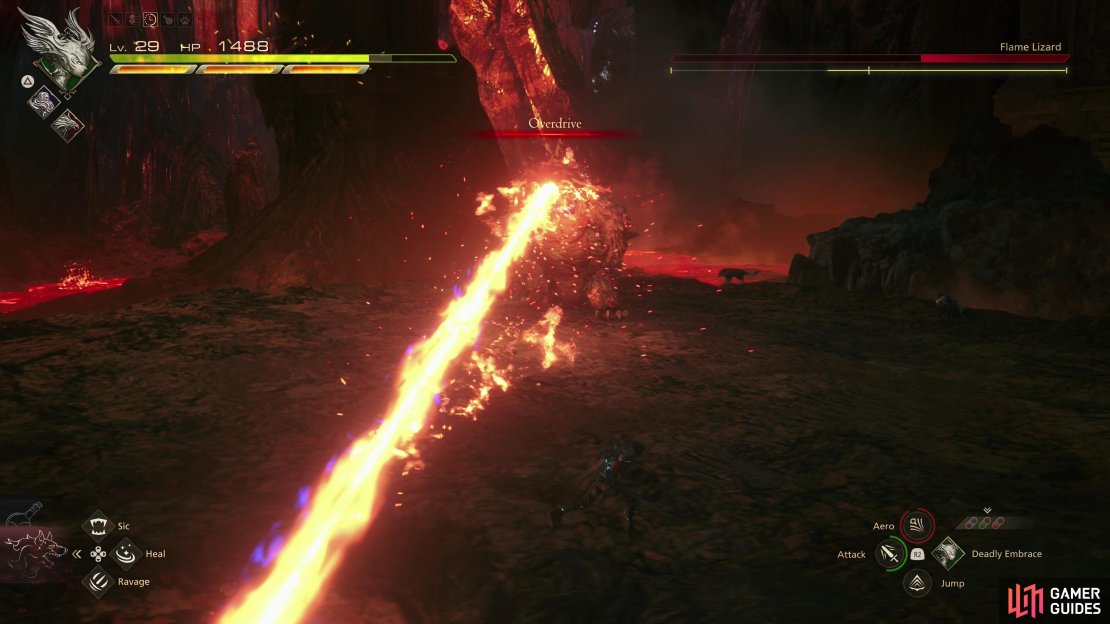
Once the beast has had half of its health removed, it’ll start using Incense more often, will attack faster, and perform combos. It can also use a new Overdrive ability, where it will attack incessantly, performing the following moves:
- A vertical Firewater beam
- A horizontal Firewater beam
- A claw swipe
- An explosive smash (similar to the rolled up smashes it does during Incense, with a much more explosive landing).
In later phases of the fight you may have to back off a bit, focus on dodging, and take what damage you can from ranged attacks while the beast wears itself out, especially when it’s incensed or using Overdrive. For a more in-depth walkthrough for this boss fight, check out the page Flame Lizard Boss Guide in FFXVI.
Defeat the beast to earn a ![]() Gnarled Scale and some Sharp Fangs, then jump across some rocks to reach a ledge where you’ll find a conciliatory post-boss Potion. Climb a ladder, then open a door to trigger a scene, after which you’ll be in the next part of this dungeon - The Oratory.
Gnarled Scale and some Sharp Fangs, then jump across some rocks to reach a ledge where you’ll find a conciliatory post-boss Potion. Climb a ladder, then open a door to trigger a scene, after which you’ll be in the next part of this dungeon - The Oratory.
| Enemies in this Area |
|---|
| Ironblood Commander |
| Ironblood Captain |
| Ironblood Crusaders |
| Ironblood Fanatic |
| Items in This Area |
|---|
| 1,620 |
| 3x |
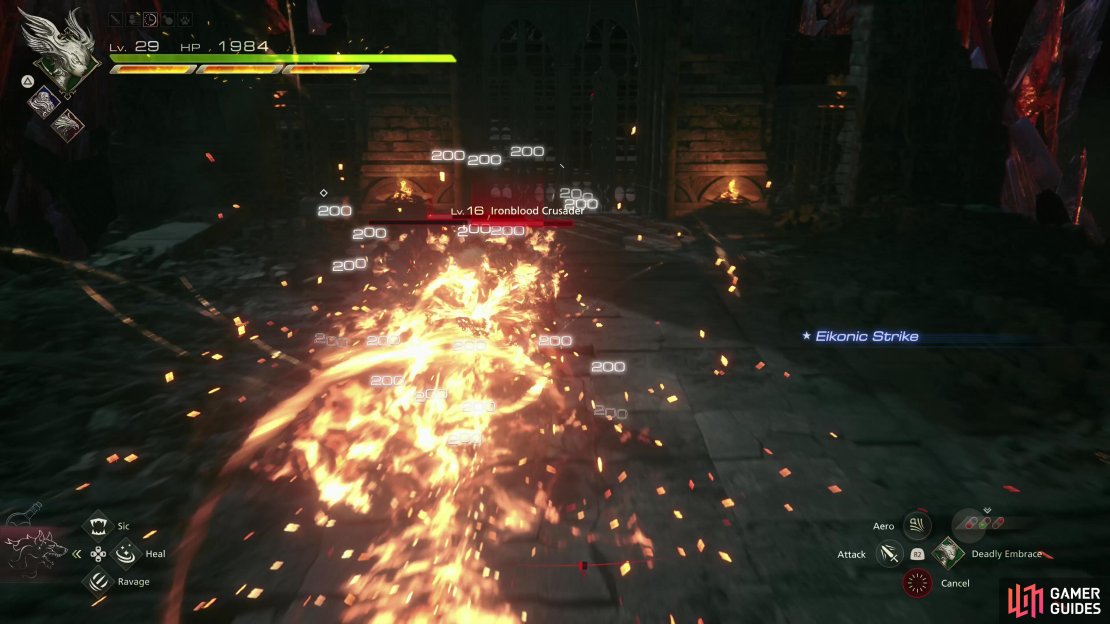
How to Defeat the Ironblood Fanatics - FF16 Fire and Ice Main Quest Walkthrough
Head down the hallway ahead to get another post-boss restorative (Potion), turn right down some stairs, nabbing a High Potion on a landing, then head right down another flight of stairs. Note the enemies skulking around here - numerous Ironblood Crusaders. They’re fairly durable for generic humanoid enemies, but they’re still mostly Ignition fodder, with their most annoying attack being their uncanny ability to defy gravity and physics while they charge to score cheap hits from off-screen. Smite them, return to the stairs, and turn left to reach a door you can enter - going right just leads to a dead end.
Go through the aforementioned door, head upstairs, grab a Potion, then go through another doorway to encounter another miniboss, an Ironblood Fanatic. Don’t get too excited, though, as it fights very similarly to Imperial Champions. Wielding a mighty axe instead of a maul, the Ironblood Fanatic will perform slow sweeping swings, including a two-hit spin, overhead chops and an uppercut attack named Crea y Cwm. Precision dodges and counters are your friend here, as are fast abilities like Rising Flames and 1Pile Drive, but this enemy’s attacks are so methodical and slow that using Will-o’-the-Wykes makes it nearly impossible to take damage. Note that it’ll be joined by several Ironblood Crusaders at the start of the fight, but they spawn down the hallway - rush to greet them with Ignition and you’ll dispatch them before you really have to bother with the Ironblood Fanatic.
After dispatching the Ironblood Fanatic, head down the hallway (right from the doorway you entered) then turn right down some stairs, where you’ll be greeted by some more Ironblood Crusaders and an Ironblood Captain. A single Ignition and a Pile Drive later and they were no longer a nuisance, and we were one Potion richer for the trouble. Ignore a doorway to the left and instead enter a balcony ahead to find a chest, which will yield 1,620 gil.
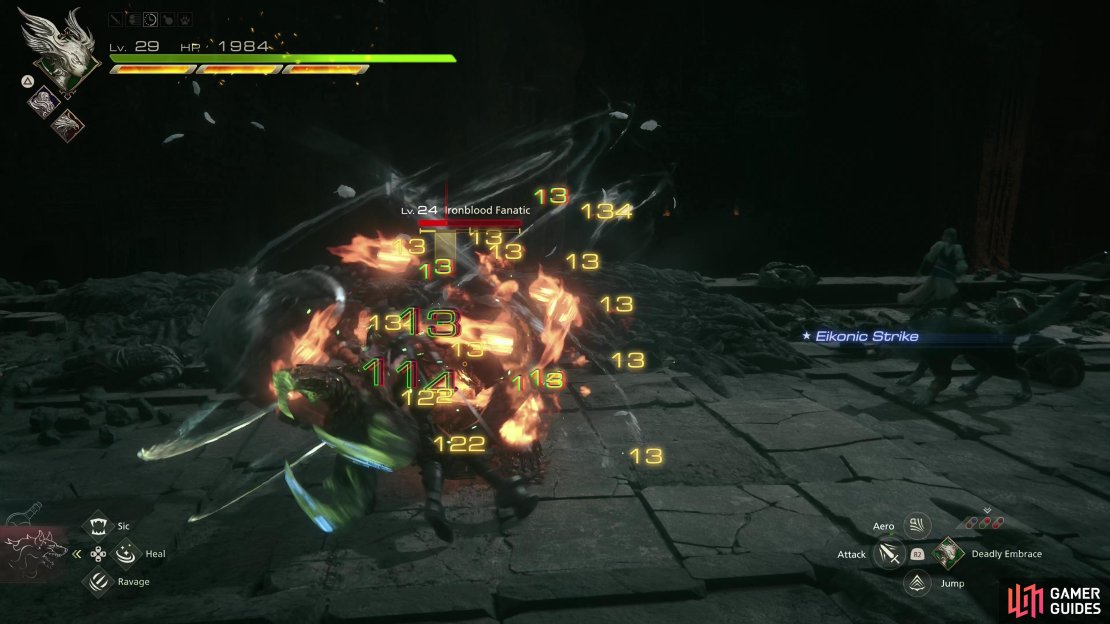
(1 of 3) Use Ignition to wipe out the lesser Ironblood,
Go through the previously-neglected door and score 3x Spools of Steelsilk and a High Potion as you follow the linear path ahead, going up stairs and eventually exiting through another doorway. Turn left and grab a High Potion, then head right to find a Potion near a large doorway, which opens to a bridge leading to the Mothercrystal. Awful lot of healing here, and not for nothing, as you’ll face another mob of enemies on the bridge. This includes the standard Ironblood Crusaders, led by the odd Ironblood Captain and now, an Ironblood Commander, but all these are mere fodder for another Ironblood Fanatic. Dispose of them the same way you did the last mob, just be wary of reinforcements arriving when the Ironblood Fanatic’s health is reduced below 50% - having an Ignition to one-shot them would be awfully handy.
Defeat the Ironblood, then head up to the gate standing insolently between you and the Mothercrystal. Loot a chest to the left to obtain ![]() The Grace of the Inferno (Will-o’-the-Wykes), which will increase the duration of this ability by five seconds, enough to cover around 75% of the ability’s cooldown… provided you don’t get hit four times before it vanishes. When you’re ready, go through the last gate to trigger a scene, and the final boss fight for this quest.
The Grace of the Inferno (Will-o’-the-Wykes), which will increase the duration of this ability by five seconds, enough to cover around 75% of the ability’s cooldown… provided you don’t get hit four times before it vanishes. When you’re ready, go through the last gate to trigger a scene, and the final boss fight for this quest.
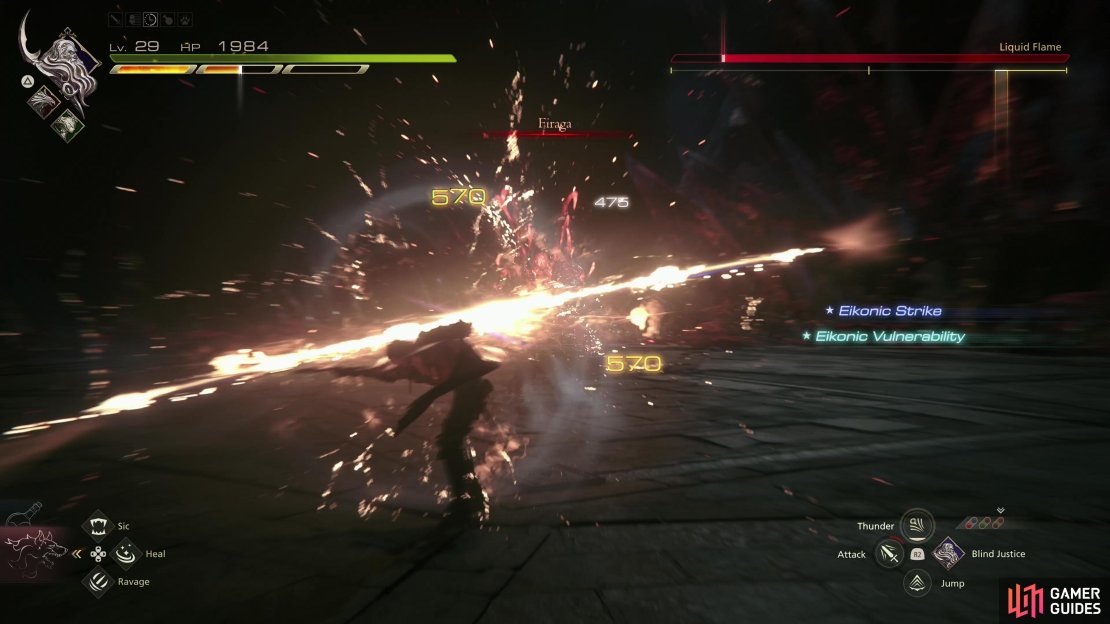
(1 of 3) You can counter the Liquid Flame’s Firaga with Heatwave, but this was more functional against the Red Mousse.
How to Defeat the Liquid Flame - FF16 Fire and Ice Main Quest Walkthrough
Another unique boss, you’ll start the fight using your ![]() Limit Break, a compromise in light of Clive’s continued inability to channel
Limit Break, a compromise in light of Clive’s continued inability to channel ![]() Ifrit. This is not free, it’ll consume your Limit Gauge, so enjoy the damage output while it lasts.
Ifrit. This is not free, it’ll consume your Limit Gauge, so enjoy the damage output while it lasts.
The Liquid Flame starts out as a humanoid, and will begin the fight with a fairly predictable routine, performing a series of two stomps, a sweeping backhand followed by a lunging charge. Neither of these attacks are all that interesting, although they’re pretty easy to dodge and retaliate against. In addition to the aforementioned attacks, the Liquid Flame can cast Firaga - identical to the attack of the same name used by the Red Mousse, and while you can counter it with Heatwave, it won’t be nearly as effective here. The attack you really want to look out for is Fiery Impact, a ground punch that’s not any more difficult to dodge than the stomps, but following this attack the Liquid Flame will remain on one knee for an extended period of time - just begging to be hit with Gouge. You can easily shave off half the enemy’s Will Gauge here, making it your prime move to punish. Unbelievably the Liquid Flame will continue to use this easily exploited attack for the rest of the fight.
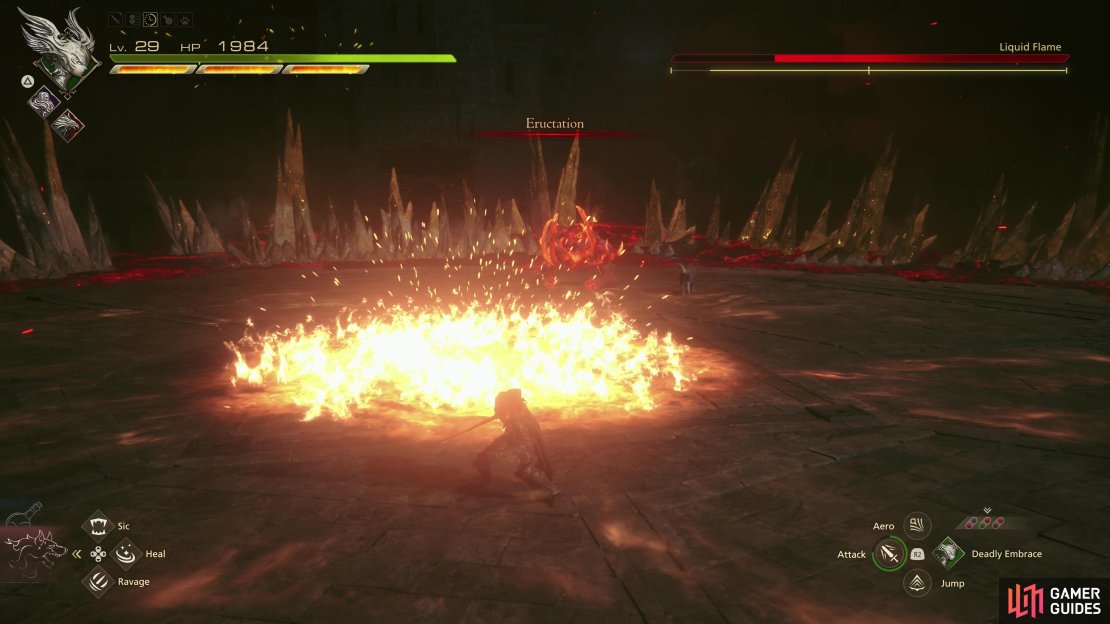
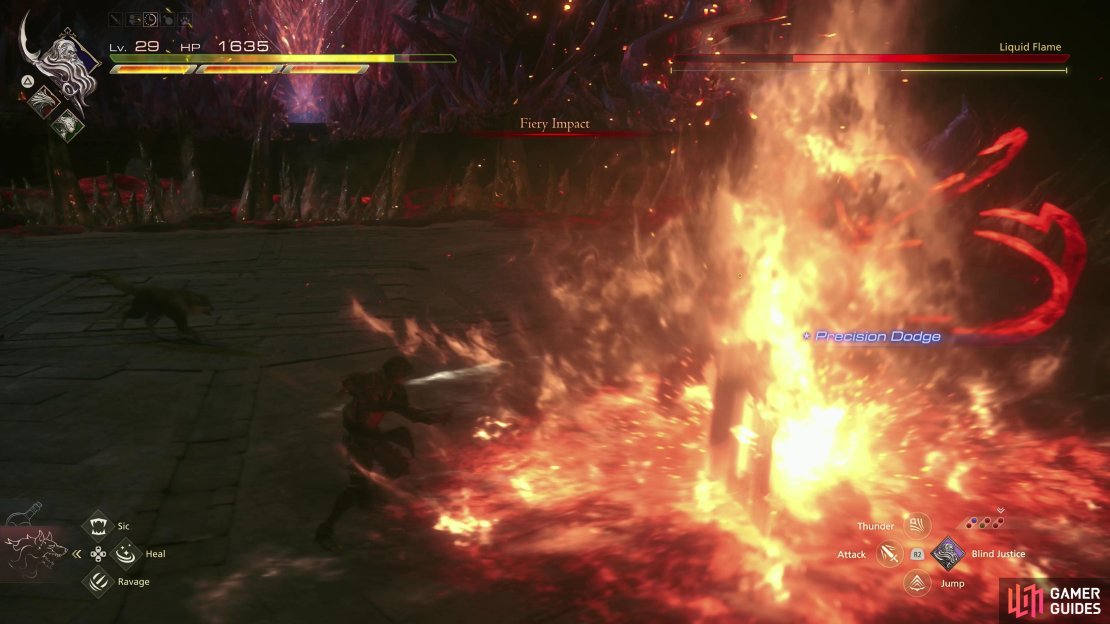
(1 of 3) After being staggered once, the Liquid Flame will start using Eructation, causing a circle of ground to burst into flames.
While the Liquid Flame’s offense is initially lackluster and ripe for abuse, it will start using more attacks as the fight drags on and its health bar depletes. It’ll eventually add Eructation to its repertoire, which causes a circle of ground to glow before erupting into flames - don’t be standing there when it ignites. Once reduced to around two-thirds of its Hit Points, the boss will use Swelter, which is more of a cutscene than a proper attack - thus far Jill has been keeping the flames at bay with Shiva’s ice, a status quo the Liquid Flame challenges at this time. Its flames are ultimately no match for ![]() Shiva’s iconic
Shiva’s iconic ![]() Diamond Dust, but its efforts do shrink the arena a bit, and will force you to mind your step, as you’ll take damage if you step on the magma bounding the arena. This wasn’t much of an issue during the first phase, but can become problematic going forward.
Diamond Dust, but its efforts do shrink the arena a bit, and will force you to mind your step, as you’ll take damage if you step on the magma bounding the arena. This wasn’t much of an issue during the first phase, but can become problematic going forward.
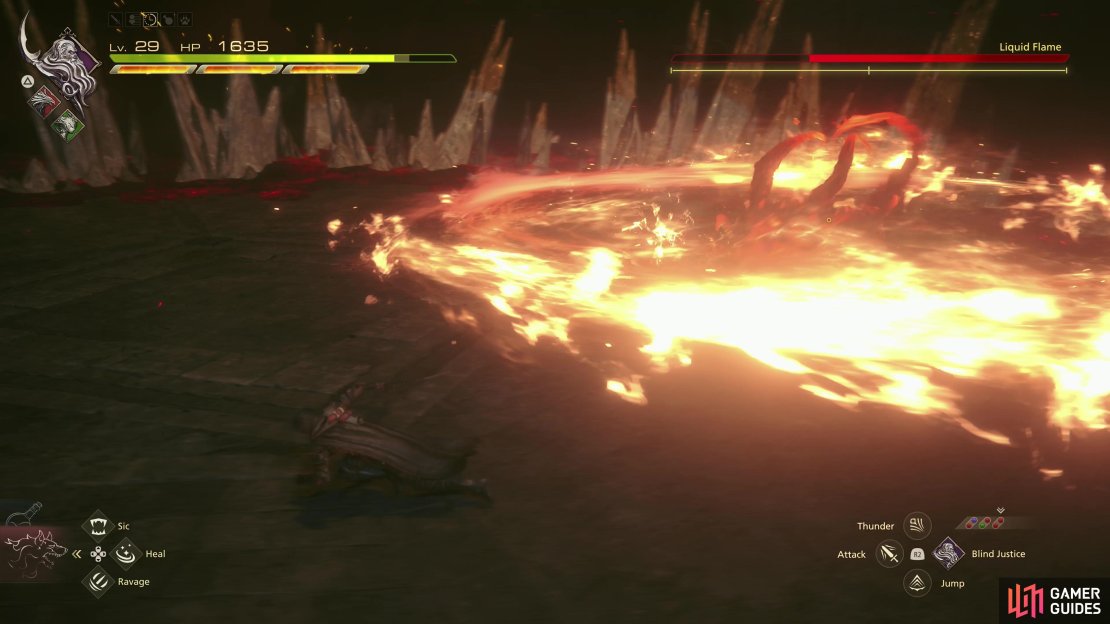
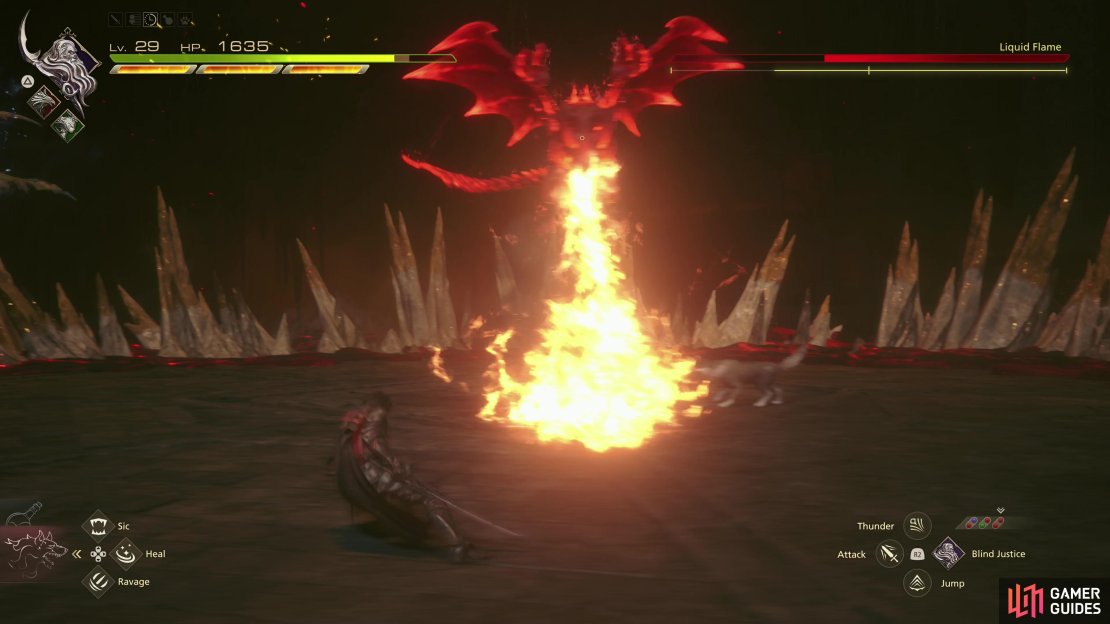
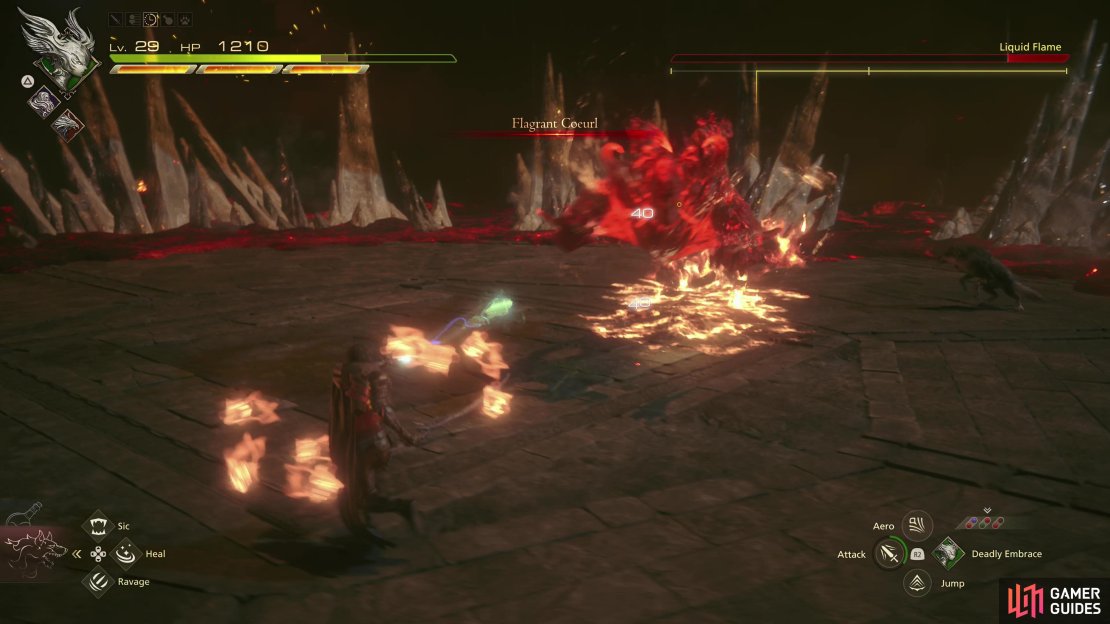
Everything before Swelter was the first phase of the fight, and afterwards the second phase will begin. Here, the Liquid Flame will begin using its shapeshifting abilities more freely - it was capable of turning into a ball of fire, usually to get space to perform attacks like Firaga, but now it’ll transform into a fiery Coeurl and perform a flaming spin attack, and it can turn into a molten wyvern and breathe a gout of flame as it flies forward. Its Eructation attack will also affect more patches of ground, but otherwise its attack routine is the same - keep waiting for Fiery Impact and punish with Gouge.

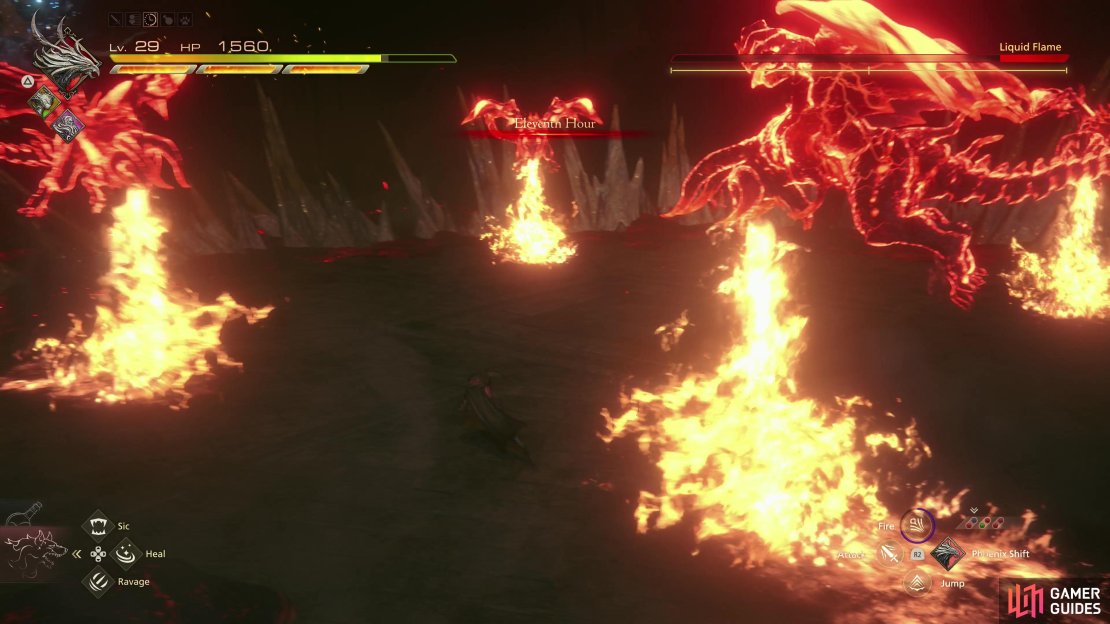
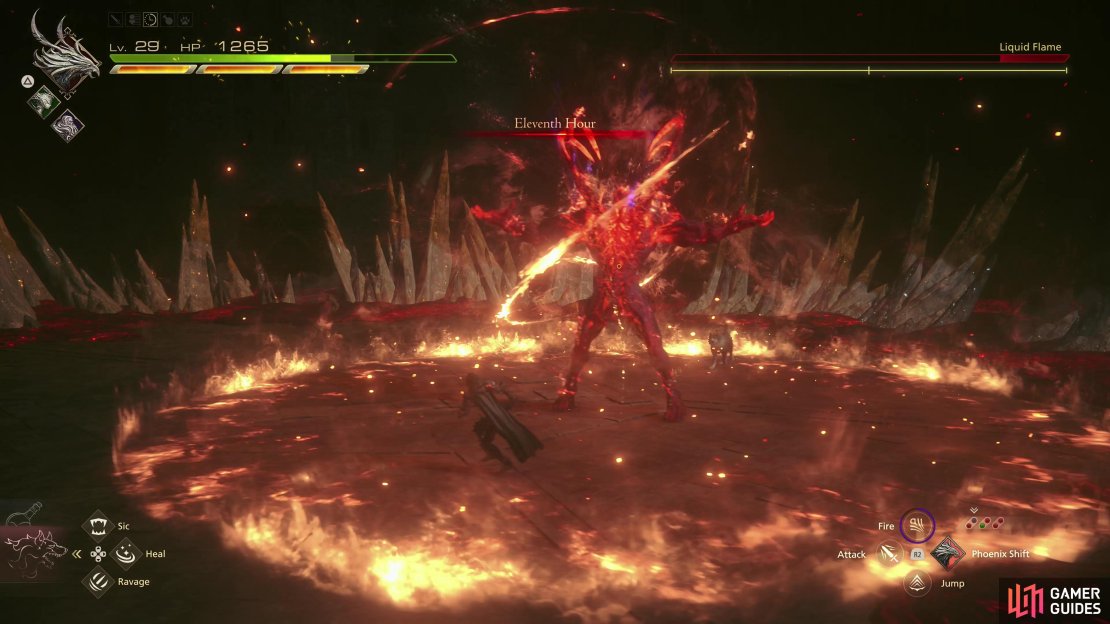
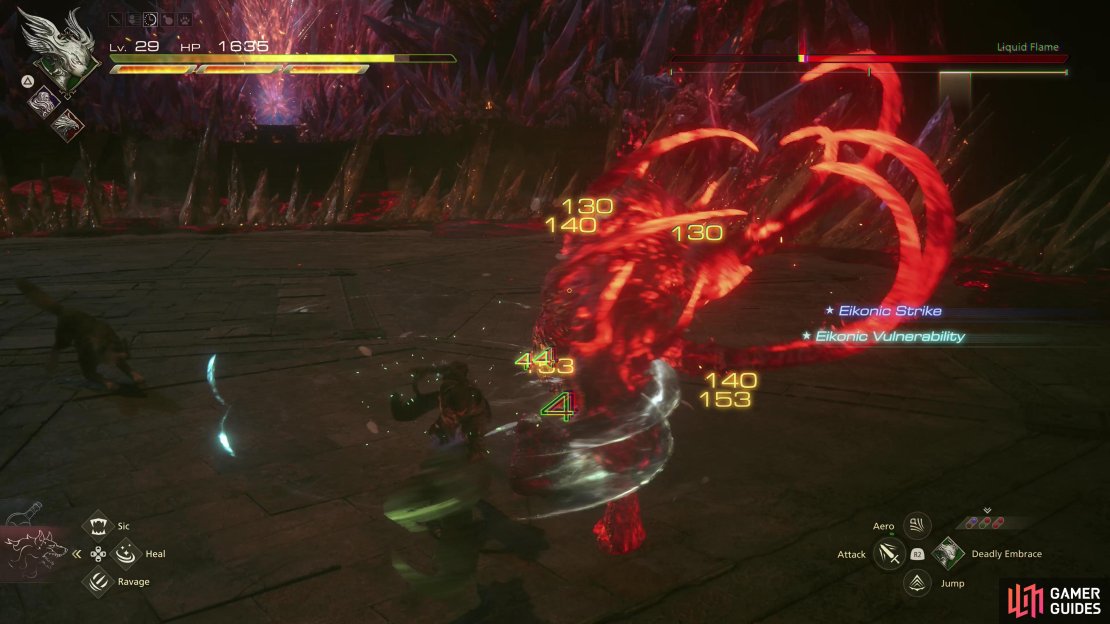
(1 of 5) At the onset of the third phase of the fight the boss will perform Eleventh Hour, where it’ll turn into four coeurls and charge at you one after another,
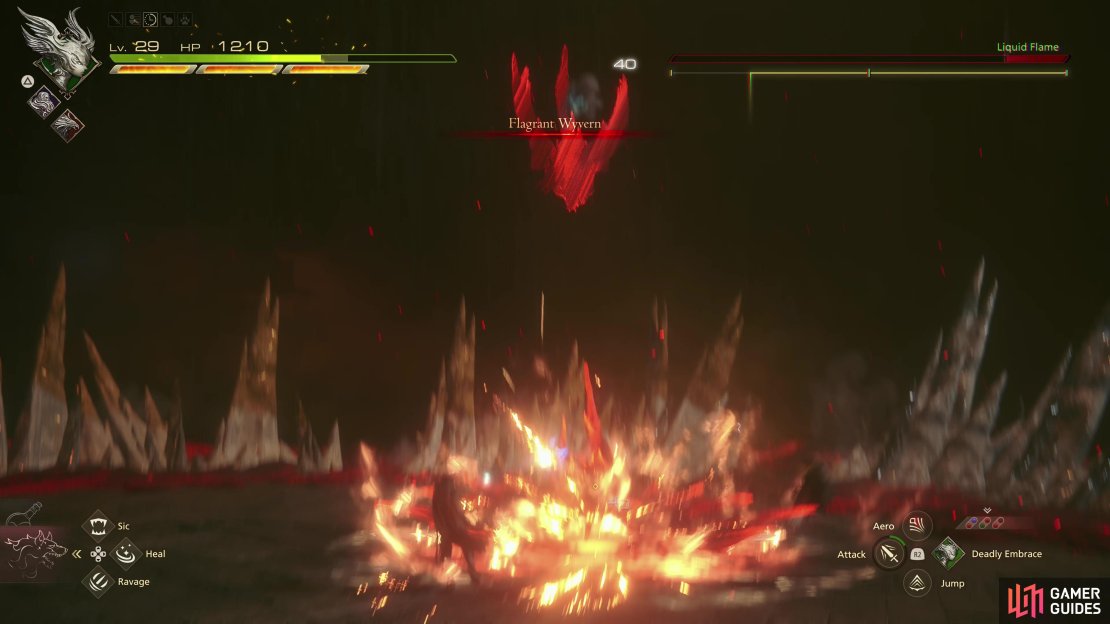
Deplete the Liquid Flame’s health to below one-third and it’ll use its ultimate attack, Eleventh Hour, which will cause the boss to split into four and perform four sequential coeurl charges and four simultaneous wyvern breath attacks. When it turns back into its humanoid form it will finish with a massive explosion - absorb this attack with Will-o’-the-Wykes or flee the area of effect. It’s quite a barrage of offense and you can do little to respond, but on the plus side the Liquid Flame will be winded momentarily afterwards. The third phase will begin following this attack, but the boss only adds two new attacks: Flagrant Coeurl (performs a leaping charge attack) and Flagrant Wyvern (dives into the ground and explodes). Keep waiting for Fiery Impact and take advantage with Gouge until the boss is defeated.
A more in-depth strategy can be found on the page Liquid Flame Boss Guide in FFXVI. You’ll earn 2x Liquid Flames for vanquishing this boss, as well as some Magicked Ash, after which you’ll be treated to a whopping fifteen minutes of cutscenes before you regain control in The Hideout at the start of the next main quest After the Storm.
No Comments