
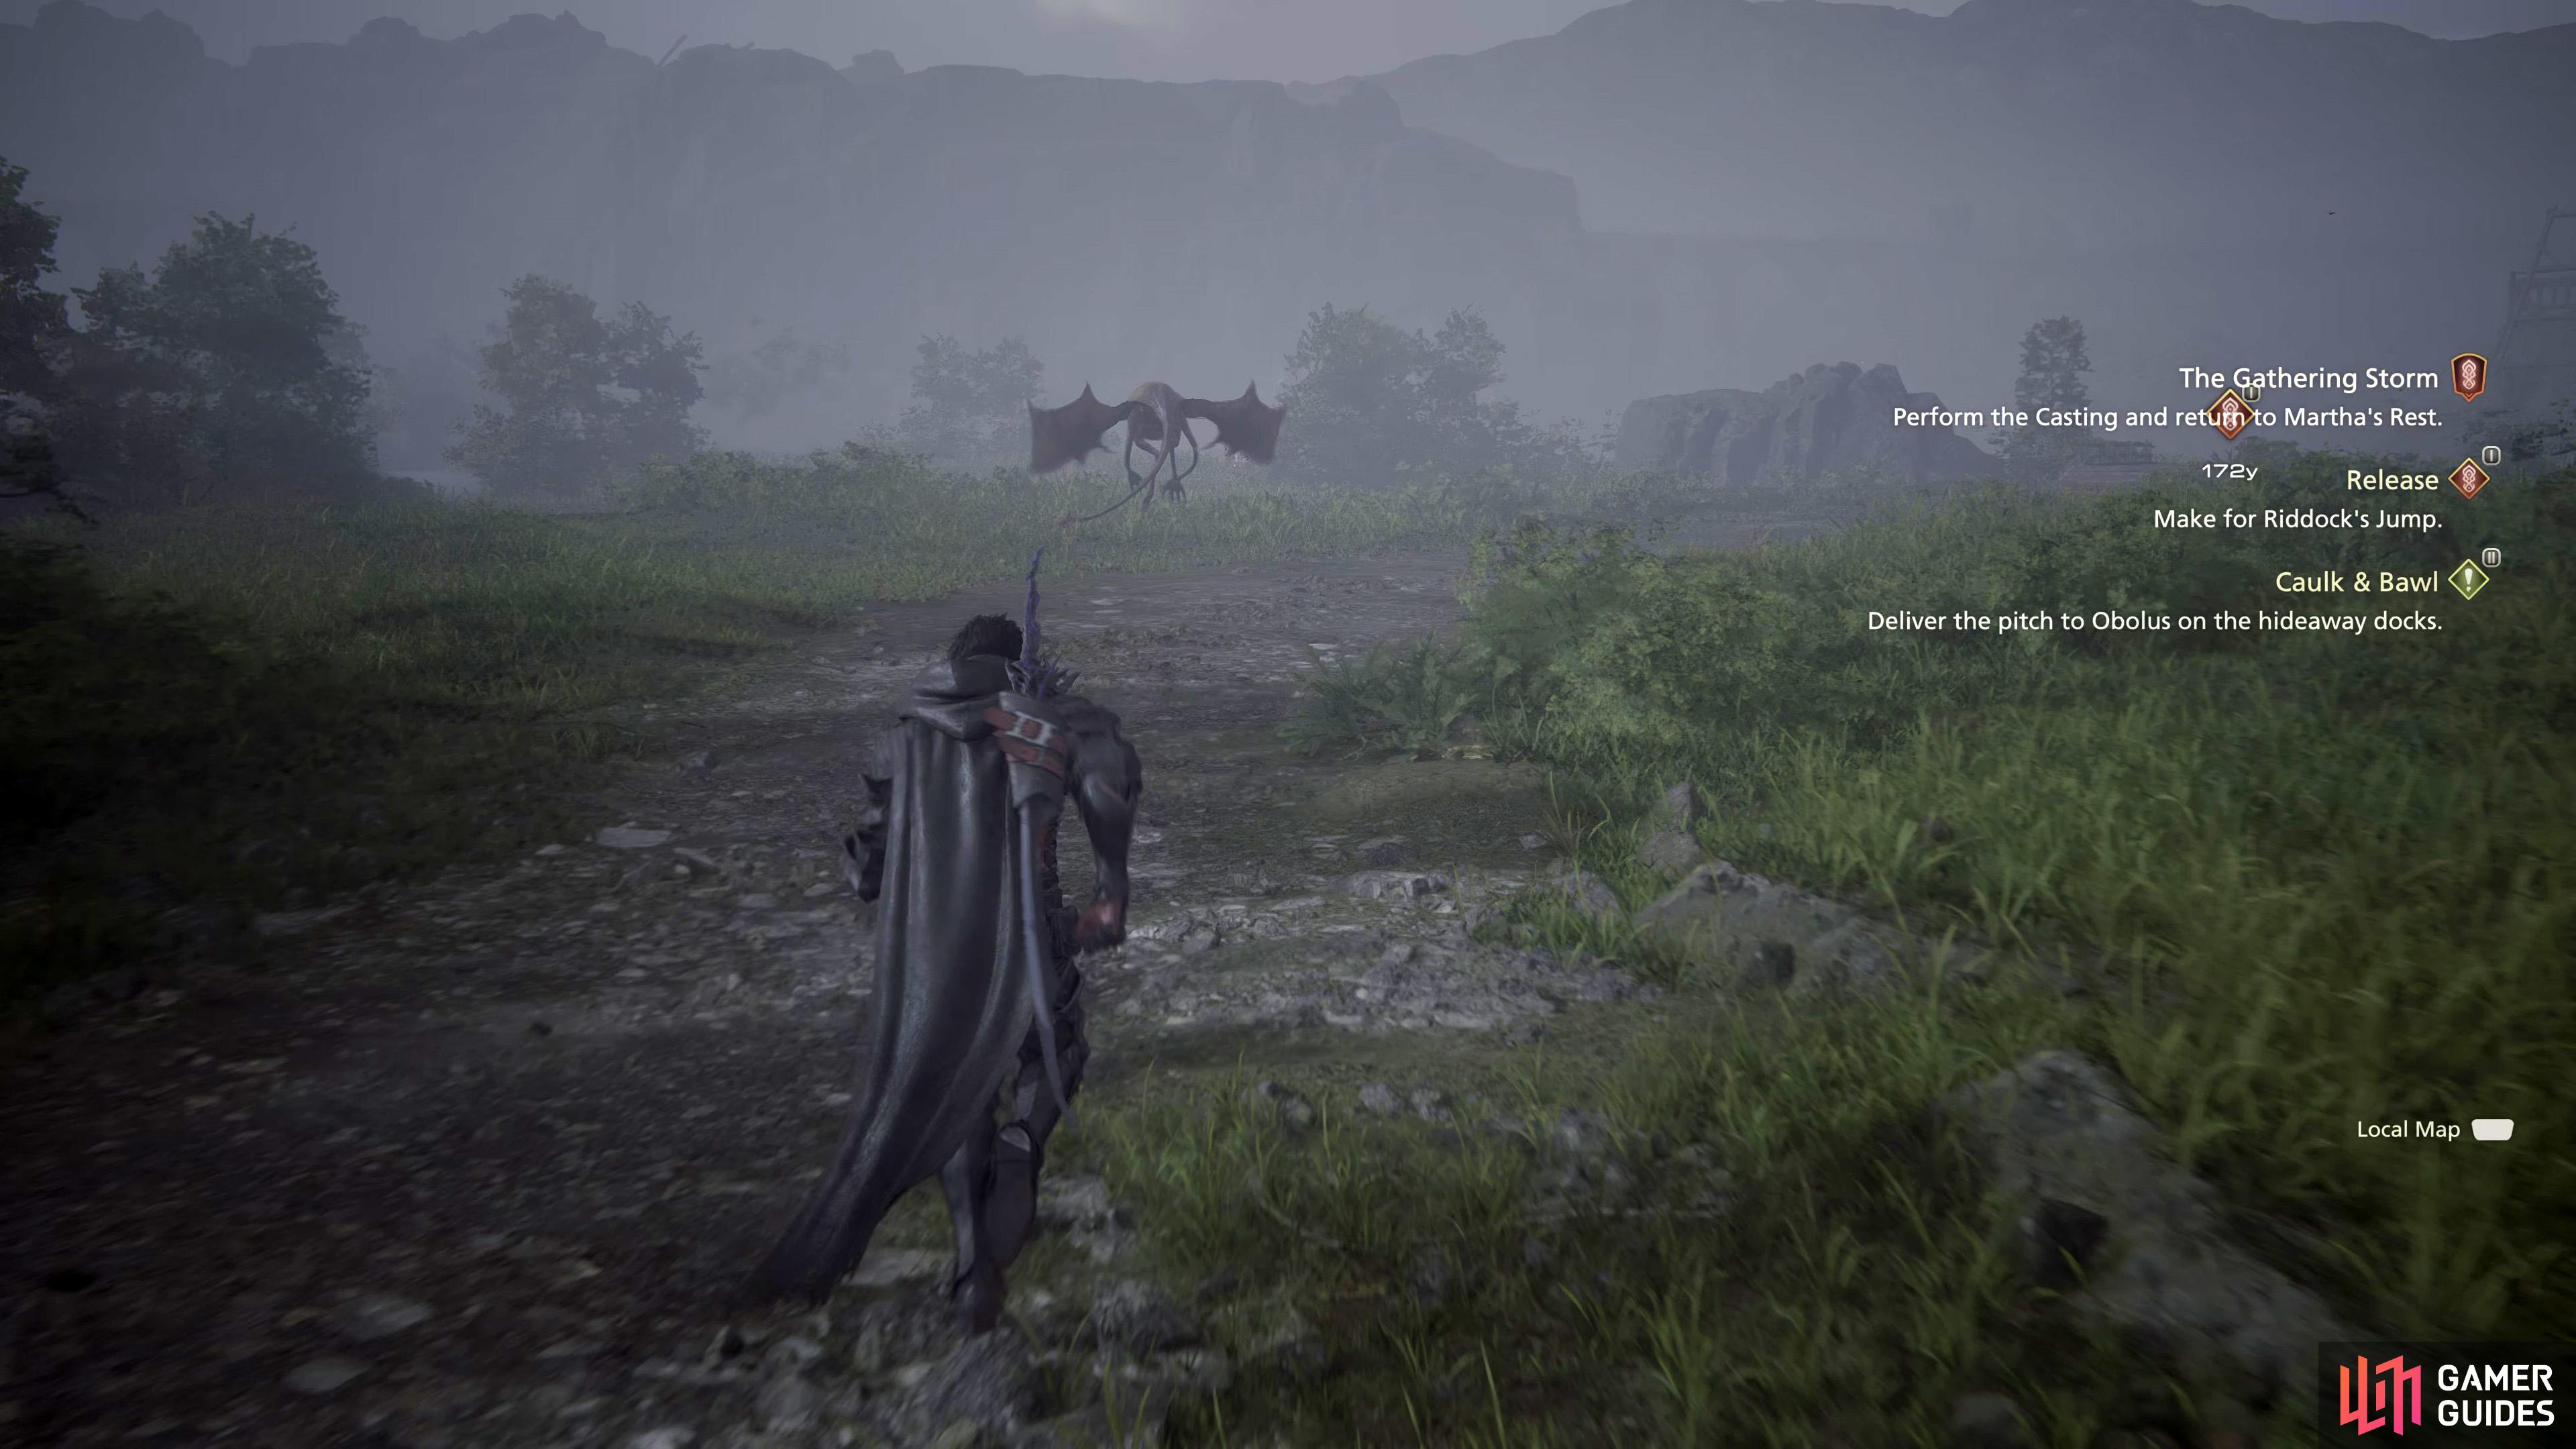
As you progress to the halfway point of the story in Final Fantasy XVI, you’ll come across a mystifying monster known as ![]() Ahriman. If you’ve played previous Final Fantasies before, you would have seen this creature before, if not, then this will be the first time you’ve seen this odd-looking eyeball with wings!
Ahriman. If you’ve played previous Final Fantasies before, you would have seen this creature before, if not, then this will be the first time you’ve seen this odd-looking eyeball with wings!

!Ahriman is the first Hunt in Final Fantasy XVI.
Where to Find the Ahriman Mark
Fortunately, you don’t need to look for Ahriman unlike the other Hunts as it will find you. During the main story quest “Release”, you’ll need to head toward a river. As you get nearer to your destination, you’ll find the Ahriman hovering above the road, just before you get to the bridge, you can’t miss it.
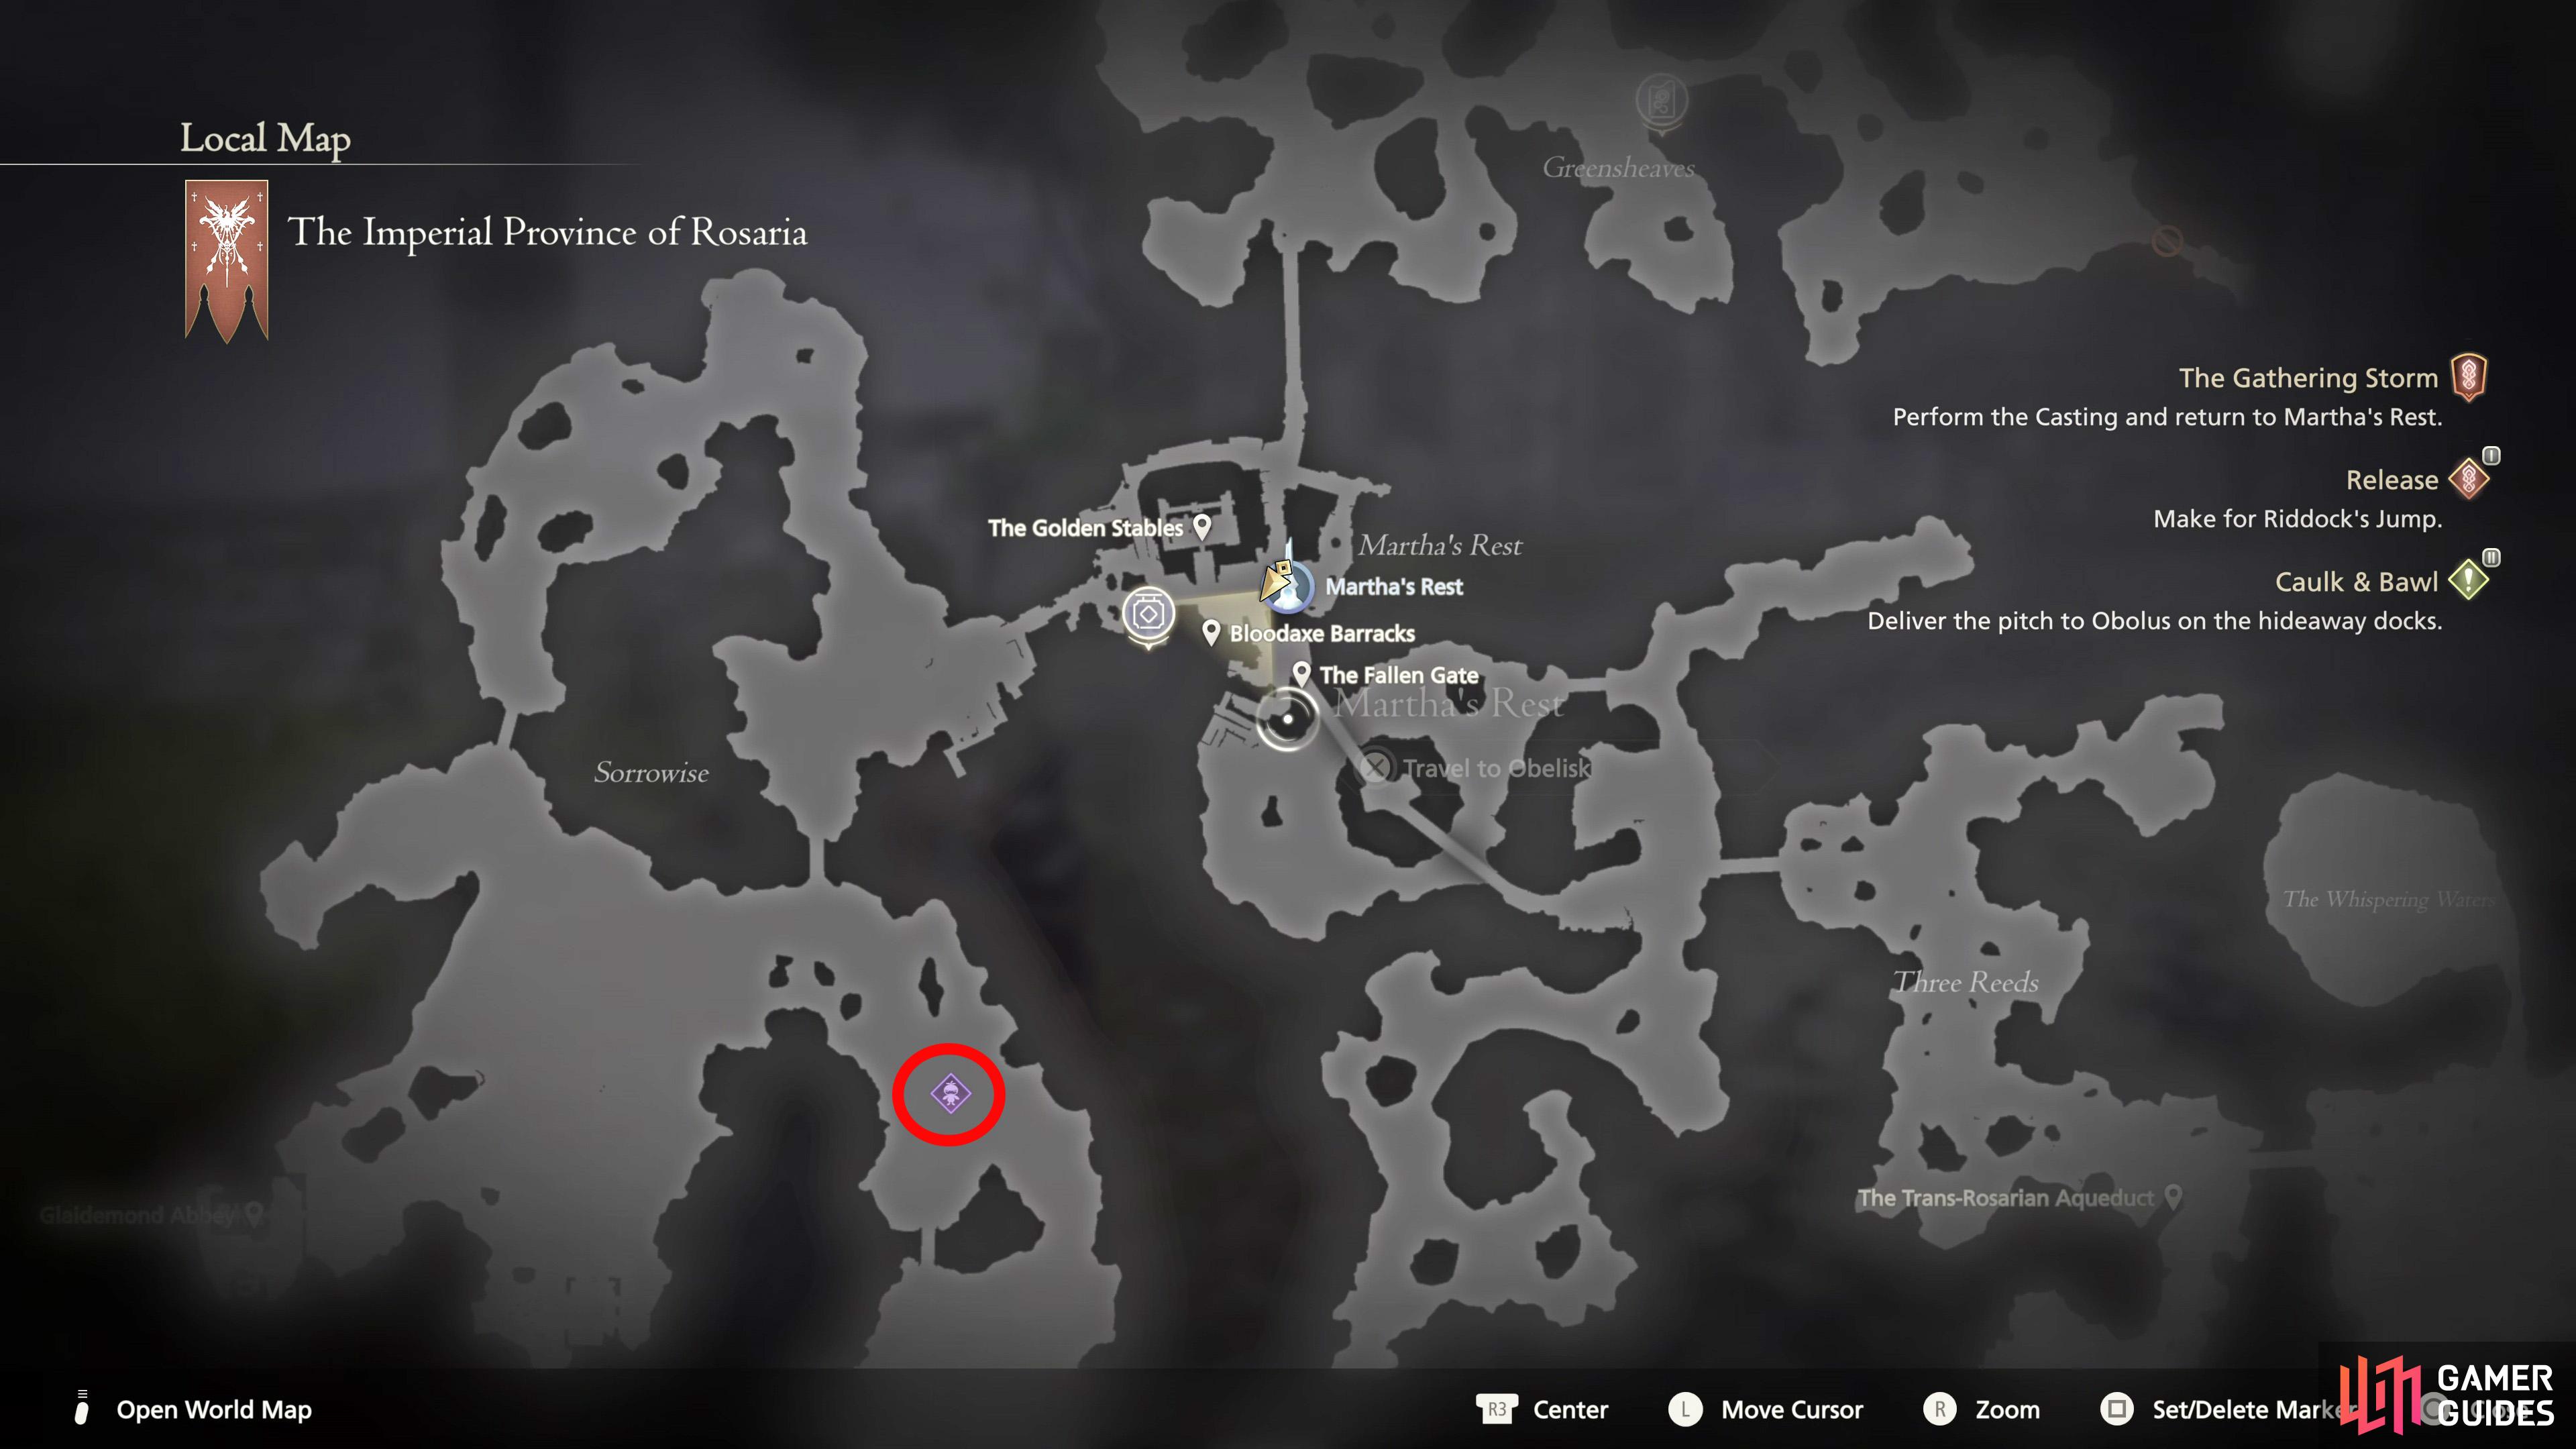
!Ahriman can be found southwest of !Martha’s Rest.
You’ll come across it while doing the Main Story quest “Release”.
How to Beat Ahriman in FF16
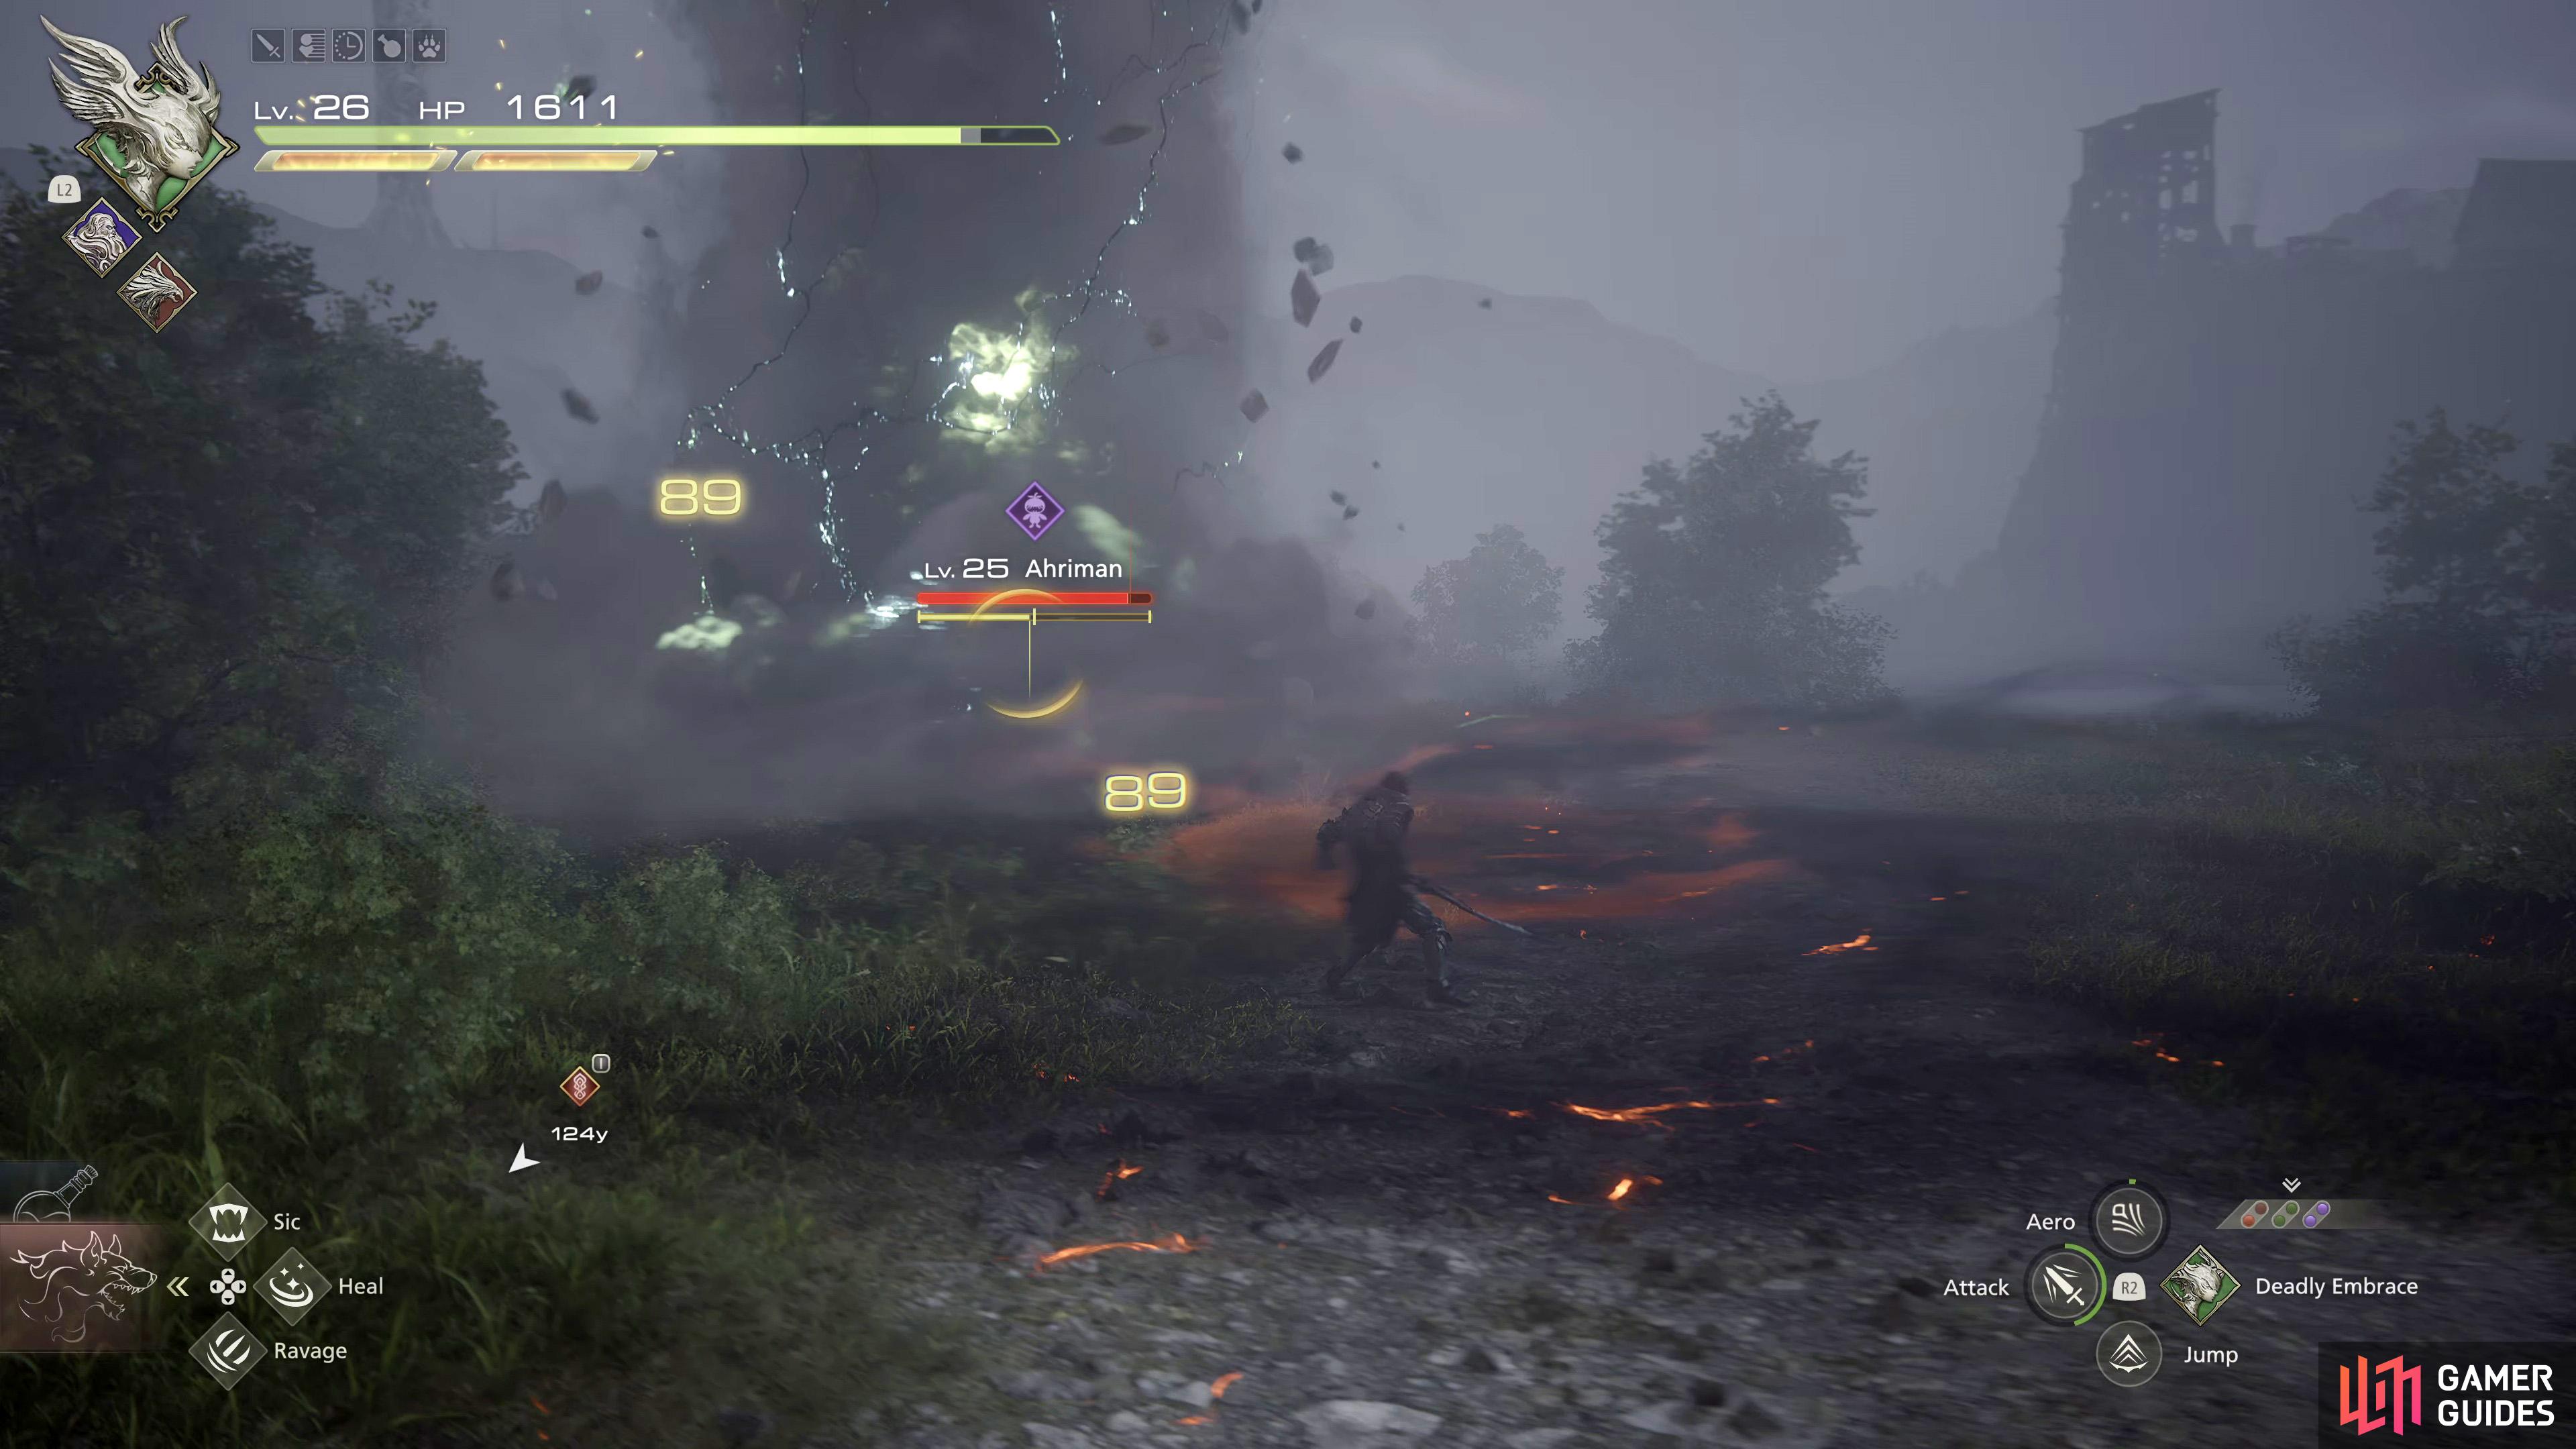
Although this is a tutorial on Hunts, it’s very much a real battle, and the mischievous creature even has an ability that can cause instant death, so don’t underestimate it at all. Here is a look at what Ahriman has in its arsenal:
| Attack | Description | Counter |
|---|---|---|
| Homing Thunder Orbs | Ahriman will unleash two orbs infused with thunder that home in on your location. | Wait until the orbs get close then dodge just as they’re about to hit you. This will give you Precision Dodge. |
| Eye-Laser | Ahriman will fire off a laser from its beady eye at your last location. This almost always follows the Thunder Orbs. | Dodge any direction when you see the laser. This shouldn’t cause you any problems as it’s easy to avoid. |
| Doom | Ahriman will place Doom on you which is indicated by four blue balls around Clive. | The four balls act like a timer, and when the last orb turns red, a large circle with red balls will appear on the floor. This circle will go off a few seconds later, and if you’re in the circle, you’ll instantly die. |
| Quaga | Ahriman will place numerous small orange/red circles across the battlefield where they will explode consecutively a few seconds later. | Stay mobile during this phase and use dodge if one of the circles is about to explode underneath you. |

Here is a video to see it’s attacks in action:
Most of Ahriman’s attacks deal substantial damage but are easy to dodge/avoid. The only real attack you need to worry about is Doom as this will cause instant death to you if you’re within the red circle when it goes off which will end the battle, and give you game over. What you want to do for this attack is keep your distance from Ahriman, and then Phoenix Shift toward it when the circle drops on the floor.
Be careful though as sometimes Ahriman will get close to you which makes this tactic invalid. If this does happen, repeatedly press dodge ( ) while heading out of the circle. You should be okay, providing you do this the second the circle hits the floor. The only other attack which may cause some problems is Quaga. Ahriman will place small red circles around the battlefield before detonating them consecutively causing them to explode with earth pillars. For this attack, stay mobile, and use dodge if you happen to be standing on one of them when they’re about to explode.
!Garuda’s Astral Blast is fantastic for stagger damage, although it does have a long cooldown.
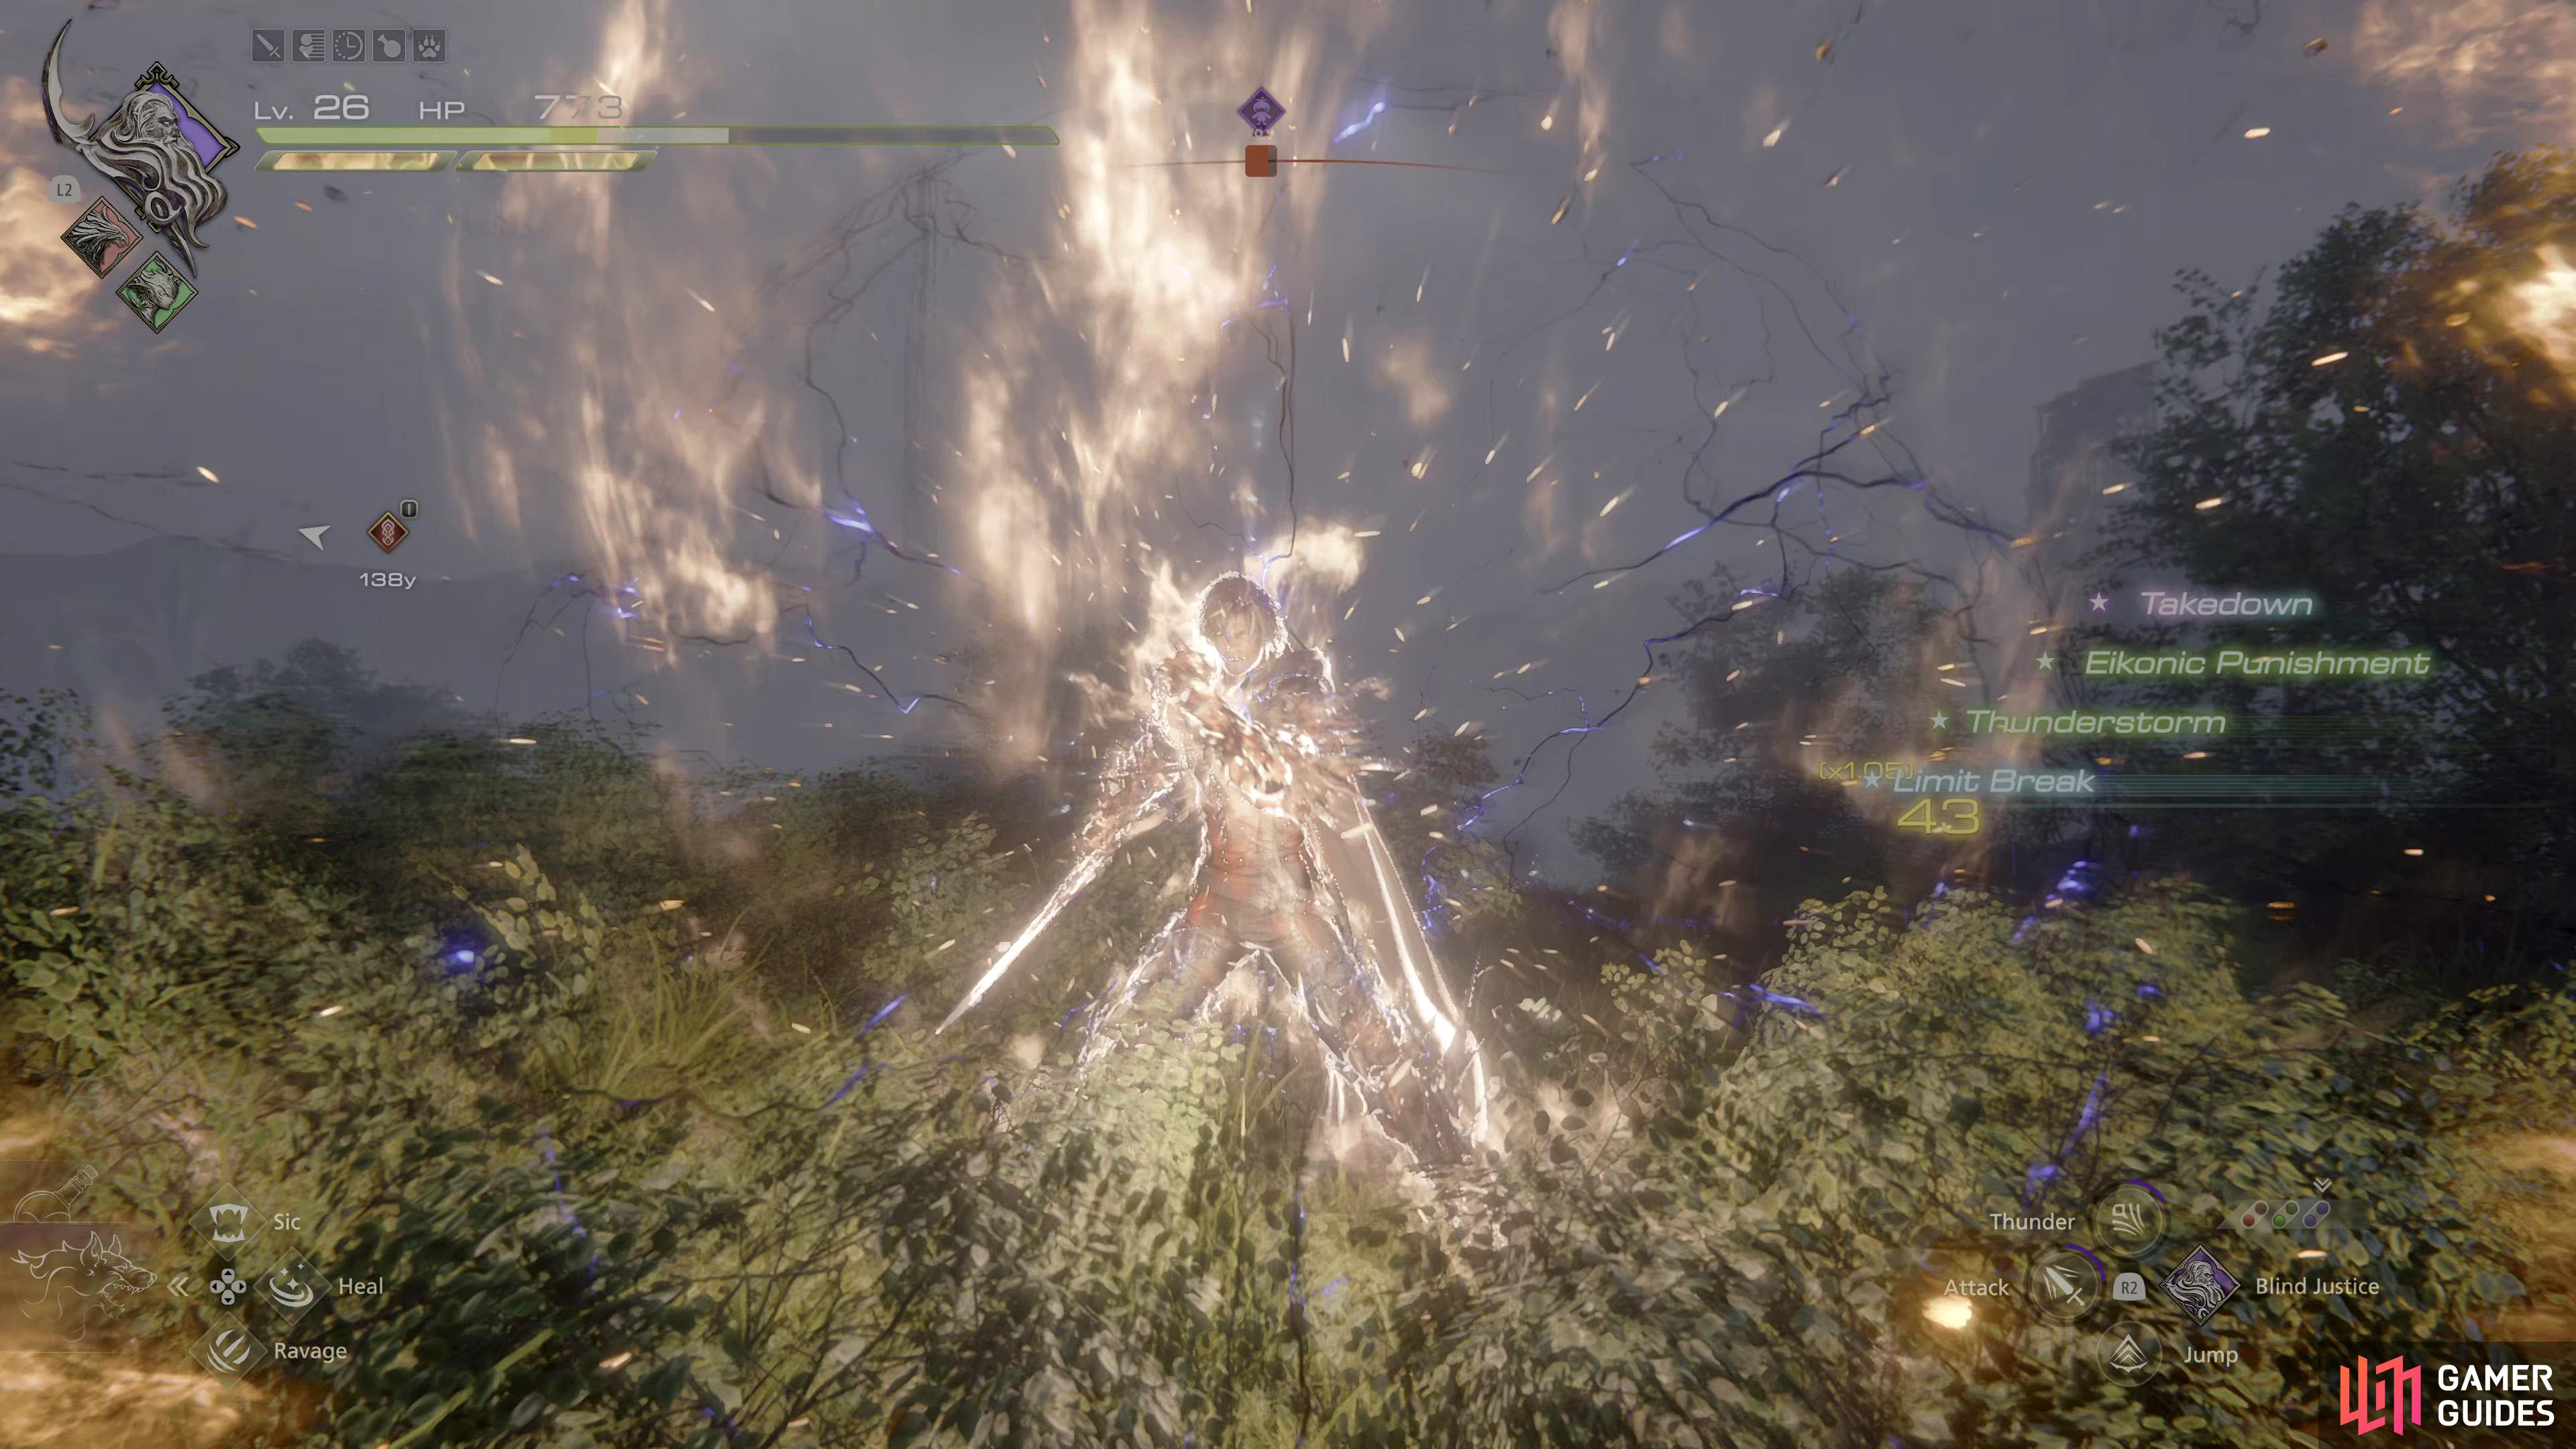
When !Ahriman is staggered, use your limit break (and a strength tonic if you have one) to maximize the damage you do to it.
Other than the two attacks mentioned above, the rest of the battle will be a continuous barrage of Thunder Orbs that home in on you, and an Eye-Laser gaze attack that will hit your last location. The Eye-Laser will always follow after the Thunder Orbs so stay mobile until the orbs get close then dodge through them at the last second. If you’re having trouble avoiding the orbs, you can just run away from them as they will eventually dissipate.
Now you know how to avoid the attacks, what’s the best way to damage the monster you say? Well, just attack it silly…just kidding. By now you should have down the flow of the battle system. Inflict Will damage until you hit the halfway mark, then switch to Garuda and use Deadly Embrace to pull them to the ground. This will leave them staggered, briefly allowing you to inflict even more Will damage. Then use more high-will damaging abilities like Gouge to fully stagger them. At this point, pop a Limit Break, and use your highest damage skills to maximize the damage you do to the monster. Rinse and repeat this method until it’s defeated.
Recommended Abilities for Ahriman
Here we will list our recommended ability set up to do this effectively:
| Eikon | Ability | Damage Type |
|---|---|---|
| Will (5 Stars) | ||
| Will (4 Stars) | ||
| Damage (3 Stars) | ||
| Phoenix | Damage and Will (3 Stars) | |
| Damage (4 Stars), Will (3 Stars) | ||
| Damage and Will (3 Stars) |
With the above abilities, cast Aerial Blast off cooldown. This has a long cooldown, but it will cause huge Will-Damage while you’re fighting. While this is going off, perform a regular combo which will be something like this: Attack > Magic (Magic Burst), Attack > Magic (Magic Burst x2), Attack > Magic (Magic Burst x3), and finish it off with a Gouge. The more times you hit  while using this ability, the more attacks Gouge will do. As soon as you get towards the halfway point of the Will-Gauge, stop what you’re doing, and use Deadly Embrace (Garuda) to pull Ahriman to the floor.
With it staggered temporarily, keep up the regular combo while weaving in some of your other attacks, although save Judgment Bolt and Flames of Rebirth for when it’s fully staggered. Before long, you’ll have Ahriman downed and staggered. This is where you want to pop Limit Break (increases damage), and go to town on the monster with Judgment Bolt, and Flames of Rebirth. After these have been used, continue using the regular combo while weaving in Ignition, Thunderstorm, and ![]() Torgal.
Torgal.
Doing this strategy above should defeat Ahriman in two full staggers if you haven’t been interrupted. Talking of being interrupted, at times, especially when Doom has been cast, you’ll have to stop your combos to avoid the attack, so use the above method as more of a priority system than an outright strategy. Note: If you take quite a few hits, and your potion supply is running low, use your Limit Break to recover some health instead of saving it for the stagger phase as you can’t deal damage if you’re dead!
Recommended Items and Equipment for Ahriman
Gear
For your Weapon, Belt, and Vambraces, you should have the following:
| Weapon | Belt | Vambraces |
|---|---|---|
If you don’t have what’s listed above, use the highest Attack for Weapon, and highest Defense and Health for the Belt and Vambraces.
Accessories
For your Accessories, this is more subjective, so here is what we used:
| Accessory 1 | Accessory 2 | Accessory 3 |
|---|---|---|
For Accessory 3, you can use any damaging ability increase accessory, but we chose Ignition due to the ability being available more quickly.
Items
Finally, we have items. This is more of a preference thing, but we chose the following items:
| Shortcut 1 | Shortcut 2 | Shortcut 3 |
|---|---|---|
You could take a ![]() Lionheart Tonic, but these are costly at this stage of the game, and Ahriman isn’t worth the cost.
Lionheart Tonic, but these are costly at this stage of the game, and Ahriman isn’t worth the cost. ![]() Stoneskin Tonic could also be taken if you’re not confident of your skill in dodging, and want the extra 30% attack. If you take the Strength Tonic as we did, use it as soon as you knock Ahriman into the Stagger phase to maximize damage.
Stoneskin Tonic could also be taken if you’re not confident of your skill in dodging, and want the extra 30% attack. If you take the Strength Tonic as we did, use it as soon as you knock Ahriman into the Stagger phase to maximize damage.
More Final Fantasy 16 Hunts
For information on some of the other ![]() Notorious Marks you can take on in Final Fantasy XVI, check out these pages below:
Notorious Marks you can take on in Final Fantasy XVI, check out these pages below:
No Comments