
During the “Footfalls In Ash” main scenario mission of Final Fantasy 16 another S-Rank Notorious Mark will be ready to hunt, and this time it is Pandemonium. This Orcish monstrosity wields a giant staff who is situated near Wolfdarr in ![]() The Kingdom of Waloed. Read below to find Pandemonium’s exact location as well as out in-depth Hunt strategy to defeat it.
The Kingdom of Waloed. Read below to find Pandemonium’s exact location as well as out in-depth Hunt strategy to defeat it.

Pandemonium becomes available during the Footfalls of !Ash main scenario quest.
Where to Find Pandemonium in Final Fantasy 16
| Location | Level | Bounty |
|---|---|---|
| Wolfdarr, Waloed | 45 | 20,000 Gil, 50 Renown |
When you reach the “Footfalls In Ash” main scenario quest, teleport to ![]() The Shadow Coast obelisk in Waloed and follow the winding path northwest until you reach an intersection leading west. Follow the western path as far south as you can go and you’ll eventually reach a large gate. As you approach the gate, it will open, and Pandemonium will walk through it.
The Shadow Coast obelisk in Waloed and follow the winding path northwest until you reach an intersection leading west. Follow the western path as far south as you can go and you’ll eventually reach a large gate. As you approach the gate, it will open, and Pandemonium will walk through it.
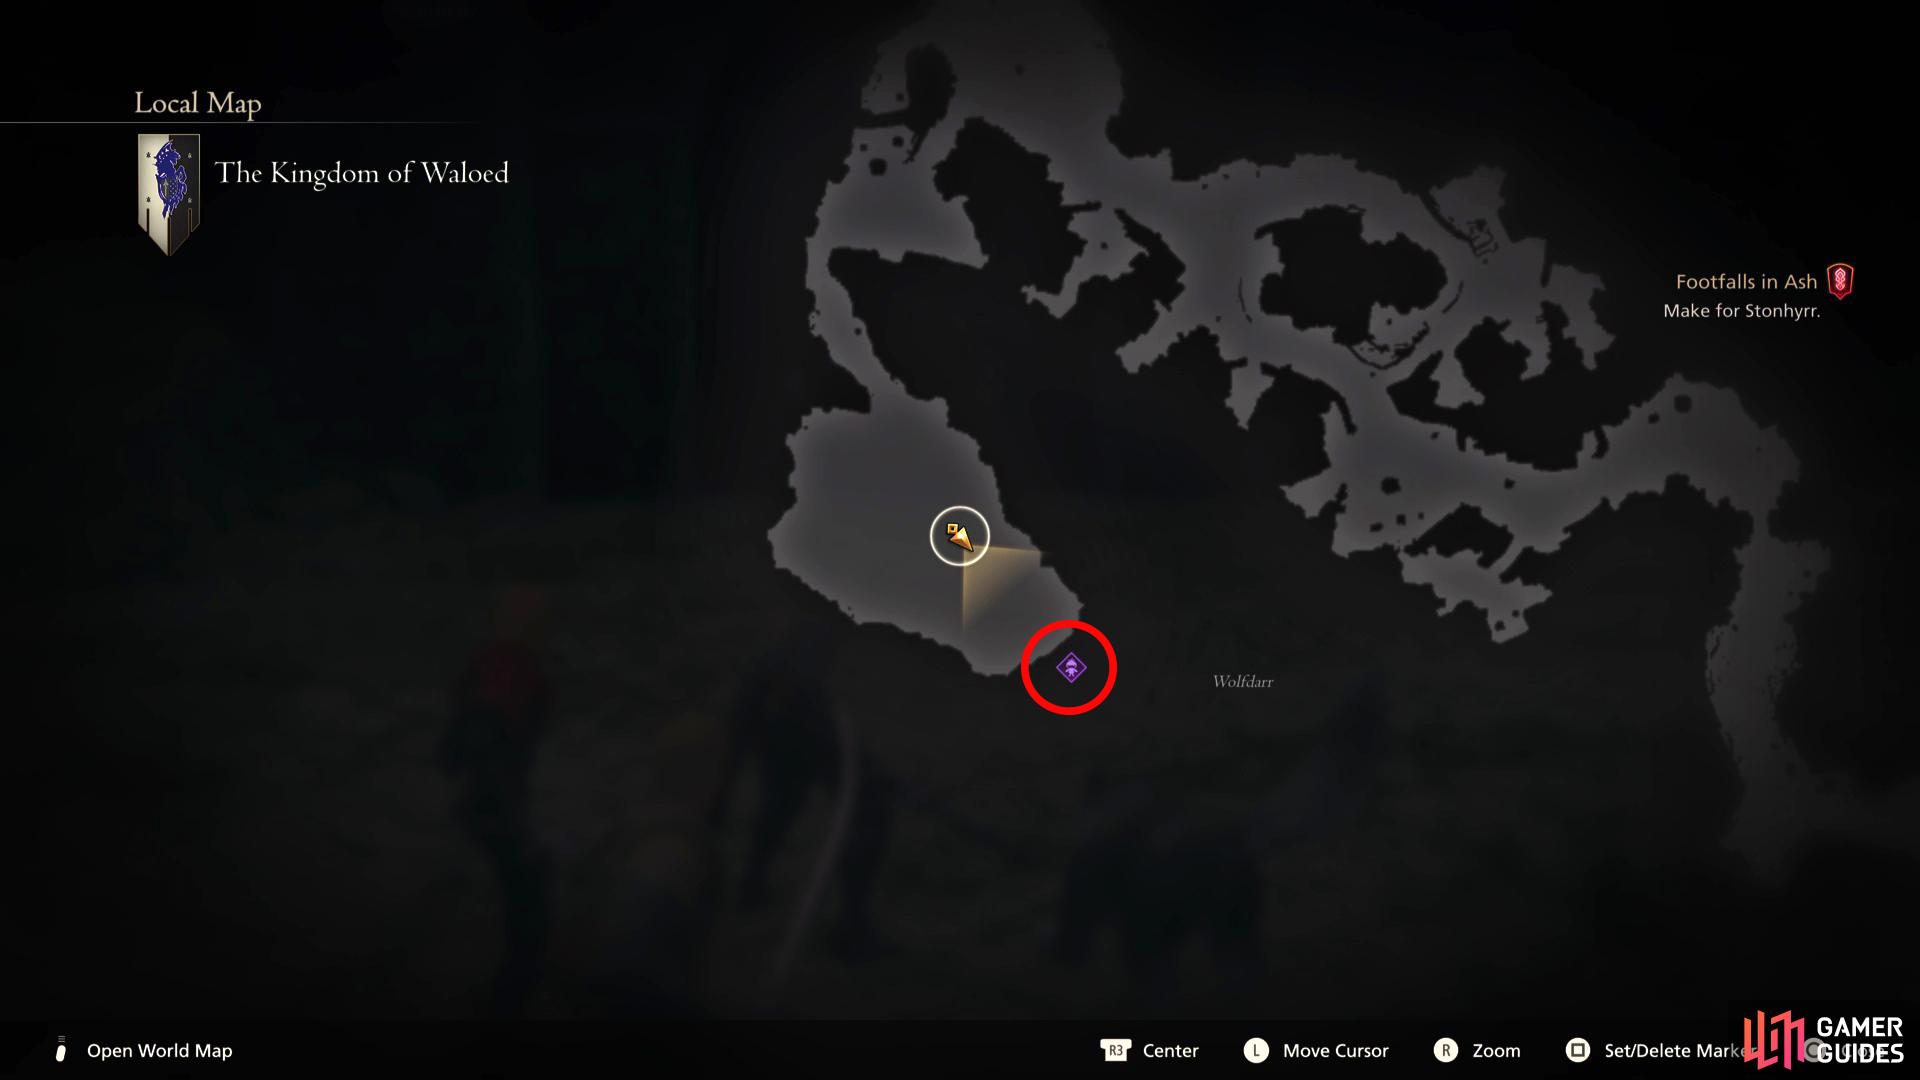
To find Pandemonium, you’ll need to teleport to The Shadow Coast, and follow it northwest then west, and south.
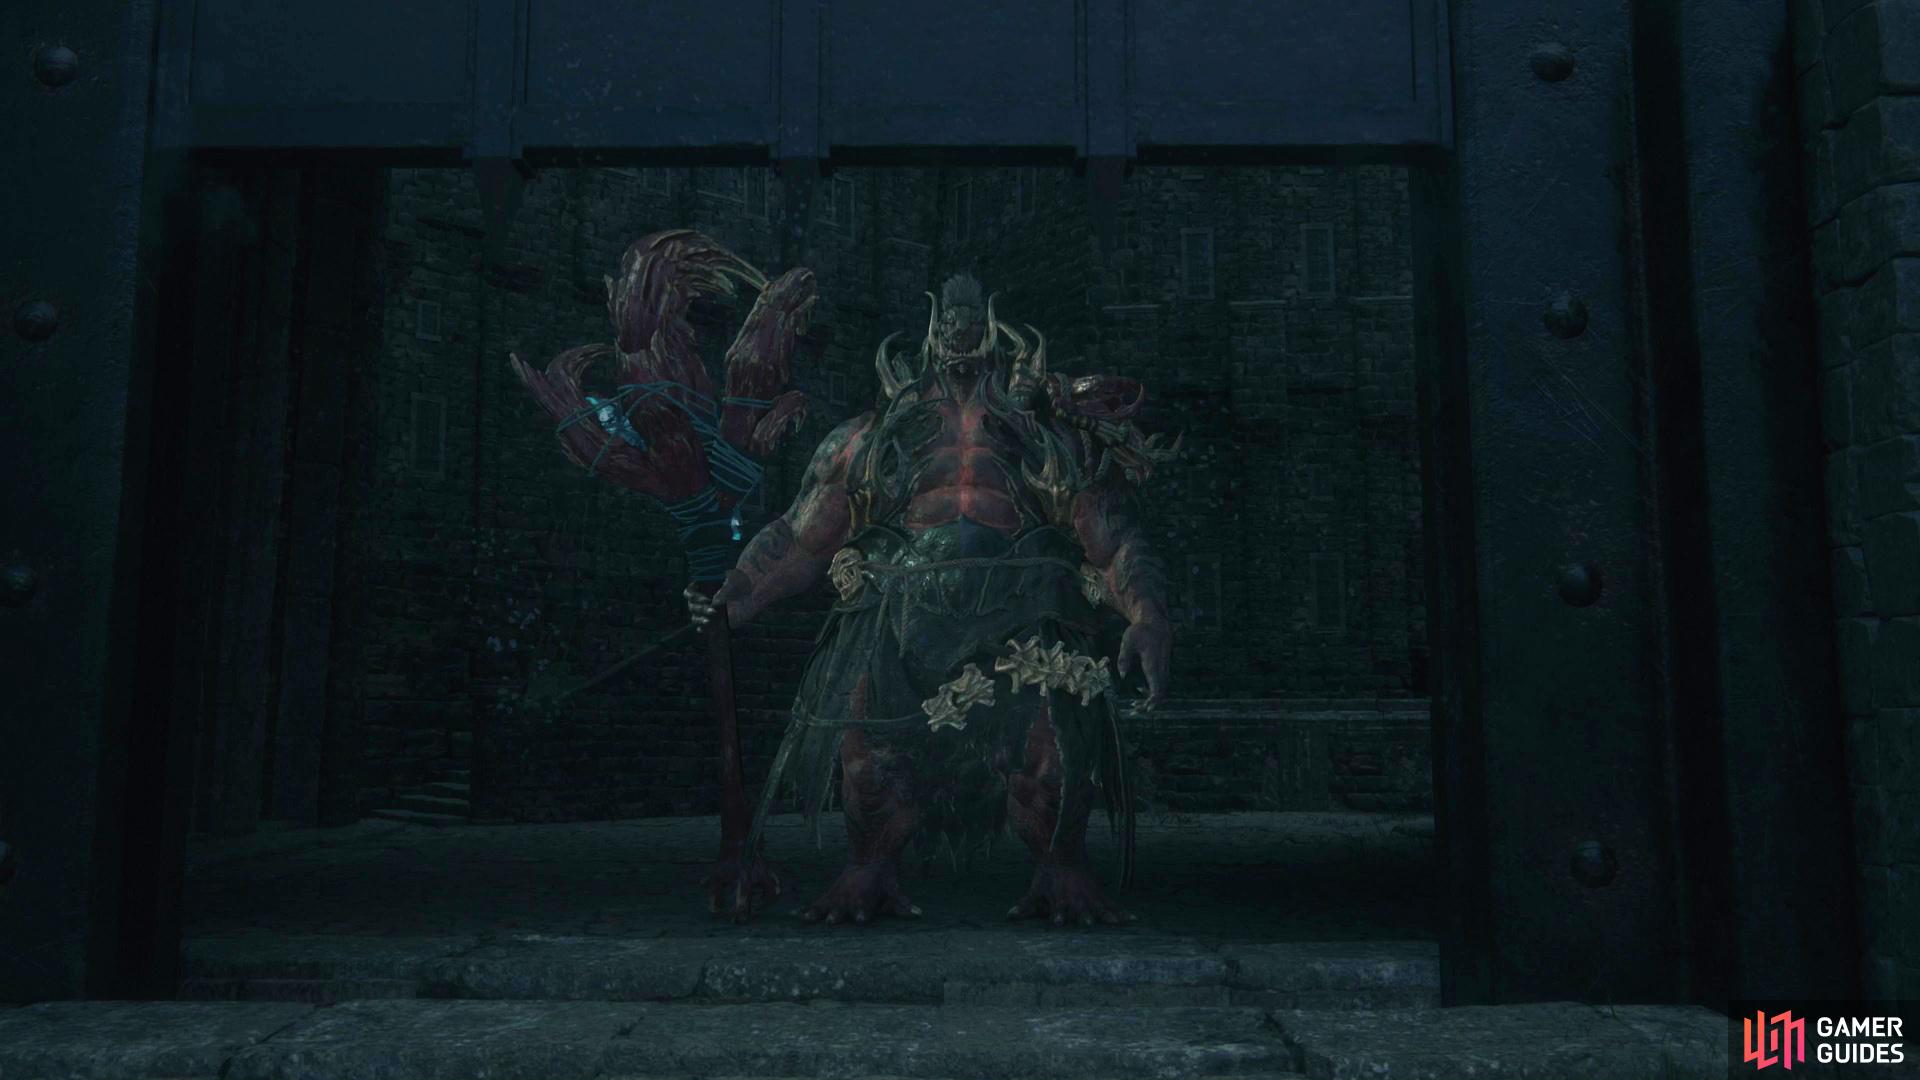
As you head south, you’ll find a closed gate, that is, until Pandemonium walks through it.
Pandemonium’s Abilities and Attacks
Below you’ll find all the attacks that Pandemonium has in its arsenal:
| Attack | Description | Counter |
|---|---|---|
| Teleport Smash | Pandemonium will teleport to your location, and slash downward at you. | Whenever you see Pandemonium teleport, get ready to dodge. The direction doesn’t matter as long as you dodge. For a Precision Dodge, activate the button when its weapon swings down. |
| Staff Swipe | Pandemonium will swipe at you with its staff. It can also be used after a teleport. | This is a simple melee attack where dodging into the attack will cause you to precision dodge the attack. |
| Dark Missiles | Pandemonium will charge up the tip of its staff before unleashing a barrage of missiles infused with dark energy. | If you keep moving, you’ll avoid the missiles, otherwise wait for them to reach you, and dodge toward them. |
| Dark Explosion | Pandemonium’s staff will briefly change to a dark blue color before placing numerous circular markers across the battlefield. After a short while, they will explode. | Simply stay out of the markers to avoid the attack. If you’re on one as they’re about to explode, you can dodge them. |
| Sanguine Rite | Pandemonium will bring down a large dark orb-like object that will slowly crash down to the floor causing significant damage. Later on, Pandemonium can cast up to three at the same time. | Although this attack can deal major damage, it’s slow to hit the floor giving you ample time to get out of the circle displayed at ground level. If there is more than one coming down, find the spot which isn’t being covered by a circle that is normally in between the three. |
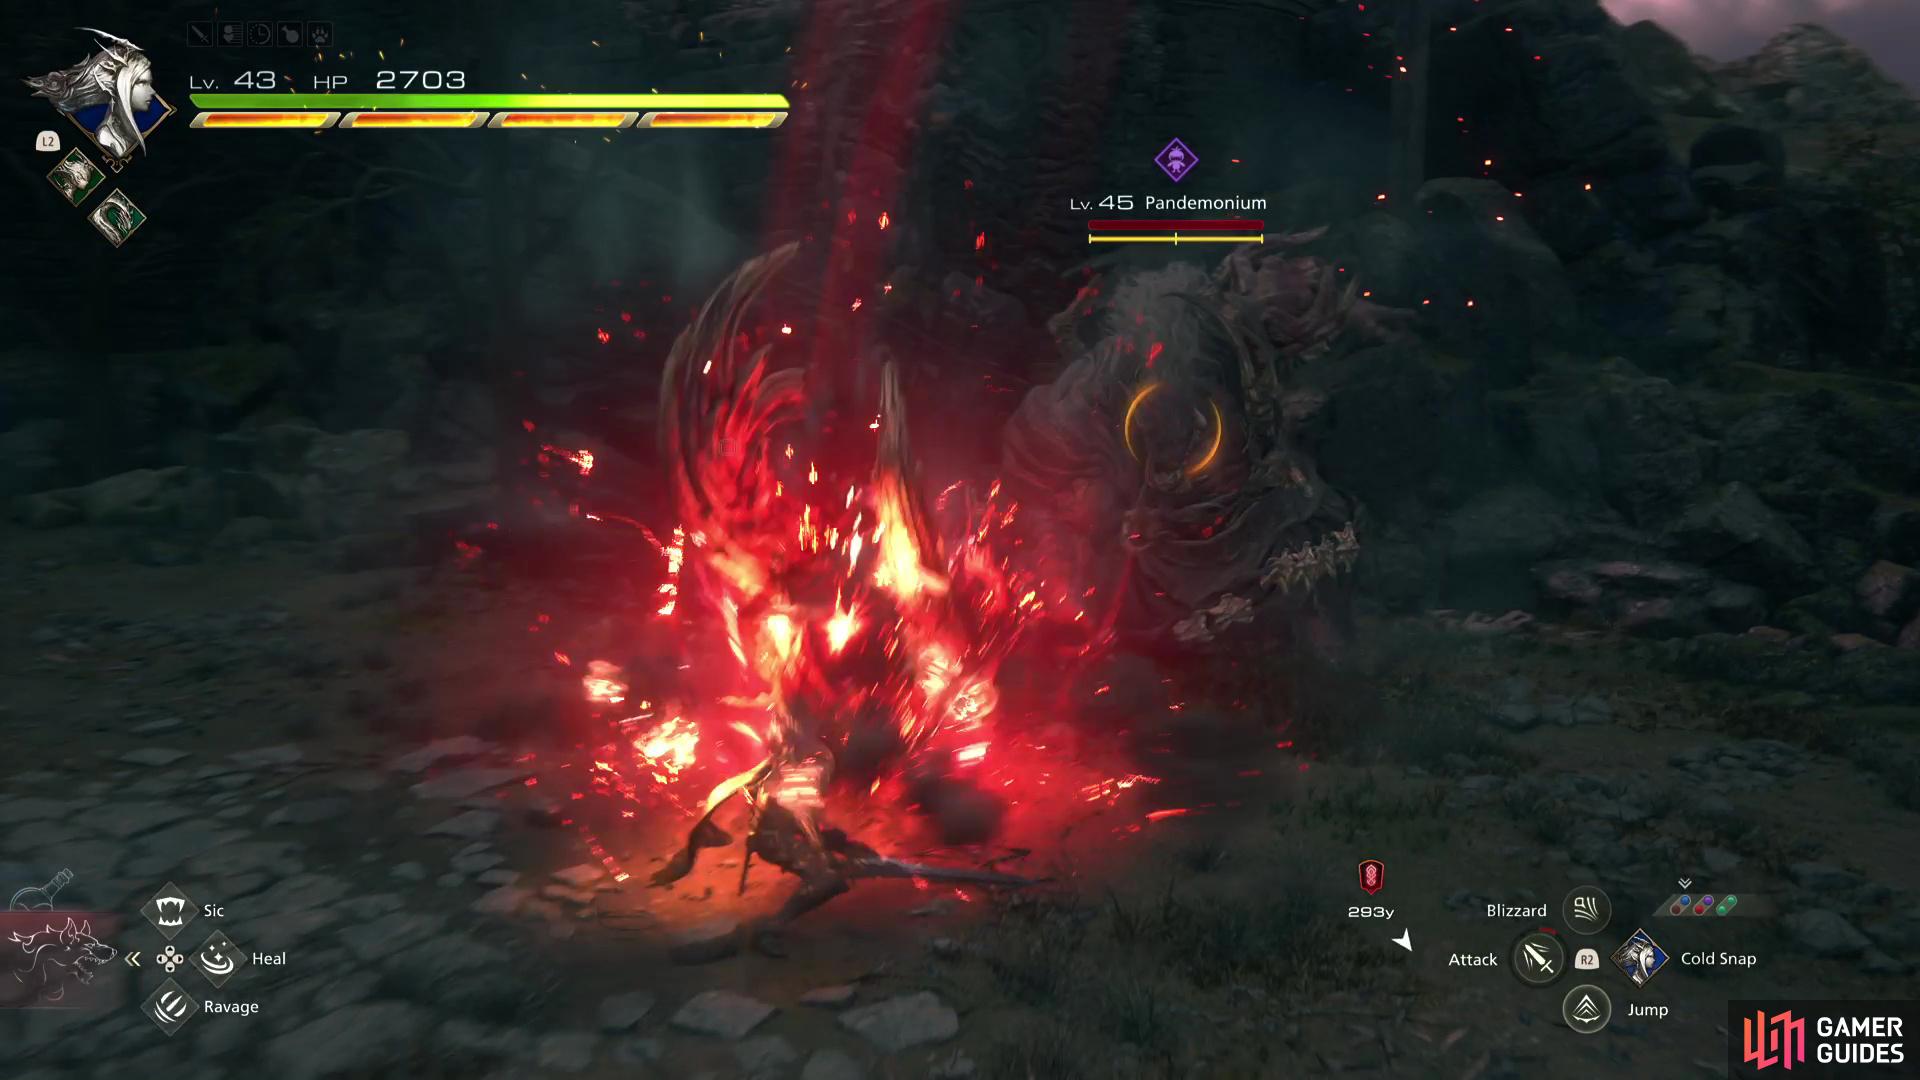
| Rictus of Horror | Pandemonium’s signature attack. If you get hit by this, you could be seeing the game over screen. Pandemonium will charge up a beam in the center of its body before teleporting and channeling a reddish-orange beam of death. | This is a powerful attack that hits multiple times until it stops channeling. You’ll want to move either side of the beam to avoid it, but the teleport can make it difficult to judge where to move. Pandemonium will always cast it at your last location, so stand still until it teleports then move to the side. If the beam is close enough to you, you can dodge to the side of it. You may want to cast Will-o’-the-Wykes on yourself just in case you mis-time the attack. |
(1 of 5) Teleport Smash has Pandemonium teleport towards you while performing an overhead attack that smashes down upon you.
Recommended Abilities for Pandemonium
Here we will list our recommended ability set up to do this fight effectively:
| Eikon | Ability | Damage Type |
|---|---|---|
| Damage (5 Stars) | ||
| Damage (2 Stars), Will (3 Stars) | ||
| Will (5 Stars) | ||
| Damage (2 Stars), Will (3 Stars) - Master this and place it as the second Shiva ability. | ||
| Damage (4 Stars) | ||
| Will (2 Stars) - Master this and place it as the second Titan ability. |
The reason behind the chosen abilities is as follows. Titan has ![]() Titanic Block which is useful for some last-second damage negation while also having access to the powerful Windup attack. You can switch out Titan for Garuda if you’d rather have
Titanic Block which is useful for some last-second damage negation while also having access to the powerful Windup attack. You can switch out Titan for Garuda if you’d rather have ![]() Deadly Embrace instead, just place Windup onto Garuda’s bar. For the other spot, place a mastered Will-o’-the-Wykes to give you the option to nullify four attacks. This is a very potent ability.
Deadly Embrace instead, just place Windup onto Garuda’s bar. For the other spot, place a mastered Will-o’-the-Wykes to give you the option to nullify four attacks. This is a very potent ability.
Shiva’s ![]() Cold Snap can Permafrost enemies whenever you perform a successful Precision Dodge which makes her invaluable to have while also having access to Diamond Dust which is the strongest Will-Damage attack in the game. Then we take Lightning Rod from
Cold Snap can Permafrost enemies whenever you perform a successful Precision Dodge which makes her invaluable to have while also having access to Diamond Dust which is the strongest Will-Damage attack in the game. Then we take Lightning Rod from ![]() Ramuh to place in front of Pandemonium when it is staggered to amplify any multiple-hit attacks we do.
Ramuh to place in front of Pandemonium when it is staggered to amplify any multiple-hit attacks we do.
Finally, take Bahamut for Gigaflare which is one of the most powerful attacks in the game. This is fantastic to use at any time, but especially at the end of a stagger phase when combined with Lightning Rod. Next up is Impulse, this can be changed to ![]() Gouge if you’d prefer more Will damage at the cost of potentially getting hit during its animation. Then you have
Gouge if you’d prefer more Will damage at the cost of potentially getting hit during its animation. Then you have ![]() Wings of Light which can be really strong, especially when you charge Megaflare to level 5 and release it just before the stagger phase commences.
Wings of Light which can be really strong, especially when you charge Megaflare to level 5 and release it just before the stagger phase commences.
Recommended Items and Equipment for Pandemonium
Gear
For your Weapon, Belt, and Vambraces, you should have the following:
| Weapon | Belt | Vambraces |
|---|---|---|
If you don’t have what’s listed above, use the highest Attack for the Weapon, and the highest Defense and Health for the Belt and Vambraces.
Accessories
For your Accessories, this is more subjective, so here is what we used:
| Accessory 1 | Accessory 2 | Accessory 3 |
|---|---|---|
| Adamantite Gauntlets (+500 HP) |
Items
Finally, we have items. This is more of a preference thing, but we chose the following items:
| Shortcut 1 | Shortcut 2 | Shortcut 3 |
|---|---|---|
If you’re not confident in avoiding Rictus of Horror, bring along a ![]() Stoneskin Tonic to negate the damage by 30% otherwise bring a
Stoneskin Tonic to negate the damage by 30% otherwise bring a ![]() Strength Tonic for the 30% damage increase.
Strength Tonic for the 30% damage increase.
Pandemonium Hunt Strategy
Pandemonium is just a giant Orcish Warlord who has similar attacks in its arsenal. This can be a difficult battle especially if it’s your first time fighting the creature. The main attacks you should worry about are definitely Rictus of Horror and Sanguine Rite, especially when it uses the two attacks at the same time after the first stagger phase. This is because later on, Sanguine Rite will restrict your space which leaves you less space to avoid Rictus of Horror and if you get hit by that, you could get game over. Trust us, we messed up, and found out!
When you see Rictus of Horror for the first time, it may appear underwhelming, I mean, it’s only a laser beam that originates from its chest. That should be easy to avoid, right…right? Well yes, but also no, due to the fact that Pandemonium will charge it up first, but just before it releases it, it’ll teleport to a different position before immediately unleashing the devastating beam which can catch you off-guard. Now combine that with Sanguine Rite where you’re trying to find a safe spot, and the chances of dying rise exponentially.
This is why we recommend bringing along Will-o’-the-Wykes as this can nullify up to four attacks when upgraded, and it may just save your life. If you have to take the hit between Sanguine Rite, and Rictus of Horror, always choose the former. It still does respectable damage, but nothing a potion or two can’t heal through. For its other attacks, they’re easy enough to avoid/dodge, and if they do hit you, it’ll only be for minor damage.
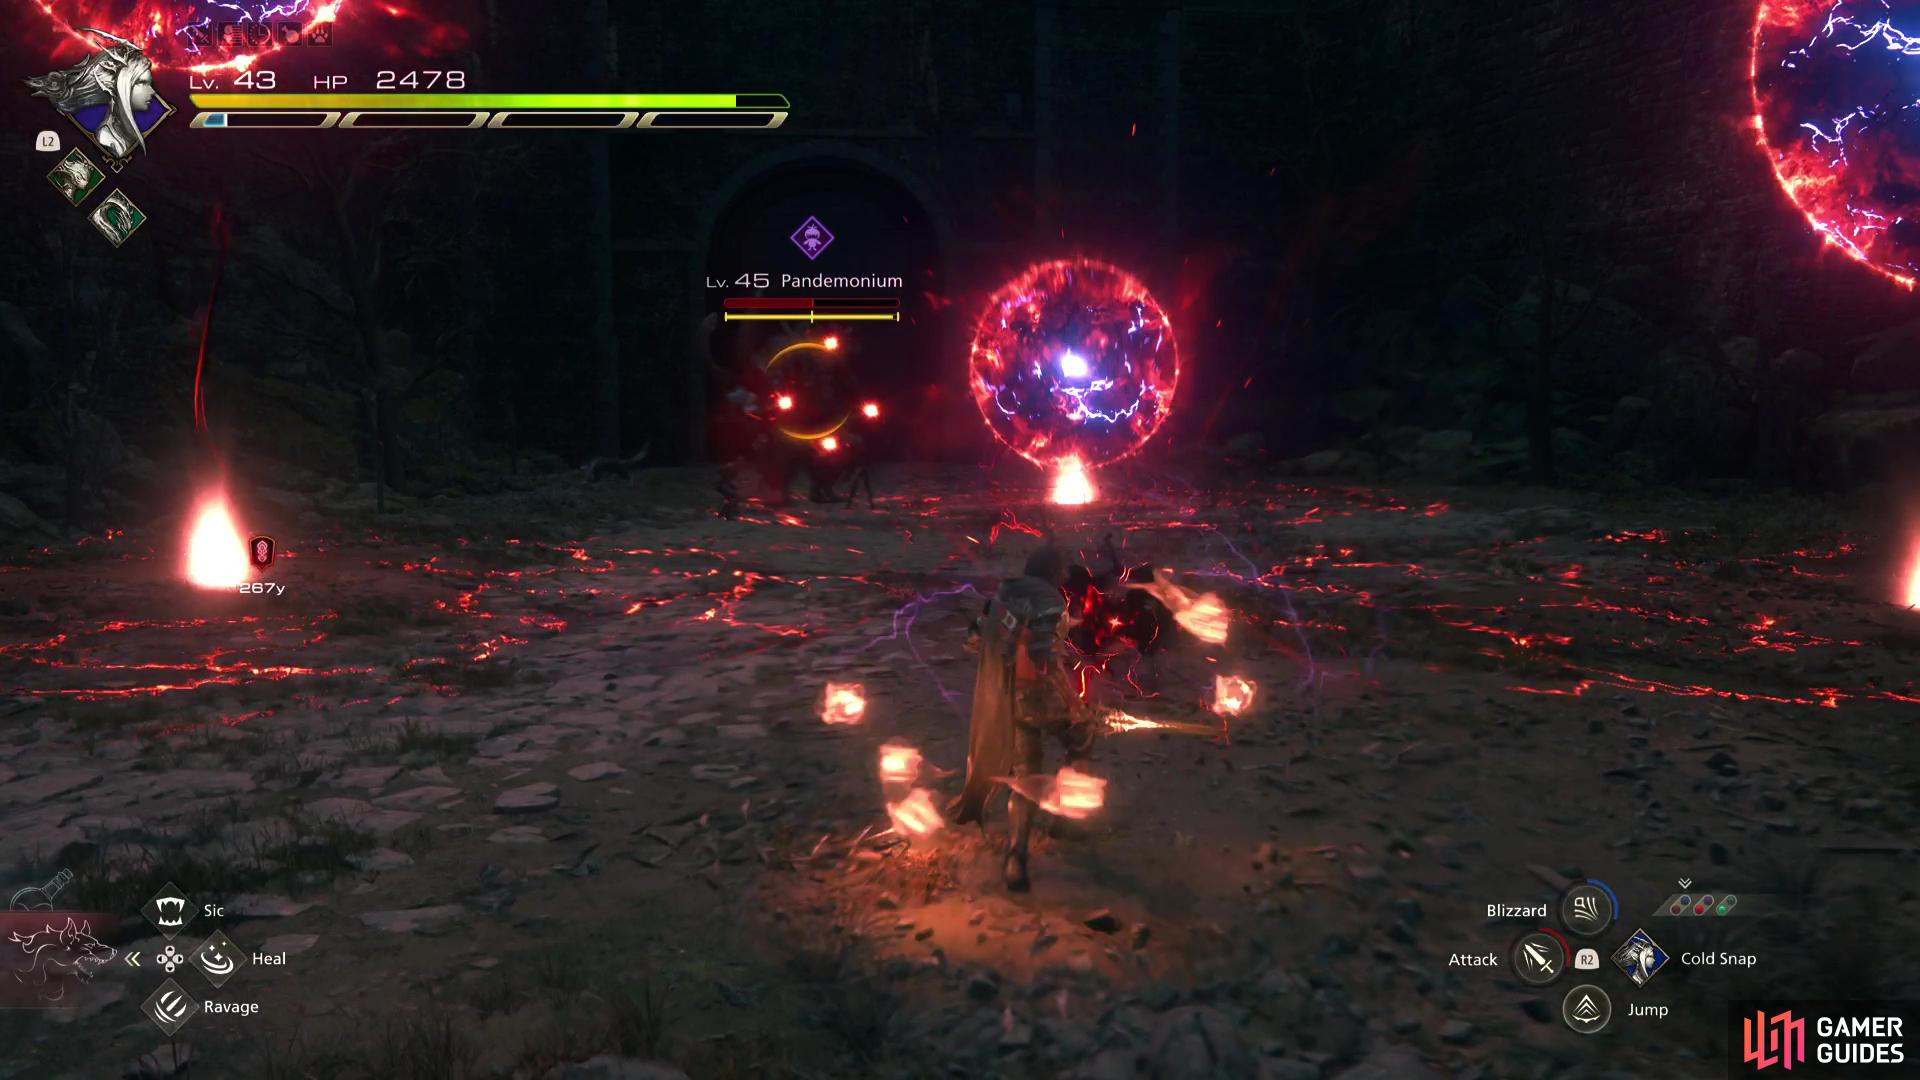
(1 of 3) After the first stagger phase, Pandemonium’s Sanguine Rite will begin dropping three orbs to the ground instead of the usual one.
The genuine flow of the battle will be Pandemonium teleporting toward you and using either its Teleport Smash or Staff Swipe attack, teleporting away and casting Dark Missiles. Occasionally, you’ll see the Dark Explosion and the singular version of its Sanguine Rite attack, but it’s not until after the first stagger phase that these become a real problem.
After you’ve staggered it once, it’ll start to combine, and chain together multiple attacks while also bringing out Rictus of Horror. Other than the Rictus of Horror and Sanguine Rite combination, it can also use Sanguine Rite combined with Dark Explosion, and even some of its teleport attacks. It definitely becomes a bit tougher during this phase, but as long as you avoid Rictus of Horror, and to a lesser extent, Sanguine Rite, you should be okay.
In terms of dealing damage to Pandemonium, you’ll want to use a combination of Lightning Rod, Diamond Dust, and Impulse/Gouge for its Will-Gauge. Then use a Level 5 Megaflare (optional) > Limit Break (Strength Tonic as well) > Lightning Rod > Gigaflare > Windup. If you have any time left on the stagger gauge, throw in another Diamond Dust or use a combo or two. This will cause devastating damage to Pandemonium, so much so, that two of these, three at most, will finish the battle.
Once you’ve defeated Pandemonium, you’ll be rewarded with 15,000 XP, 120 AP, 20,000 Gil, and 50 Renown. On top of that, you’ll obtain the invaluable Stained Loincloth from the Spoils. This is used to create the best Vambraces in the game, ![]() The Sons of Ouroboros.
The Sons of Ouroboros.
More Final Fantasy 16 Hunts
For information on some of the other ![]() Notorious Marks you can take on in Final Fantasy XVI, check out these pages below:
Notorious Marks you can take on in Final Fantasy XVI, check out these pages below:
No Comments