
After crossing the deserts of Western Dhalmekia with uncle Byron - stopping to deal with some troubles plaguing Dalimil at the behest of ![]() L’ubor - Clive will finally reach
L’ubor - Clive will finally reach ![]() Drake’s Fang. Unlike the other Mothercrystals, this one is buried deep within a hollow crag, and
Drake’s Fang. Unlike the other Mothercrystals, this one is buried deep within a hollow crag, and ![]() Hugo Kupka has built his palace within. It’s time to infiltrate the mad dominant’s stronghold and put an end to him once and for all, both to eliminate the continued threat he represents to Clive and the other
Hugo Kupka has built his palace within. It’s time to infiltrate the mad dominant’s stronghold and put an end to him once and for all, both to eliminate the continued threat he represents to Clive and the other ![]() Branded and to avenge those who were slain at Kupka’s request when the old Hideout was sacked. This page will walk you through the main quest Into the Darkness, including information on finding the
Branded and to avenge those who were slain at Kupka’s request when the old Hideout was sacked. This page will walk you through the main quest Into the Darkness, including information on finding the ![]() The Favor of Lightning (Lightning Rod) and strategies for defeating the Orcish Warlord, the Undertaker and Titan.
The Favor of Lightning (Lightning Rod) and strategies for defeating the Orcish Warlord, the Undertaker and Titan.
Enemies in Drake’s Fang
| Enemies in this Area |
|---|
| Black Mastiff |
| Orcish Fodder |
| Orcish Mesmerizer |
| Orcish Warlord |
Items in Drake’s Fang
| Items in This Area |
|---|
| Blood Hides |

(1 of 3) Orcish Fodder live up their name - they can be easily dispatched with Eikonic Abilities like Ignition.
Drake’s Fang Mines - FF16 Into the Darkness Main Quest Walkthrough
You’ll regain control of Clive in the crystal minds on the outskirts of ![]() Castle Dazbog, the former of which is now overrun with beastmen - orcs, specifically. Make your way forward to encounter the first of these beastmen, Orcish Fodder, who, as their names suggest, are trash mobs. A single
Castle Dazbog, the former of which is now overrun with beastmen - orcs, specifically. Make your way forward to encounter the first of these beastmen, Orcish Fodder, who, as their names suggest, are trash mobs. A single ![]() Ignition and Piledriver combo should smoke them. Crawl under an obstruction to reach another section of the chamber, then follow the tracks forward to find a greater concentration of enemies, including more Orcish Fodder and some Black Mastiff, neither of which are terribly interesting. Cull them and follow some tracks to reach a gate which can be opened with a lever.
Ignition and Piledriver combo should smoke them. Crawl under an obstruction to reach another section of the chamber, then follow the tracks forward to find a greater concentration of enemies, including more Orcish Fodder and some Black Mastiff, neither of which are terribly interesting. Cull them and follow some tracks to reach a gate which can be opened with a lever.
Do so and enter the next chamber to find a trio of Orcish Mesmerizers, who are your standard ranged spellcaster. Without any melee fodder backing them up, however, they’re trivial to cut down. Once they’re defeated, grab 3x Pinches of Magicked Ash from the middle of the room, then search side chambers to the right and left for a Potion and a chest containing 10x Steelsilk, 10x Bloody Hides and 10x Magicked Ash, respectively.
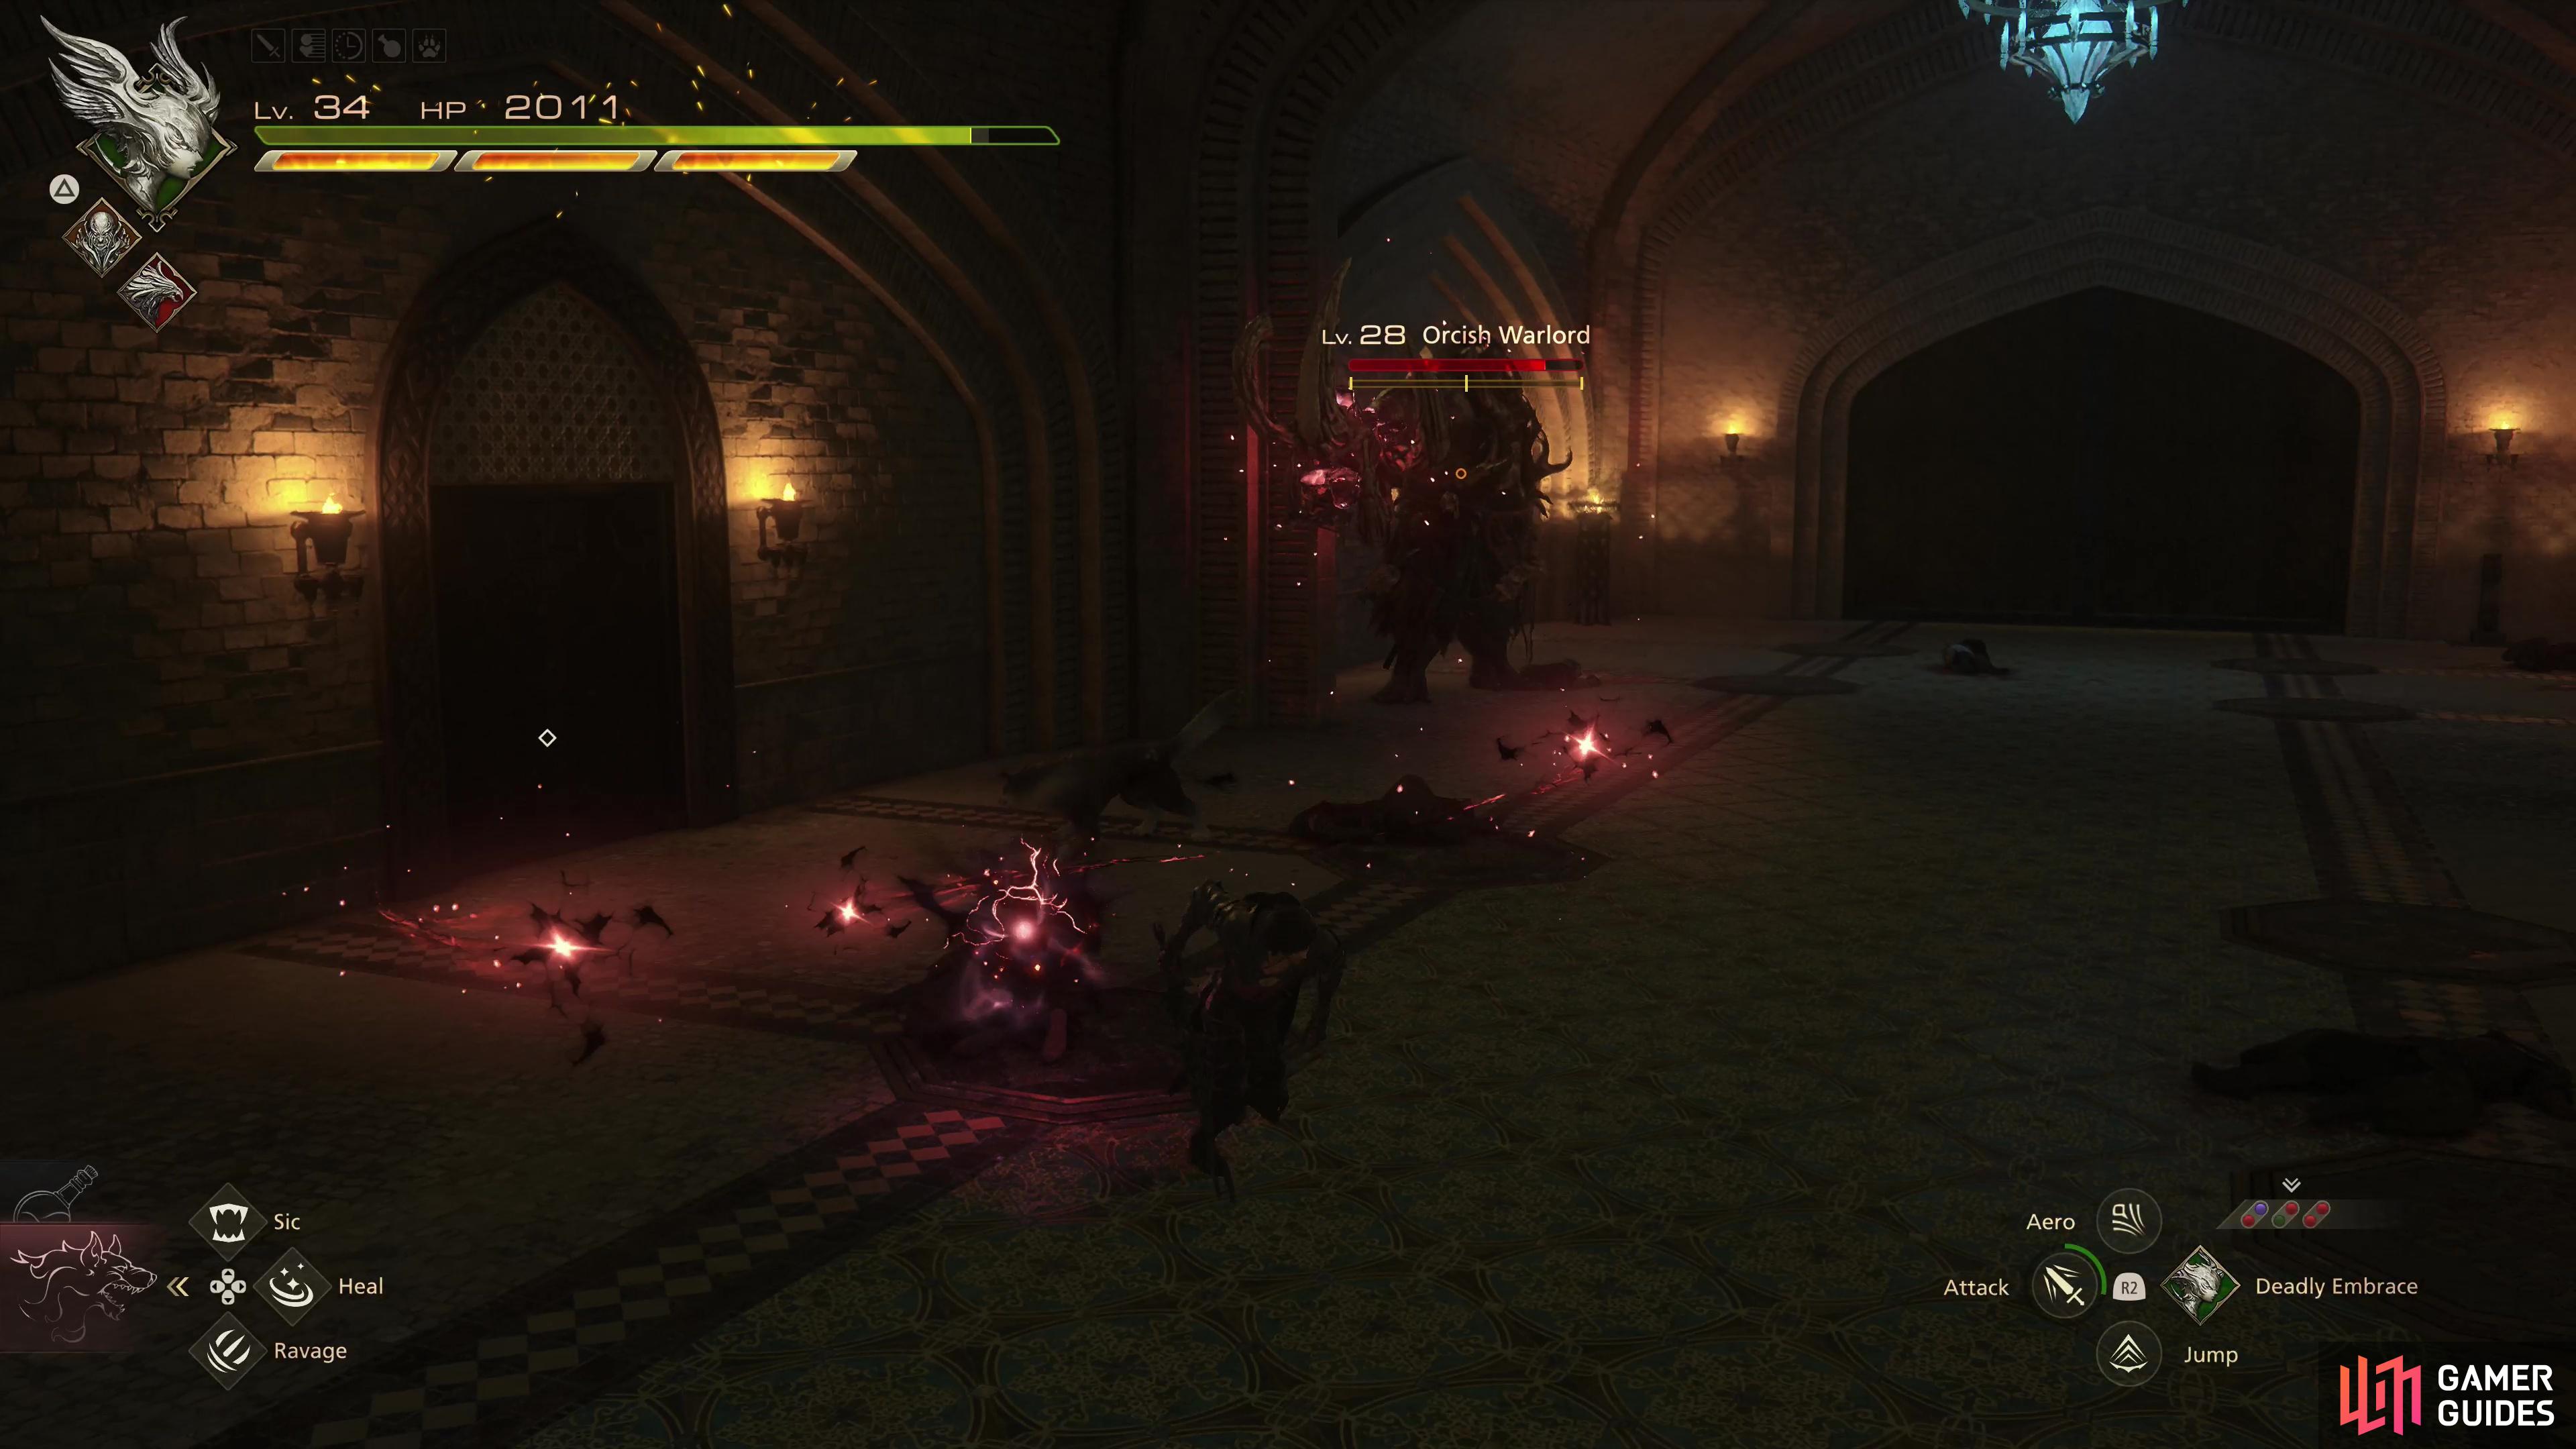
Follow the tracks and squeeze through another gate and proceed to the far end of this chamber to encounter more orcs. For now there are only a handful of Orcish Fodder and two Orcish Mesmerizers on wooden platforms. If you ignore these mages, they’ll happily pelt you with ranged attacks, and when you deplete the Orcish Fodder on the ground, more reinforcements will arrive, making this fight surprisingly hectic. Kill a few of the Orcish Fodder, but try to use ![]() Deadly Embrace to grab the Orcish Mesmerizers from their perch so you’re not be pelted by ranged attacks for the duration of this fight - make things easier on yourself.
Deadly Embrace to grab the Orcish Mesmerizers from their perch so you’re not be pelted by ranged attacks for the duration of this fight - make things easier on yourself.
Once Clive and ![]() Torgal are the last two living things in this room, pull another lever to open another gate and reach another chamber. Loot a chest to score the The Favor of Lightning (
Torgal are the last two living things in this room, pull another lever to open another gate and reach another chamber. Loot a chest to score the The Favor of Lightning (![]() Lightning Rod) accessory, then pick up a Potion before heading right through a doorway. Go upstairs (using Ignition on the Orcish Fodder standing in your way is a quick enough way of forcing passage), snag 2x S!harp Fangs at the top of the stairs, then turn right through some more doors.
Lightning Rod) accessory, then pick up a Potion before heading right through a doorway. Go upstairs (using Ignition on the Orcish Fodder standing in your way is a quick enough way of forcing passage), snag 2x S!harp Fangs at the top of the stairs, then turn right through some more doors.
Here you’ll encounter the first enemy of note in this dungeon - the Orcish Warlord.

How to Defeat the Orcish Warlord - FF16 Into the Darkness Main Quest Walkthrough
Despite being somewhat prominently placed in this dungeon, the Orcish Warlord is merely a miniboss, and once you come to grips with his flashy moves you’ll realize he’s not really any more threatening than a Minotaur, despite the pretentious title this porcine specimen bears. Something of a mix between a shaman and a warrior, the Orcish Warlord mixes magic projectile attacks with brute force melee, rarely indulging in lengthy combos, instead preferring to perform a simple routine (or even just one attack!) before teleporting away to launch another. If this foe sounds versatile… sure, but he’s got a fairly simple routine, almost all of which has a simple counter. If you have the Titan Eikon equipped - ideally with a mastered ![]() Heatwave and
Heatwave and ![]() Will-o’-the-Wykes - there’s not much this foe can do to you.
Will-o’-the-Wykes - there’s not much this foe can do to you.
At the start of the fight the Orcish Warlord will point his staff at you, conjuring four magic missiles - red darts of homing magical energy. Wait until they’re near before dodging or they’ll simply adjust course, or better yet, hit them with Heatwave to counter them and send four arcs of reprimanding damage back at the Orcish Warlord. A successful Heatwave counter does significant damage to the Orcish Warlord’s Will Gauge, putting him at the edge of 50% - a few more hits and he’ll be semi-staggered, and if you quickly capitalize with Deadly Embrace and ![]() Gouge, you can all but deplete his Will Gauge fully.
Gouge, you can all but deplete his Will Gauge fully.
Following magic missile, the Orcish Warlord will teleport near you and attack to swing at you with his staff. This attack can, with practice, be precision blocked with Titan via ![]() Titanic Block, giving you plenty of time to pull off three Titanic Counters. Landing both a Heatwave Counter and a Precision Block and three Titanic Counters followed by Deadly Embrace and Gouge should leave the Orcish Warlord in a bad state, indeed, and after you finish punishing him during his stagger period you can expect half of his life to be gone. Just be wary, as after the Orcish Warlord recovers from stagger he’ll perform a vengeful magical explosion centered on himself - just dodge backwards to escape the AoE.
Titanic Block, giving you plenty of time to pull off three Titanic Counters. Landing both a Heatwave Counter and a Precision Block and three Titanic Counters followed by Deadly Embrace and Gouge should leave the Orcish Warlord in a bad state, indeed, and after you finish punishing him during his stagger period you can expect half of his life to be gone. Just be wary, as after the Orcish Warlord recovers from stagger he’ll perform a vengeful magical explosion centered on himself - just dodge backwards to escape the AoE.
When injured, the Orcish Warlord will get more creative with its attacks, summoning vortexes of magic missiles at your location,
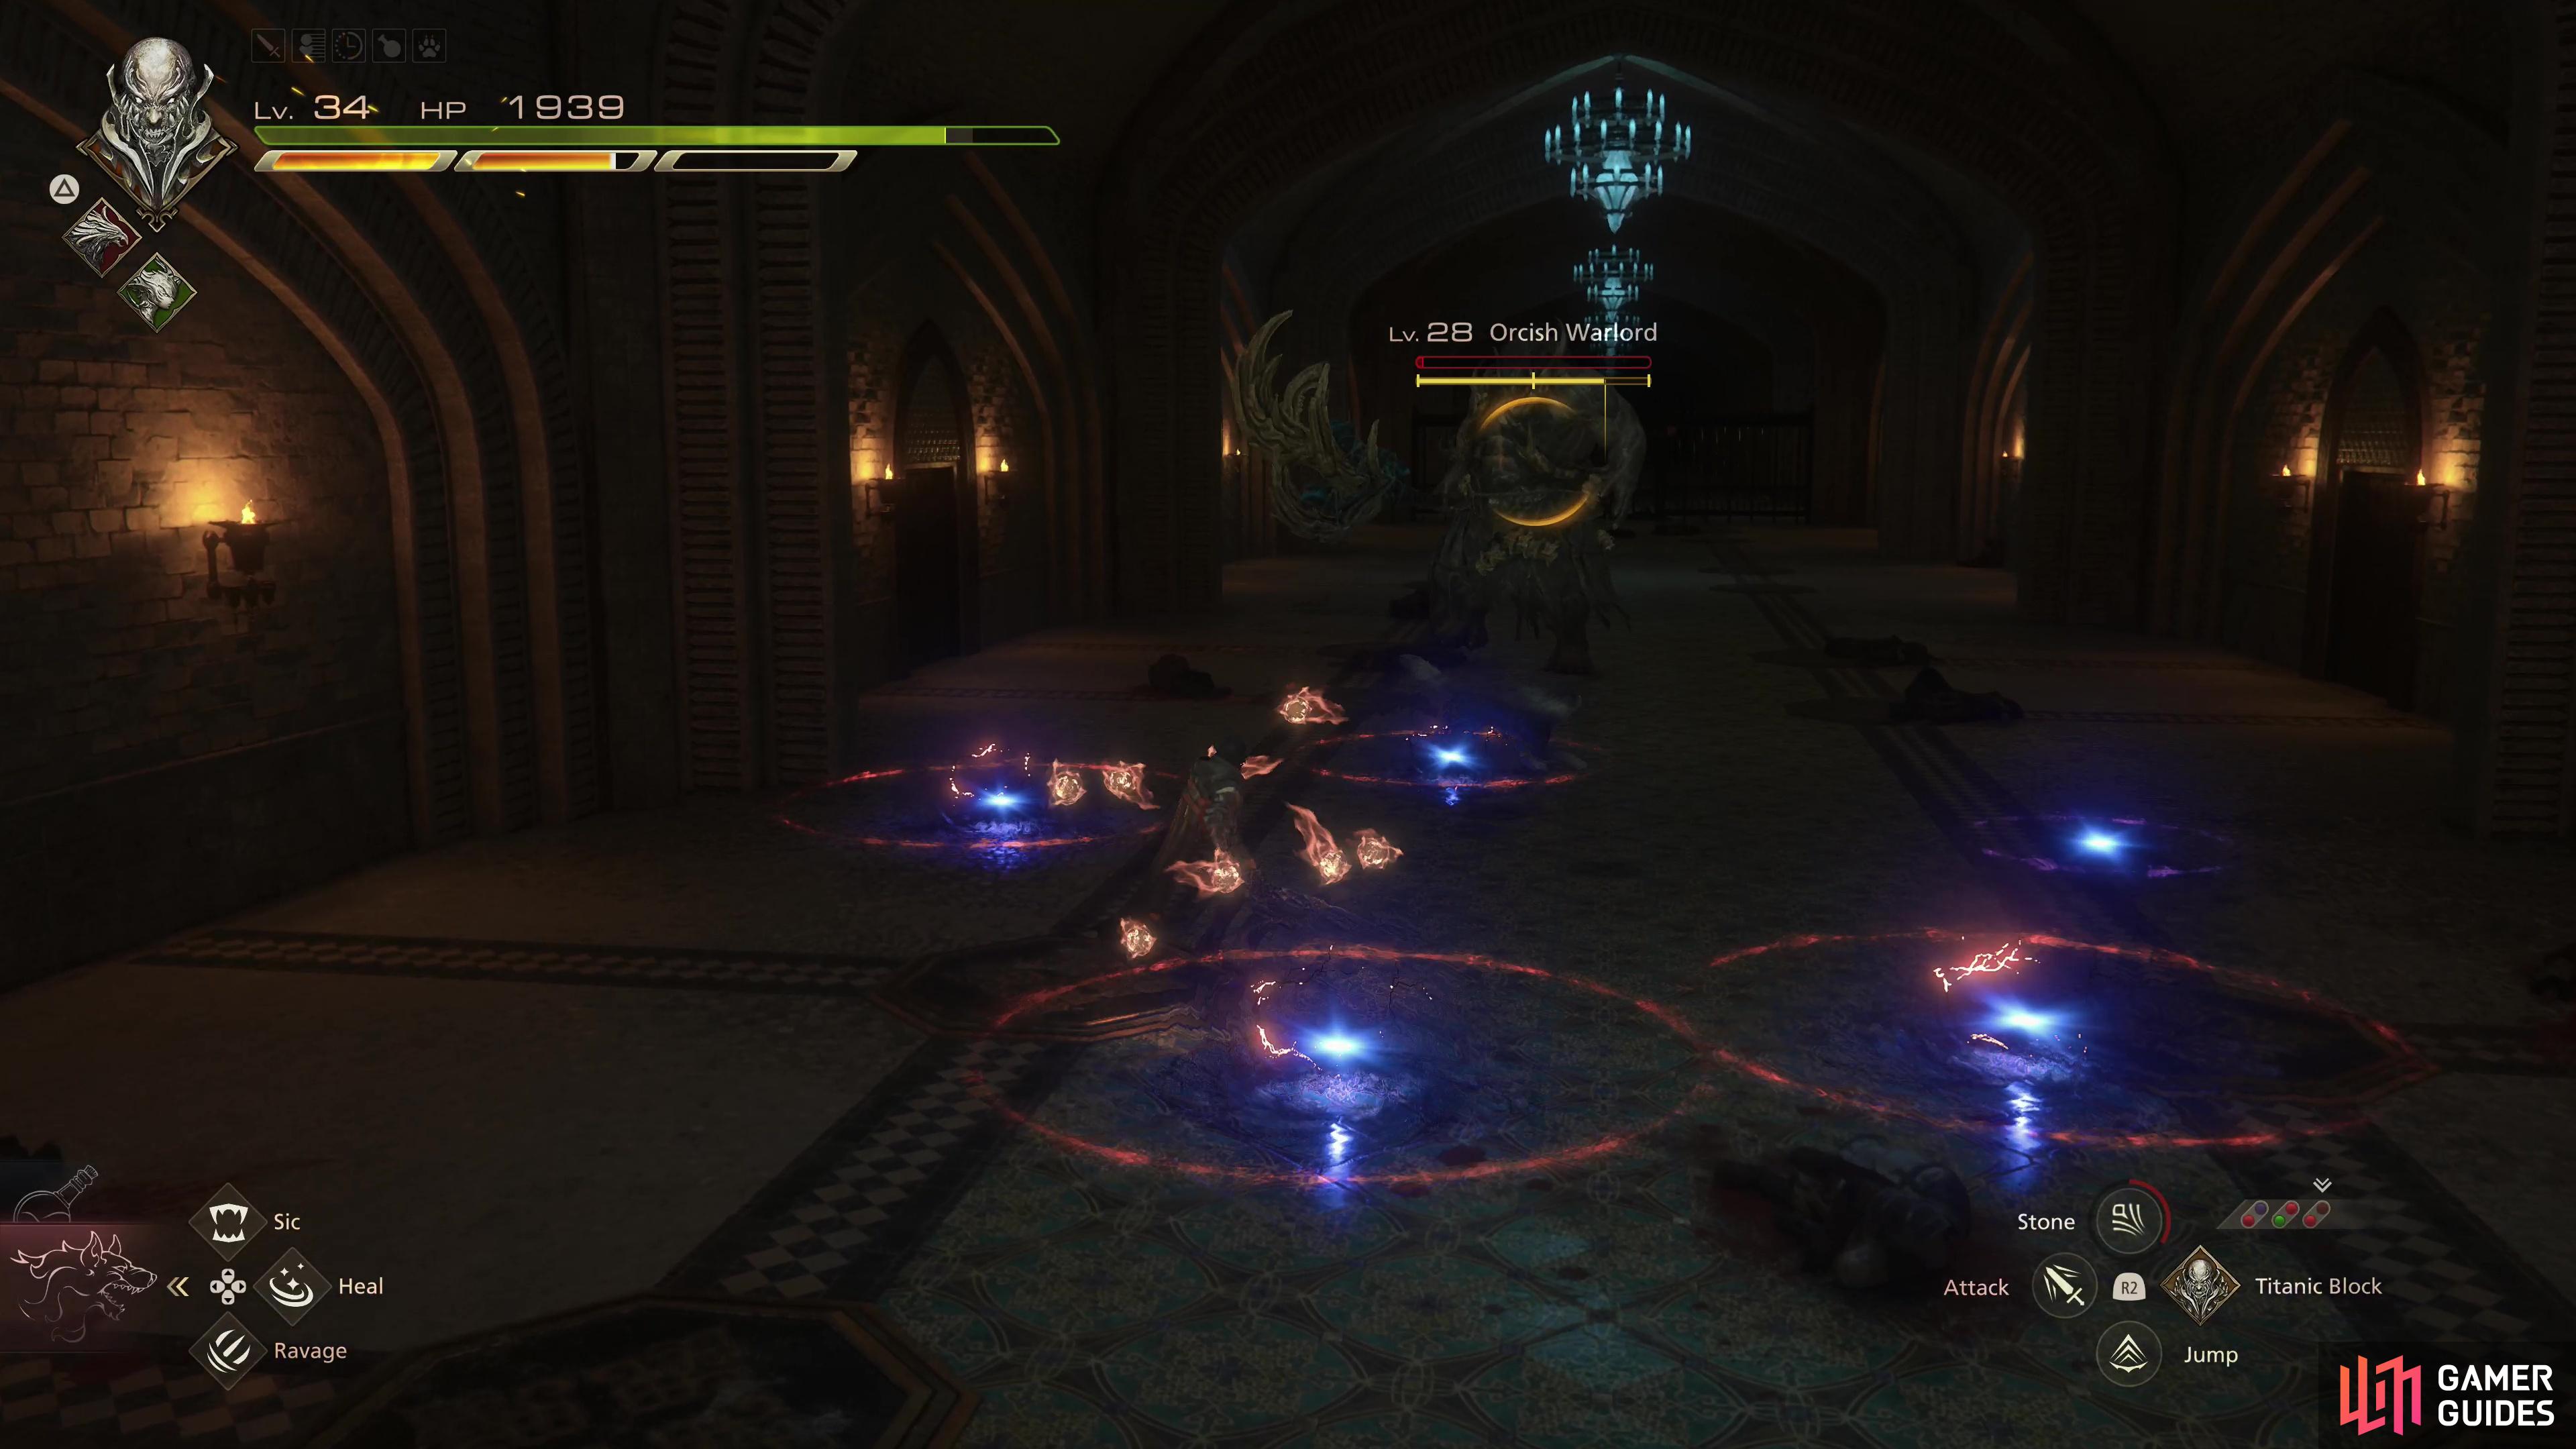
and laying down magical mines, which are mostly just a distraction for the Orcish Warlord’s impeding teleport assault.
When injured, the Orcish Warlord will add some new attacks to his arsenal; he’ll summon magic missiles that orbit you rapidly before conversing on you (dodging will suffice to avoid them as they don’t continue to follow you after appearing) and the Orcish Warlord will summon some magical mines on the ground that will shortly explode. The last attack isn’t all that dangerous, but the mines serve as a distraction - expect the Orcish Warlord to teleport at you and begin launching attacks as the mines detonate.
While the Orcish Warlord has some sneaky attacks and the camera can be a pain while trying to deal with a teleporting foe in a room barely sizeable enough for such mobility, his attacks are incredibly predictable. If you varnish countering and blocking with the failsafe of Will-o’-the-Wykes you should find this a very easy foe to best, indeed. You’ll score 3x Meteorite when you fell the Orcish Warlord.
| Enemies in this Area |
|---|
| Undertaker |
| Items in This Area |
|---|
How to Defeat the Undertaker - FF16 Into the Darkness Main Quest Walkthrough
Now that you’ve vanquished the beastmen befouling the mines, pull a lever behind the vanquished Orcish Warlord to open the way to Kupka’s ostentatious, secluded castle. Grab some nearby items (3x Wyrrite and a High Potion) then continue along the bridge towards the castle gates, grabbing a Potion along the way. Hopefully these restoratives are just the standard post-miniboss fare, there can’t possibly be a full boss lurking ahead… right? Go through the gate and after a scene, sure enough you’ll find yourself fighting the Undertaker.
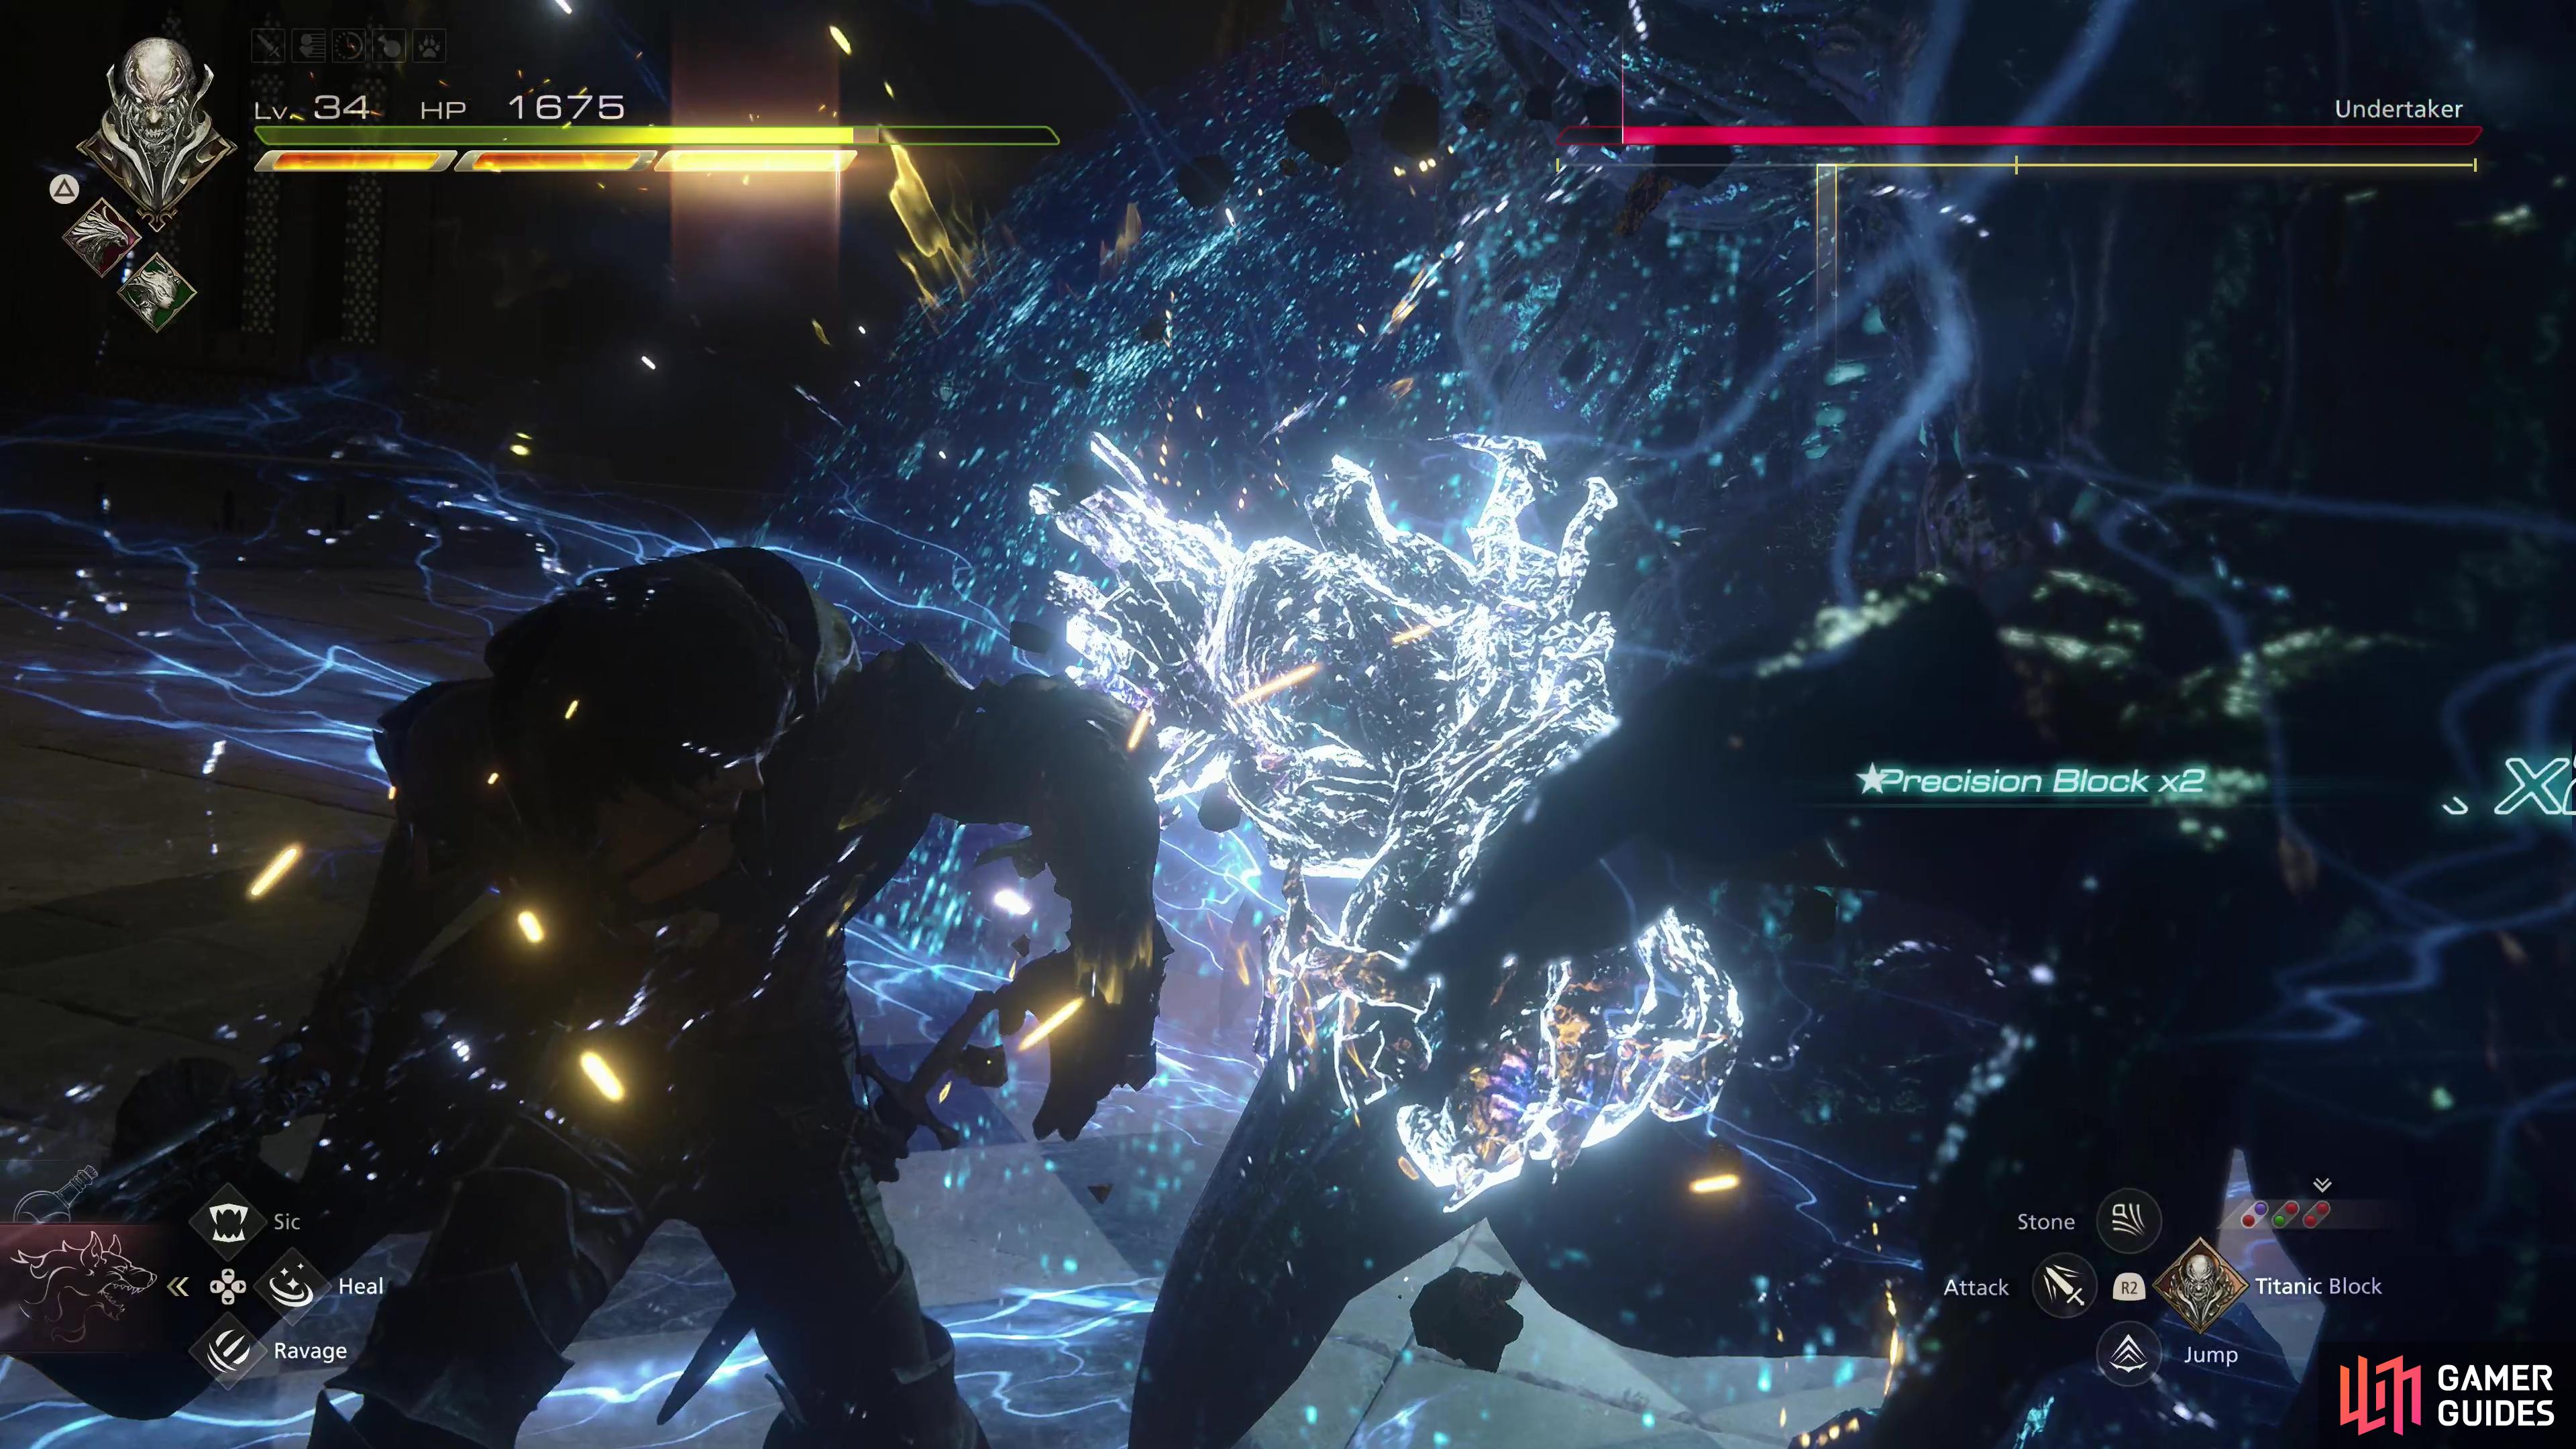
You can block many of the Undertaker’s attacks with !Titanic Block,
which allows you to perform Titanic Counters, dealing significant damage.
This golem is a bit of an odd boss in that it looks like a hulking monstrosity you’d need to dance around, performing hit and run attacks while avoiding its power melee… but that’s not really the way this fight has to play out. Most of the Undertaker’s attacks are melee, sure, but they’re also blockable with Titanic Block, and if you perform a Precision Block you’ll be able to land a few free Titanic Counters. The Undertaker’s only ranged attacks aren’t blockable or counterable, so ideally you’ll find yourself standing up in melee, engaged in a proper slugfest, blocking most of what the Undertaker throws at you and dodging what can’t be blocked.
Pretty much every non-energy attack the Undertaker uses can be blocked by Titanic Block, leaving only an unnamed energy-charged fist slam and the Spirits Within and Exhume attacks that you can’t simply counter with Titanic Block. The unnamed energy-charged fist slam is well telegraphed - when you see the Undertaker rear back its right fist for a moment, gathering bluish energy around it, run away. If you see Spirits Within pop up on the screen, try to circle around the golem so you can safely attack its back during the energy discharge, otherwise dodge through the beam. Exhume causes spots on the ground to glow before erupting in magical explosions - just run around and stay off the marked locations.

(1 of 3) Energy attacks, like an unnamed fist slam attack, cannot be blocked by !Titanic Block.
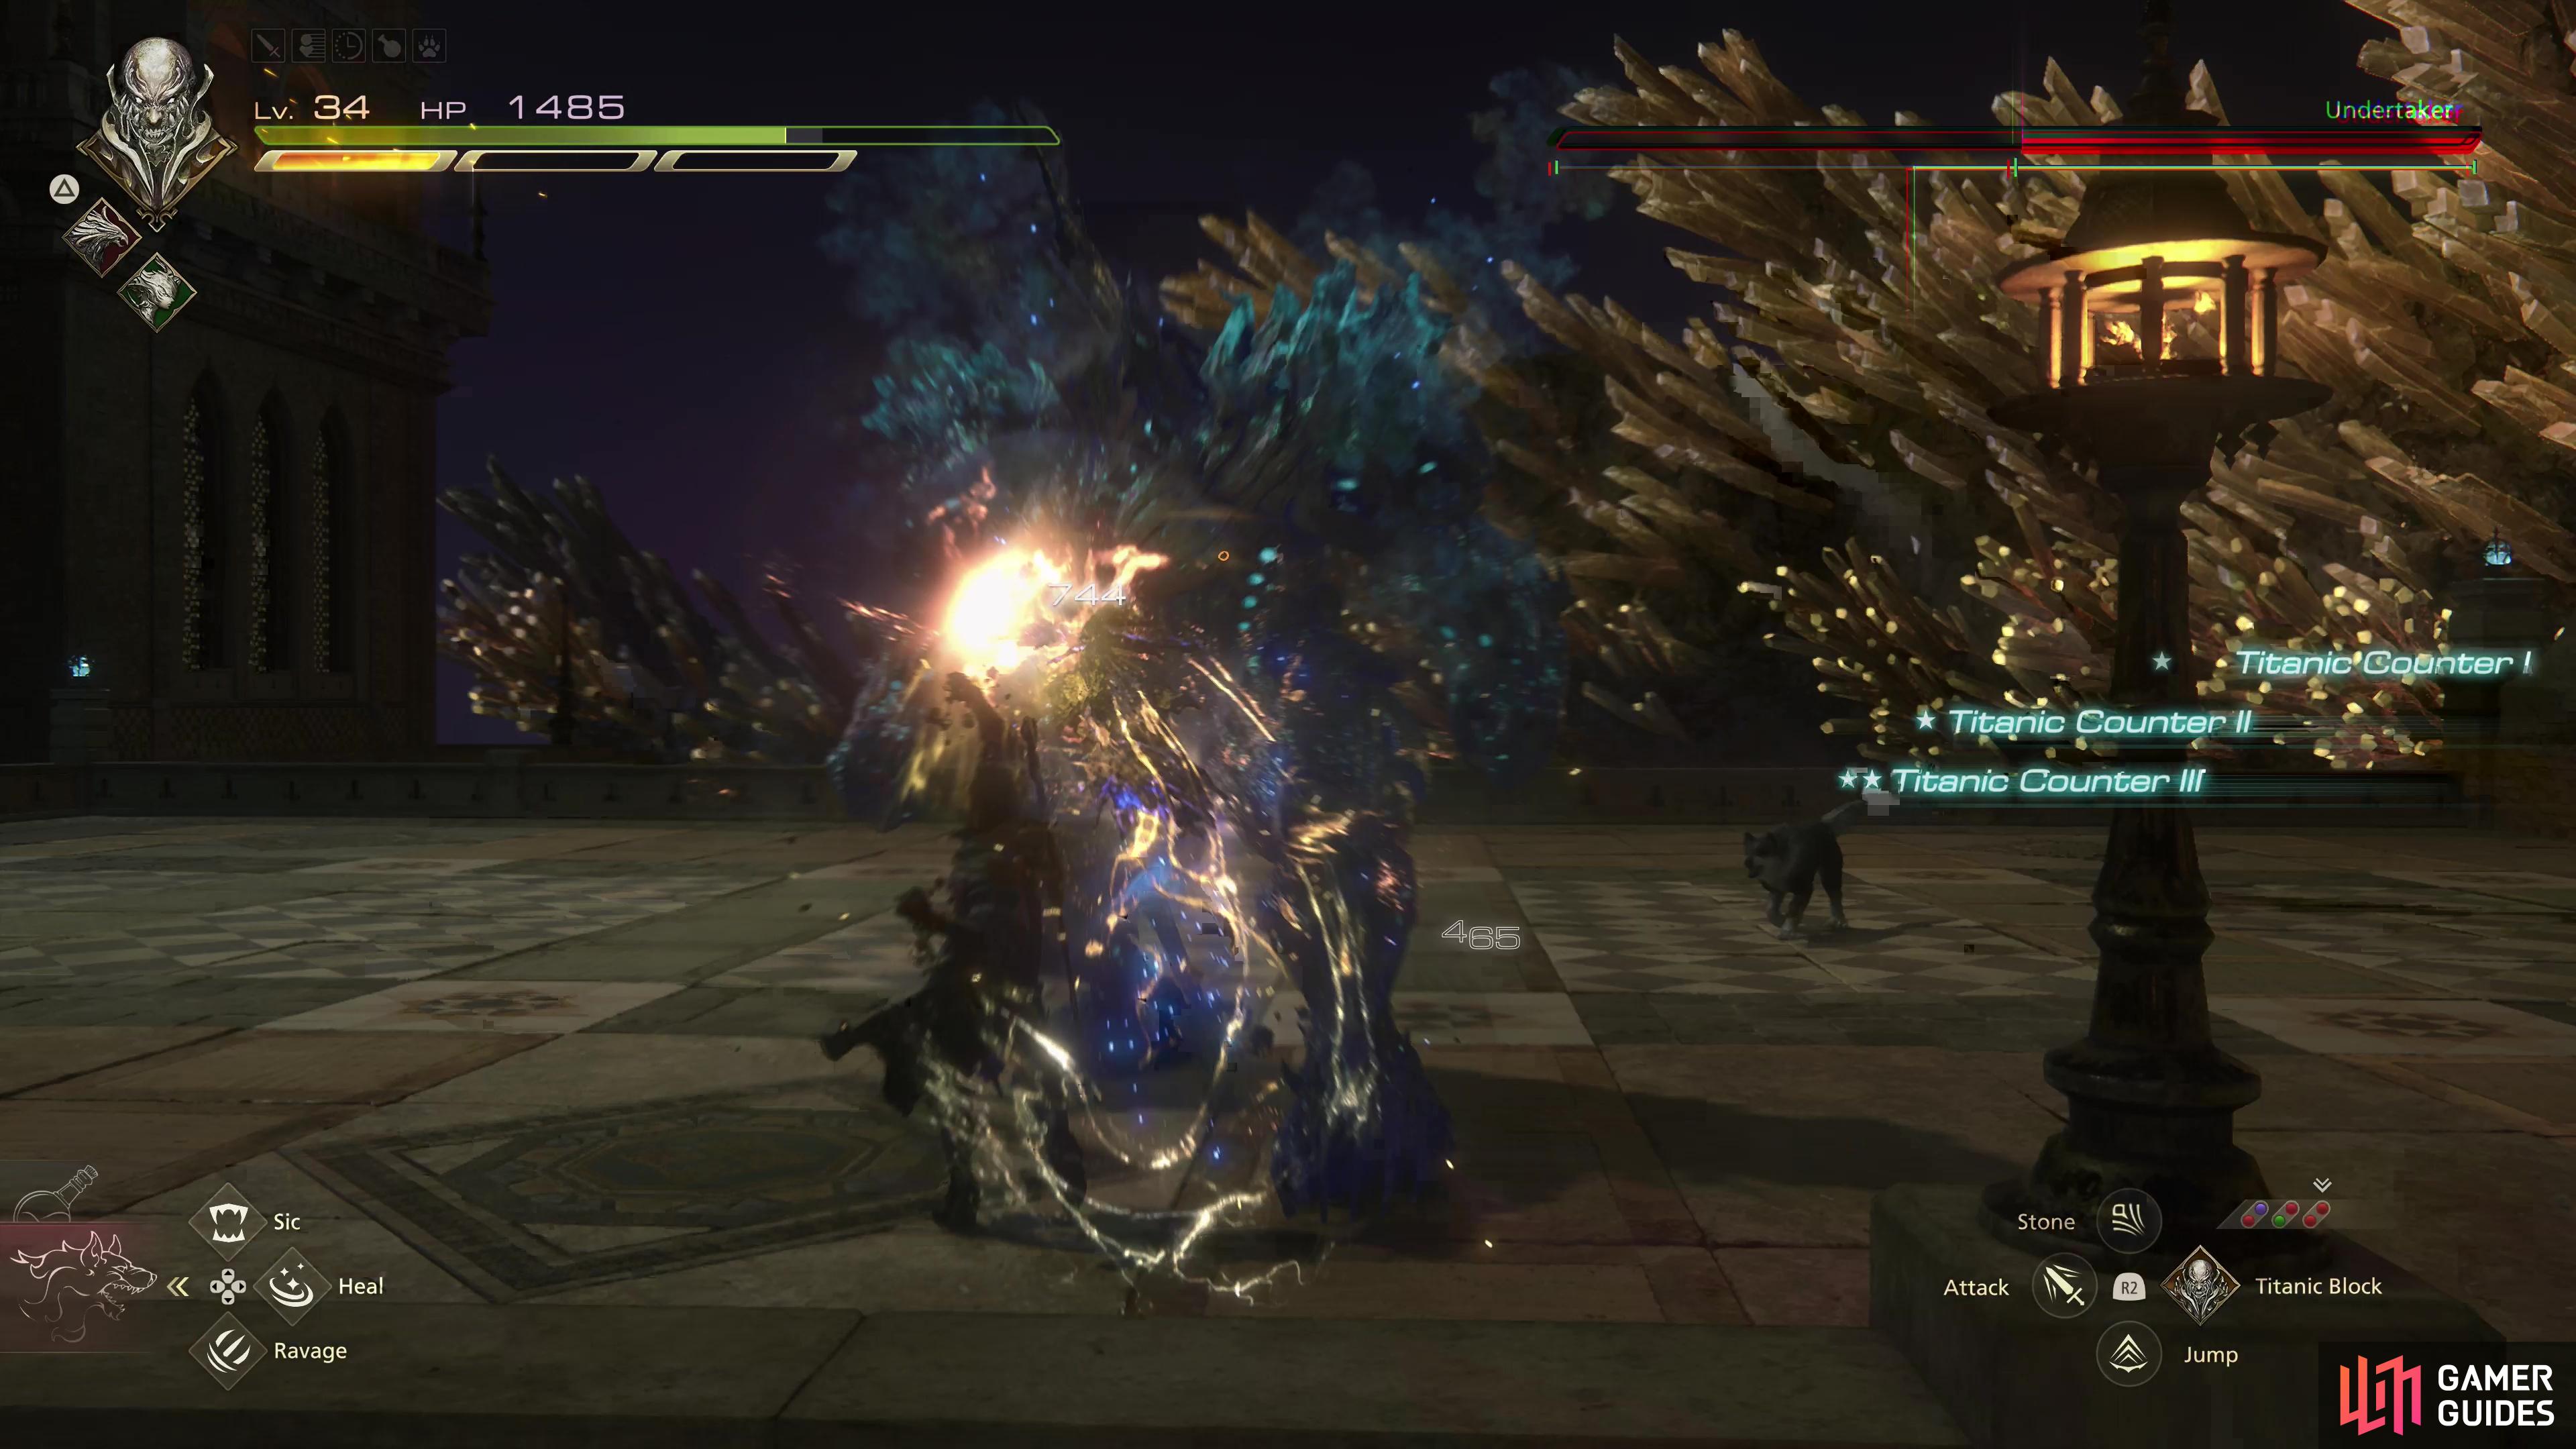
Aside from those attacks, everything else - the charge, the generic melee attacks, the jumping stomp (the shockwave will be ignored if you do a precision block) can be handled with Titanic Block. Titanic Counter will shave off sections of the boss’s Will Gauge, and between sneaking in the odd melee attack (especially if you can flank during Spirits Within) this is a surprisingly easy boss. Other than the dodge energy, block everything else routine, just follow the standard formula of hitting the boss with Deadly Embrace when it’s at 50% of its Will Gauge, then punish with Gouge to deplete much of the second half of the Will Gauge, then go out all with your other Eikonic Abilities when it’s staggered.
Duke it out with the Undertaker, going one-on-one (thanks Teddy) until you’re victorious - a more in-depth guide for this battle can be found on the page FF16 - Undertaker Main Quest Boss Strategy. You’ll gain ![]() The Favor of Lightning (Thunderstorm) accessory for you trouble along with some Sharp Fangs and Magicked Ash. After some more scenes play you’ll resume control in Castle Dazbog.
The Favor of Lightning (Thunderstorm) accessory for you trouble along with some Sharp Fangs and Magicked Ash. After some more scenes play you’ll resume control in Castle Dazbog.
| Enemies in this Area |
|---|
| Lich |
| Revenant |
| Specter |
| Wraith |
| Items in This Area |
|---|

(1 of 3) Now that you have !Titan, you’ll find it much easier to deal with Liches - just block their attacks.
Castle Dazbog Walkthrough - FF16 Into the Darkness Main Quest Walkthrough
You’re most of the way through this dungeon now, just gotta push on through the castle to reach its master. Grab a Potion, then search behind the pillars to the right to find a chest containing 100 gil and 10x Sharp Fangs. Head upstairs to nab a High Potion, then continue up another flight to find some unwelcome foes - Wraiths and Revenants. The last time you encountered these was in the ruins under ![]() Phoenix Gate and before that, during the fateful approach to the
Phoenix Gate and before that, during the fateful approach to the ![]() Drake’s Breath mothercrystal. Needless to say, their appearance here is inauspicious. Banish them, then search the end of the left balcony to find a chest, inside of which is 1,600 gil. You can find some Steelsilk on the right balcony.
Drake’s Breath mothercrystal. Needless to say, their appearance here is inauspicious. Banish them, then search the end of the left balcony to find a chest, inside of which is 1,600 gil. You can find some Steelsilk on the right balcony.
Make your way through some doors near where you fought the Revenants and in the room beyond you’ll encounter another familiar, unwelcome foe - the Specter. These specimens can buff their allies with Bravery, a traditional Final Fantasy buff that will, in this game, make an enemy more resistant to flinching. They will also resort to ranged attacks and teleport around, making them general nuisances, but make dispatching them a priority, if you can.
Defeat the enemies, then go through some doors to the right and head down the hallway behind to find a Potion. Follow the linear path ahead to stumble across a second Potion, then enter a larger hallway and turn right to find a Lich and three Revenants. Liches aren’t new, but this is the first time you’ll face one with ![]() Titan, and in keeping with the theme of this main quest you’ll be delighted to know that you can make this fight much easier by abusing Titanic Block. Pretty much every scythe attack can be Precision Blocked and subsequently Titanic Countered - even the ranged attack that leaves an AoE where it strikes, but the AoE will still damage you even if you block the projectile itself (Heatwave is a much better response to this ranged attack). With these new defensive options you should have little trouble exorcising this miniboss.
Titan, and in keeping with the theme of this main quest you’ll be delighted to know that you can make this fight much easier by abusing Titanic Block. Pretty much every scythe attack can be Precision Blocked and subsequently Titanic Countered - even the ranged attack that leaves an AoE where it strikes, but the AoE will still damage you even if you block the projectile itself (Heatwave is a much better response to this ranged attack). With these new defensive options you should have little trouble exorcising this miniboss.
Defeat the undead, then go through some doors to the right to trigger a scene. When it ends you’ll be out on a balcony. Leave the balcony and loot a chest near a bed to score ![]() The Favor of Earth (Upheaval), then snatch 3x Wyrrite off a counter. Go through some doors opposite the bed and head downstairs, picking up a Potion, then pass through another pair of doors to reach a small room with a Potion inside. Turn left and push open yet another pair of large doors and head towards the shrine ahead. Three waves of Revenants and Specters will spawn to bar your way, but between Will-o’-the-Wykes and Incinerate, they should be easy enough to safely and quickly dispatch.
The Favor of Earth (Upheaval), then snatch 3x Wyrrite off a counter. Go through some doors opposite the bed and head downstairs, picking up a Potion, then pass through another pair of doors to reach a small room with a Potion inside. Turn left and push open yet another pair of large doors and head towards the shrine ahead. Three waves of Revenants and Specters will spawn to bar your way, but between Will-o’-the-Wykes and Incinerate, they should be easy enough to safely and quickly dispatch.
Enter the Inner Sanctum to find Kupka, and after some scenes that clearly show Kupka’s deteriorating mental state (and, perhaps, the ability for even dominants to be manipulated by forces acting through the mothercrystals) you’ll find yourself engaged in an epic struggle against Titan. After the multi-phase fight with Titan, the main quest will continue with Out of the Shadow.
No Comments