
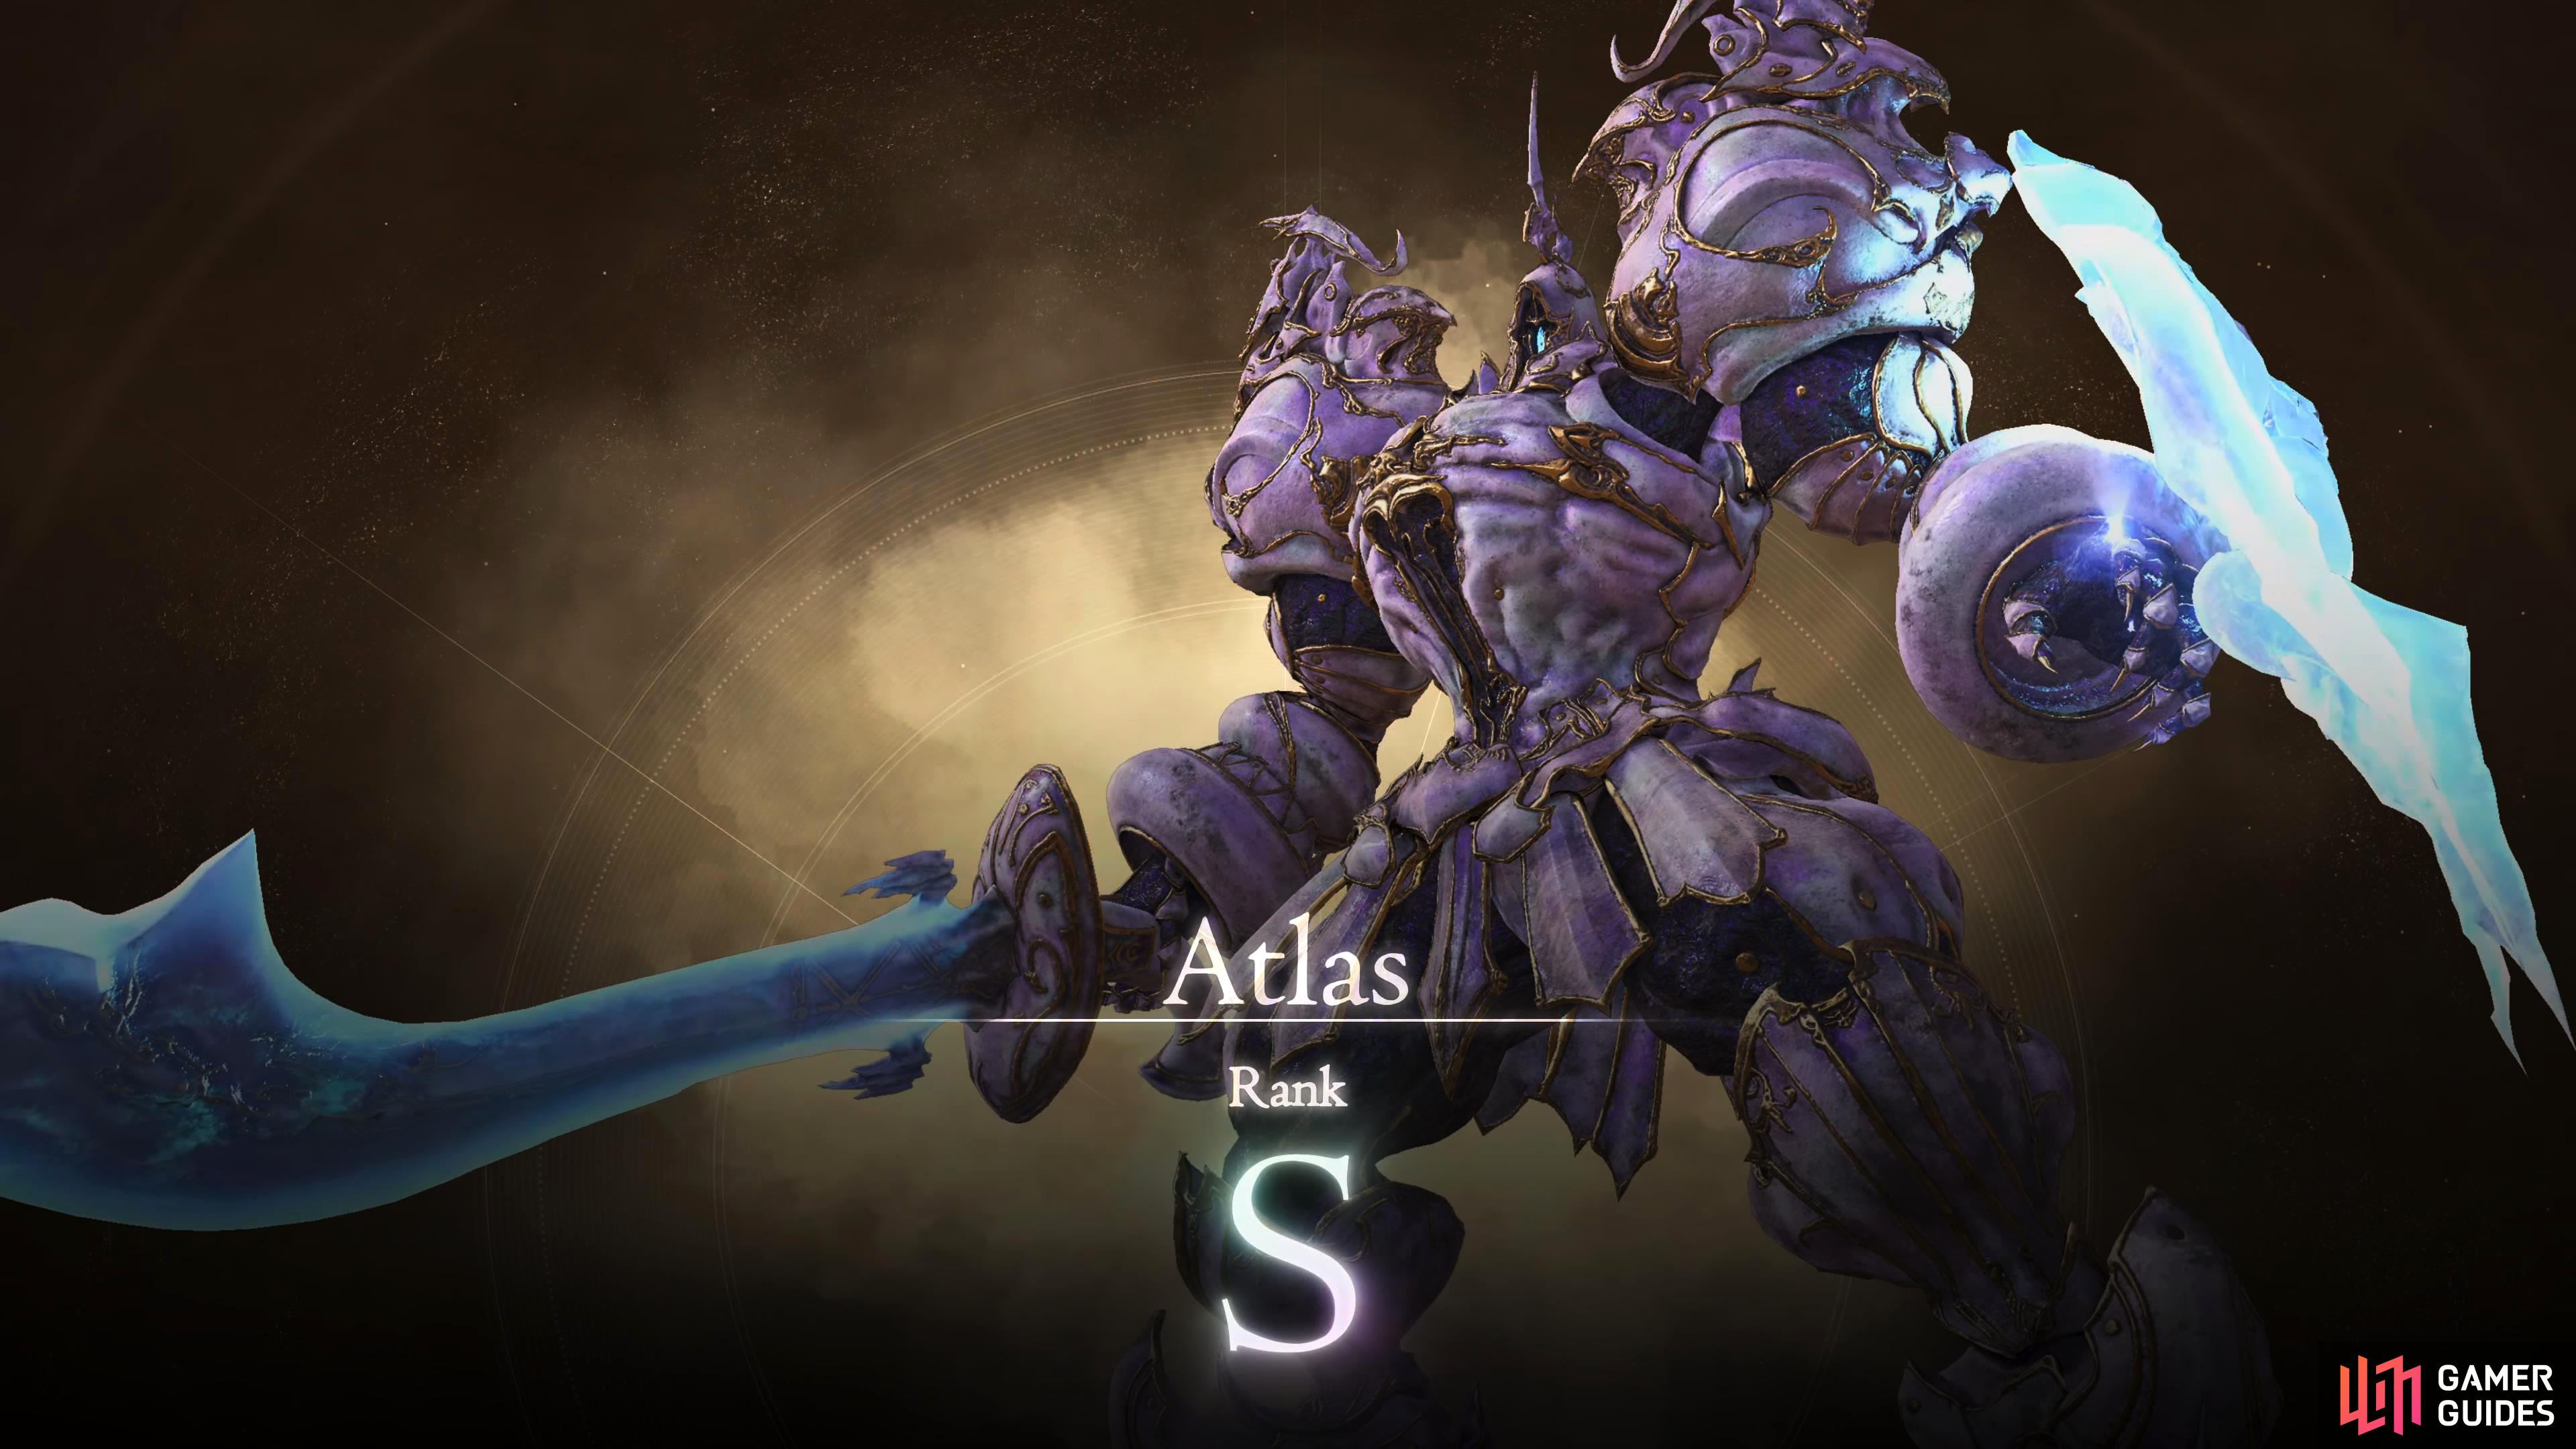
Atlas, Breaker of Worlds is the first S Rank you’ll come across in Final Fantasy 16, and it’s a difficult one. This hulking mechanical being who wields an energy blade accompanied by a large shield can be accessed from the Hunt board during the Out of the Shadow story mission.Read below to find out Atlas’ exact location, what equipment, and abilities you should use, and our in-depth strategy to beat it.
Atlas, Breaker of Worlds is unlocked during the Out of the Shadow main story quest.
Where is the Atlas, Breaker of Worlds Notorious Mark Location?
| Location | Level | Bounty |
|---|---|---|
| East Cressida | 45 | 20,000 Gil, 50 Renown |
When you look at the bill for the first time, you’ll notice it displays ??? for the location. This is something you’ll get familiar with regarding S-Ranks due to the game not giving away their location. Normally, you would have to read the text and make an educated guess on its location. Fortunately, you’re here, and we’ve done the hard work for you.
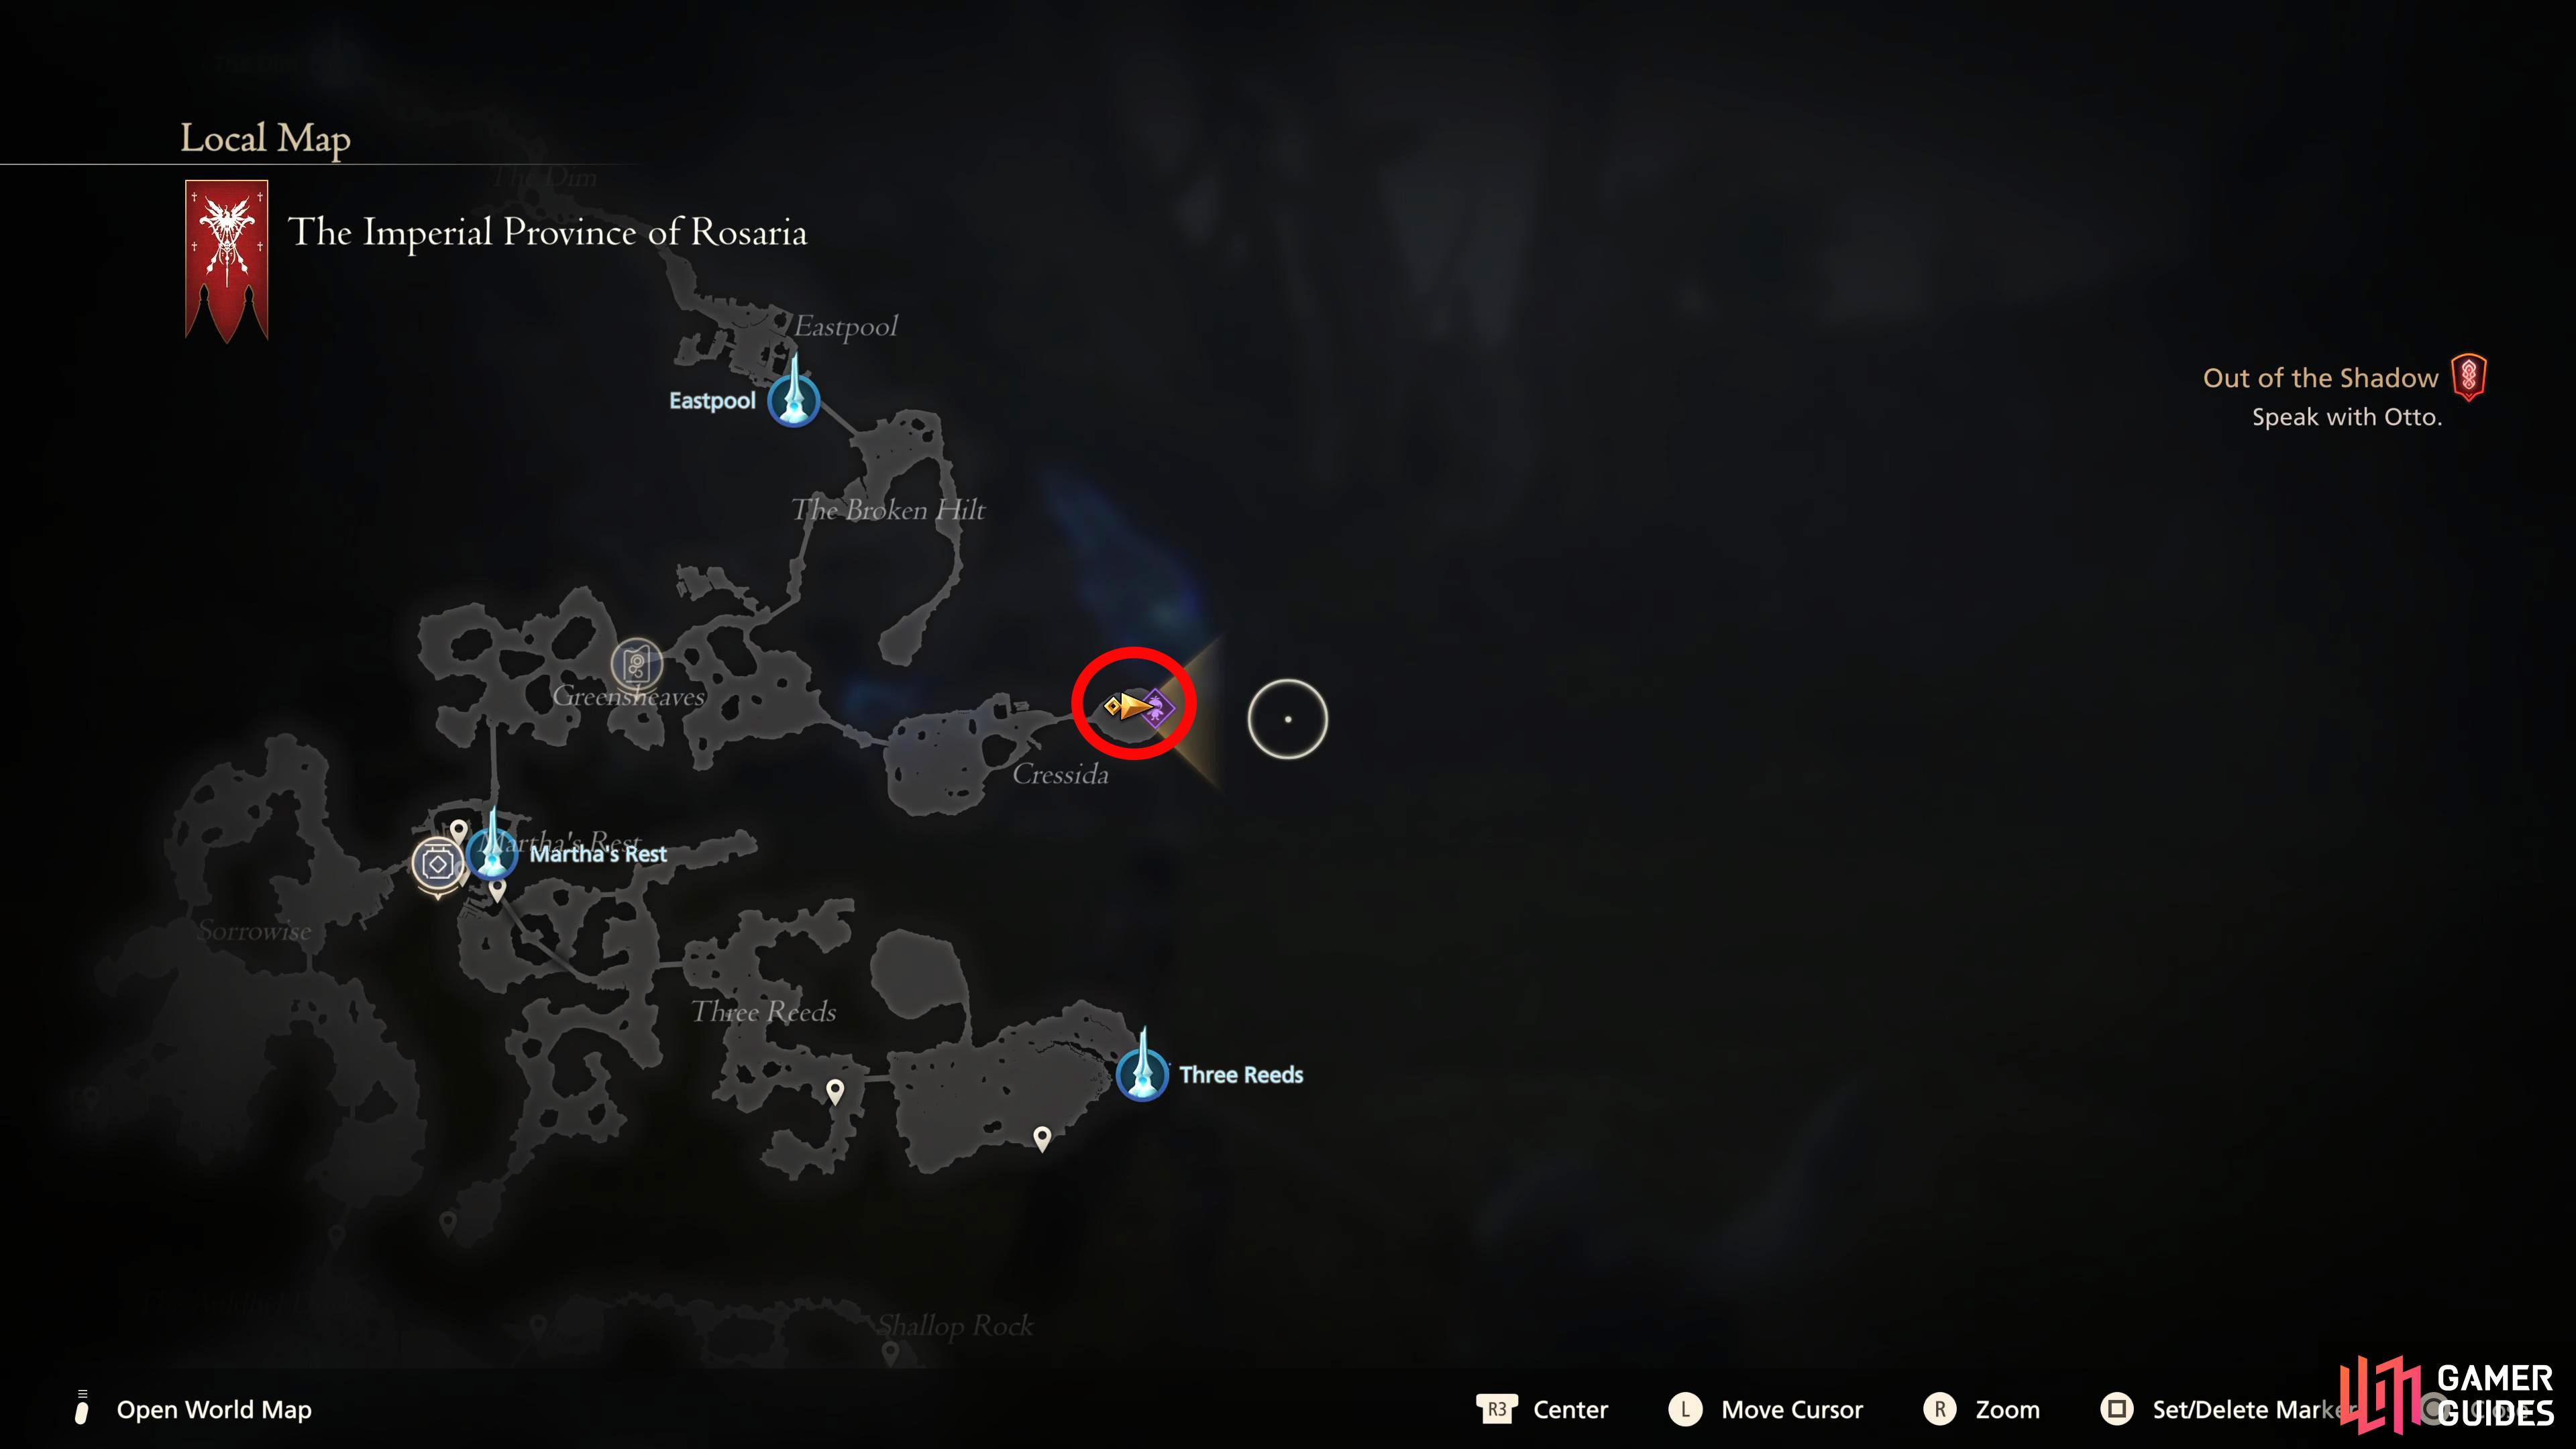
The Breaker of Worlds, aka, Atlas can be found in the abandoned town of ![]() Cressida, Rosaria. Open the World Map, and Teleport to
Cressida, Rosaria. Open the World Map, and Teleport to ![]() Eastpool (
Eastpool (![]() Martha’s Rest is a similar distance from it, so you can use that instead) and take the southern exit into The Broken Hilt. Take the southwest exit there, and follow the narrow path into the large area below before finally heading east/southeast into Cressida. For some reason, Clive will get off the Chocobo, and you’ll need to make your way slowly through the village to the circular area in the east. When you get there, walk to the back of the area, and you’ll be introduced to the S-Rank Hunt, Atlas, Breaker of My Controller.
Martha’s Rest is a similar distance from it, so you can use that instead) and take the southern exit into The Broken Hilt. Take the southwest exit there, and follow the narrow path into the large area below before finally heading east/southeast into Cressida. For some reason, Clive will get off the Chocobo, and you’ll need to make your way slowly through the village to the circular area in the east. When you get there, walk to the back of the area, and you’ll be introduced to the S-Rank Hunt, Atlas, Breaker of My Controller.
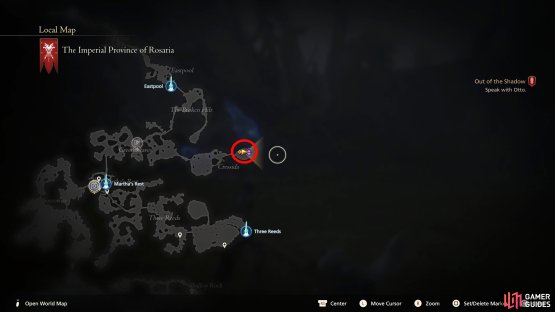
(1 of 2) Atlas can be found in the abandoned village Cressida. Head there via Eastpool or Martha’s Rest.

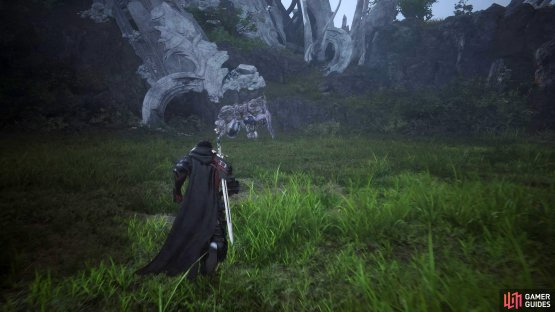
Atlas can be found in the abandoned village Cressida. Head there via Eastpool or Martha’s Rest. (left), When you reach the area, Atlas will be powered down until you get near it. (right)
Atlas, Breaker of Worlds Attacks
Below you’ll find all the attacks that Atlas has in its arsenal:
| Attack | Description | Counter |
|---|---|---|
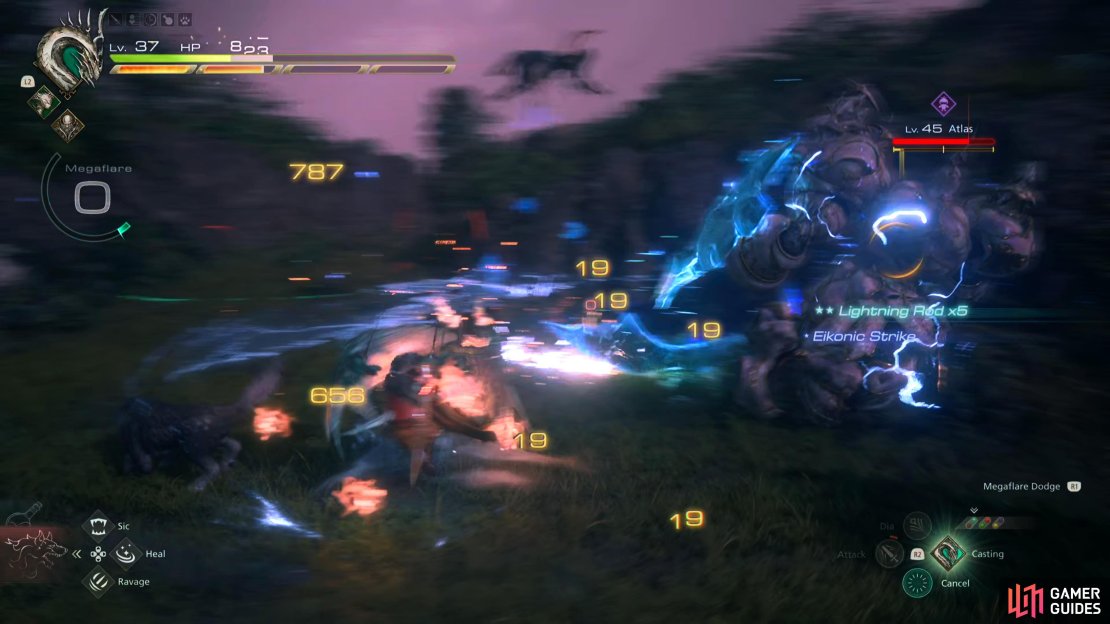
| Light Wave Slam | Atlas will perform a three-hit combo where it’ll slam down in front of him unleashing three light waves. The third hit can have a little spin which can mess up your timing. | These come in quick succession, and if you get hit by one, you’ll most likely get hit by at least another one before you can recover. Wait for the Light Wave to reach your location, and use Dodge on it when it’s about to hit you to get Precision Dodge. You can move side-to-side if you’re not confident of your timing. |
| Electric Stamp | Atlas will raise its left foot before slamming its electric-charged foot onto the floor. | Expect to see this attack if you stay in the melee range of Atlas. Fortunately, it’s relatively easy to dodge. Either back away, or wait for the foot to begin heading toward the floor before using your dodge. |
| Backhand Slice - Shield Thrust Combo | Atlas will perform a quick spin while slicing with its sword before following it up with an electrified shield thrust. Atlas can follow-up the shield thrust with a second. | Either get some distance to avoid the attacks, or time your dodge after the spin has completed, and the slice is about to hit you. After the first Precision Dodge, wait for the shield thrust to complete before countering, or perform a second dodge on that as well. |
| Lunging Sword Combo | Atlas will perform a three-hit attack which starts off with a lunge. It will use a lunge which finishes off with a slam, then performs an overhead slice, before finishing with a horizontal sweep. | You’ll see this attack a lot. Atlas likes to use it to close distance, or immediately use it after one of its other attacks such as Celestial Sphere, and Shield Uppercut. Will-o’-the-Wykes is useful here to nullify the hits, or you can Precision Dodge the attacks by waiting until the sword is just about to make contact. Finally, you could use Rook’s Gambit, Titanic Block, or Raging Fists to counter it. |
| Shield Uppercut | Atlas will perform a short charge of its shield before unleashing a devastating uppercut with its shield which fires off a large line of blue flames. | Move or dodge either side of the attack to avoid it. |
| Spinning Charge | Similar to Voltaic Charge, Atlas will charge at you, but this time it’ll drag its sword along the ground, and perform a spinning slash before the end of the charge. | You want to Dodge as soon as the charge is about to hit you otherwise you’ll get knocked into the air, and take moderate damage. You can see the charge coming as Atlas will bring the sword behind its back while lowering its head before it lowers the blade to the ground and charges. |
| Voltaic Charge | Atlas will charge for you before performing a vertical sword slice at the end of the charge. | This is more or less the same as most of the hunts charge attacks in the game. Dodge just when you’re about to get hit. This will nullify the sword slice at the end too. |
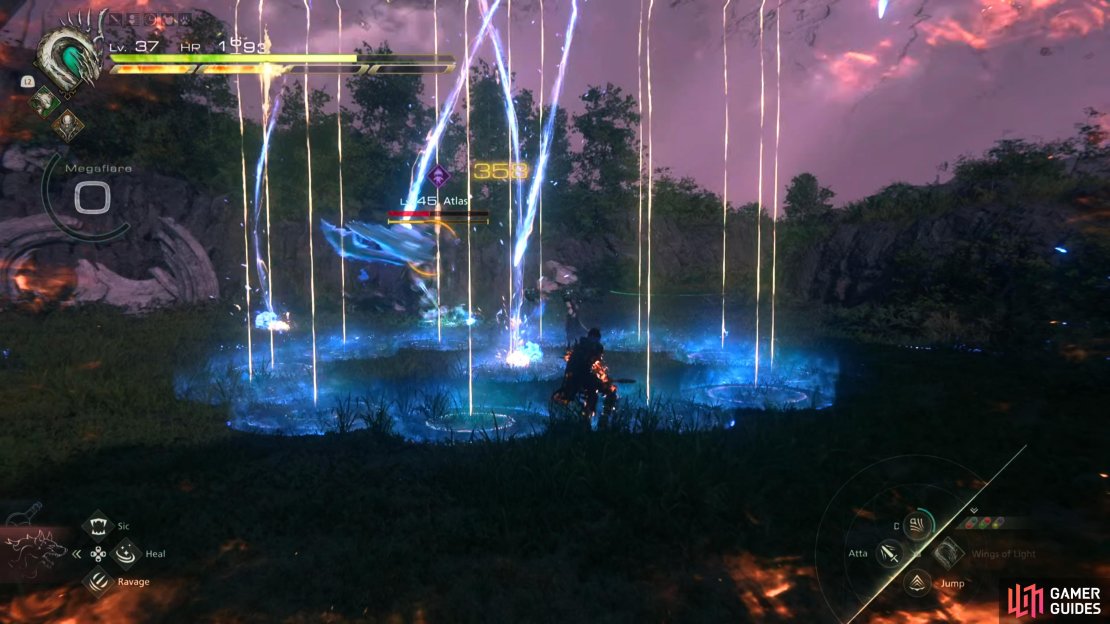
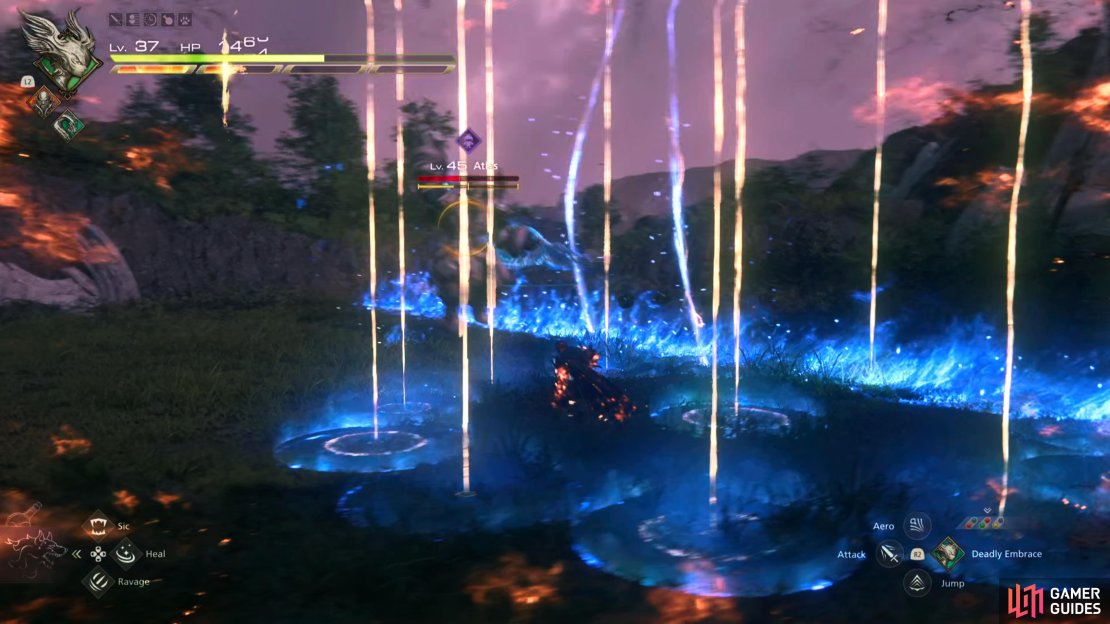
| Celestial Sphere | Probably the most frustrating attack, mainly because it obscures your vision. Atlas will raise the tip of its shield into the air before placing a circle of small rings around you with a further small circle being placed in the middle of them. Beams will then crash down onto the small circles, dealing damage. Then another ring exactly the same as the first will be placed at your new location. | This attack has a lot going on. For the first large circle, start moving out of it to the side while repeatedly using dodge. When the second large circle happens, immediately leave via the back part of the circle. On this second circle, Atlas will use one of its other attacks. This is why you want to move immediately. |
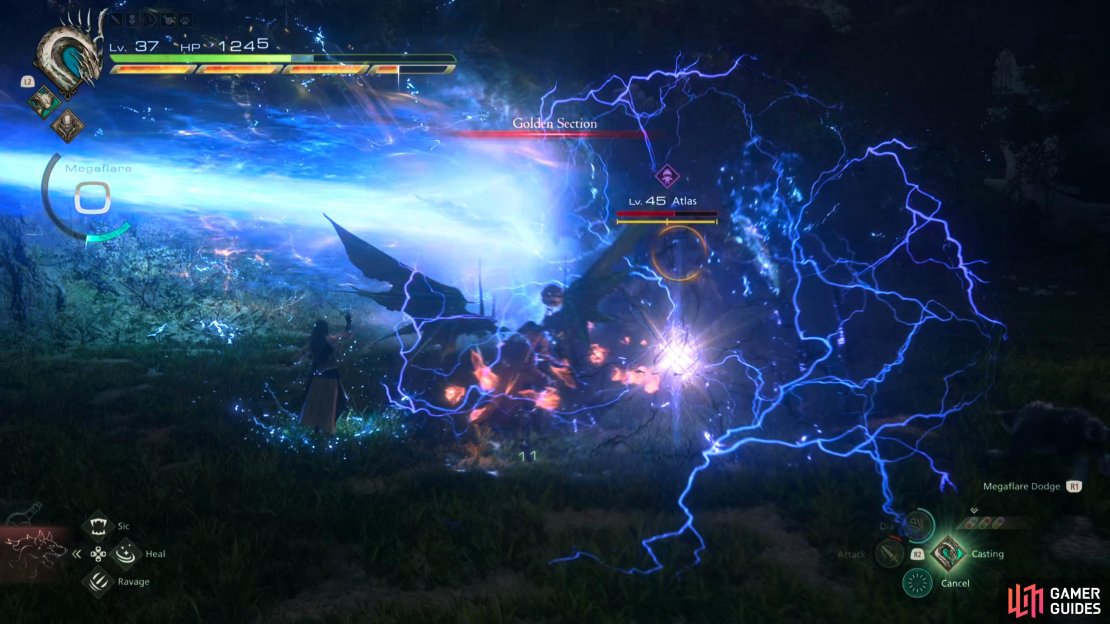
| Golden Section | Atlas will greatly extend its sword into a giant beam of light before sweeping it from left to right, covering most of the arena. | After you’ve staggered Atlas for the first time, it’ll start using Golden Section followed by Saber Dance. This attack will cover the entire battlefield in a single swipe. The attack will start from the left (Atlas’ right) and sweep across the arena to the right. This does a lot of damage, and your only real option is to Precision Dodge it. Wait until the sword is about to make contact, and dodge to the left. Alternatively, you can use any of the counters such as Rook’s Gambit, Titanic Block, or Raging Fists. |
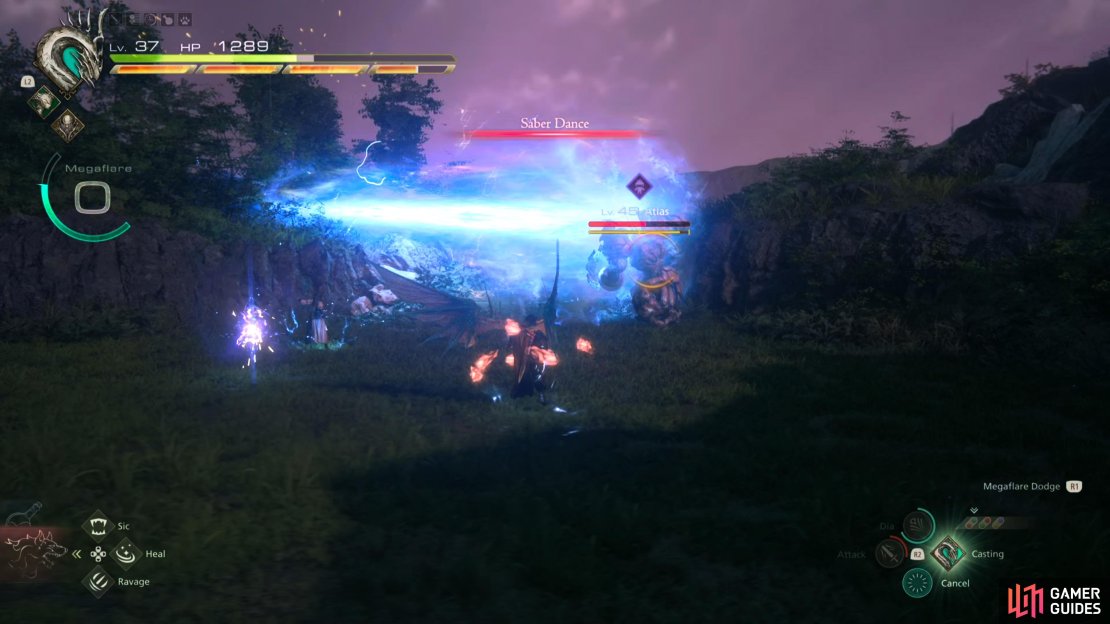
| Saber Dance | This attack is a mirror image of the Golden Section attack, but for the most part instead of it being left to right, it’ll be right to left. Note! Saber Dance can be from left to right, the same as Golden Section, but it’s more likely to be right to left, at least in our experience. | This attack always follows the Golden Section, but you’ll have a second or two before it happens, giving you a short breather. Other than dodging to the right instead of the left depending on Atlas using it in that direction, the same counters apply here to what you would do to avoid Golden Section. Look at the sword to know its direction, if it’s on the left side of Atlas, it’ll be left to right, and vice versa. |


(1 of 11) Light Wave Slam combo has Atlas unleash three waves of light across the arena by slamming its sword at the ground.
Recommended Abilities for Atlas
Here we will list our recommended ability set up to do this effectively:
| Eikon | Ability | Damage Type |
|---|---|---|
| Will (4 Stars) | ||
| Damage (2 Stars) Will (3 Stars) Master the ability and switch it on to Garuda. | ||
| Damage and Will (2 Stars) Master the ability and switch it on to Titan. | ||
| Will (2 Stars) Master the ability and switch it on to Titan. | ||
| Gigaflare | Damage (5 Stars) | |
| Damage and Will (3 Stars) Master the ability and switch it on to Bahamut. |
The reason behind the chosen abilities above is mainly due to Atlas being a more, wait for an opening type of battle. Take Garuda for the Deadly Embrace feat, so you can pull down Atlas when it has half its Will-Gauge. Titan is brought along for its defensive capability with Titanic Block, and finally, Bahamut is taken for its Megaflare feat, and Gigaflare ability.
Gouge is a fantastic ability to use after you’ve pulled down Atlas during the halfway stagger due to its high Will-Damage. If you combine it with a Lightning Rod (place next to Atlas) then it becomes even more powerful. Then you have Gigaflare, one of the most powerful attacks in the game which is best used during the stagger phase. Rook’s Gambit and Will-o’-the-Wykes are brought along for much-needed damage negation and counter potential. Finally Flames of Rebirth is brought along to use during the Stagger phase when you’ve accumulated x1.50 damage multiplier. This can be switched out for Titan / Ramuh’s Earthen Fury / Judgment Bolt.
Recommended Items and Equipment for Atlas
Gear
For your Weapon, Belt, and Vambraces, you should have the following:
| Weapon | Belt | Vambraces |
|---|---|---|
| Brightburn / |
If you don’t have what’s listed above, use the highest Attack for the Weapon, and the highest Defense and Health for the Belt and Vambraces.
Accessories
For your Accessories, this is more subjective, so here is what we used:
| Accessory 1 | Accessory 2 | Accessory 3 |
|---|---|---|
Items
Finally, we have items. This is more of a preference thing, but we chose the following items:
| Shortcut 1 | Shortcut 2 | Shortcut 3 |
|---|---|---|
Atlas can deal a lot of damage in a short amount of time, so more healing items are always a good thing. For the other slot, bring along ![]() Stoneskin Tonics to reduce damage by 30%, or
Stoneskin Tonics to reduce damage by 30%, or ![]() Elixir’s, although the former is more beneficial.
Elixir’s, although the former is more beneficial.
Atlas, Breaker of Worlds Hunt Strategy
When you first unlock the hunt, you’ll be around level 35, and Atlas is level 45. Although this can be done as soon as you have the option to fight it, we recommend doing the next part of the story to unlock the next Eikon as it’s useful for this battle. On top of that, you should gain a few more levels, and get an upgrade to the Excalibur. This strategy will assume that you’ve taken the above advice and got the next Eikon. If not, exchange it with Phoenix for the gap closer.
At the beginning of the battle, Atlas will most likely begin the battle with its Light Wave Slam attack where it’ll unleash three light waves from its sword every time it hits the ground. Wait for the projectile to reach you, and Precision Dodge to the side of it. Do this if you can for all three waves, so you’ll get Precision Dodge x3. After the third dodge, attack it with the counter from the Precision Dodge, and get a few hits in, but don’t get greedy as Atlas is deceivingly pretty quick, and will use another attack soon after.
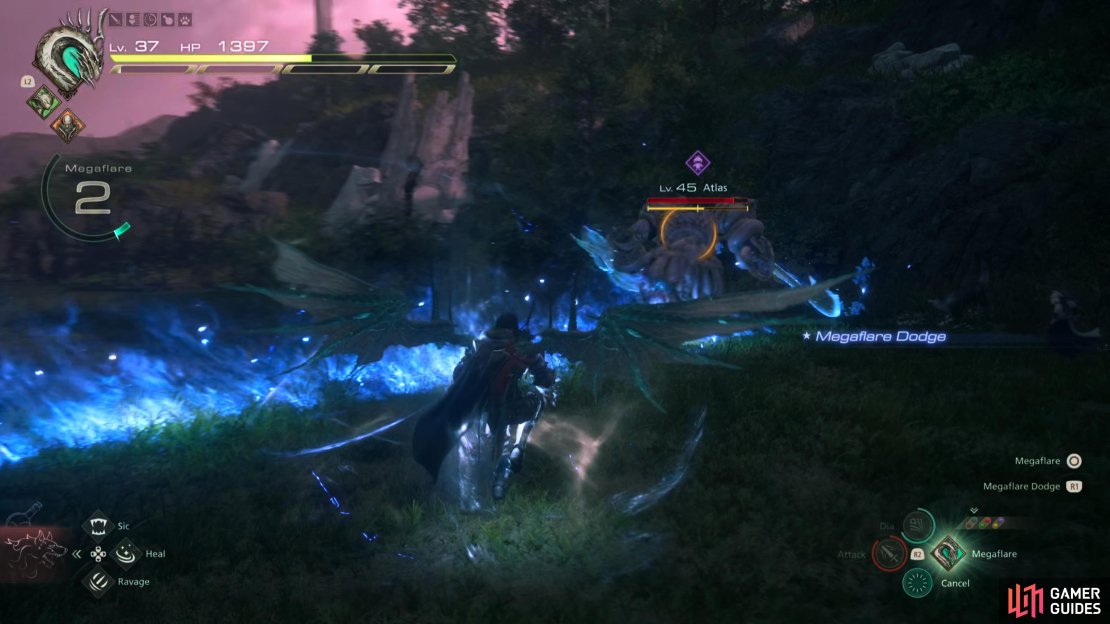
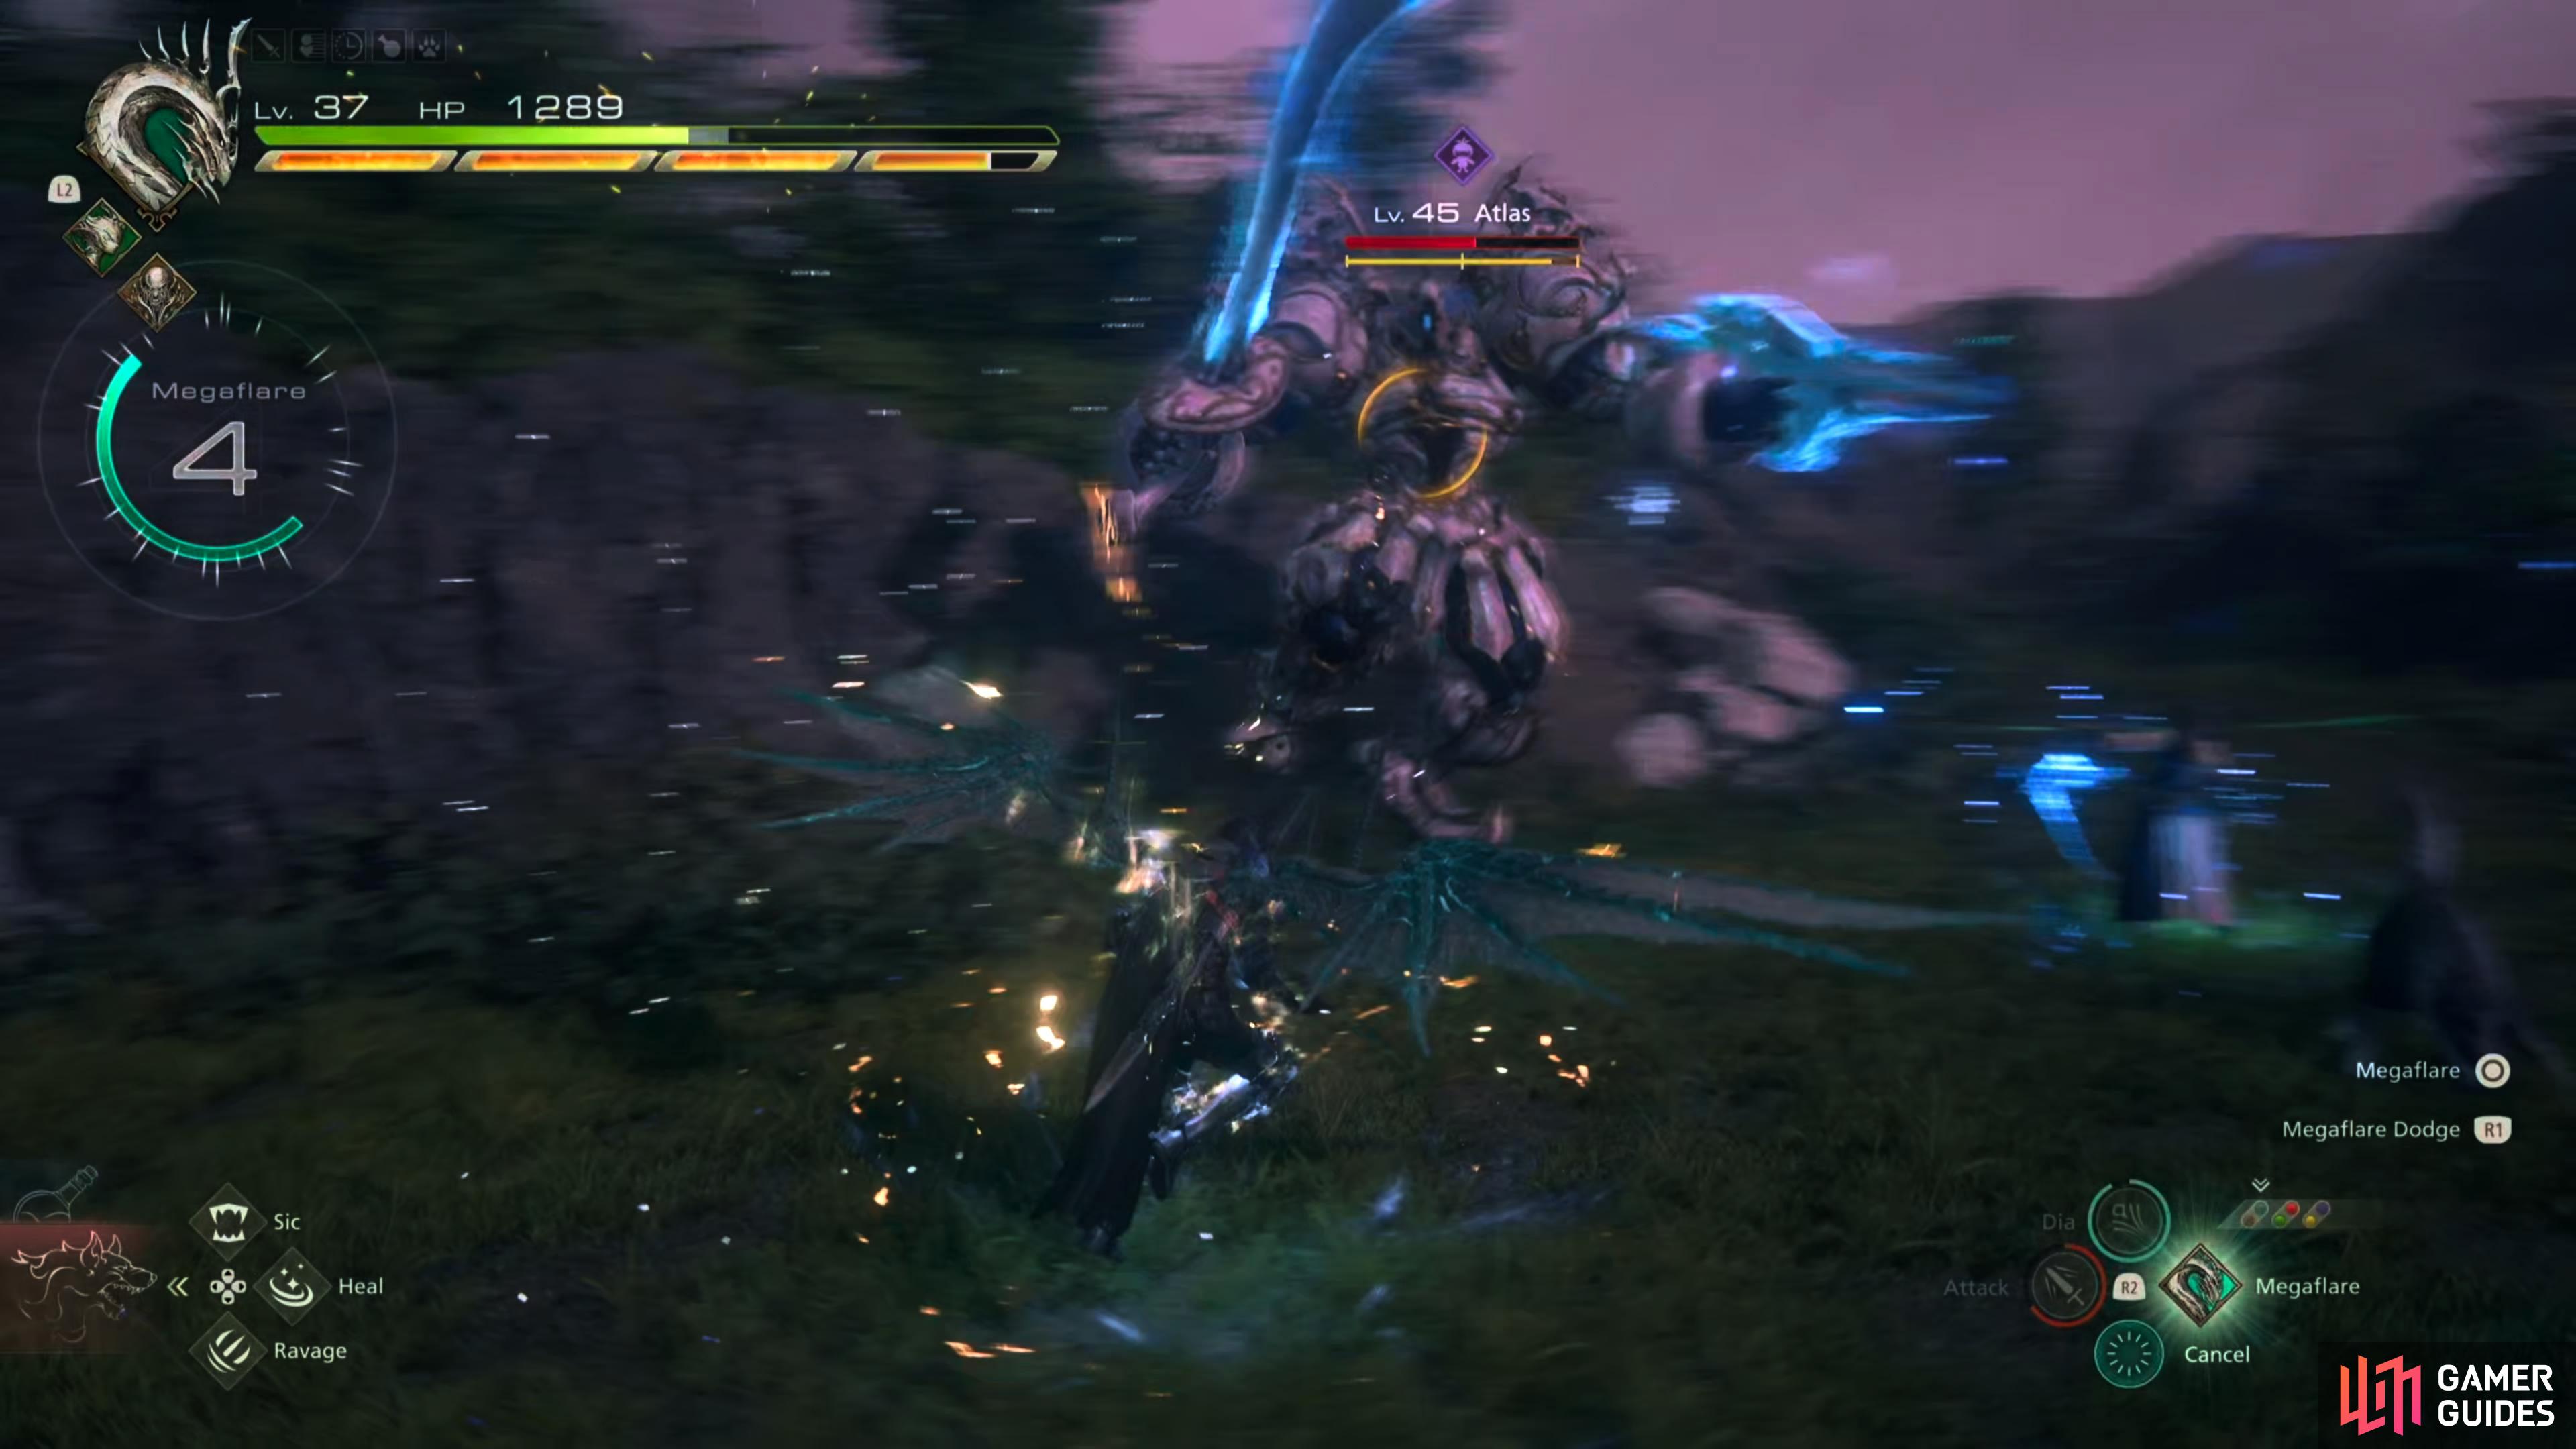
Because of the level difference, when Atlas hits you, it hits hard, so most of this battle will be passive rather than aggressive. For the first half of the battle until you stagger Atlas for the first time, you’ll be dealing with its melee combos, and Celestial Sphere. The problem with Celestial Sphere is, you’ll be surrounded by multiple small circles which make up a large circle, and you’ll be in the center of it. After a brief moment, beams of light will crash down onto every small circle, damaging you in the process. Repeatedly dodge out of this until you leave the circle, and get ready for another circle.
Hippity Hoppity. Although Atlas is bordering on the larger side, it often performs small hops around the arena to maneuver itself. This adds deceptive speed to the mechanical monster.
With the second circle, Atlas will perform a follow-up attack from its many attacks it has while you’re in the second circle. This is normally its lunge combo, but it can use other attacks such as the Shield Uppercut. What you want to do is leave the second circle immediately by dodging out to the right of the circle, and be ready for the incoming attack. Another tricky attack to deal with is its Shield Uppercut attack as this will not only deal damage on the initial hit, but it will unleash a line of blue flames. When you dodge this, dodge to the side to avoid the flames.
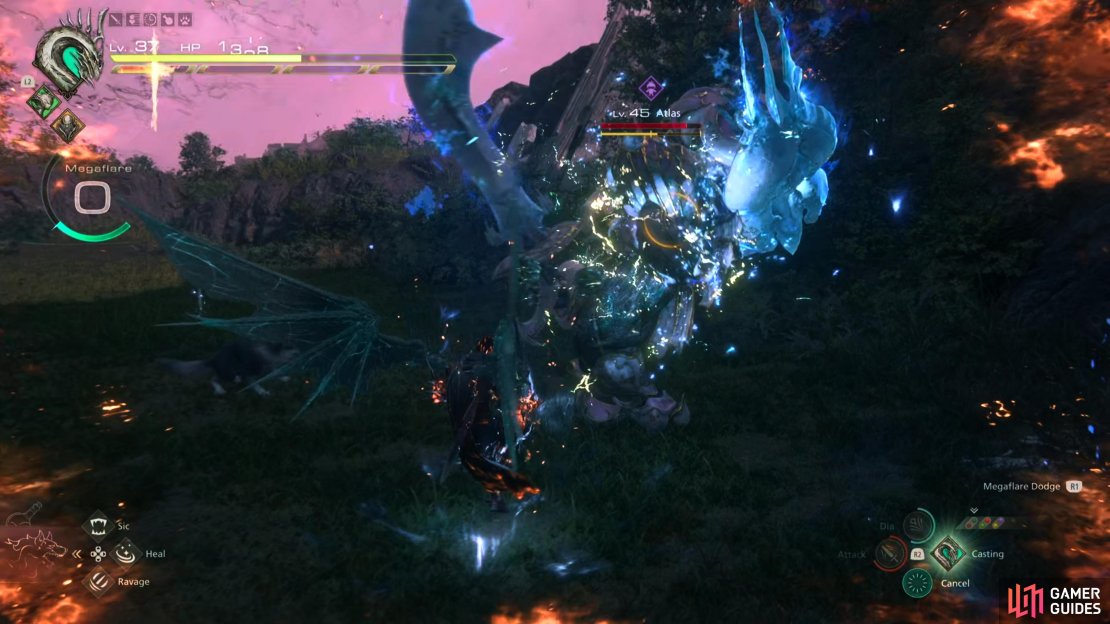
Once you stagger Atlas for the first time, its attacks become more frequent, and it’ll add the Golden Section, and Saber Dance attacks to the mix. This is when the battle gets really difficult. These attacks cover the whole arena and deal major damage if you get hit by it. What’s worse is it can use these while you’re dealing with the Celestial Sphere attack. Both of these attacks elongate the sword into a thick beam of light before Atlas sweeps across the arena in a singular attack. Golden Sphere is from left to right while Saber Dance is right to left for the most part, but they can be come the opposite direction.
The best way to deal with these is to dodge at the last second to the direction the attack is coming from, so left for Golden Section, and right, for Saber Dance. The positioning also plays a big part when you’re having to avoid Celestial Sphere and one of Golden Section/Saber Dance. Leave the Celestial Sphere circle in the direction the attack is coming from as you don’t want to dodge back into Celestial Sphere. That’s pretty much it in regard to Atlas’ attacks, although be ready for the odd Voltaic Charge, and Electric Stamp attacks as it’ll use the former more often if you’re at range, or the latter if you’re in melee range.


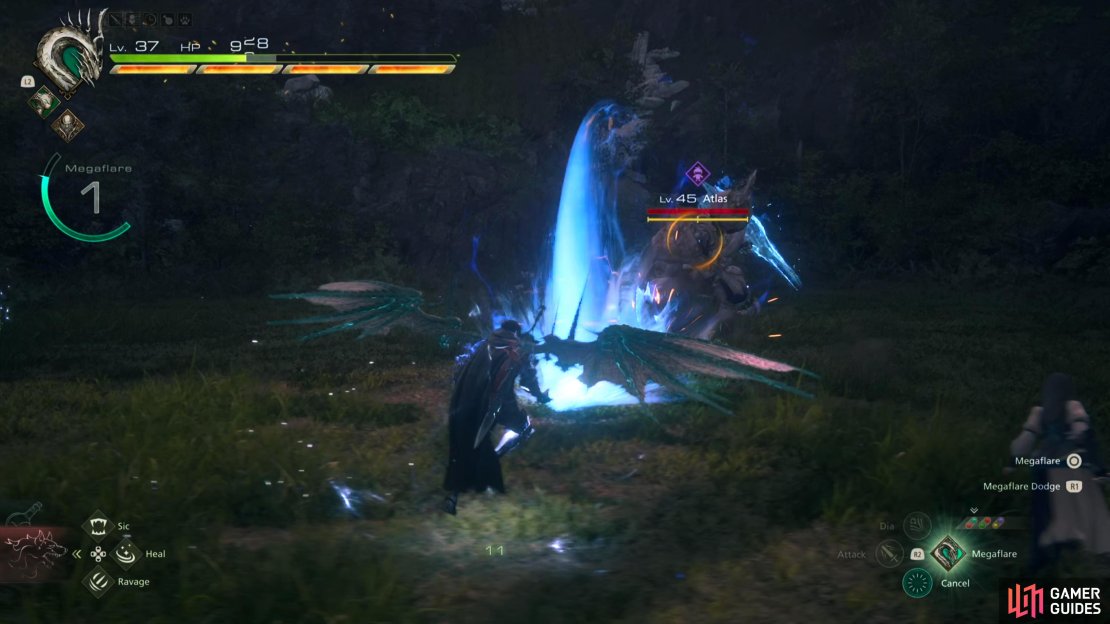
(1 of 2) Using Bahamut allows you to change a passive play style to an aggressive play style with Megaflare. Simply charge it up, and dodge to quicken the charge before unleashing it upon Atlas.
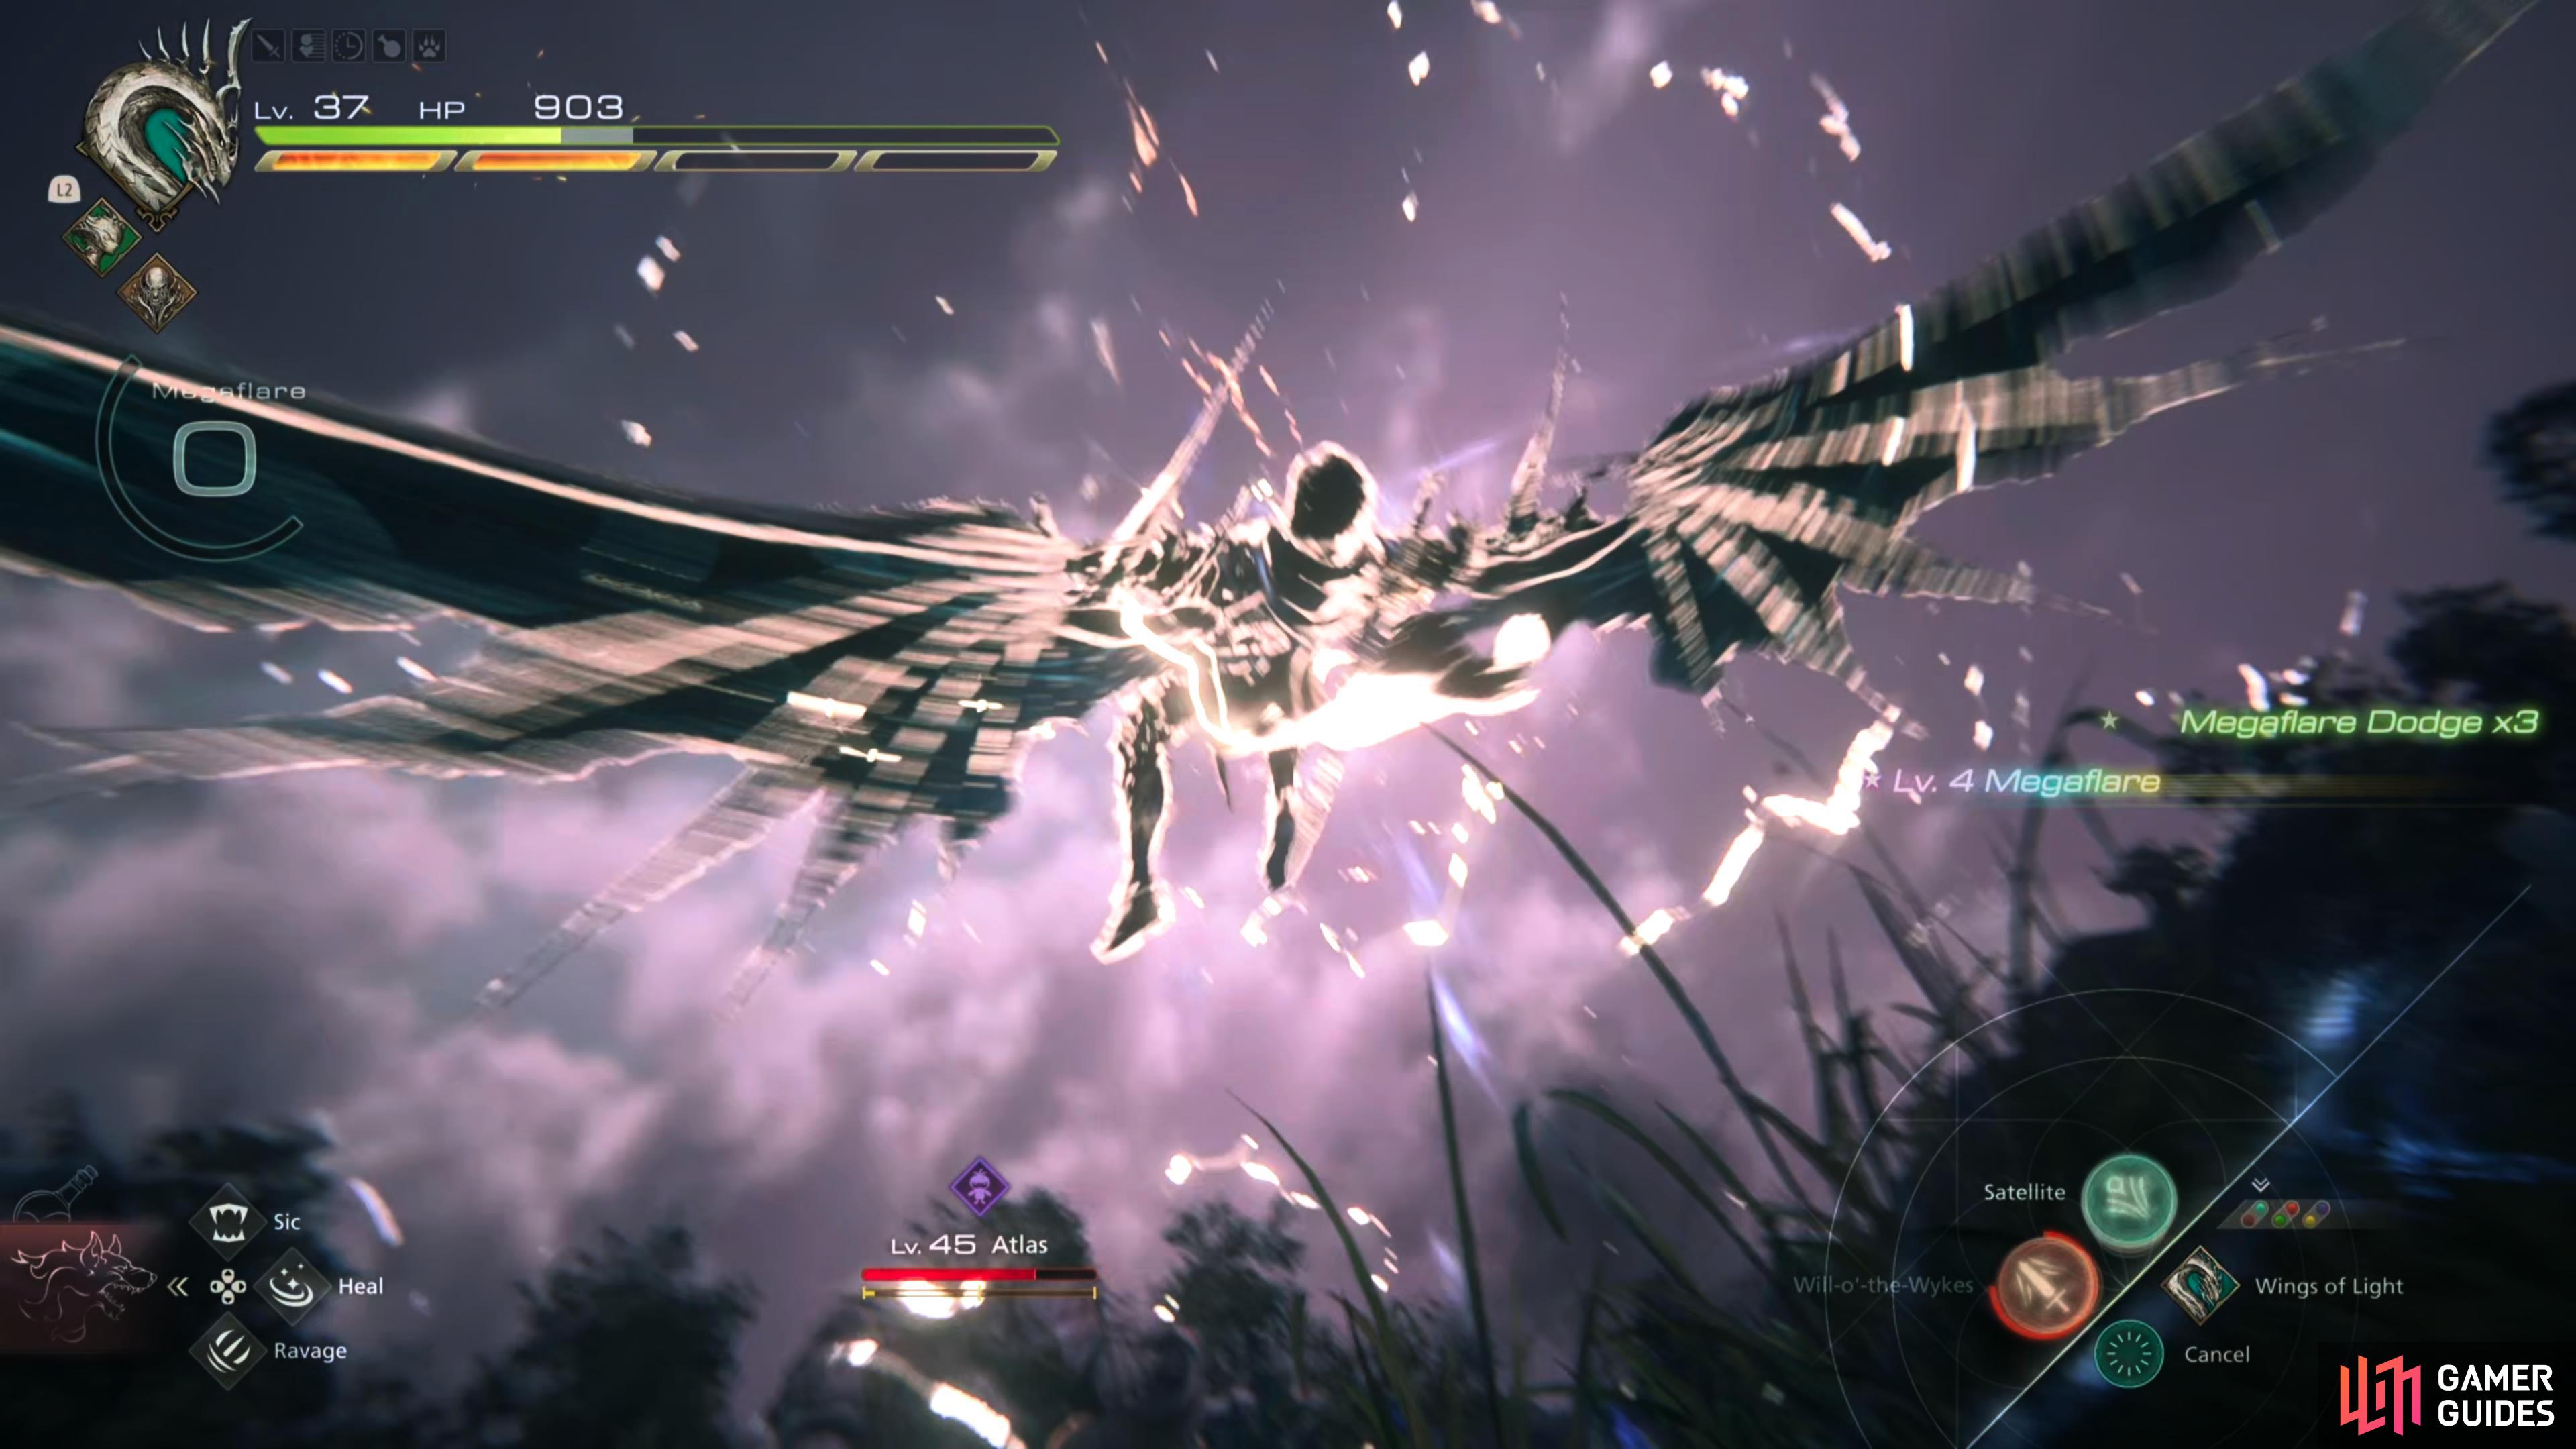

Using Bahamut allows you to change a passive play style to an aggressive play style with Megaflare. Simply charge it up, and dodge to quicken the charge before unleashing it upon Atlas. (left), When you bring Atlas’ Will Gauge to half, switch to Garuda, and use Deadly Embrace to bring Atlas to the ground. (right)
In terms of dealing damage to Atlas, be patient, and favor defense over offense. This is why Bahamut is good for this battle. Because you’ll be spending a lot of time at range, or dodging, you can use Bahamut’s Feat to charge up Megaflare which will charge up quicker with each successful dodge. Try to get this to Level 3 (4 with mastery), and allow the beams them to pummel Atlas while you do your other attacks.
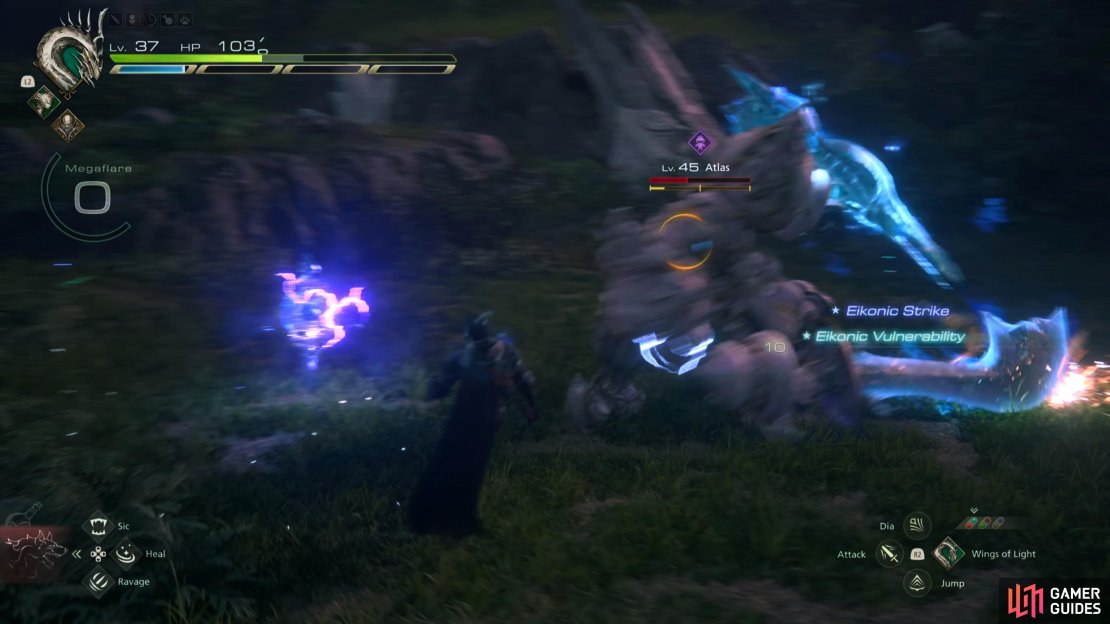
Another good tactic is to place a Lightning Rod at Atlas’ feet whenever it’s safe to do so, and combine it with Gouge, and Will-o’-the-Wykes to deal moderate Will-Damage. Talking of Will-o’-the-Wykes, keep this up at all times, especially whenever you go in for a combo or two as it will negate up to four attacks (upgraded). This helps tremendously when dealing with the power of Atlas.
When you take Atlas’ Will-Gauge to half, immediately switch to Garuda, and use Deadly Embrace ( ) to pull it to the ground. Quickly do a Gouge > Lightning Rod combo to deplete the gauge a bit more. You can use the same method when you send Atlas into full stagger as this will build up the damage multiplier quickly, especially when combined with your Limit Break then you can finish off the combo with one of the Eikon’s Ultimate.
Summary
- Play passive, and use all your damage negation abilities to lower or avoid some of Atlas’ attacks.
- While playing passive, use Bahamut’s Megaflare feat while dodging to unleash level 3/4 Megaflares. !Dodging increases the charge.
- Keep Will-o’-the-Wykes up at all times.
- Keep Stoneskin Tonics up at all times during the second phase. It doesn’t take much from Atlas to Game Over you.
- Keep your health above halfway, especially if you’re fighting Atlas earlier.
- When you do attack, perform short combos, preferably from Precision Dodges as the Berserker Ring will modify your attacks.
- Celestial Sphere sucks, and you’ll lose most of your health to it/the follow-up attacks. Get out of the circles immediately, so you don’t have to deal with them, and the follow-up attacks at the same time.
- The lower Atlas’ health gets, the quicker it becomes.
- Don’t forget Torgal exists, he’s a good boy, and he can add to the depletion of the Will-Gauge, especially if you get a Precision Sic/Ravage.
Once you’ve defeated Atlas, you’ll receive 15,000 XP, 120 AP, 27,000 Gil, and 50 Renown. On top of that, you’ll receive the ![]() Fallen Iron, and
Fallen Iron, and ![]() Orichalcum materials with the latter being needed for a Weapon.
Orichalcum materials with the latter being needed for a Weapon.
More Final Fantasy 16 Hunts
For information on some of the other ![]() Notorious Marks you can take on in Final Fantasy 16, check out these pages below:
Notorious Marks you can take on in Final Fantasy 16, check out these pages below:
No Comments