
Once Clive has full access to every Eikonic Ability in the game, there are a lot to choose from and you may be wondering what the best ones are to use to get the most out of each of those Stagger phases. This page will give you all the details on what we believe are the best Eikonic Abilities in Final Fantasy XVI.

You can deal massive damage to enemies during Stagger in Final Fantasy 16.
When it comes to the matter of dealing maximum damage in FFXVI, it’s all about how much you can deal during a Stagger phase. By the time you’ve unlocked all of ![]() Eikons, it’s easy enough to grab the It’s Over 50,000 Trophy, Clive has so many powerful choices at his disposal. But if you want to push that further, dealing with S Rank hunts in just a Stagger phase or two, you’ll want to know what the best abilities are to equip and invest in.
Eikons, it’s easy enough to grab the It’s Over 50,000 Trophy, Clive has so many powerful choices at his disposal. But if you want to push that further, dealing with S Rank hunts in just a Stagger phase or two, you’ll want to know what the best abilities are to equip and invest in.
Best Abilities Loadout
With that in mind, let’s get this show underway. Below, in the table, you’ll find our loadout for what we used when we (regularly) hit upwards of 150,000 damage during a Stagger. This is during a first playthrough too, and although there are ways to take this damage higher, this is one that worked well for us.
| Eikon | Ability 1 | Ability 2 |
|---|---|---|
It goes without saying that you should upgrade/master the necessary abilities (you only need to master the ones from other Eikons) along with making sure you upgrade all three of the Eikonic Feats from each of Shiva, Odin, and Bahamut. Likewise, if you equip the Accessories that boost these attacks (many come from the Chronolith Trials), you will see your damage increase further.
Ability Breakdown
You’ll find more details about the reasoning for each ability below, along with how you should put these in use.
Will-o’-the-Wykes
From the moment you unlock this ability, you know it’s a powerful one. Having the ability to absorb attacks is already powerful but add to the fact that with it up, you won’t get flinched when attacked and its uses increase even more. It even adds some damage to your Stagger phases should it be up still, as the surrounding flames will strike the enemy if you’re close enough. As a general rule, you should look to use this ability whenever it’s available.
Diamond Dust
The Shiva ultimate ability is a powerful one that deals massive Stagger damage to a large area, especially when upgraded. This is your bread-and-butter ability to Stagger your enemy and should mainly be saved for that purpose (rather than the Stagger phase). To make this even more effective, equip the Shiva’s Kiss Accessory from the Priceless Side Quest to shorten the cooldown.

!Diamond Dust is great for Staggering enemies
while !Dancing Steel will charge up the Zantetsuken gauge a lot quicker.
Dancing Steel
A large part of dealing maximum damage is using a Lv 5 Zantetsuken while an enemy is Staggered. Using ![]() Dancing Steel when upgraded (and even easier if you have the accessory equipped) will allow you to charge that gauge as quickly as possible. Outside of Dancing Steel, use
Dancing Steel when upgraded (and even easier if you have the accessory equipped) will allow you to charge that gauge as quickly as possible. Outside of Dancing Steel, use ![]() Arm of Darkness to hit Lv 5 before a Stagger phase.
Arm of Darkness to hit Lv 5 before a Stagger phase.
Lightning Rod
A staple of all of our damage builds ever since it became available, Lightning Rod just helps multiply all of the damage you deal when you place it properly. That placing, is by lunging into an enemy after Stagger and dropping it right on its head so that when you use ![]() Gigaflare, it shoots through it.
Gigaflare, it shoots through it.
Heatwave
This ability can really be anything, as it’s only an extra way to perform some more damage but it has great uses outside of Stagger with its Heatwave Counter. If you’re looking for more damage, arguably you could go with ![]() Titan’s
Titan’s ![]() Windup ability, but that does require some charge time which could eat into your Stagger time.
Windup ability, but that does require some charge time which could eat into your Stagger time.
Gigaflare
The final ability to equip, Gigaflare, is a monster of an ability and will be where most of your damage comes from. Once you Stagger the enemy, and have your Lightning Rod down, firing this through it will deal massive damage to your target. As always, equip the Accessory from Bahamut’s Chronolith Trial for even more damage.
Wings of Light - Megaflare
Charging a Max Level Megaflare (so you’ll need to upgrade ![]() Wings of Light) does require more setup, but it will make a difference in your overall total damage. Look to charge this up once you get your target down to the last part of their Stagger gauge and then fire it off just before you Stagger the enemy. This will cause most of Megaflare’s attacks to hit during the Stagger phase and see your max skyrocket.
Wings of Light) does require more setup, but it will make a difference in your overall total damage. Look to charge this up once you get your target down to the last part of their Stagger gauge and then fire it off just before you Stagger the enemy. This will cause most of Megaflare’s attacks to hit during the Stagger phase and see your max skyrocket.
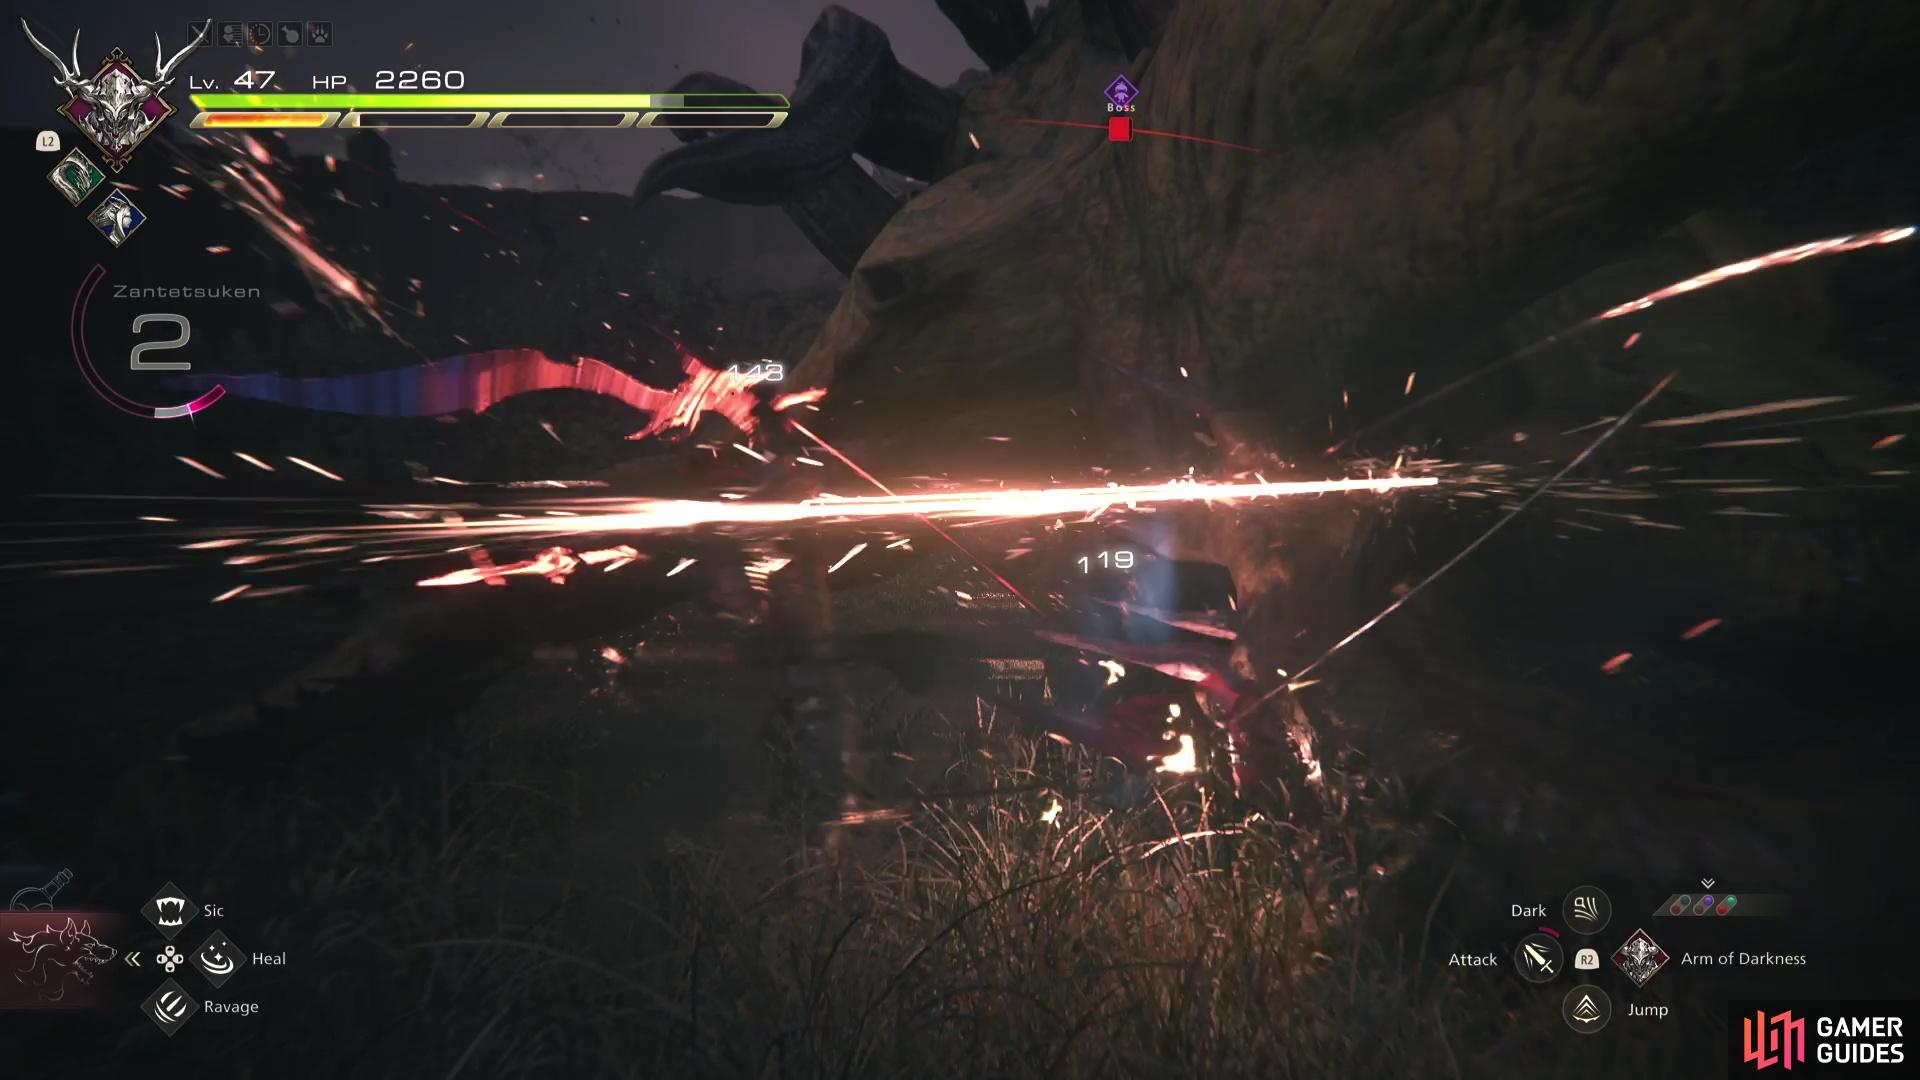
Arm of Darkness - Zantetsuken
A large part of your maximum damage, make sure to use Dancing Steel off cooldown followed by any other necessary attacks with Arm of Darkness to charge to Lv 5. Unlike Bahamut, you can switch out of Odin and you’ll keep your charge so do this before Wings of Light. Once the enemy is Staggered and after Gigaflare, use Zantetsuken.
Dealing Over 150,000 Damage during a Stagger in FF16
So now that you know the abilities you need, how do you go about doing this in practice? First, you’ll need to make sure you’re fighting an enemy that won’t die before you can pull all of it off (we used the Behemoth King).

Once you begin the battle, make sure you use Diamond Dust off cooldown to bring that Stagger gauge down, then switch to Odin to build up the Zantetsuken gauge to Lv 5 with Arm of Darkness and Dancing Steel. Once you’ve done that, if you’ve managed to bring the Stagger gauge down to just a little left, work on charging Megaflare with Bahamut. This is the lengthiest part of the process and unless you’re trying to break your record, you can usually forego this part (and still easily hit 120,000+). Remember that Megaflare charges quicker by using ![]() Precision Dodges and once it’s ready, fire it off.
Precision Dodges and once it’s ready, fire it off.
The Megaflare combined with the regular attacks will put the enemy in Stagger and then you can truly begin. Use ![]() Limit Break, Lunge into the enemy and then use Lightning Rod before immediately using Gigaflare. Once that’s finished, you should still be in Limit Break and have enough time to use Lv 5 Zantetsuken. If you have any time left on Stagger after these abilities, use Heatwave, Diamond Dust (if cooldown is up), or another like-minded powerful ability.
Limit Break, Lunge into the enemy and then use Lightning Rod before immediately using Gigaflare. Once that’s finished, you should still be in Limit Break and have enough time to use Lv 5 Zantetsuken. If you have any time left on Stagger after these abilities, use Heatwave, Diamond Dust (if cooldown is up), or another like-minded powerful ability.
FF16 Stagger Combo Video Guide
If you want to see this process in action, check out the video below to see how all the parts fit together.
No Comments