
The Lines in the Sand II side quest in Final Fantasy 16 can be acquired at The Dalimil Inn once you reach the Back to Their Origin. main quest. Here you’ll find an NPC named ![]() L’ubor, who is the towns blacksmith. He’ll tell you about some Akashic that are closing in on Dalimil and he asks Clive to assist them in taking them down. We’ll take you through the necessary steps to defeating the Akashic Bandits and Akashic Gentleman on this page.
L’ubor, who is the towns blacksmith. He’ll tell you about some Akashic that are closing in on Dalimil and he asks Clive to assist them in taking them down. We’ll take you through the necessary steps to defeating the Akashic Bandits and Akashic Gentleman on this page.
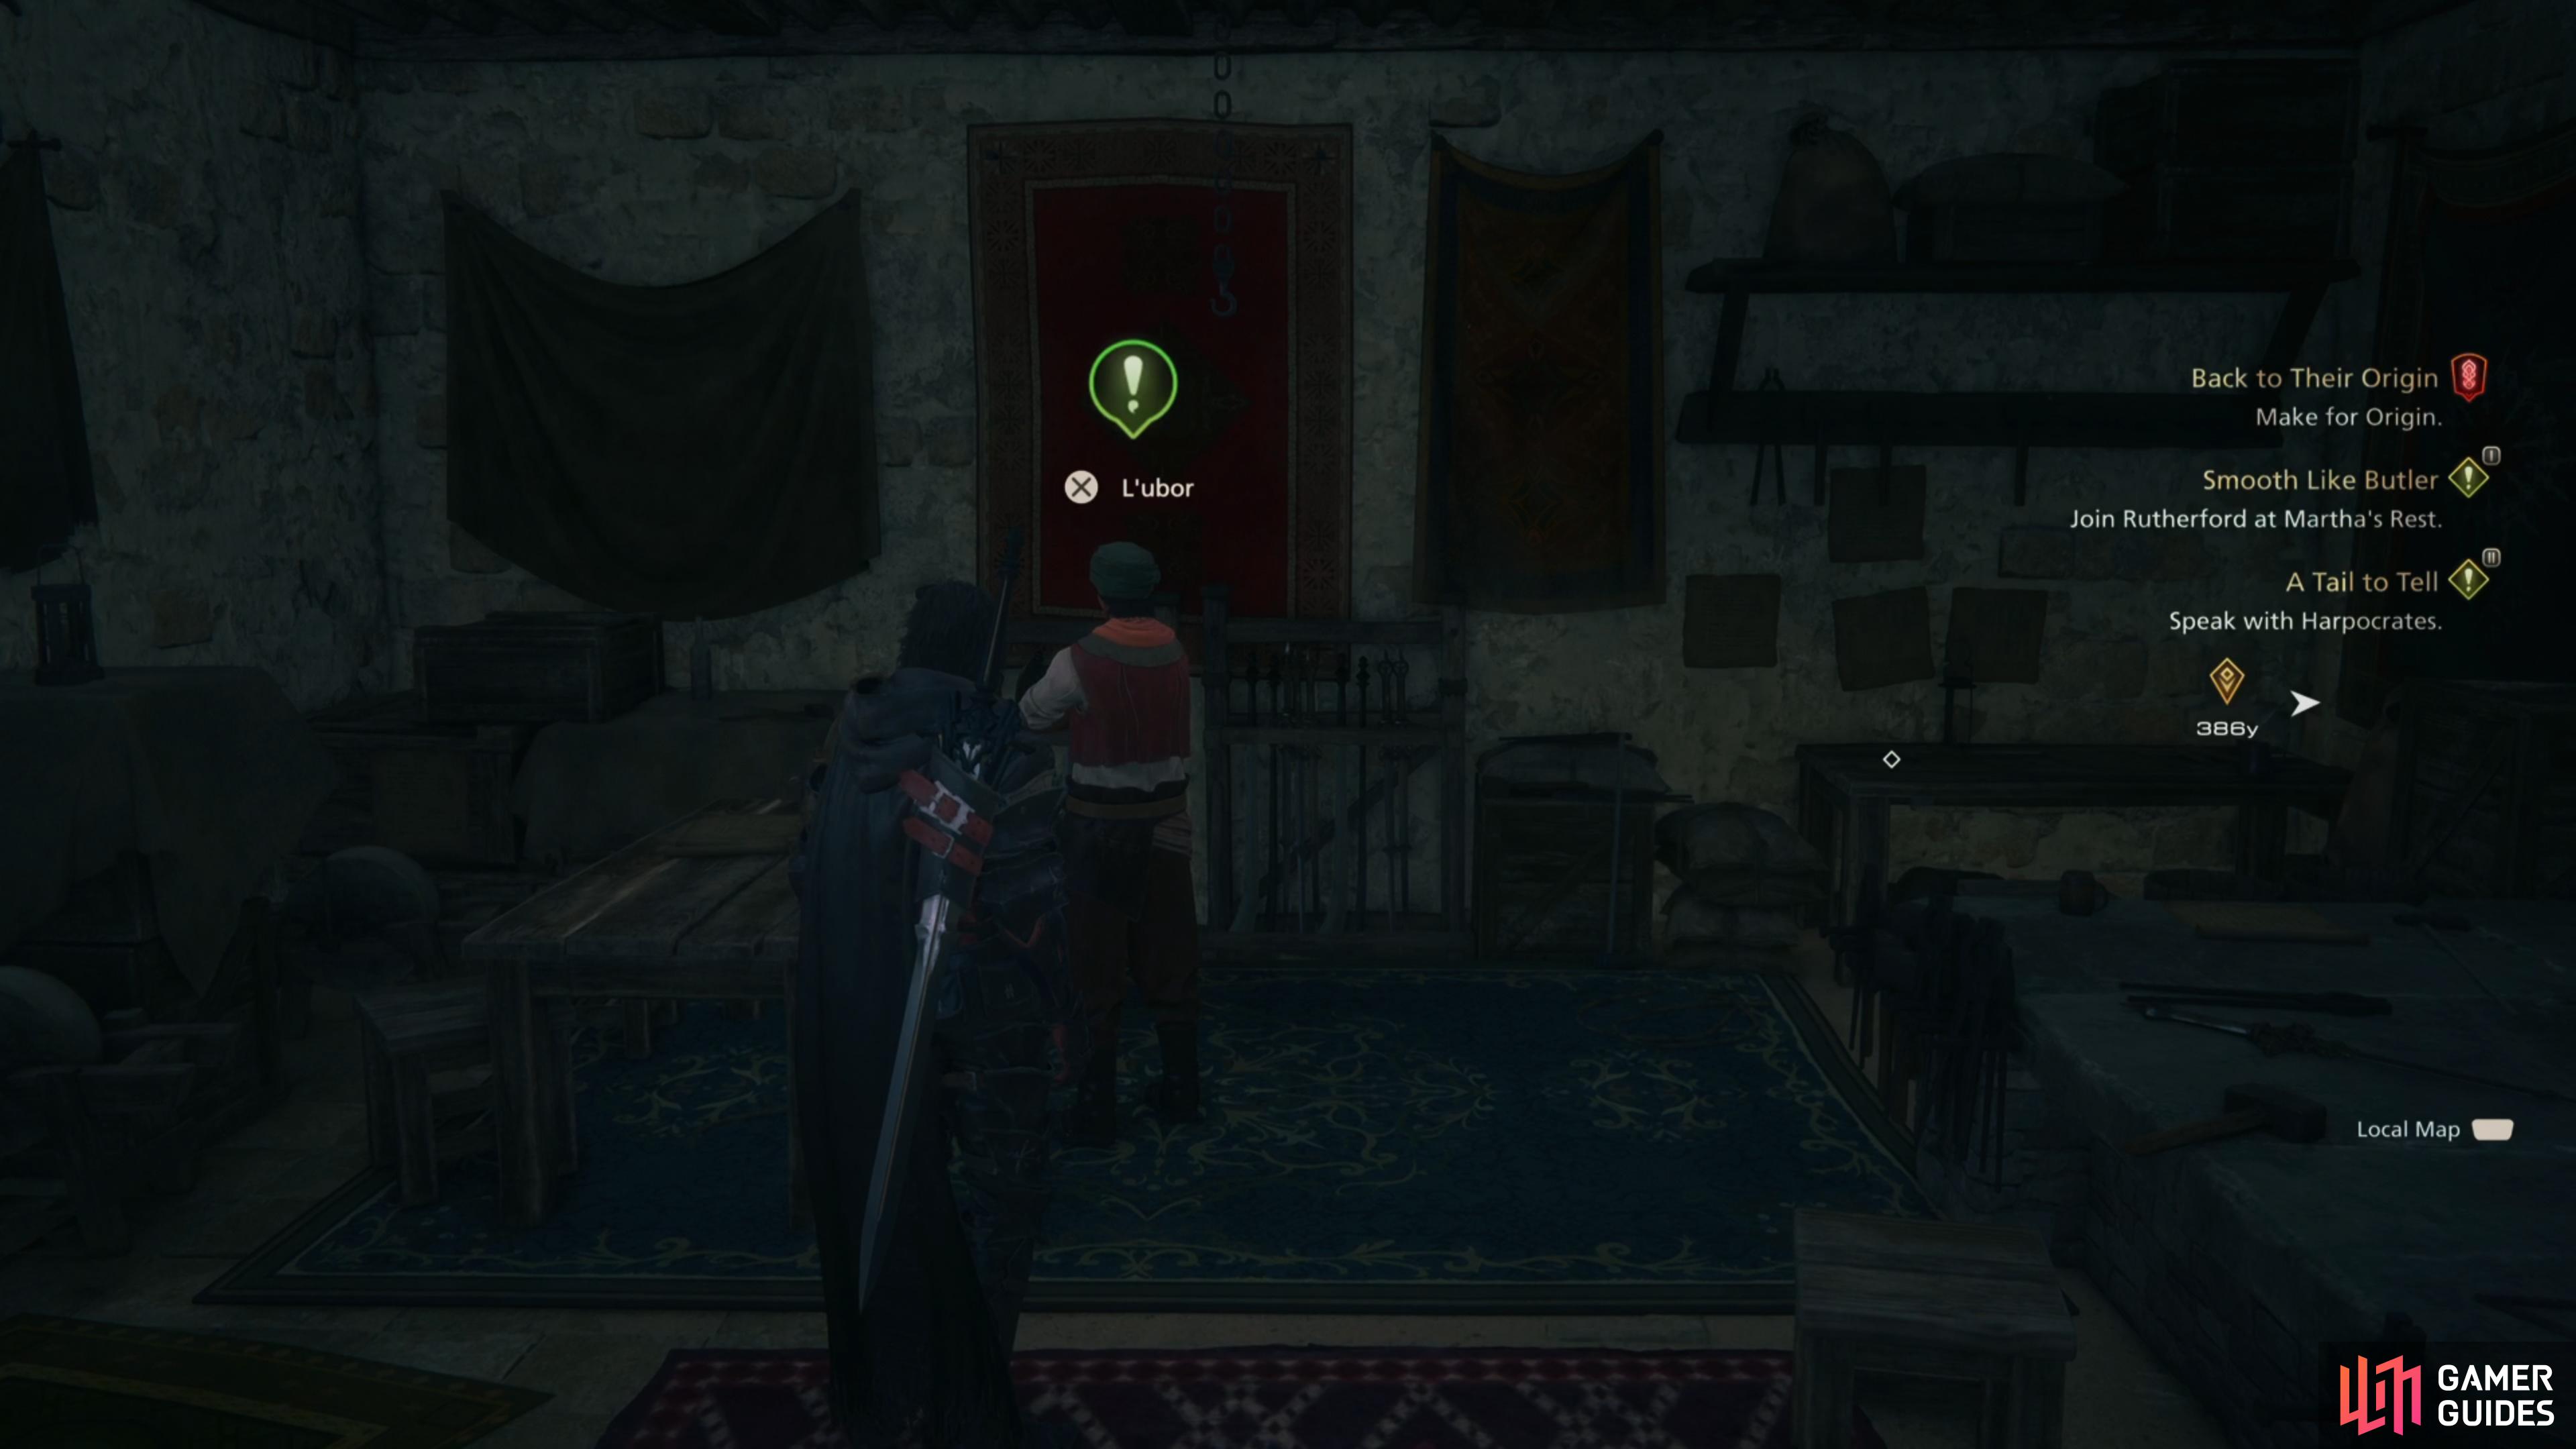
Speak with L’ubor at The Briar’s Kiss to begin this quest.
L’ubor asks Clive to take the orphans that he has been caring for into his protection. Clive gladly agrees, but as he does so, they hear the horrifying news that a band of Akashic may soon be at Dalimil’s gates.
How to Start the Lines in the Sand II Side Quest in Final Fantasy 16
First things first, you’ll need to have completed the main story mission Streets of Madness, and be on Back to Their Origin, then you’ll need to complete Lines in the Sand Side Quest. When those requirements have been met, head over to L’ubor who can be found at ![]() The Briar’s Kiss which is located at
The Briar’s Kiss which is located at ![]() The Dalimil Inn. Speak with him and you’ll learn that he wants the children he was looking after to go somewhere safe before he leaves, so he requests that you take them back to the Hideaway.
The Dalimil Inn. Speak with him and you’ll learn that he wants the children he was looking after to go somewhere safe before he leaves, so he requests that you take them back to the Hideaway.
However, before you are able to do so, you’re both informed that a group of Akashic Bandits are coming towards The Dalimil Inn, so you need to help everyone evacuate the area. Once you’ve finished speaking with L’ubor, enter the Tavern and talk to ![]() Konrad and
Konrad and ![]() Natalie and try and convince them to start the evacuation. Unfortunately, due to L’ubor’s history of lying they refuse to listen, so Clive must find another way.
Natalie and try and convince them to start the evacuation. Unfortunately, due to L’ubor’s history of lying they refuse to listen, so Clive must find another way.
How to Defeat the Akashic Bandits and Akashic Gentleman
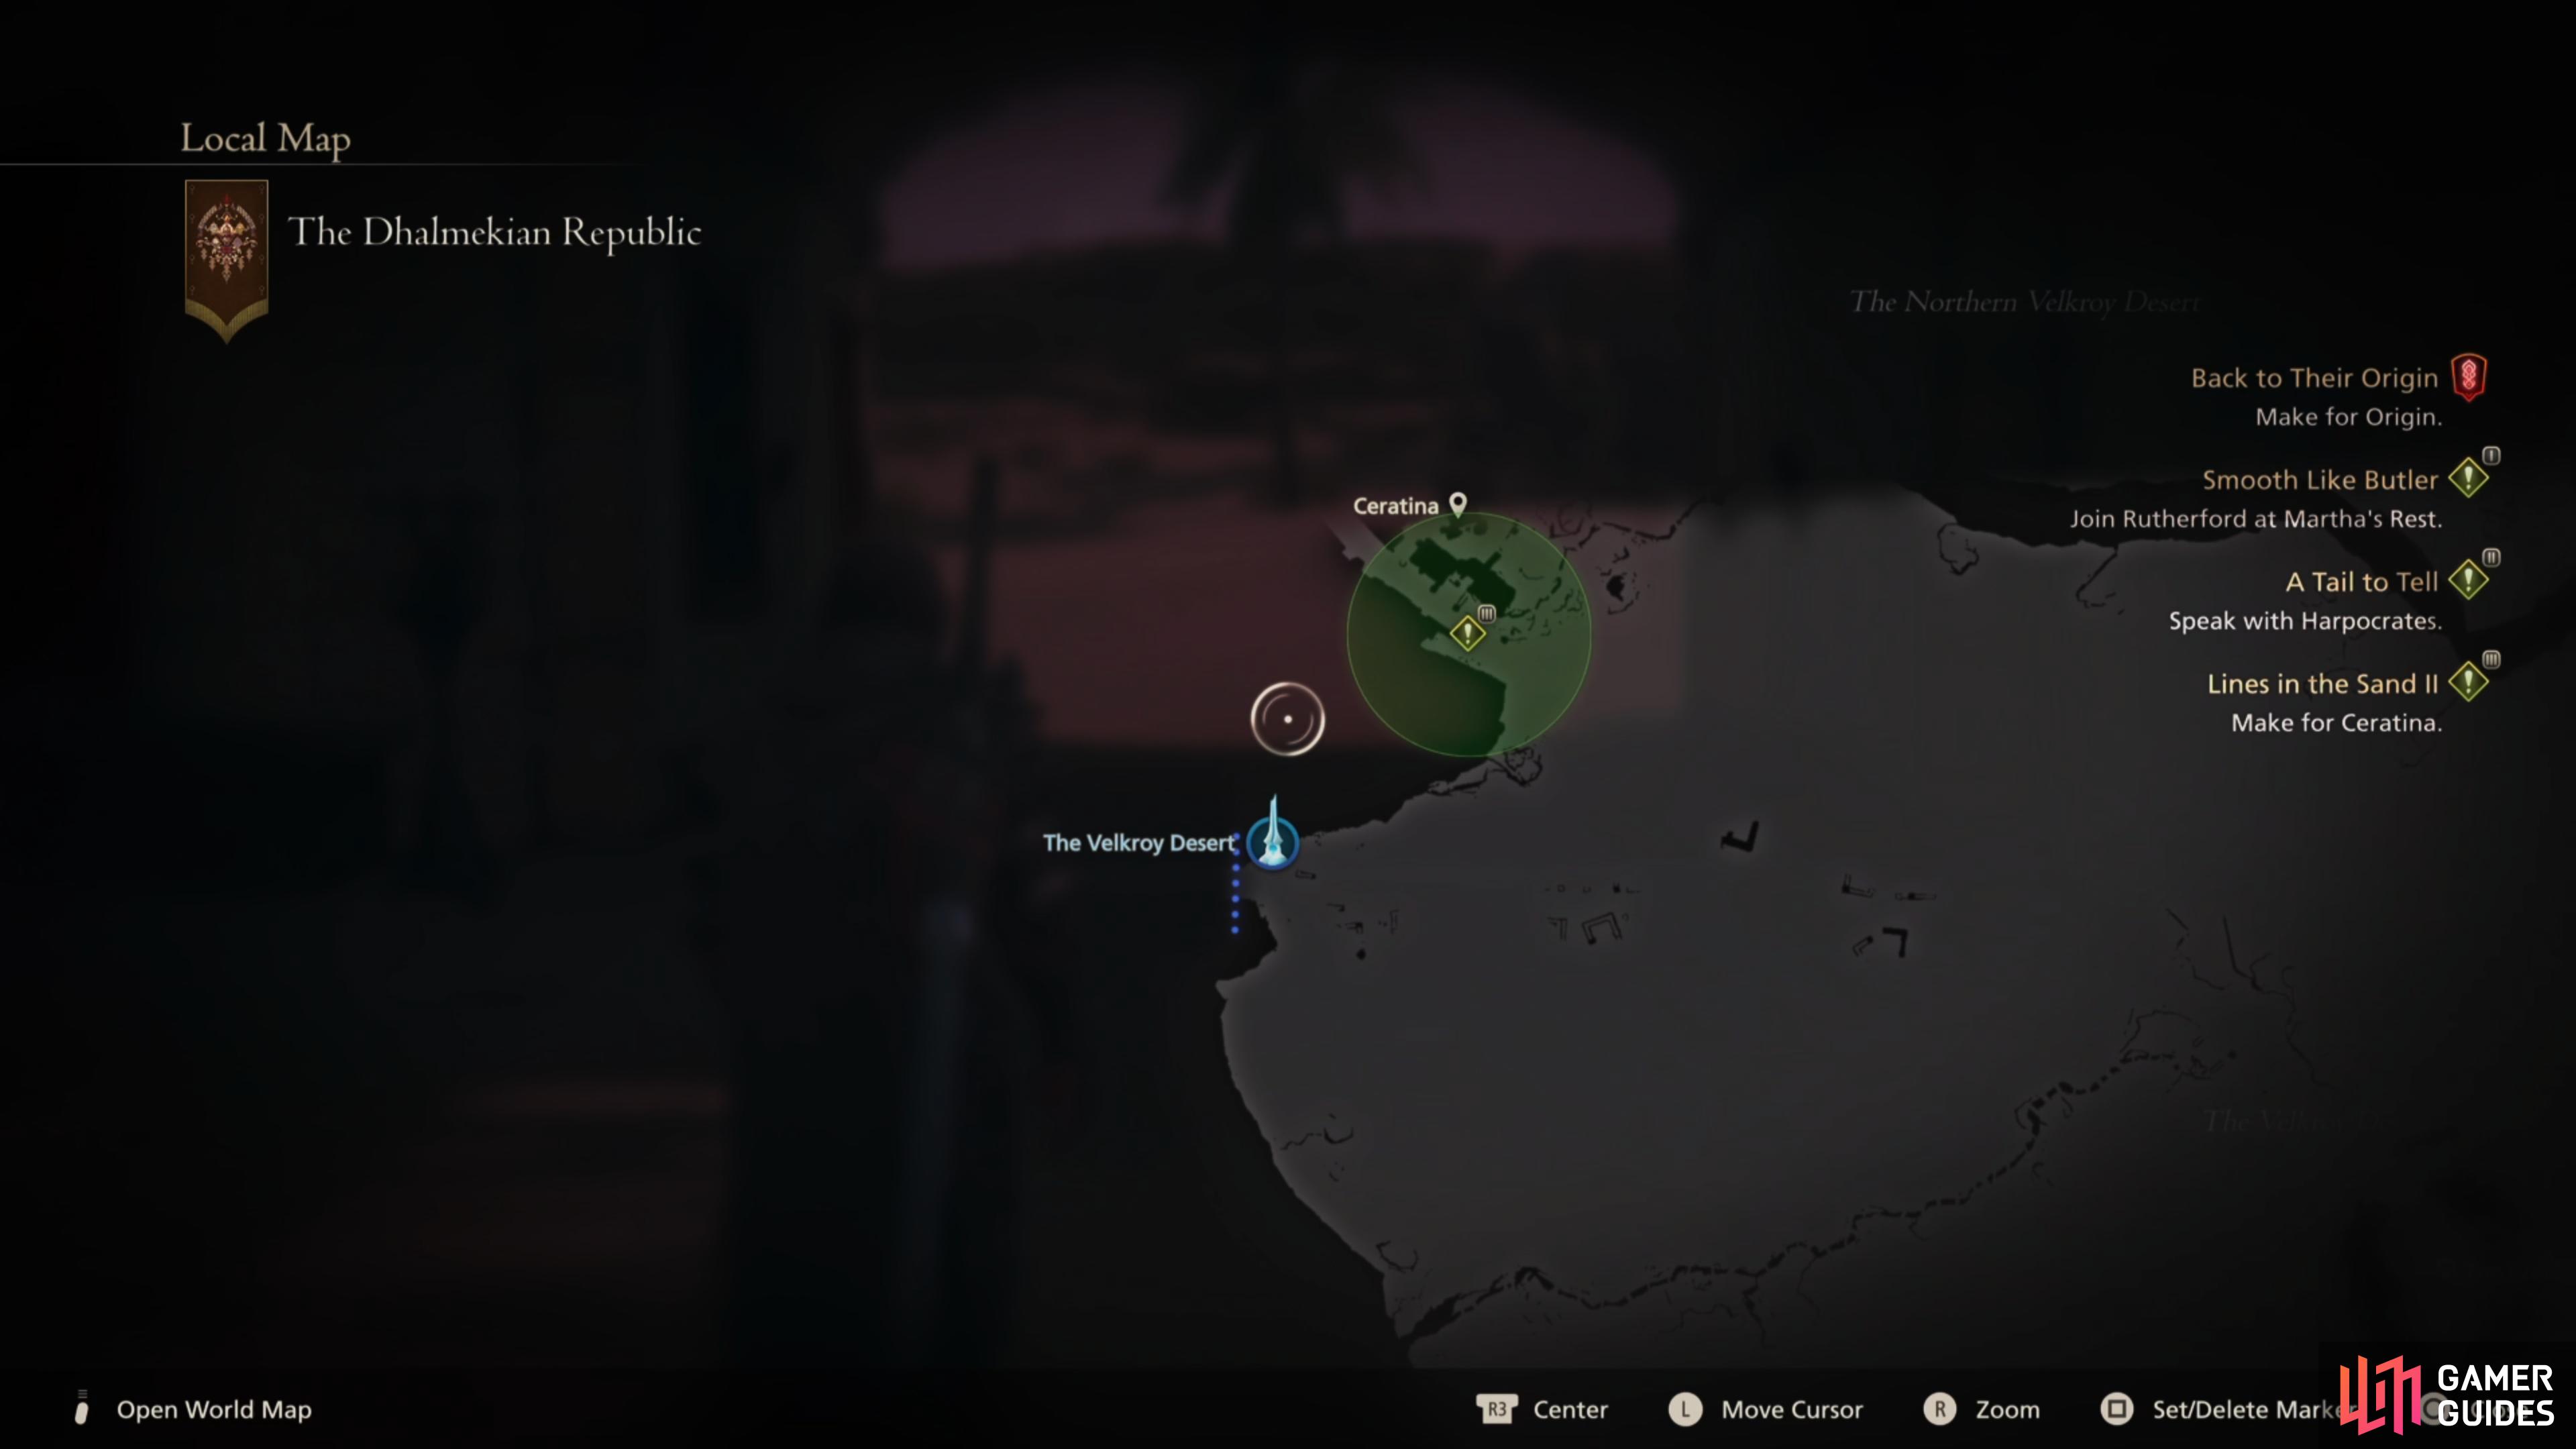
Head over to The Lock of Toil area and speak with ![]() Ferda and inform him that you’ll help defend Dalimil. Following your conversation, a few scenes will play out where everyone discusses how to fight off the Akashic, then you’ll want to fast travel to The Velkroy Desert
Ferda and inform him that you’ll help defend Dalimil. Following your conversation, a few scenes will play out where everyone discusses how to fight off the Akashic, then you’ll want to fast travel to The Velkroy Desert ![]() Obelisk and follow the path along to the left until you reach Ceratina. Inside you’ll come across multiple Akashic Footpads, so you’ll want to quickly take down the Cunning-man first, as he can heal the other enemies, then you’ll want to group them by using
Obelisk and follow the path along to the left until you reach Ceratina. Inside you’ll come across multiple Akashic Footpads, so you’ll want to quickly take down the Cunning-man first, as he can heal the other enemies, then you’ll want to group them by using ![]() Ignition and make use of any AoE Abilities, such as
Ignition and make use of any AoE Abilities, such as ![]() Diamond Dust or
Diamond Dust or ![]() Aerial Blast.
Aerial Blast.
At this point most of the enemies should only have a tiny bit of health left, so you’ll want to focus on one at a time and finish them off with ![]() Magic Bursts. Once you’ve dealt with the regular enemies you’ll find yourself going up against the Akashic Gentleman. This is an elite enemy, so you’ll want to tackle it with caution. To begin, you’ll want to work on staggering it, so get close and use Diamond Dust to deplete most of the bar, then finish it off with
Magic Bursts. Once you’ve dealt with the regular enemies you’ll find yourself going up against the Akashic Gentleman. This is an elite enemy, so you’ll want to tackle it with caution. To begin, you’ll want to work on staggering it, so get close and use Diamond Dust to deplete most of the bar, then finish it off with ![]() Gouge.
Gouge.
Now you’ll want to place down ![]() Lightning Rod directly in front of it and activate your
Lightning Rod directly in front of it and activate your ![]() Limit Break before unleashing
Limit Break before unleashing ![]() Gigaflare into it. If you have Zantetsuken available, then use that to deal extra damage. This should take the elites health below half depending on your equipment and upgrades, so you’ll want to repeat this process twice to take it down. However, you’ll want to watch out for the following attacks whilst you’re chipping away at its health:
Gigaflare into it. If you have Zantetsuken available, then use that to deal extra damage. This should take the elites health below half depending on your equipment and upgrades, so you’ll want to repeat this process twice to take it down. However, you’ll want to watch out for the following attacks whilst you’re chipping away at its health:
- Swing - Akashic Gentleman will often swing its axe around in front of it when you’re too close, so only go in for a couple attacks at a time to avoid getting struck by it.
- Ground Slam - If you stand too close to the Akashic Gentleman it’ll lift its weapon above its head and slam it onto the ground directly in front of it, so you’ll want to stick to attacking it from the side.
After all the enemies have been dealt with, return to Dalimil for a short scene and the quest will come to a close. Here you’ll be rewarded with a ![]() Meteorite x1, Briar’s Kiss Signboard and The Breath of Light (
Meteorite x1, Briar’s Kiss Signboard and The Breath of Light (![]() Impulse) Accessory. This will reduce the cooldown time for Impulse for 2 seconds.
Impulse) Accessory. This will reduce the cooldown time for Impulse for 2 seconds.
Other Side Quests in The Dhalmekian Republic
As you’re playing through the Main Quest you’ll find more Side Quests pop up in The Dhalmekian Republic, so it’s a good idea to check back often. Below is a list of all the currently available Side Quests:
| Name | Location |
|---|---|
| Hot Water | |
| Use Your Loaf | |
| Live and Let Live | The Boklad Markets |
| Bearer of Good News | The Boklad Markets |
| Trading Places | The Boklad Markets |
| Lines in the Sand | The Dalimil Inn |
No Comments