
When you reach the Brotherhood main scenario quest close to the end of Final Fantasy 16, a few more Hunts will appear on the hunt board. Gobermouch, a small goblin, is one of them, but finding it can be difficult. Read below to find out the exact location of Gobermouch, and how to defeat it.
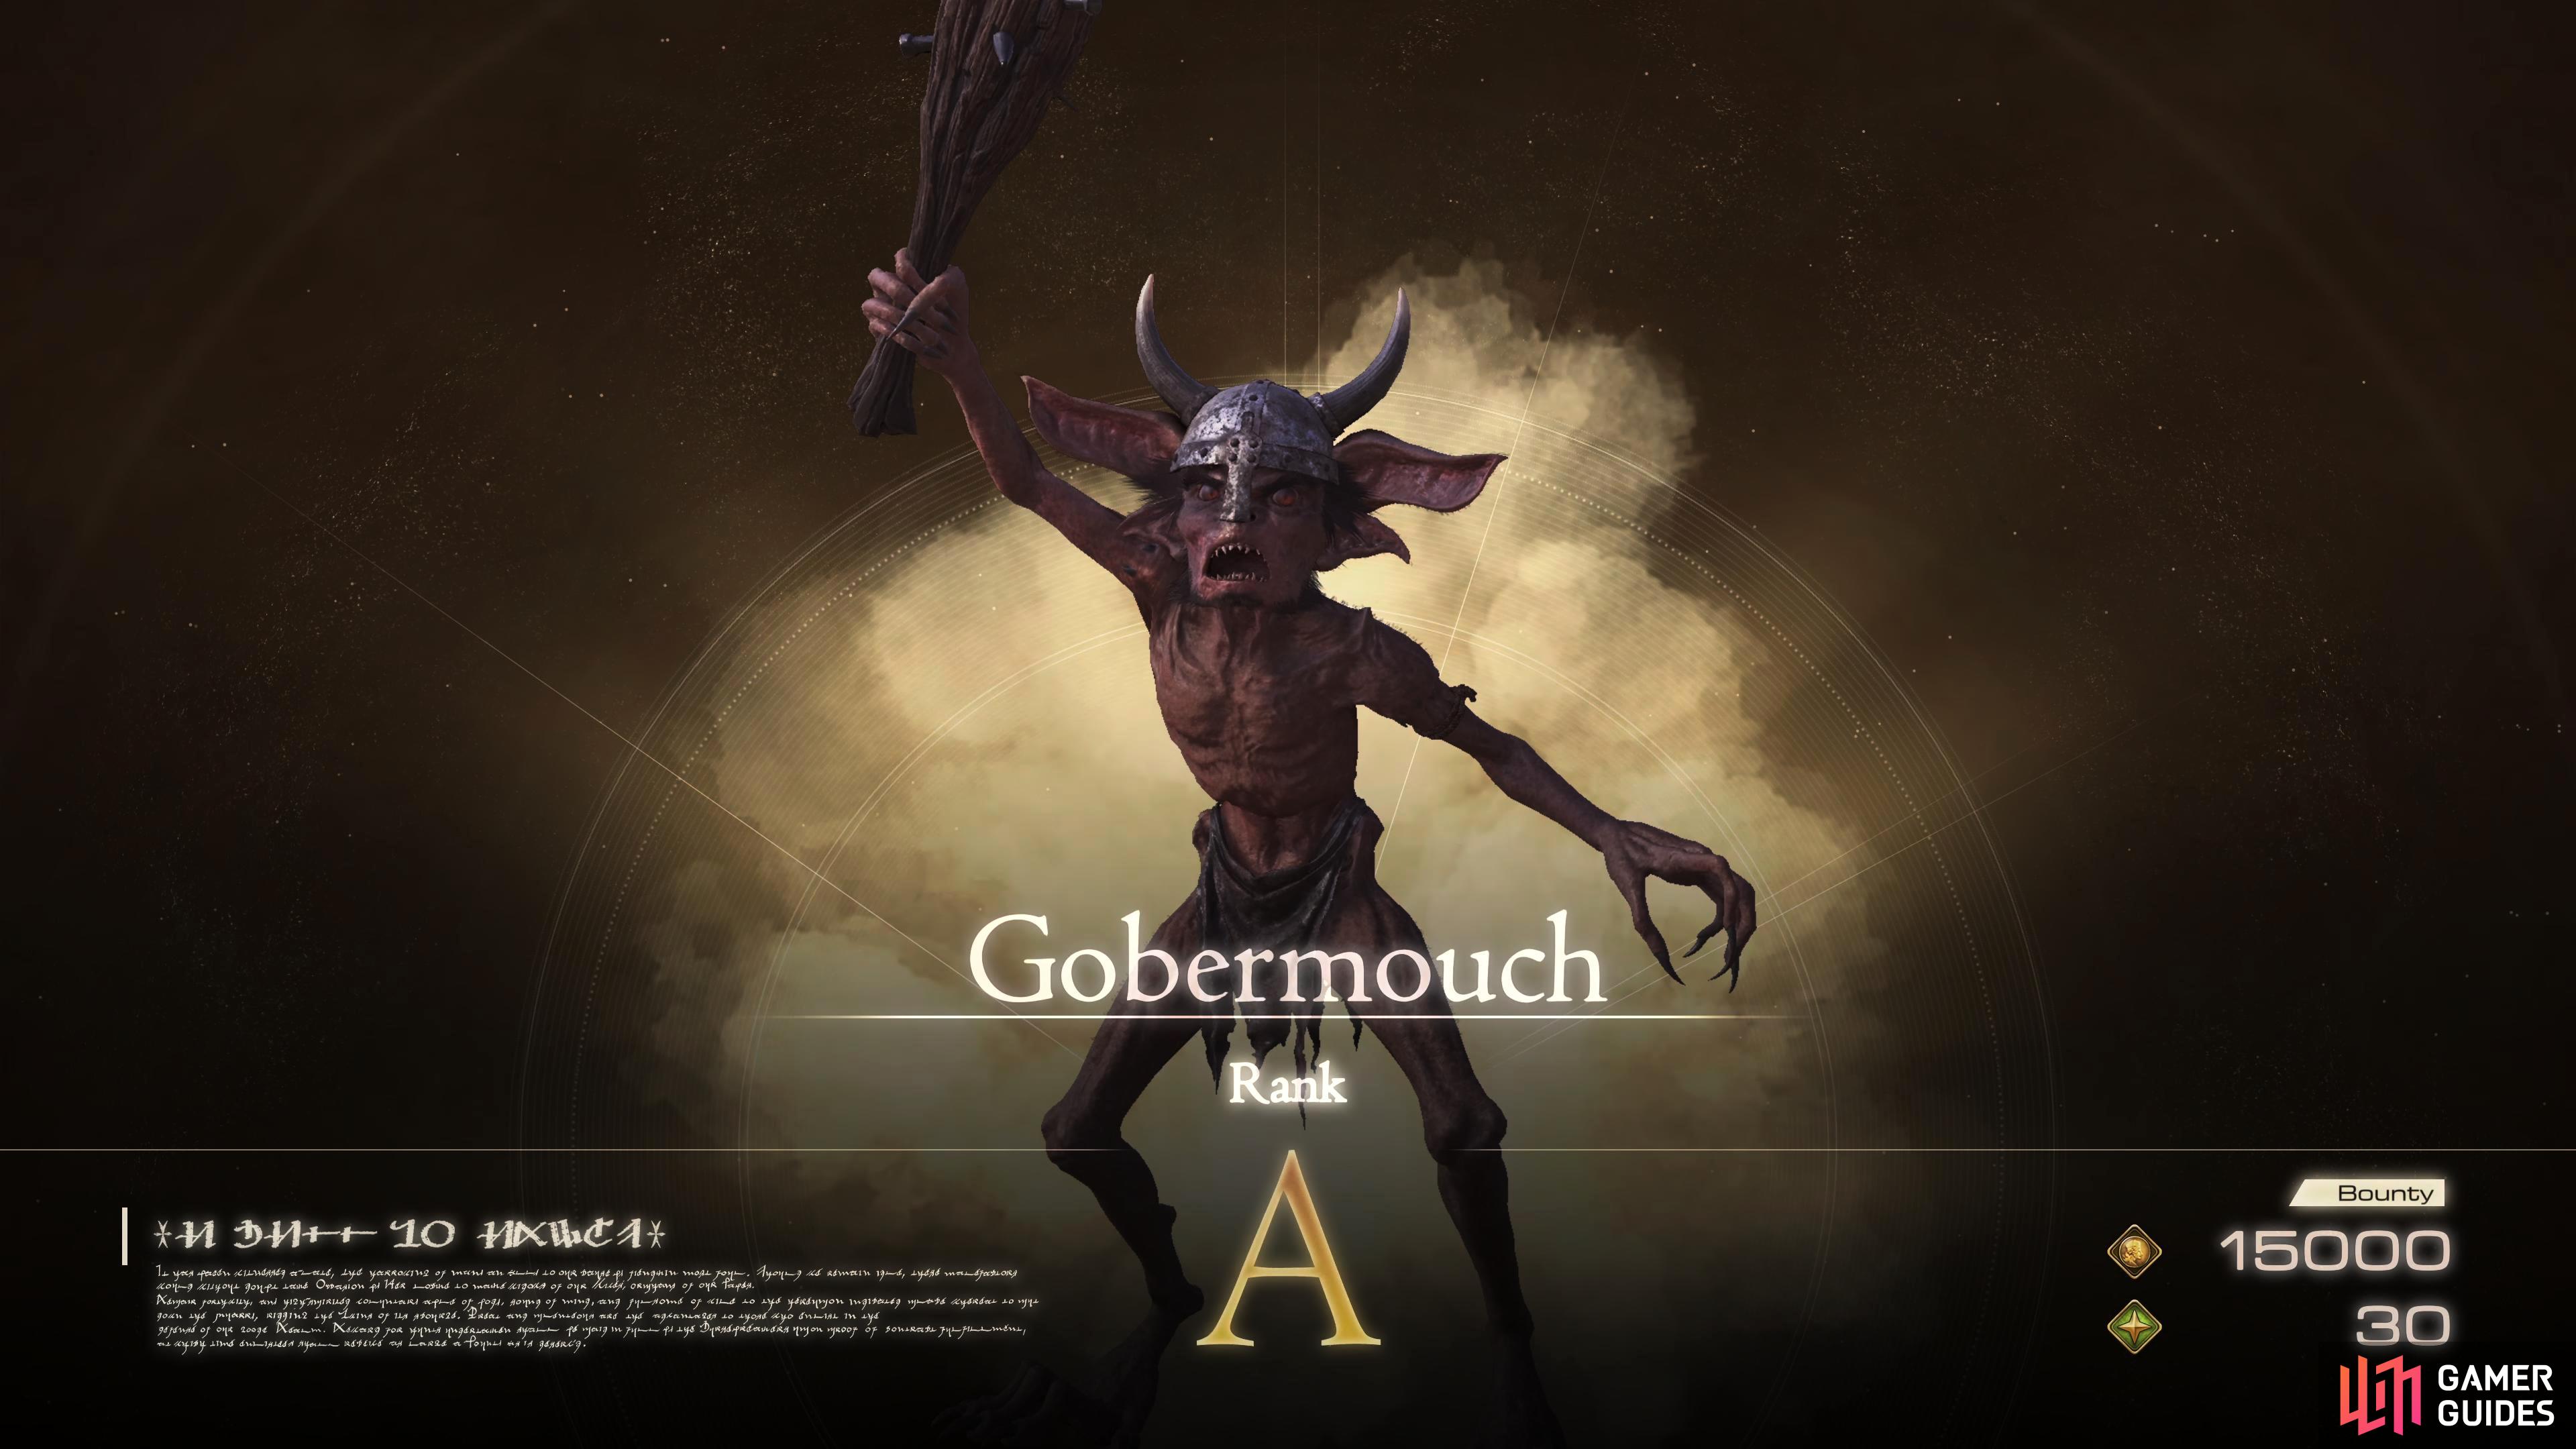
Gobermouch is a small goblin found in the town of !Eistla, Waloed
Where to Find Gobermouch
| Location | Level | Bounty |
|---|---|---|
| 38 | 15,000 Gil, 30 Renown |
As stated above, this Hunt won’t be available until you reach the Brotherhood main scenario quest (4th from last). Once the Notorious Mark has appeared on the hunt board, teleport to the ![]() Eistla obelisk, and head northwest, across the town. This will lead you to some wooden stairs, go up the first set, then climb the ladder immediately in front of you. At the top, head west where you’ll find Gobermouch waiting for you.
Eistla obelisk, and head northwest, across the town. This will lead you to some wooden stairs, go up the first set, then climb the ladder immediately in front of you. At the top, head west where you’ll find Gobermouch waiting for you.

From the Eistla Obelisk, head northwest across town, and climb the stairs/ladder then turn left.
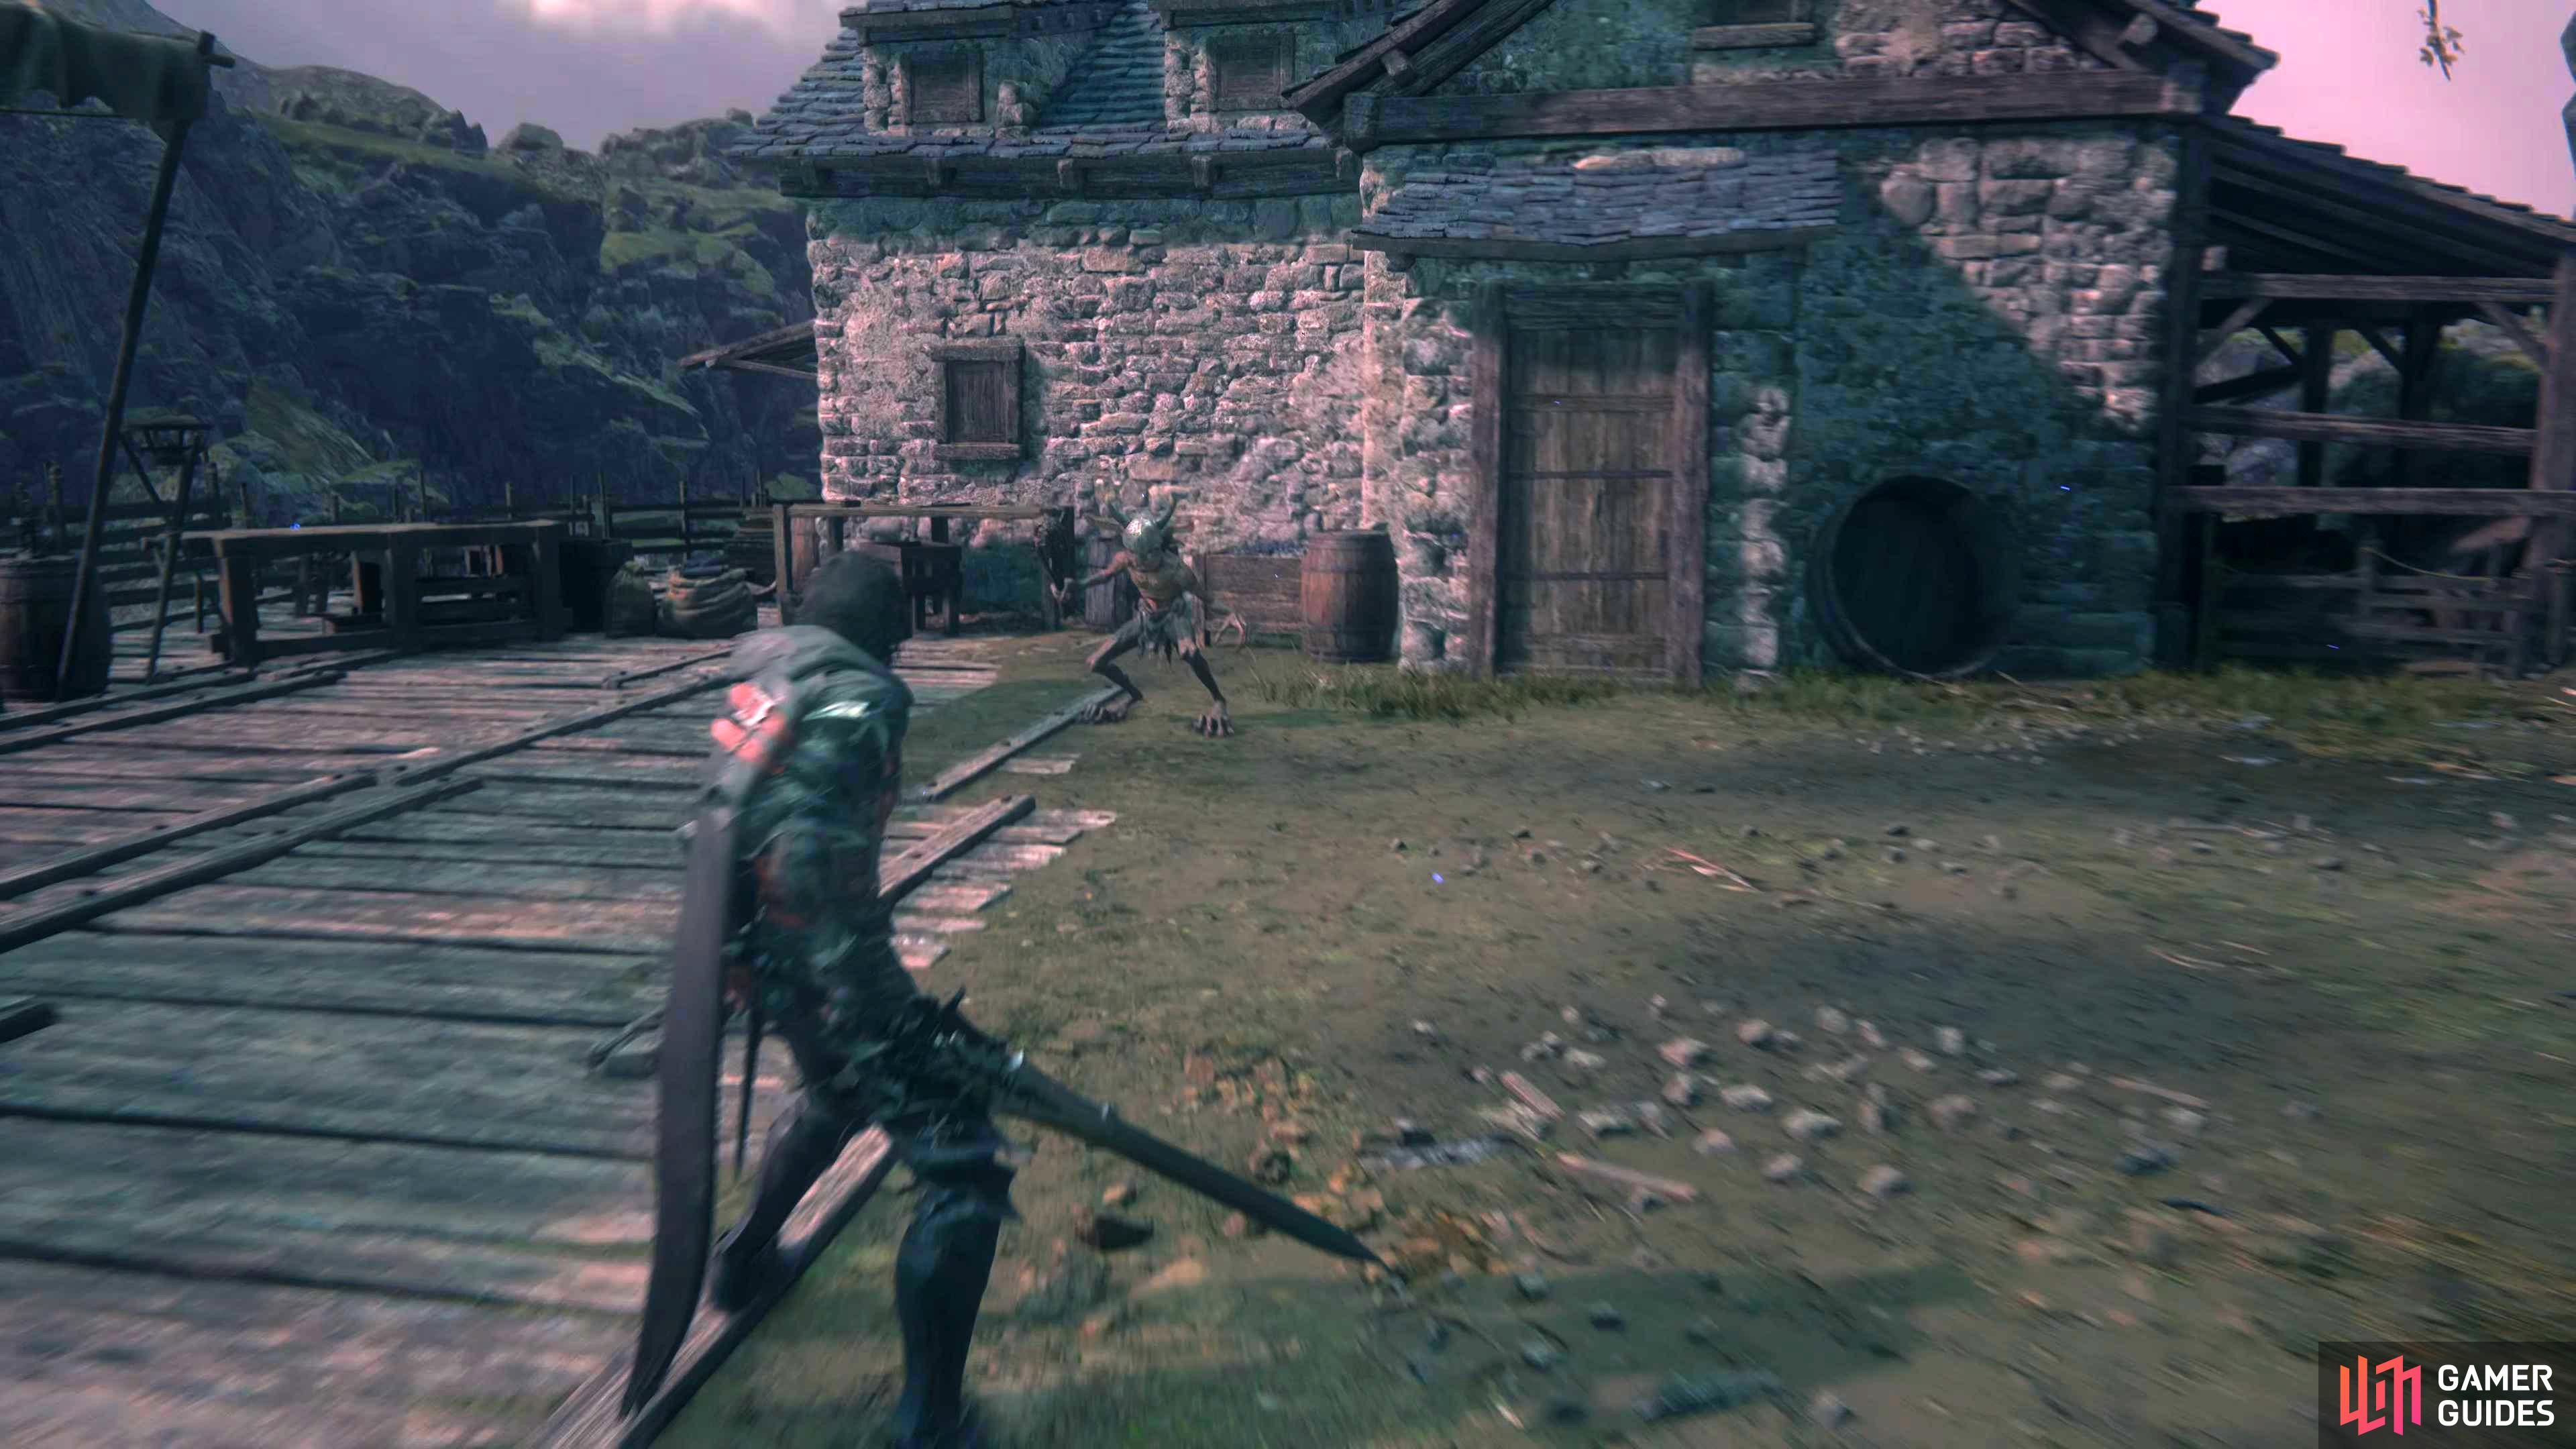
Gobermouch will be waiting for you next to the abandoned house.
Gobermouch’s Abilities and Attacks
Below you’ll find a list of all the attacks that Gobermouch has in its arsenal, and how to counter them:
| Attack | Description | Counter |
|---|---|---|
| Club Strike | Gobermouch will hop towards you before unleashing a measured club strike which will leave it open if it misses. If it hits you with this, it’ll briefly stun you. | This is an extremely slow attack where almost anything will avoid it other than standing in front of the attack itself. You can punish Gobermouch with a short combo, or ability after you avoid the attack as it will briefly leave it open. |
| Club Slam | Gobermouch will leap into the air, holding its club in both hands before slamming down at you which is indicated by Gobermouch placing the club behind its head. | This is another attack which can be avoided with ease by sidestepping or dodging. If you do get hit by it though, you’ll be briefly knocked to the floor. |
| Little Swing | Gobermouch will windup before spinning throughout the battlefield. | Gobermouch can keep this up for a moderate amount of time, and the attack will loosely lock on to you. Simply keep your distance from the attack to avoid it, but pounce on it once the attack has finished due to it leaving Gobermouch open. |
| Goblin Punch | Gobermouch’s signature attack. Its arm will glow a light blue before it lunges across the battlefield to perform a thrusting punch. | Goblin Punch is one of the few attacks that Gobermouch has that is relatively quick. The attack will come in two phases, the first, a small combo, and the second, a lunging punch. If you’re close to Gobermouch when it’s using this attack, you’ll most likely get hit by the first part unless you have great reflexes. The second part, which is where most of the damage will come from can be avoided by dodging as soon as Gobermouch closes in on you. |
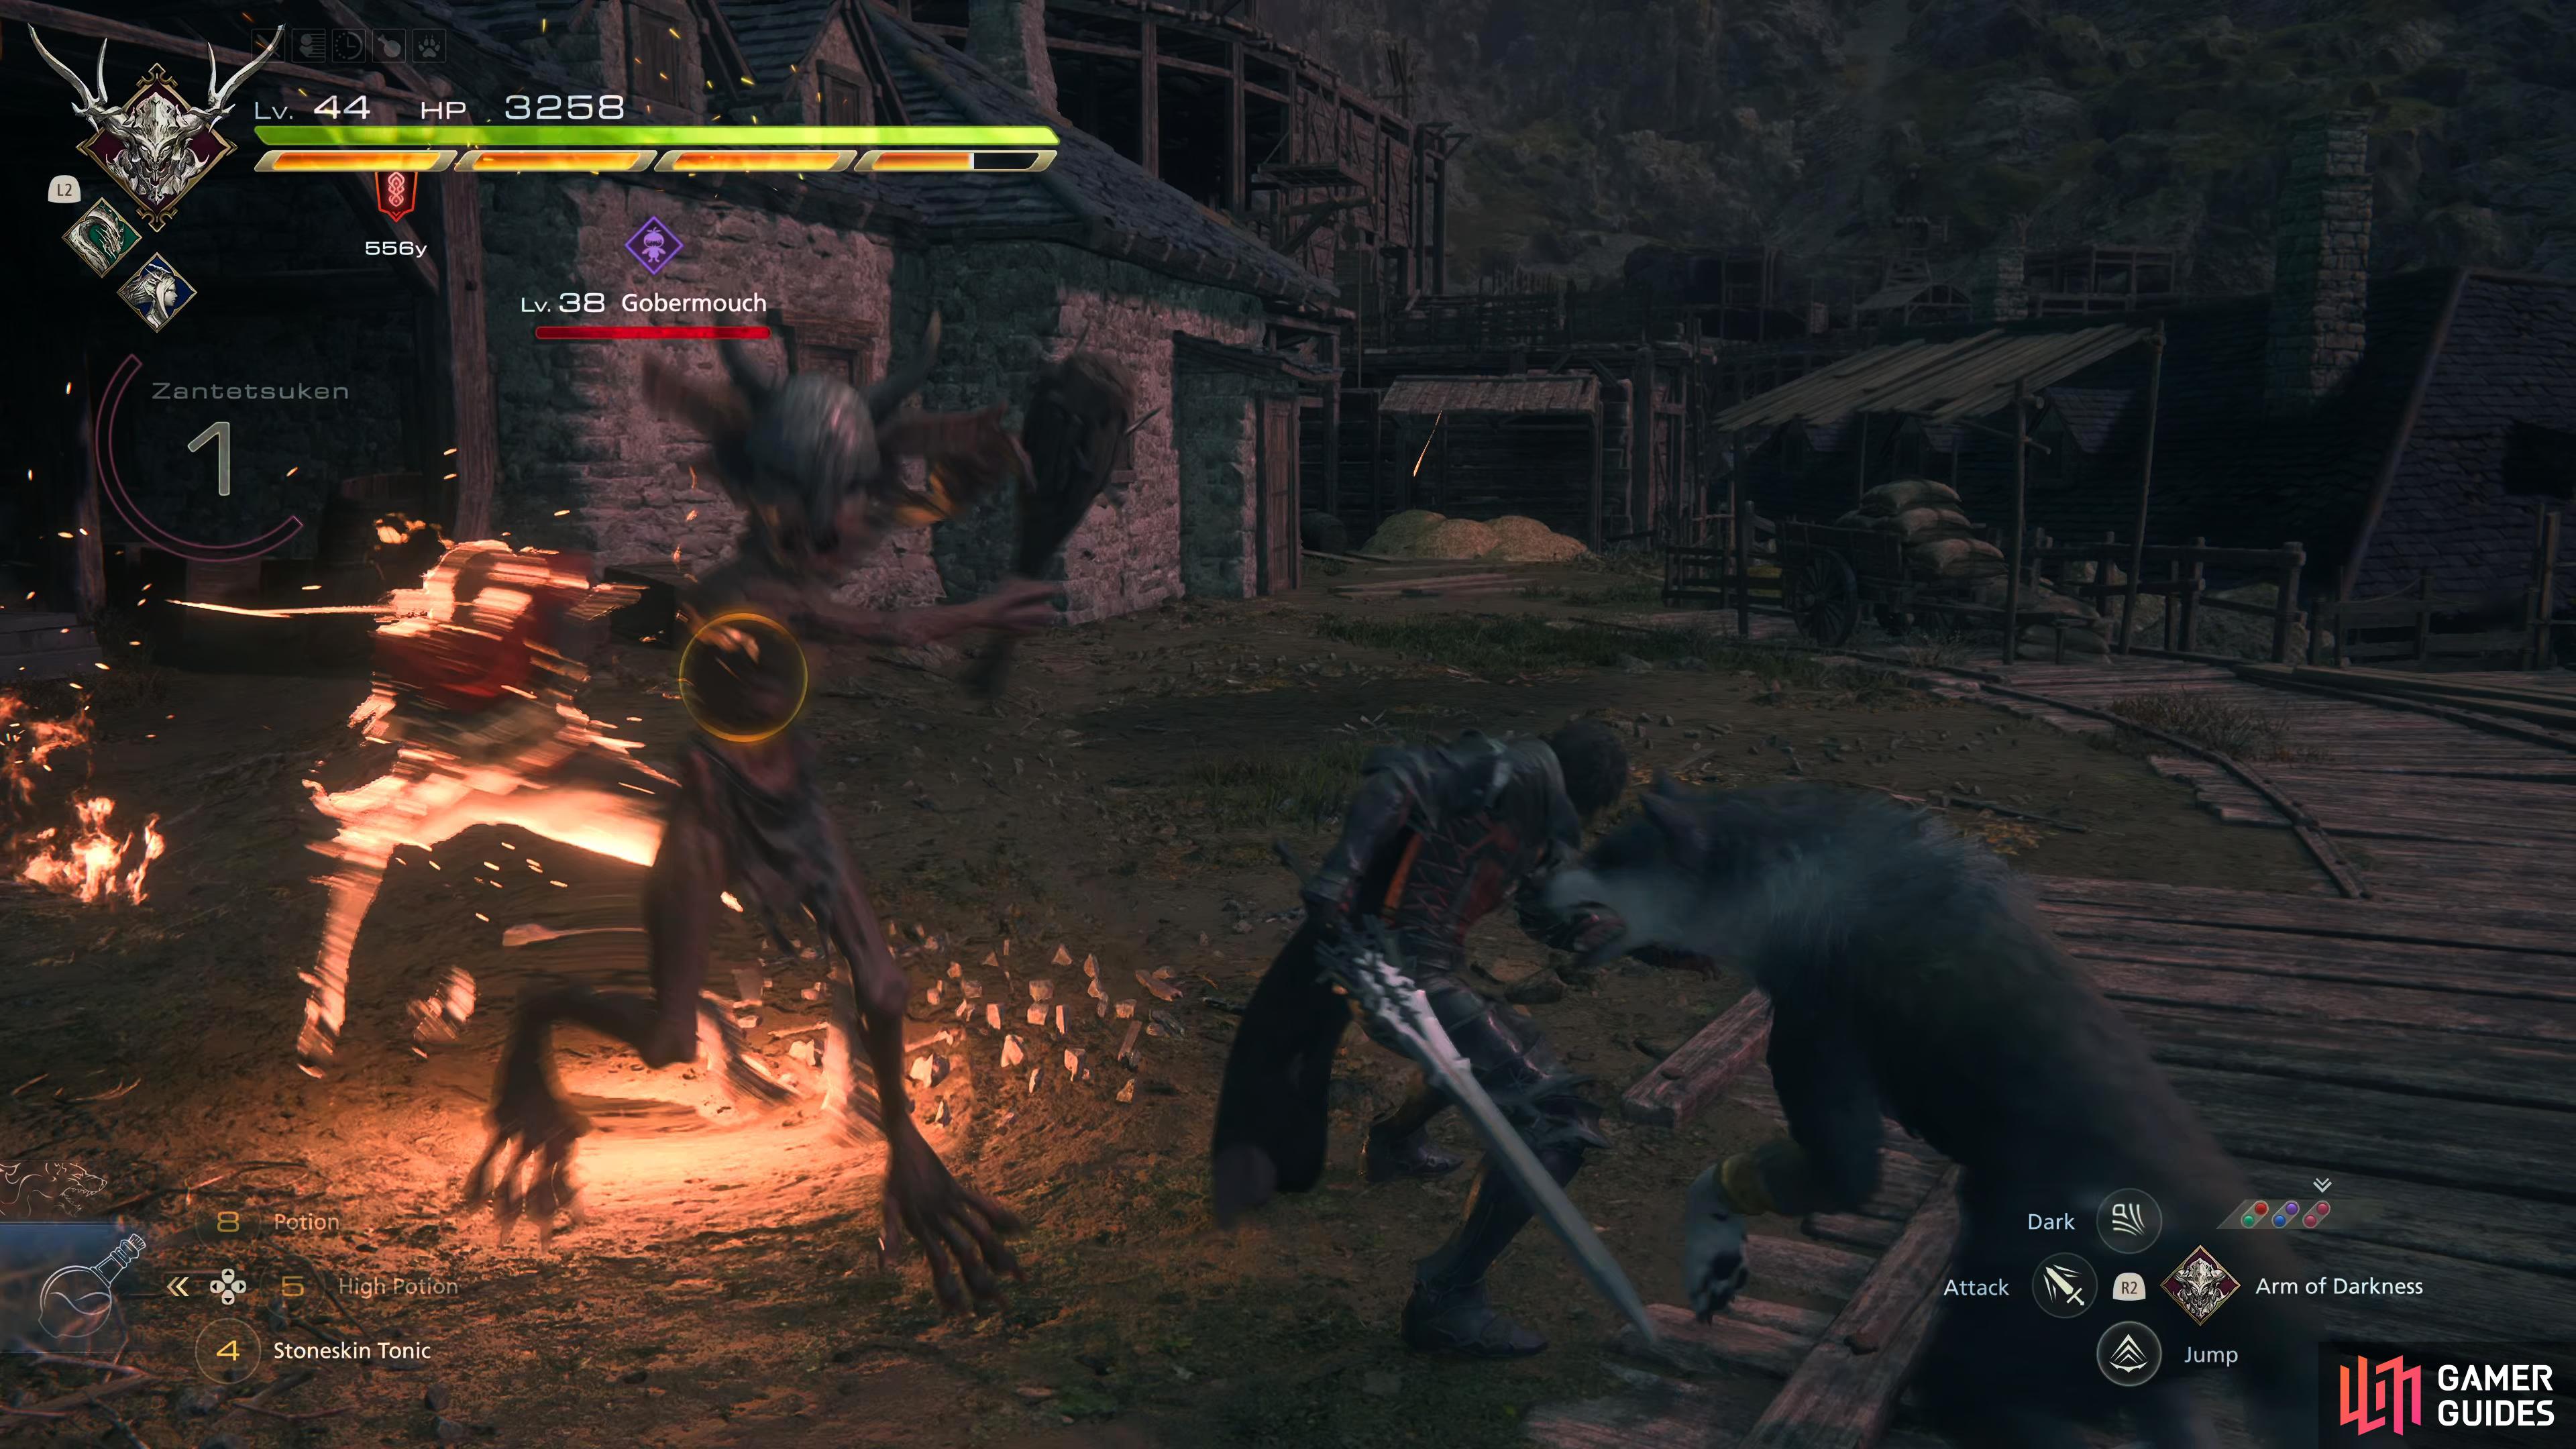
(1 of 4) Club Strike will be Gobermouch’s main attack for the first half of the battle. This is a simple strike with its club which can stun you briefly.
Recommended Abilities for Gobermouch
Here we will list our recommended ability set up to do this fight effectively:
| Eikon | Ability | Damage Type |
|---|---|---|
| Damage (5 Stars) | ||
| Will (2 Stars) - Master this and place it as the second Bahamut ability. | ||
| Will (5 Stars) | ||
| Damage (2 Stars), Will (3 Stars) - Master this and place it as the second Shiva ability. | ||
| Damage (1 Star) Will (2 Stars) | ||
| Damage (2 Stars), Will (3 Stars) - Master this and place it as the second Odin ability. |
The reason behind the chosen abilities is as follows. Odin’s Zantetsuken when used at level 5 is powerful, to say the least, and can be used quite frequently especially when combined with Dancing Steel which can give you 3–4 levels of Zantetsuken in one attack. Wicked Wheel is brought along specifically for this battle due to Gobermouch’s affinity to being launched into the air, and there is nothing better in the game than this for lifting enemies other than maybe ![]() Torgal’s Sic/Ravage.
Torgal’s Sic/Ravage.
Shiva’s Cold Snap can Permafrost enemies whenever you perform a successful Precision Dodge which makes her invaluable to have while also having providing Diamond Dust which is the strongest Will-Damage attack in the game, although Gobermouch doesn’t have a Will-Gauge which may make you want to swap it out with Windup from Titan, but Diamond Dust still does respectable damage. Now take Lightning Rod from Ramuh to place in front of Gobermouch to amplify any multiple-hit attacks you do with Gigaflare, and Zantetsuken.
Finally, bring Bahamut predominantly for Gigaflare which is one of the most powerful attacks in the game. You could switch out Bahamut with Titan for added defense with Titanic Block, but Bahamut’s Wings of Light can be really strong, especially when you get to level 5 Megaflare just before the stagger phase.
Recommended Items and Equipment for Gobermouch
Gear
For your Weapon, Belt, and Vambraces, you should have the following:
| Weapon | Belt | Vambraces |
|---|---|---|
If you don’t have what’s listed above, use the next highest Attack for the Weapon, and the next highest Defense/Health for the Belt and Vambraces. If you do the Hunt during the last scenario mission, equip The Founder’s Grasp instead from the side quest “Where There’s a Will”.
Accessories
For your Accessories, this is more subjective, so here’s what we used:
| Accessory 1 | Accessory 2 | Accessory 3 |
|---|---|---|
| Adamantite Gauntlets (HP+500) |
Items
Finally, we have items. This is more of a preference thing, but we chose the following items:
| Shortcut 1 | Shortcut 2 | Shortcut 3 |
|---|---|---|
Gobermouch shouldn’t be too difficult, so bring a Strength Tonic as it will increase your damage by 30% which will end the battle quicker.
Gobermouch Hunt Strategy
Gobermouch is a mystifying battle due to the creature being both quick and slow at the same time. It can close the gap between you quickly, but most of its attacks have a delay before they take effect which gives you ample time to avoid them. Then you have its attacks, on the one hand, there are only a few attacks, most of which are slow and easy to avoid, on the other hand, when they do connect, they hit hard. Add to that it has no Will-Gauge, but in return, it has a boatload of health to make up for it, and you can see what makes it mystifying, fortunately, it isn’t too difficult.
On to the battle, Gobermouch will spend much of the beginning half hopping (skipping?) towards you to perform a Club Strike. If it connects with you, you’ll be stunned briefly which will leave you open to a follow-up attack. When you’re close to Gobermouch, it’ll use its Club Slam attack where it’ll place its hands (and club) behind its head before unleashing a devastating overhead slam attack with it which can knock you to the floor. Thankfully, this has a slight delay giving you enough time to move away from it or prepare a dodge.
The main two attacks to watch out for are its Little Swing and Goblin Punch. Both of these can deal a significant amount of damage especially if every attack hits you. When you see Little Swing, get as much distance between you, and stay away from any walls. The reason for this is the attack can bounce off the nearby walls making it considerably more difficult to avoid. By keeping your distance, you’ll waste half of the attack by making it travel. You can Precision Dodge this attack by hitting the dodge button just when it’s about to spin into you.

(1 of 3) !Torgal’s Precision Sic can lift Gobermouch into the air. This can keep it at bay when used in combination with !Wicked Wheel.
Goblin Punch is a bit more difficult to avoid where you’ll need to actively dodge the attack to avoid the damage. This can be challenging though as Gobermouch can use it right next to you which leaves you little time to react. Another thing is that Goblin Punch is a two-phase attack. First, it’ll perform a short three-hit punch combo before it lunges towards you with a final thrusting attack. Both of these attacks can be dodged, and with the Berserker Ring equipped, dodging the first attack will usually result in avoiding the follow-up. When Gobermouch’s health drops below half, it will begin to use Goblin Punch more frequently. Fortunately, if you keep Will-o’-the-Wykes on you at all times, you’ll gain a significant buff to defense from it due to it nullifying up to four attacks.
Now that you know what to expect, here’s how you deal damage to it. Due to Gobermouch not having a Will-Gauge, you can focus entirely on damage. Gobermouch is susceptible to being launched into the air due to its small stature, and you should definitely take advantage of it. With a combination of the Wicked Wheel ability (from Garuda) and Sic/Ravage from Torgal, you can keep Gobermouch in the air for a lot of the battle.
When it lands back on the floor, you can unleash any of your hard-hitting attacks such as Windup, Diamond Dust, or Gigaflare!. If you place a Lightning Rod before any of these attacks, the damage will be amplified, even more so if you use your Limit Break, and Strength Tonic as well. Although Gobermouch isn’t your typical hunt, you shouldn’t have too many problems taking it down. Once Gobermouch is defeated, you’ll gain 4,800 XP, 90 AP, 15,000 Gil, and 30 Renown. On top of that, you’ll get the invaluable ![]() Primitive Battlehorn material from the spoils which is needed to craft the best weapon during the first play through,
Primitive Battlehorn material from the spoils which is needed to craft the best weapon during the first play through, ![]() Gotterdammerung!
Gotterdammerung!
How to Craft the Gotterdammerung
If you want to know exactly what’s needed to craft the best weapon in the game, Gotterdammerung, check out the page below.
More Final Fantasy 16 Hunts
For information on some of the other ![]() Notorious Marks you can take on in Final Fantasy XVI, check out these pages below:
Notorious Marks you can take on in Final Fantasy XVI, check out these pages below:
No Comments