
Near the end of Final Fantasy 16, one last bunch of hunts will become available which can be accessed during the last main scenario quest. One of these Notorious Marks is The Wailing Banshee, Gizamaluk. Read below to find out its exact location as well as our in-depth strategy to defeat it.
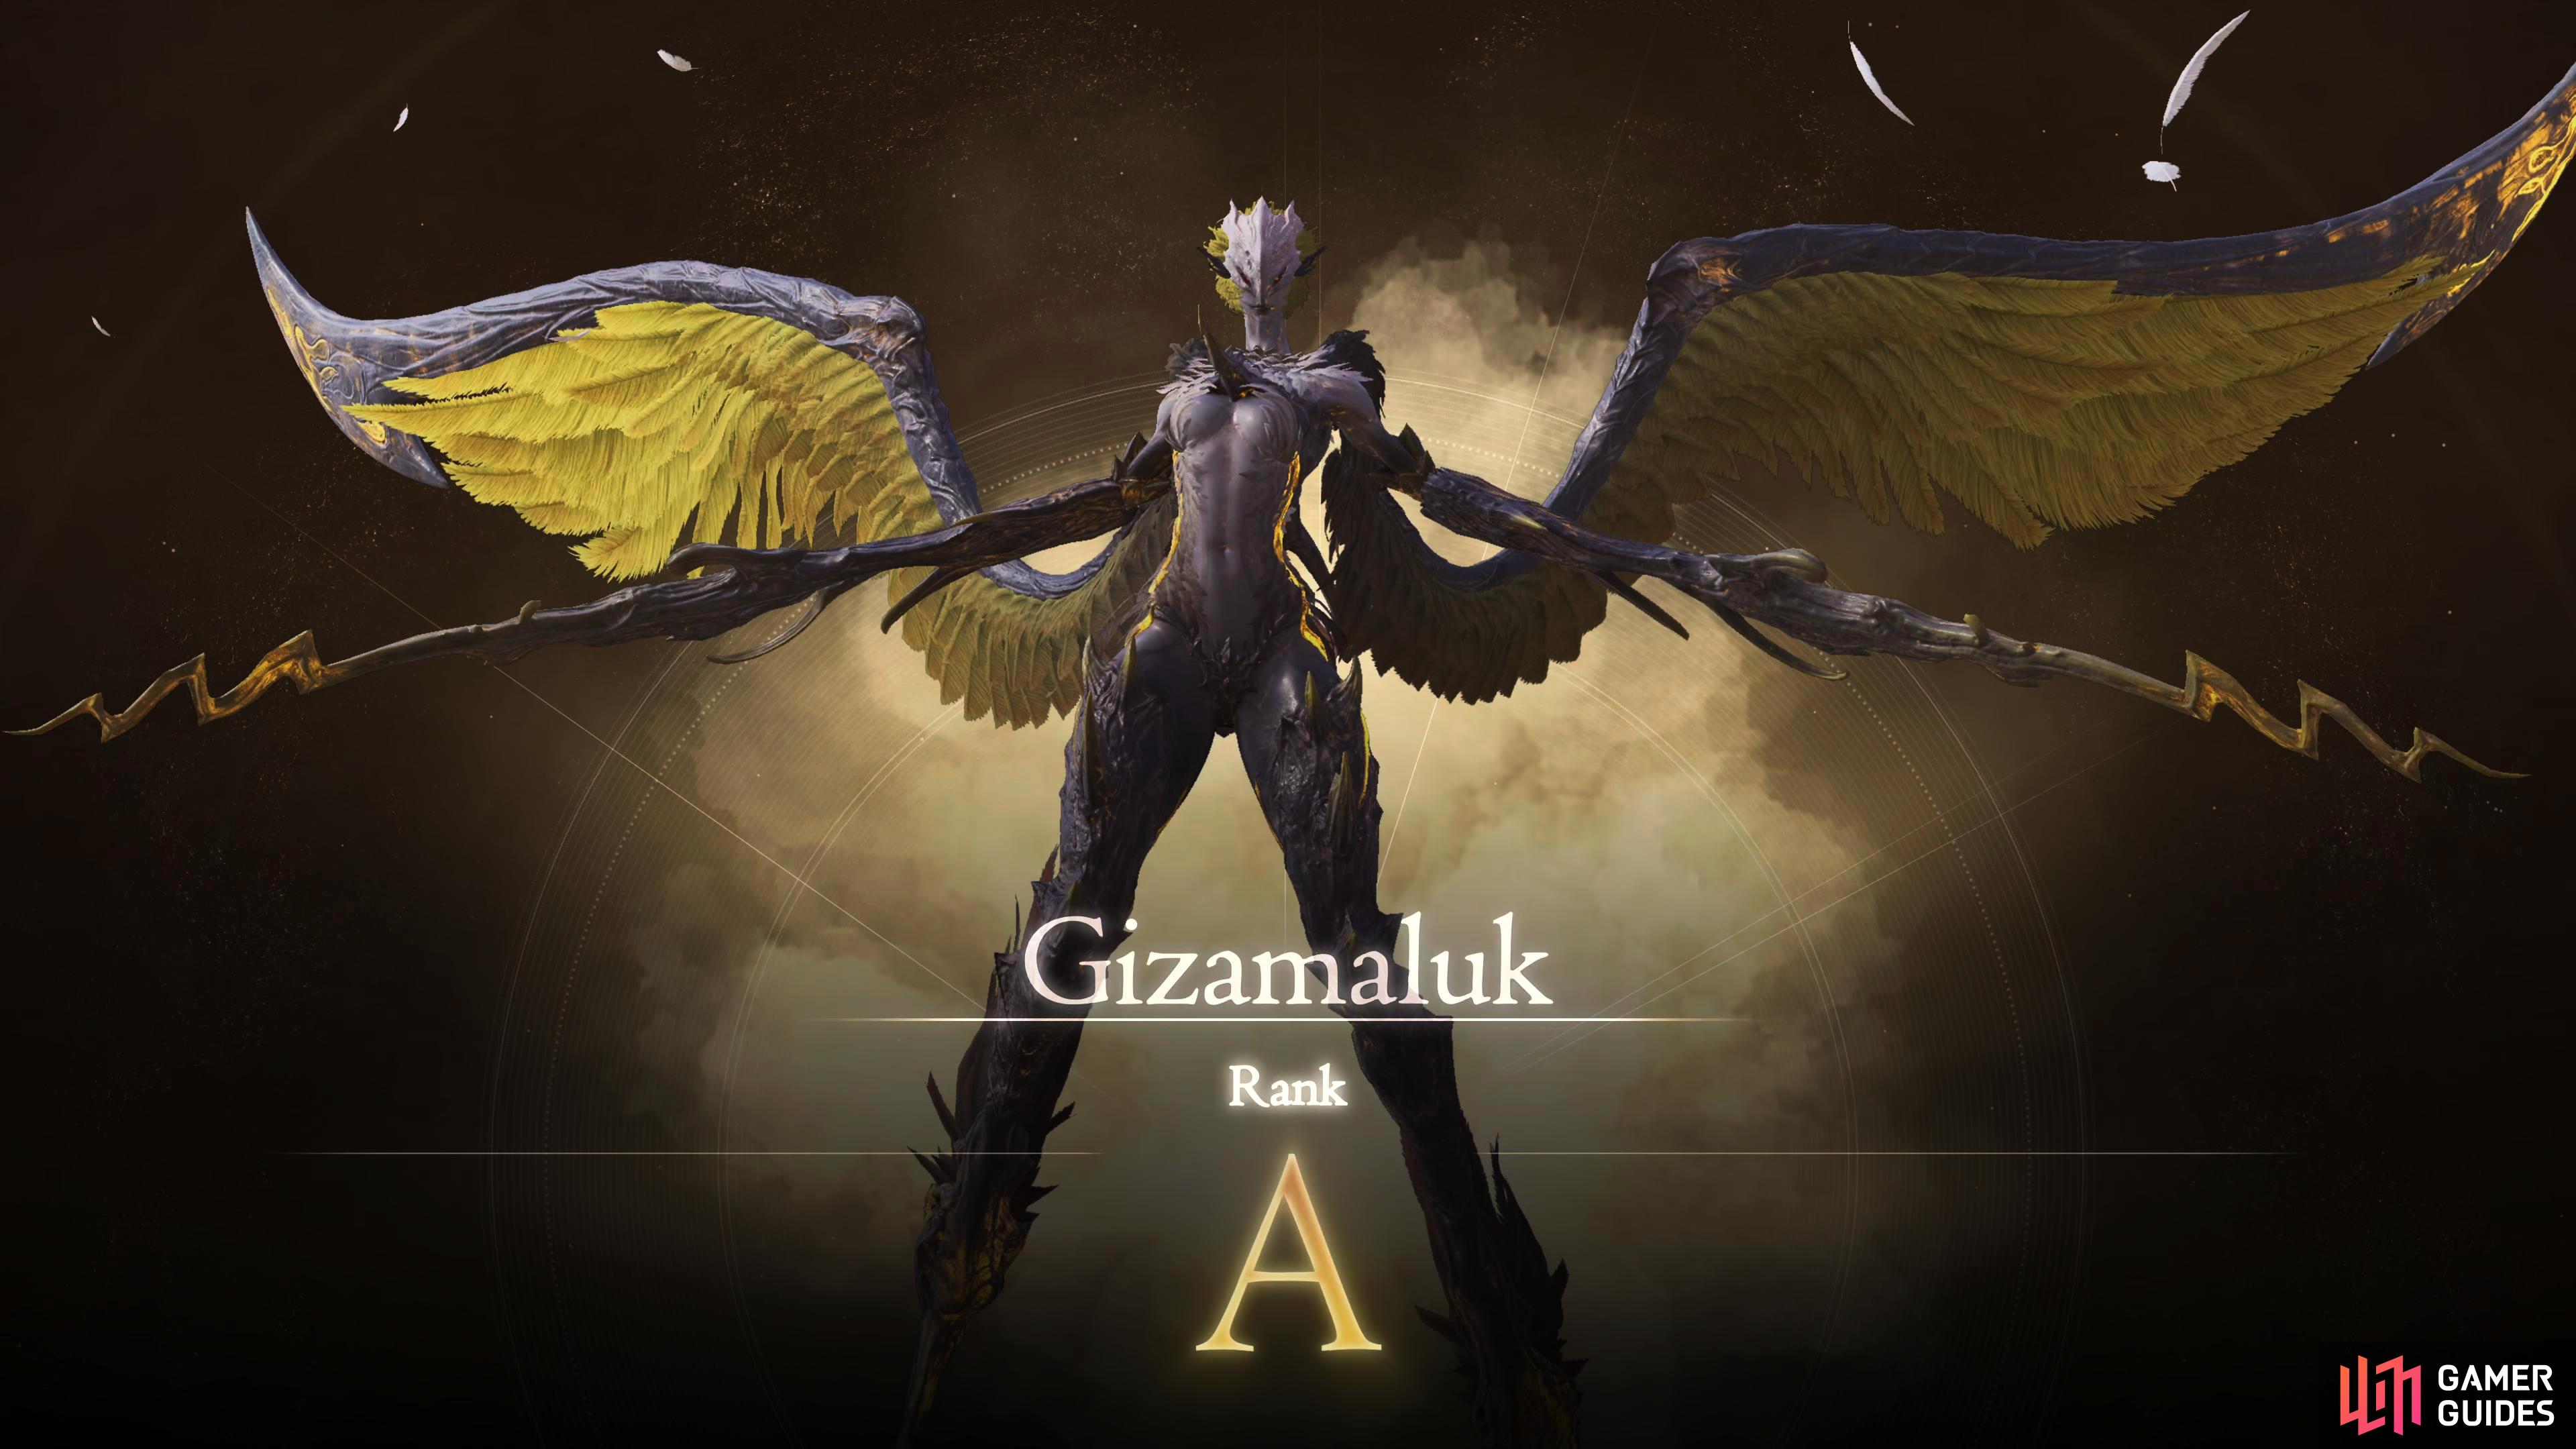
The Wailing Banshee, Gizamaluk is an A-Rank Notorious Mark which can be accessed during the last main story quest.
Where to Find The Wailing Banshee, Gizamaluk in FF16
| Location | Level | Bounty |
|---|---|---|
| 41 | 9,700 Gil, 45 Renown |
Before you try finding Gizamaluk, you’ll need to “unlock” the hunt first, and this can only be done by reaching the last main scenario quest of the game, “Back to Their Origin”. Once you’ve got The Wailing Banshee on your hunt board, it’s time to find it. Teleport to the Vidargraes obelisk in Waloed then head southwest towards the small village of Garnick. Eventually, you’ll reach the village entrance, and as soon as you head inside, you’ll get off your Chocobo. Proceed a little further, and you’ll find Gizamaluk.
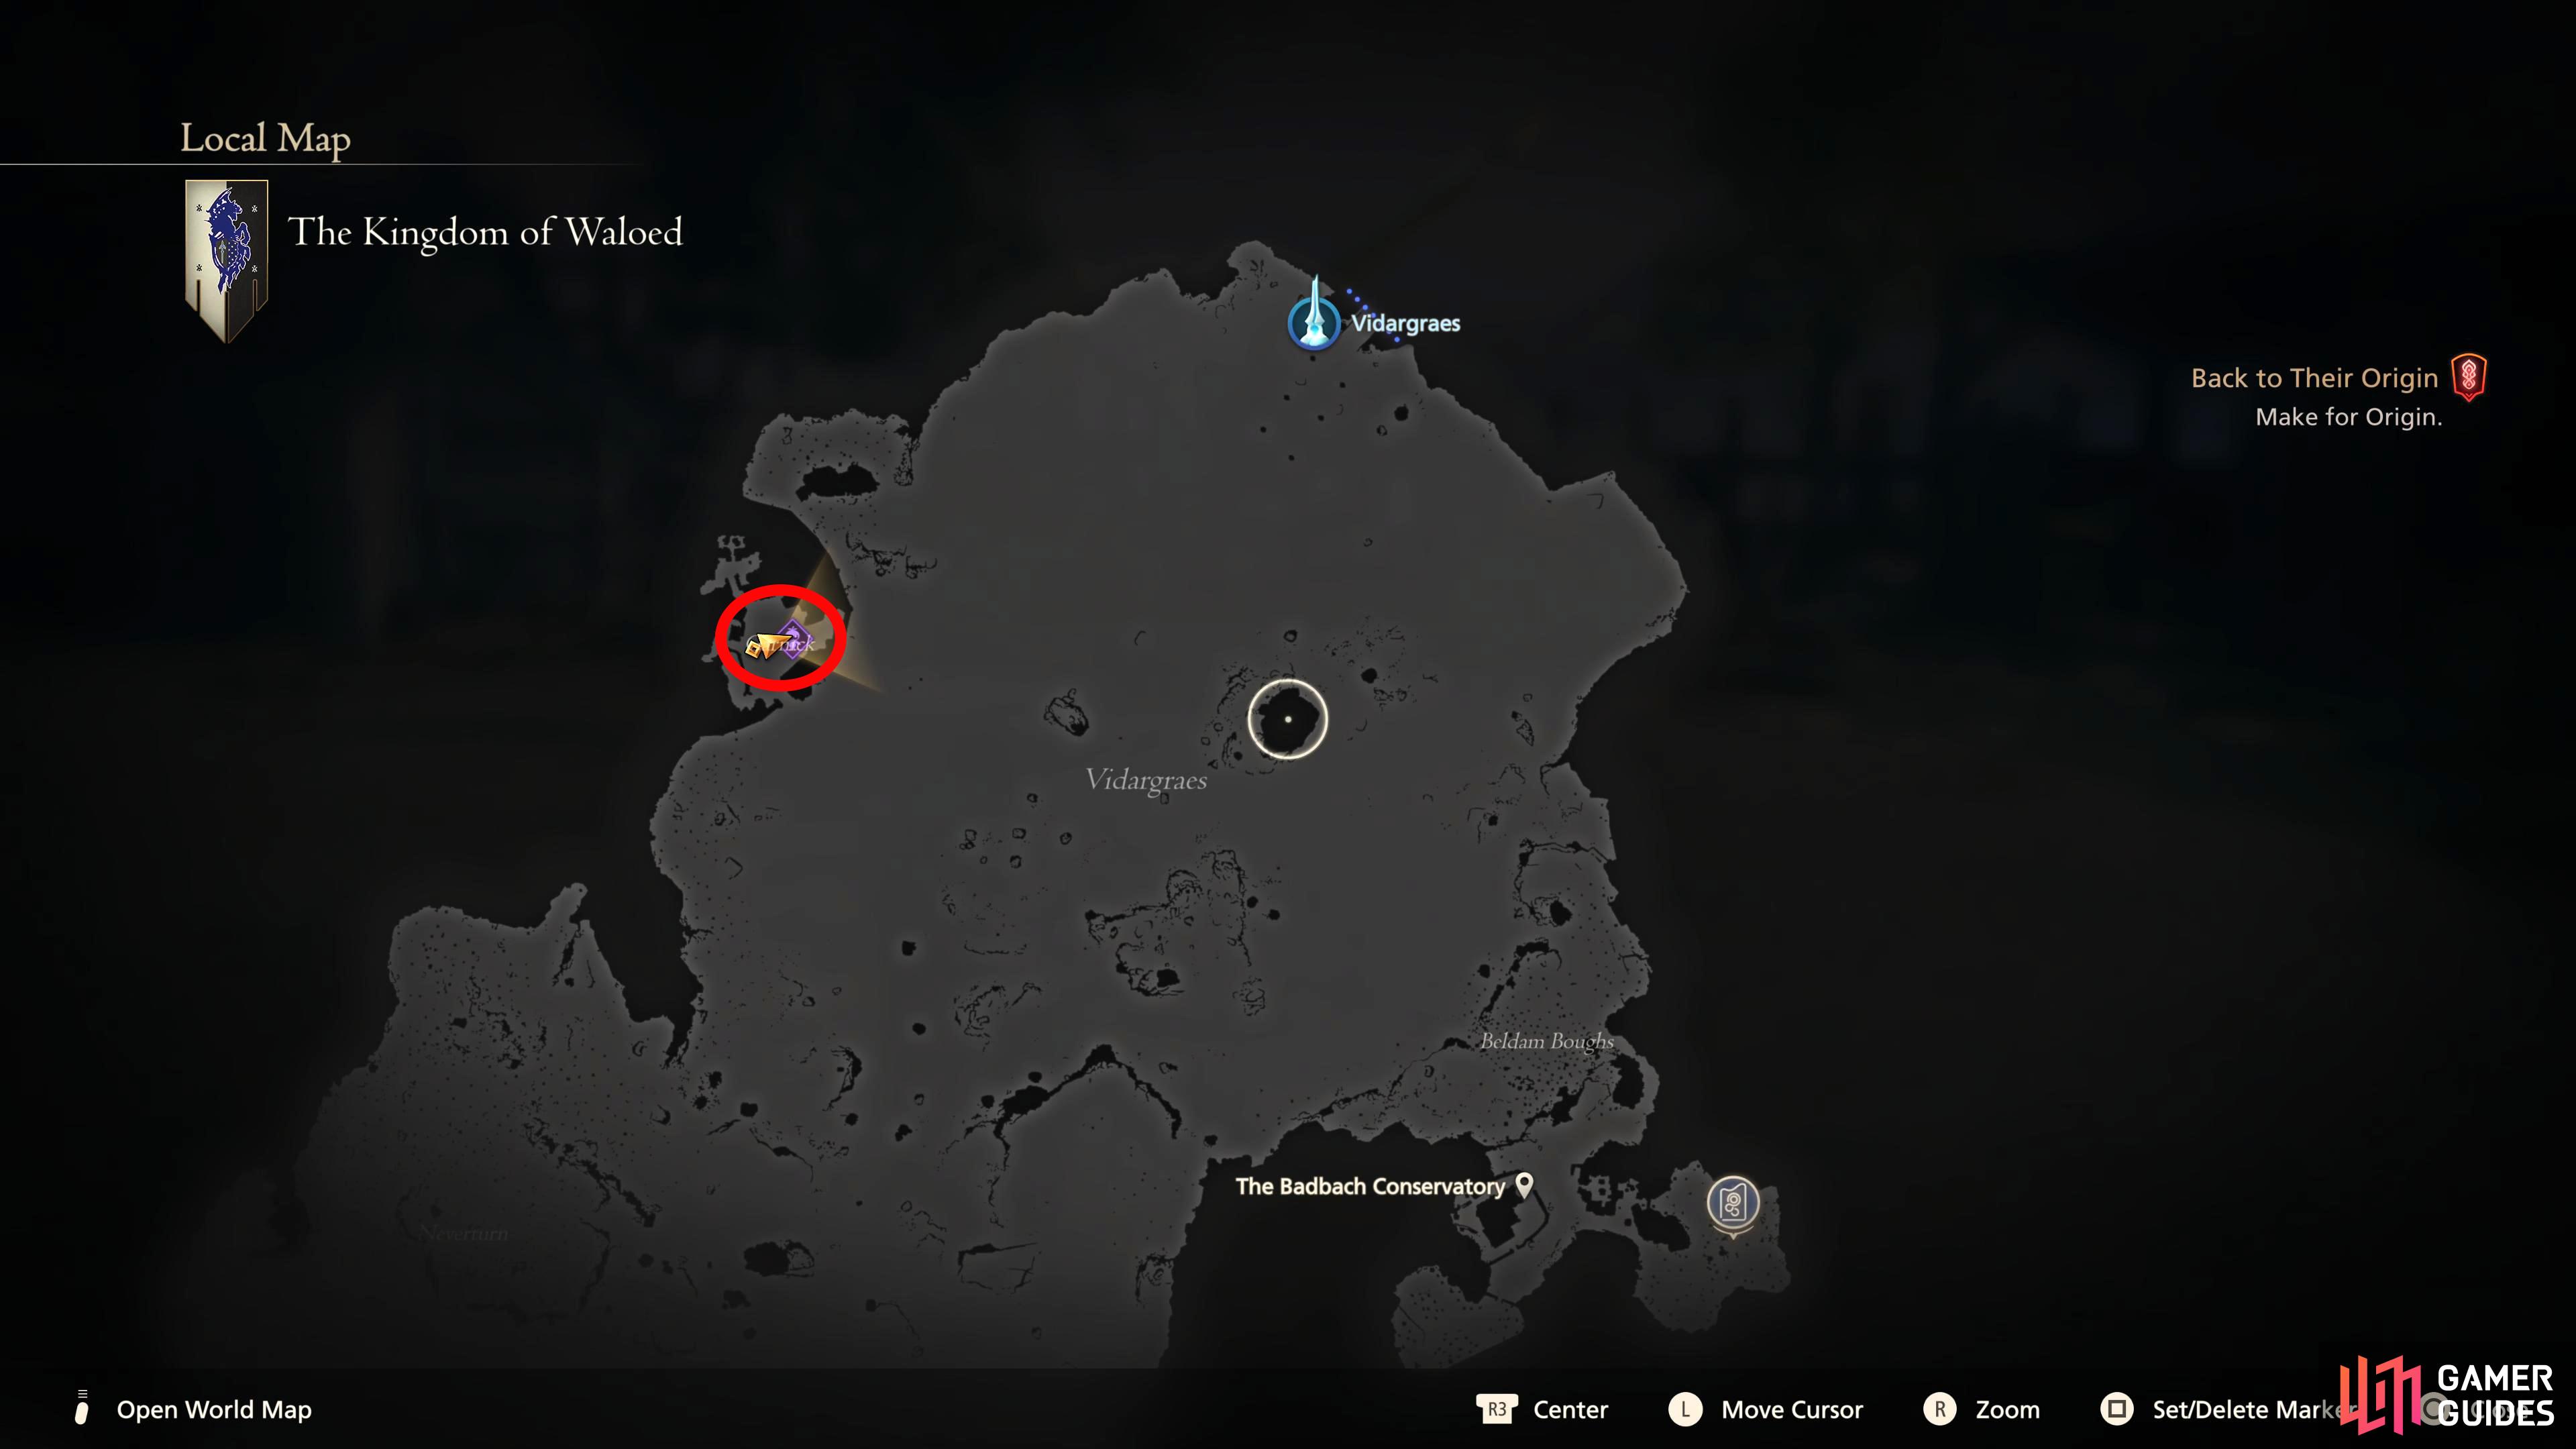
Teleport to the Vidargraes Obelisk and head southwest into Garnick Village.
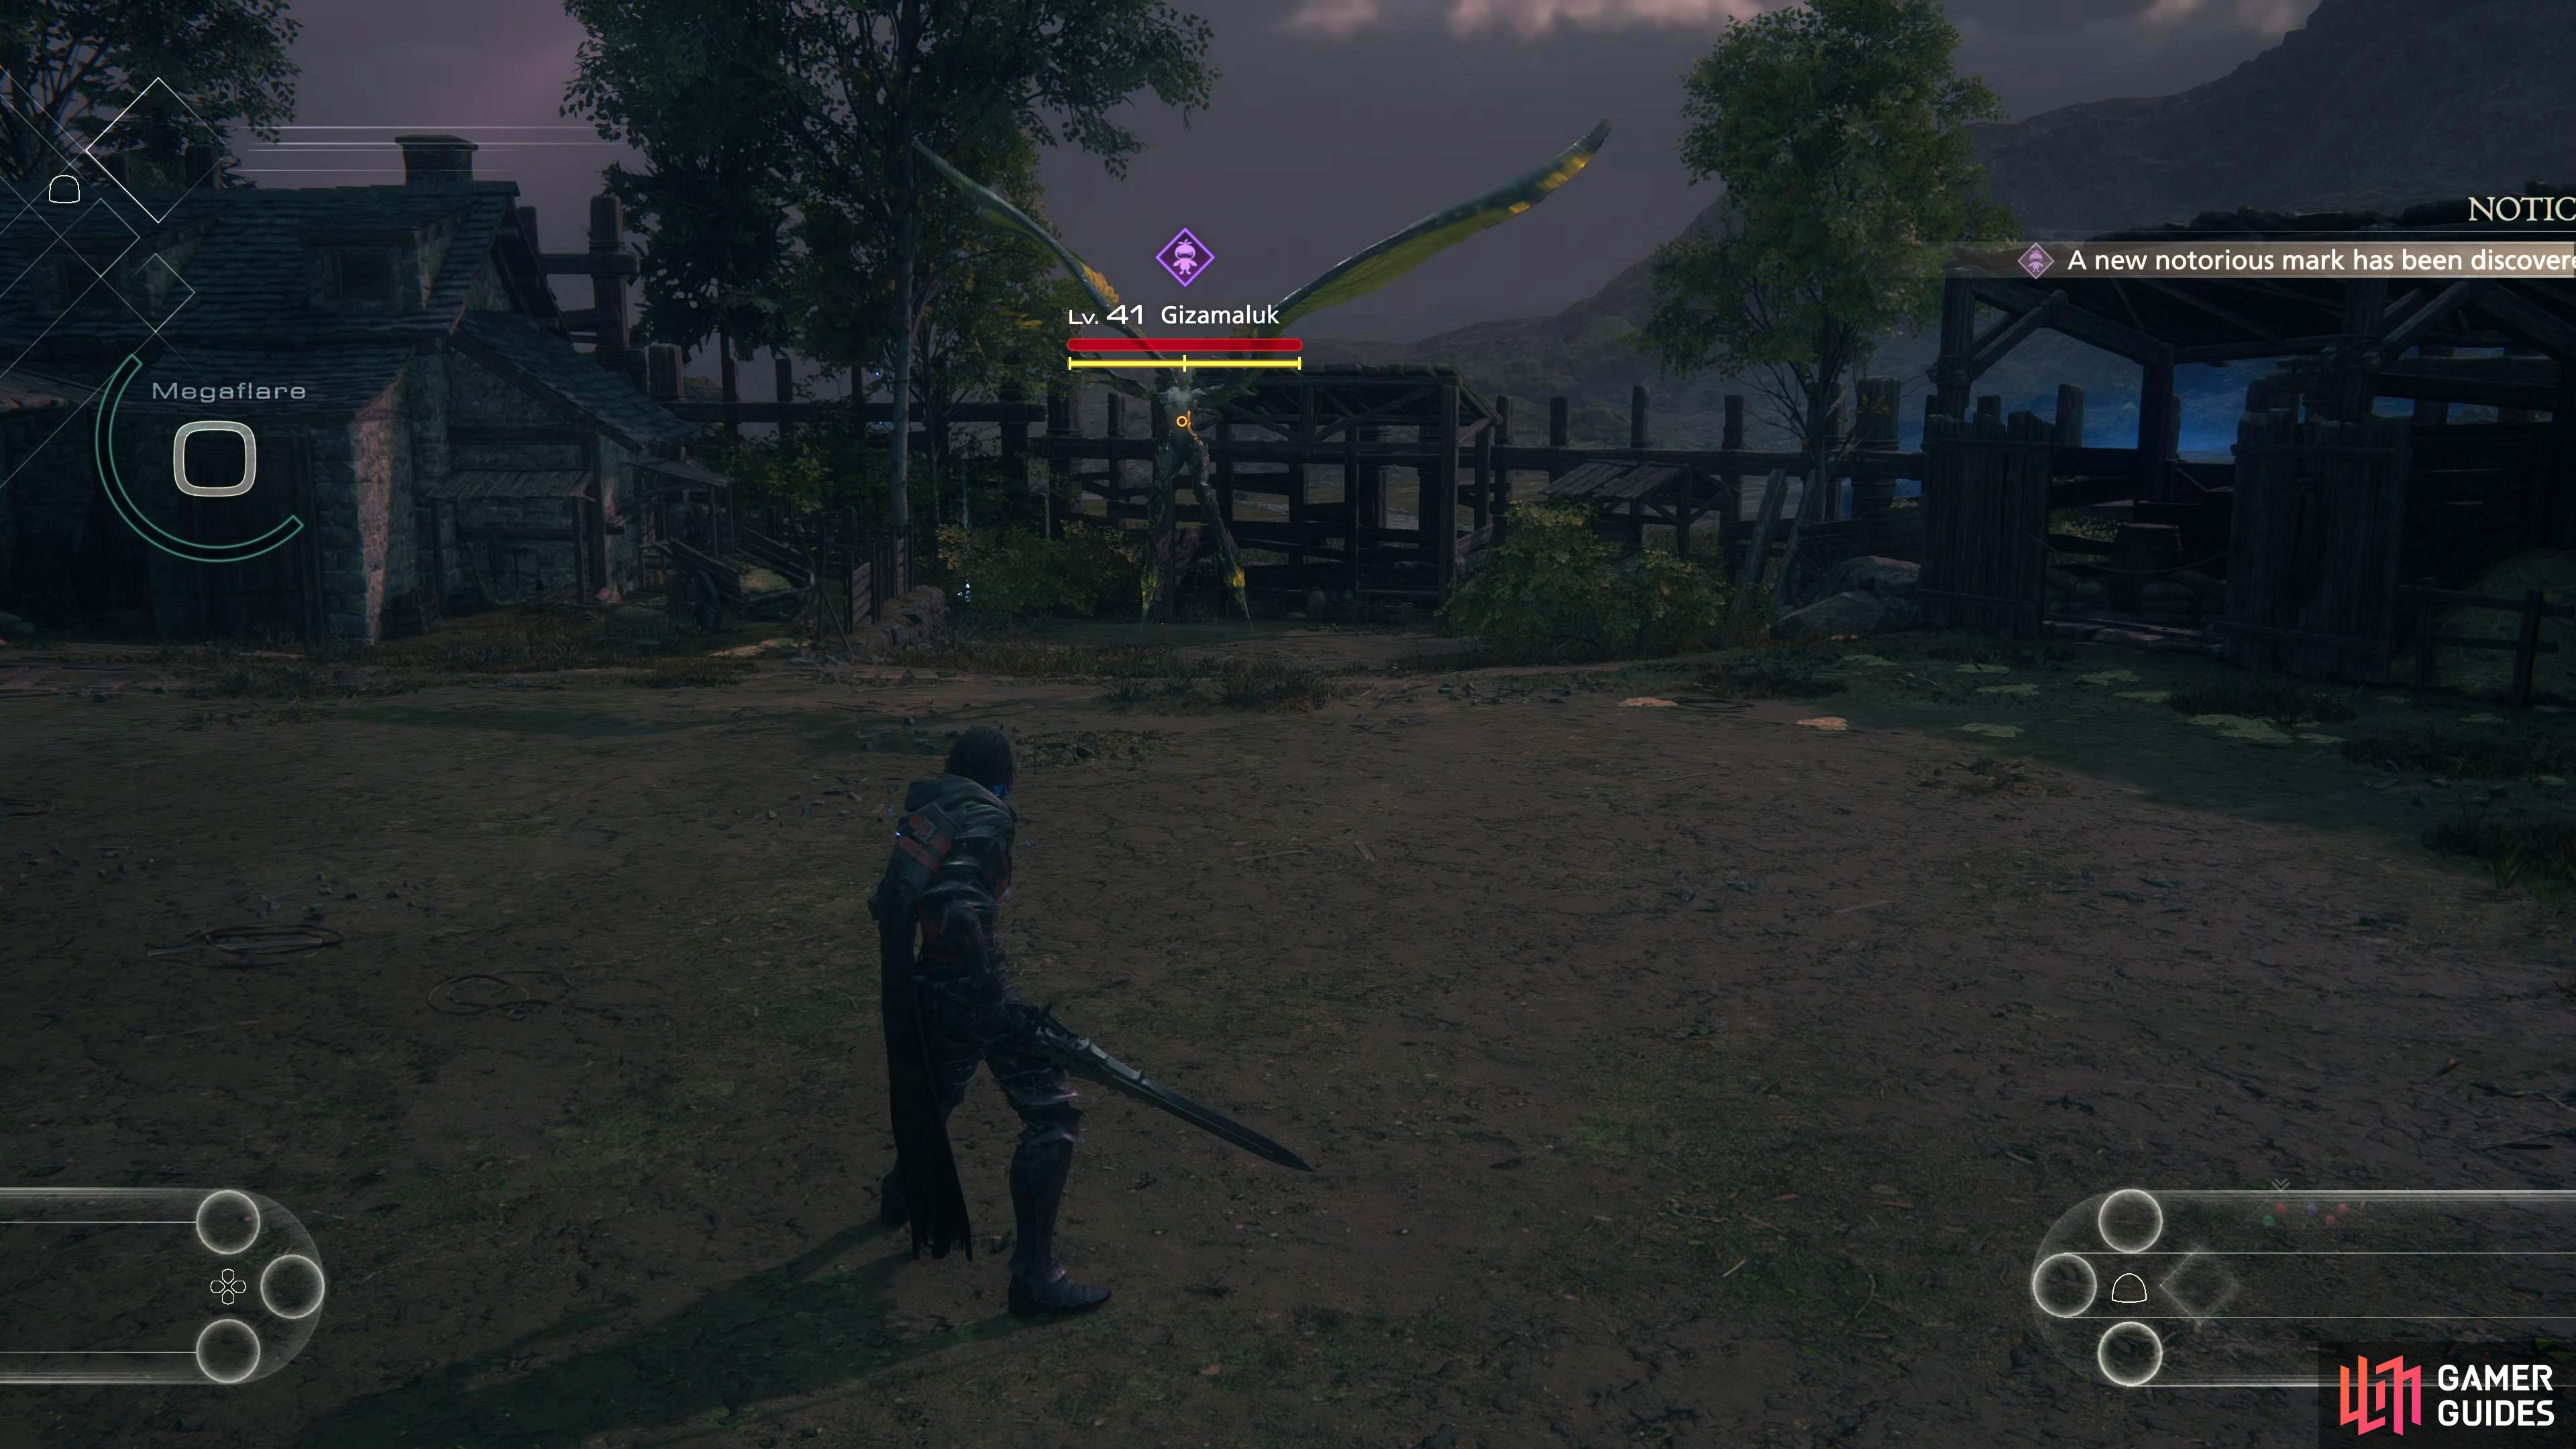
Proceed further in, and you’ll be met by Gizamaluk.
Gizamaluk Abilities and Attacks in FF16
Below you’ll find all the attacks that Gizamaluk has in its arsenal:
| Attack | Description | Counter |
|---|---|---|
| Wind Missile | Gizamaluk will hover in the air, absorbing some magic (green effects) before unleashing two consecutive wind projectiles at your location. | Dodge just as the projectile reaches you. This can also be sidestepped. |
| Wing Dive | Gizamaluk will dive across the arena at your location. | You can avoid this attack the same way you’d avoid any other charge attack, just activate dodge just before it reaches you. |
| Lunging Thrust Combo | Gizamaluk will lean back briefly before lunging into you with a thrust attack from its bladed hand. It will then retreat for a moment before following it up with a swipe from its opposite arm. Finally, it will perform one more swipe attack from its first arm. | The most difficult part of this attack is the thrust as it comes at you quickly. Either sidestep to avoid the thrust, or dodge when you’re about to be impaled, but you’ll need to be quick. For the follow-up attacks, you can dodge as normal. You may want to have Will-o’-the-Wykes up for this attack as it will absorb every attack. |
| Spinning Wings | Gizamaluk will perform a stationary spin with its wings stretched out. | You can back away to avoid the attack, or you can use dodge as soon as you see it spin. |
| Wind Blast | Gizamaluk will charge up an attack that will display a faint green line in front of itself. Once the charge is complete, it will unleash a blast of Wind. | This attack takes forever to charge which gives you ample time to move out of its line. If you want to be efficient, rush toward the side of Gizamaluk, and hit it with a few combos while you are waiting. |
| Foot Stab | Gizmaluk will raise its foot into the air. It’s foot will turn green before stabbing down into the ground where you’re standing. | Simply sidestep to avoid it, or activate dodge as the foot is coming down. |
| Cacophony | Gizamaluk will place numerous green markers around the arena. These will explode one by one in the order that they were placed. After the first group detonates, another group will appear underneath and follow you. | Simply avoid standing on/near the marker when it explodes. If you are on it, you can dodge just as it explodes to gain a Precision Dodge. For the second group, keep moving until they stop appearing. |
| Stormchaser | This is Gizamaluk’s signature attack. It’ll cast Cacophony which will do its thing while Gizamaluk performs up to three Wing Dive attacks across the arena. | You’ll want to have Will-o’-the-Wykes up for this attack while keeping mobile to avoid Cacophony. If Gizamaluk gets close to you with the Wing Dives, dodge when it’s about to hit you. |

Recommended Abilities for Gizamaluk
Here we will list our recommended ability set up to do this fight effectively:
| Eikon | Ability | Damage Type |
|---|---|---|
| Damage (5 Stars) | ||
| Will (2 Stars) - Master this and place it as the second Bahamut ability. | ||
| Will (5 Stars) | ||
| Damage (2 Stars), Will (3 Stars) - Master this and place it as the second Shiva ability. | ||
| Damage (1 Star) Will (2 Stars) | ||
| No damage – Use to recover immediately from any ability or action. |
The reason behind the chosen abilities is as follows. Odin’s Zantetsuken when used at level 5 is powerful, to say the least, and can be used quite frequently especially when combined with Dancing Steel which can give you 3–4 levels of Zantetsuken in one attack. Rift Slip allows you to cancel an action immediately should you need to while also allowing you to slow down time briefly when followed up after a combo to give you more time to get Dancing Steel off as it takes a while to execute.
Shiva’s Cold Snap can Permafrost enemies whenever you perform a successful Precision Dodge which makes her invaluable to have while also having access to Diamond Dust which is the strongest Will-Damage attack in the game. Then we take Lightning Rod from Ramuh to place in front of Gizamaluk when it is staggered to amplify any multiple-hit attacks we do.
Finally, we take Bahamut for Gigaflare which is one of the most powerful attacks in the game. This is fantastic to use at any time, but especially at the end of a staggered phase when combined with Lightning Rod. You could switch out Bahamut with Titan for added defense with Titanic Block, but Bahamut’s Wings of Light can be really strong, especially when you get to level 5 Megaflare just before the stagger phase.
Recommended Items and Equipment for Gizamaluk
Gear
For your Weapon, Belt, and Vambraces, you should have the following:
| Weapon | Belt | Vambraces |
|---|---|---|
If you don’t have what’s listed above, use the highest Attack for the Weapon, and the highest Defense and Health for the Belt and Vambraces. If you do the hunt during the last scenario mission, equip The Founder’s Grasp instead which is from the side quest “Where There’s a Will”.
Accessories
For your Accessories, this is more subjective, so here is what we used:
| Accessory 1 | Accessory 2 | Accessory 3 |
|---|---|---|
| Genji Gloves (5% damage increase) |
Items
Finally, we have items. This is more of a preference thing, but we chose the following items:
| Shortcut 1 | Shortcut 2 | Shortcut 3 |
|---|---|---|
Gizamaluk has a couple of tricky attacks to contend with, but you shouldn’t have too many problems. That is why we suggest bringing Strength Tonics as they will increase your damage by 30% which will end the battle quicker.
Gizamaluk Hunt Strategy
Gizamaluk is a relatively easy battle, but it does have a few attacks that can cause you a few issues. These are Lunging Thrust Combo, Cacophony, and Stormchaser. The first attack of the Lunging Thrust Combo comes at you quickly, so you’ll need to be reactive to avoid it, but the follow-up attacks are just swipes from both of its hands/blades and shouldn’t be too difficult to avoid. If you have Will-o’-the-Wykes available, make sure you use it as this can nullify up to four attacks when upgraded which allows you to ignore the attack altogether.
When Gizamaluk uses Cacophony, keep mobile, and move around the battlefield to avoid the explosions, but be aware of any other attacks that may come your way during the attack such as Wing Dive. Finally, you have Gizamaluk’s signature attack, Stormchaser. This combines Cacophony with the Wing Dive attack. Gizamaluk will use Cacophony first and while this is exploding around the arena, it will use Wing Dive three times. Each Wing Dive will come from a different direction, so you’ll need to keep your camera focused on Gizamaluk while avoiding Cacophony. When it gets close to you with Wing Dive, activate dodge to evade the attack. Once again, this is a great time to have Will-o’-the-Wykes on you.
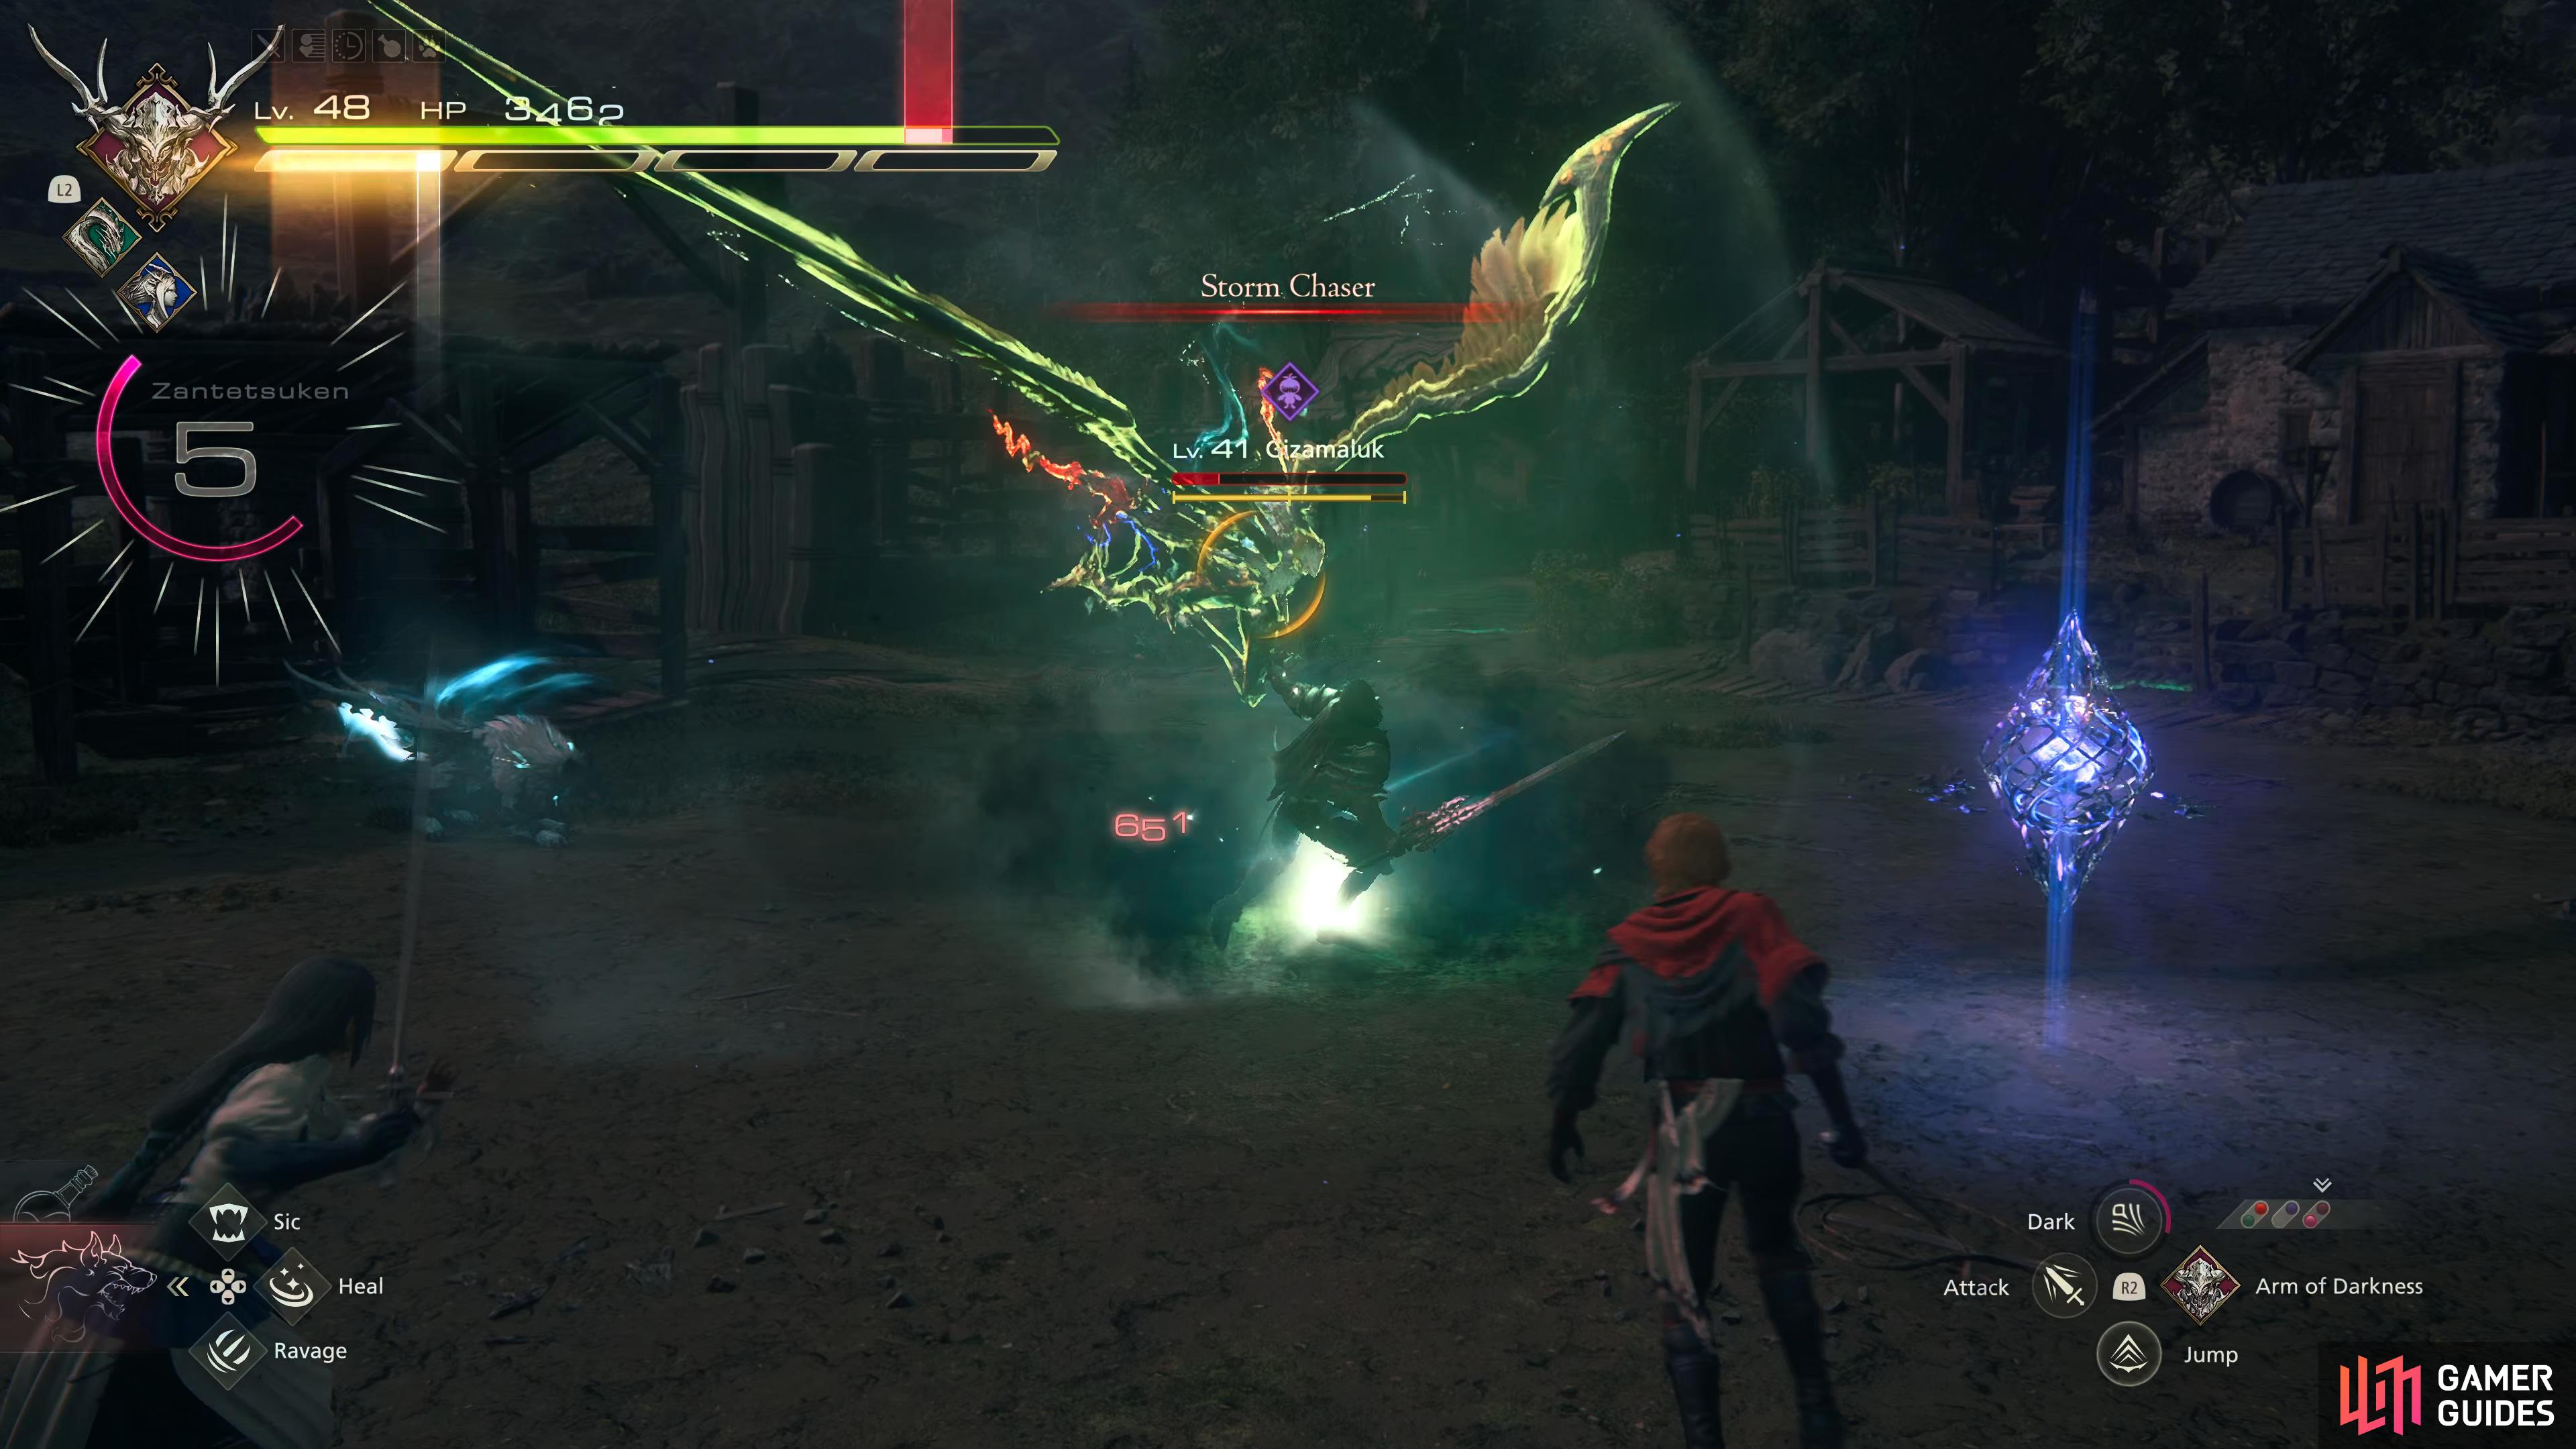
Stormchaser is Gizamaluk’s signature attack. It’ll cast Cacophony first which will explode throughout the arena.

During this, Gizamaluk will perform three Wing Dives from different directions.
Although Gizamaluk has a few difficult attacks to contend with, you’re so powerful at this stage in the game, that you shouldn’t have any problems. Use Lightning Rod alongside Diamond Dust a couple of times to shatter its Will-Gauge, then use the combination of Lightning Rod, Dancing Steel, level 5 Zantetsuken, and Gigaflare to leave poor old Gizamaluk in a mess. Throw in a level 5 Megaflare just before the Will-Gauge breaks, and Gizamaluk will be on its last legs.
Once you’ve dealt with the silly bird, you’ll be rewarded with 3,000 XP, 80 AP, 9,700 Gil, and 45 Renown. You’ll also obtain a ![]() Clouded Eye, 20
Clouded Eye, 20 ![]() Sharp Fangs, and 10
Sharp Fangs, and 10 ![]() Magicked Ash from its spoils.
Magicked Ash from its spoils.
More Final Fantasy 16 Hunts
For information on some of the other ![]() Notorious Marks you can take on in Final Fantasy XVI, check out these pages below:
Notorious Marks you can take on in Final Fantasy XVI, check out these pages below:
No Comments