
Near the end of Final Fantasy 16, during the last main scenario quest, you’ll have the chance to unlock the final hunts in the game. One of these Notorious Marks is the Knight of the Splendent Heart, a ![]() Dragoon, who is hellbent on revenge for you driving his Highness to madness, but before you can gain access to him, you’ll have to complete a side quest first. Read below to find out the exact location of the Knight of the Splendent Heart, and what you need to unlock the hunt as well as our detailed in-depth strategy to defeat him.
Dragoon, who is hellbent on revenge for you driving his Highness to madness, but before you can gain access to him, you’ll have to complete a side quest first. Read below to find out the exact location of the Knight of the Splendent Heart, and what you need to unlock the hunt as well as our detailed in-depth strategy to defeat him.
Knight of the Splendent Heart is one of the last A-Rank hunts you’ll fight.
Where to Find the Knight of the Splendent Heart
| Location | Level | Bounty |
|---|---|---|
| The Penitent’s Gate, Sanbreque | 42 | 17,000 Gil, 35 Renown |
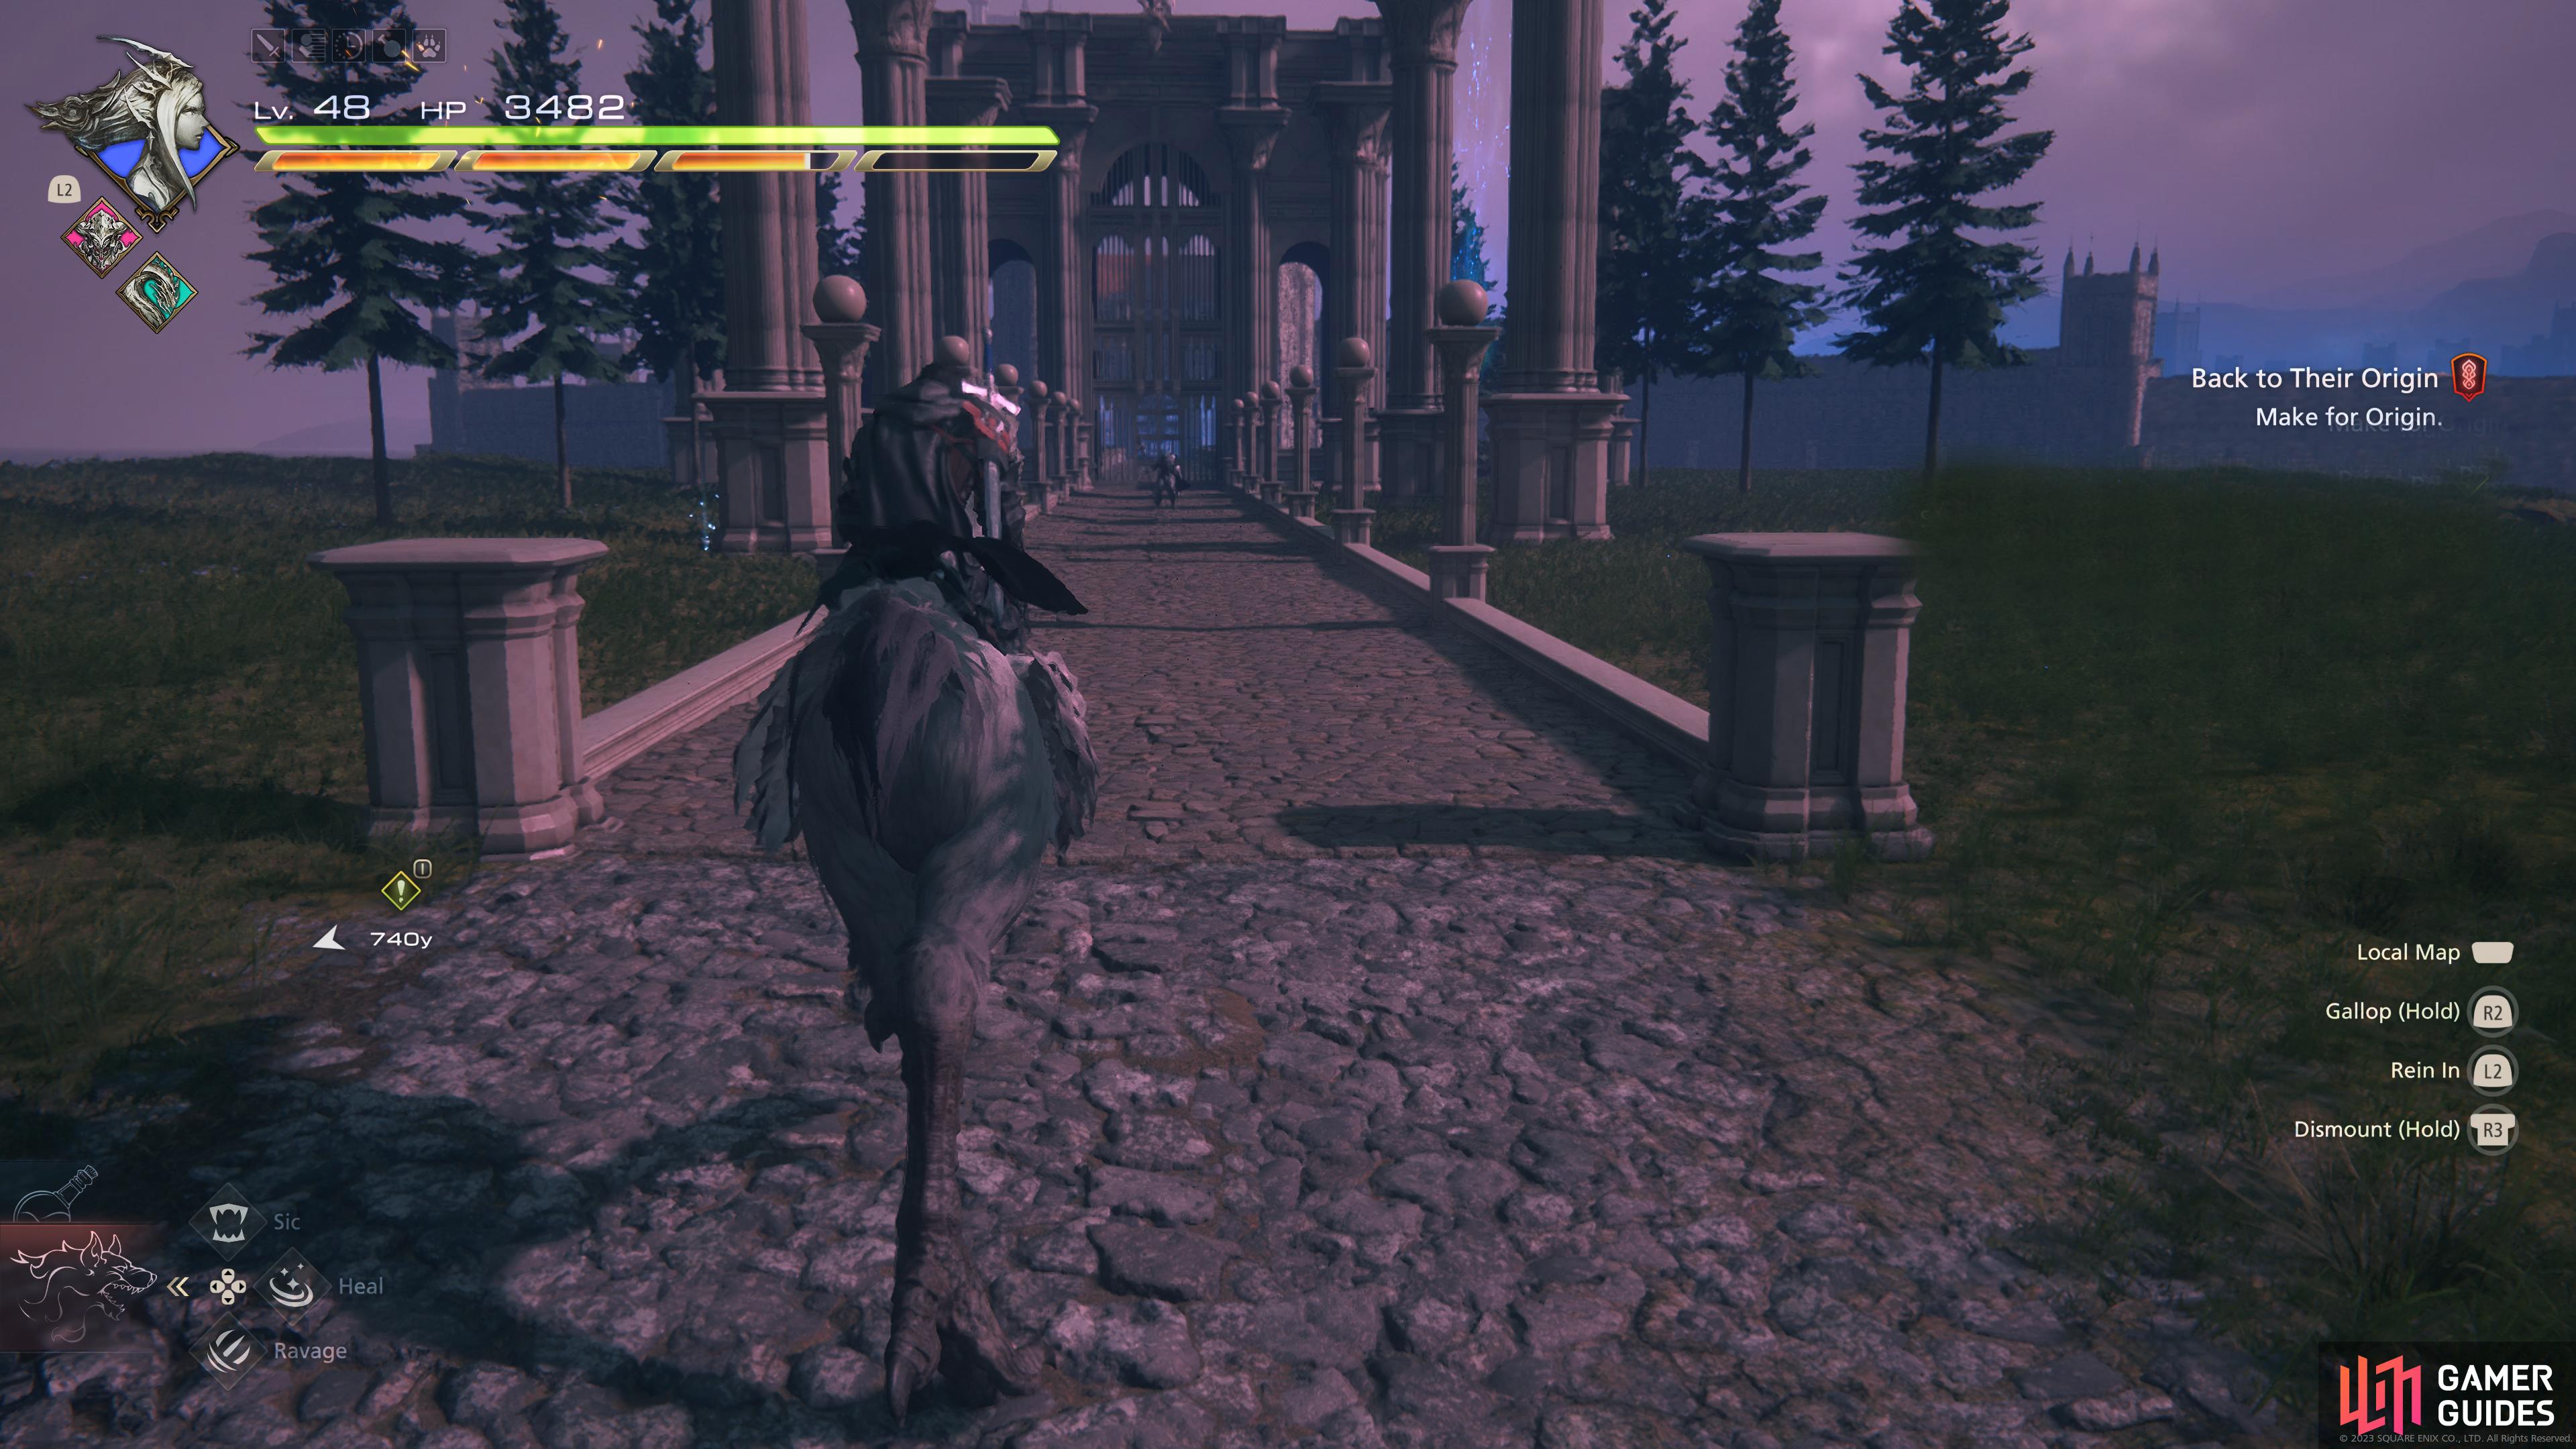
During the Back to Their Origin main scenario quest, you’ll unlock a boatload of side quests. The side quest you need to complete to unlock this, and the Prince of Death hunts is Under New Management II. Once you’ve completed the quest, teleport to the Royal Meadows obelisk, and walk southwest a little to find a lonely figure standing on the path, near the gate. If you don’t have the Royal Meadows obelisk for some reason, you can get there from the ![]() Northreach obelisk instead. From there, leave the town via the northern exit, and traverse northeast across the Royal Meadows towards The Penitent’s Gate.
Northreach obelisk instead. From there, leave the town via the northern exit, and traverse northeast across the Royal Meadows towards The Penitent’s Gate.
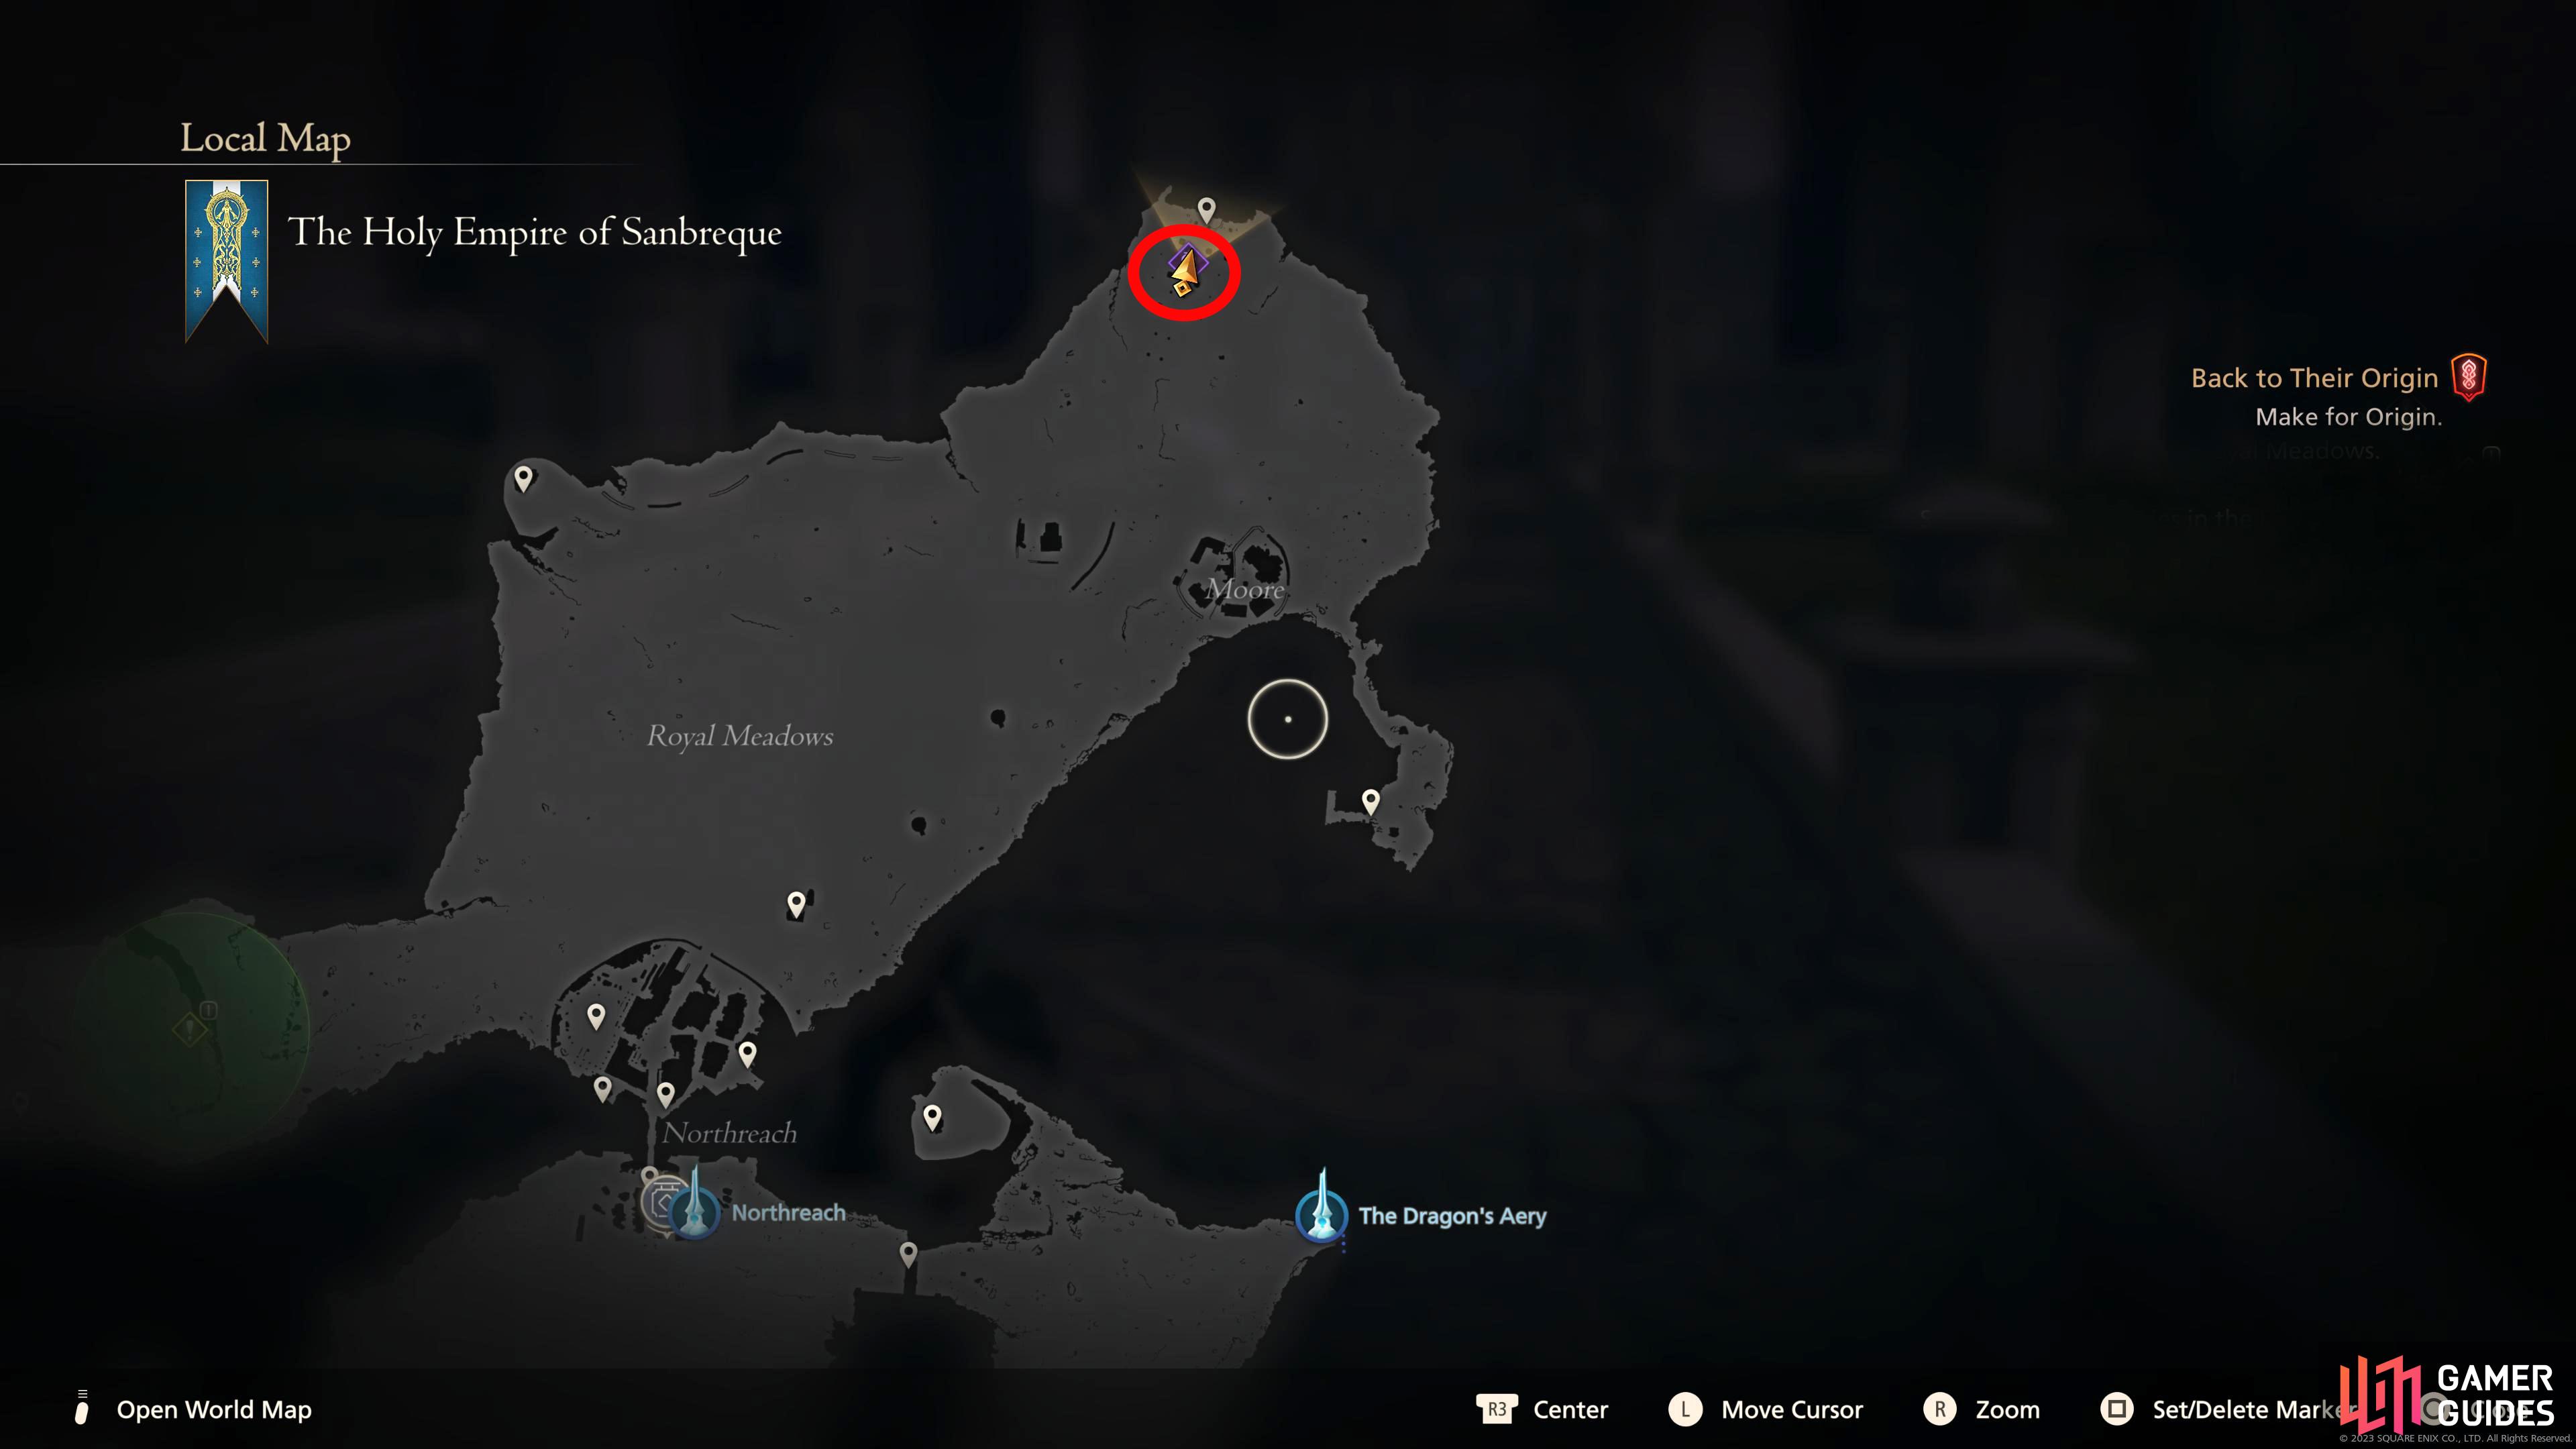
Either teleport from the Royal Meadows obelisk which is to the right of the gate, or teleport to Northreach and head northeast.
The Dragoon can be found in the far northeast of Sanbreque, at the Penitent’s Gate.
Knight of the Splendent Heart’s Abilities and Attacks
Below you’ll find all the attacks that Knight of the Splendent Heart has in its arsenal:
| Attack | Description | Counter |
|---|---|---|
| Lunging Thrust | The Dragoon will perform a short lunge while thrusting out his spear. | This attack is normally used after another attack such as Charging Thrust, although it can be used on its own. Dodge to either side of the Dragoon to avoid the attack. |
| Sweeping Spear | The Dragoon will briefly twirl the spear in his hands before performing a spinning sweeping horizontal attack which hits twice. | Either back away when you see him twirling his spear, or dodge as soon as the spear is coming your direction. |
| Rising Slash Combo | The Dragoon will jump in the air and slam his spear into the ground before following it up with a rising upwards strike. | It’s easier to dodge the first attack than the second, although both can be dodged. Activate dodge when the Dragoon is on his way down from the first attack, and dodge toward him. If you have the Berserker Ring equipped, you can ignore the second attack. |
| Spear Throw Combo | The Dragoon will slowly spin and thrust at you then lunge in with a second thrust before leaping into the air to throw a charged spear at your location. | Either dodge towards the first couple of attacks then wait for the spear to be thrown before activating dodge, or run away from the Dragoon to avoid the first two attacks then run towards him to evade the spear throw. |
| Charging Thrust | The Dragoon will perform a thrust attack while charging across the battlefield. | This attack comes at you quickly. It can be sidestepped/dodged to the side, but it’s easier to wait and dodge the attack. Switch to Odin and dodge the attack just before the Dragoon reaches you then instantly counter with Flash of Steel. |
| Mirage Dive | The Dragoon will leap into the air and rain down spears at your location before crashing down with a spear in hand. | Fight the Dragoon on the path where you find them as it makes it easier to avoid his attacks. When he leaps into the air, run to the opposite end of the path to evade the attacks. Make sure you move out of the marker should one be placed in front of you. If you have a quick enough trigger finger, you can dodge all the spears, but the former method is the safest. |
| Mirage High Dive | This is similar to Mirage Dive other than there will be more spears raining down which cover a wider area, and he’ll periodically crash down throughout it. | You can avoid this attack using the same method as Mirage Dive. Run to the opposite end of the path that he starts the attack from while avoiding any blue markers in front of you. |
| Phantom March | The Dragoon’s signature attack. Once again this is similar to the Mirage Dive attacks, but it has a few differences. First off, he will expel a burst of energy which will push you back if you’re close to him before leaping in the air to perform a Mirage Dive, but he’ll crash down in front of you at the end before immediately lunging towards you. | For the most part, you can avoid the attack the same way as Mirage Dive. Run to the opposite end of the path, but when you see the last blue marker in front of you, run back the way you came, while getting ready to dodge the incoming thrust attack. |

(1 of 10) Sweeping Spear will have the !Dragoon twirl his spear before sweeping it across you twice in a spinning slash.
Recommended Abilities for the Knight of the Splendent Heart
Here we will list our recommended ability set up to do this fight effectively:
| Eikon | Ability | Damage Type |
|---|---|---|
| Damage (1 Star) Will (2 Stars) | ||
| No damage – Use to recover immediately from any ability or action. | ||
| Will (5 Stars) | ||
| Damage (2 Stars), Will (3 Stars) - Master this and place it as the second Shiva ability. | ||
| Damage (5 Stars) | ||
| Will (2 Stars) - Master this and place it as the second Bahamut ability. |
The above abilities are chosen for the following reasons. Odin is strong in general, dodging while using ![]() Arm of Darkness allows you to perform an instant counter with Flash of Steel which is useful against the Knight of the Splendent Heart due to the speed of his attacks. Equipping, and upgrading Dancing Steel will instantly get you to Level 3/4 Zantetsuken with the only downside being it takes a second to use the ability which is why Rift Slip is brought along as you can use it after a
Arm of Darkness allows you to perform an instant counter with Flash of Steel which is useful against the Knight of the Splendent Heart due to the speed of his attacks. Equipping, and upgrading Dancing Steel will instantly get you to Level 3/4 Zantetsuken with the only downside being it takes a second to use the ability which is why Rift Slip is brought along as you can use it after a  +
+ attack (with Arm of Darkness out) which will briefly stop time. This gives you enough time to get Dancing Steel off. When Zantetsuken is level 5, it deals massive damage, especially when used during the stagger phase.
Then you have Shiva, who’s Cold Snap ability allows you to briefly freeze enemies with Frostbite (press  again during the slide) and the even better Permafrost which can be used while perfect dodging with Cold Snap which has a longer duration depending on the strength of the attack you’re dodging. Finally, you have Diamond Dust which is the best Will-Damage attack in the game bar none, especially if it’s upgraded.
Finally, there’s Bahamut, who is mainly taken for Wings of Light, and Gigaflare. The latter is one of the highest damaging attacks in the game with only Zantetsuken coming close which makes it great to use during the Stagger phase, then you have the former which is used for level 5 Megaflare which is great to use just before, and during the stagger phase, but this can take a while to charge up. If you don’t want to wait around for Megaflare, you can switch out Bahamut for Titan who offers you more defensive options.
Recommended Items and Equipment for the Knight of the Splendent Heart
Gear
For your Weapon, Belt, and Vambraces, you should have the following:
| Weapon | Belt | Vambraces |
|---|---|---|
If you don’t have what’s listed above, use the highest Attack for the Weapon and Defense and Health for the Belt and Vambraces.
The Founder’s Grasp is a reward for completing the Where There’s a Will side quest.
Accessories
For your Accessories, this is more subjective, so here is what we used:
| Accessory 1 | Accessory 2 | Accessory 3 |
|---|---|---|
| Shiva’s Kiss (Reduces Diamond Dust cooldown time by 7.5 seconds) | The Pull of Darkness ( |
Shiva’s Kiss is a reward for completing the Priceless side quest with Jill.
Items
Finally, we have items. This is more of a preference thing, but we chose the following items:
| Shortcut 1 | Shortcut 2 | Shortcut 3 |
|---|---|---|
Although Knight of the Splendent Heart can be difficult for an A-Rank, it shouldn’t trouble you too much at this stage of the game. If you’re having trouble with the Knight of the Splendent Heart, bring ![]() Stoneskin Tonics instead.
Stoneskin Tonics instead.
Knight of the Splendent Heart Hunt Strategy
The Knight of the Splendent Heart can be a difficult battle due to how agile it can be, and its many methods of closing the distance between you and him. On top of that, his attacks deal respectable damage, and they come at you quickly. Fortunately, you should still be too strong for him at this point unless you’ve been ignoring a lot of the upgrades available to you.
When you start the battle, try fighting along the path leading to the gate. You may be wondering why you’d want to leave yourself less room to maneuver, and that is a fair question, but a lot of the Dragoon’s attacks are in a line/in front of him, and using the path makes it easier to avoid the many dive attacks he has. At the beginning of the battle, until you stagger him for the first time, you’ll be dealing predominantly with his melee combos, Charging Thrust, and Mirage Dive. All of these can be tough to avoid other than Mirage Dive which can be avoided by running to the opposite end of the path.
You may find yourself getting hit a lot with the Charging Thrust until you understand how quickly this comes at you which is why you should switch to Odin, use Arm of Darkness and dodge attacks with it. Not only is it easier to avoid attacks, but if you hit immediately after dodging, you’ll perform the Flash of Steel counter. His combo attacks are relatively easy to avoid after you’ve seen them a few times.

(1 of 4) Phantom March is the !Dragoon’s signiture attack, he will expel a burst energy to knock you back.
The Rising Slash Combo is a twofold attack where he’ll jump in the air to perform a slam attack before lunging towards you with an upwards slash. This can be avoided by dodging away from the Dragoon, or running towards him while dodging through the first attack. With the Spear Throw Combo, it’s easier to run away during the first attacks, then move to the side, or towards the Dragoon to evade the spear throw.
As the Dragoon is fairly quick, you’ll struggle to get any meaningful combos on him, so you want to use Diamond Dust in conjunction with Lightning Rod to break his Will-Gauge. If you have Shiva’s Kiss equipped, and you should, you can break the Will-Gauge in no time. When he’s staggered, throw another Lightning Rod down next to him if it’s off cooldown, use Limit Break, Level 5 Zantetsuken, Gigaflare, and if you have time, Dancing Steel. This will deal significant damage to the Dragoon, and if you use a Level 5 Megaflare just before the stagger phase, it’ll increase dramatically.
After the first stagger phase, his attacks will mainly stay the same, although it will being to use Mirage High Dive. This is almost the same as Mirage Dive, but he’ll crash down to the floor with a spear in hand numerous times throughout the attack. Thankfully, you can evade the attack using the same method you use for Mirage Dive, simply run to the opposite end of the path from where the attack begins, and maneuver around any blue markers in your path.
When the Dragoon has approximately a third of his health left, he’ll begin to use his signature attack, Phantom March. Once again this is similar to Mirage Dive, but this version has a few notable differences. The first is he’ll expel pent-up energy, knocking you back, then the spears that’ll rain down will cover more area, and finally, he’ll crash down in front of you when he’s finished. This will be immediately followed up with a charging thrust attack which is extremely difficult to avoid.
During this “phase” of the battle, you’ll want to keep Will-o’-the-Wykes on you at all times to negate any attacks you fail to avoid. Then, when you see Phantom March, run to the opposite end of the path like you would if he used Mirage Dive, but when you get to the end, run back, to avoid the last dive before dodging the thrust attack after. The last third of the battle will mainly be melee combos, combined with numerous Phantom Marches, simply avoid the attacks, and use Diamond Dust off cooldown to shatter the Will-Gauge then finish him off with the Zantetsuken > Gigaflare combo.
Once you’ve defeated the Knight of the Splendent Heart, you’ll be rewarded with 9,000 XP, 105 AP, 17,000 Gil, and 35 Renown. On top of that, you’ll obtain two pieces of ![]() Meteorite.
Meteorite.
More Final Fantasy 16 Hunts
For information on some of the other ![]() Notorious Marks you can take on in Final Fantasy XVI, check out these pages below:
Notorious Marks you can take on in Final Fantasy XVI, check out these pages below:
No Comments