
The Pokémon Center should always be your first port of call.
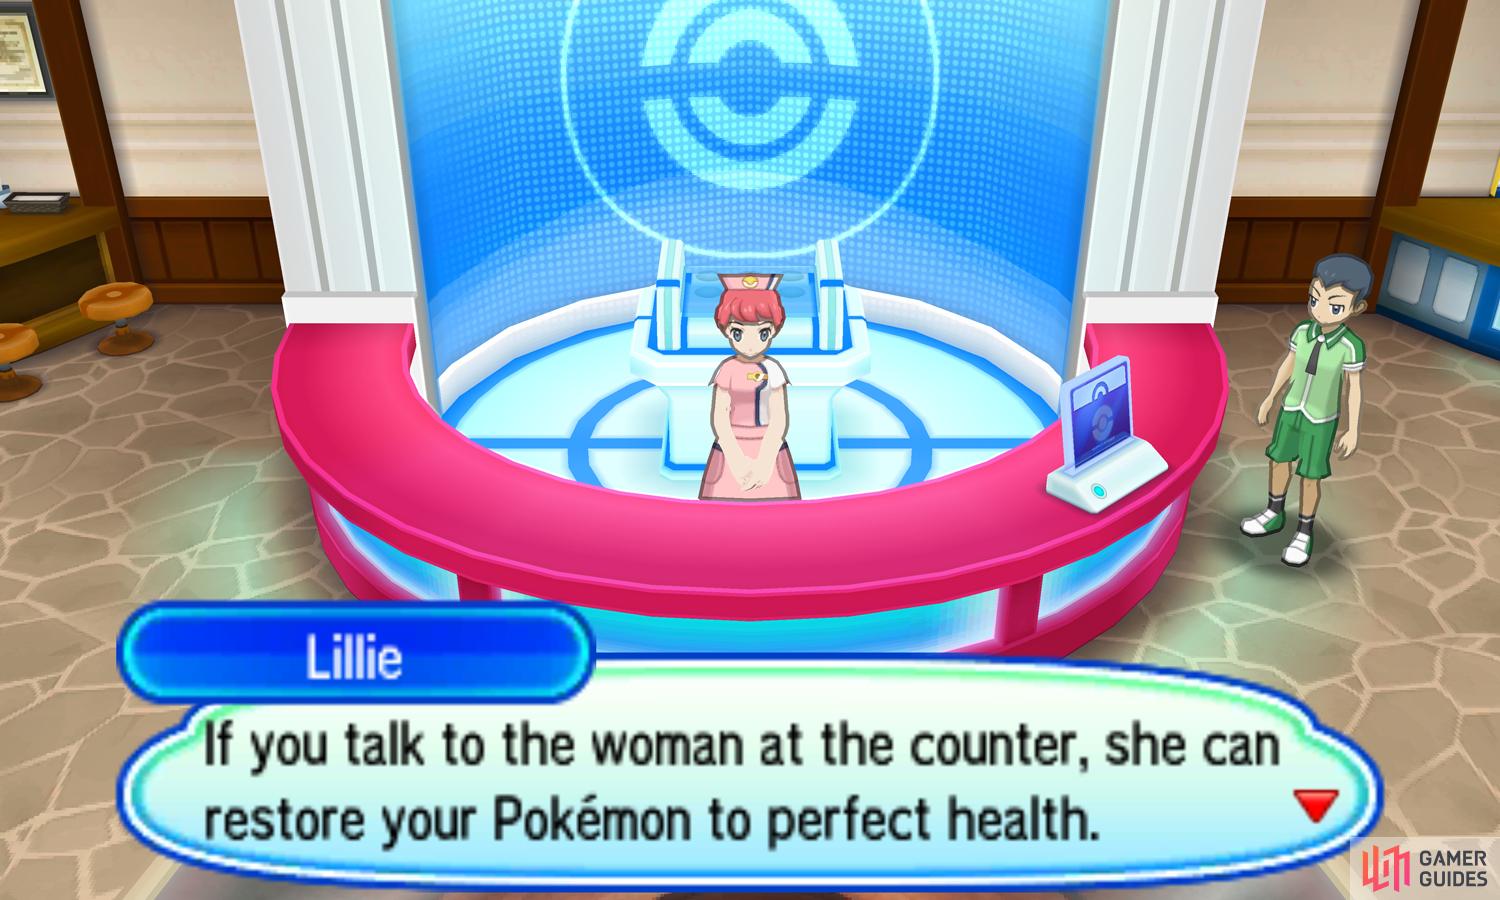
Before you can reach the school itself, you’ll pass by your first Pokémon Center. Lillie will take you inside and give you a quick tour. If you’re a new Pokémon player, you’d do well to listen carefully! Pokémon Centers can be found all over Alola and they all function exactly the same.
Sitting behind the bright red counter in the middle is the Pokémon Nurse, who will heal your Pokémon party free of charge. After a long journey out in the Alolan wilds, you’ll want to visit the nurse to restore your Pokémon back to health. On the east side of the counter is a PC for organizing your Pokémon.
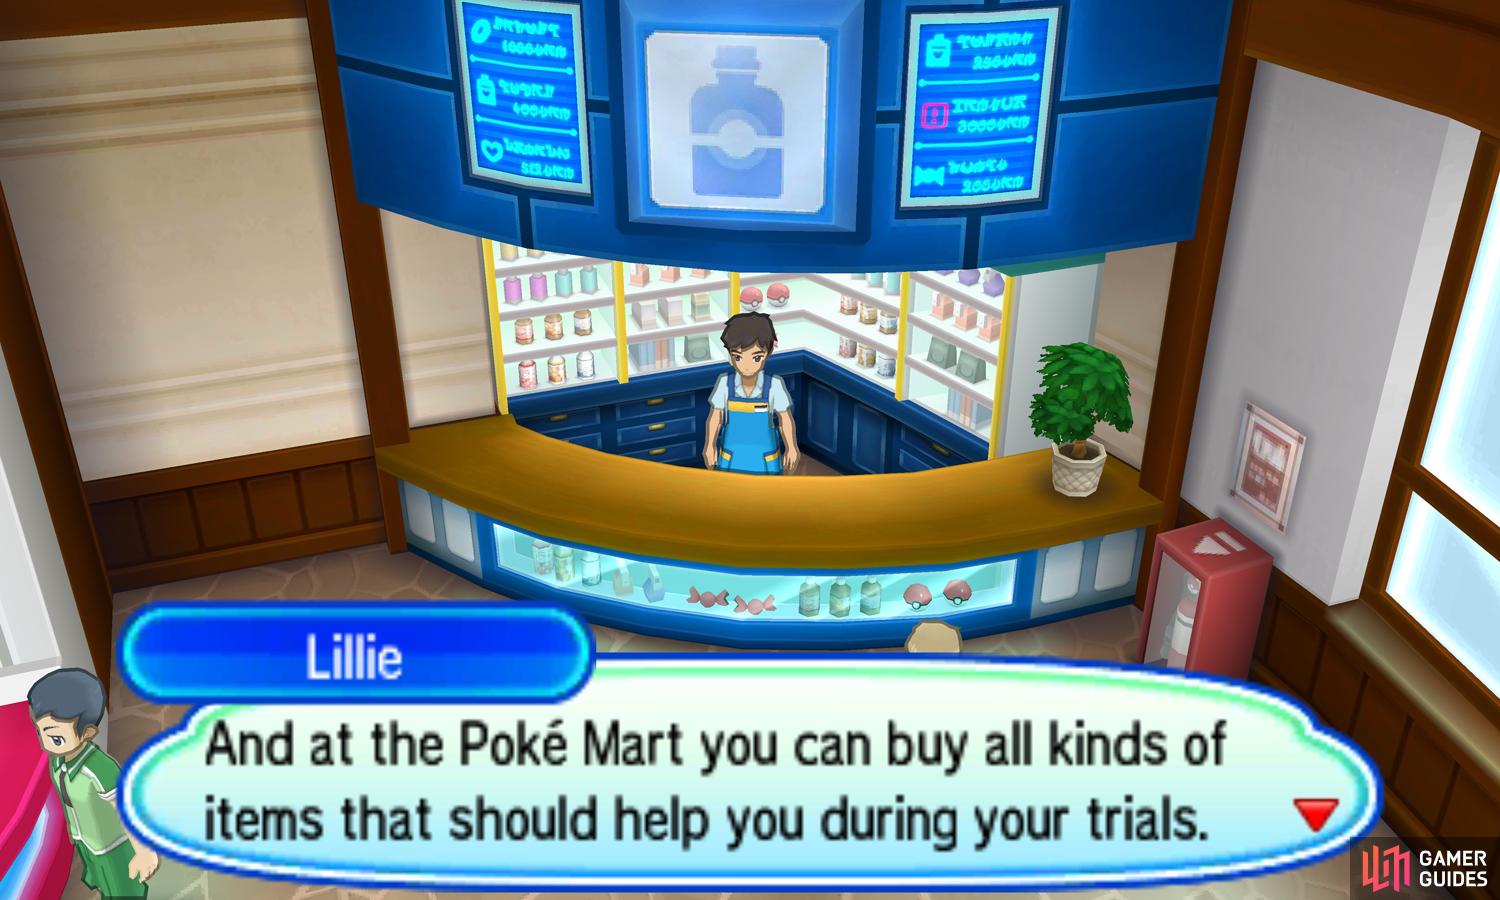
Meanwhile, east from the nurse is the Poké Mart, which sells essential items for trainers on their Island Challenge. Here, you can buy Poké Balls, Potions, etc. As you acquire Z-Crystals from completing trials, the Poké Mart will add more items to their stock. Some Poké Marts also feature a second clerk who sells different items.
Finally, west from the nurse is the Café. Here, you can buy a drink, which doesn’t actually do anything–it’s just for building atmosphere. But once per day you’ll receive a free snack item, plus Poké Beans to feed your Pokémon. You may also receive some advice from the shop owner.
While you’re here, don’t be shy to utilize the facilities in the Pokémon Center–they are designed for trainers like yourself, after all! In particular, stock up on additional Poké Balls and/or Potions if you’re running out. If you want to change your party, you can use the PC to access your boxes as well.
Additionally, a couple of new options will become available from the X button menu.
After that all-important detour, exit the Pokémon Center and head into the Trainer’s School to its west. Trying to go any further down the road will send you towards an angry  Tauros, so let’s not risk that.
Trainer’s School

Everyone was a beginner at one time.
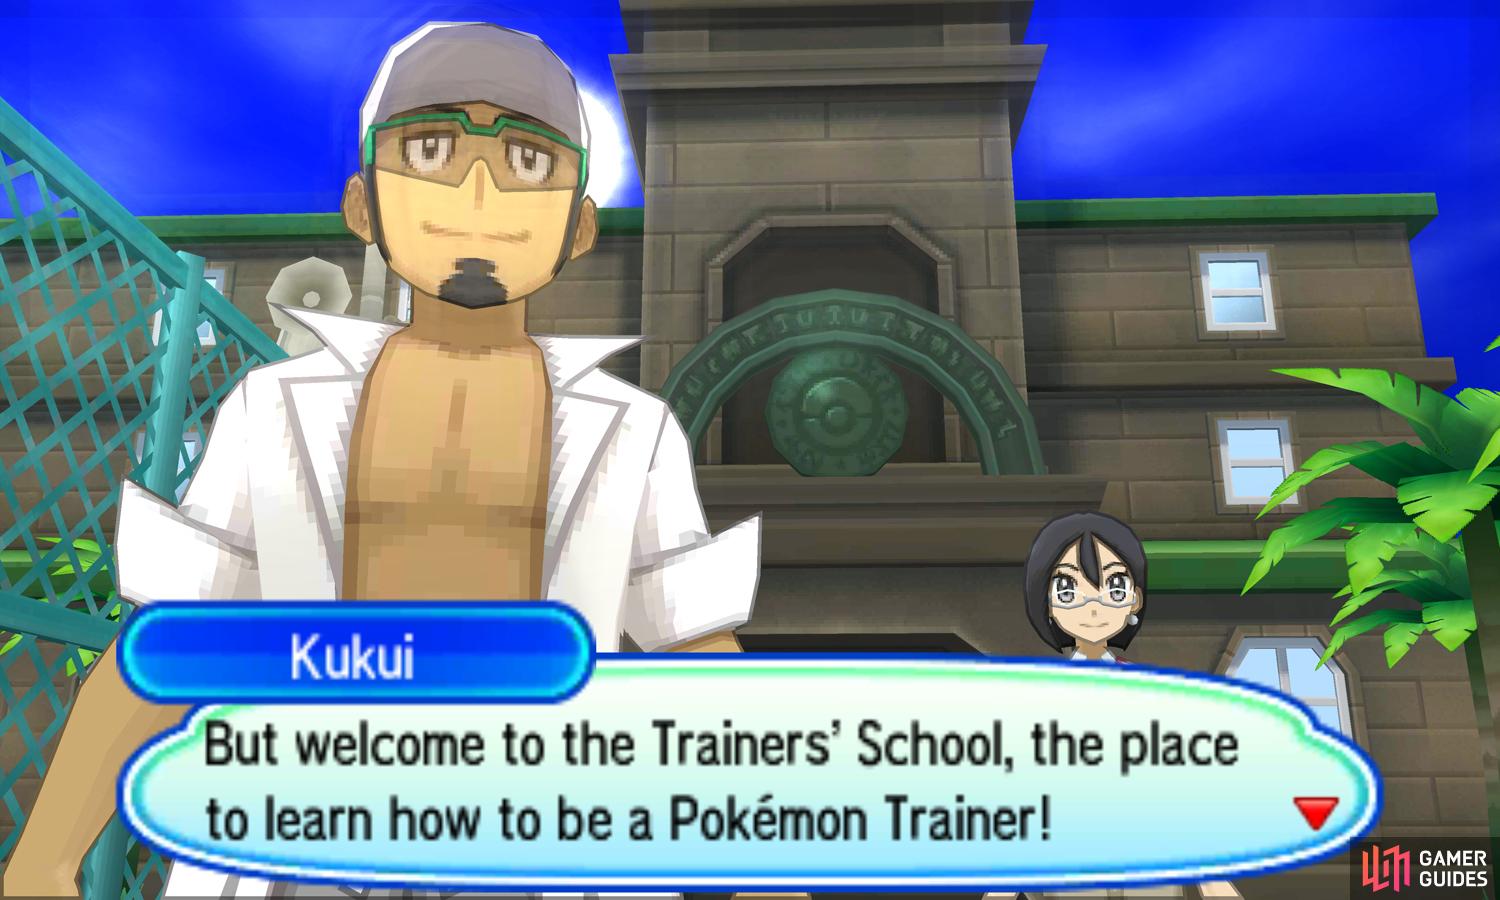
This is the place where Pokémon trainers learn the very basics. For those of you who are expert trainers, you’ll just have to keep nodding in agreement. Maybe one day there will be an option to skip tutorials… Anyway, if you wish to “graduate” from a novice, you need to seek out and defeat four trainers located in this area.
To assist you, Professor Kukui will pass you an Exp. Share, which provides all Pokémon in your party that don’t participate in battle with 50% of the equivalent experience points they would’ve earned by fighting. This is incredibly useful for keeping your party at a consistent level–as well as quickly getting newer recruits up to speed.
Pokemon Encounters - Trainer’s School
| Name | Type(s) | Location (Rate) |
|---|---|---|
 Meowth (Alolan) Meowth (Alolan) |
Dark | All grass in Trainer’s School (50%) |
 Zorua Zorua |
Dark | All grass in Trainer’s School (30%) |
 Magnemite Magnemite |
Electric/Steel | All grass in Trainer’s School (10%) |
 Grimer (Alolan) Grimer (Alolan) |
Poison/Dark | All grass in Trainer’s School (10%) |
From where you start off, head directly east towards the parking bays. Like you did when searching for the Pearl at the beach, keep pressing the A button just above the railing in the corner. Hopefully you should find an invisible Poké Ball. After this, make your way north towards the far corner.
Pick up the Potion by the palm tree. Next, approach the girl with the tennis racket up ahead, standing near the incinerator–she’s the first trainer you’re looking for.
Youth Athlete Hiromi
| Pokémon | Level | Type |
|---|---|---|
 Bonsly Bonsly |
7 | Rock |
This baby bonsai tree is a Rock-type, so trainers who started with  Rowlet and
  Popplio will have an easy time.
  Litten users will be at a slight disadvantage, but hopefully you picked up a
  Pichu or one of the Water Pokémon before coming coming here. If all else fails, you can Lick it into submission.
One trainer down, three more to go. Moving on, follow the school building west. Very soon, you’ll find the front entrance of the building itself. Ignore it for now and press on into the school courtyard. Below the school building and between a pair of palm trees is another Potion for the taking.
Further west are two school kids playing a game of Rock, Papers, Scissors, but replaced with Fire, Grass and Water. Hopefully you know which Type beats what! Head directly south from the two kids to find a Poké Ball shaped court; search the very center of the court markings to find a hidden Great Ball.
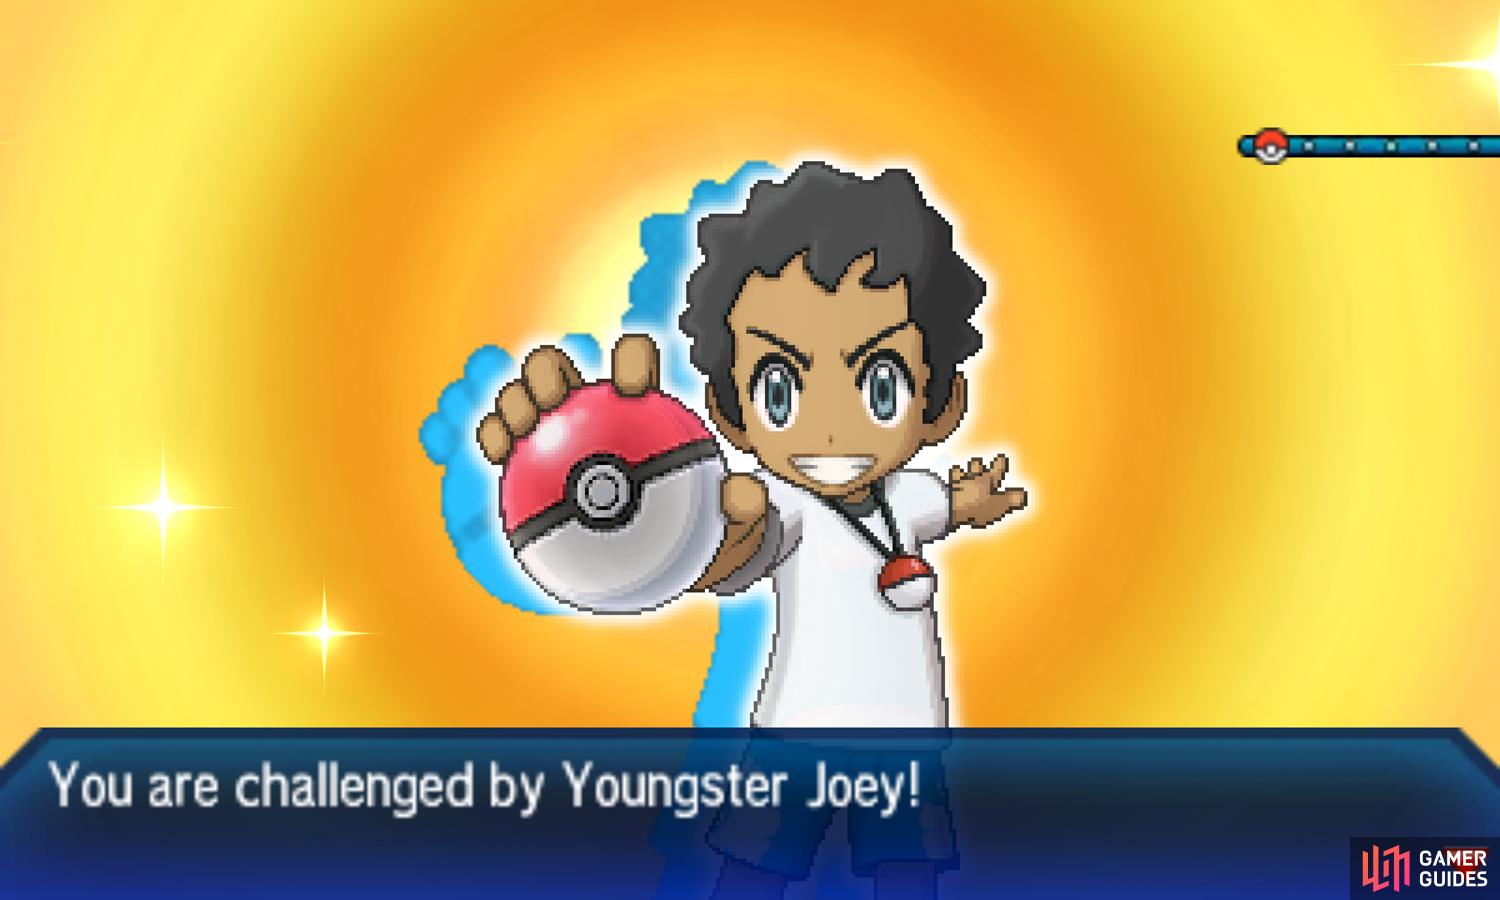
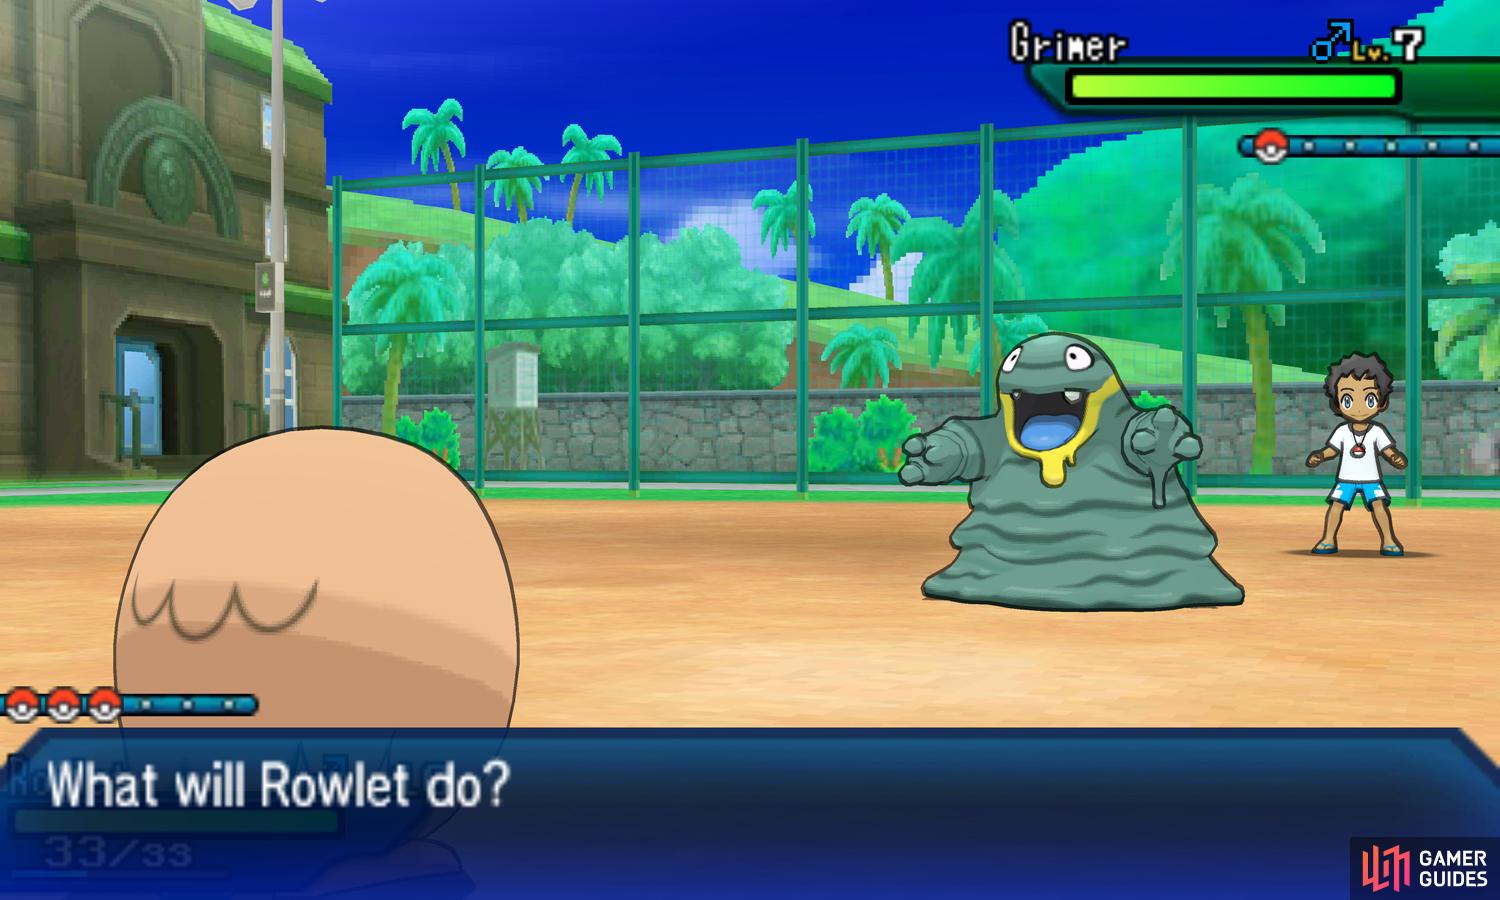
Go back to the tarmac and follow it north around the west side of the school building. At the far end is a red gate, which you can open to reach the other side. Here, make your way south through the tall grass, picking up the Antidote and Paralyze Heal along the way. The second Pokémon trainer is waiting for you at the end.
Youngster Joey
| Pokémon | Level | Type |
|---|---|---|
| Grimer (Alolan) |
7 | Poison/Dark |
This colorful slime can be quite tricky, especially if you picked Rowlet, who’s weak to its Poison-type moves. If you’re struggling, Magnemite, which you can find in the nearby tall grass with a 1 in 10 chance, is immune to Poison. Otherwise, just power through with your other party members.
You’re halfway there! Retrace your steps until you’re standing sandwiched between the red gate and the school building. To your right is a side entrance–use it to enter the school building. Inside, head into the classroom on the other side of the nearby green door. The third Pokémon trainer is waiting in the north-west corner of the room.
Preschooler Mia
| Pokémon | Level | Type |
|---|---|---|
 Metapod Metapod |
7 | Bug |
The evolved form of  Caterpie barely poses a threat. Litten can easily take it down with Ember, while Rowlet can bully it with Peck if it has learned it. The only thing to watch out for is Metapod’s Oran Berry, which automatically restores some health after you lower its HP.
Succeed and you’ll receive 3 Oran Berries to give to your own Pokémon. These can be fed to your Pokémon immediately to restore HP. Or you can give it to your Pokémon as a held item via the Pokémon or Bag menu. During battle, if your Pokémon’s HP drops, they will automatically consume the berry to restore HP.
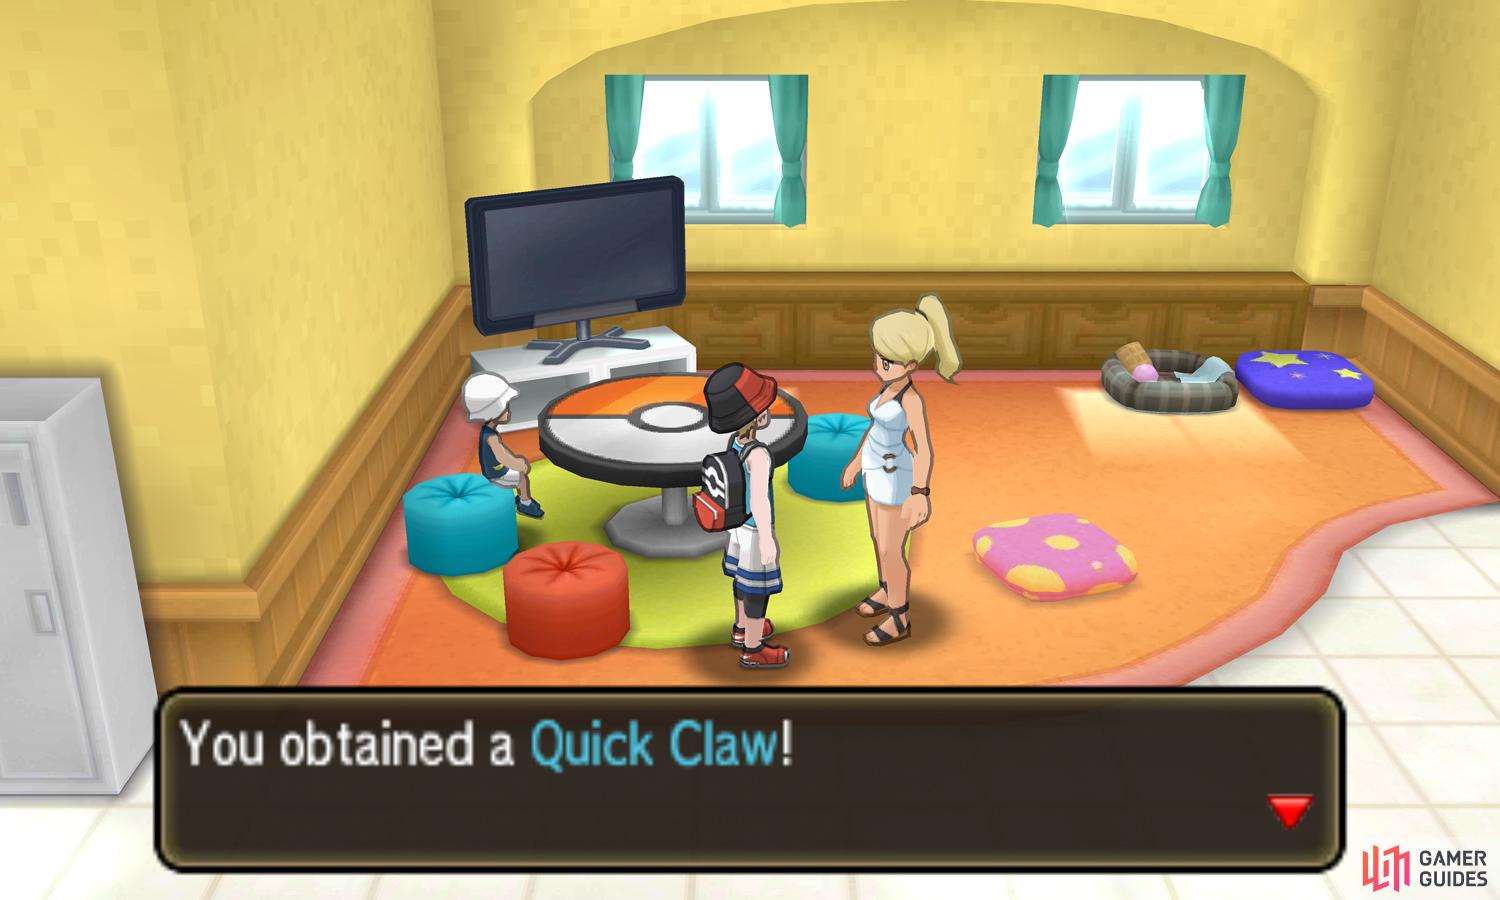
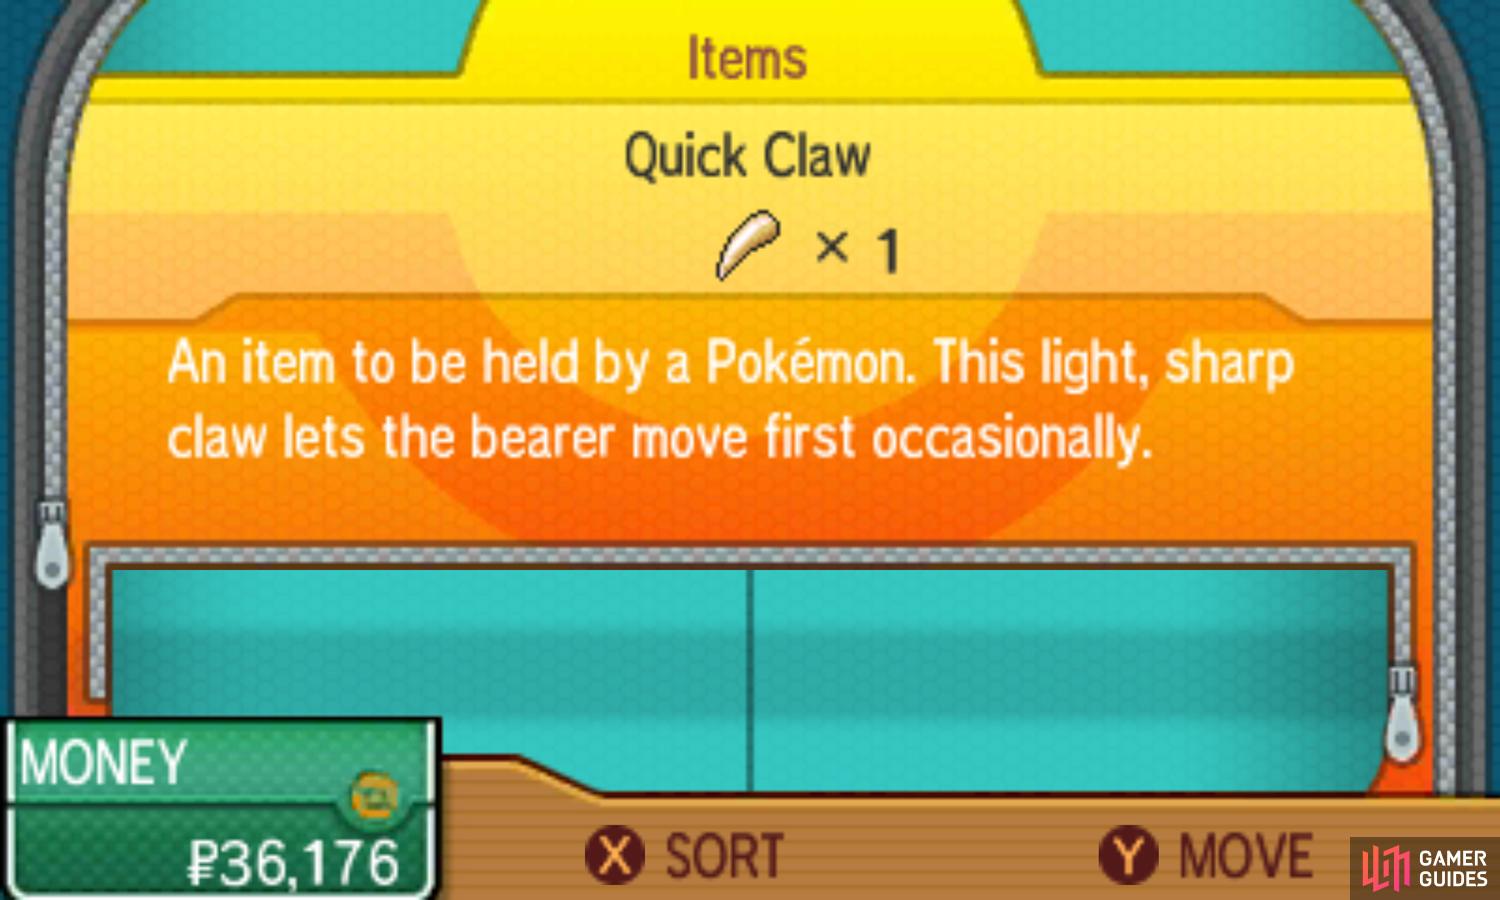
Exit the classroom and continue east. Past the lockers is a cute little play area with a Poké Ball shaped table and a TV. Chat to the teacher standing guard here to receive a Quick Claw. If you give this to a Pokémon as a held item, there’s a small chance the Pokémon will move first in battle, even if the opponent’s Speed is higher.
Don’t sleep on hold items; your Pokémon should always hold something!
At this stage, you’re almost finished. Carry on east, then exit to the south. You’ll emerge outside the front of the school building, and directly opposite Kukui and the others. Feel free to talk to Lillie if you need to heal your Pokémon. To wrap up the task, head west, back to the courtyard area.
Waiting at the east-most court is the fourth and final Pokémon trainer of this humble area. If you spoke to him earlier, he’ll mention that he won’t battle you until you’ve defeated the other three trainers. This time, he should have no excuse.
Rising Star Joseph
| Pokémon | Level | Type |
|---|---|---|
 Ekans Ekans |
8 | Poison |
This crafty snake has the Intimidate ability, which lowers your Pokémon’s Attack when it enters battle. Like Grimer, Rowlet users may struggle against this Poison-type; try to rely on your other party members if possible. By the way, if the Attack drop is annoying, you can cancel it (and other stat drops/gains) by switching Pokémon.
Your reward for besting the final trainer is TM01 Work Up.
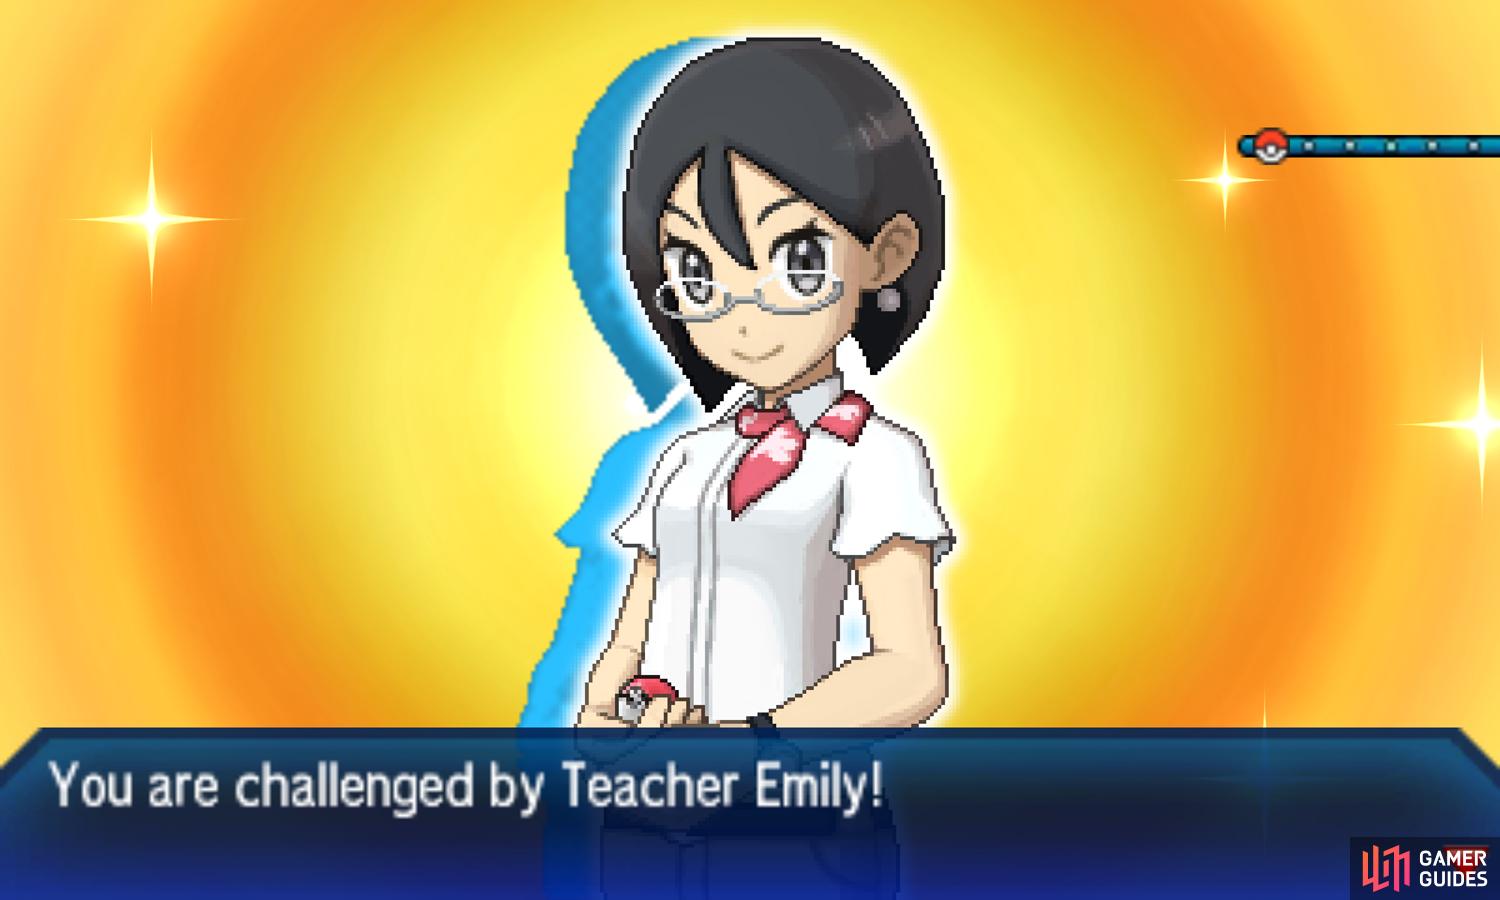
Well, you completed the task set out for you, but your stay at the Trainer’s School isn’t over just yet. The school tannoy will call for you to visit the 2nd floor. Head through the school building’s front entrance and ascend the staircase from earlier. You’ll bump into a teacher who’s all too eager to battle you.
Teacher Emily
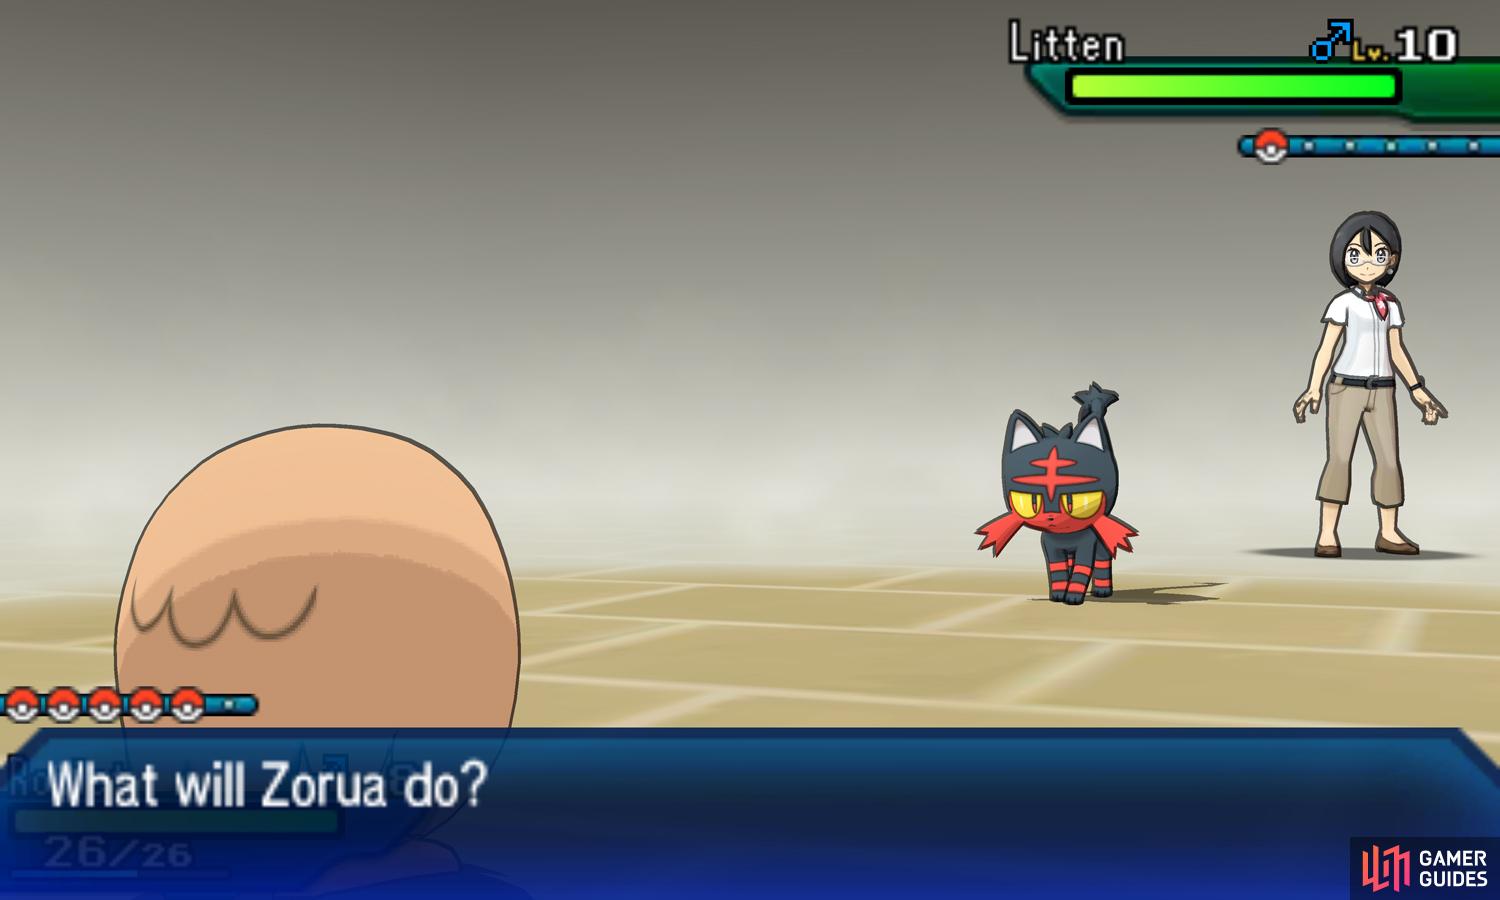
| Pokémon | Level | Type |
|---|---|---|
| Litten (if you picked Rowlet) |
10 | Fire |
| Popplio (if you picked Litten) |
10 | Water |
| Rowlet (if you picked Popplio) |
10 | Grass/Flying |
If you’ve been relying heavily on your starter Pokémon, you’re in for a shock, because the Pokémon that Emily uses has a Type advantage against your starter. Against Litten, you can send out  Wingull or
  Slowpoke if you caught one. Popplio is best tackled with Pichu, while Grimer is the best choice for dealing with Rowlet.
Otherwise, you’ll simply have to make do with what you’ve got. Regardless, it’s only one Pokémon and you should have a team of 6 if you’ve been diligent. Even if a single one of your Pokémon can’t handle hers, just do as much damage as you can so the next one(s) can finish the job.
Emerge victorious and you’ll be given 5 Great Balls to commemorate your efforts. With that, your stay at the Trainer’s School officially comes to a close! Your next mission is to challenge the first of the island trials–Ilima’s trial, to be held at the Verdant Cavern. To get there, you’ll need to cut through Hau’oli City.
No Comments