
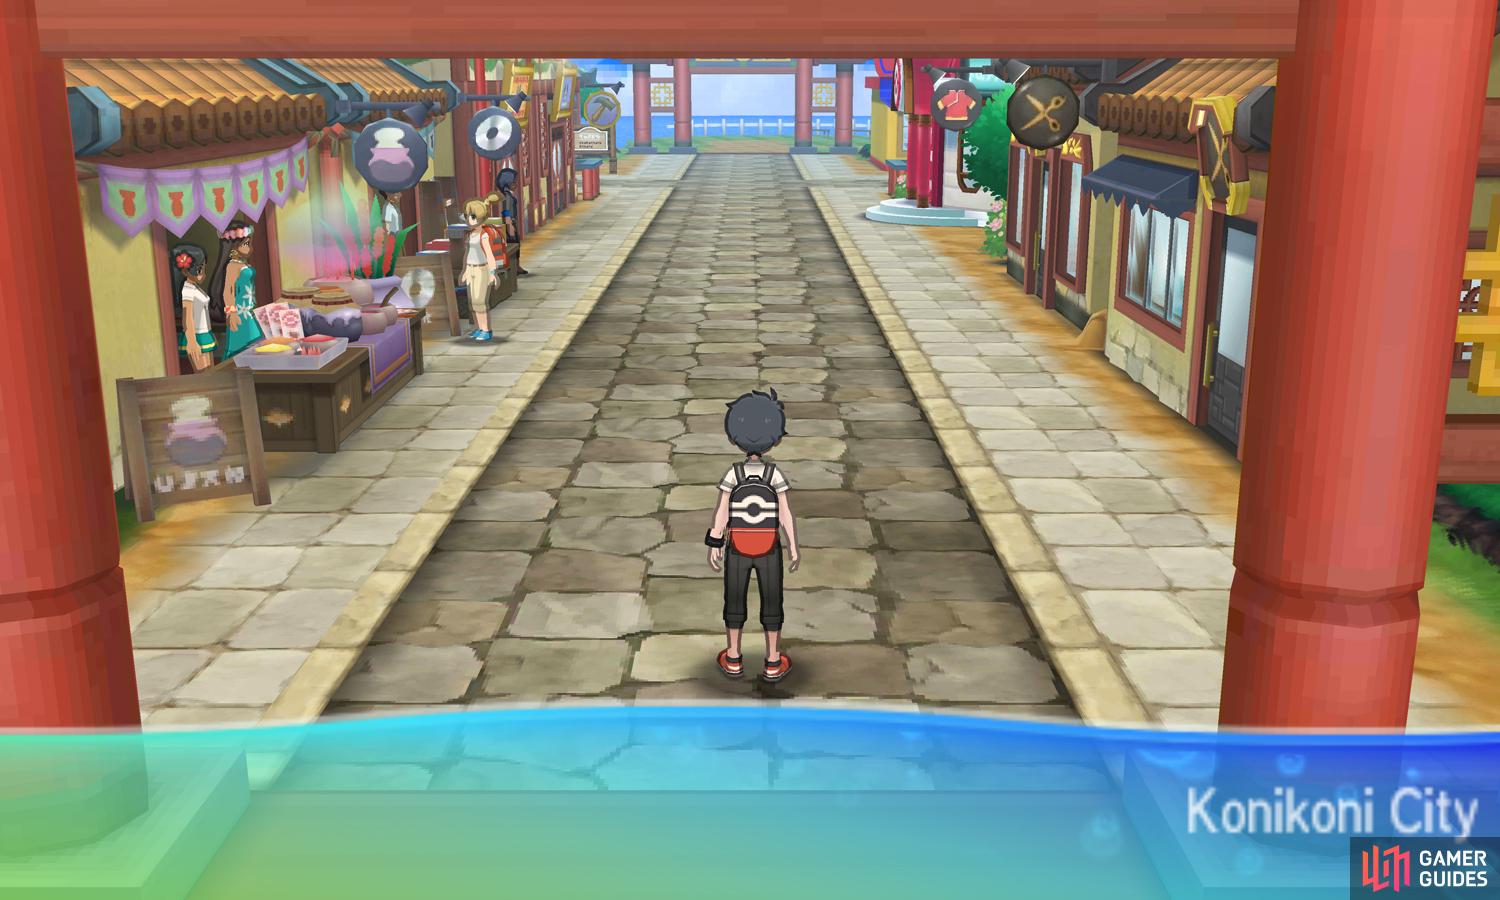
This city is a shopper’s paradise.
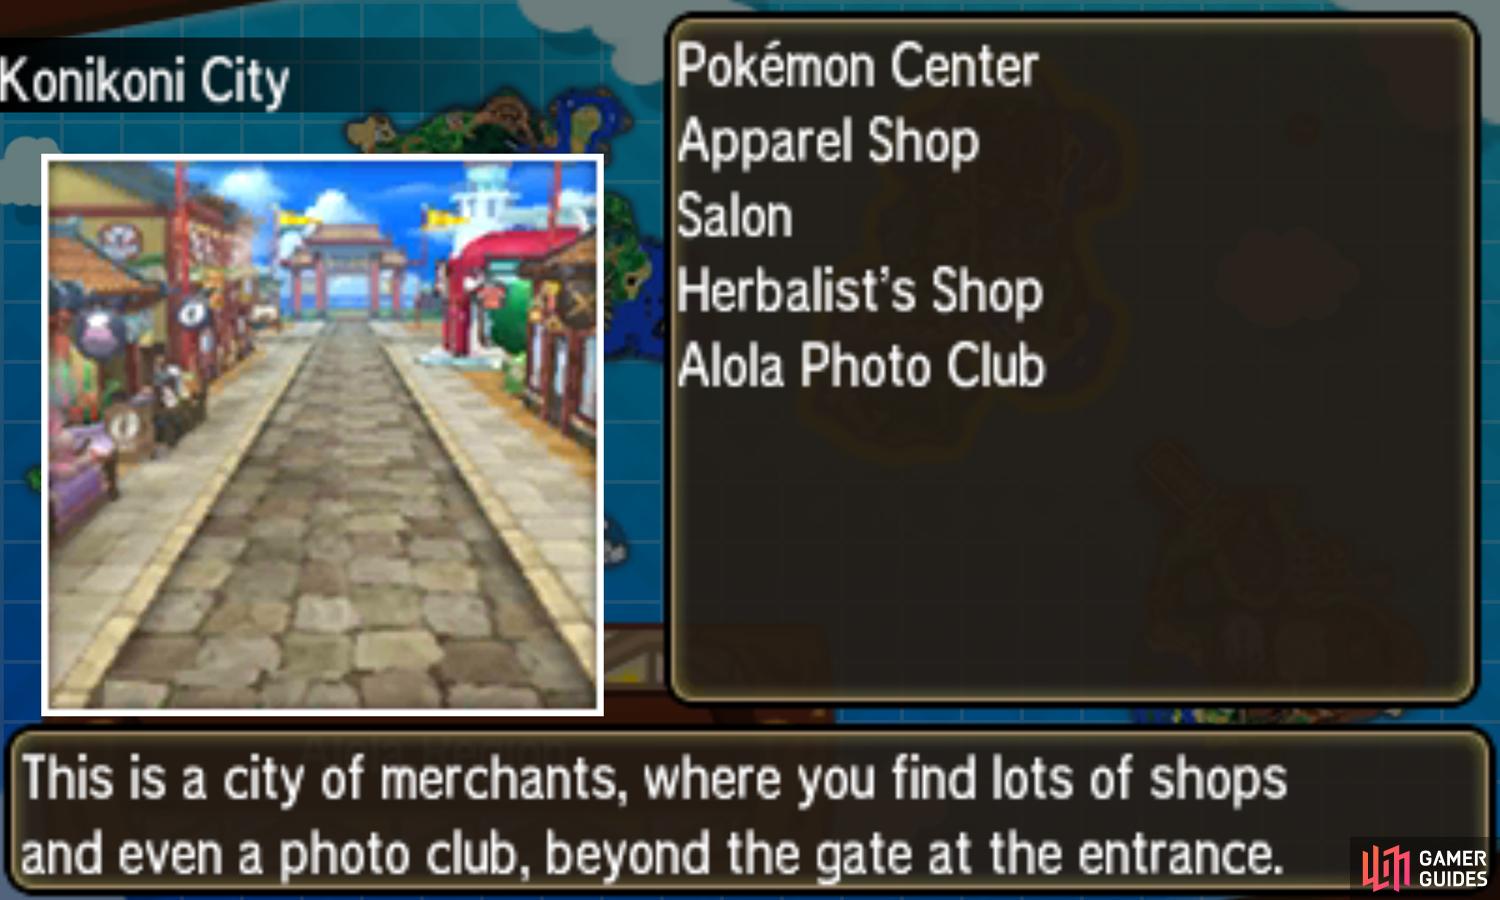
Akala Island’s other city is essentially one very long market street. To avoid getting lost and confused, let’s check out the shops systematically. Starting along the west side, at the very bottom we have a Lass running an incense shop. These items have various effects when held, but nothing terribly exciting.
Just above her, there’s a Dancer who offers a therapeutic massage, for your Pokémon that is. This will raise the Happiness stat of your first Pokémon, useful for certain evolutions or increasing the damage of Return. The service is free, but limited to once per day.
Immediately above the TM shop is a woman who can gauge the Happiness of your Pokémon.
The building above the TM shop is a restaurant run by Mallow’s family. Inside, you can order food from the woman behind the counter near the entrance. Each meal costs 1,040 Poké Dollars and you’ll receive 2 Heart Scales as a complementary gift. Regardless, go and grab Totem Sticker #042 behind the counter.
Back on the main street, the final building on this side of the street is Olivia’s shop. Inside, you’ll be greeted by Olivia’s  Probopass. You’ll learn that Olivia is waiting outside the Ruins of Life, accessible via Memorial Hill. To give you encouragement for the battle ahead, you’ll be be handed a Max Potion.
Afterwards, you should take a gander around Olivia’s shop. The woman in red to the left of the counter sells common evolution stones. If playing as a female, the Beauty to the right sells unique hair accessories. Finally, the woman at the back has a bunch of rare fossils. The type of fossils depends on the game you’re playing.
| Pokémon Ultra Sun | Pokémon Ultra Moon |
|---|---|
Skull:  Cranidos (Rock) Cranidos (Rock) |
Plume:  Archen (Rock/Flying) Archen (Rock/Flying) |
Cover:  Tirtouga (Rock/Water) Tirtouga (Rock/Water) |
Armor:  Shieldon (Rock/Steel) Shieldon (Rock/Steel) |
Helix:  Omanyte (Rock/Water) Omanyte (Rock/Water) |
Dome:  Kabuto (Rock/Water) Kabuto (Rock/Water) |
Claw:  Anorith (Rock/Bug) Anorith (Rock/Bug) |
Root:  Lileep (Rock/Grass) Lileep (Rock/Grass) |
Jaw:  Tyrunt (Rock/Dragon) Tyrunt (Rock/Dragon) |
Sail:  Amaura (Rock/Ice) Amaura (Rock/Ice) |
As the woman asserts, you can only buy one of each type of fossil. So you could buy all 5 fossils if you wanted to. Fossils bought from this shop (or obtained elsewhere) can be taken to the Fossil Restoration Center on Route 8, where they can be instantly resurrected. Does this remind you of Jurassic Park?
When you’re finished shopping, head up the staircase to the right of the counter.

It’s fine to splurge, but be sure to set a budget!

Upstairs, you can check out Olivia’s room and see how the kahuna of Akala Island likes to decorate. With lots of  Stufful toys it seems… Head for the south-west corner of the room, near the TV and sofa. Just below the TV cabinet is Totem Sticker #043 ready to be removed. North from here, there’s a real Stufful to play with.
Next, let’s check out the shops on the east side. Starting from the bottom again, the first building is the salon–remember this. Above the salon is the apparel shop, if you need to update your wardrobe. Finally, at the corner is Konikoni City’s Pokémon Center; obviously you’ll want to go in there.
Otherwise, the right Poké Mart clerk sells Battle Items if you need a helping hand with the Grand Trial.
Back outside, there’s a crossroad up ahead. To the east is another branch of the Alola Photo Club. Standing in front of the building is a hiker selling herb items. These have strong effects, but lowers a Pokémon’s Happiness. If you accepted the  Ditto sidequest, speaking to him will trigger another battle with a wild Ditto.
Meanwhile to the west of the crossroad is a house that belongs to Lana’s family. Inside, there’s nothing to do right now, but you can nosy around if you’d like. Further west is a wooden pier. Standing between the pier and Lana’s house is a young man who really needs your help. Make sure to have at least one Z-Crystal equipped.
Office Worker Dugal
| Pokémon | Level | Type |
|---|---|---|
 Clamperl Clamperl |
23 | Water |
To satisfy Dugal’s request, you must use a Z-Move during this battle. Obviously, the best one in this situation would be Bloom Doom, the Grass-type Z-Move. But any will do. Succeed and you’ll receive a rare Max Revive. By the way, if you fail to use a Z-Move, you’ll have to come again the next day.
After that little episode, head down to the pier and pick up Totem Sticker #044 at the end of the eastern path. Moving on, return to the crossroad and go directly north, past the giant, ornate gate. You’ll come to a scenic plaza overlooking the sea.
Finally, go around the bench behind the lass to find an Eviolite. This item raises the defensive stats of Pokémon that can still evolve (Mega Evolution doesn’t count).
That wraps up the tour of Konikoni City. To proceed, exit back to Route 9, then follow the path south-east towards Memorial Hill. Although if you have some spare time, you may want to report back to the police station and finish off the Ditto Five sidequest.
Ditto Five Detour
Besides the rewards, you can catch yourself a rare Ditto… or five.
Assuming you’ve followed our instructions, you should have found two of the Ditto Five members already. But for reference, here are the locations of all five members. You must encounter them in order and report back to the policeman at the front after apprehending a member (by defeating or catching them).
| Member | Location | Reward |
|---|---|---|
| 1 | Policeman inside the police station, at the back. | 12,000 |
| 2 | Herb seller in front of the Alola Photo Club. | 16,000 |
| 3 | Chef working in Mallow’s restaurant, at the back. | 20,000 |
| 4 | Woman giving massages near the entrance of the city. | 24,000 |
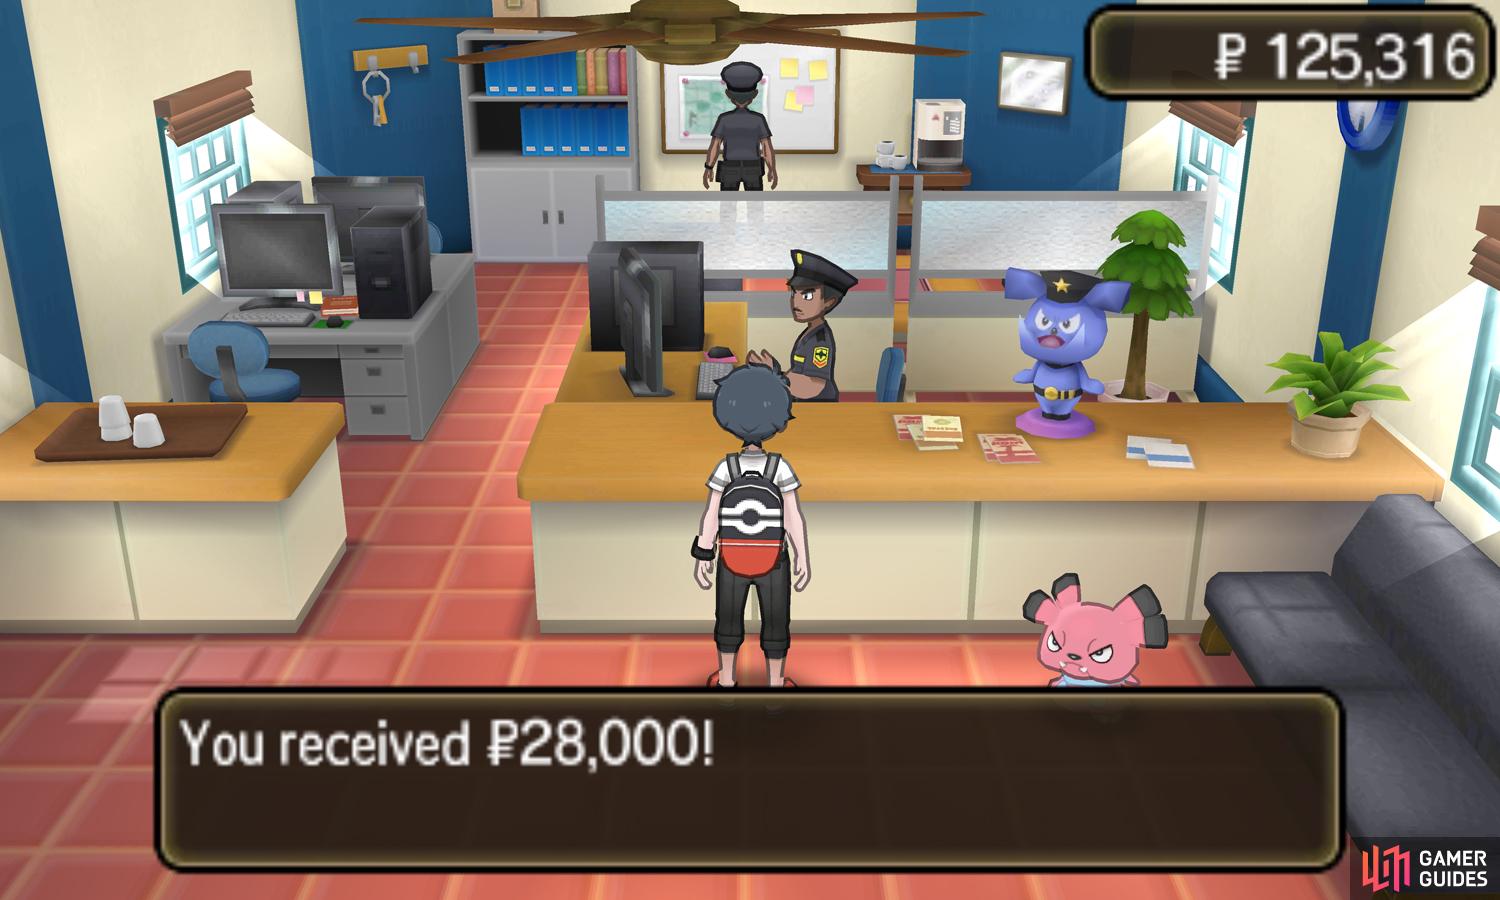
| 5 | Olivia standing at the city’s northern cape, by the sea. | 28,000 |
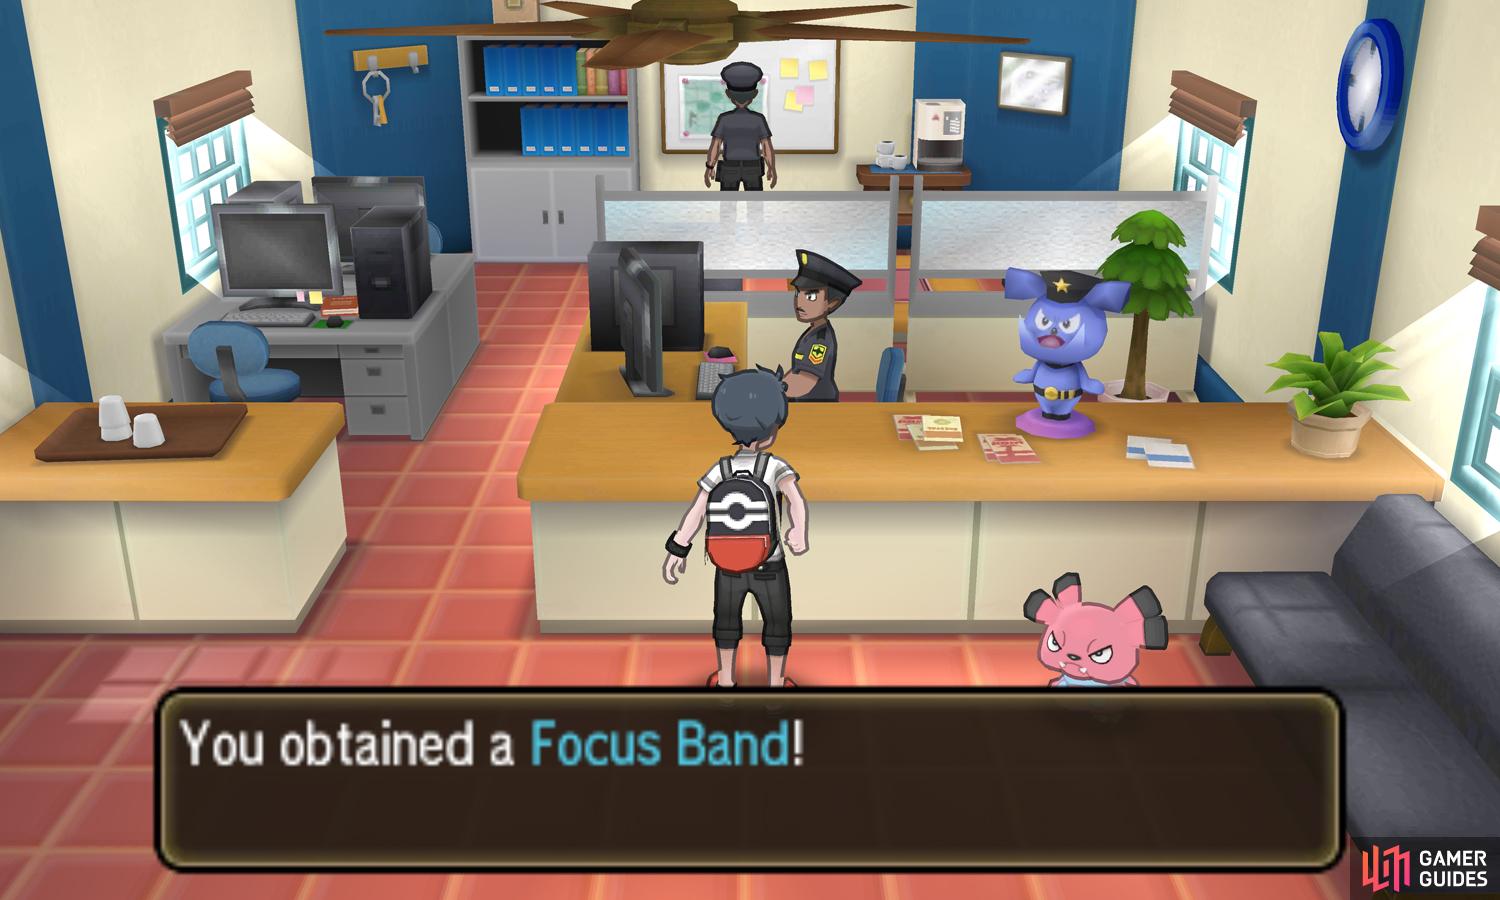
Each time you report back, you’ll receive a respectable sum of money. After reporting the fifth and final member, you’ll receive a Focus Band. This held item provides a 10% chance to survive any attack that would otherwise reduce the Pokémon to 0 HP. It is thus very unreliable, but a life-saver if it actually works when you need it.
No Comments