
Thanks to  Machamp’s strength, you can finally move the gigantic cube-shaped blocks that stood in your path earlier. Of course, a lot of crazy things have happened recently, so it’s easy to forget where all the blocks were. Fortunately, we’ve been keeping notes!
Sandy Cave
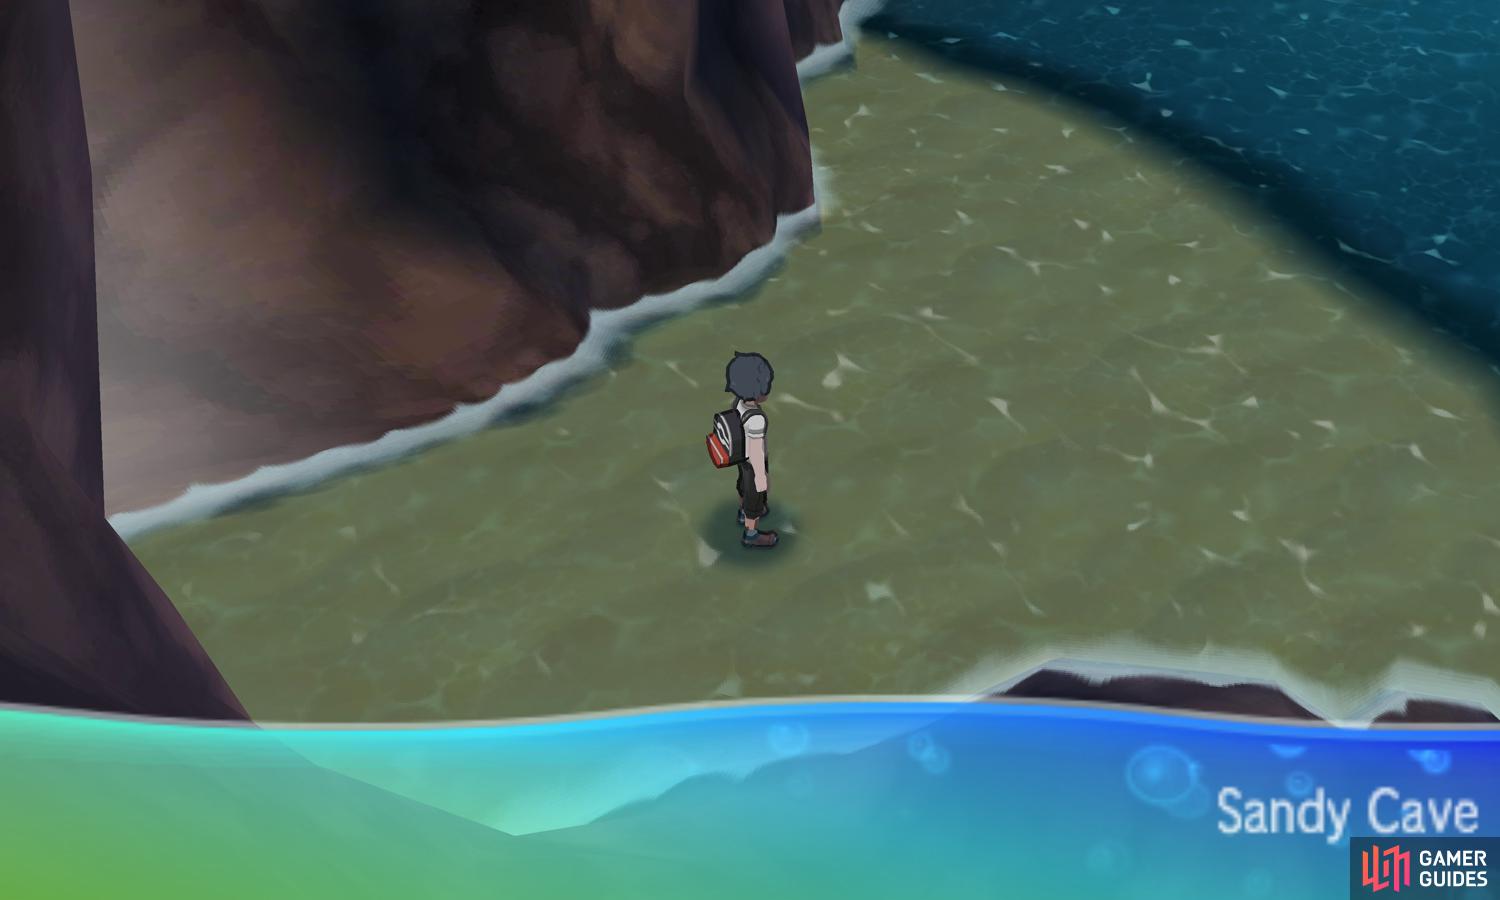
(1 of 2) You need the help of multiple Ride Pokémon to find all the items here.
You need the help of multiple Ride Pokémon to find all the items here. (left), (right)
Jump on  Charizard and fly to Big Wave Beach on Melemele Island. When you arrive, head towards the southernmost part of the beach, where the entrance to the Sandy Cave can be found. Inside the cave, swim north-east until you reach the island in the center, where the Big Pearl is–or was.
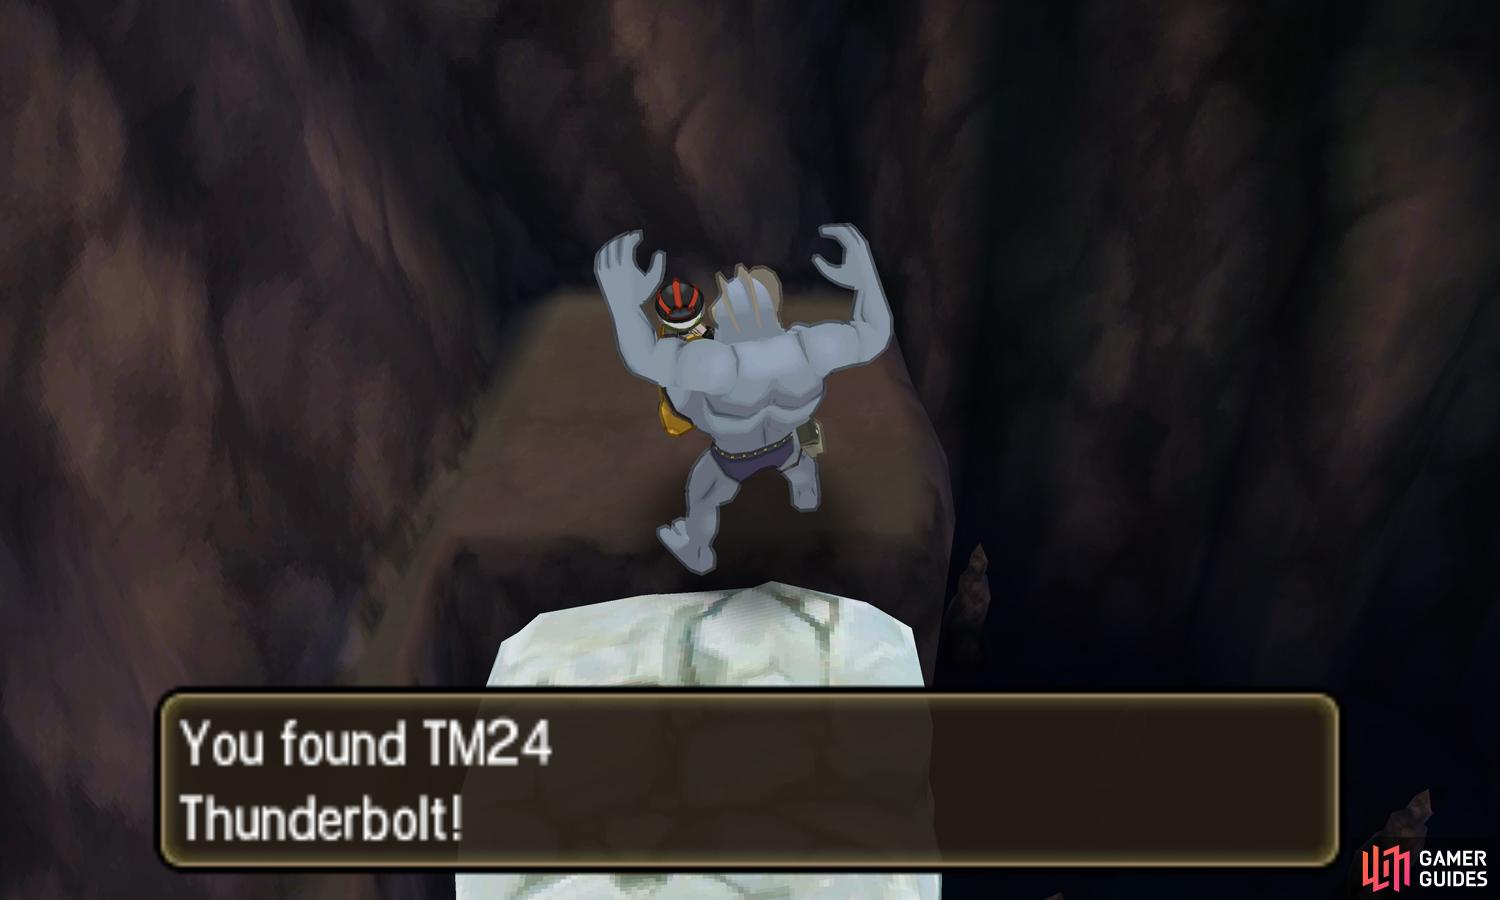
From here, continue north towards a stretch of dry land. When you see the giant block near the back, call Machamp and push the block north into the gap just above it. On the other side, you’ll discover a shocking secret: TM24 Thunderbolt. Afterwards, exit the cave and fly to your next location.
Lush Jungle
Make your way to the Lush Jungle’s east zone, where the  Sudowoodo were. Towards the far east, face the giant block from its north side and push it south into the gap. Go across the block and exit towards the east.
Pokemon Encounters - Lush Jungle (Cavern)
| Name | Type(s) | Location (Rate) |
|---|---|---|
 Golbat Golbat |
Poison/Flying | Walking everywhere (39%) |
 Crobat Crobat |
Poison/Flying | SOS from Golbat |
 Salandit Salandit |
Poison/Fire | Walking everywhere (30%) |
 Salazzle Salazzle |
Poison/Fire | SOS from Salandit |
 Dugtrio (Alolan) Dugtrio (Alolan) |
Ground/Steel | Walking everywhere (30%) |
 Larvesta Larvesta |
Bug/Fire | Walking everywhere (1%) |
 Volcarona Volcarona |
Bug/Fire | SOS from Larvesta |
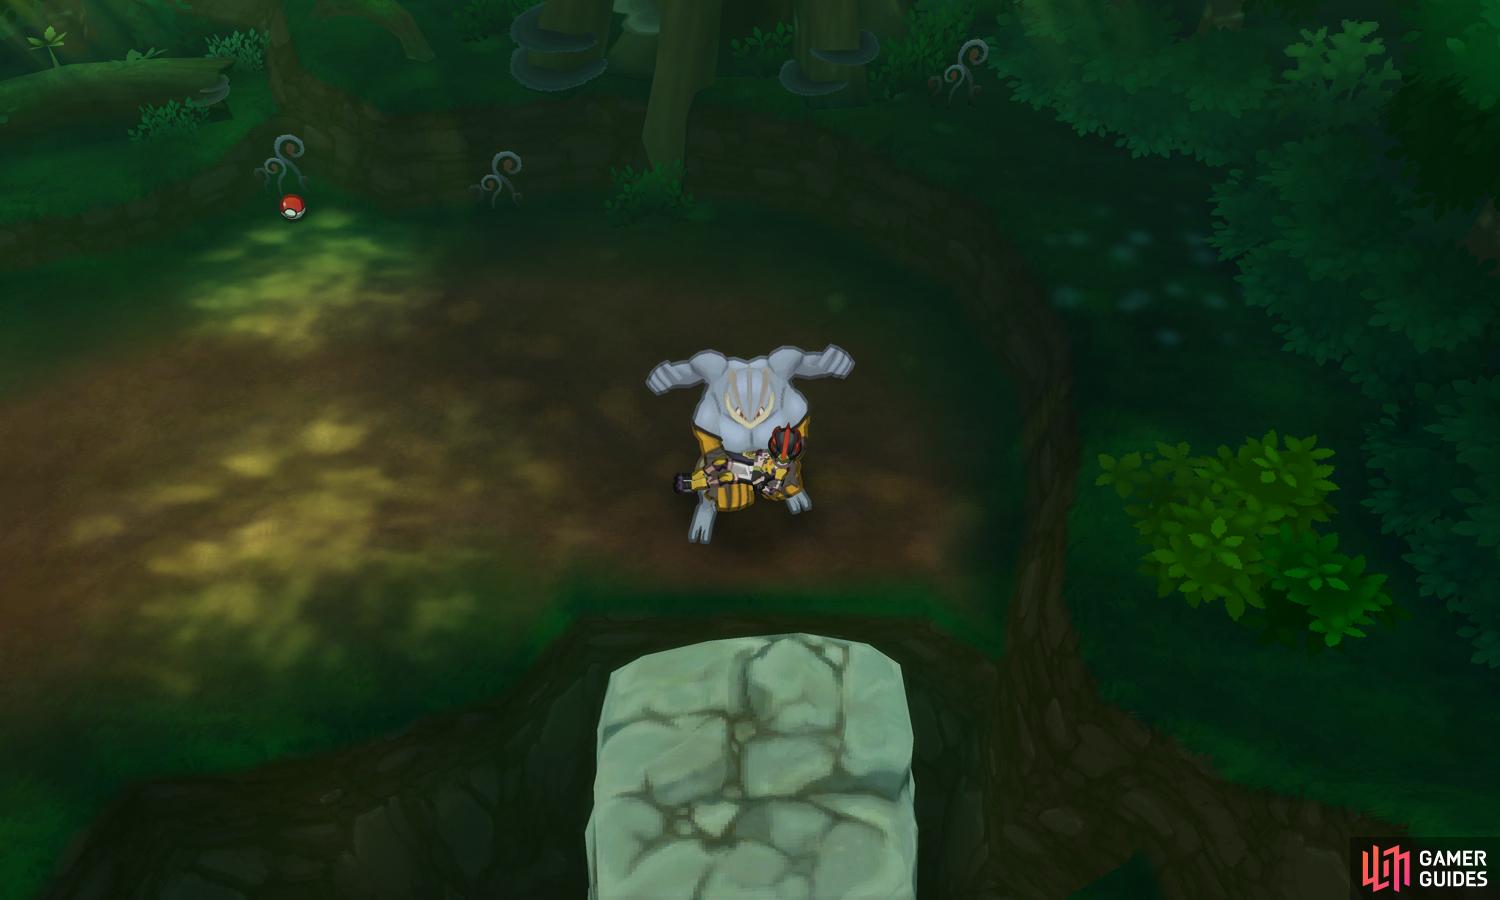
You’ll emerge in a small cavern. Carry on east, where you’ll come across another giant block. Push this block east, until it’s directly below a gap in the floor, but no further than that. Once it’s in position, face the block from its south and push it north into the gap. While you’re here, grab the Hyper Potion on the floor just below
(1 of 2) It feels good finding secret vantage points.
It feels good finding secret vantage points. (left), (right)
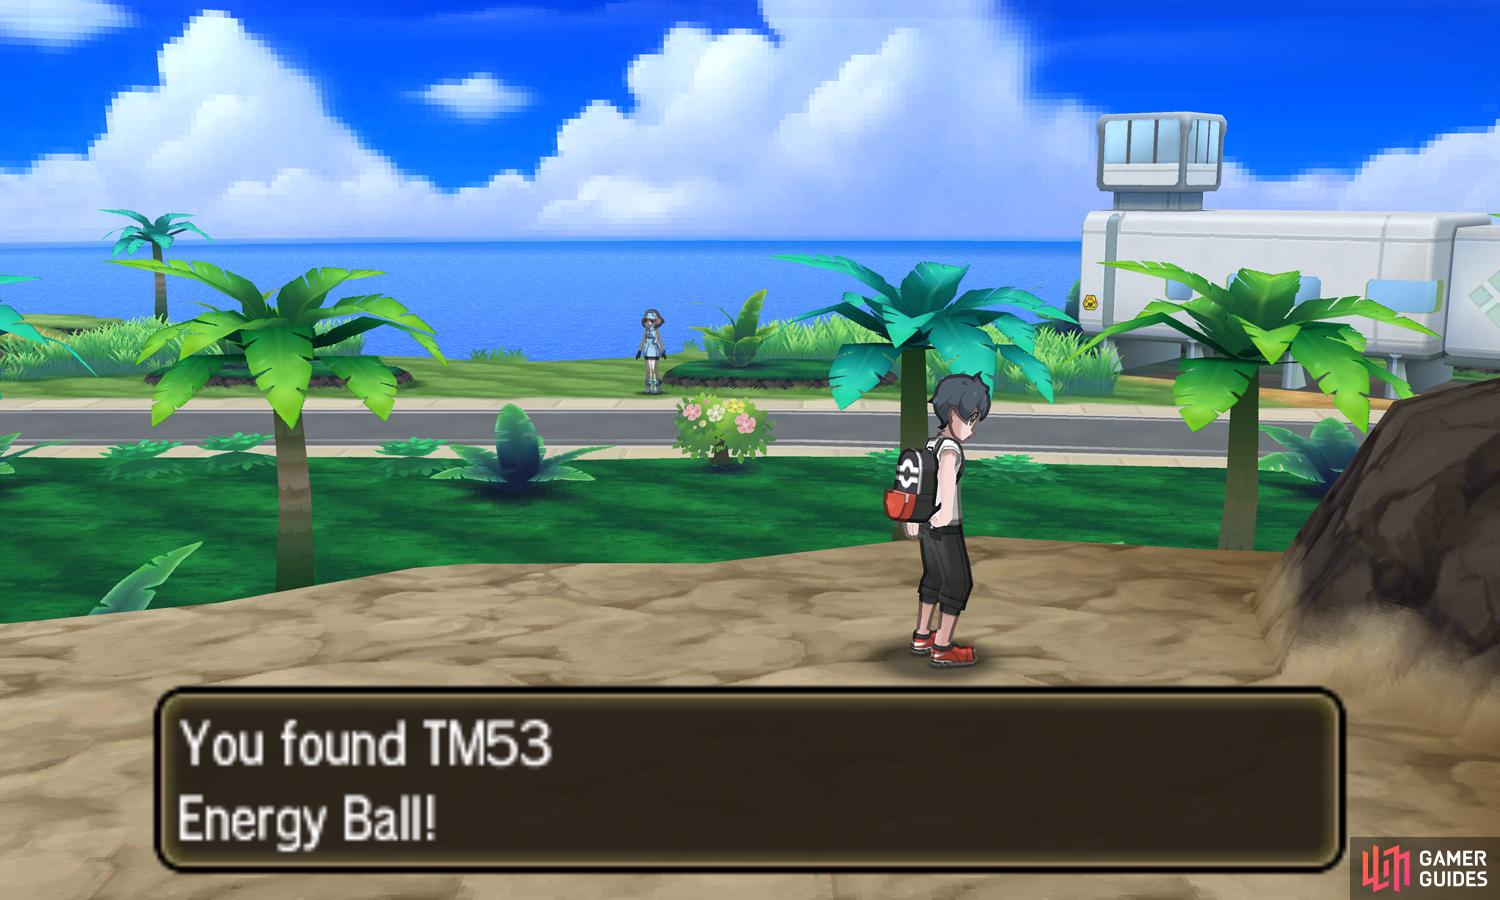
Afterwards, search the rocks to the right for a hidden Rare Candy. Finally, exit via the north. You’ll arrive on a ledge overlooking Route 8. In the top-right corner, pick up the reward for your curiosity: TM53 Energy Ball.
Diglett’s Tunnel
Head to the westernmost part of Diglett’s Tunnel, preferably from the Route 9 side. You’ll need to squeeze through a narrow path towards the south-west, then run past a burrowing Pokémon moving in a circle. At the end of this path, there’s a giant block to the left. Make Machamp push it west, into the nearby gap.
Beyond is an exit that leads to the other half of Konikoni City’s northern cape. Here, go west and up the nearby slope. Search the outcrop to the right of the slope to find a hidden Big Pearl. Next, approach the lighthouse and grab TM61 Will-O-Wisp near it, as well as Totem Sticker #050 stuck to its side.
That’s all the work Machamp can do right now. Unfortunately, the path ahead is closed, so you can’t reach the rest of Konikoni City from here. When it’s time to leave, call Charizard and have it carry you back to a safe place.

 Sign up
No Comments