
Suggested Level: 21
The Deliverer
When you’re done running about Memphis, enter the Temple of Ptah to witness an interaction between Pasherenptah and his wife, Taimhotep. All is definitely not well in Memphis, with Pasherenptah blaming The Lizard for the vile pestilence that affects the city… including Pasherenptah and his wife, very, very personally. Even the gods aren’t spared this malaise, as the Apis Bull itself suffers from some afflication. So dire is the situation that Bayek immediately promises to get to the bottom of things.
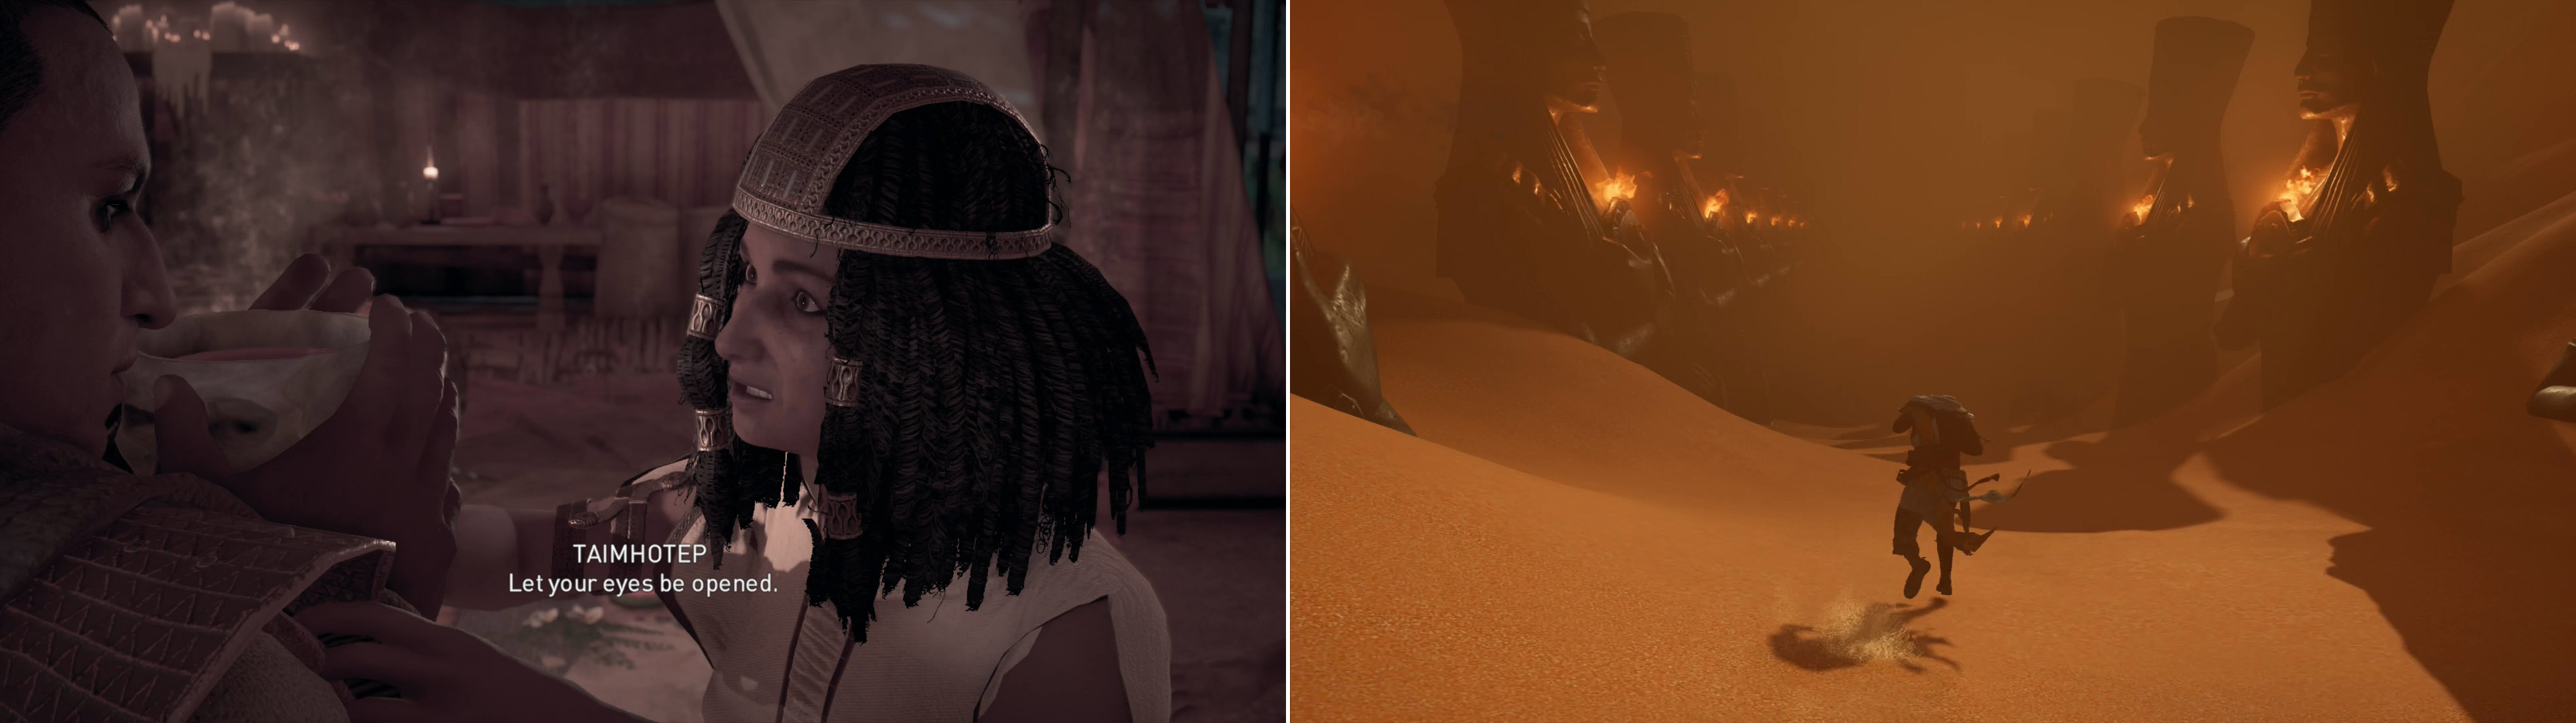
When you arrive at the seer’s house, Taimhotep will force Bayek to drink some decoction (left). Make your way through the sands of the dreamscape and into a foreboding shrine (right).
First stop, you need to see this seer that Pasherenptah recommended - the same seer his wife, Taimhotep is currently visiting. Make your way to the seer’s humble abode on the southwestern edge of Memphis and intrude on the ritual, at which Bayek will get sucked into the foolishness and end up having to assist. Move a cauldron onto a fire in the center of the room and Bayek will again find himself drinking something he shouldn’t be drinking. Given the effect the decoction has on Bayek, is it any wonder that Taimhotep has had so many miscarriages?
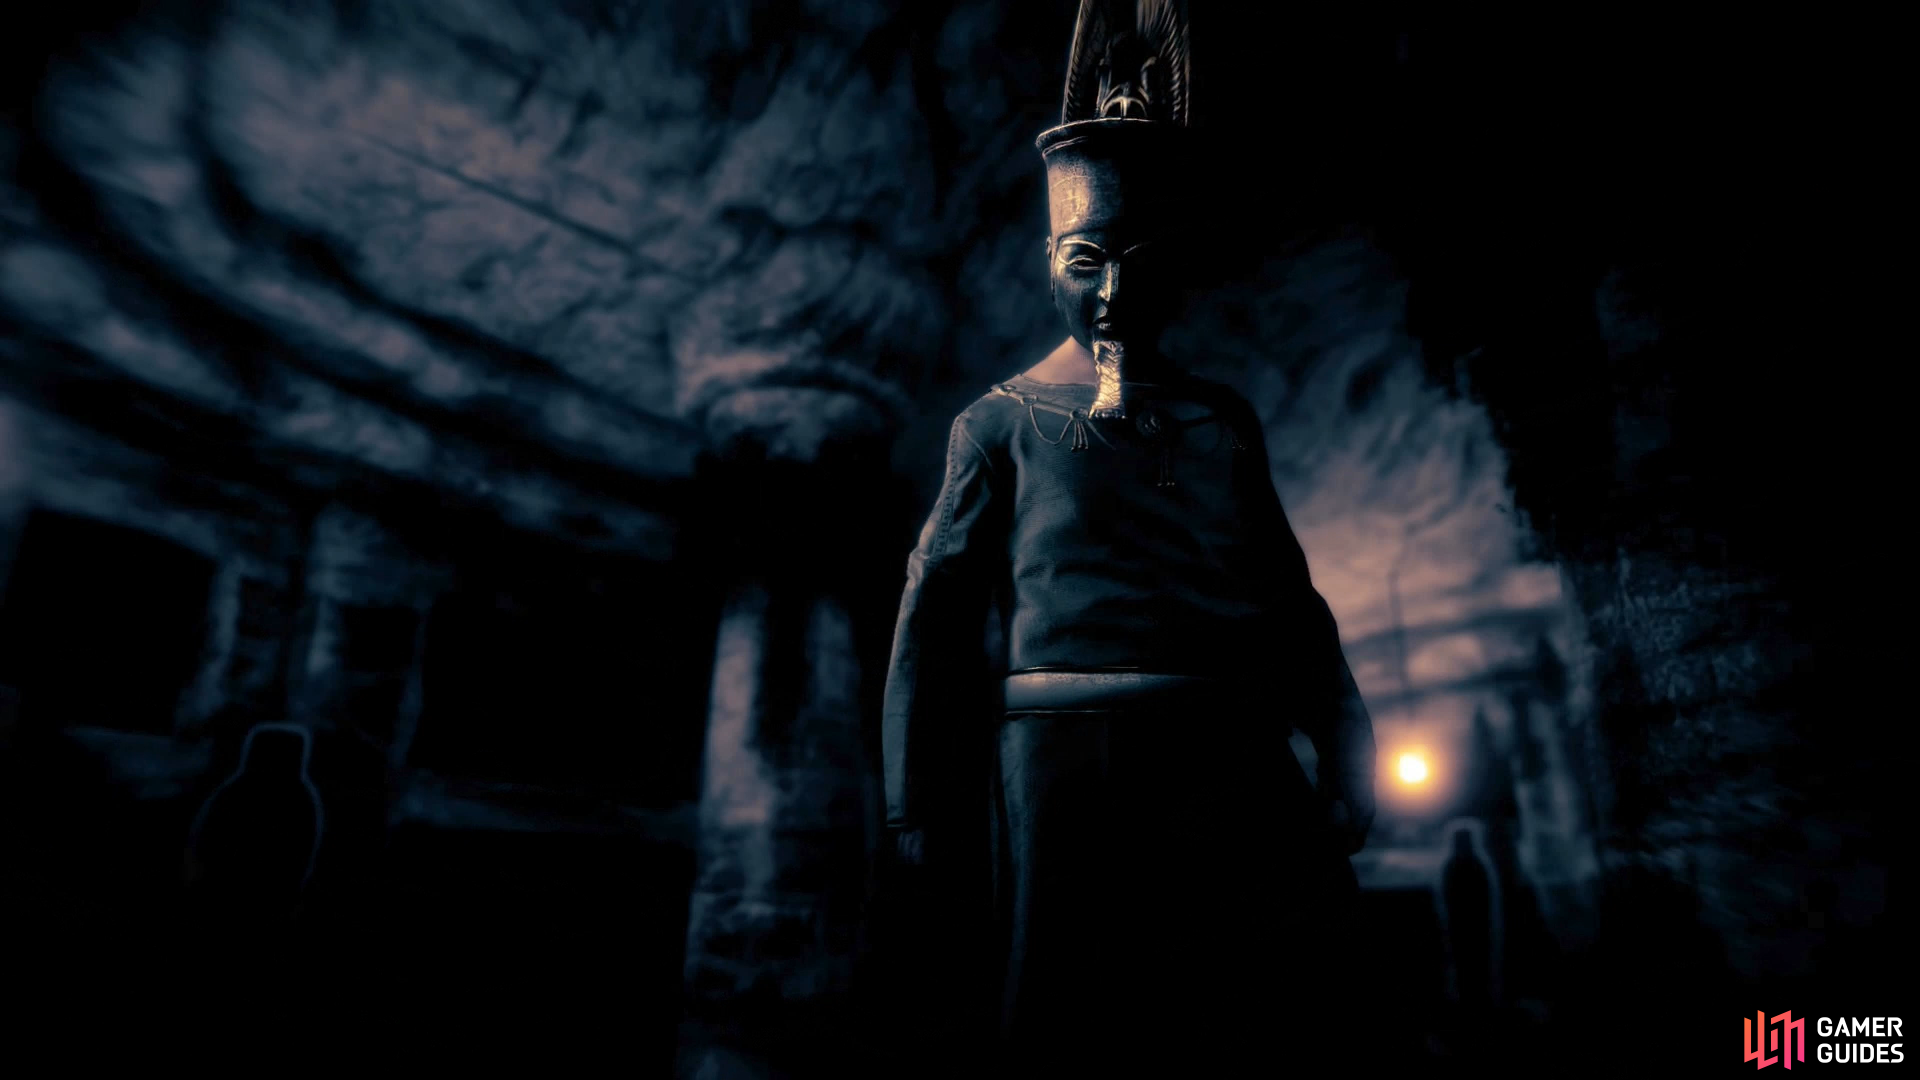
When Bayek awakens, he’ll find himself in a desert dreamscape. Look for some braziers in the distance, glowing against the efforts of the sand storm around you to obscure them. Head past the effigies of the seer and Taimhotep and head towards the braziers, which, when you approach you’ll see are held by rows of statues. Follow the path between the statues and descend into a tomb, escaping the sand storm in the process. Head down some stairs, pass through a massive chamber, and enter a doorway at the end to reach another chamber, in which you’ll find an over-sized scale.
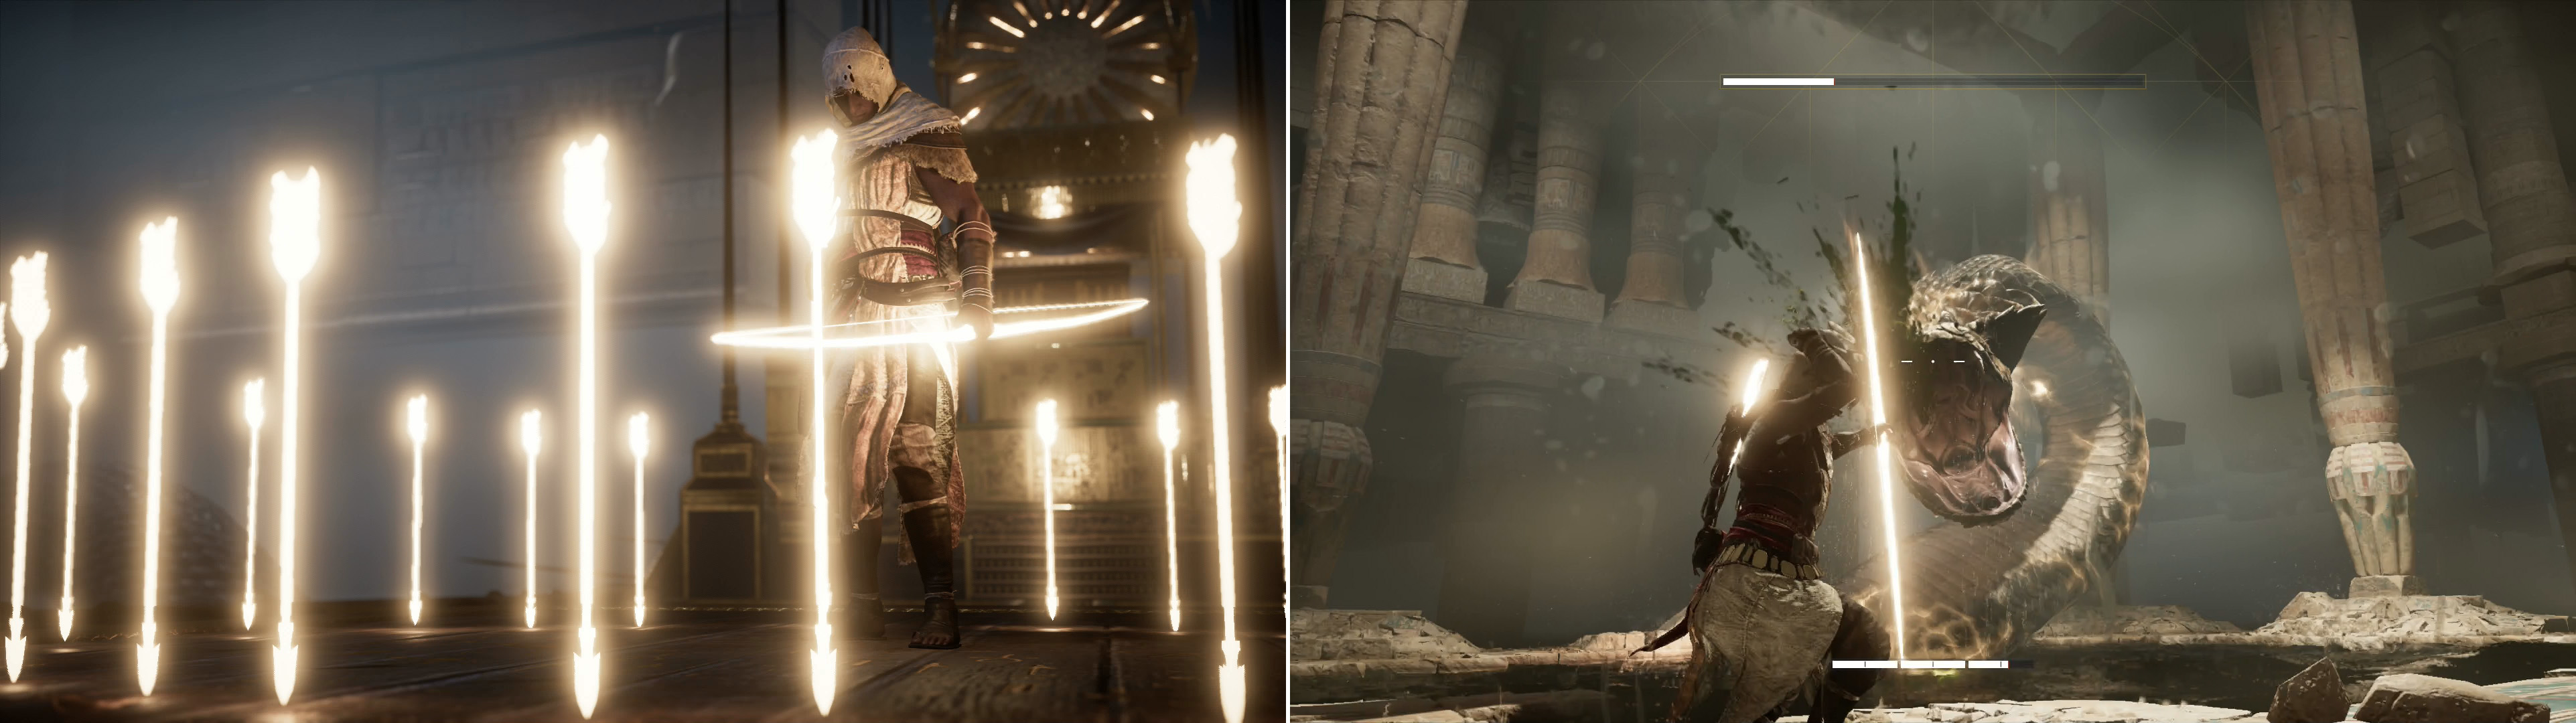
You’ll be armed with weapons of light (left), which you must use to put down the great serpent that attacks you (right).
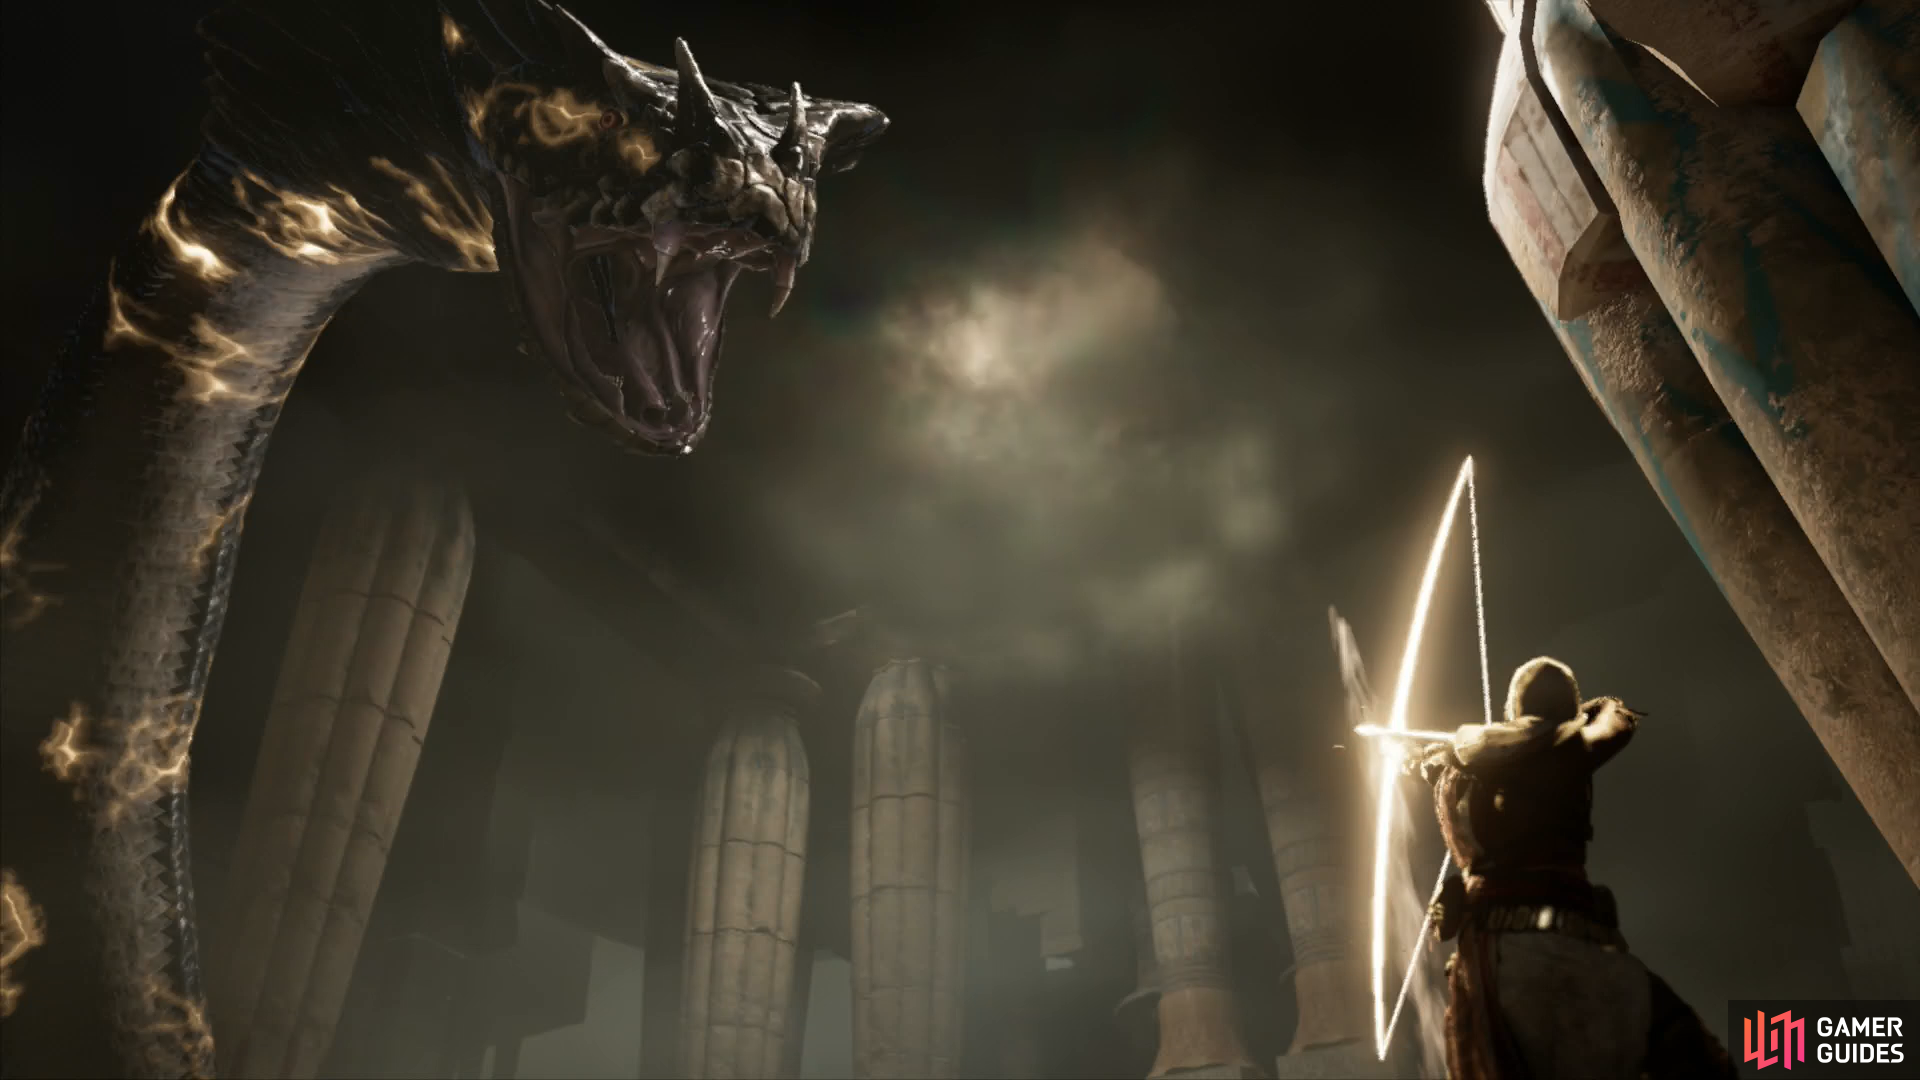
Watch the scene that follows, after which Bayek will find himself armed with a bow of light, complete with a quiver full of radiant arrows. Your goal here is to defeat the giant serpent that will attack you while you ride the barge. Keep an eye out for the glowing enemy indicator to know where the serpent is, as it will usually coil around the pillars on either side of the barge - perches from which it’ll spit poison at you. Sometimes it’ll switch sides, swimming under the boat, and after several poison attacks it’ll lunge across the top of the barge, dealing heavy damage if it hits. It’ll perform this lunge twice in a row before reverting to spitting poison and you’ll recover your health after the cycles. The bow you’re equipped with is your only means of defense, and while it functions as a normal Hunter Bow, don’t bother drawing it and don’t worry about precise aim. The bow arguably works better if you just rapidly fire it while strafing back and forth.
Once the snake is down to half its health, after some scenes you’ll find yourself on more stable ground. The serpent’s attacks are largely the same, save after a few bouts of spitting poison it’ll lunge at you, destroying the ground where it hits. If you find yourself in the liquid around the ruins you’re fighting on, get out quickly, as you only have a few seconds of time to escape before dying. Otherwise, the fight can be handled much like the first phase; strafe while rapidly firing your bow, without much care for drawing or aiming.
Afterwards you’ll find yourself in the water. Swim through the lily-infested endless lake you’re on to reach a stone sarcophagus, after which you’ll be treated to a scene. When you’re in a wheat field, just run towards the sun to trigger another scene.


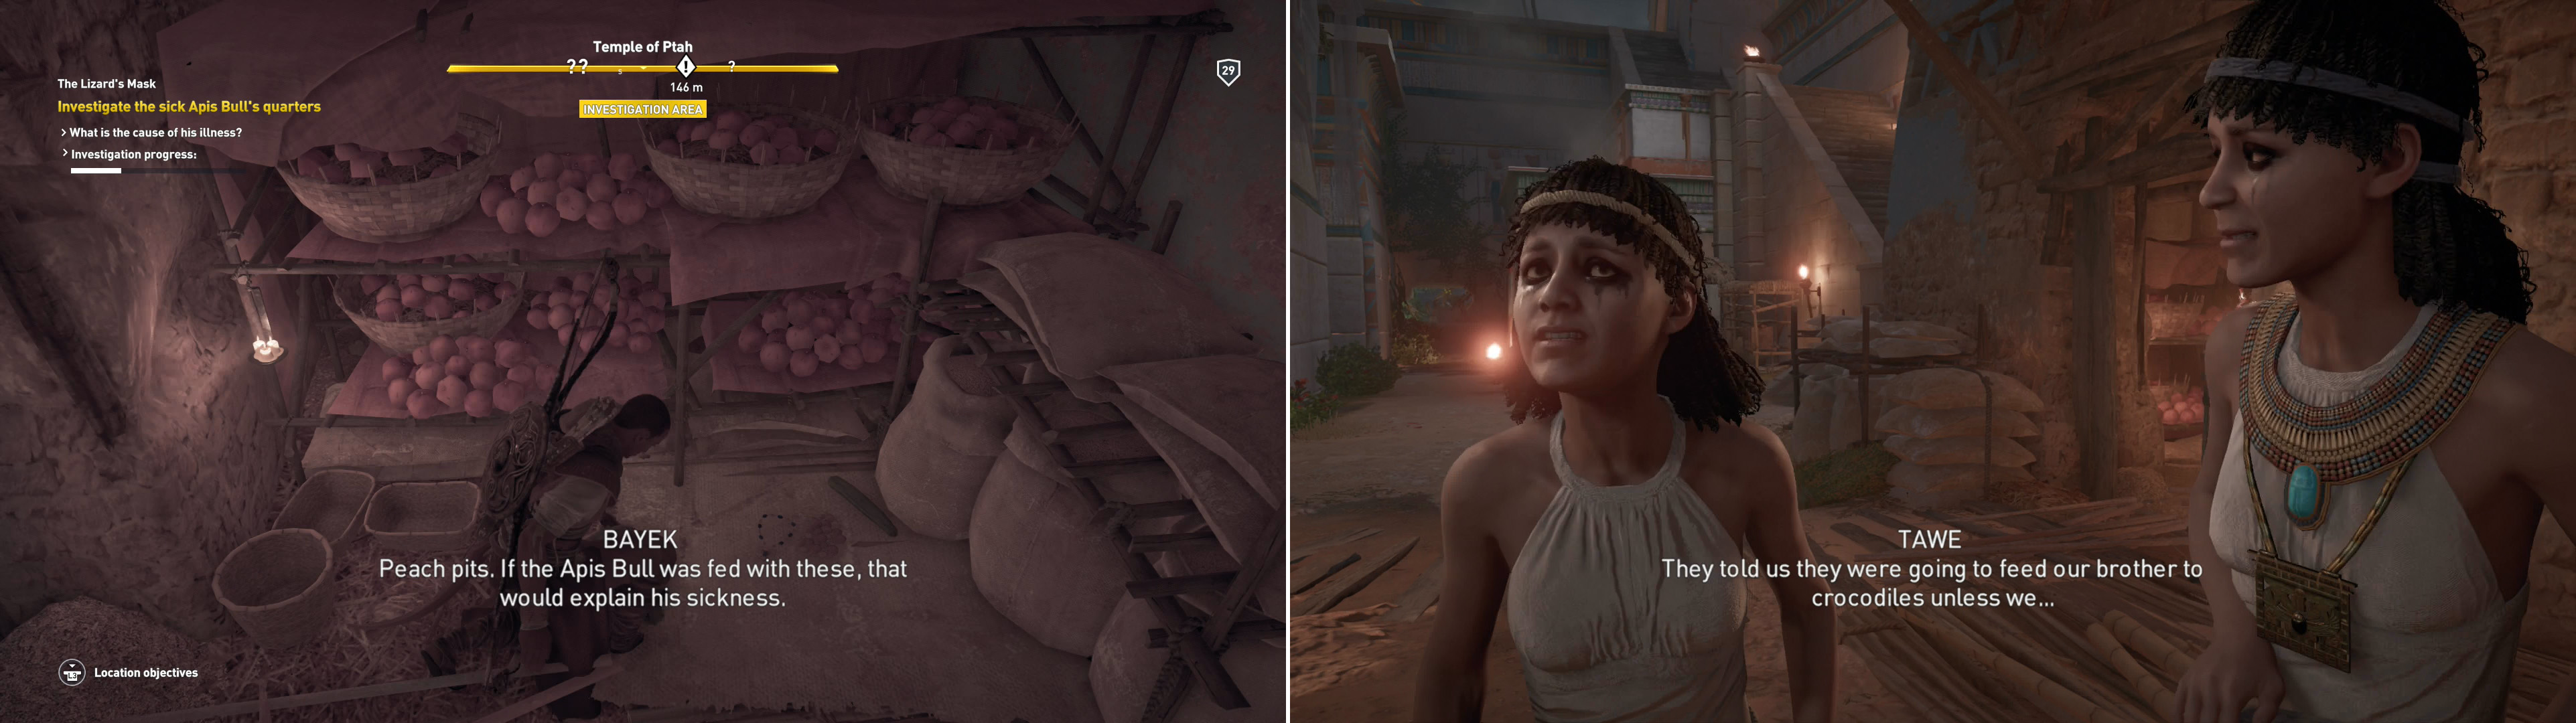
Search the store room to find the cause of the Apis Bull’s sickness (left) then confront the priestesses responsible (right).
The Pit of the Problem
Finally, the dream will end and Bayek and Taimhotep will be informed of the identity of the poisoner, and encouraged to get rid of them. leave the house and Bayek and Aya will reunite, talking politics as they head to the Temple of Ptah. Hop in the nearby boat and sail up the canal to reach the docking at the western end of the Temple of Ptah, then disembark and follow Aya to the Apis Bull’s enclosure, where she’ll leave you with the shitty work… literally!
Okay, not really. You can entirely ignore the bull and focus on what’s going into the beast, instead of worrying about anything come out of it. Use your Animus Pulse and talk to a nearby man, examine some hay near a shed to the west, then smash your way into the shed and examine some peach pits and necklace on the floor. Leave the shed and find Aya to the north talking to the two priestesses, who will cough up their secrets, blaming their bad behavior on the usual forces of coersion; bandits, captive, etc.
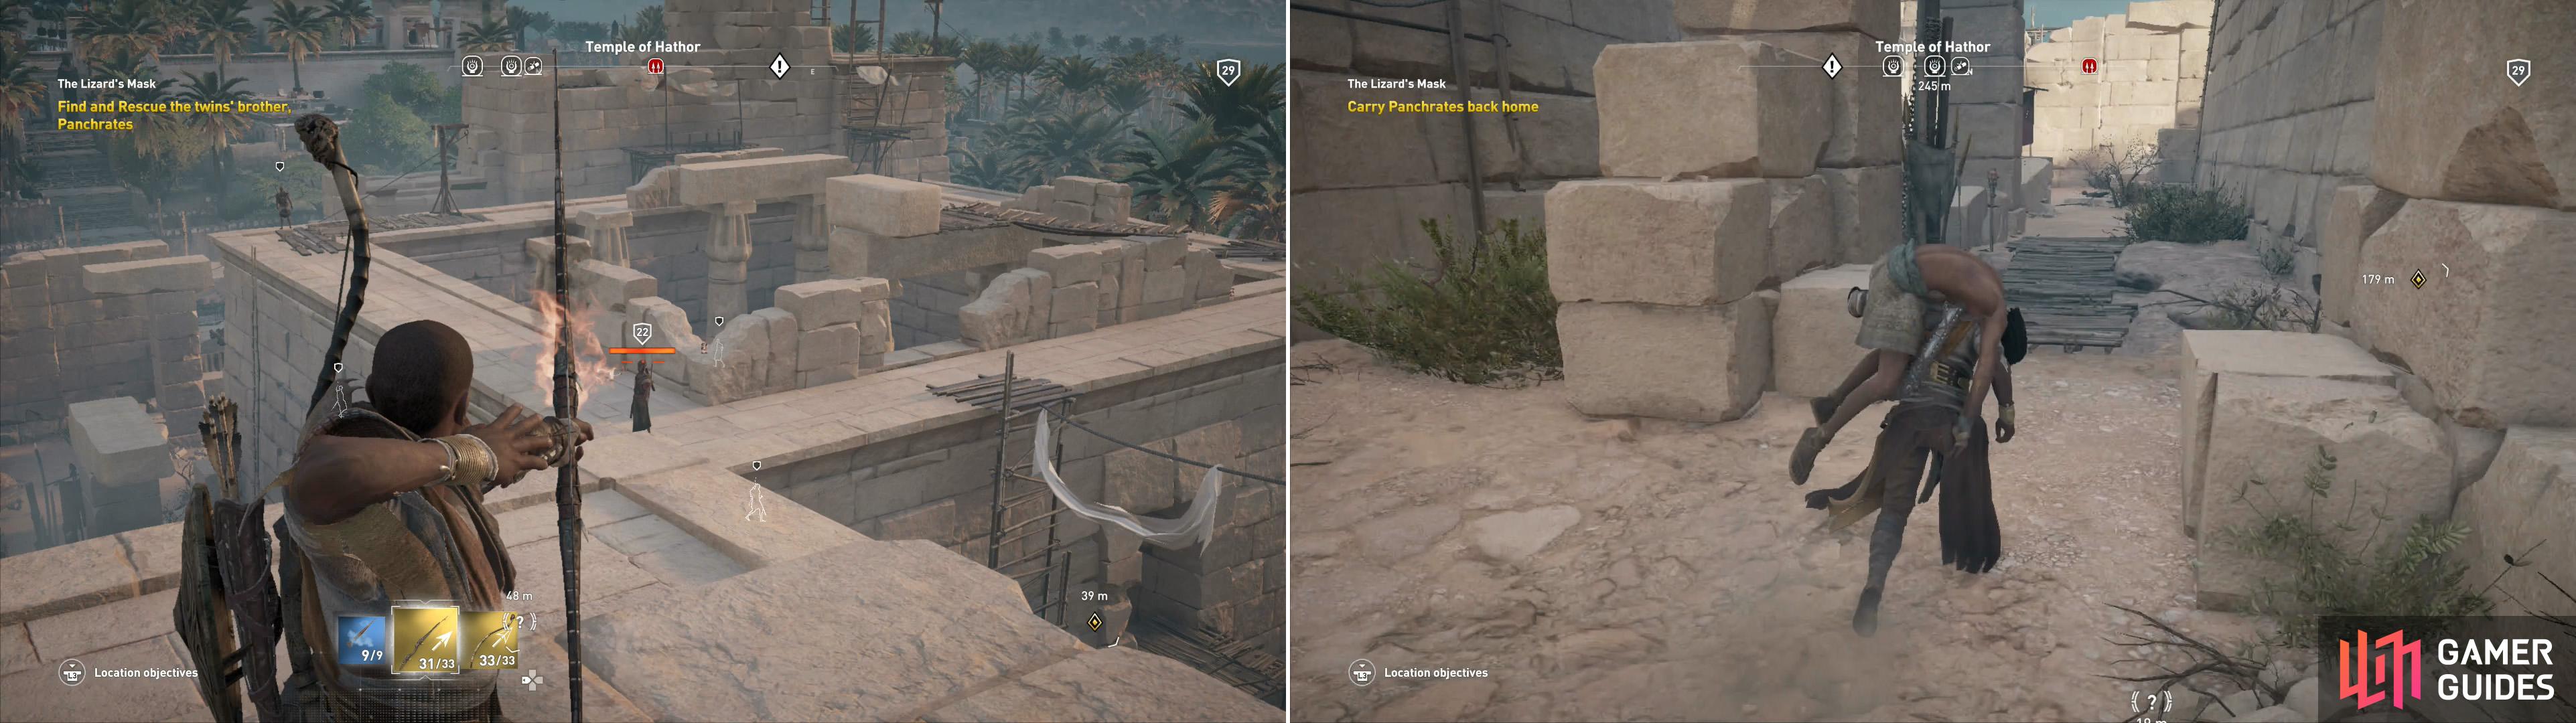
Pick off the bandits at the Temple of Hathor (left), then rescue Panchrates (right).
Temple of Hathor
Looks like you have no choice but to rescue Panchartes, the brother of the traitorous priestesses. On the plus side, if the Order of Ancients really is behind all this, whomever kidnapped Panchartes may be able to give you a solid lead to The Lizard. Make your way towards the Temple of Hathor at the southern end of Memphis, which is your standard enemy camp, there’s a captain (level 22), less soldiers (levels ) a treasure that needs to be looted, and of course, Panchartes himself. Use Senu to spot them all when you get close enough.
The Temple of Hathor consists of a large exterior wall surrounding a smaller walled courtyard. The entire structure is open to the elements now, and the exterior walls are very poorly guarded. All together, this makes for a relatively simple and easy infiltration. Climb the exterior wall, pick off the guards on the interior wall with a bow, then make sure there’s nobody on the exterior wall. Once done, you just need to circle the temple’s exterior wall and shoot down the guards on the ground below. When you’re done killing, search the southern end of the temple grounds to find a large red chest, which you can loot to finish this point of interest.
| Reward: For completing the Temple of Hathor |
|---|
| 400 XP |
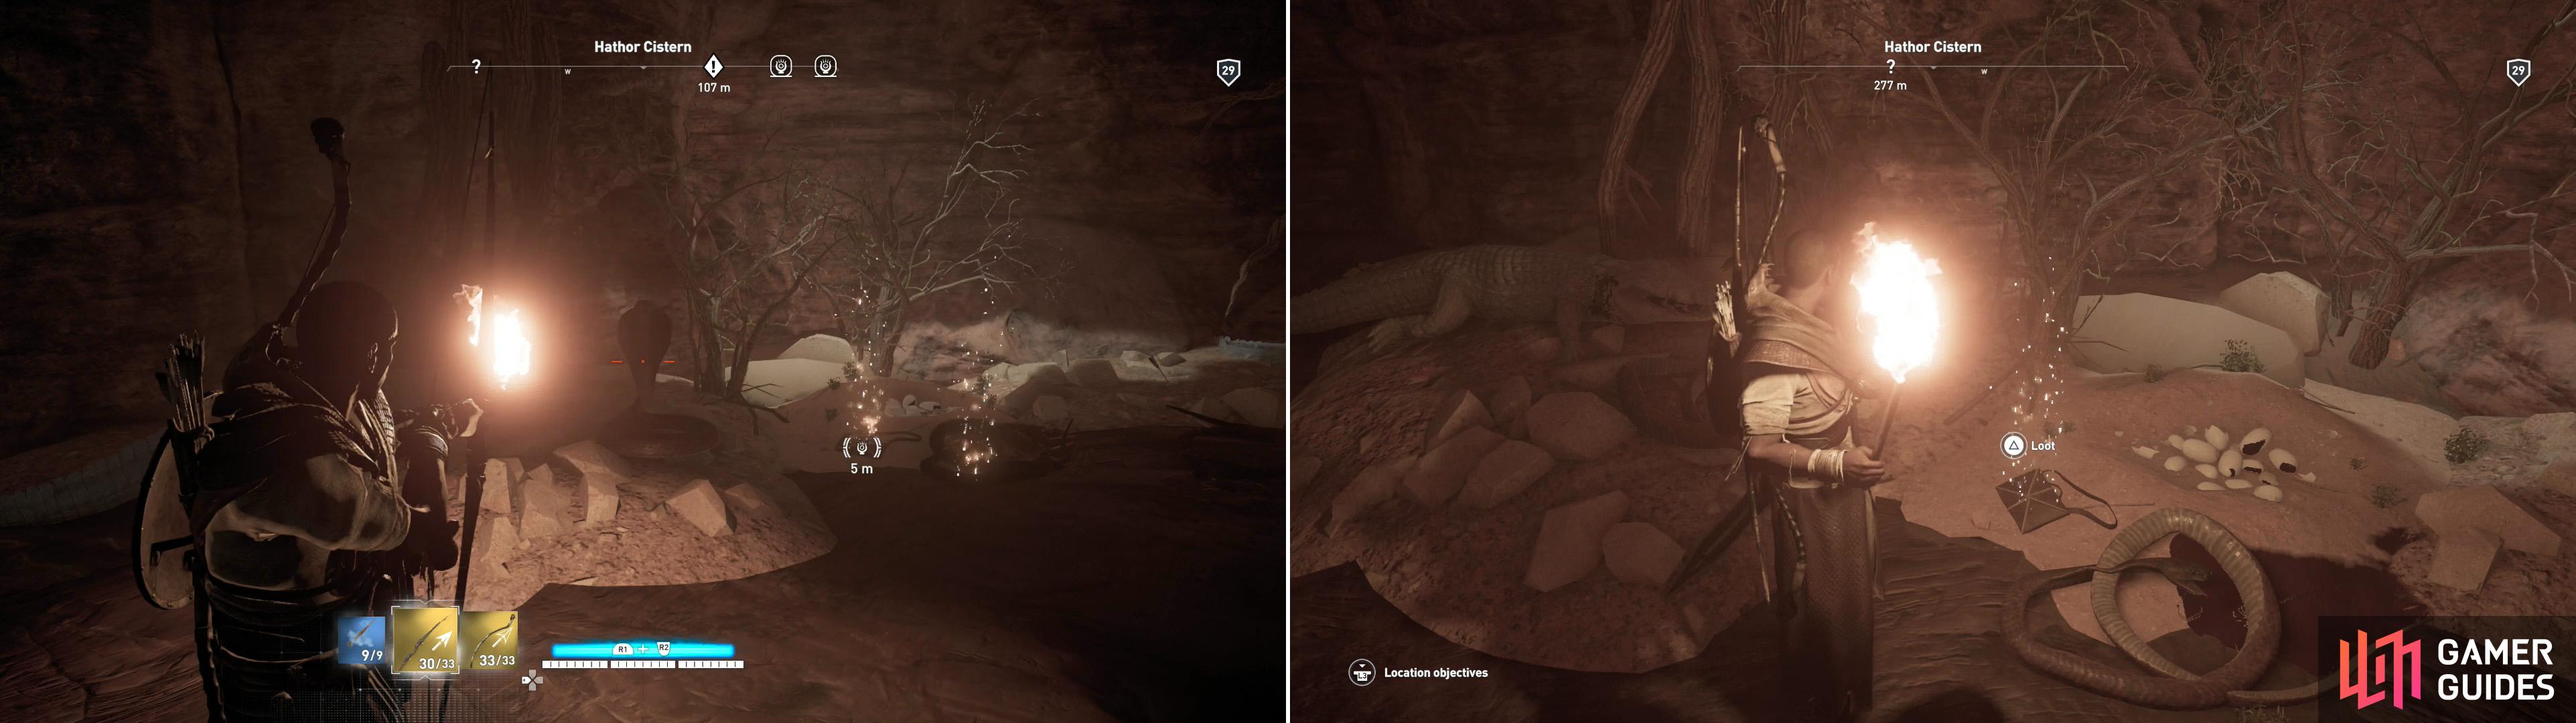
Cobras (left) guard the treasure in the Hathor Cistern (right).
Hathor Cistern
There’s another point of interest nearby, the Hathor Cistern, which you may as well complete while you’re here. Don’t worry, Panchartes isn’t going anywhere. On the ground between the exterior and interior walls of the Temple of Hathor you should note at least three pits descending deeper into the earth. All three of them are safe to descend, and all three of them will lead you to the Hathor Cistern area. Inside you may find a few more soldiers you need to dispatch, but otherwise there’s little to do but seek out the treasures you’ll need to loot to satisfy the location objectives.
The center of this subterranean point of interest consists of two interlocking water ways. Depending on which pit you dropped down, you could have dropped into some caves to the northeast of this watery intersection, into a pool of water to the west of it, or indeed, right into the midst of this intersection. Whatever the case may be, your goal should be the aforementioned pool to the west, so swim down the channel that way, turn west and climb up onto a ledge to find the first treasure, a red chest guarded by a cobra. Look it and jump back into the water to the north, then dive underwater and search for a submerged passage to the northwest. Swim through this tunnel until it ends, surface, then turn south to find dry land, but be wary - another three cobras rest on this ledge, guarding a satchel - the second and final treasure you need to complete this area.
| Reward: For completing the Hathor Cistern |
|---|
| 300 XP |
Now that you’re done with everything in the area, return back to the Temple of Hathor and search the grounds for Panchartes, who, naturally, you’ll have to carry to safety. You’ll find him near the large red chest along the southern end of the temple ground, and unlike many “victims”, he won’t instantly recover once he’s out of the fort - you’ll need to carry him all the way home. If you killed all the guards in the area, this shouldn’t be too much trouble and when you arrive Panchartes will tell you what you need to know. Now that you have enough information to identify The Lizard, Aya will join Bayek so they might rid Memphis of this menace for good.
| Reward: For completing the quest “The Lizard’s Mask” |
|---|
| 2,700 XP |
No Comments