
There are 24 ![]() Revelio Field Guide Pages to be found in The Great Hall of Hogwarts Castle, in Hogwarts Legacy. We’ll show you how and where to find all of them on this page.
Revelio Field Guide Pages to be found in The Great Hall of Hogwarts Castle, in Hogwarts Legacy. We’ll show you how and where to find all of them on this page.
All Revelio Field Guide Page Locations in The Great Hall of Hogwarts
You will note that not all of the phrases associated with each page here denote the precise location of where you’ll find it. Instead, they are intended to give you a quick glance at the nearest Floo Flame or general area from where you found the last page for your convenience. You’ll find detailed explanations for how to reach each page in the text for the associated subheader.
Brazier Field Guide Page - Boathouse
You’ll find this brazier which contains a Field Guide Page in the Boathouse of Hogwarts Castle, located on its eastern side as you view the castle from the world map. You can fly here on your broom, or if you’ve already discovered the Floo Flame you can fast travel to it. You’ll find the brazier inside the Boathouse and you need to cast a fire-based spell such as ![]() Incendio or
Incendio or ![]() Confringo to light it. The page will then spit out for you to collect.
Confringo to light it. The page will then spit out for you to collect.
You’ll find the brazier inside the Boathouse.
Cast a fire-based spell to light the brazier and reveal the page.
Black Lake - Boathouse
You’ll find the ![]() Black Lake Revelio Field Guide Page just outside the Boathouse, on its northern side. You need to cast Revelio to reveal the page next to the boat here.
Black Lake Revelio Field Guide Page just outside the Boathouse, on its northern side. You need to cast Revelio to reveal the page next to the boat here.
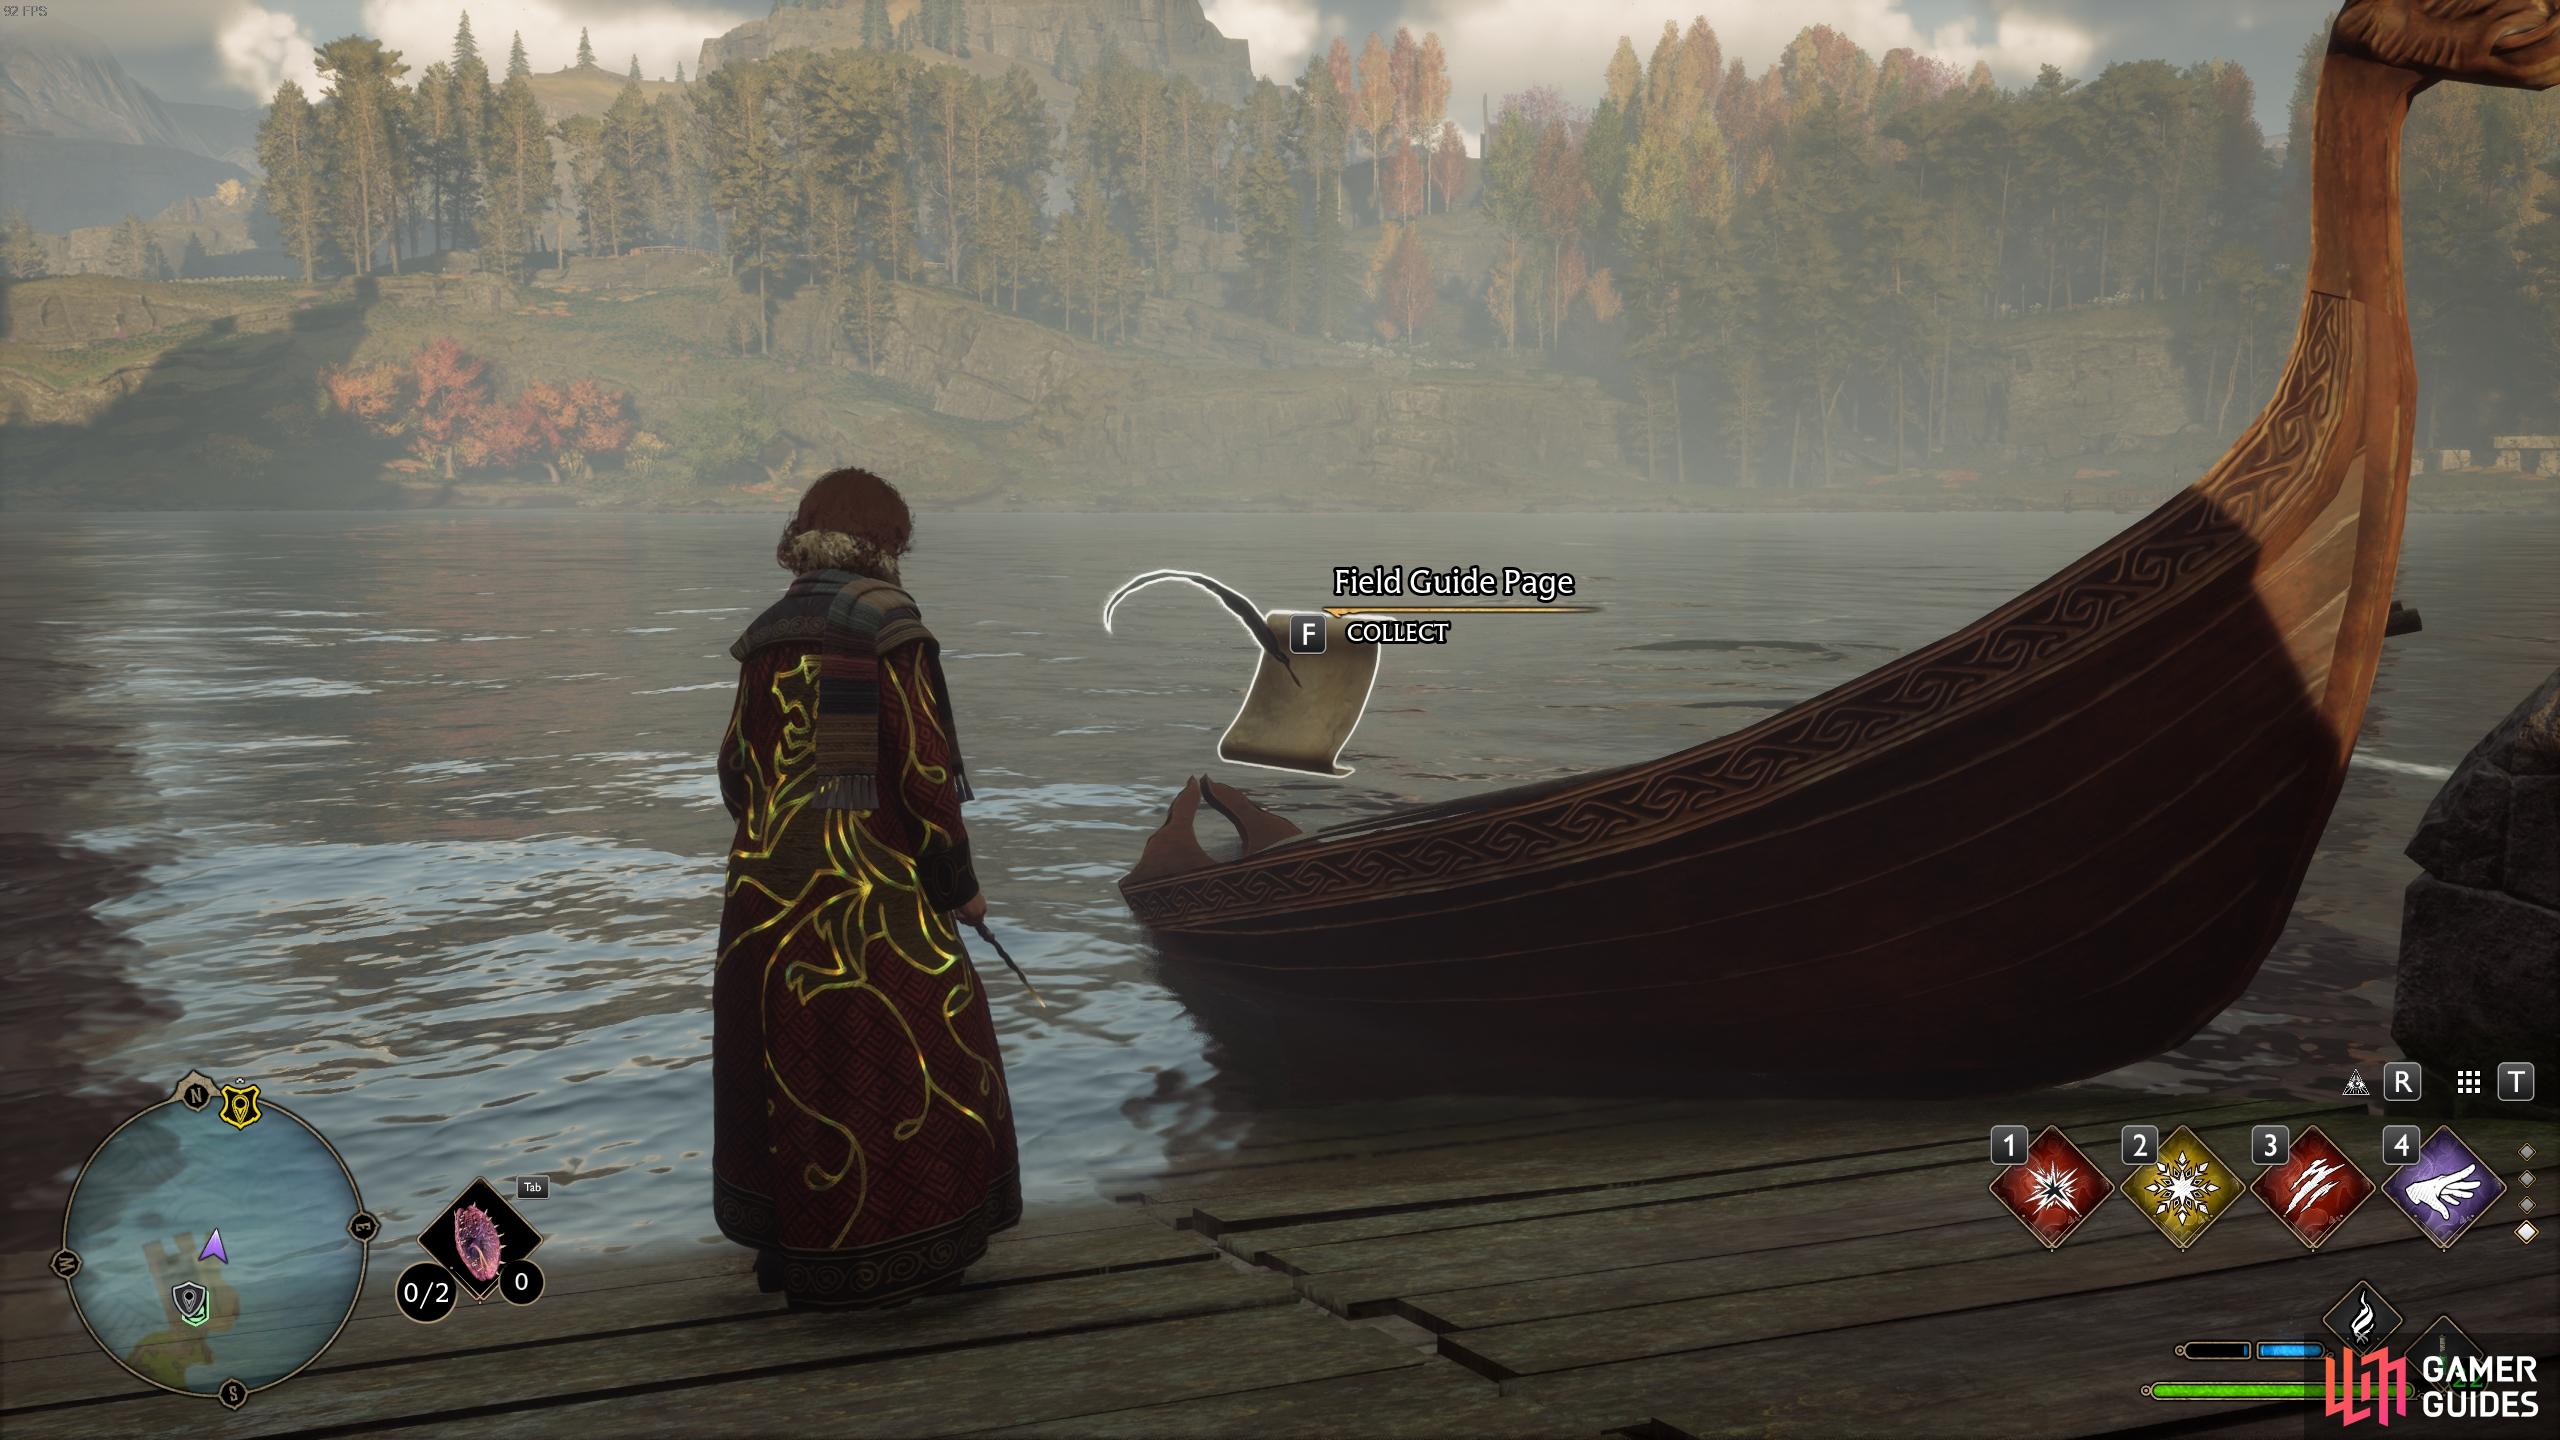
Cast Revelio to reveal the page next to the boat on the northern side of the Boathouse.

The description for the Black Lake page.
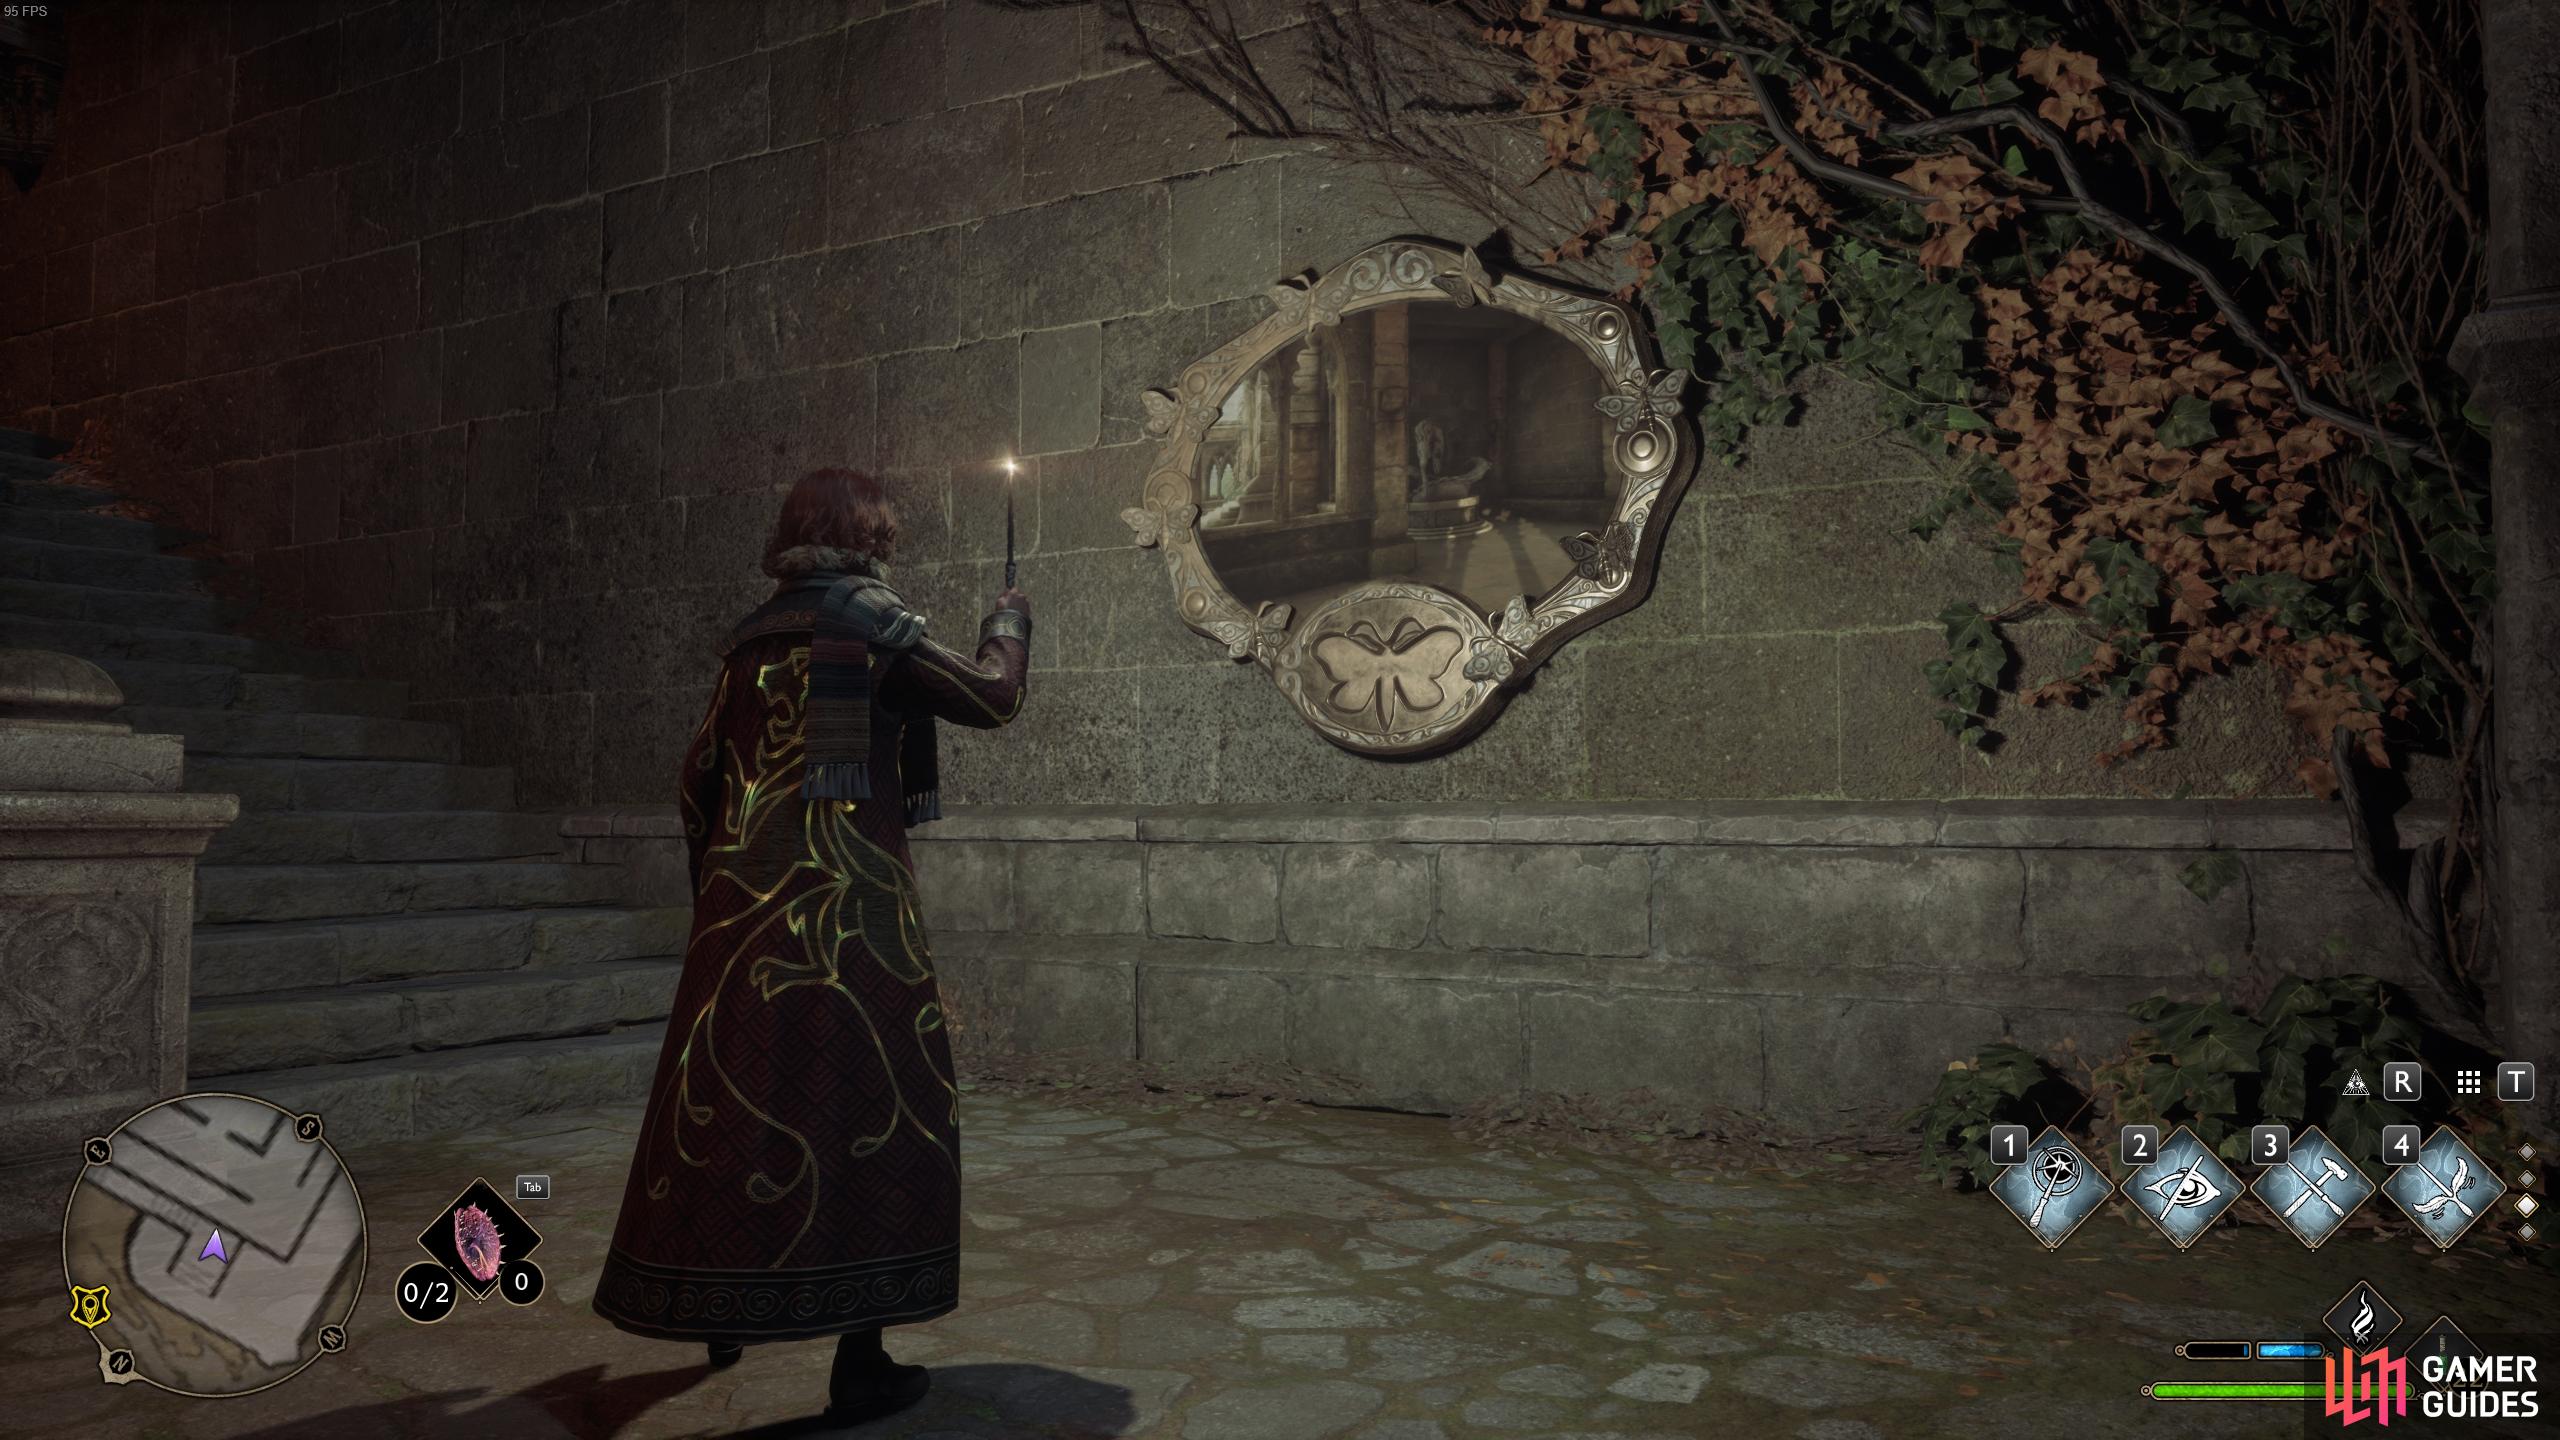
Moth Puzzle Field Guide Page - Viaduct Courtyard 1
To find this moth puzzle, fast travel to the Viaduct Courtyard Floo Flame in The Great Hall section. Go down the steps directly to your north and turn right, following the path around the fenced off tree and under the archways to your right until you reach a statue of a Werewolf. Turn right again here and up the steps to find the black mirror. Cast ![]() Lumos here to reveal the location of the moth, then make your way up the stairs to the left and turn right at the top. Follow this balcony path west and turn left at the first opening, continuing directly south down the steps and up a set of another, before turning left at the end. You’ll find the moth on the wall to the right of the statue here. All you need to do now is take the moth back to the mirror, then decast Lumos to place it and reveal the page.
Lumos here to reveal the location of the moth, then make your way up the stairs to the left and turn right at the top. Follow this balcony path west and turn left at the first opening, continuing directly south down the steps and up a set of another, before turning left at the end. You’ll find the moth on the wall to the right of the statue here. All you need to do now is take the moth back to the mirror, then decast Lumos to place it and reveal the page.
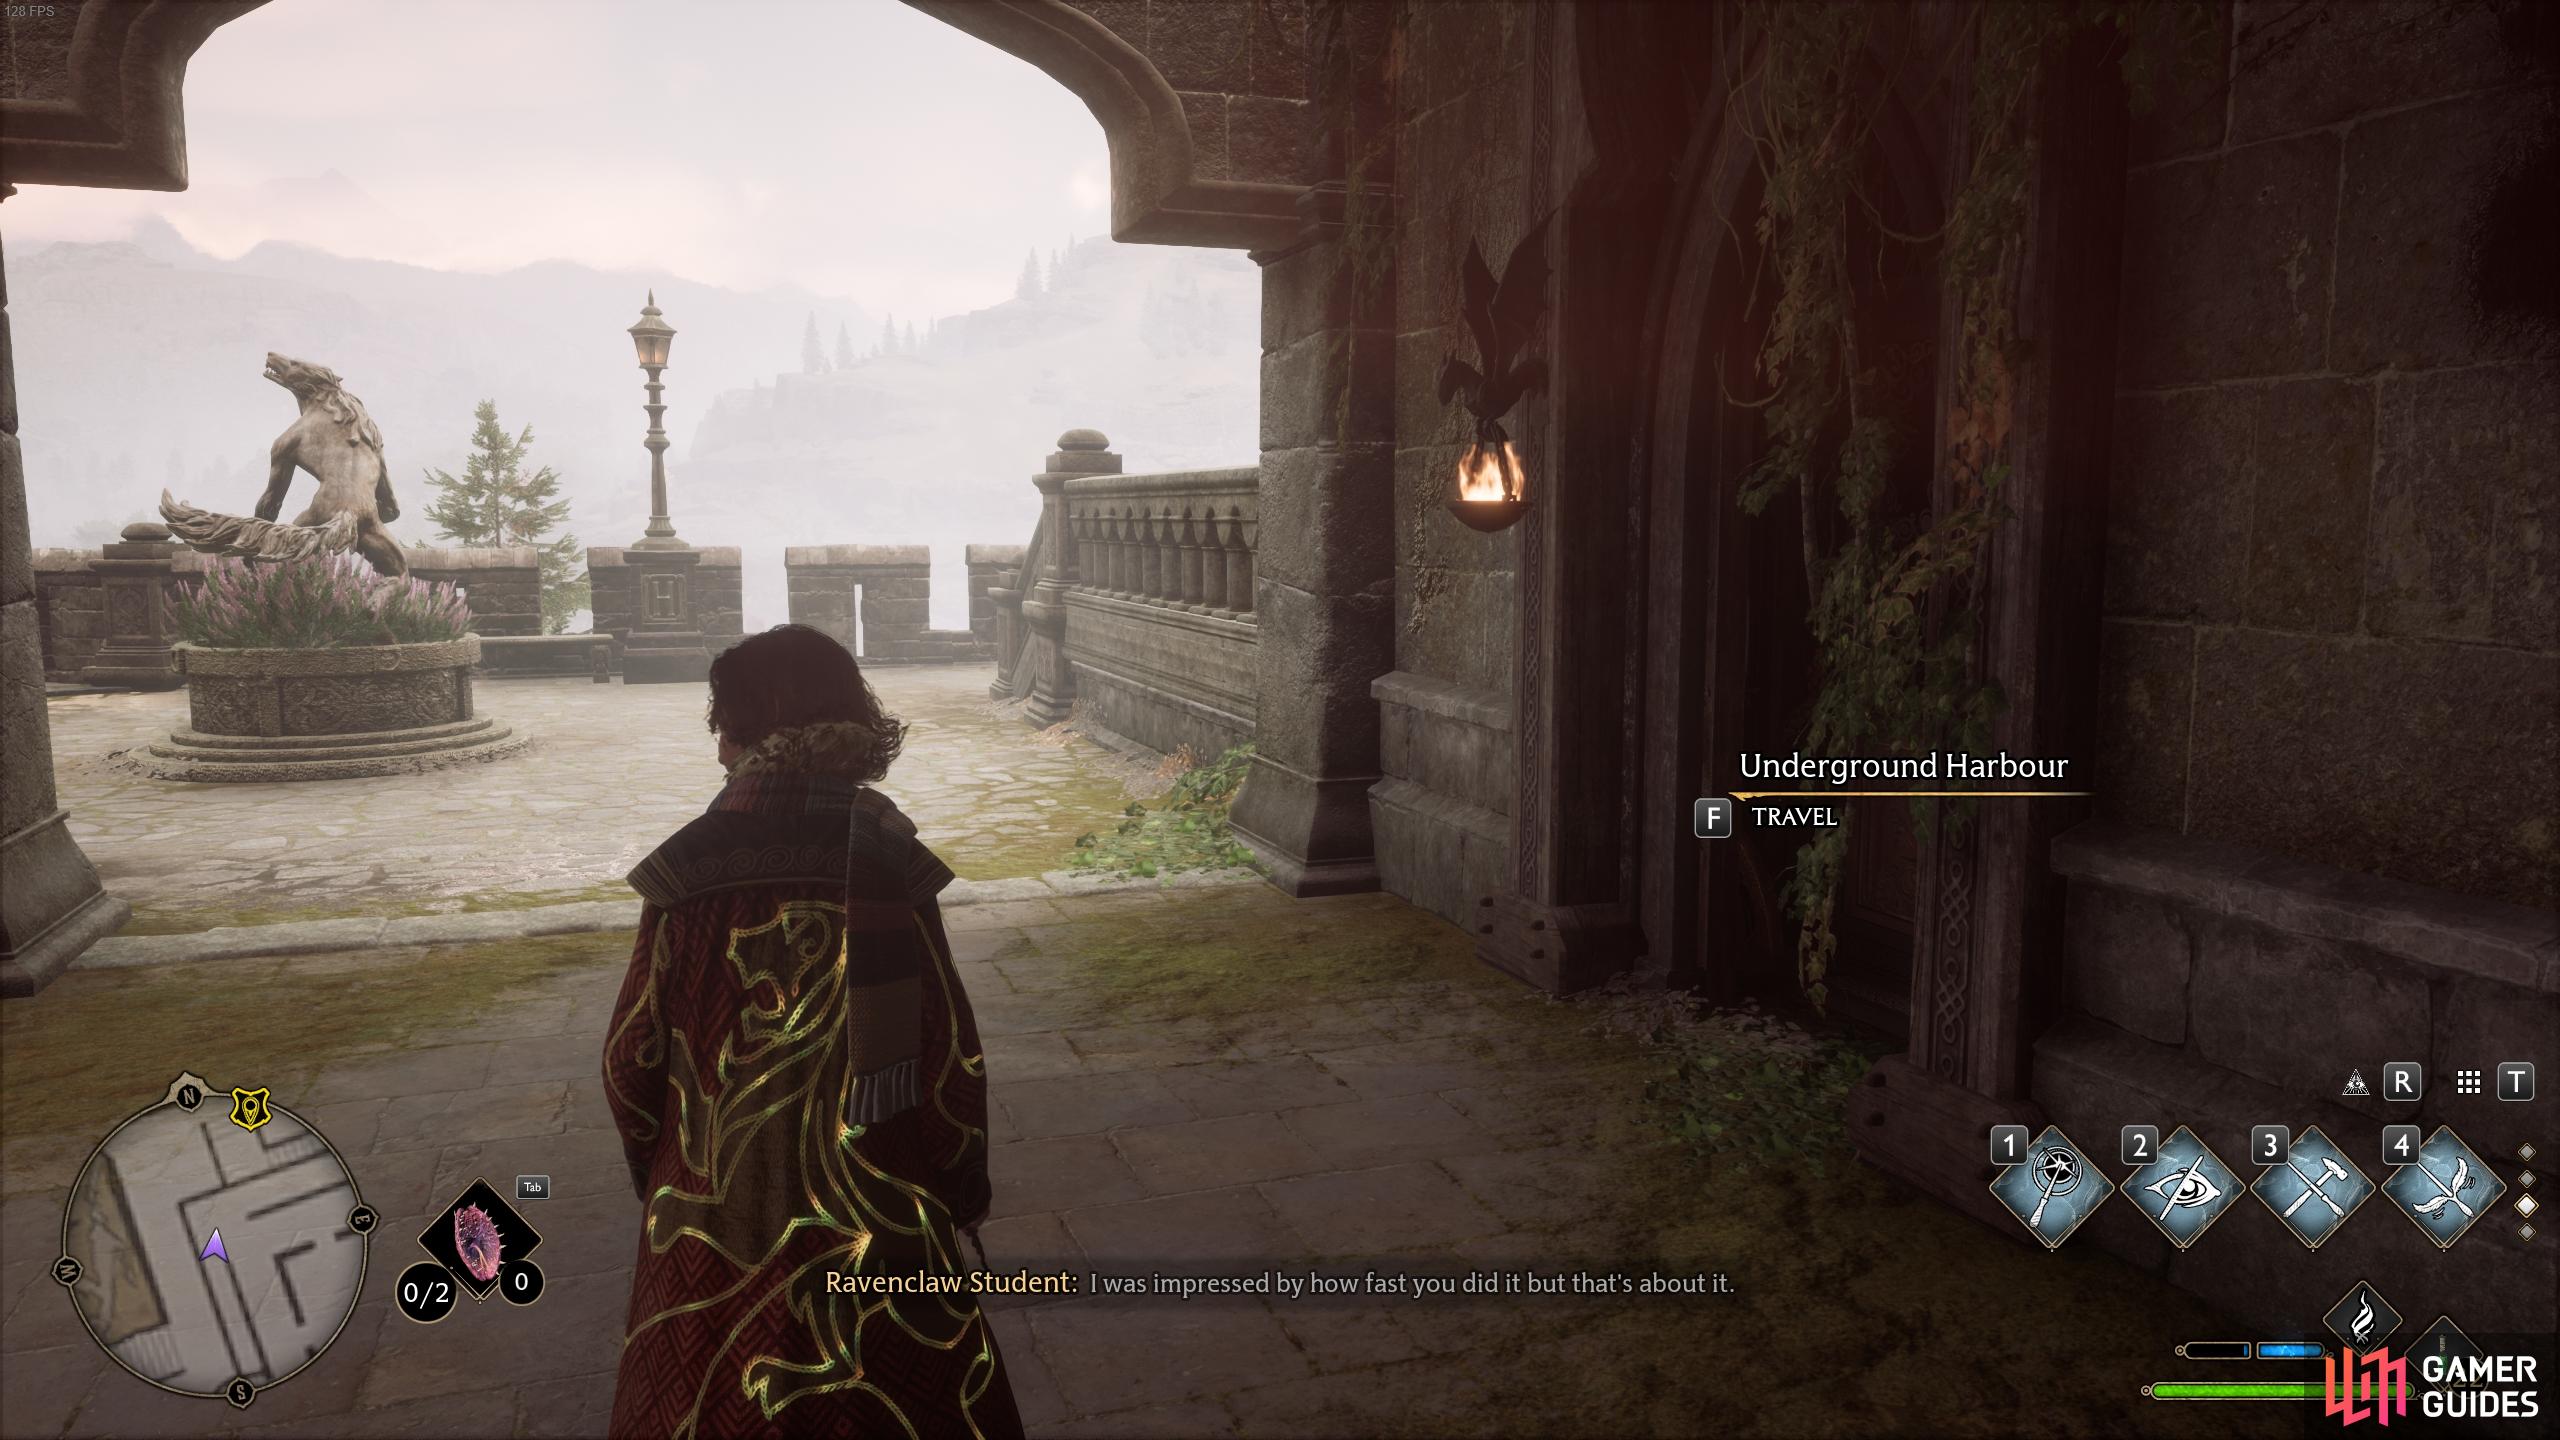
Underground Harbour - Viaduct Courtyard
Starting again from the Viaduct Courtyard Floo Flame, follow the same path you did to reach the moth puzzle above, but look to your right just before you reach the Werewolf statue. You’ll see a door here for the ![]() Underground Harbour. Go through it and take the lift down. Once at the bottom, go to the right side and cast Revelio at the end of the harbour to reveal the page.
Underground Harbour. Go through it and take the lift down. Once at the bottom, go to the right side and cast Revelio at the end of the harbour to reveal the page.
Statue Field Guide Page - Viaduct Courtyard
For this next one, we’ll be starting at the Viaduct Courtyard Floo Flame again. This time, take the stairs up immediately to your right and continue northeast through the courtyard until you reach the eastern cloister. Turn south from here and just before you leave the cloister, look to your right to find a statue next to the wall painting of a phoenix. You need to use ![]() Levioso to extract the page from this statue as it disappears.
Levioso to extract the page from this statue as it disappears.
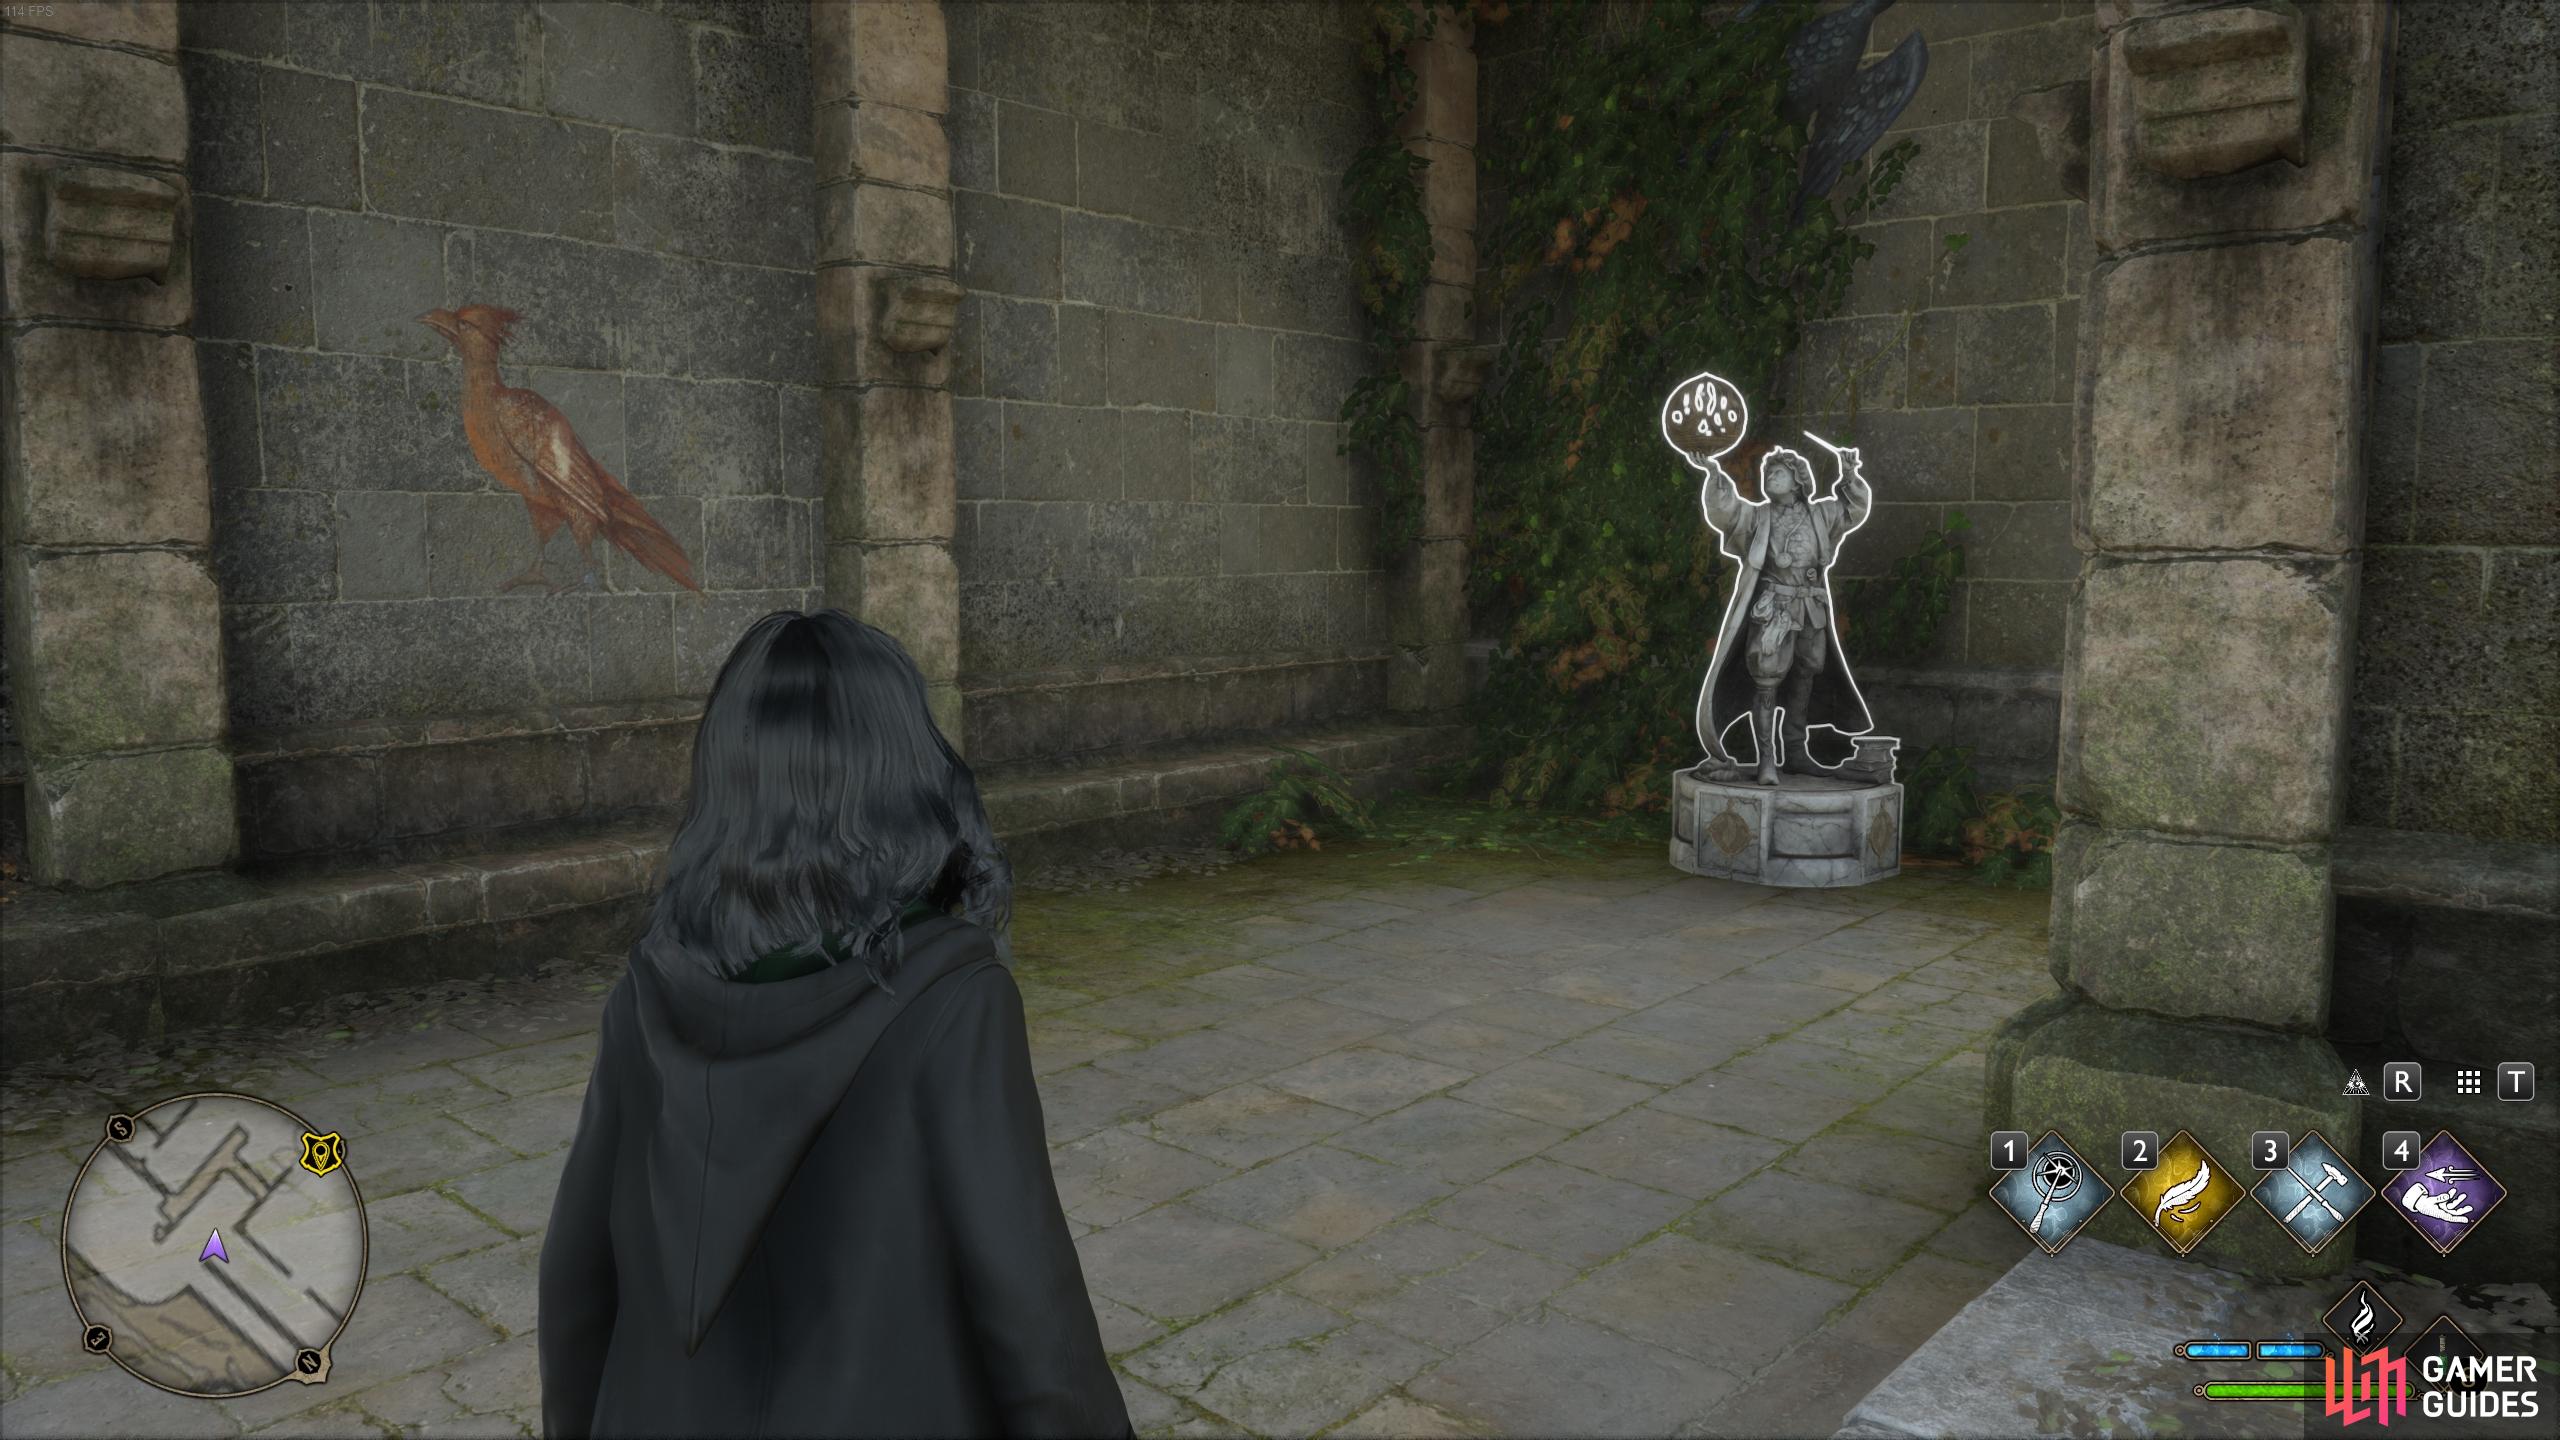
You’ll find the statue on the eastern side of the courtyard, within the cloister here.
Use Levioso to extract the page from the statue.
Hogwarts Crest - Viaduct Courtyard Entrance
From the position that you’re in at the courtyard, go through the large doors on its southern side to enter the castle. You’ll see the ![]() Hogwarts Crest directly in front of you, and you just need to cast Revelio to reveal its page.
Hogwarts Crest directly in front of you, and you just need to cast Revelio to reveal its page.

Cast Revelio in front of the crest to reveal its page.

The description for the Hogwart’s Crest page.
Statue Field Guide Page - Viaduct Courtyard Entrance
You’ll find this statue just up the steps to the left of the Hogwarts Crest. Cast Levioso to extract the page from it.
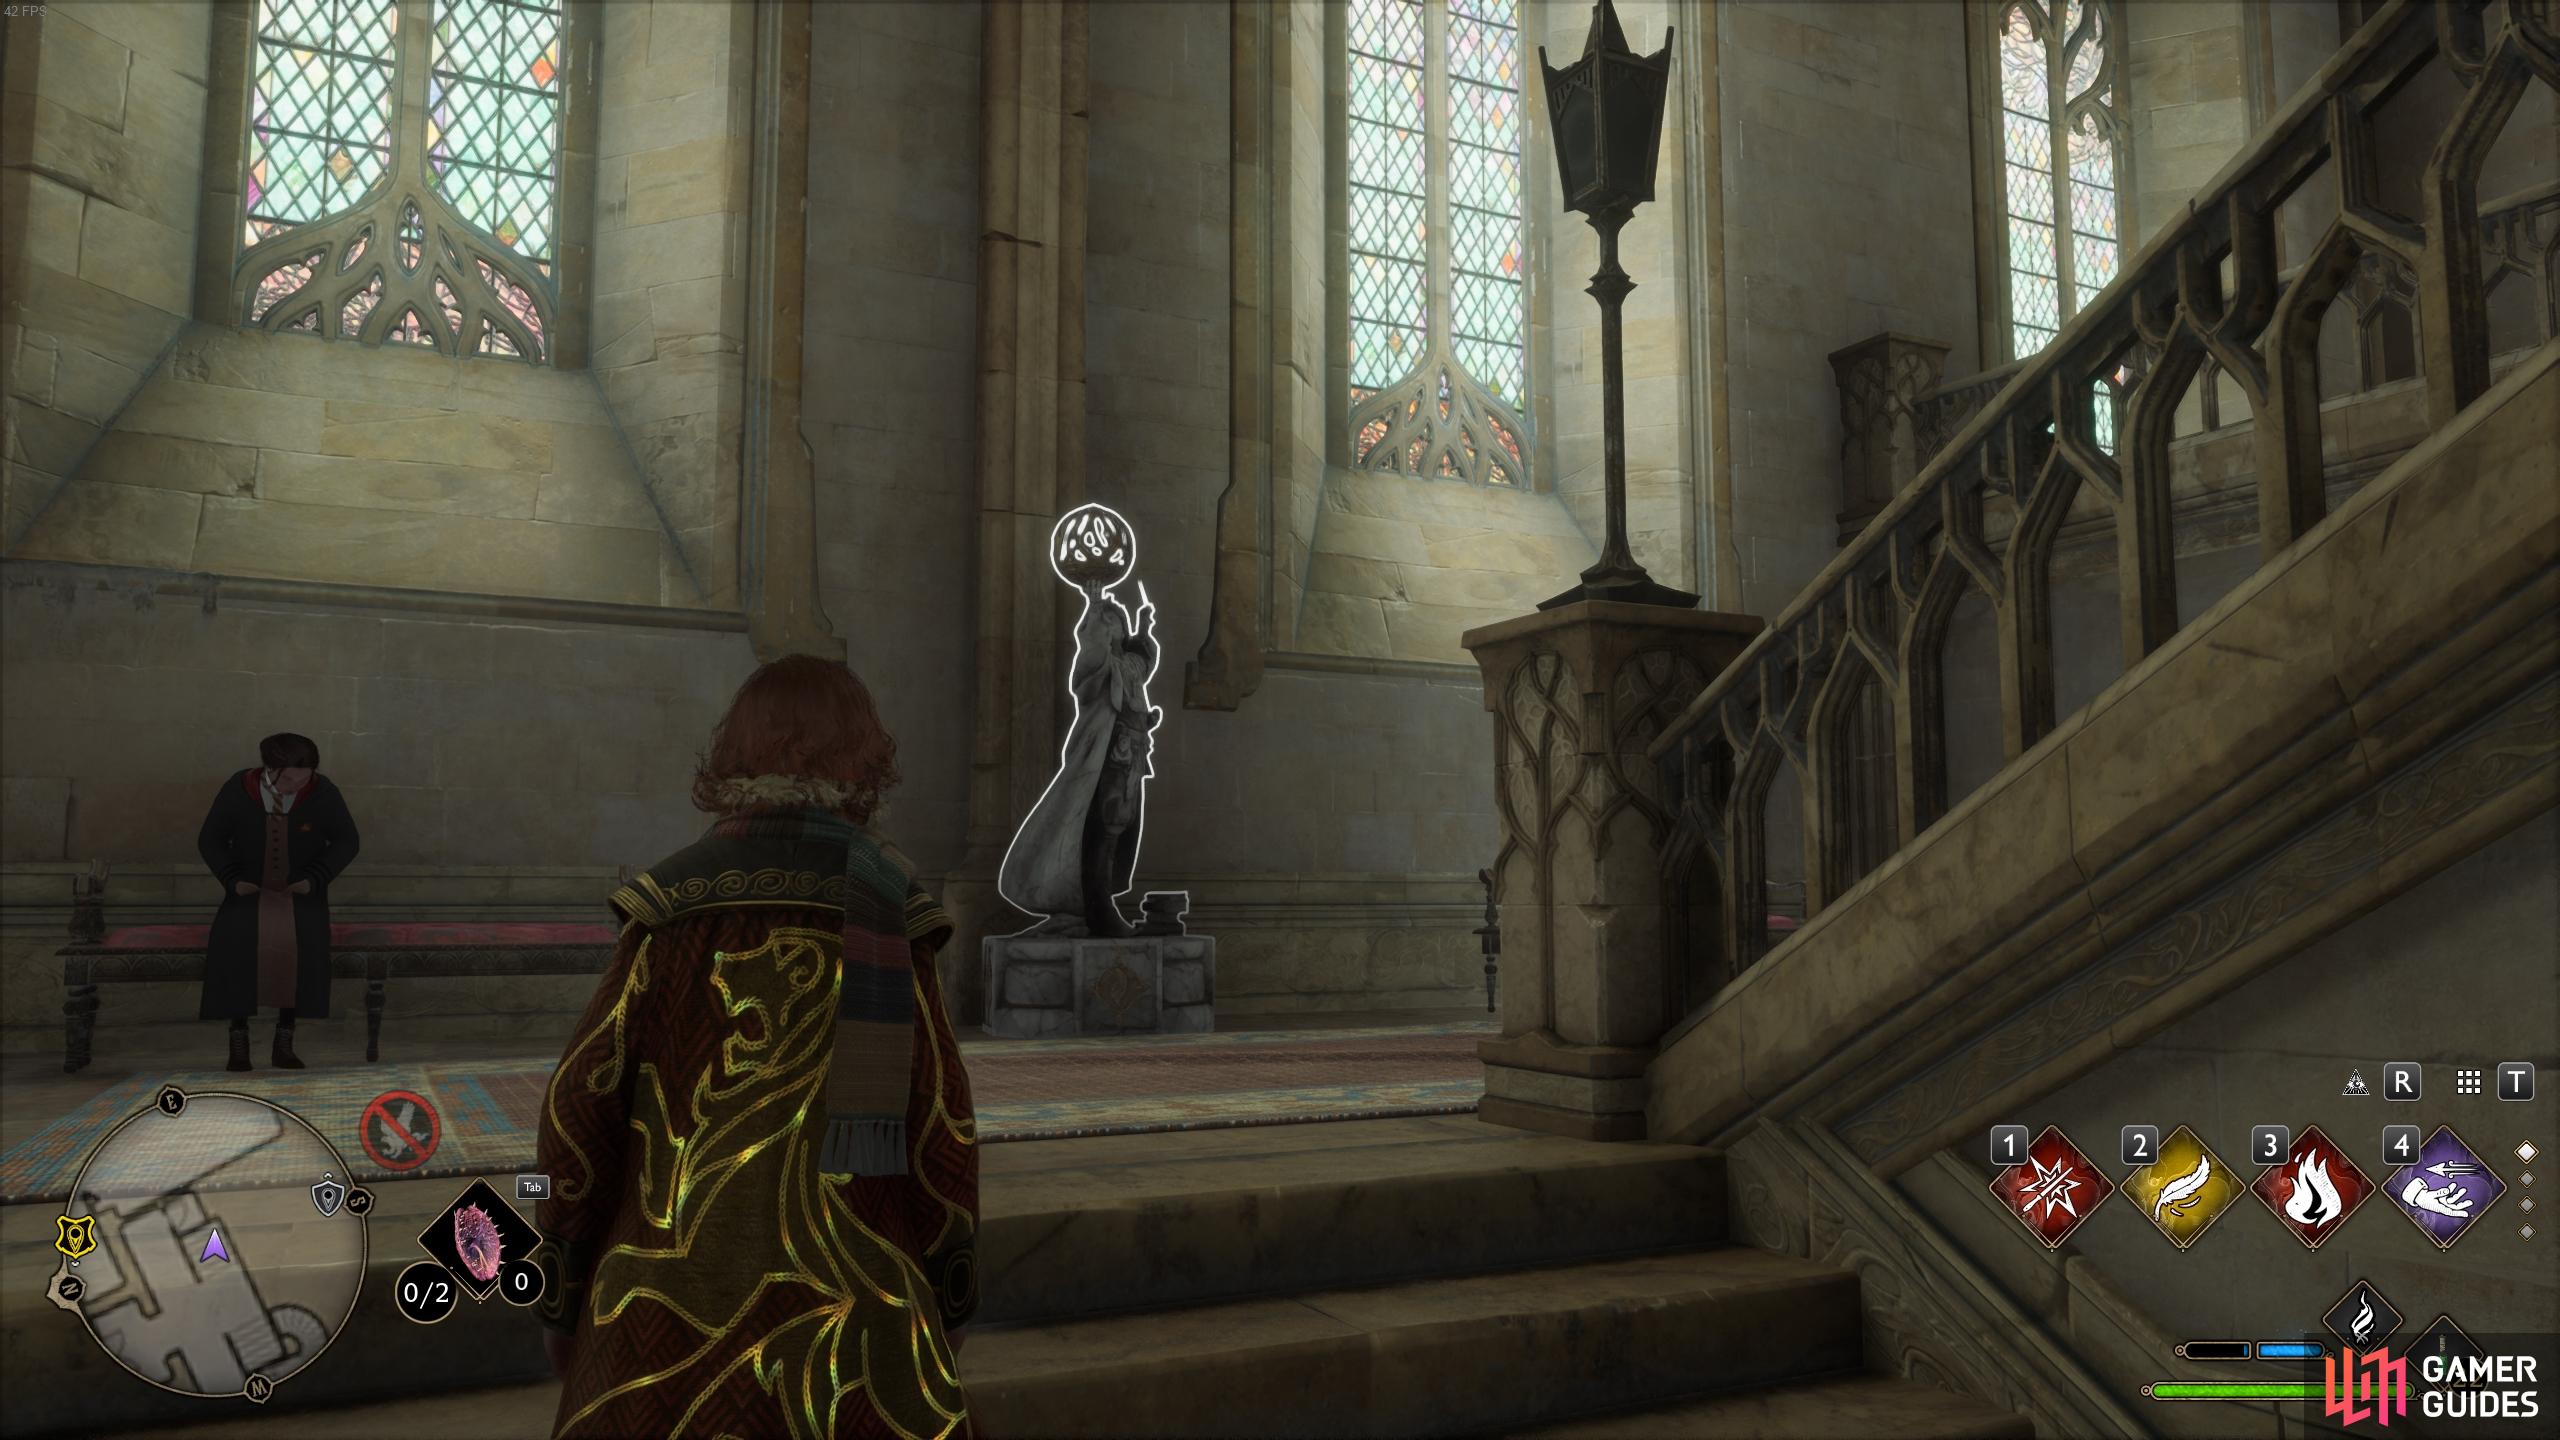
You’ll find the statue just up the stairs from the Hogwarts Crest.
Cast Levioso to extract the page from the statue.
Flying Field Guide Page - Viaduct Courtyard Entrance
You’ll find this flying page just above you from the steps where you acquired the previous page from the statue. Use the ![]() Accio spell to collect it.
Accio spell to collect it.

Look up from the stairs to see the page flying above and use Accio to catch it.
Slytherin’s Sink - Hogwarts Dungeons
Before we move further into the castle, we have some pages in the dungeon to collect. As you’re standing in front of the Hogwarts Crest, turn right and go down the steps to the west, then through the door to your left at the bottom of them. This will lead to another spiral staircase, at the bottom of which you should turn right, and then right again, then go through the door directly ahead. This will bring you to a room containing ![]() Slytherin’s Sink. Cast Revelio in front of it to reveal the page.
Slytherin’s Sink. Cast Revelio in front of it to reveal the page.
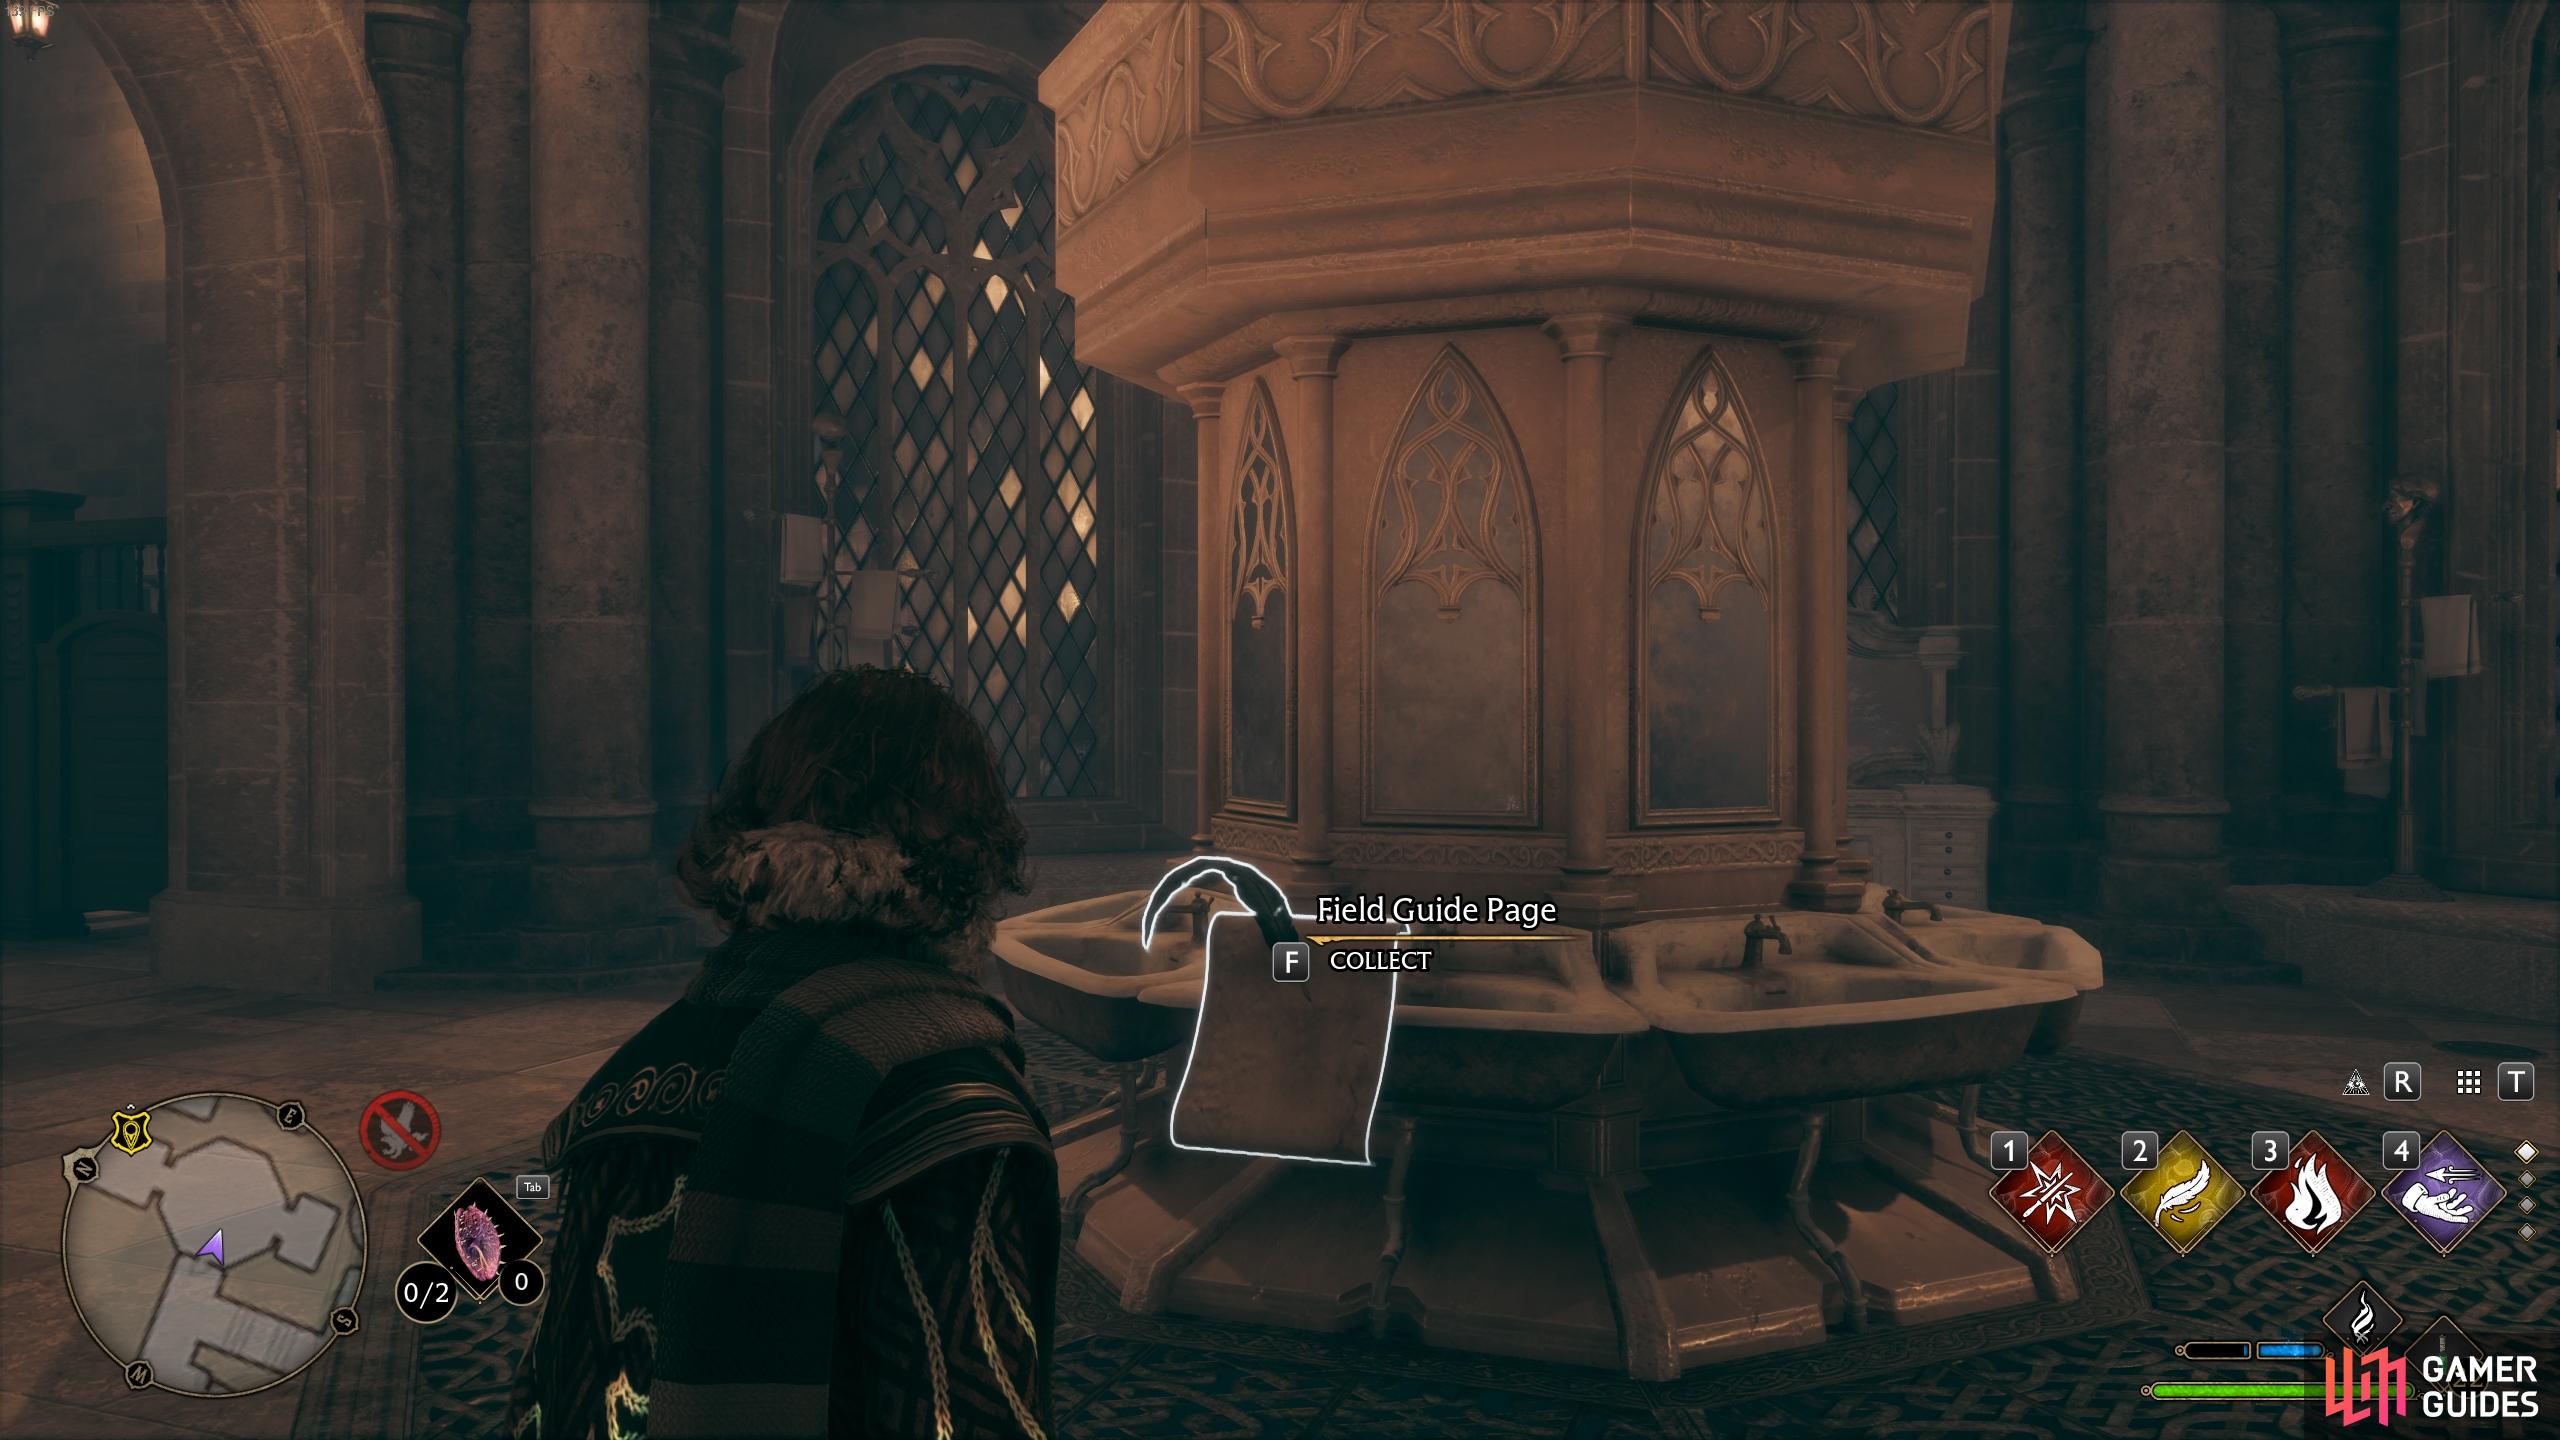
Cast Revelio in front of the sink to reveal the page.
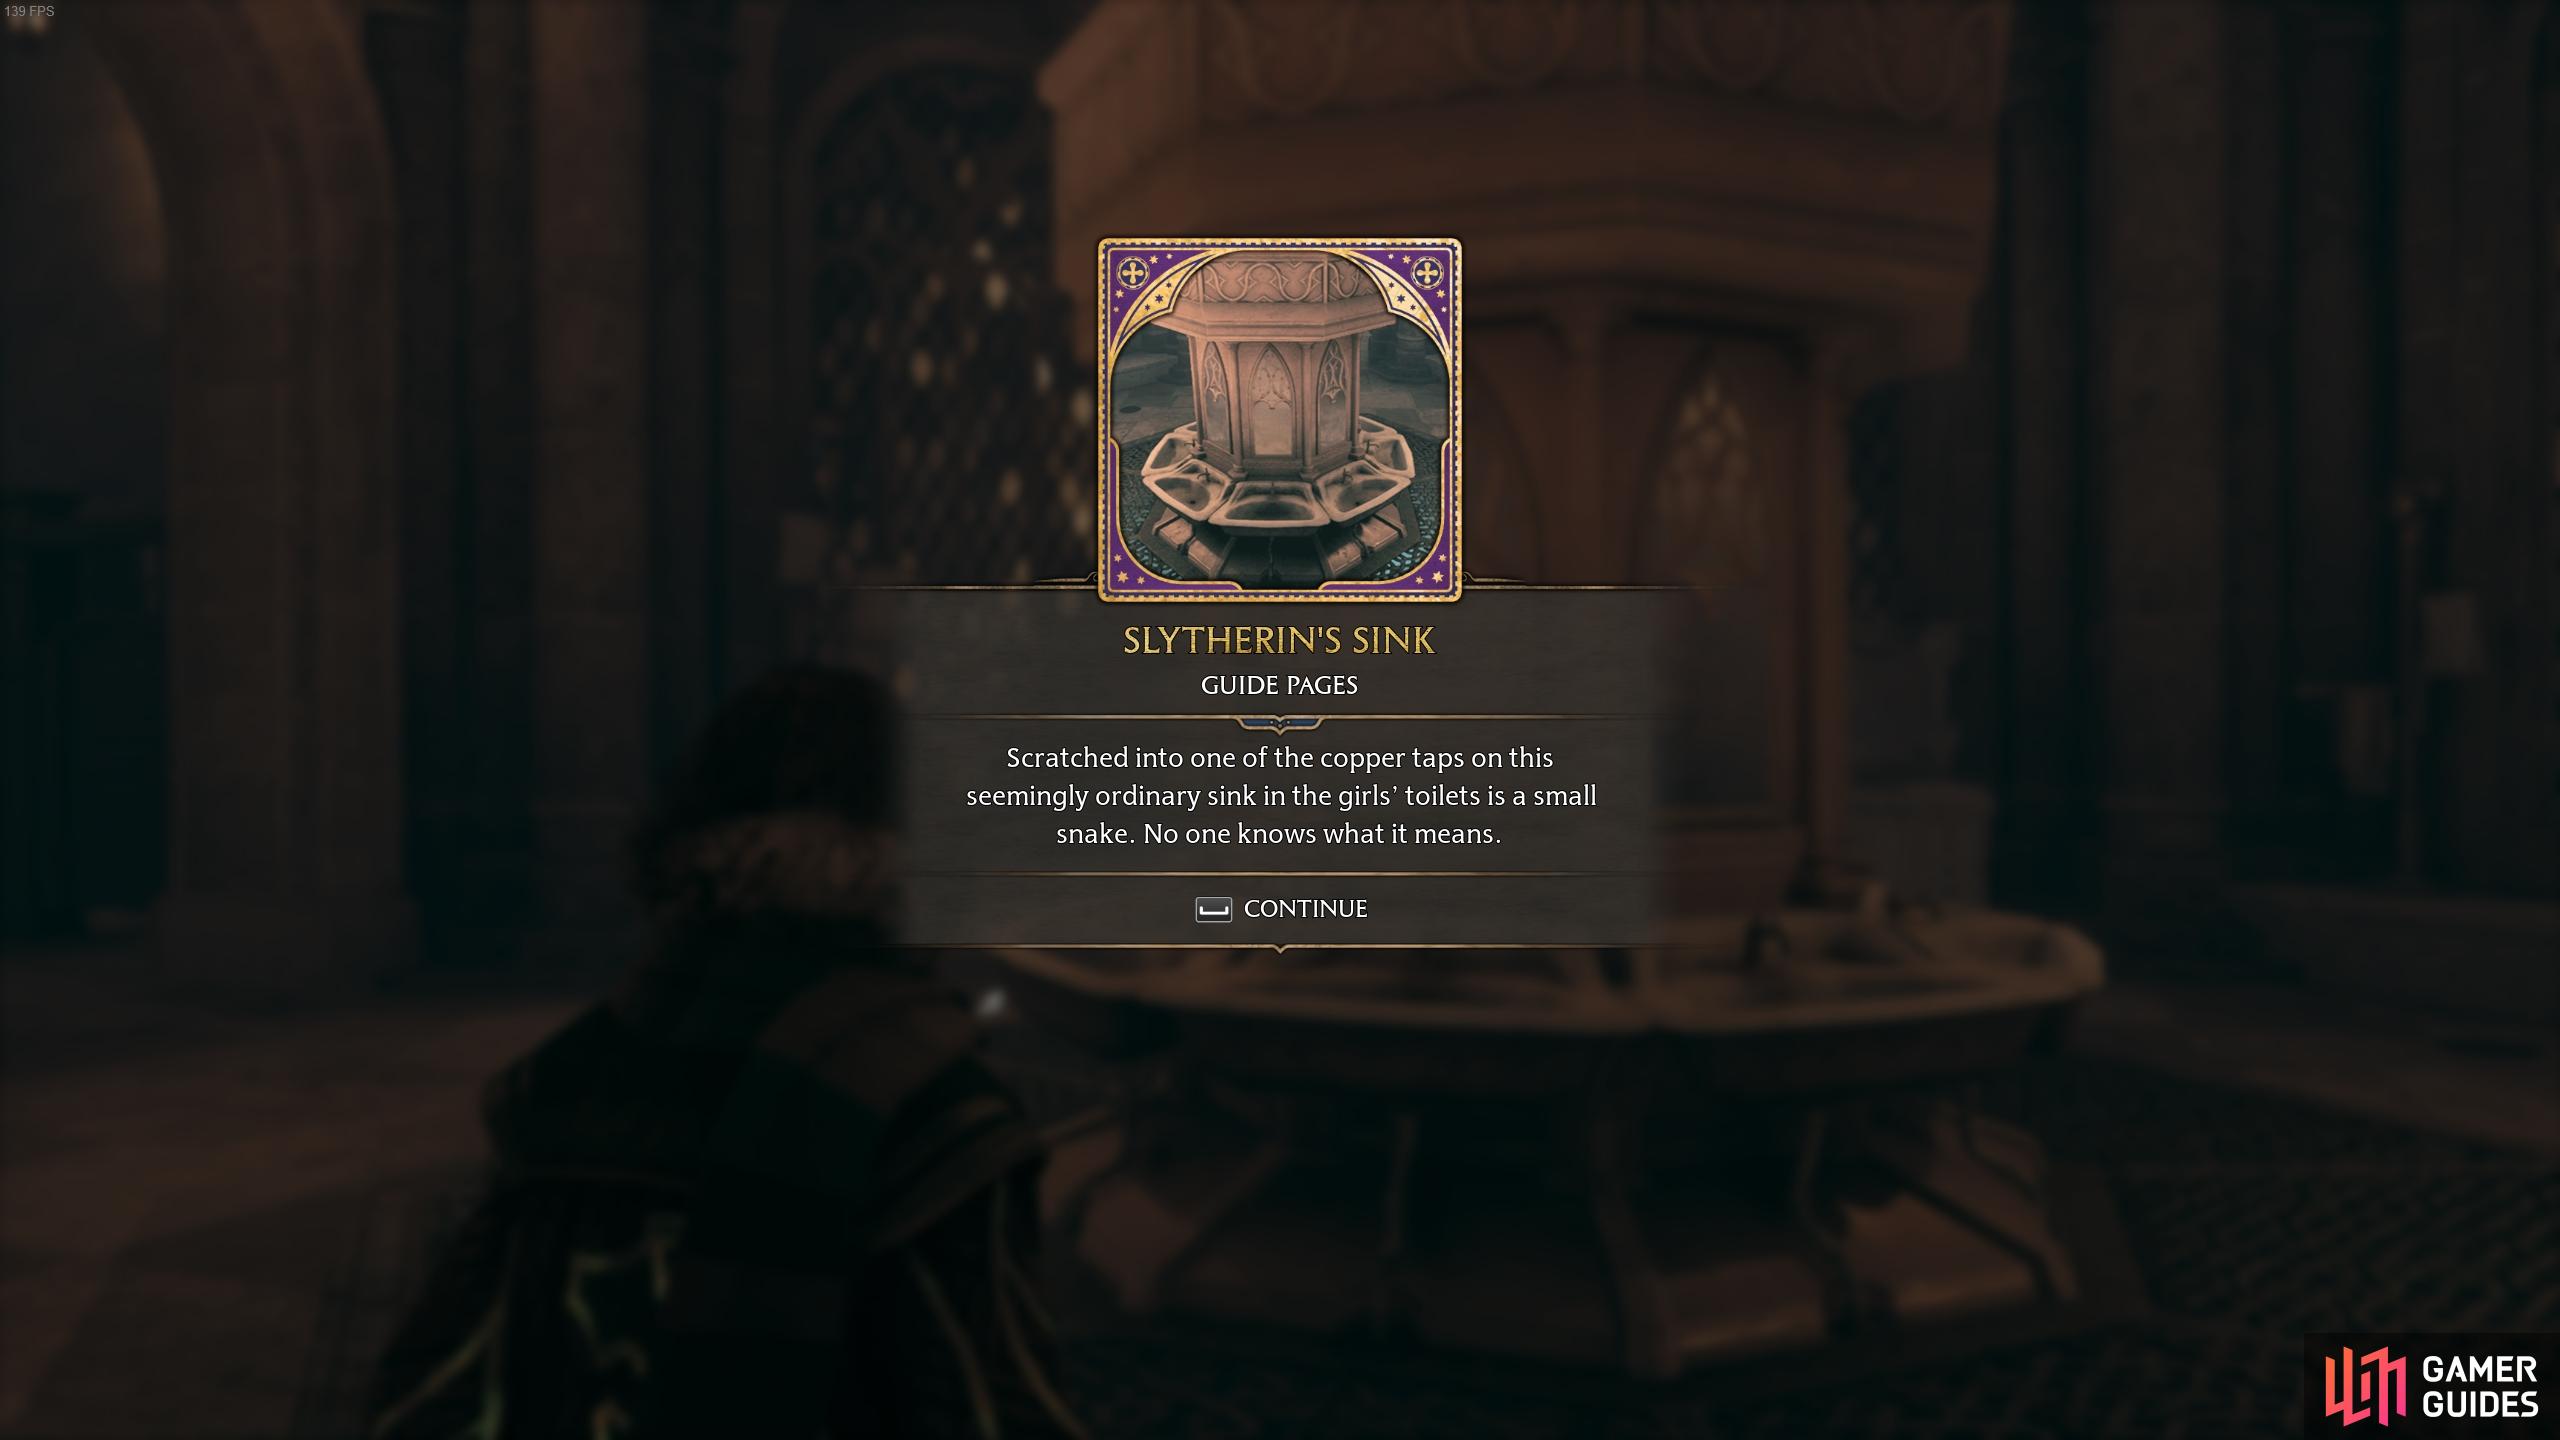
The description for the Slytherin’s Sink page.
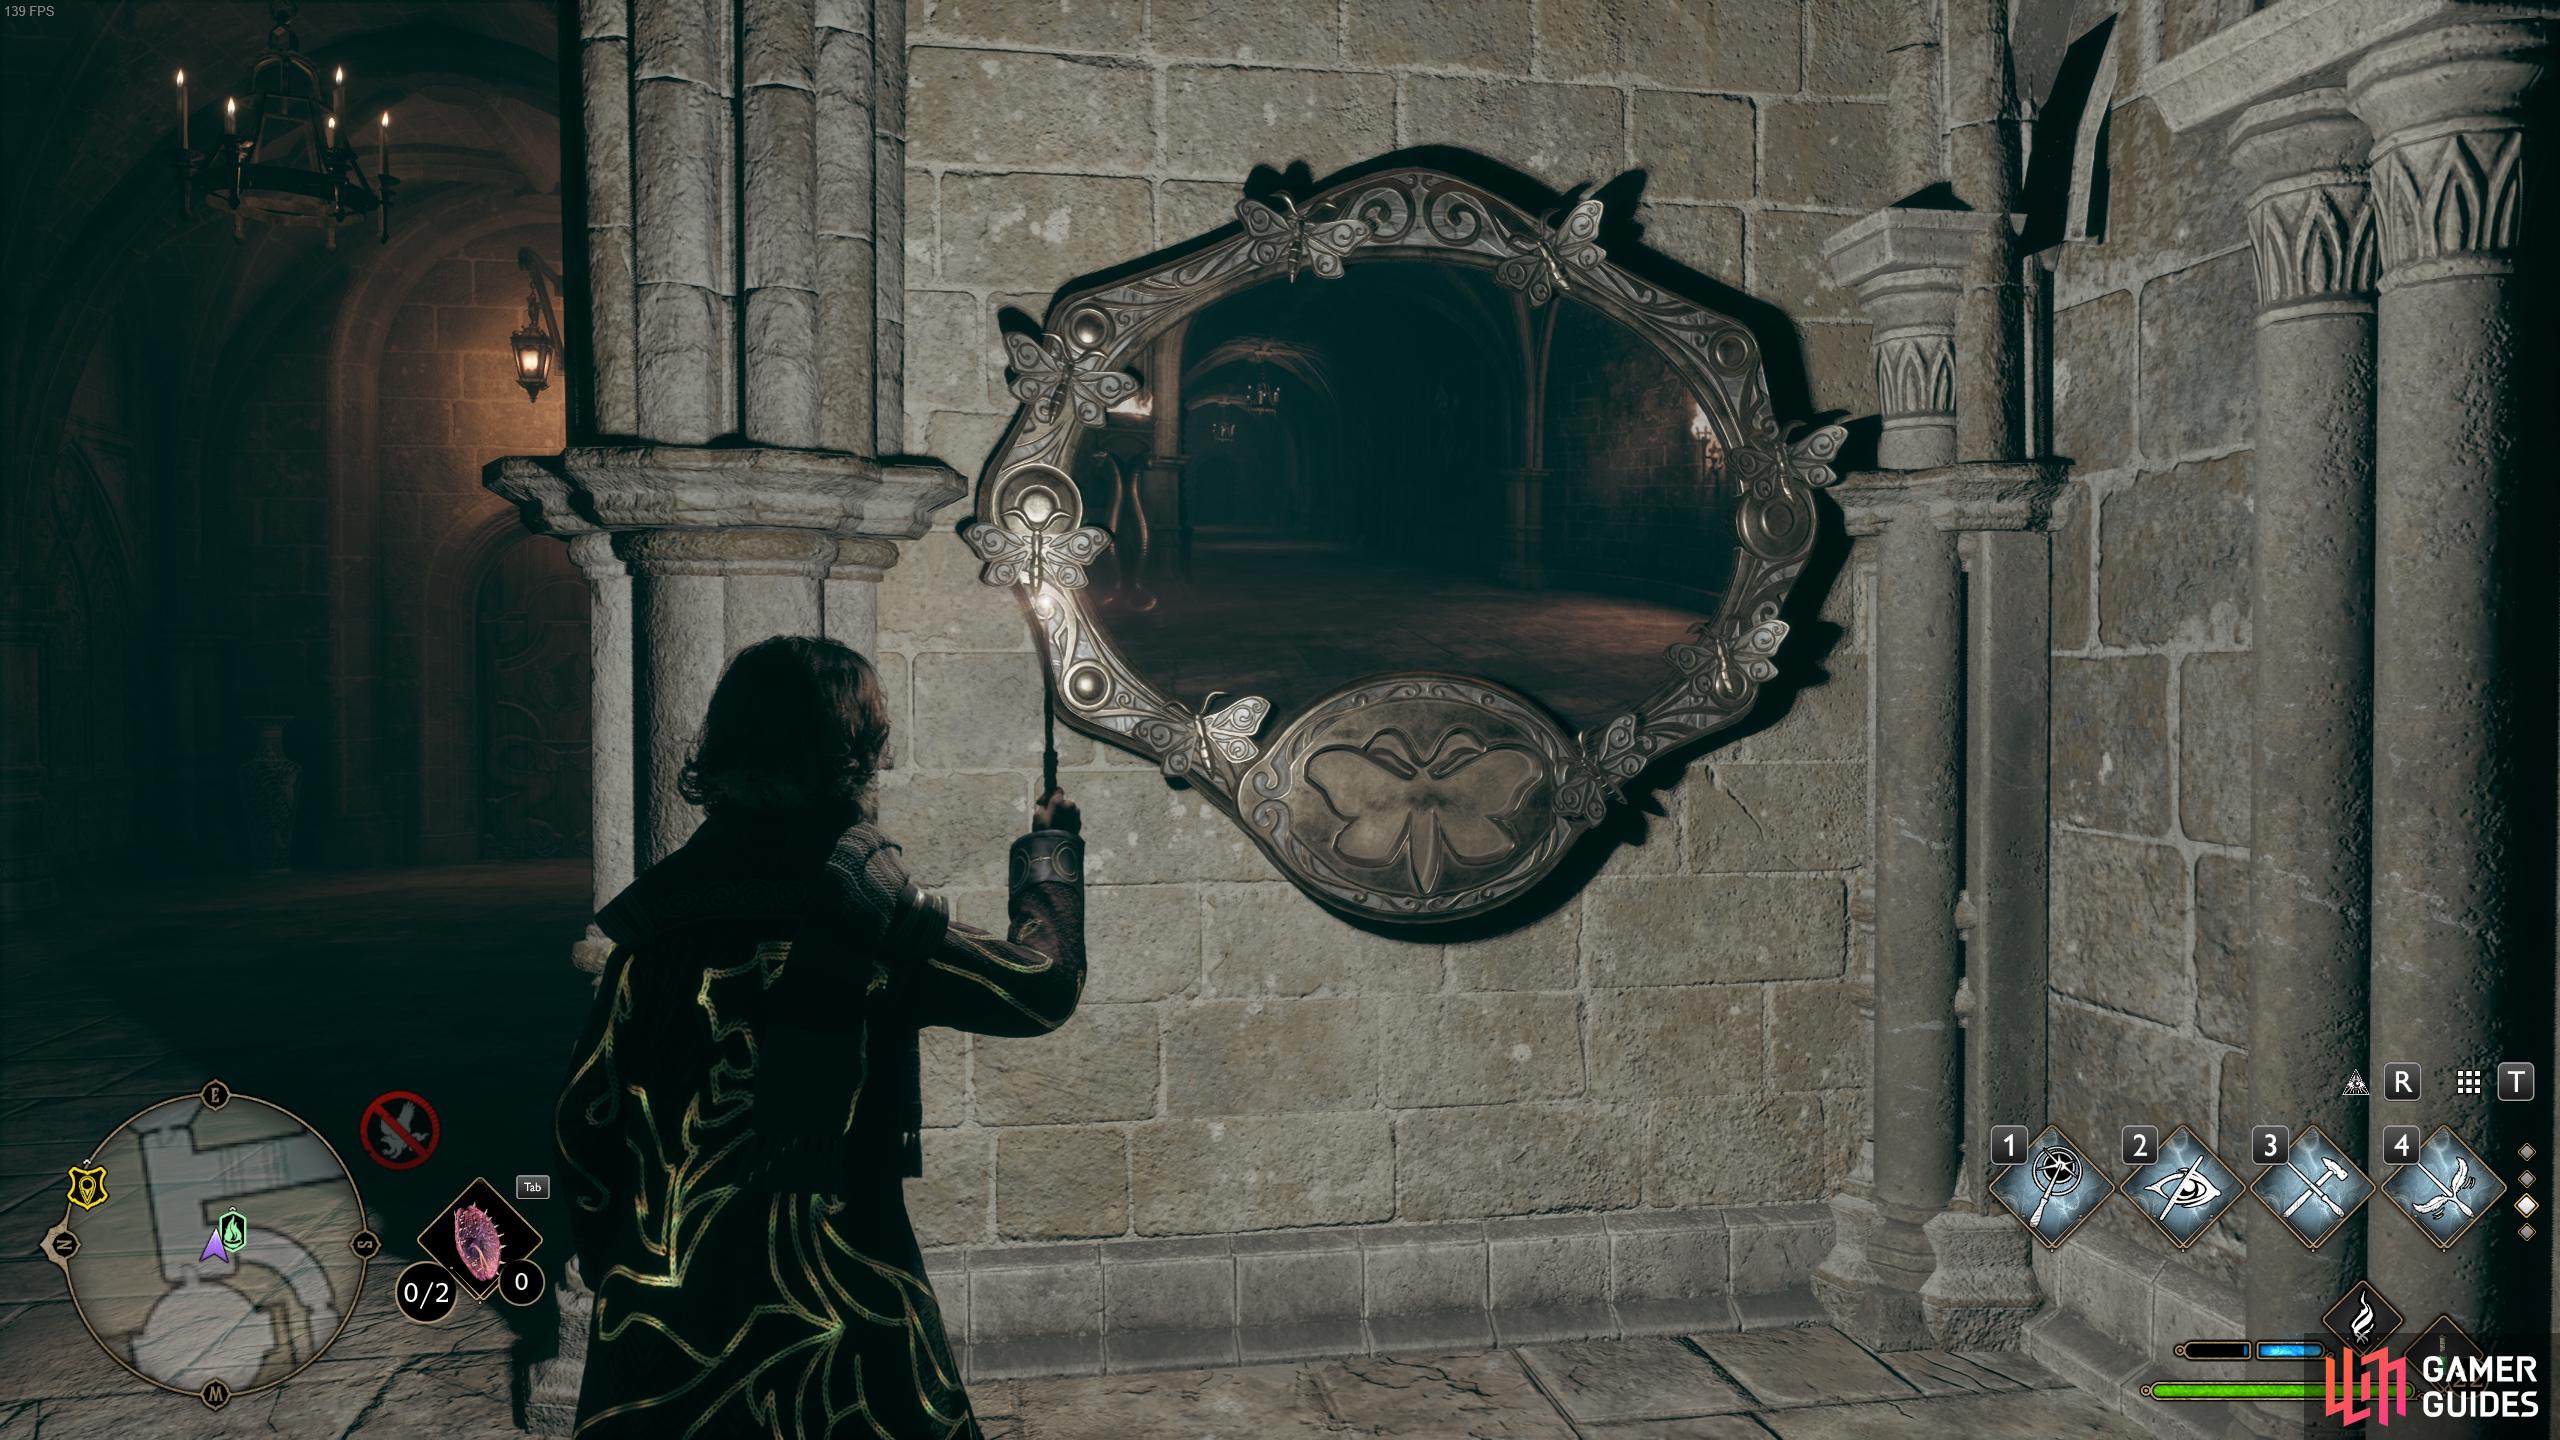
Moth Puzzle Field Guide Page - Hogwarts Dungeons
If you’re starting from the room containing Slytherin’s Sink, head outside and look immediately to your right to see a black mirror. Cast Lumos to reveal the location of its moth, then go up the stairs to the left, turning left at the very top to find the moth on the right wall here. Bring the moth back to the mirror and decast Lumos to place it in the mirror and reveal the page.
Detention Chamber - Hogwarts Dungeons
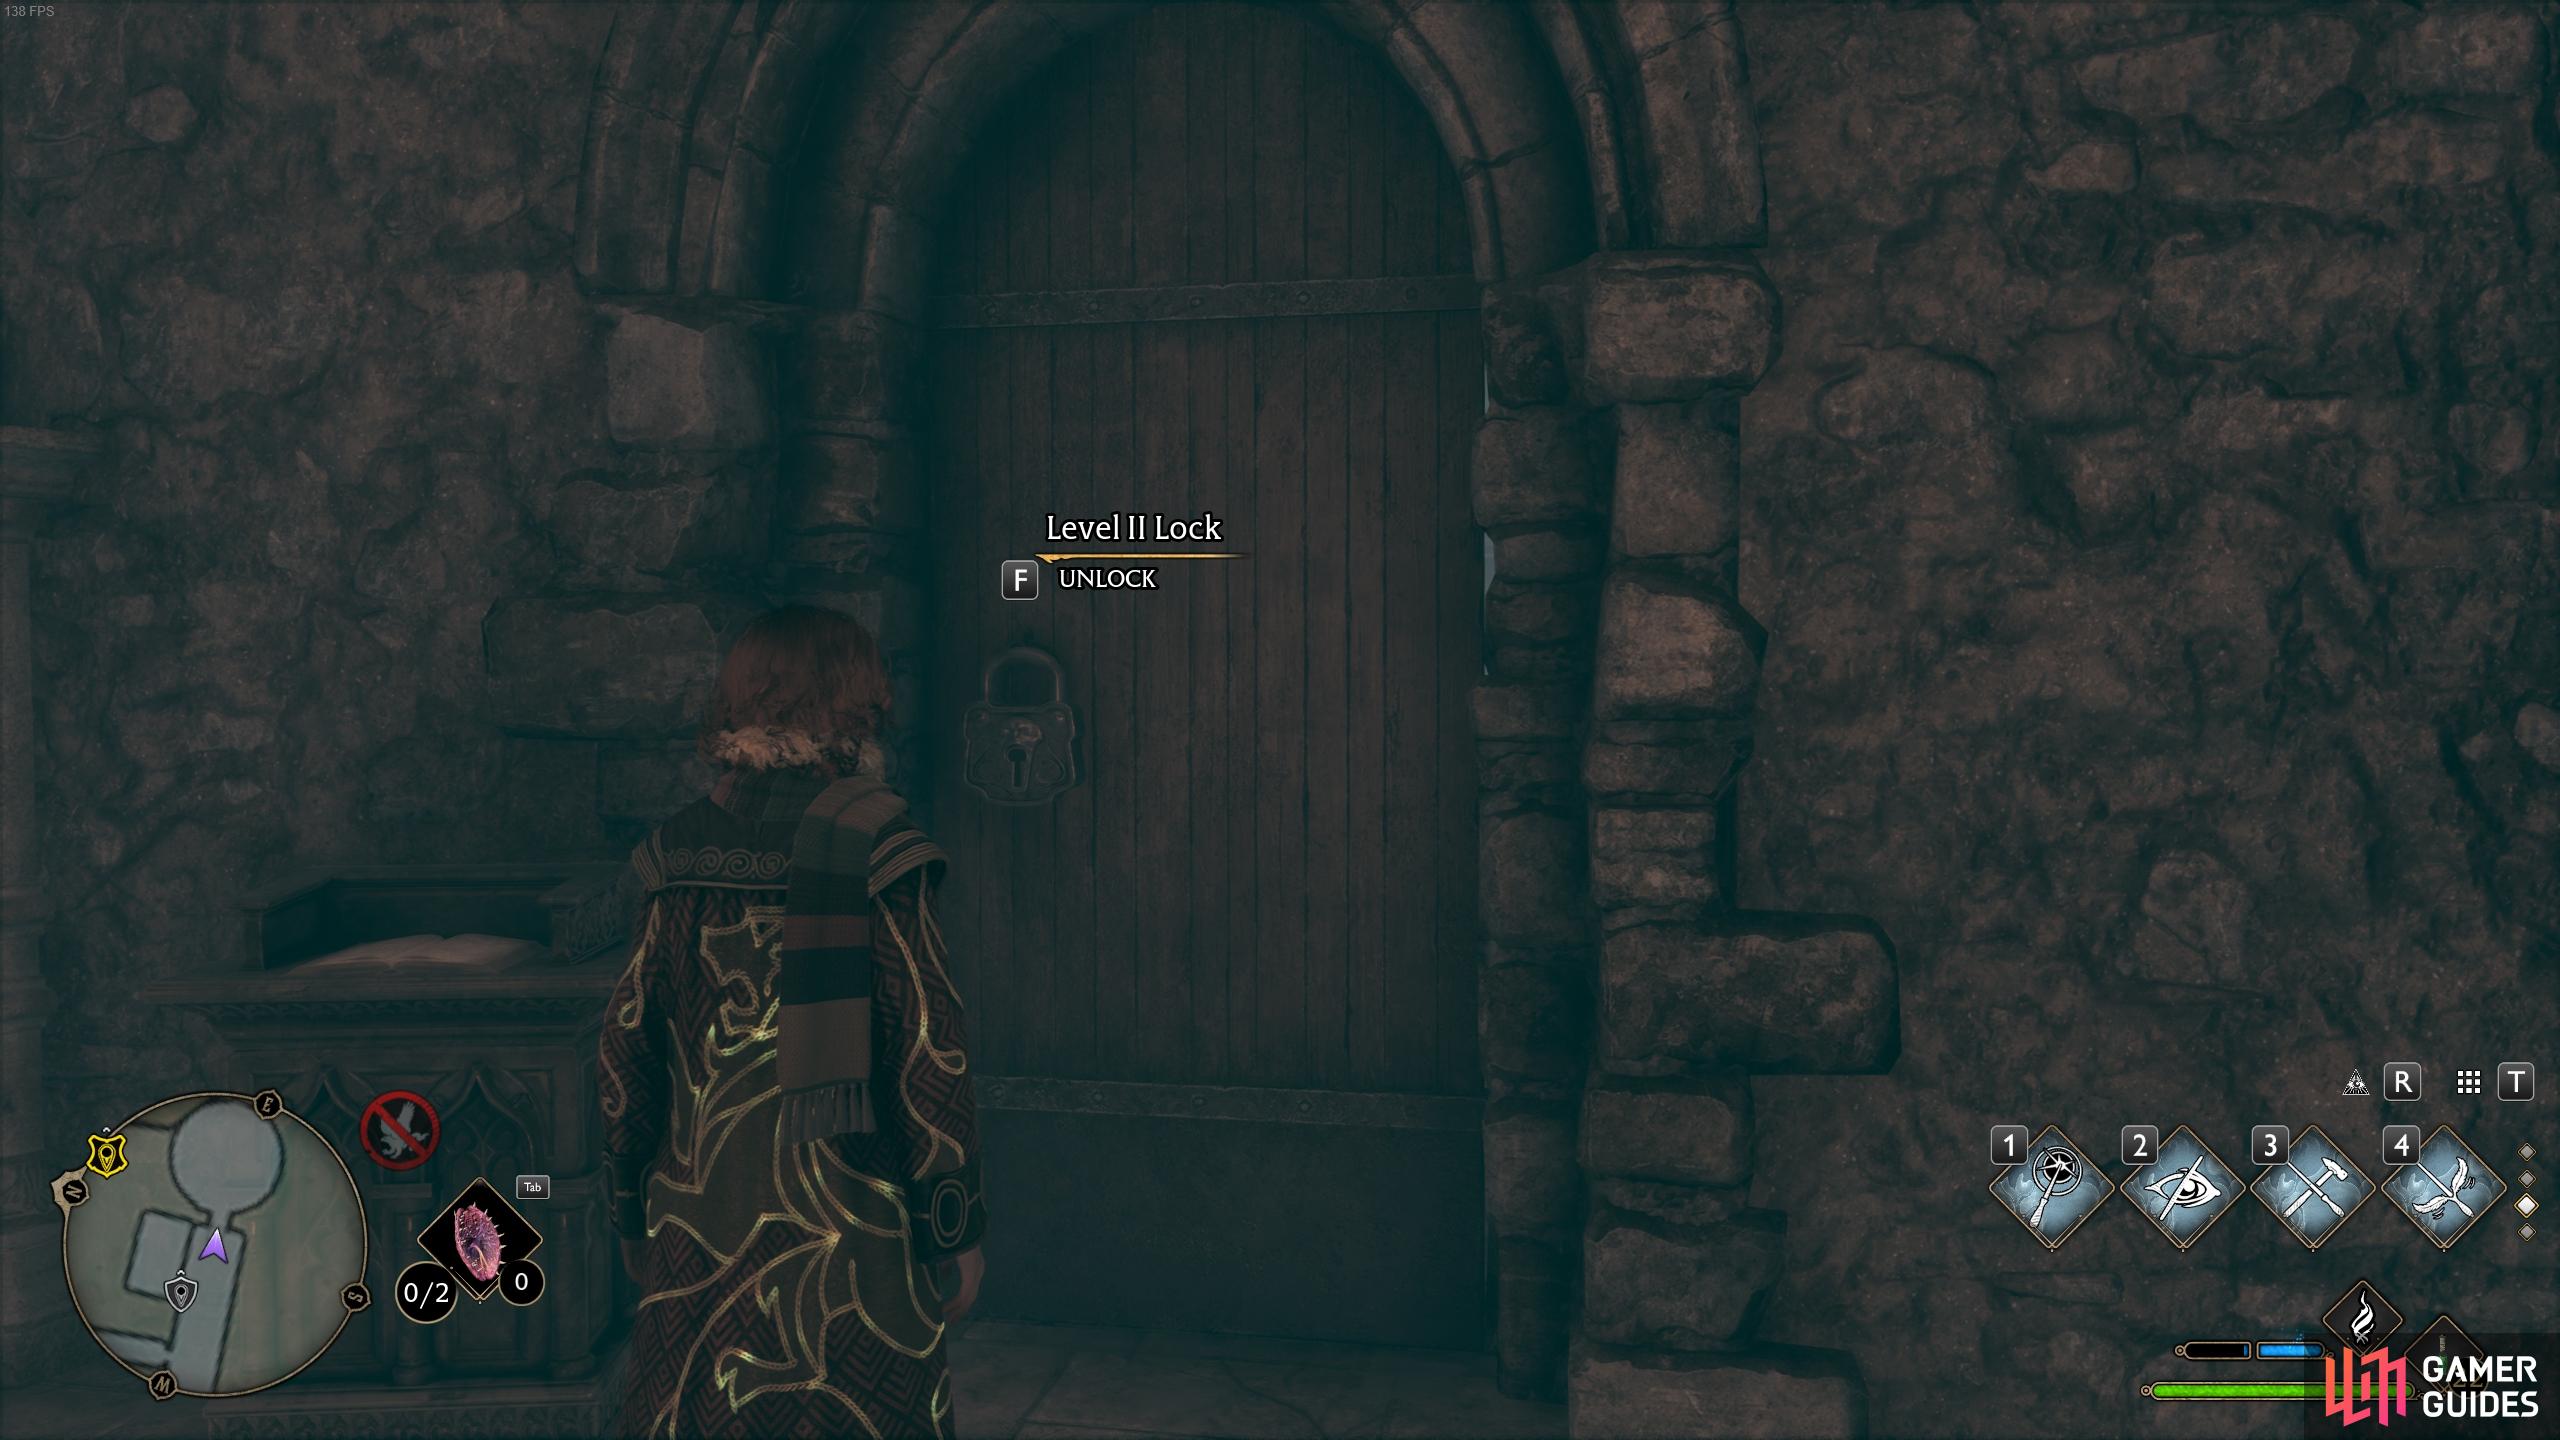
From the mirror where you placed the moth, go back to the wall where you initially found the moth but follow the corridor eastward until you reach a locked door which requires Level II ![]() Alohomora to open. Once inside, cast Revelio to reveal the page for the Detention Chamber.
Alohomora to open. Once inside, cast Revelio to reveal the page for the Detention Chamber.
Brazier Field Guide Page - Hogwarts Dungeons
To find this brazier, go outside the Detention Chamber and look to your right to find another locked door. This one requires Level I Alohomora. Once inside, use a fire-based spell such as Incendio or Confringo to light the brazier, then read the page that it spits out.
Cast a fire-based spell to light the brazier.
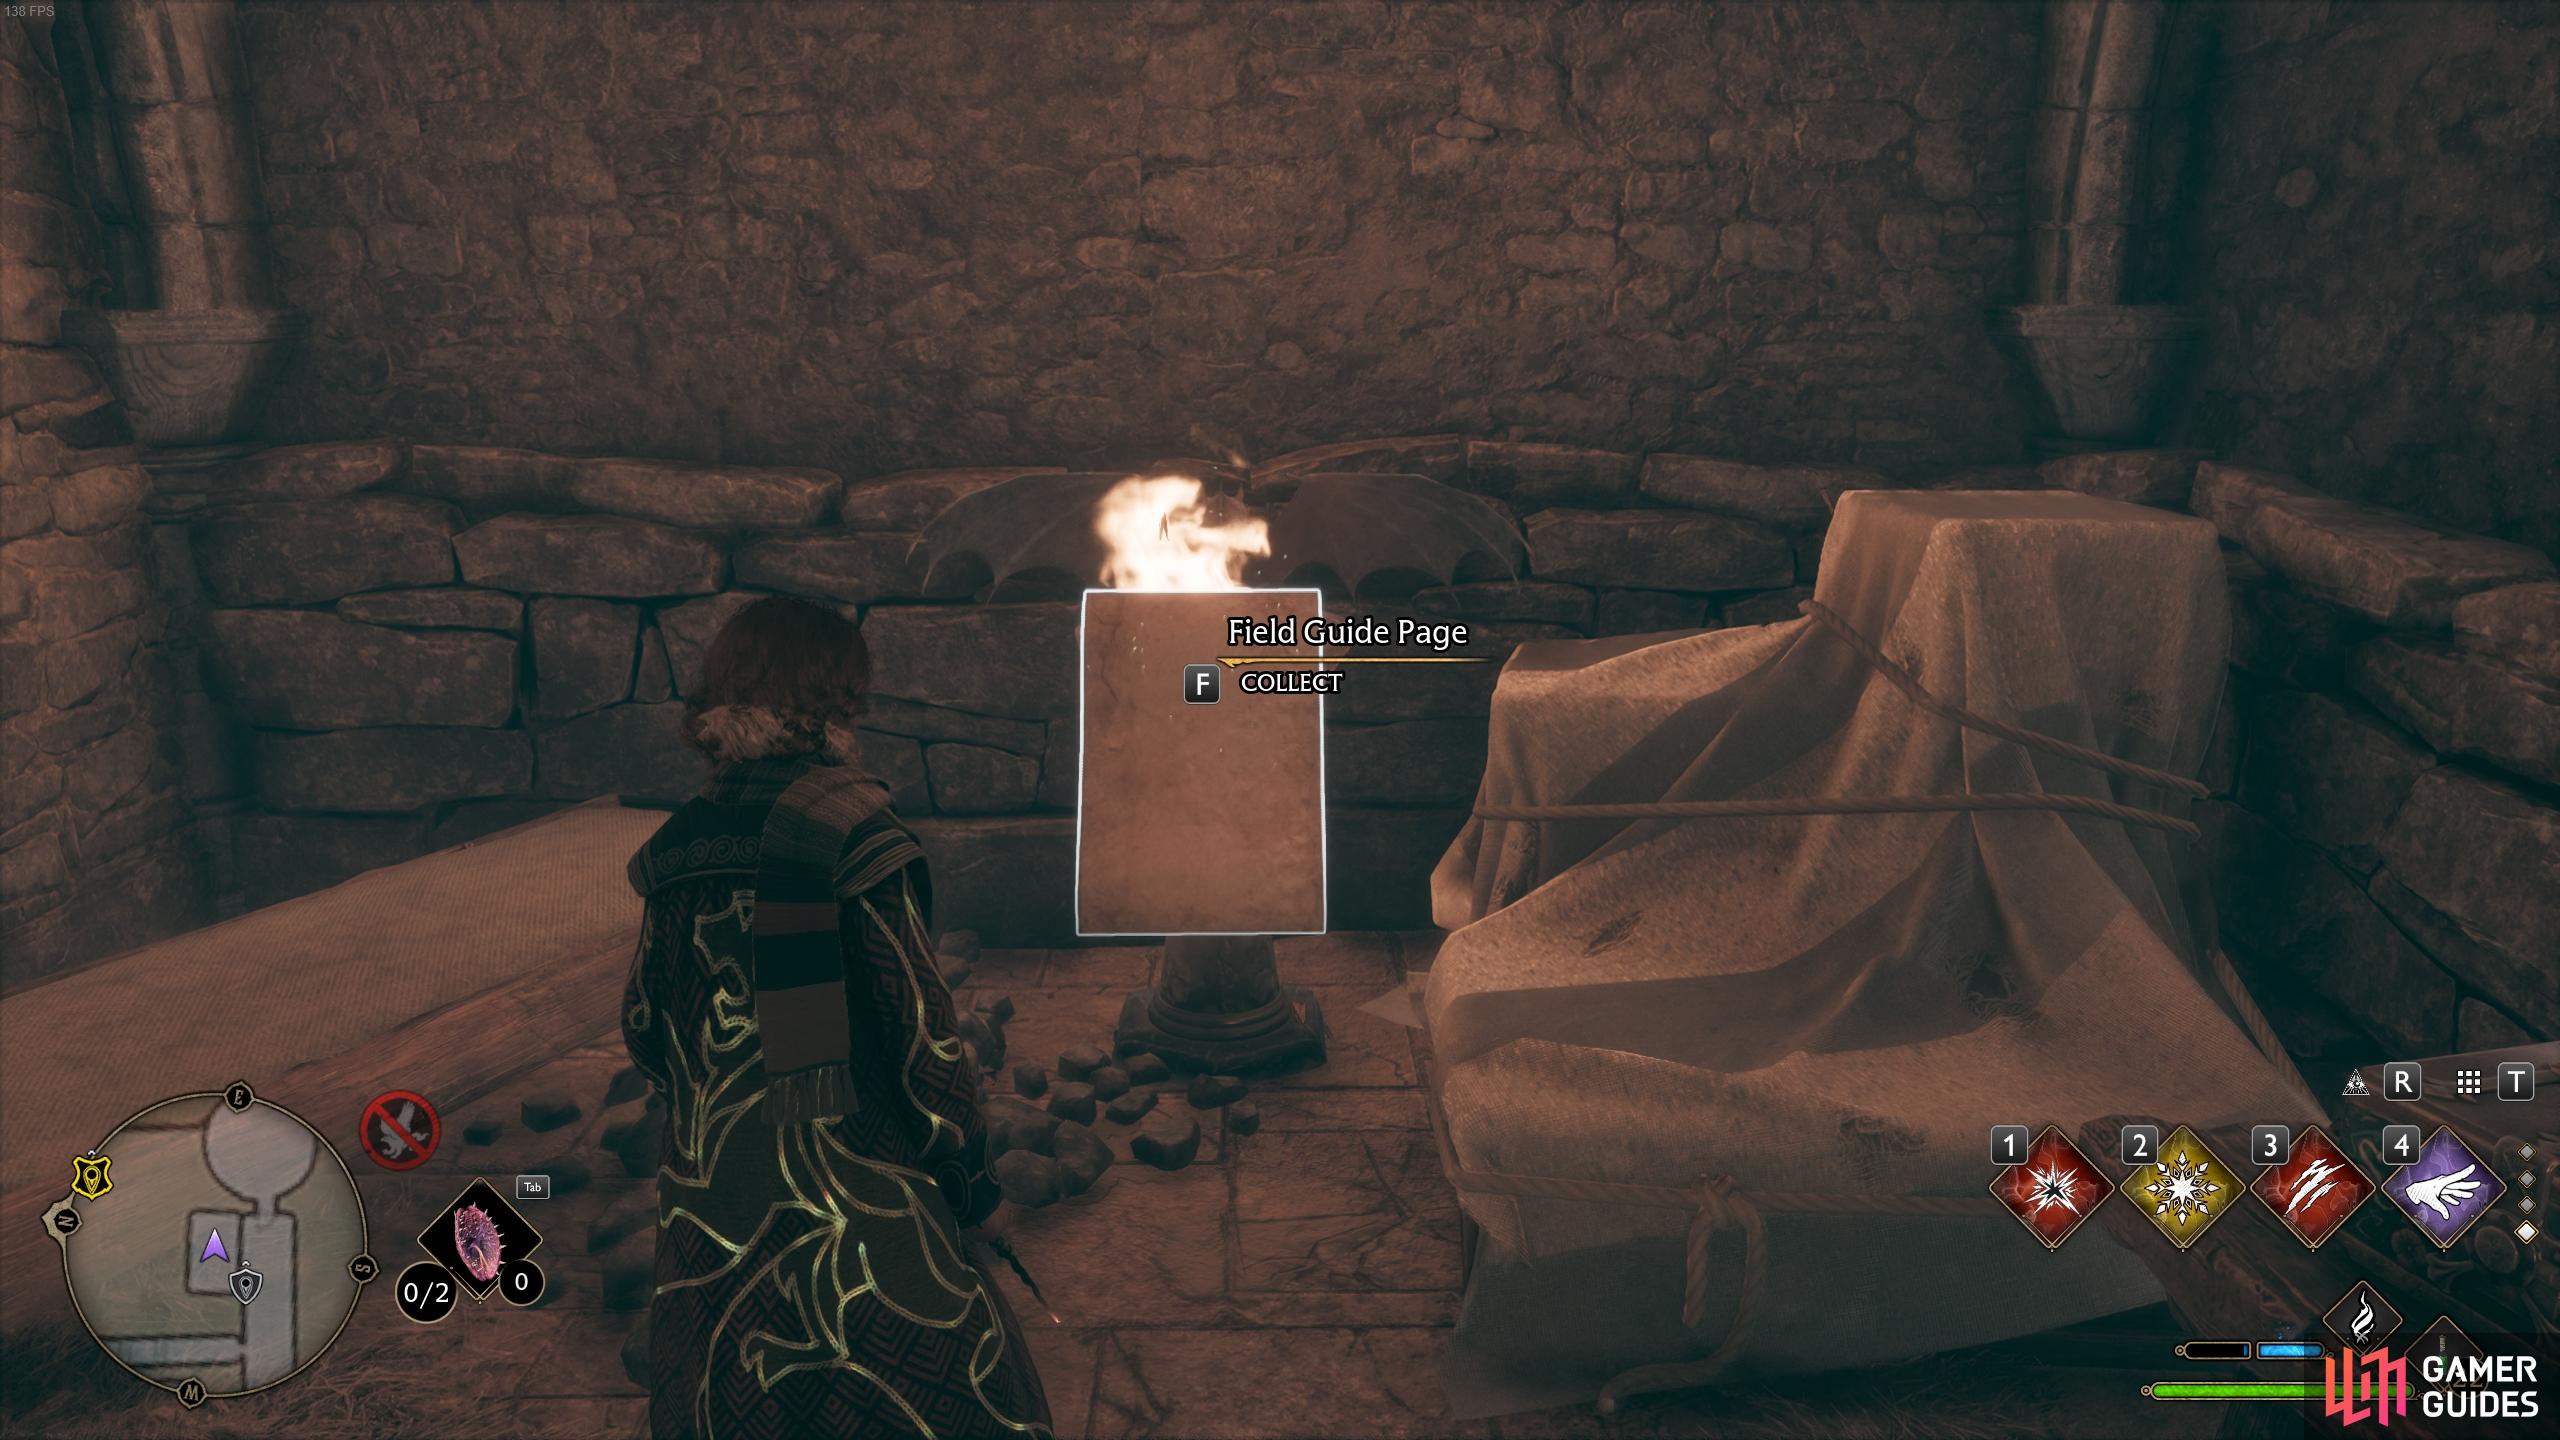
You can collect the page after lighting the brazier.
Flying Field Guide Page - Hogwarts Dungeons
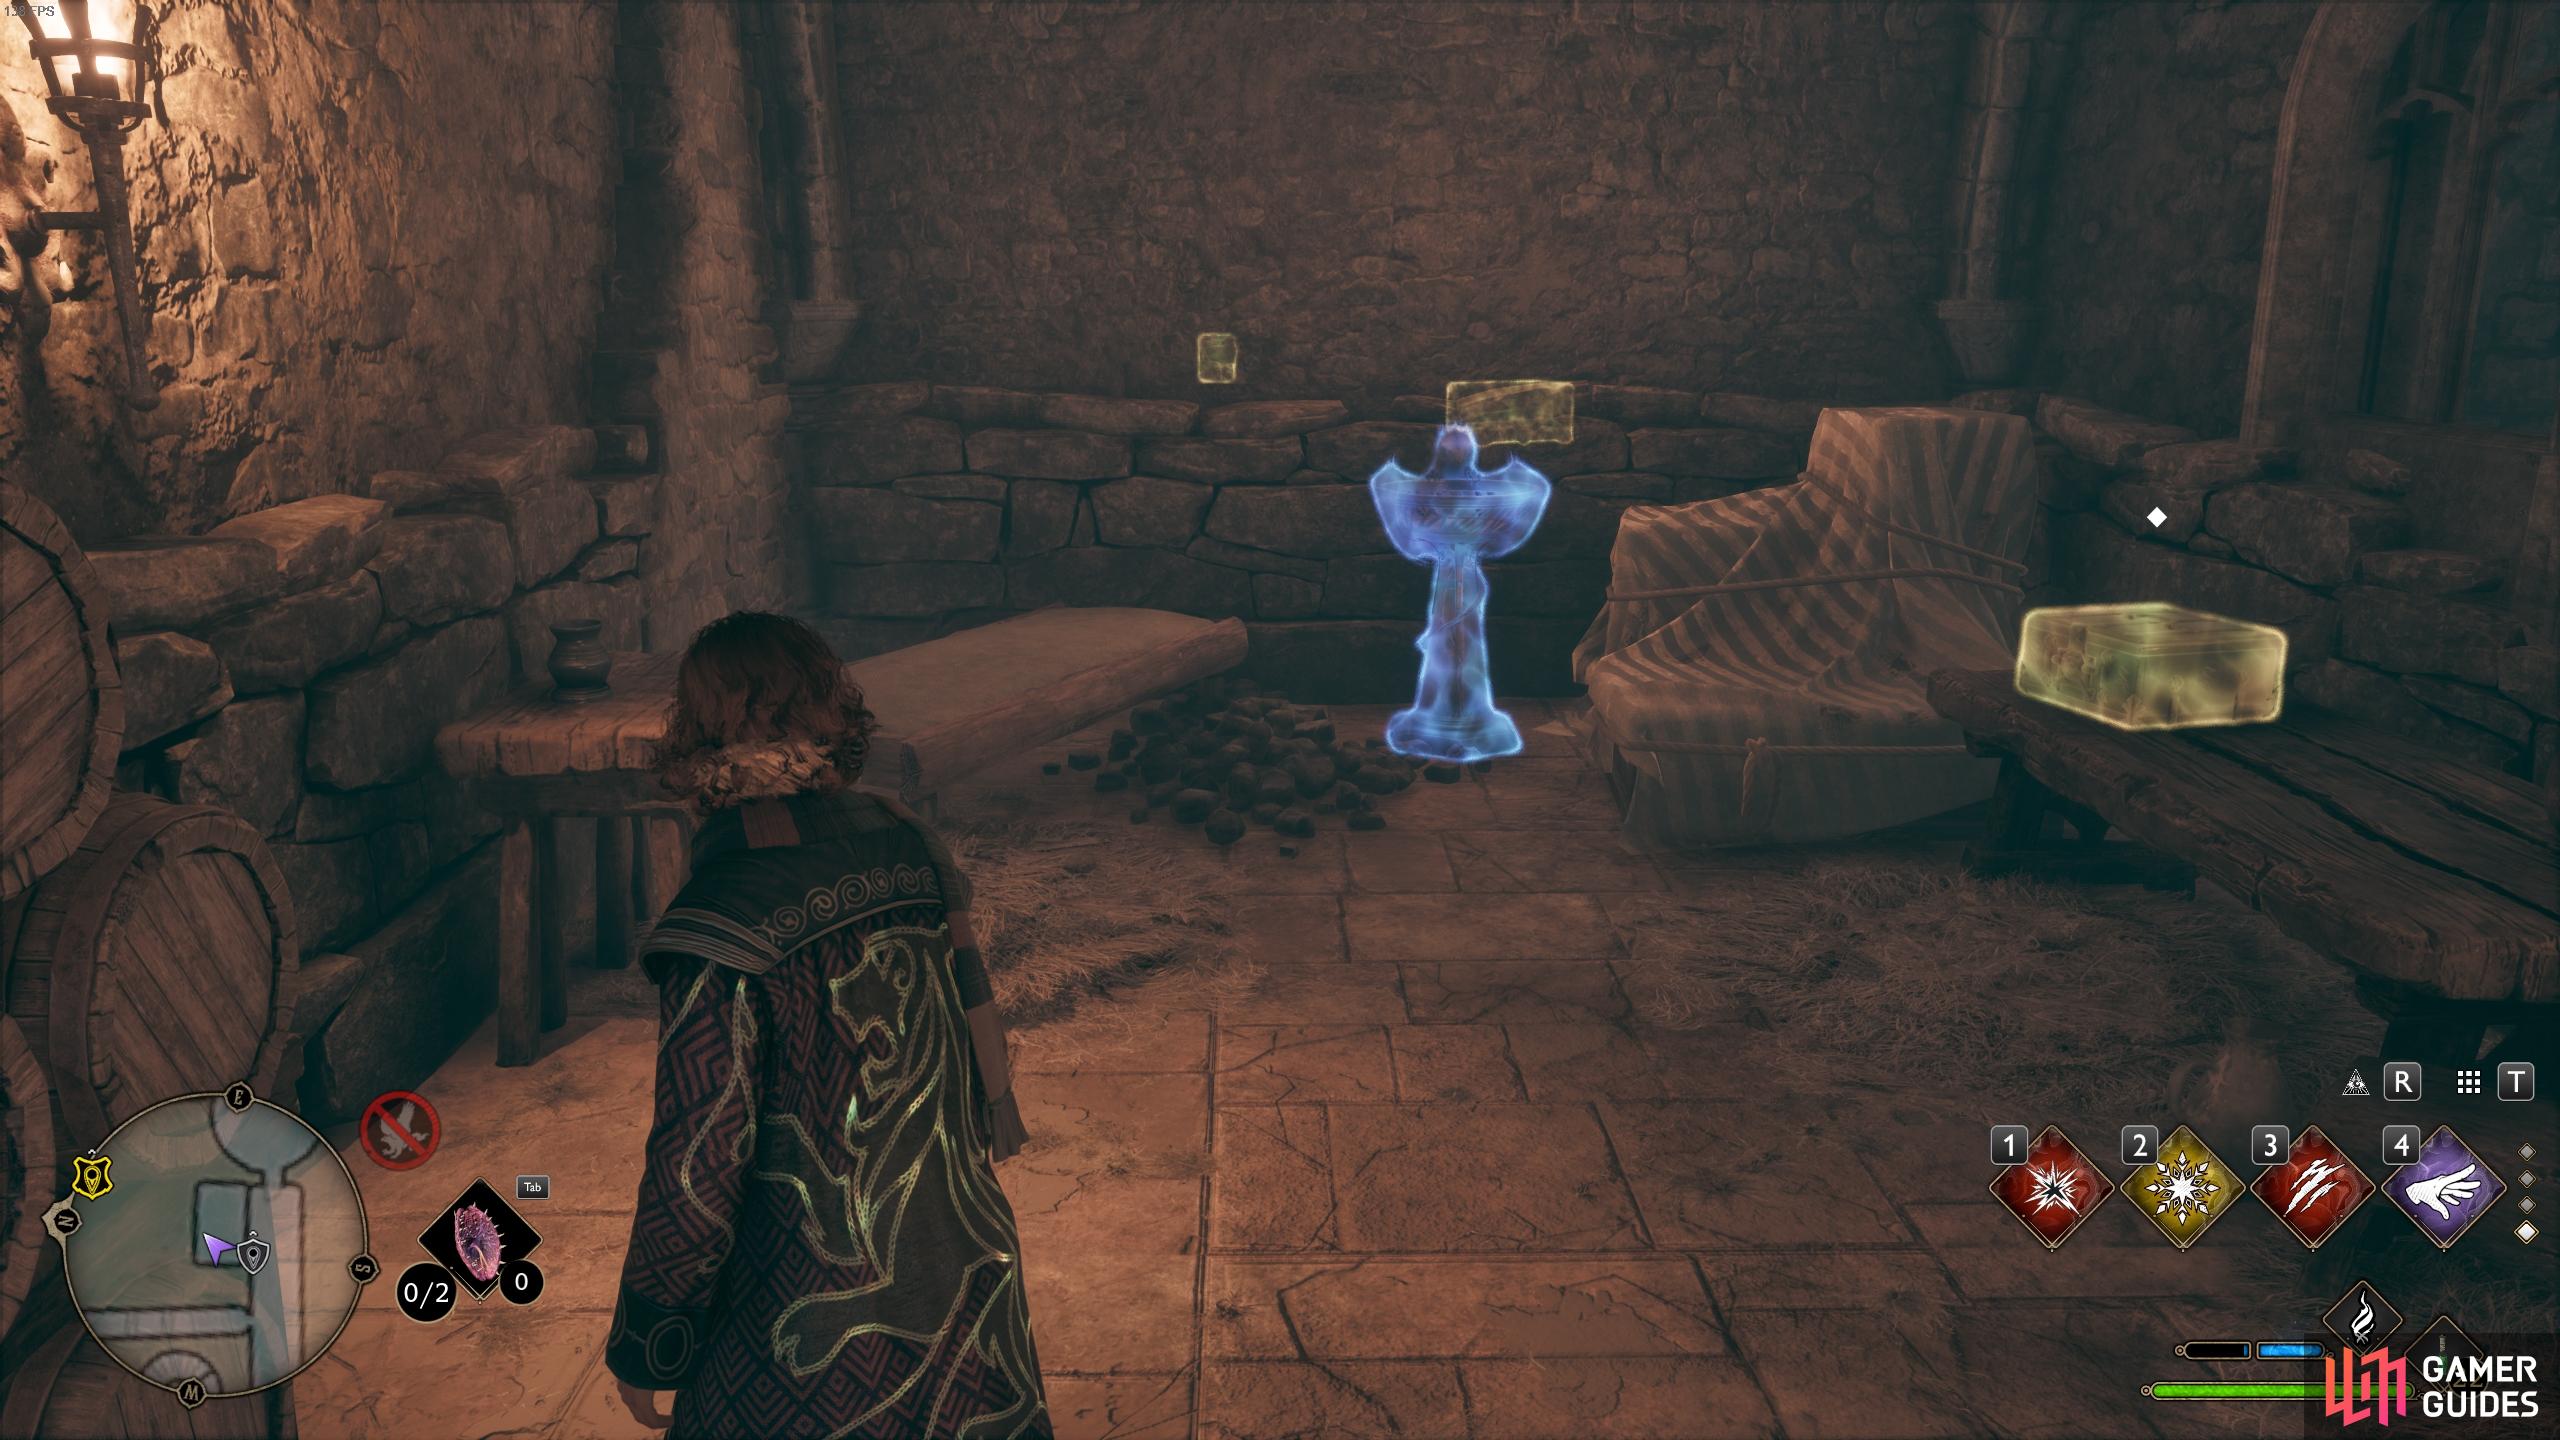
For the next one, go out the door and turn right to find another Level I Alohomora locked gate here. Go down the steps on the other side and through the door at the end. This will lead to a chamber with ghosts in it, lit by candles with a flying page above you. Use Accio to catch it.

Use Accio to catch the flying page in the room.
Deathday Party Room - Hogwarts Dungeons
In the same room where you caught the flying page, look to the eastern side and cast Revelio to reveal a page which describes the main purpose of this room.
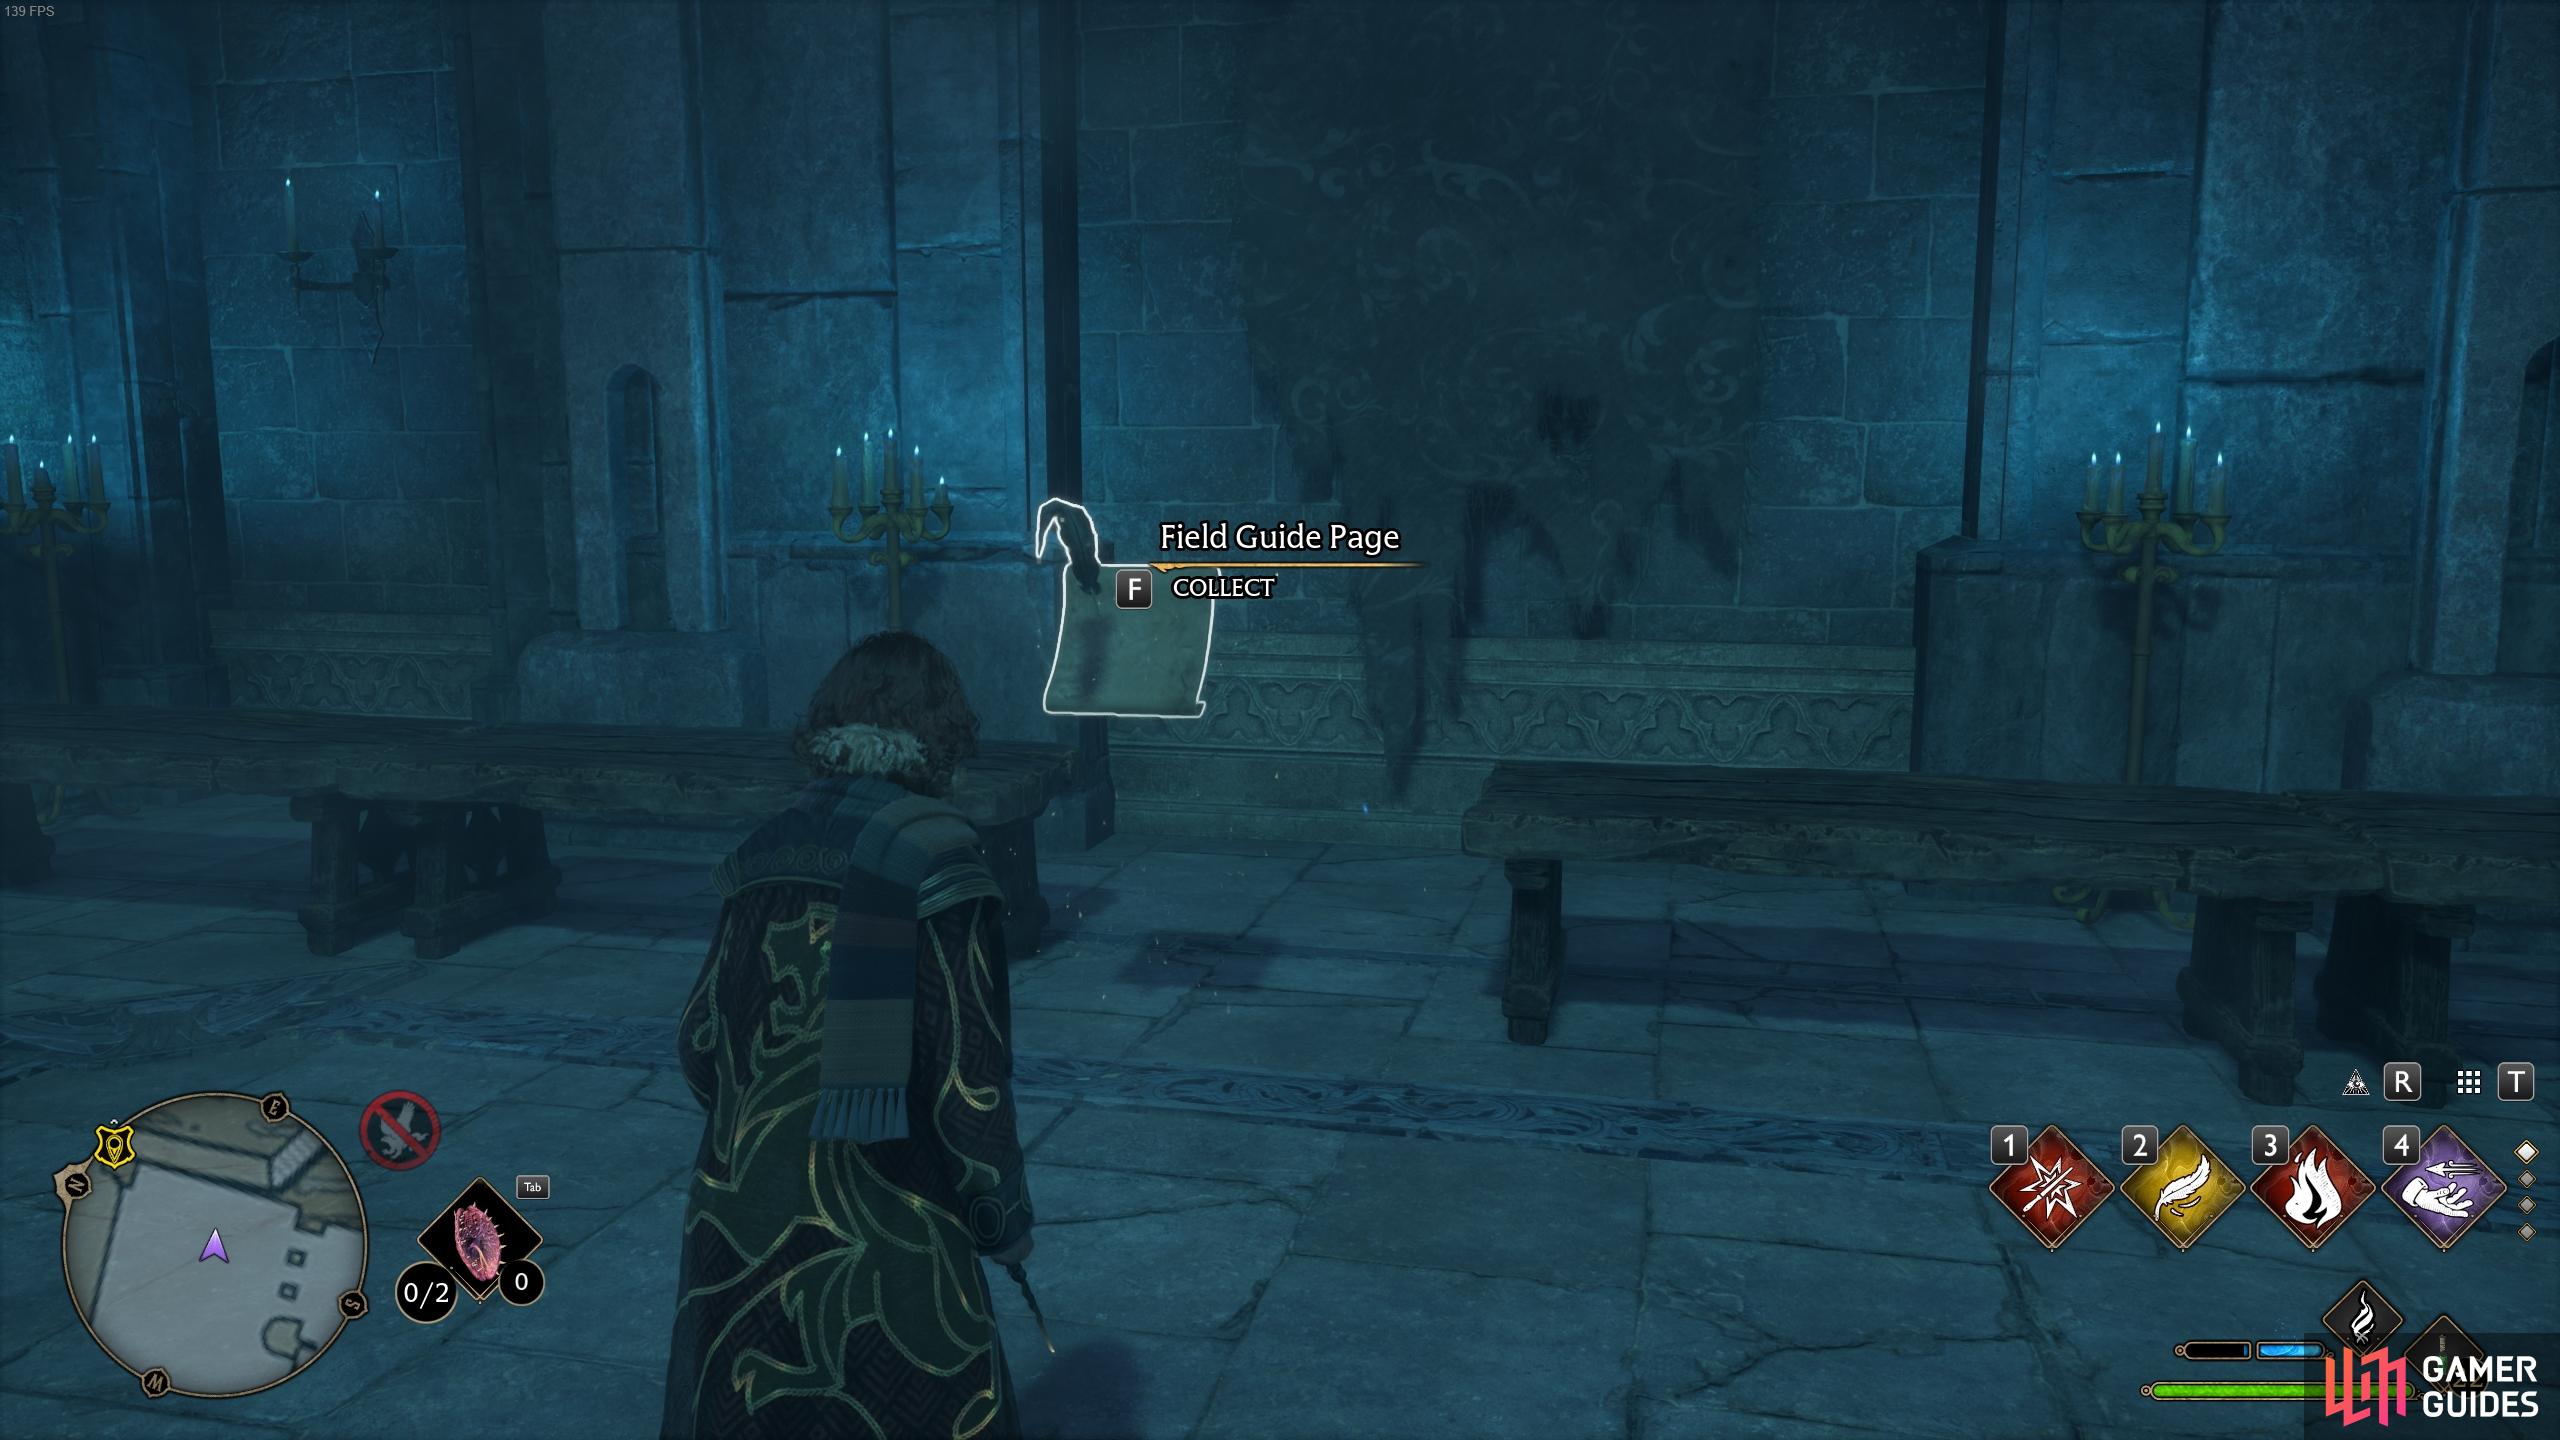
Cast Revelio on the eastern side of the room to reveal the page.
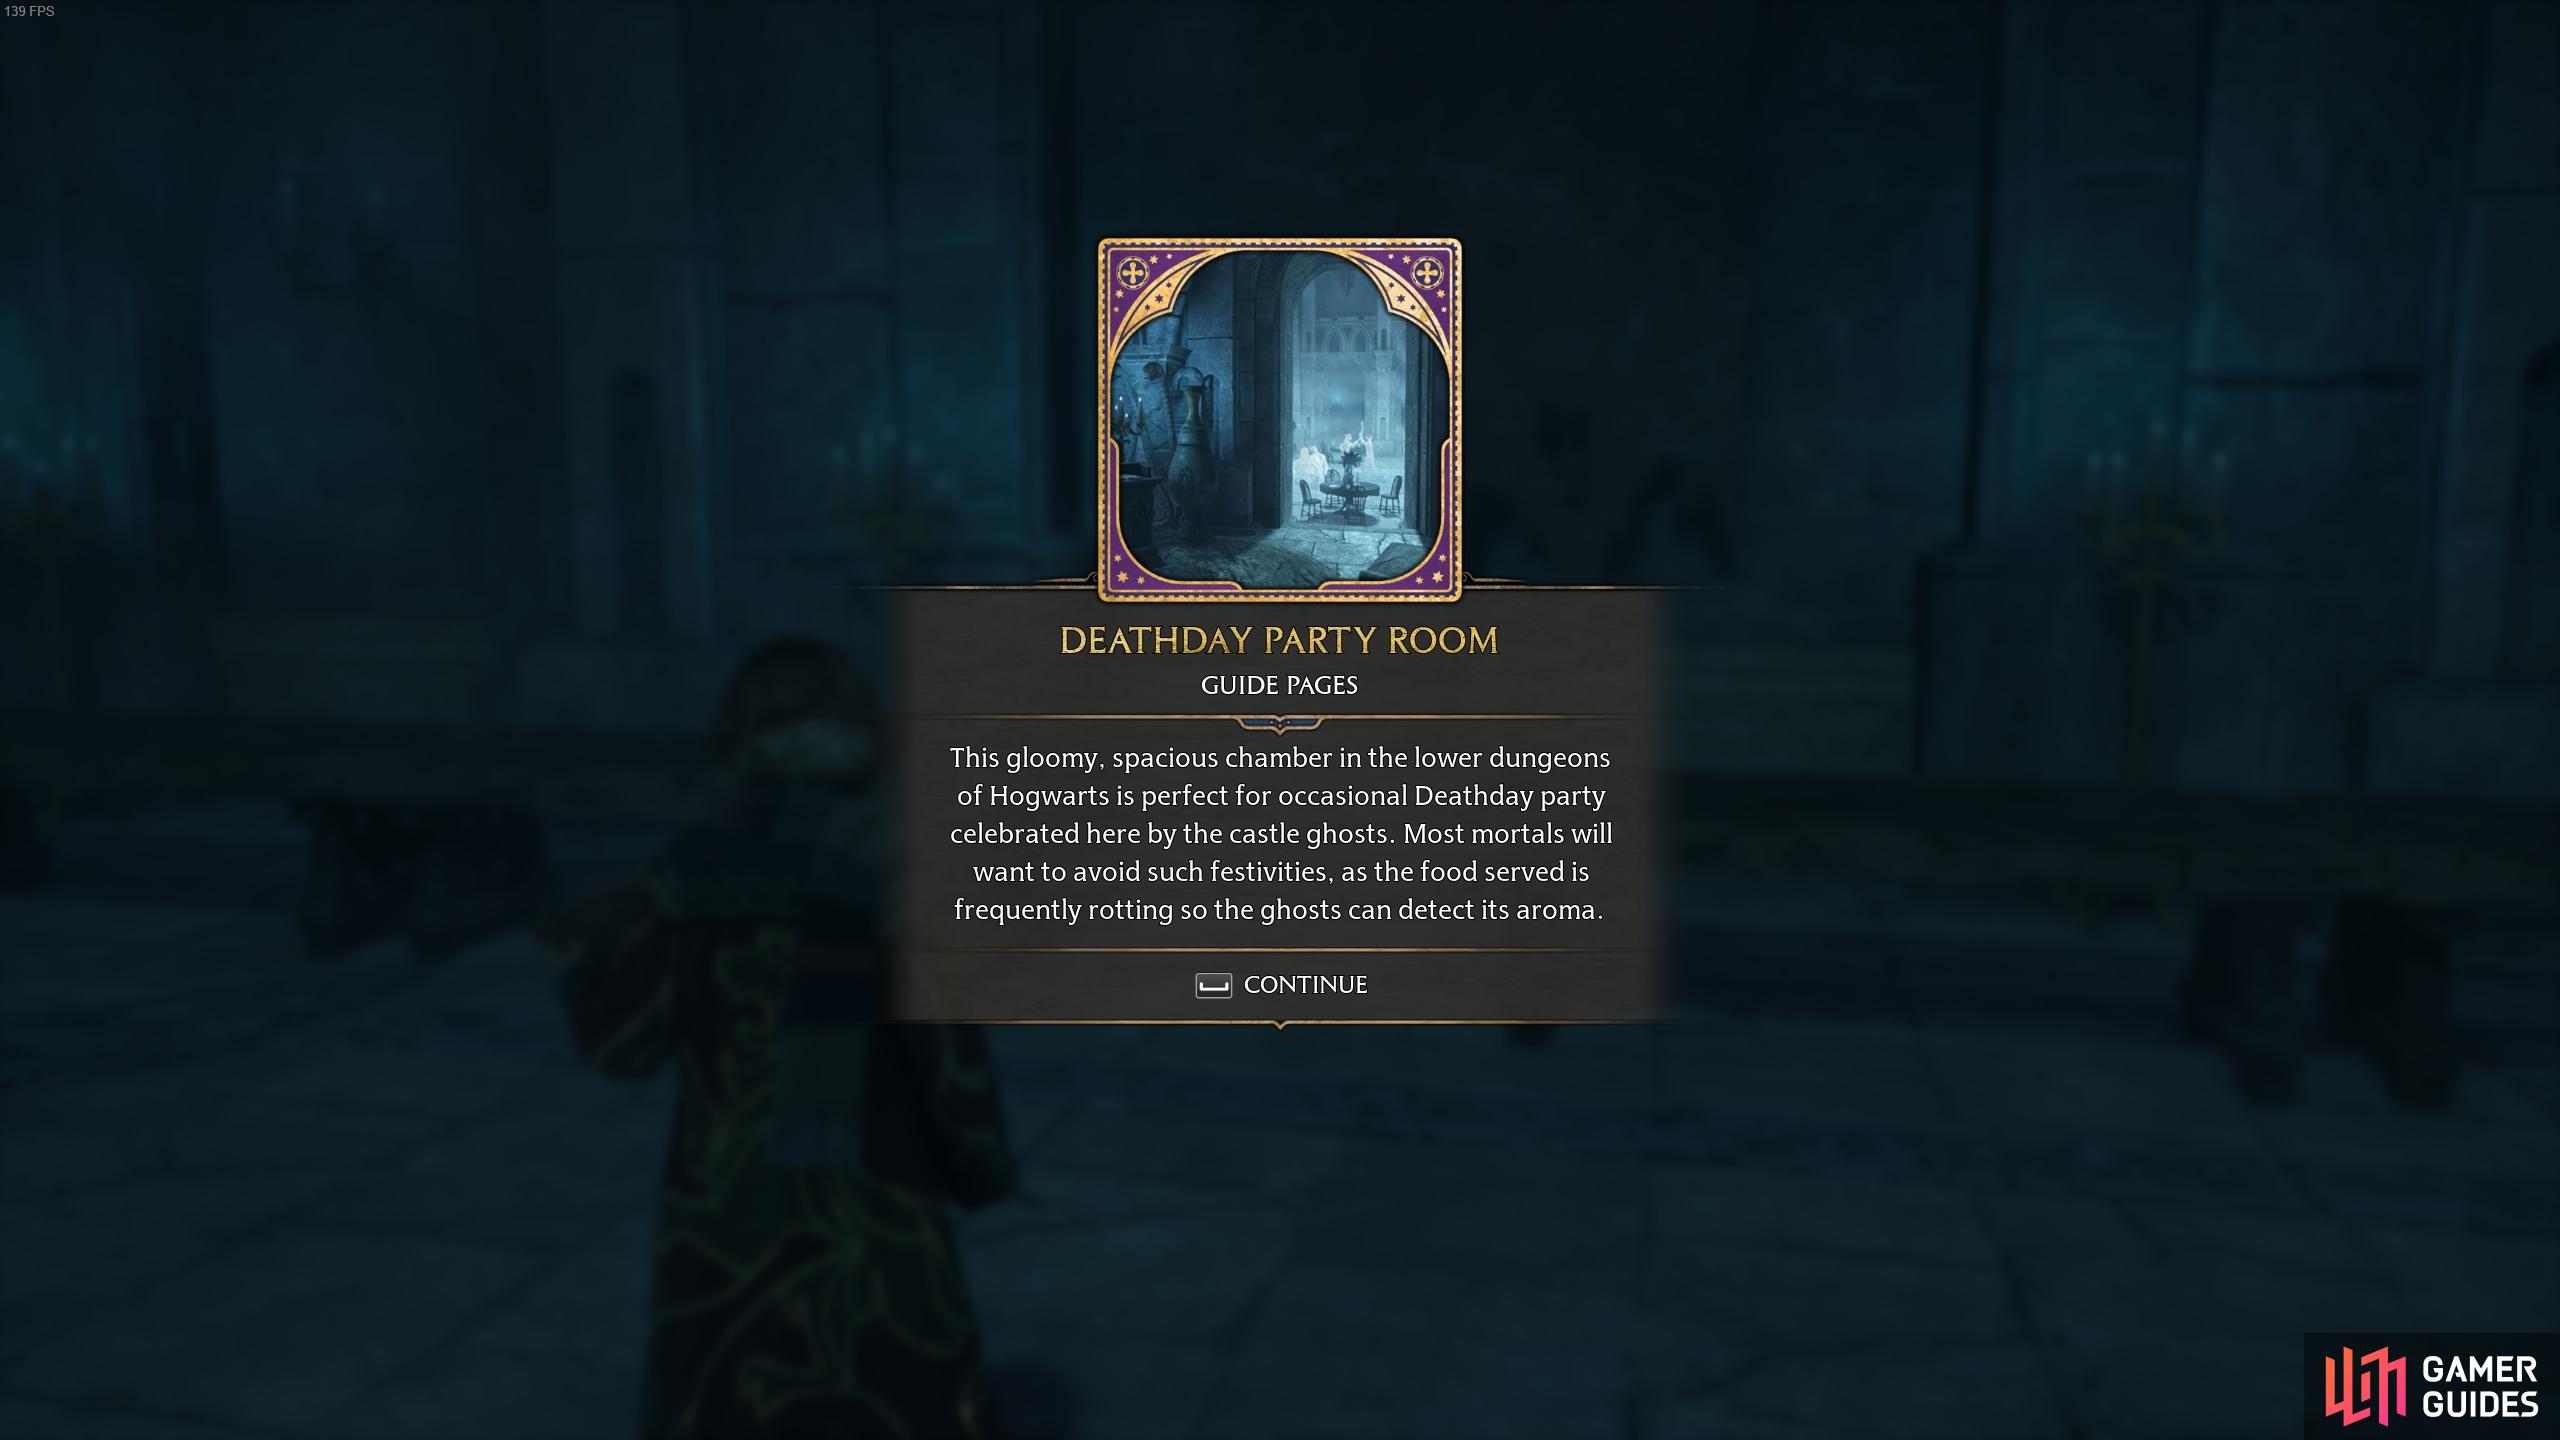
The description for the Deathday Party Room page.
Headless Hunt Tapestry - Hogwarts Dungeons
In the same room where you found the above page, look to the western side for a tapestry on the wall. Cast Revelio to reveal its page.
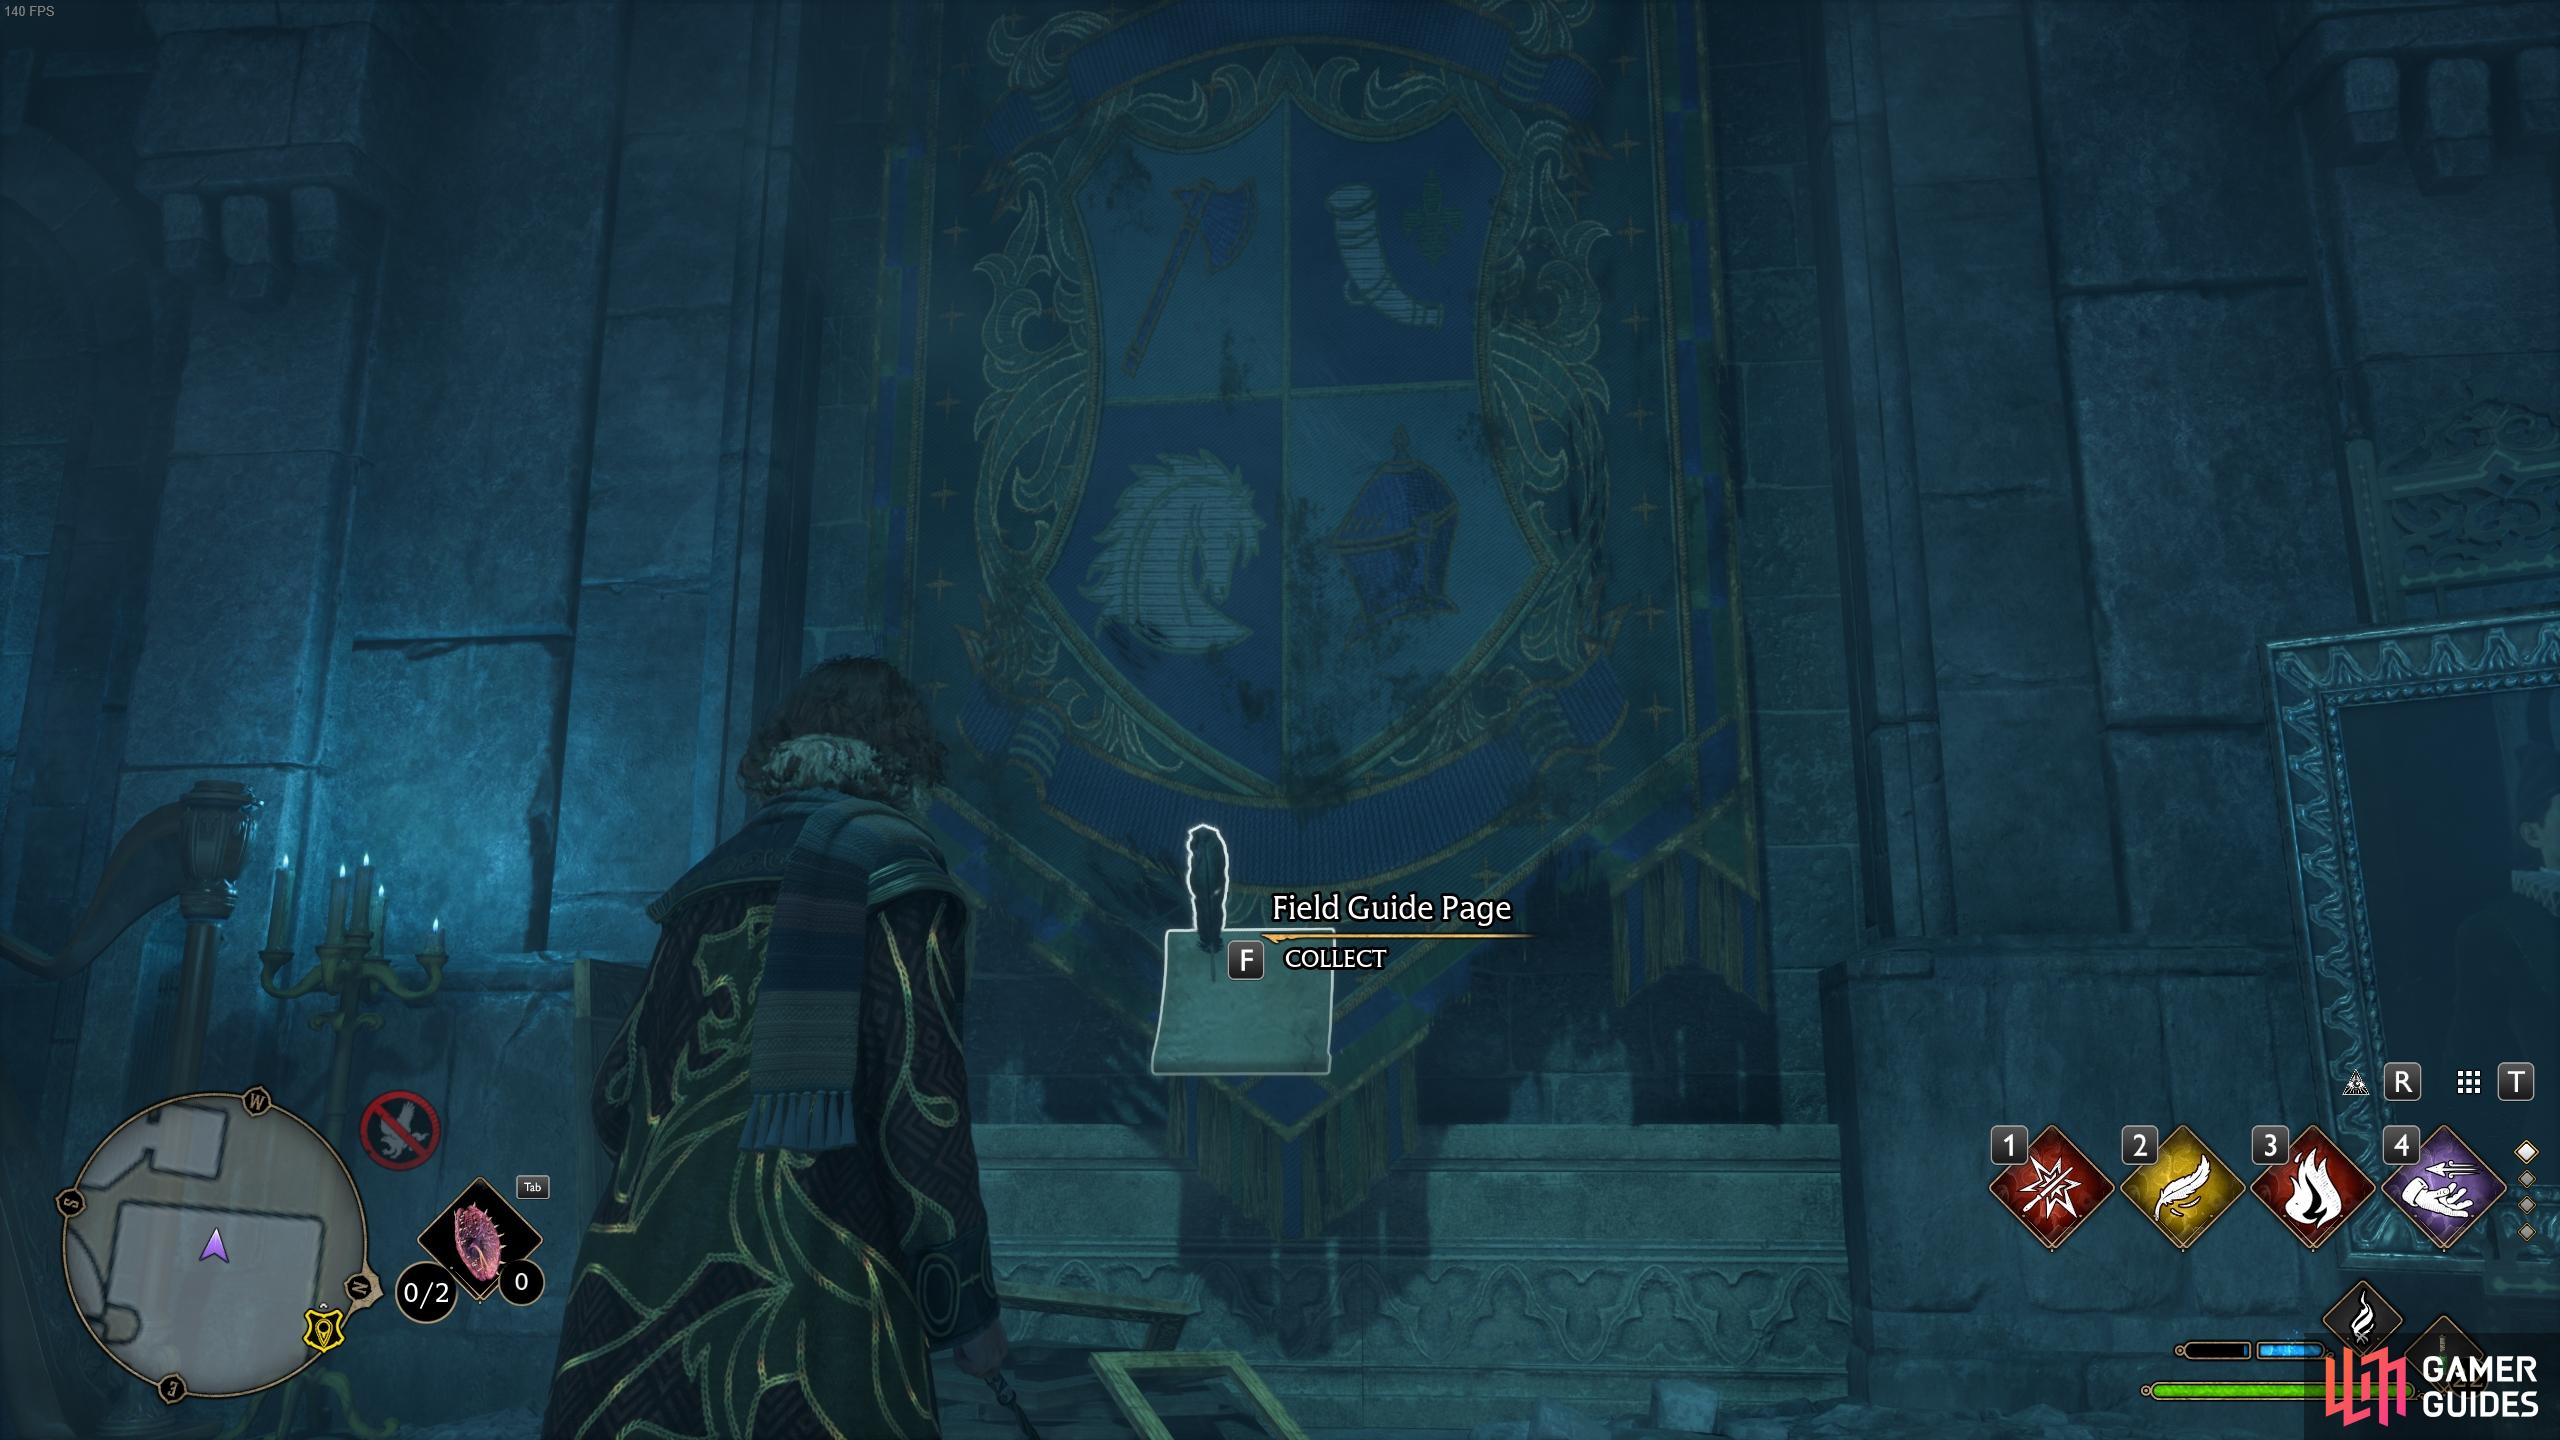
Cast Revelio in front of the tapestry to reveal the page.
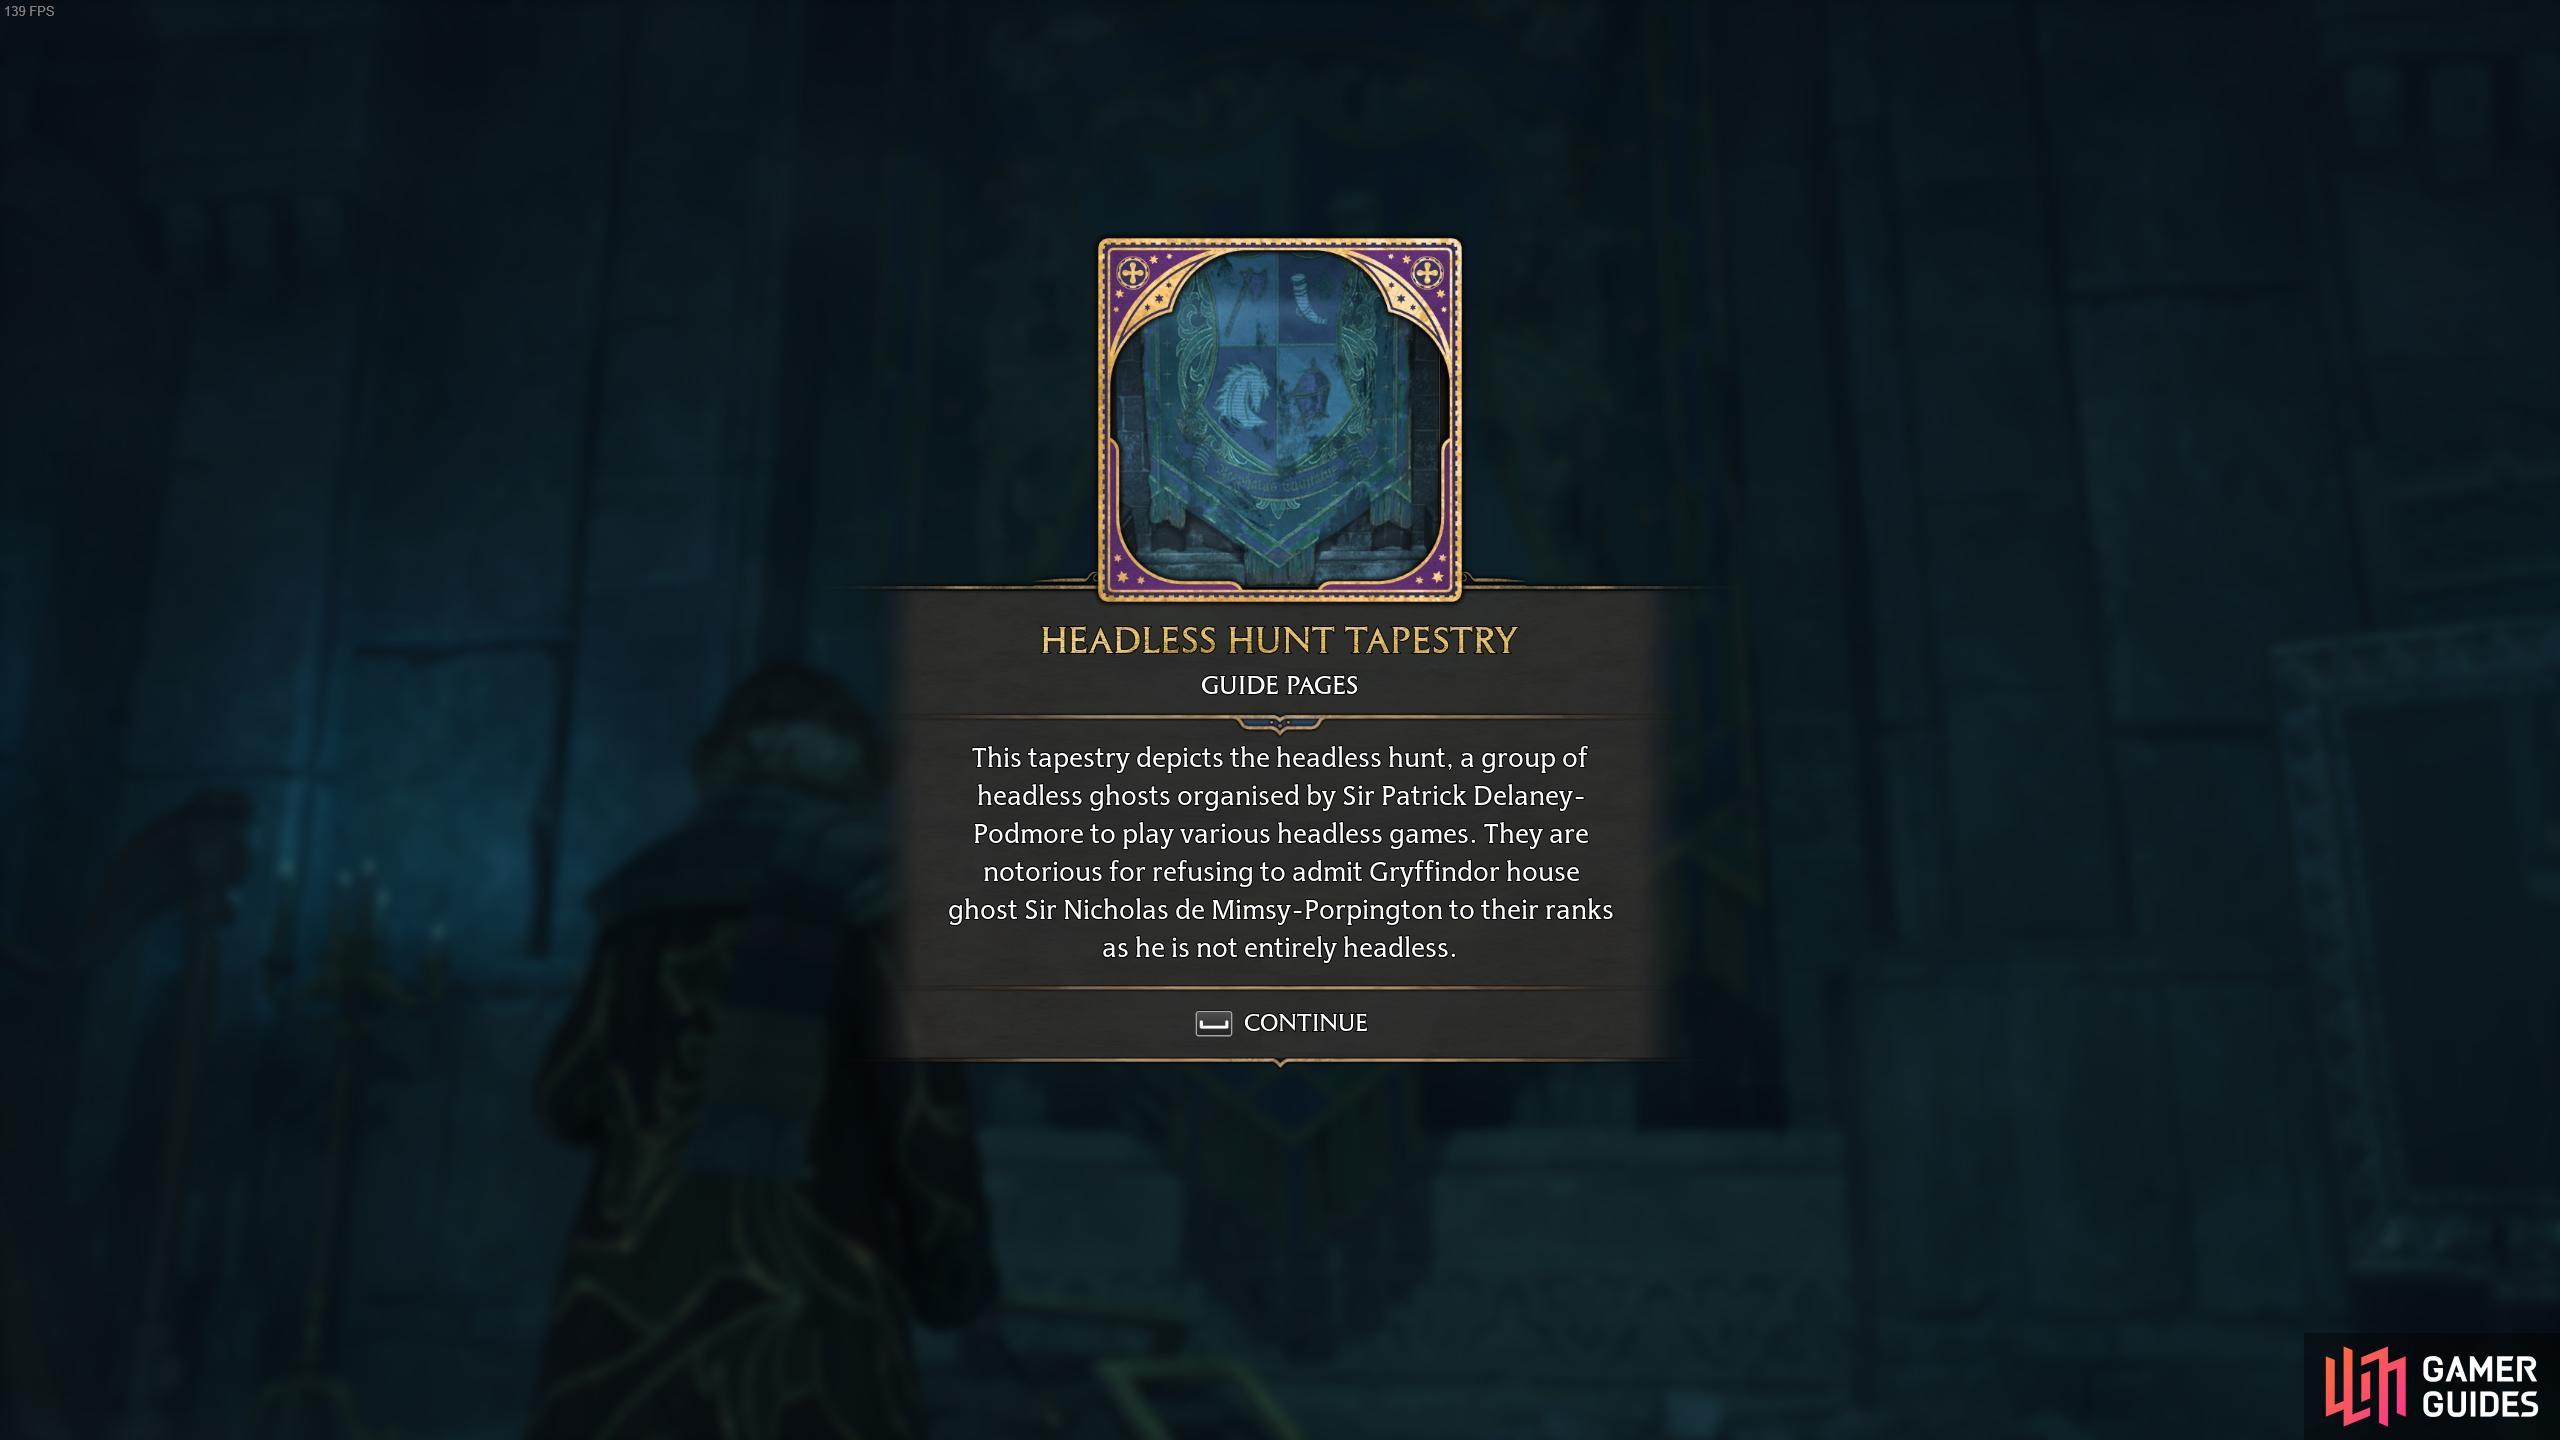
The description for the Headless Hunt Tapestry.
House Point Hourglasses - Great Hall
To reach this Revelio Field Guide Page, go to the Great Hall Floo Flame and then turn around to open the large doors to the north. Go through these and then through another set of doors to the north, beyond which you’ll find the ![]() House Point Hourglasses to your right. Cast Revelio in front of these to reveal the page.
House Point Hourglasses to your right. Cast Revelio in front of these to reveal the page.

Cast Revelio in front of the hourglasses to reveal the page.
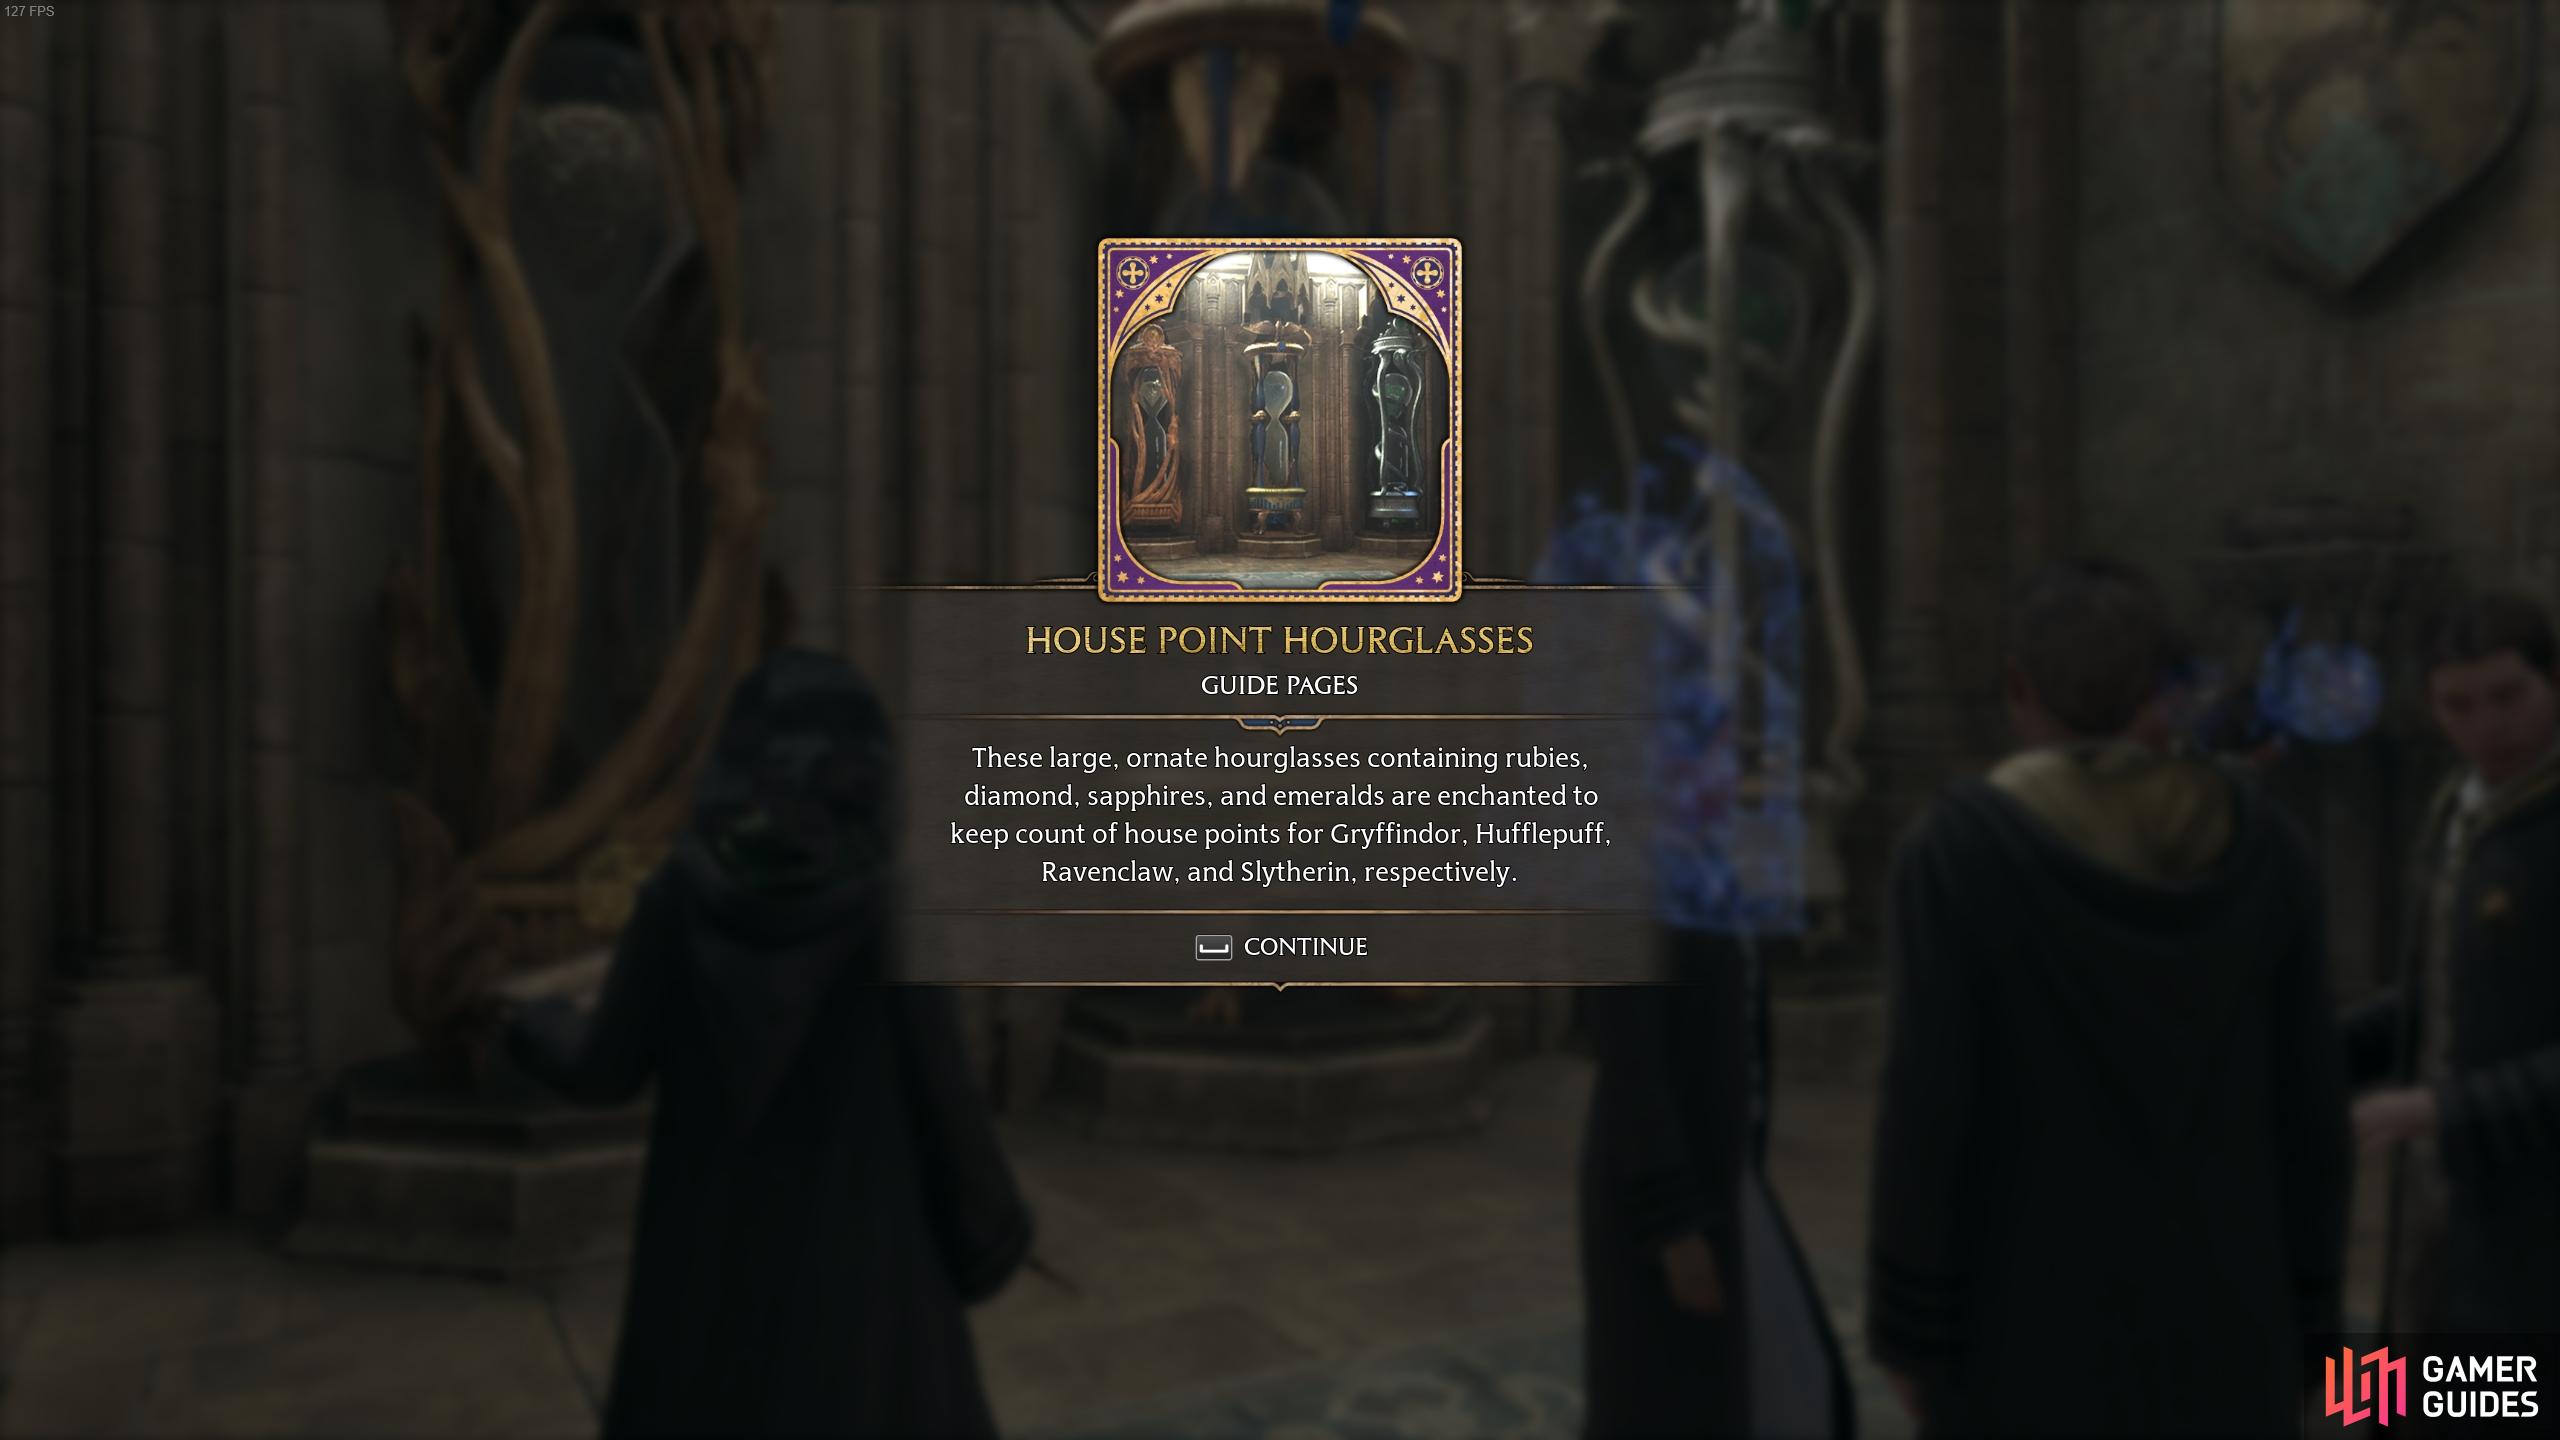
The description for the House Point Hourglasses page.
Pear Portrait - Great Hall
For this next one, turn around and go down the set of stairs to the west. Turn left as you reach the Grand Staircase Floo Flame, and go down the spiral staircase here. There’s a Revelio page halfway down but it counts for a different area. You can still collect it if you wish. Continue down the staircase and when you reach the bottom, cast Revelio in front of the portrait of the pears, which serves as an entrance to the Hogwarts Kitchens.
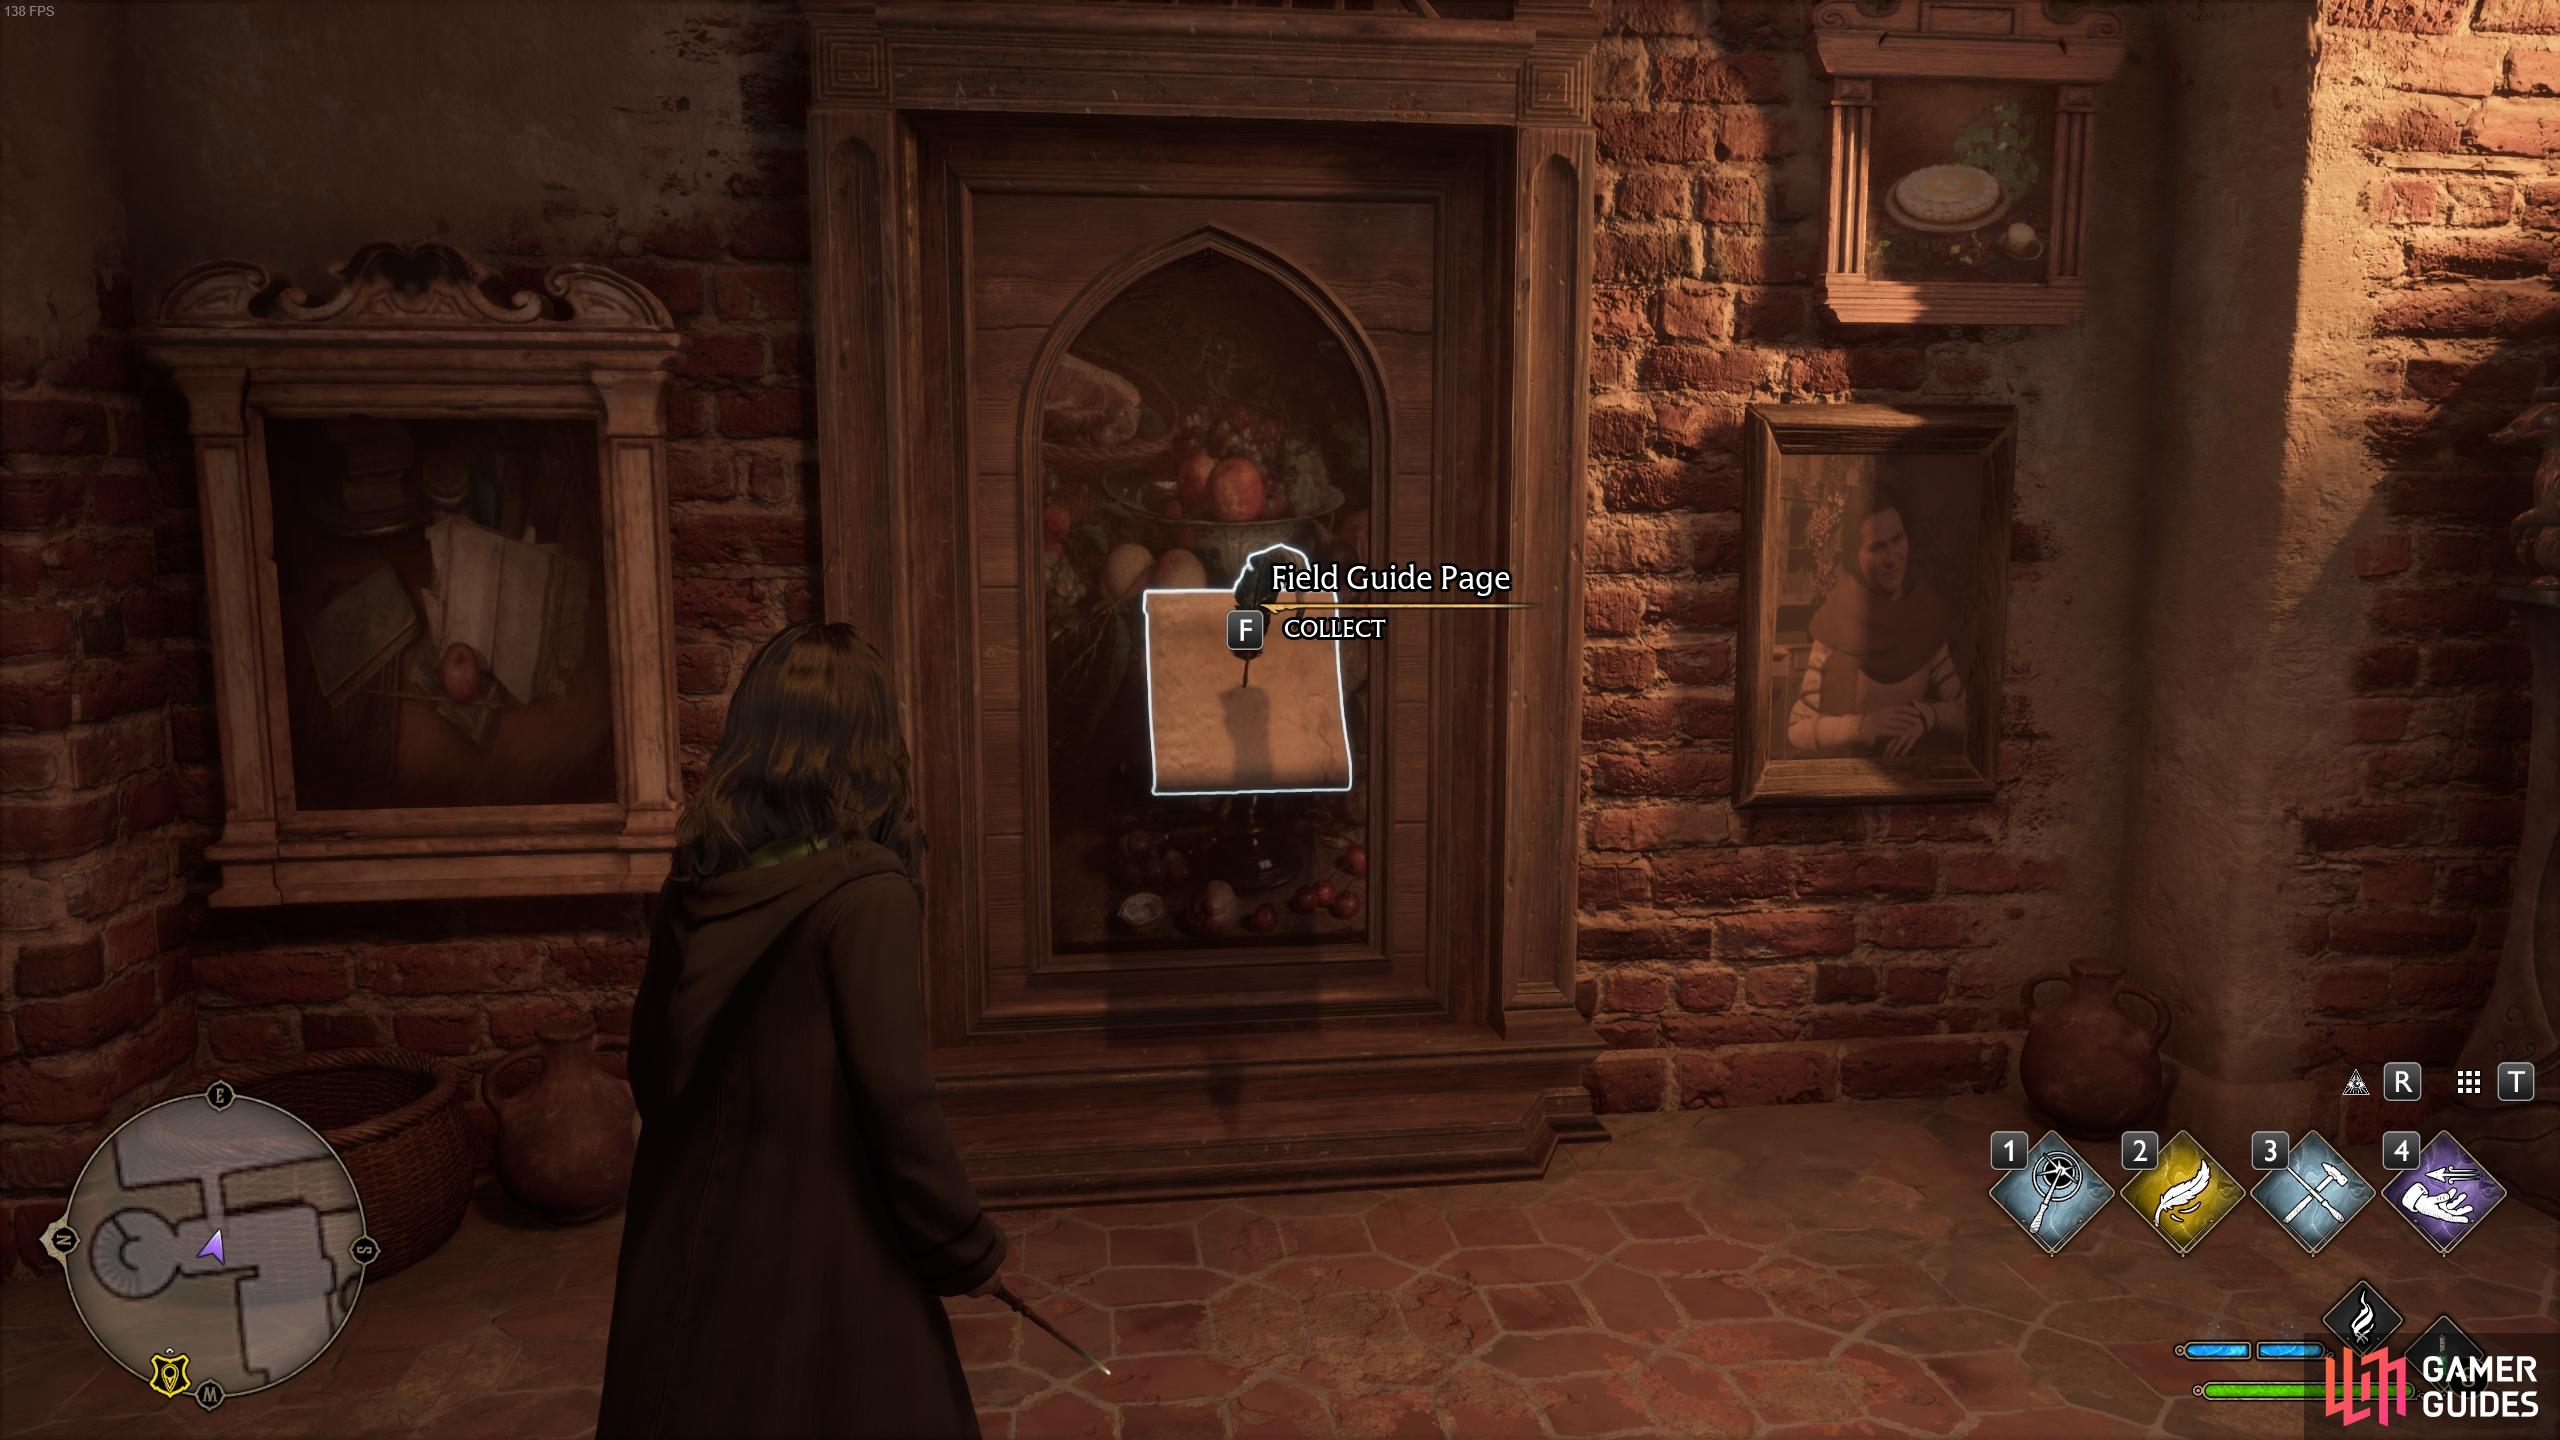
Cast Revelio in front of the pear portrait to reveal its page.
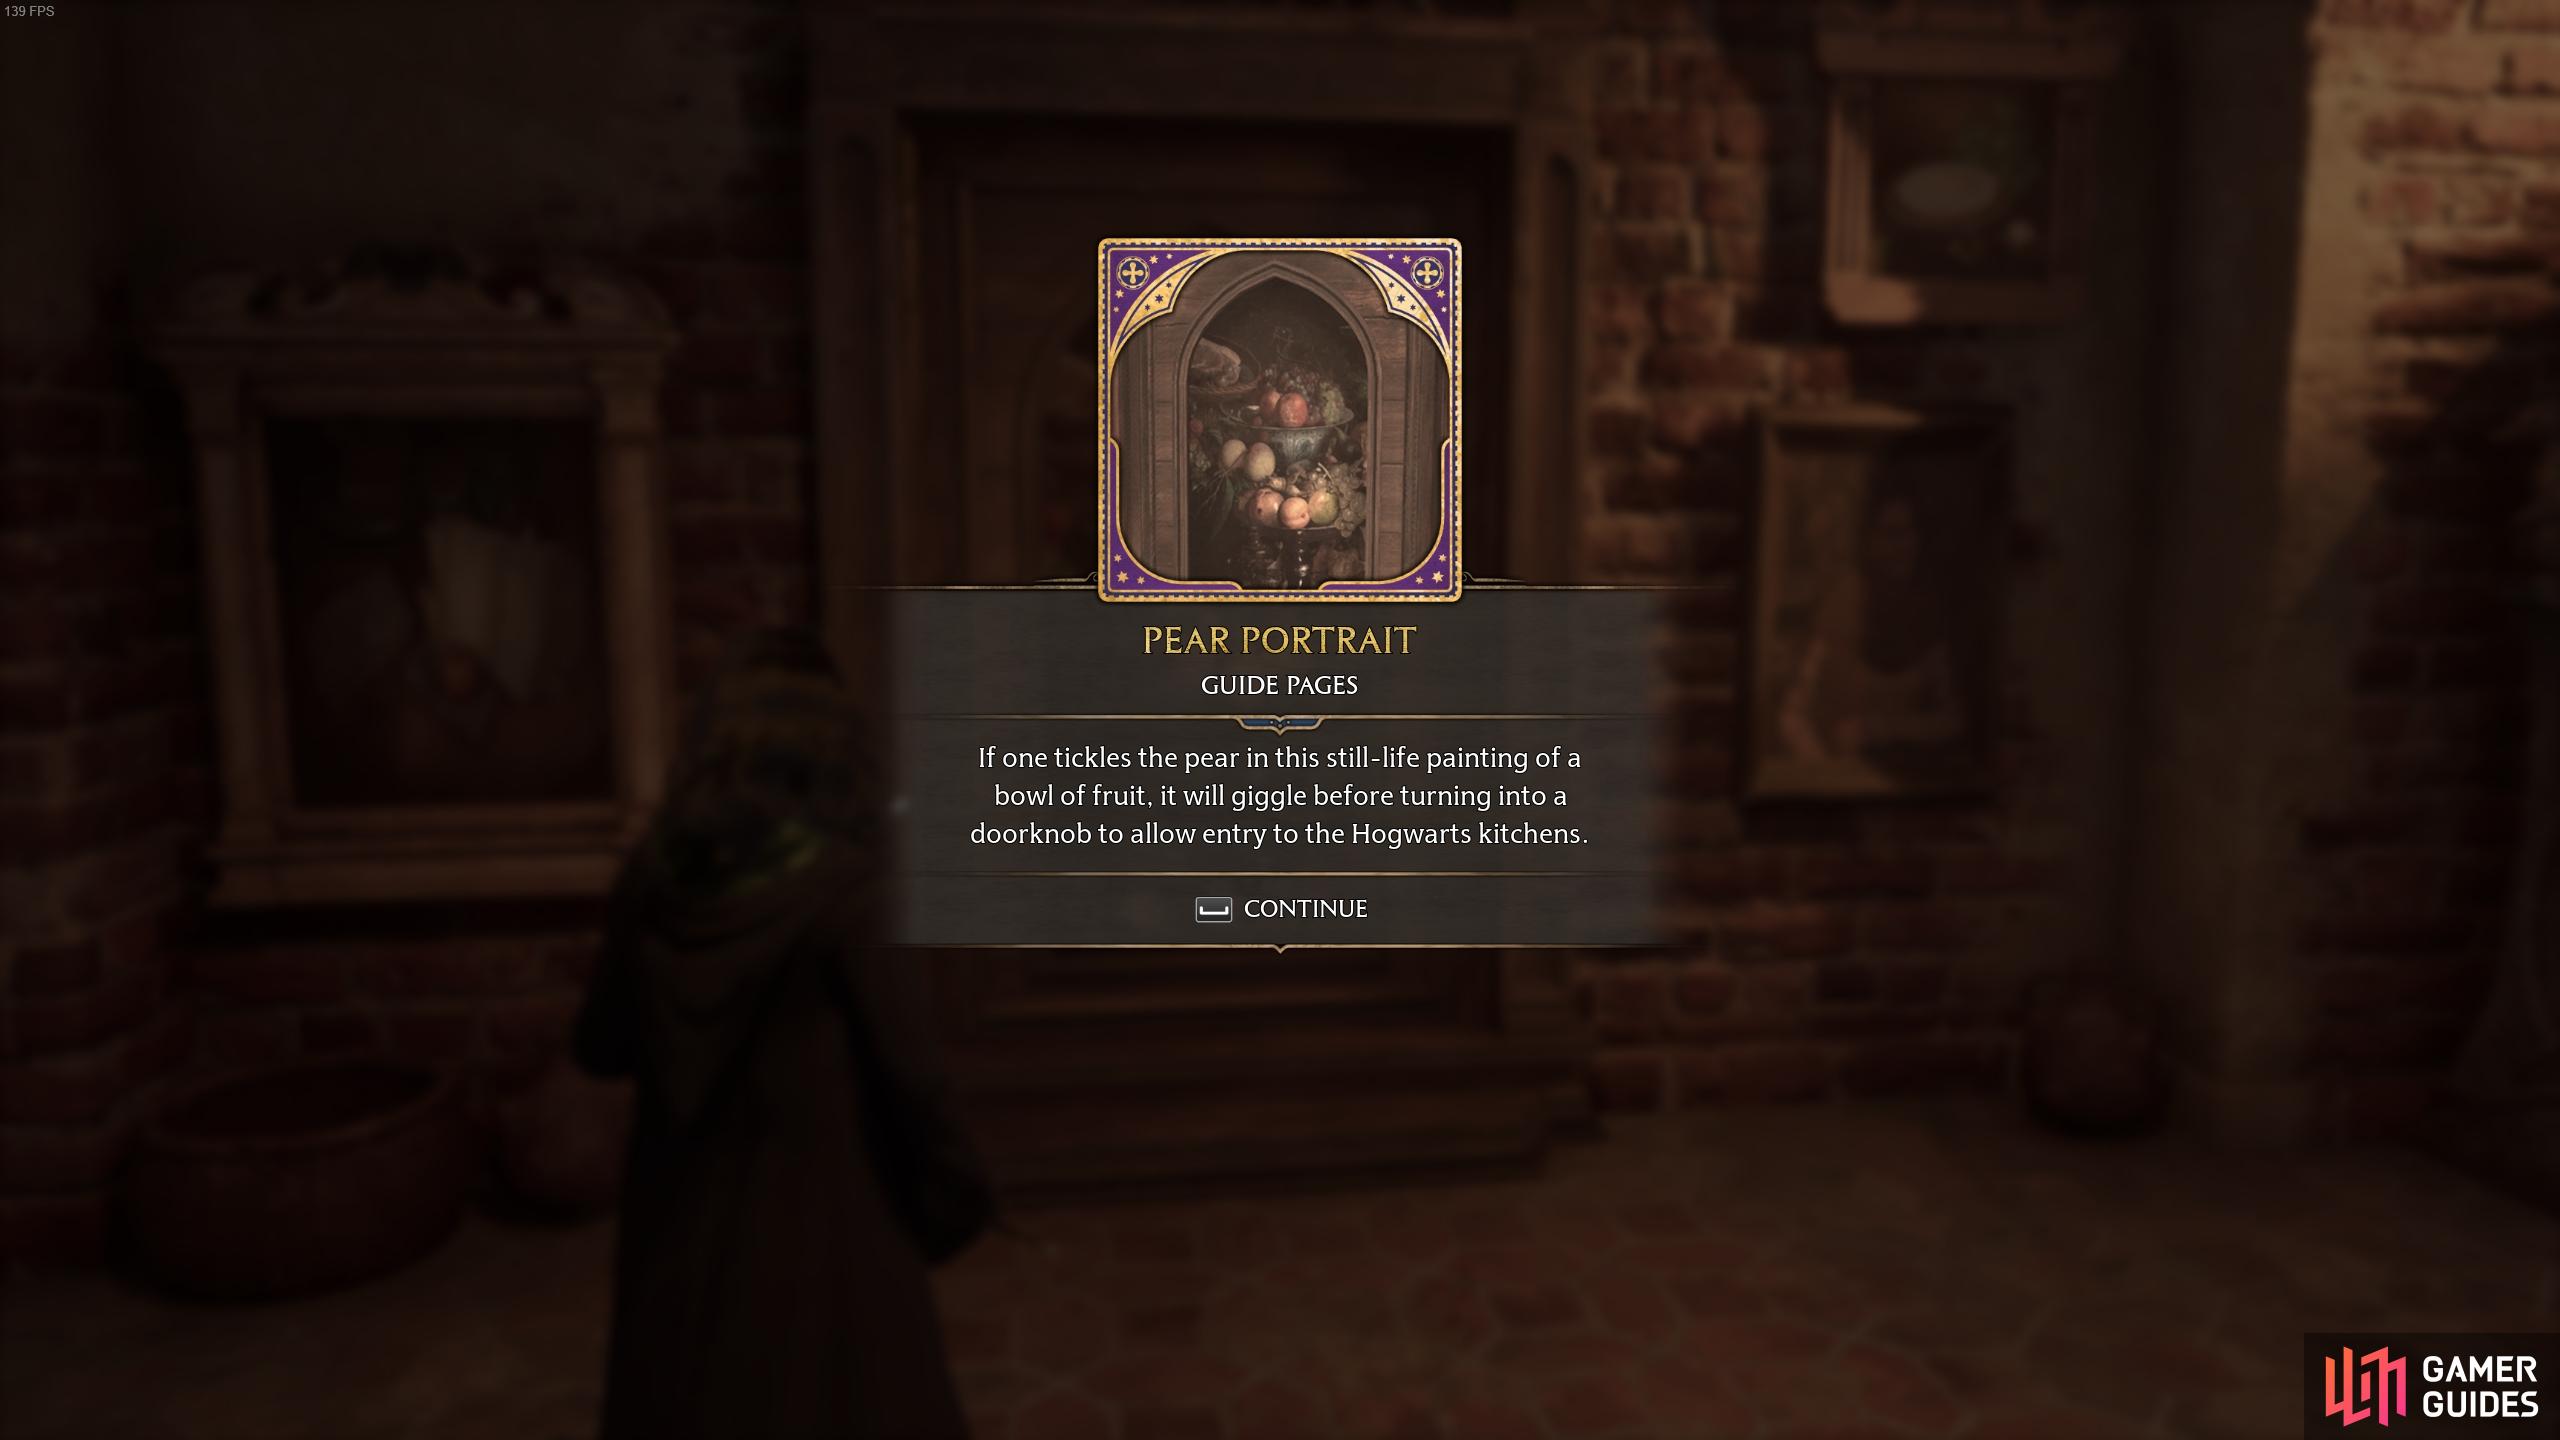
The description for the Pear Portrait page.
Kitchen Tables - Great Hall
To find this one, you’ll need to enter the kitchens by interacting with the pear portrait. This can only be done once you’ve reached the point in the main story where you enter the kitchens for the first time, which is slightly different for students of each house. If you’ve done this already you should be able to walk into the kitchens as you would through any normal door. Once inside, go to the center of the room and cast Revelio to reveal a page for the Kitchen Tables.
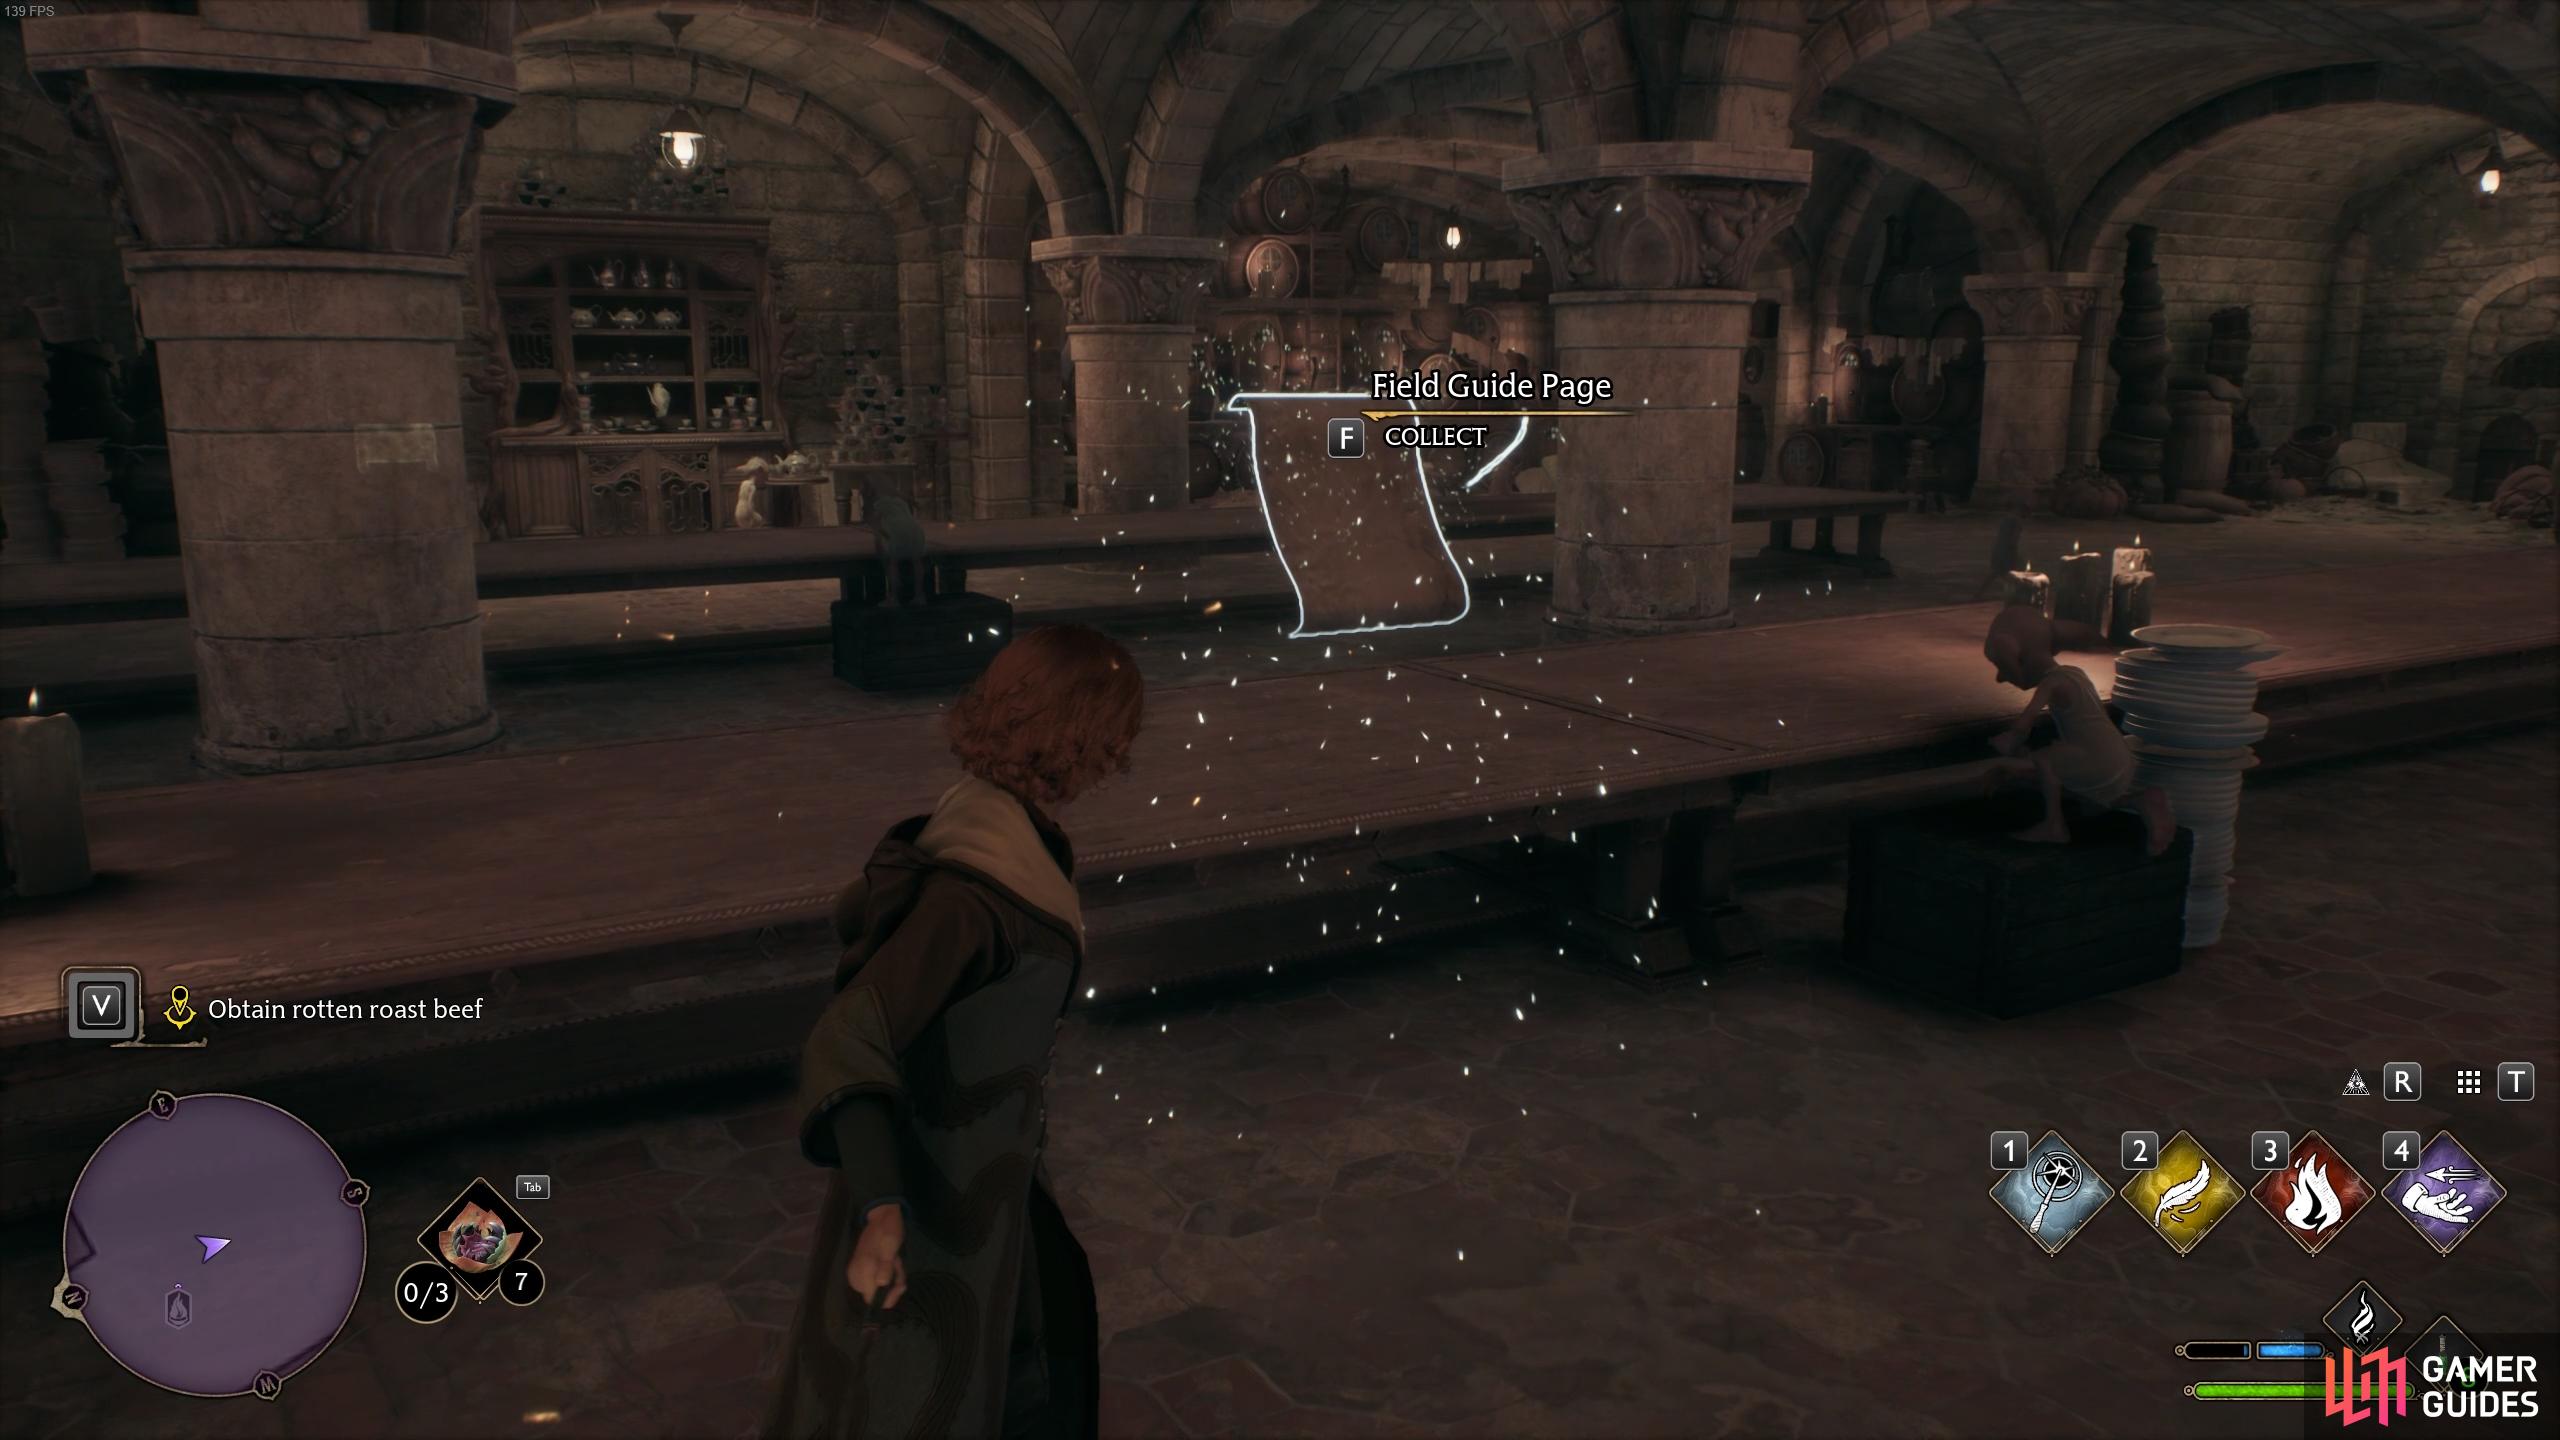
Cast Revelio in the center of the room to reveal this page.
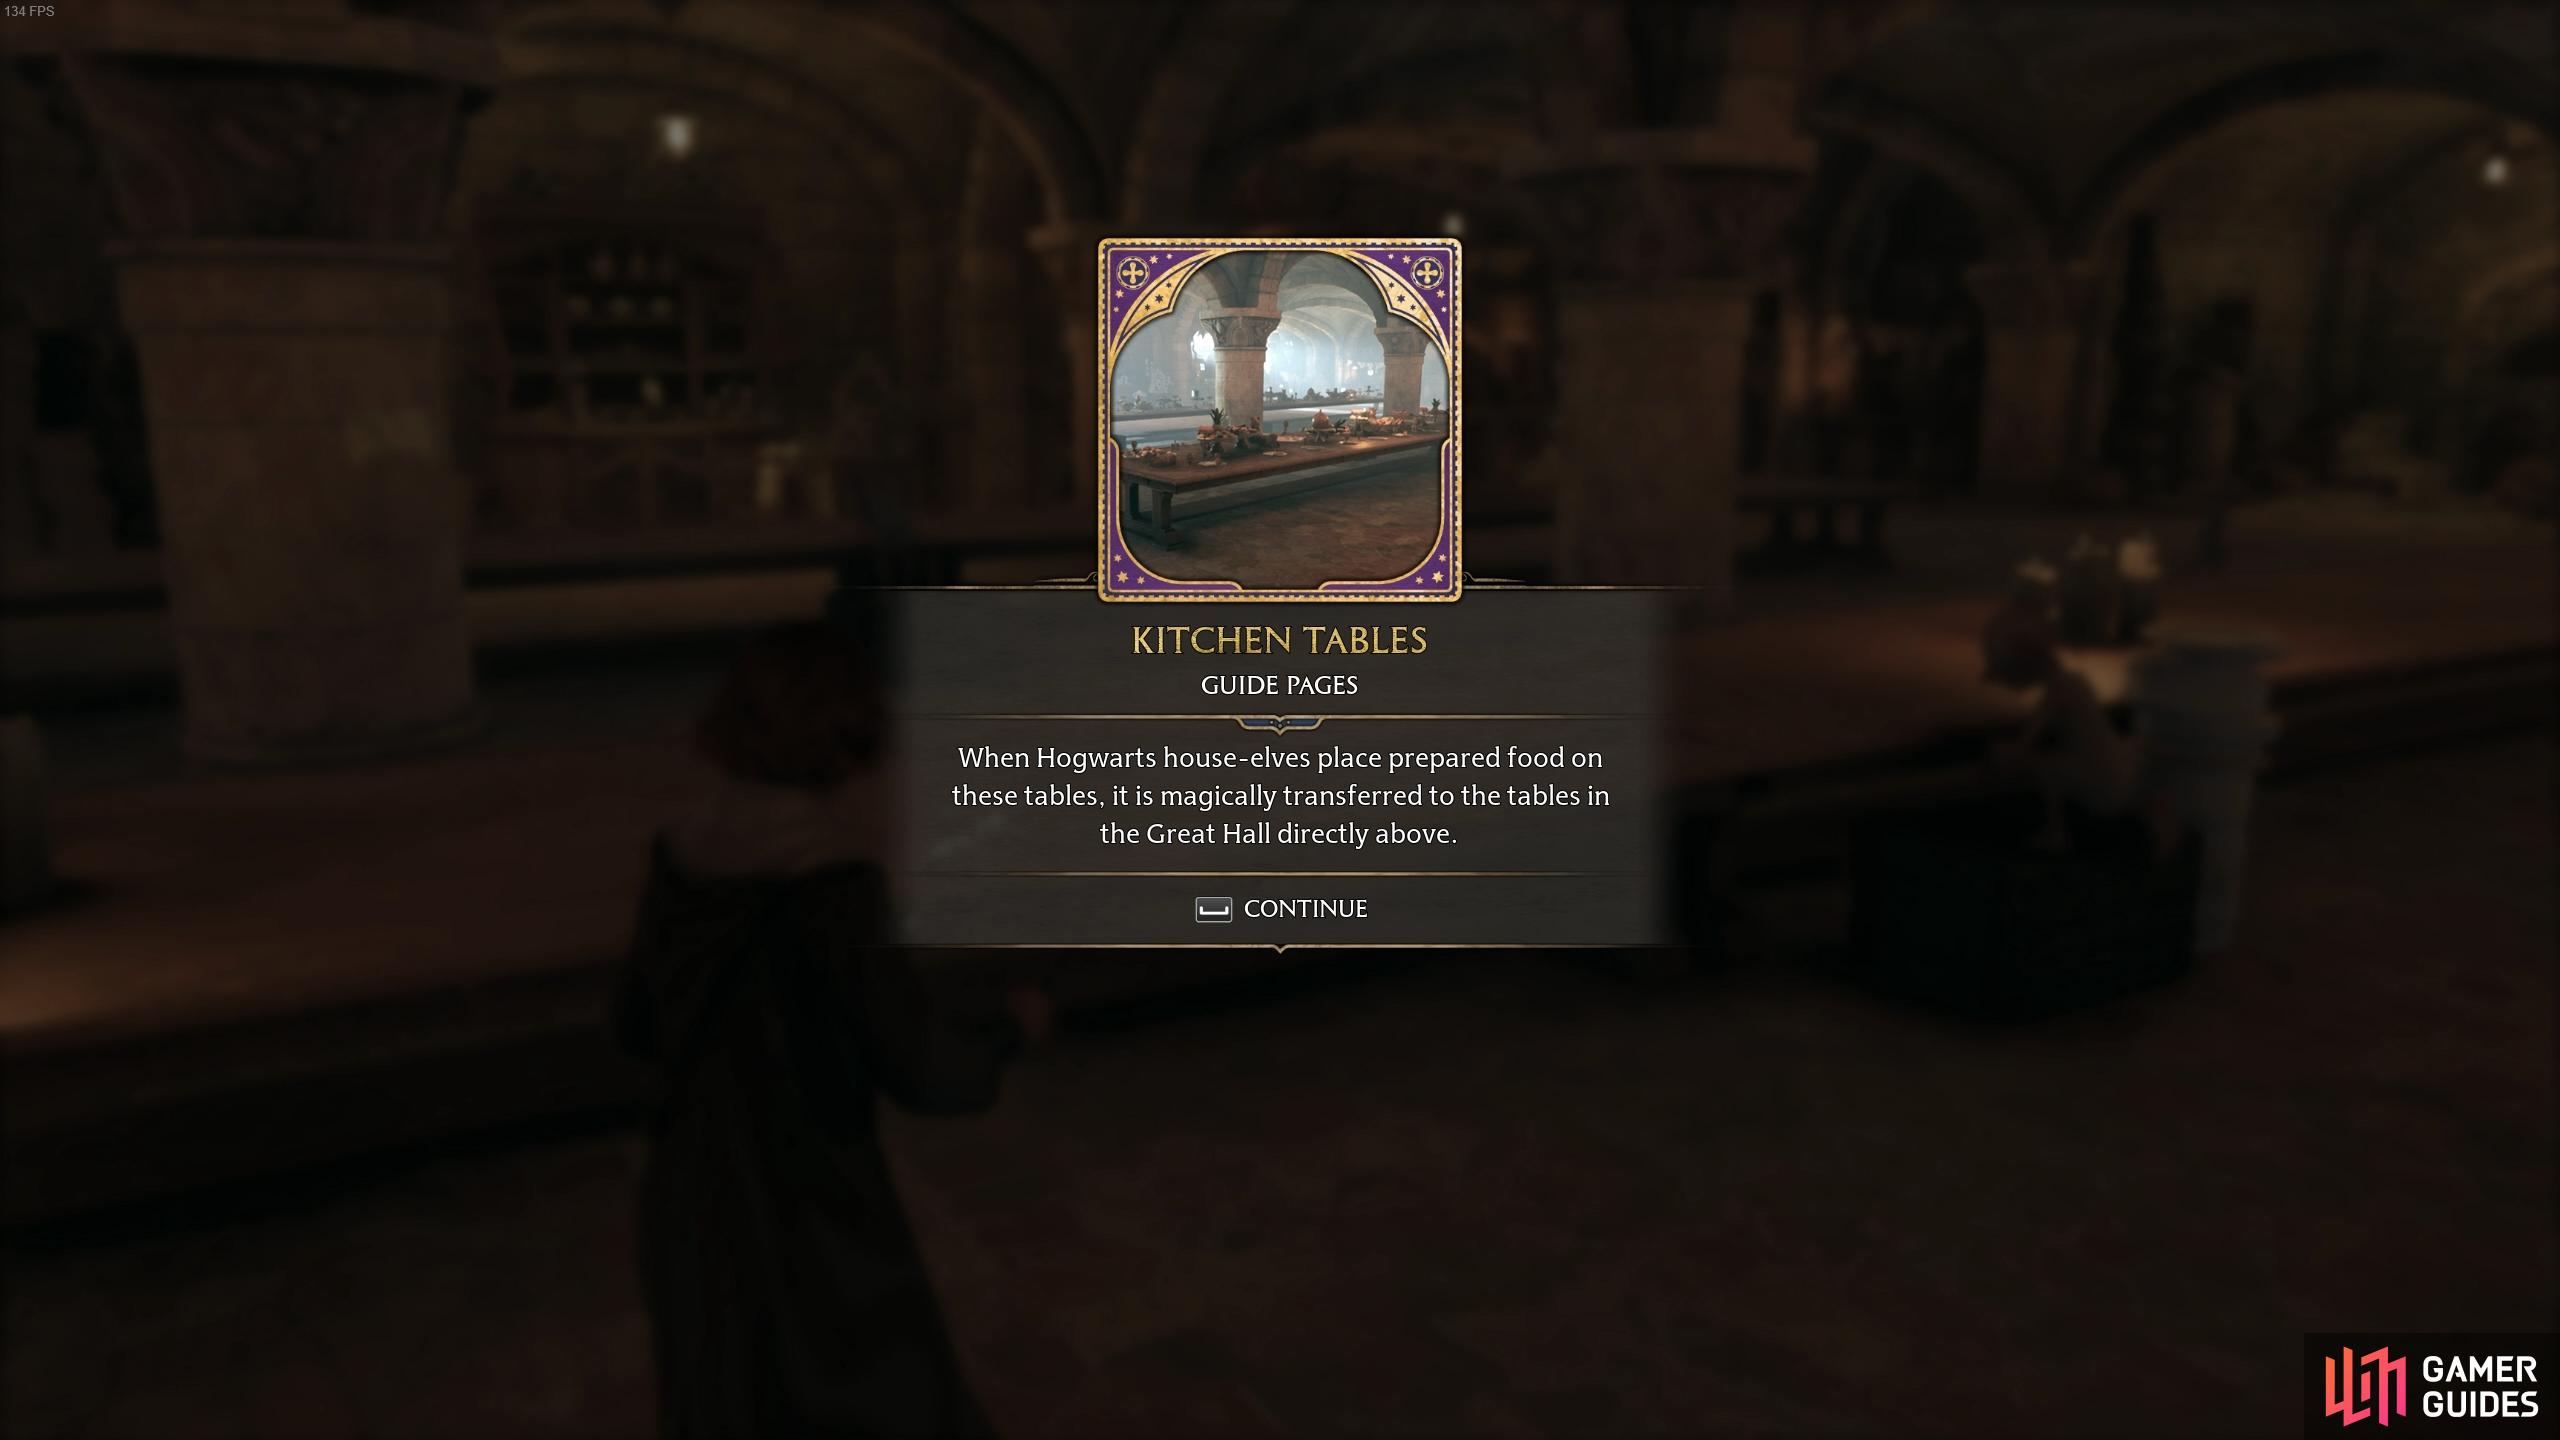
The description for the Kitchen Tables page.
House-Elf Living Quarters - Great Hall
This one is also in the Hogwarts Kitchen, but on the eastern side of the room. Cast Revelio in front of the barrels here to reveal the page for the House-Elf Living Quarters.
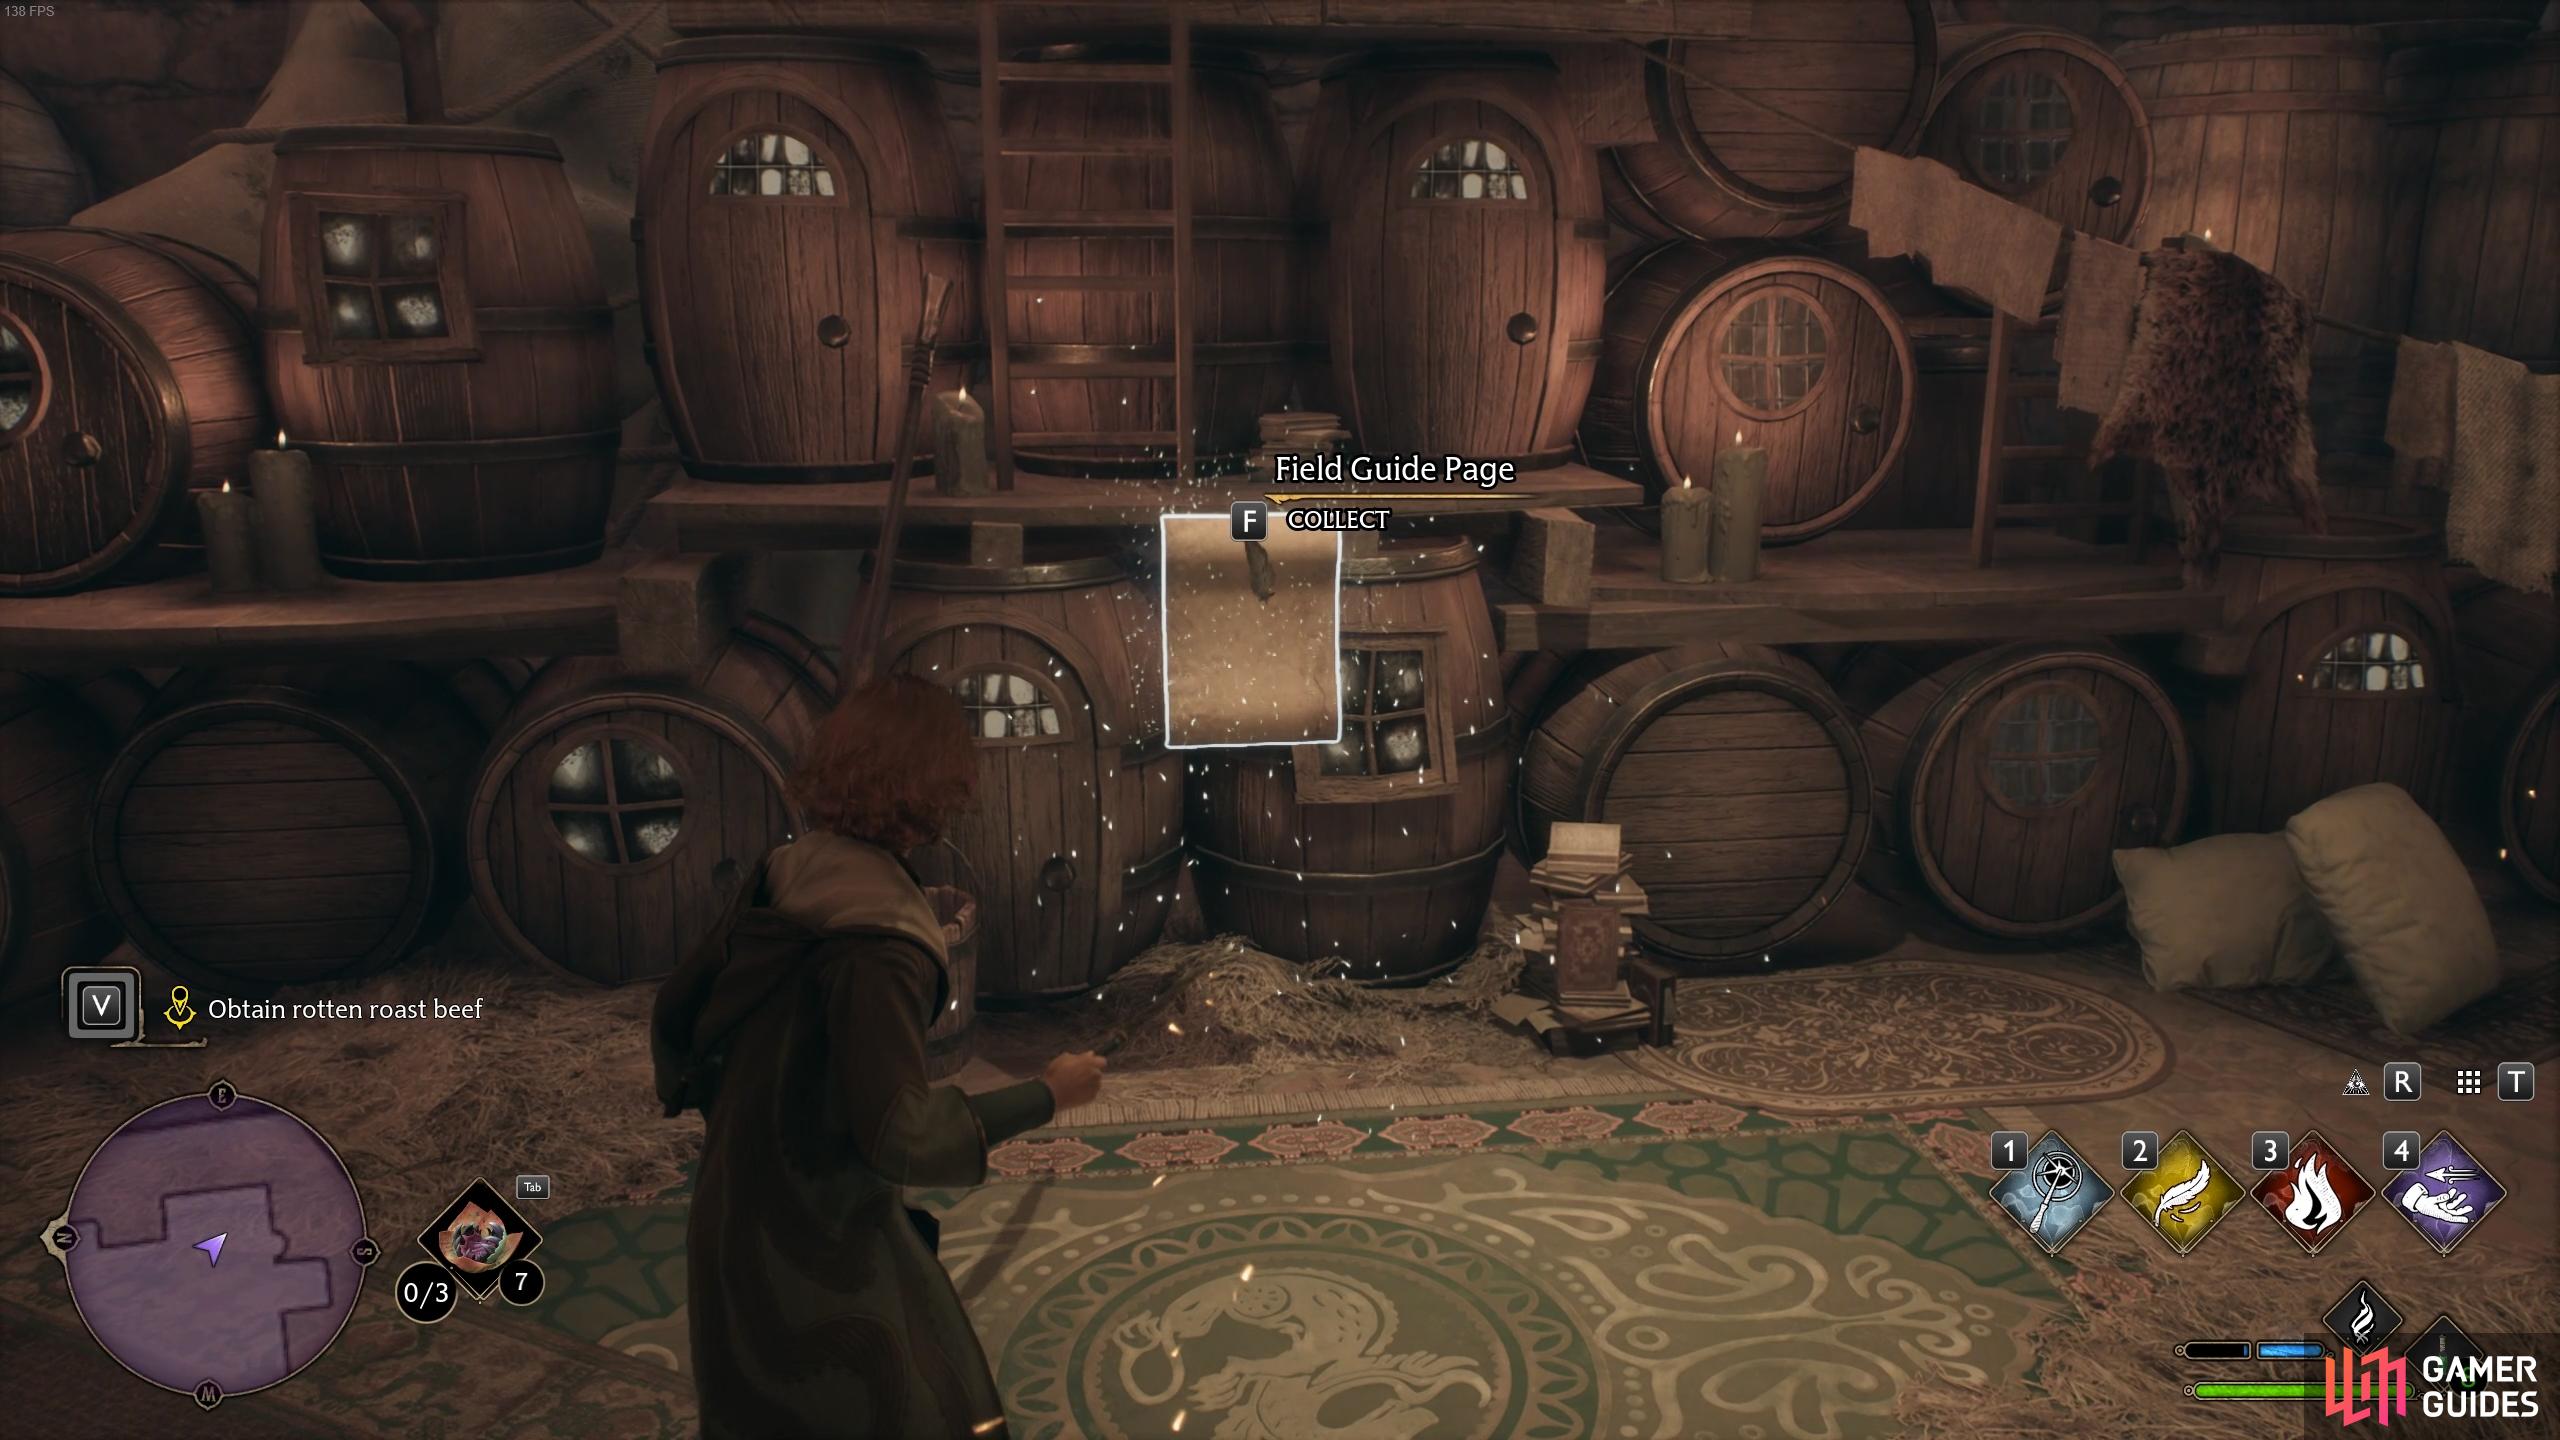
Cast Revelio in front of these magical barrels to reveal the page.
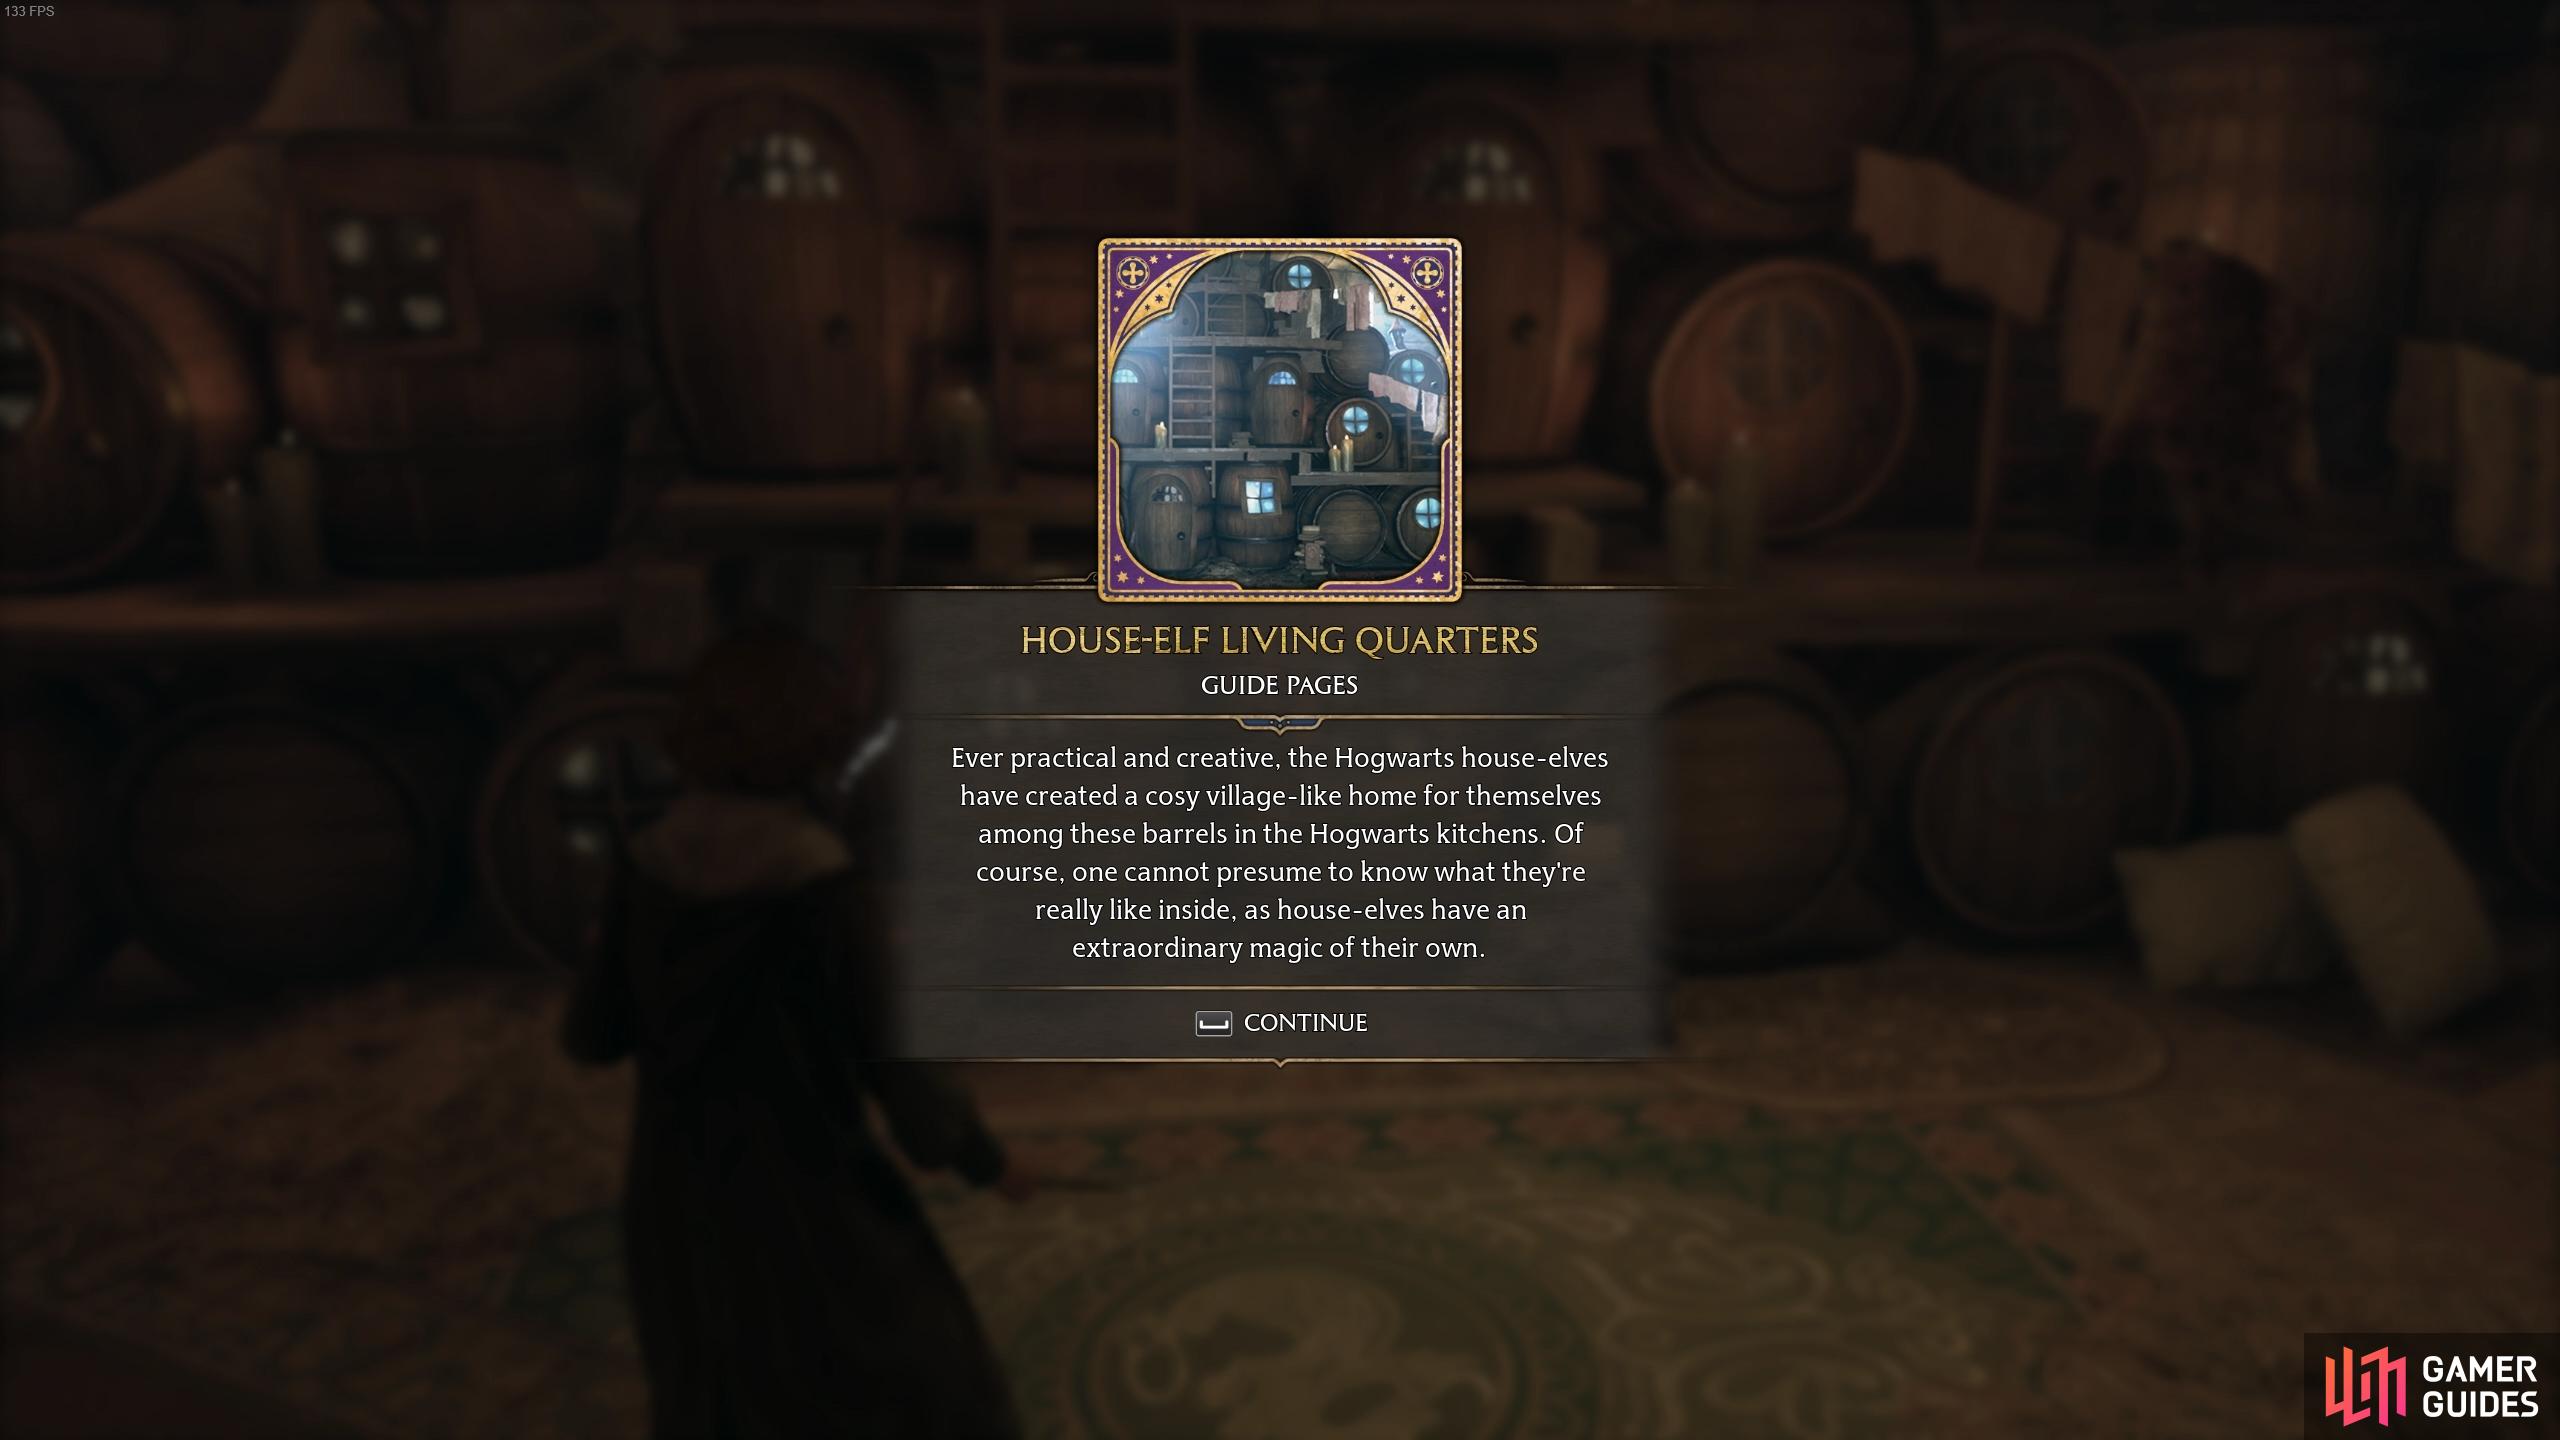
The description for the House-Elf Living Quarters page.
The Great Hall Ceiling - Great Hall
For this one, fast travel to the Great Hall Floo Flame and cast Revelio near the center of the room, in front of the row of tables. You’ll reveal the page for ![]() The Great Hall Ceiling.
The Great Hall Ceiling.
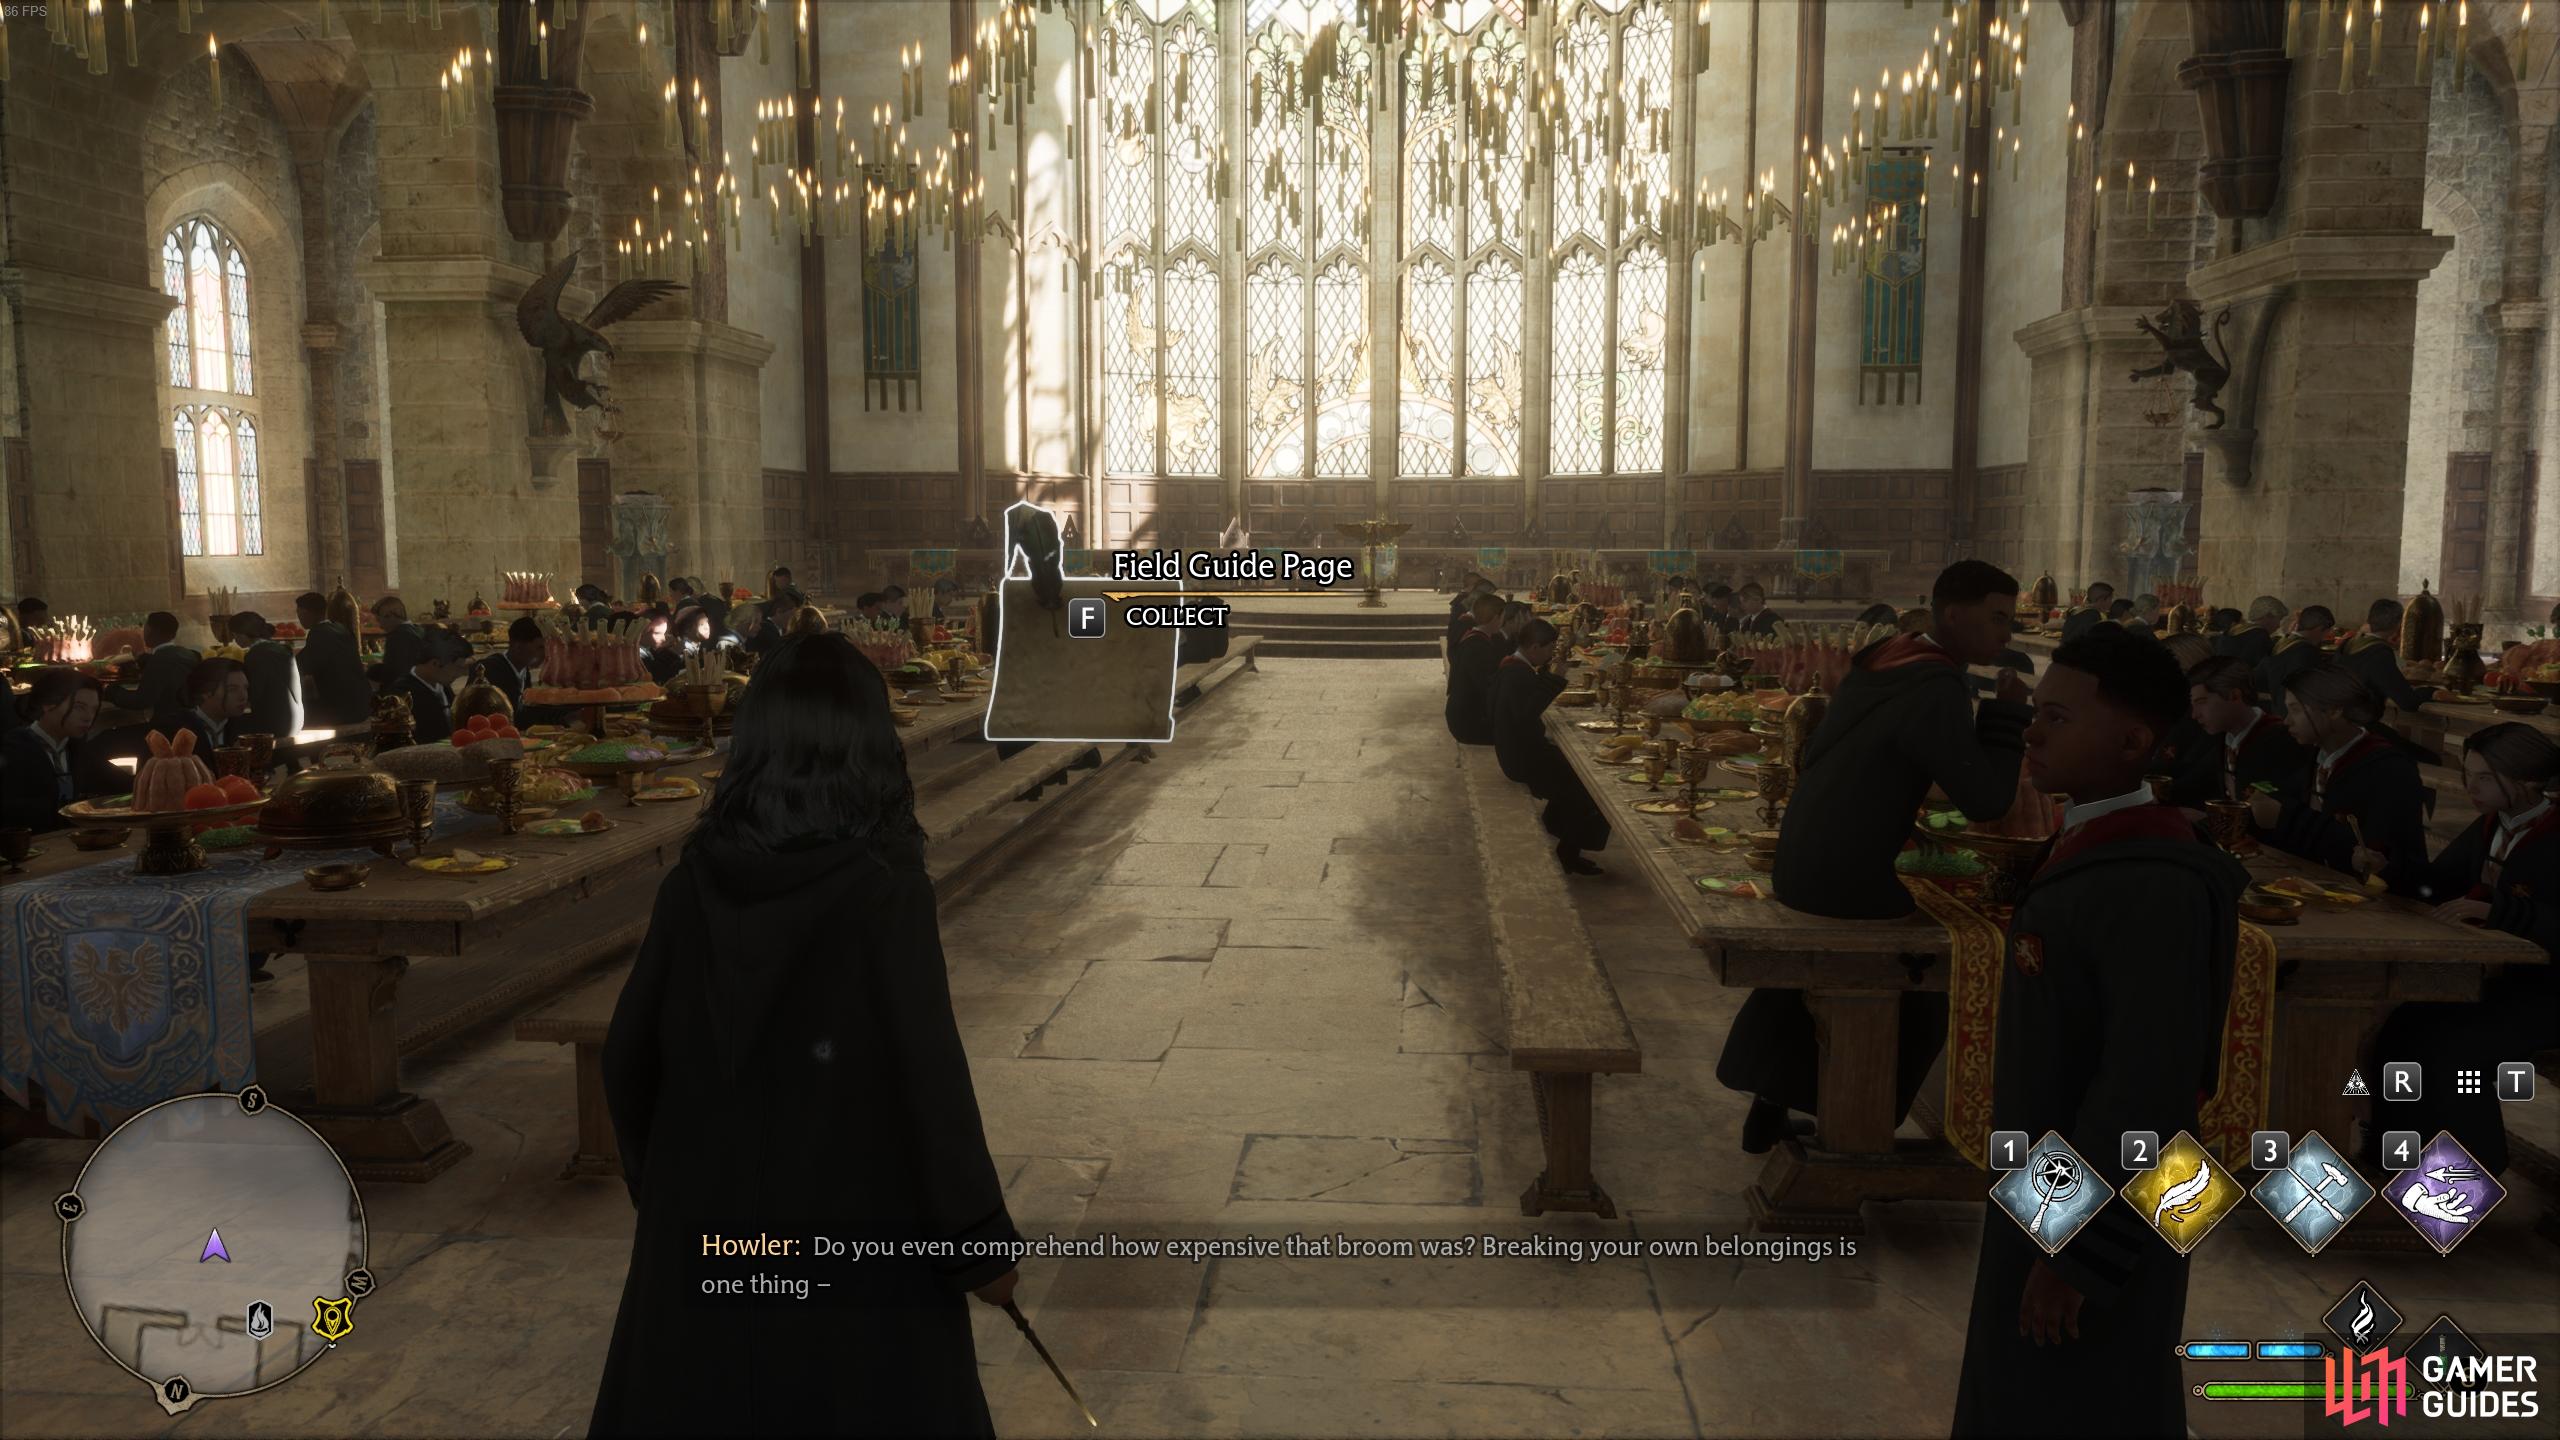
Cast Revelio here to reveal the page.
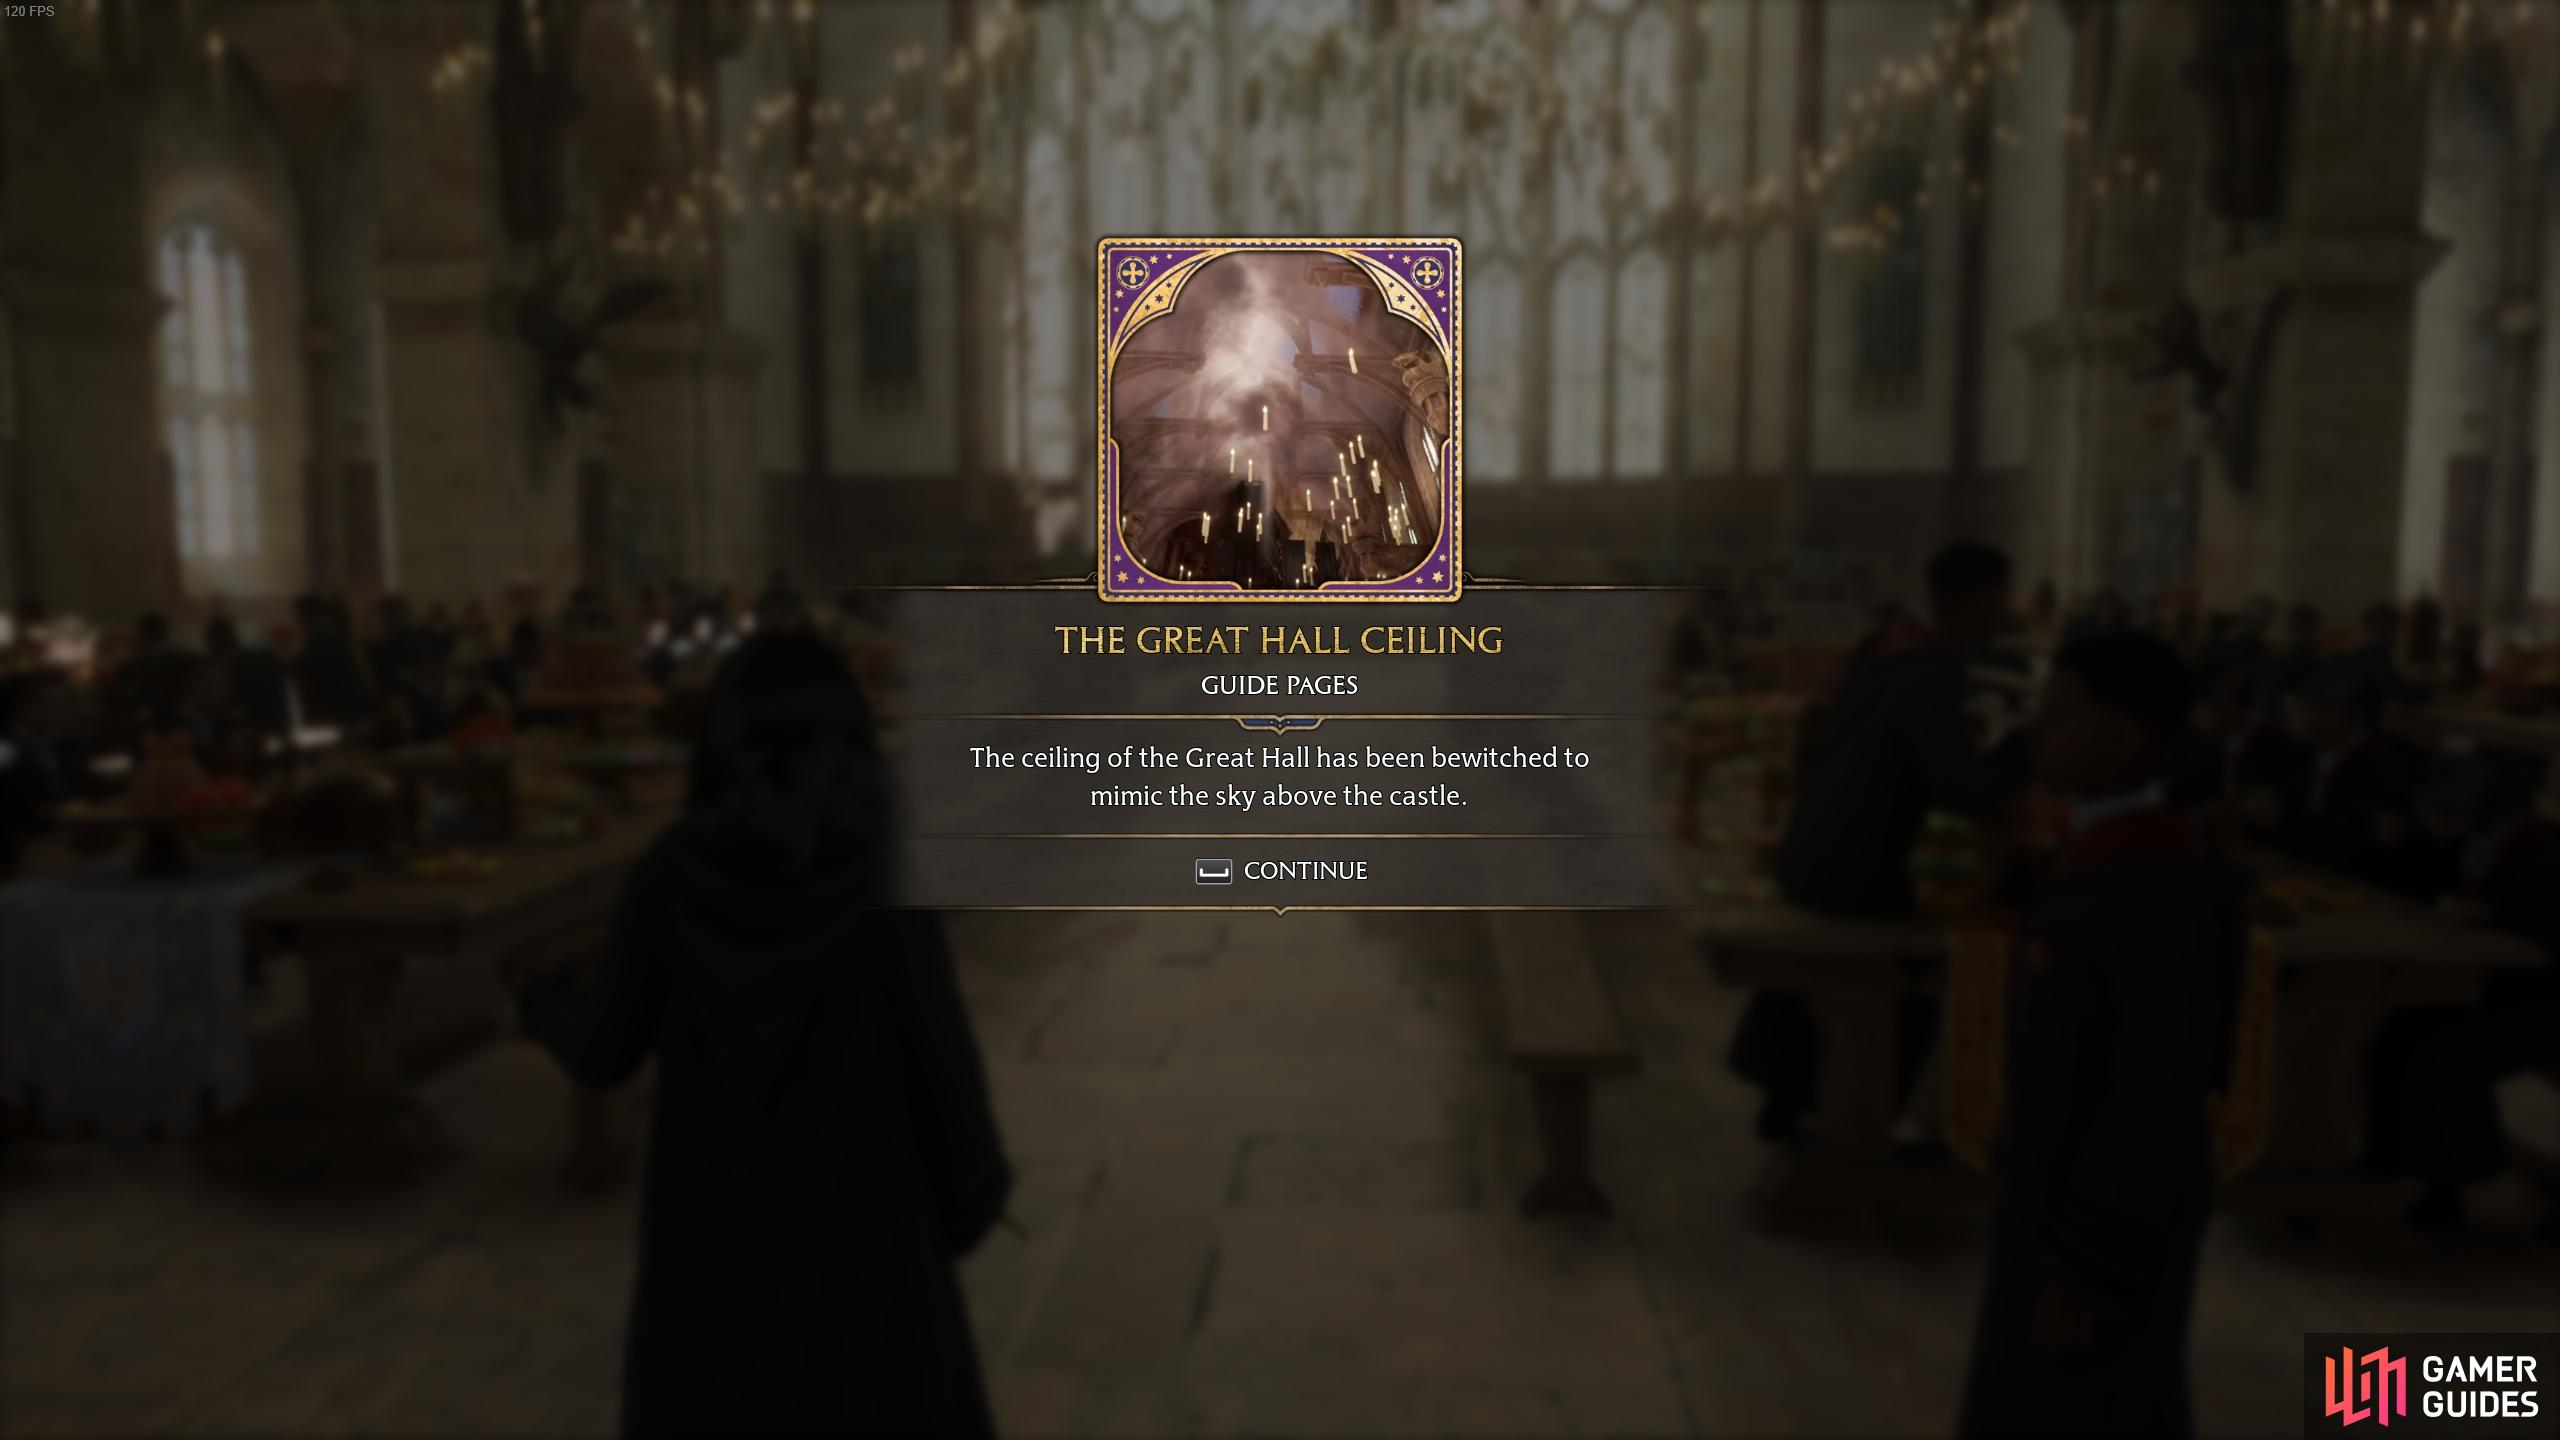
The description for The Great Hall Ceiling page.
Owl Lectern - Great Hall
You’ll find this one if you walk forward from where you found the last, in front of the lectern known as the ![]() Owl Lectern at the southern end of the hall. Cast Revelio here to reveal its page.
Owl Lectern at the southern end of the hall. Cast Revelio here to reveal its page.
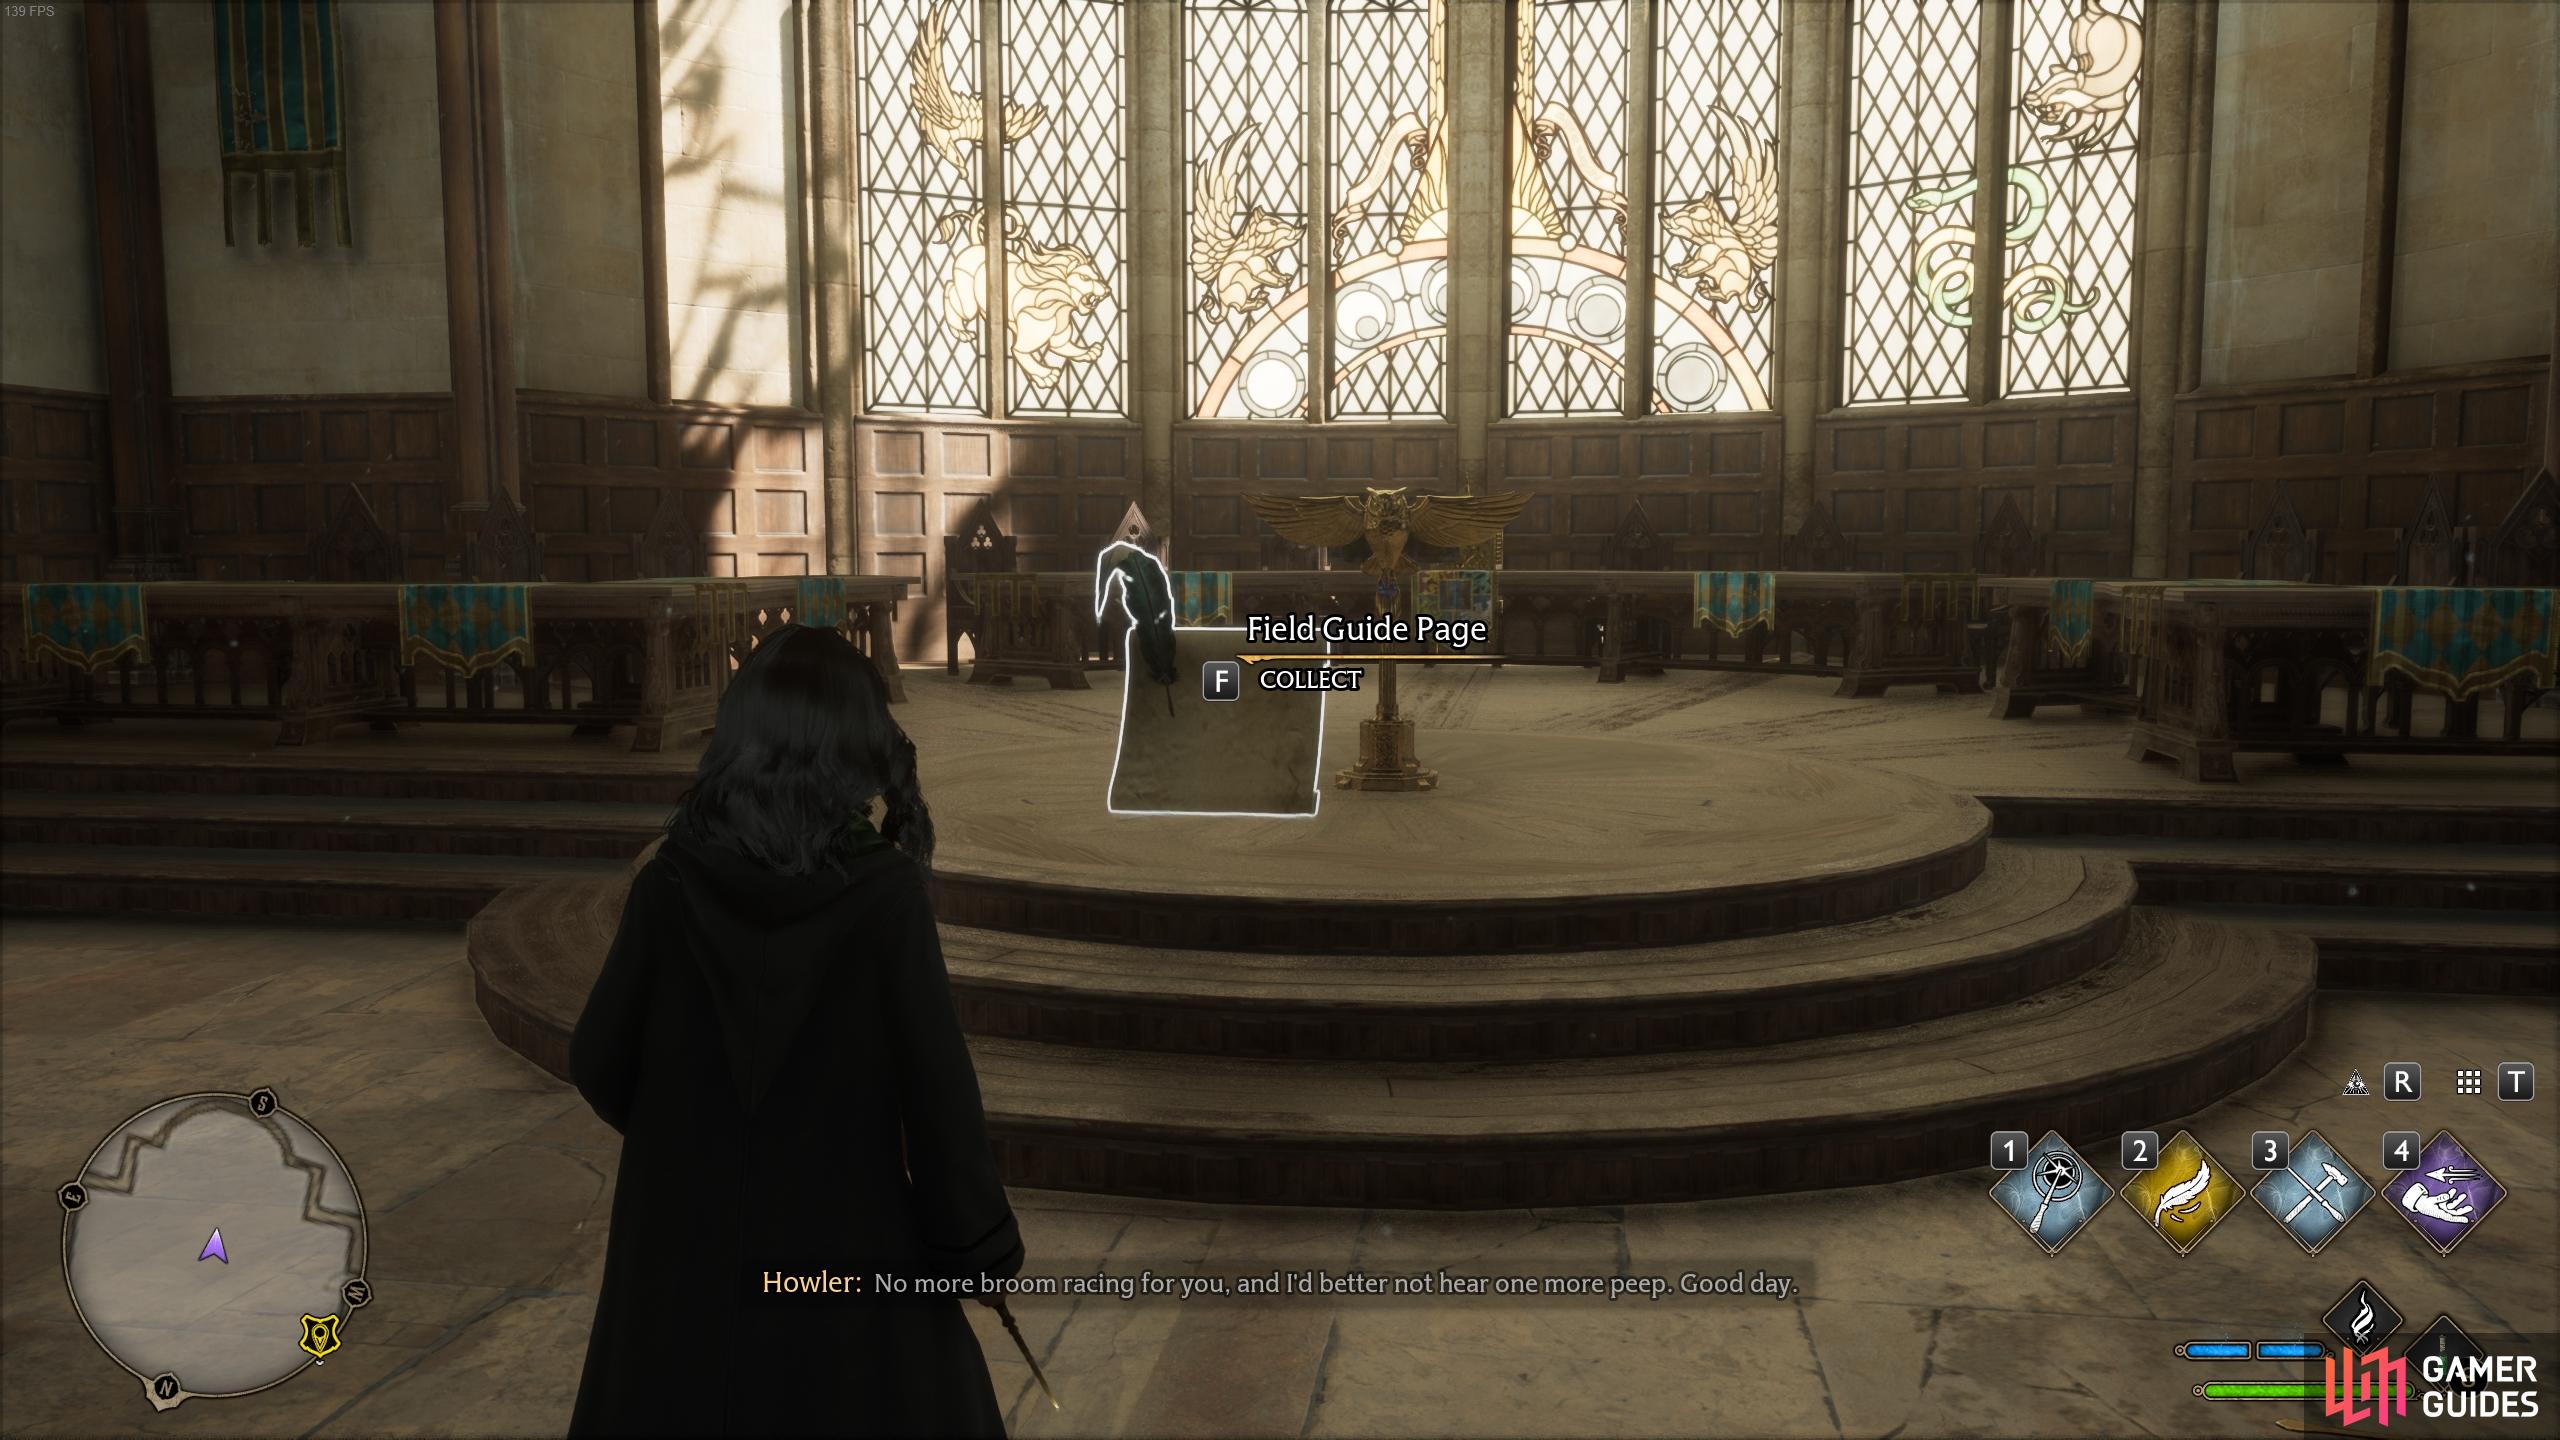
Cast Revelio in front of the Owl Lectern to reveal its page.
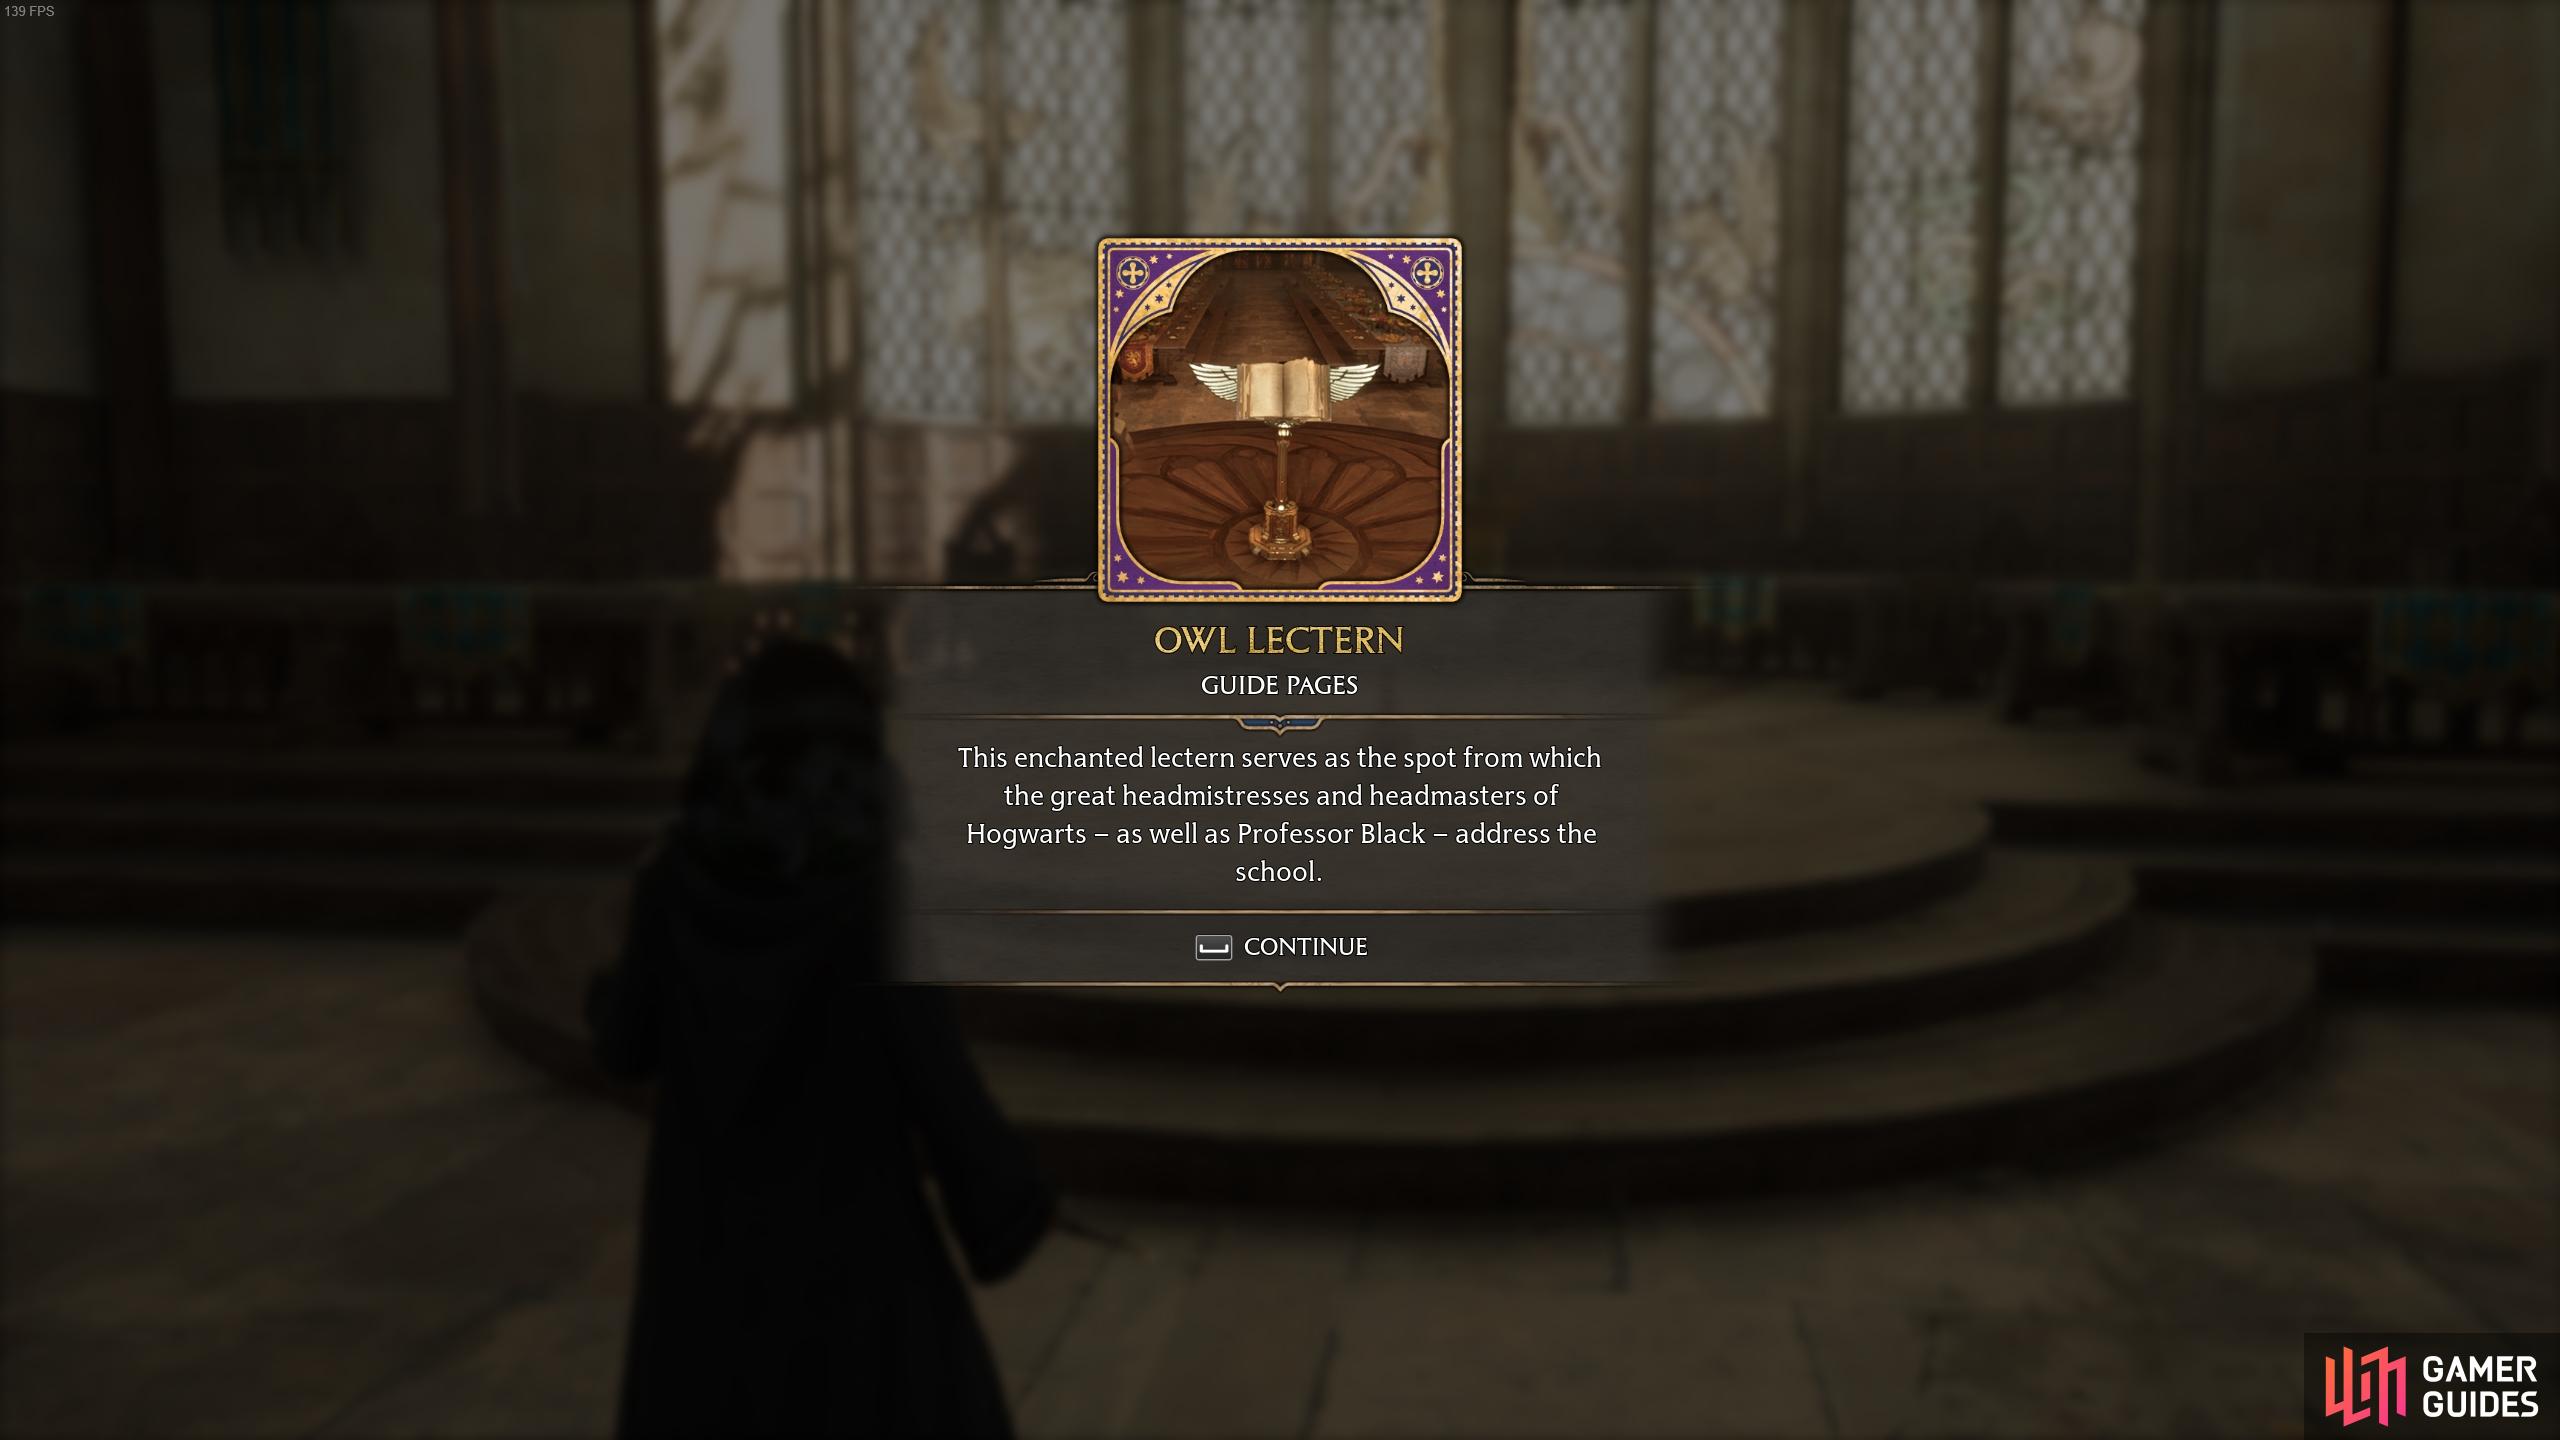
The description for the Owl Lectern page.
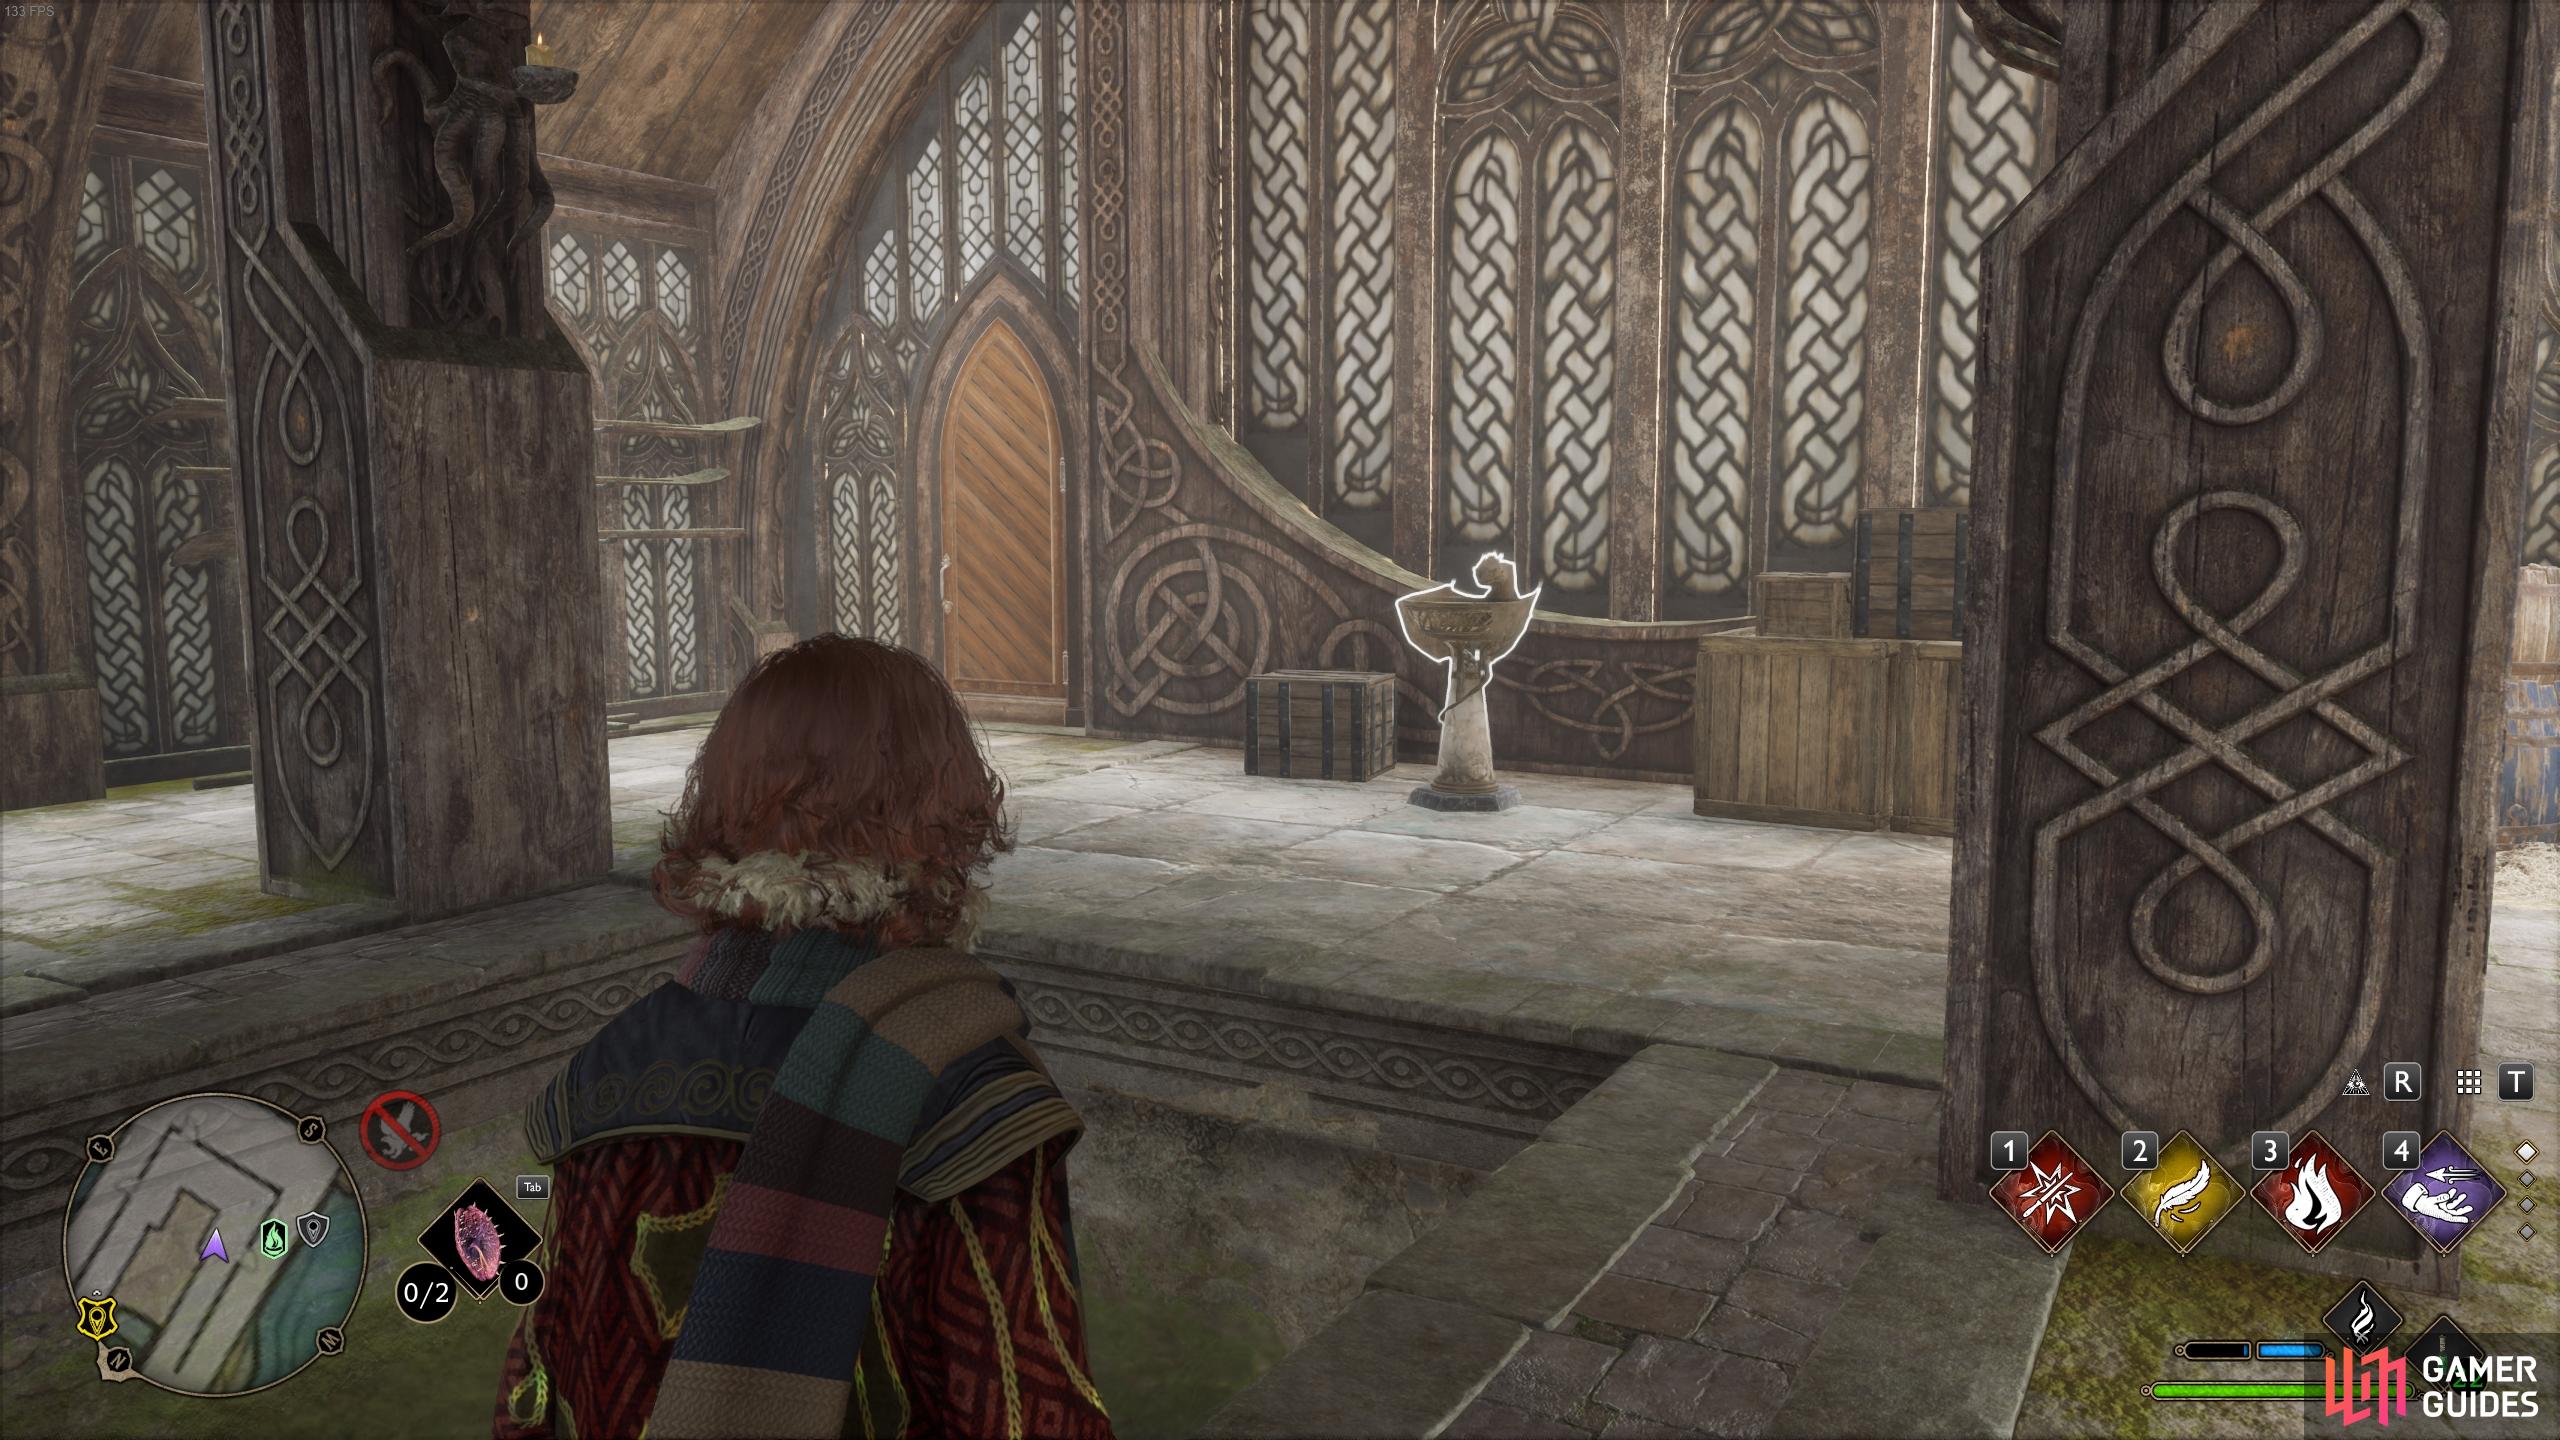
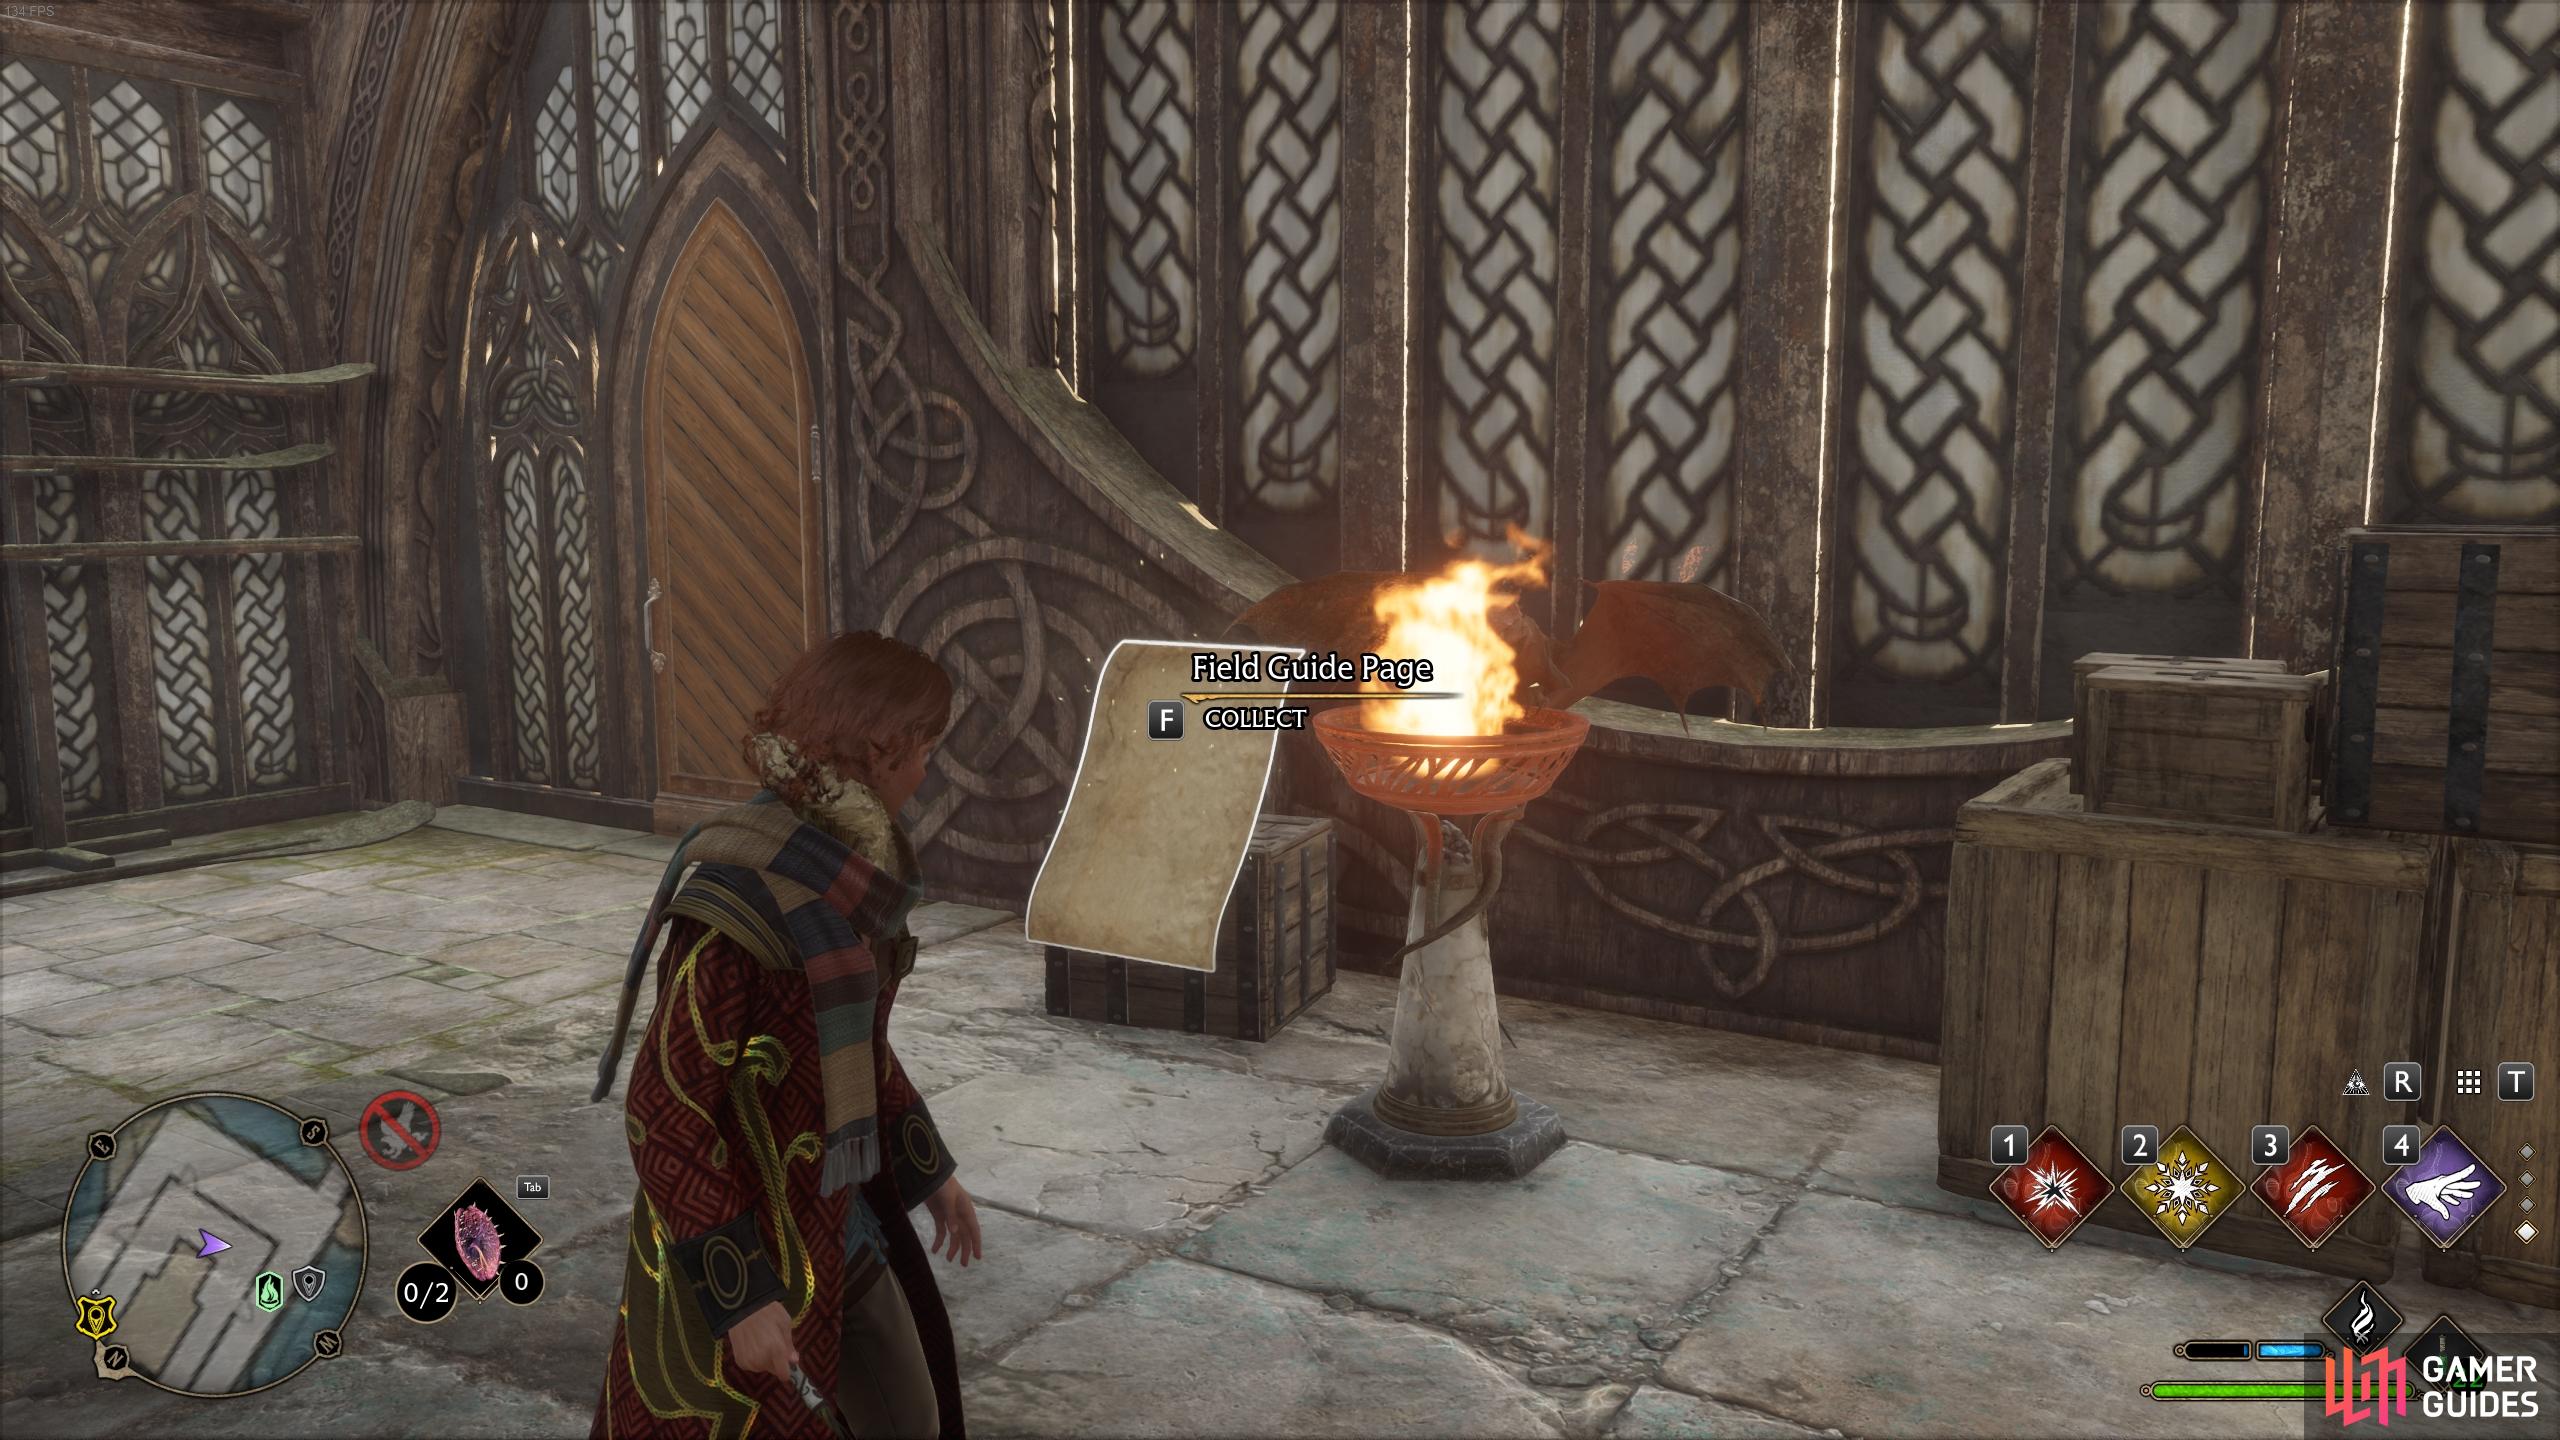
Brazier Field Guide Page - Great Hall
From the Great Hall Floo Flame, turn immediately to the west and go up the stairs to your right. At the top you’ll see a brazier on the wooden platform on the southern side of this balcony area. Use a fire-based spell such as Incendio or Confringo to light it and reveal its page.
You’ll find the unlit brazier on the balcony just up these stairs.
Flying Field Guide Page - Great Hall Courtyard
To find this flying page, go through the large doors on the western side of the Great Hall to enter the courtyard adjacent to the Great Hall. You should see the page flying above or in front of you here.
You’ll find this page flying just outside the Great Hall on its western side.
The Yawning Gargoyle - Great Hall Courtyard
This Revelio page can be found in the same area as the flying page. Just move forward a bit and cast Revelio to see it pop near the statue of the yawning gargoyle.

Cast Revelio near the statue to reveal its page.
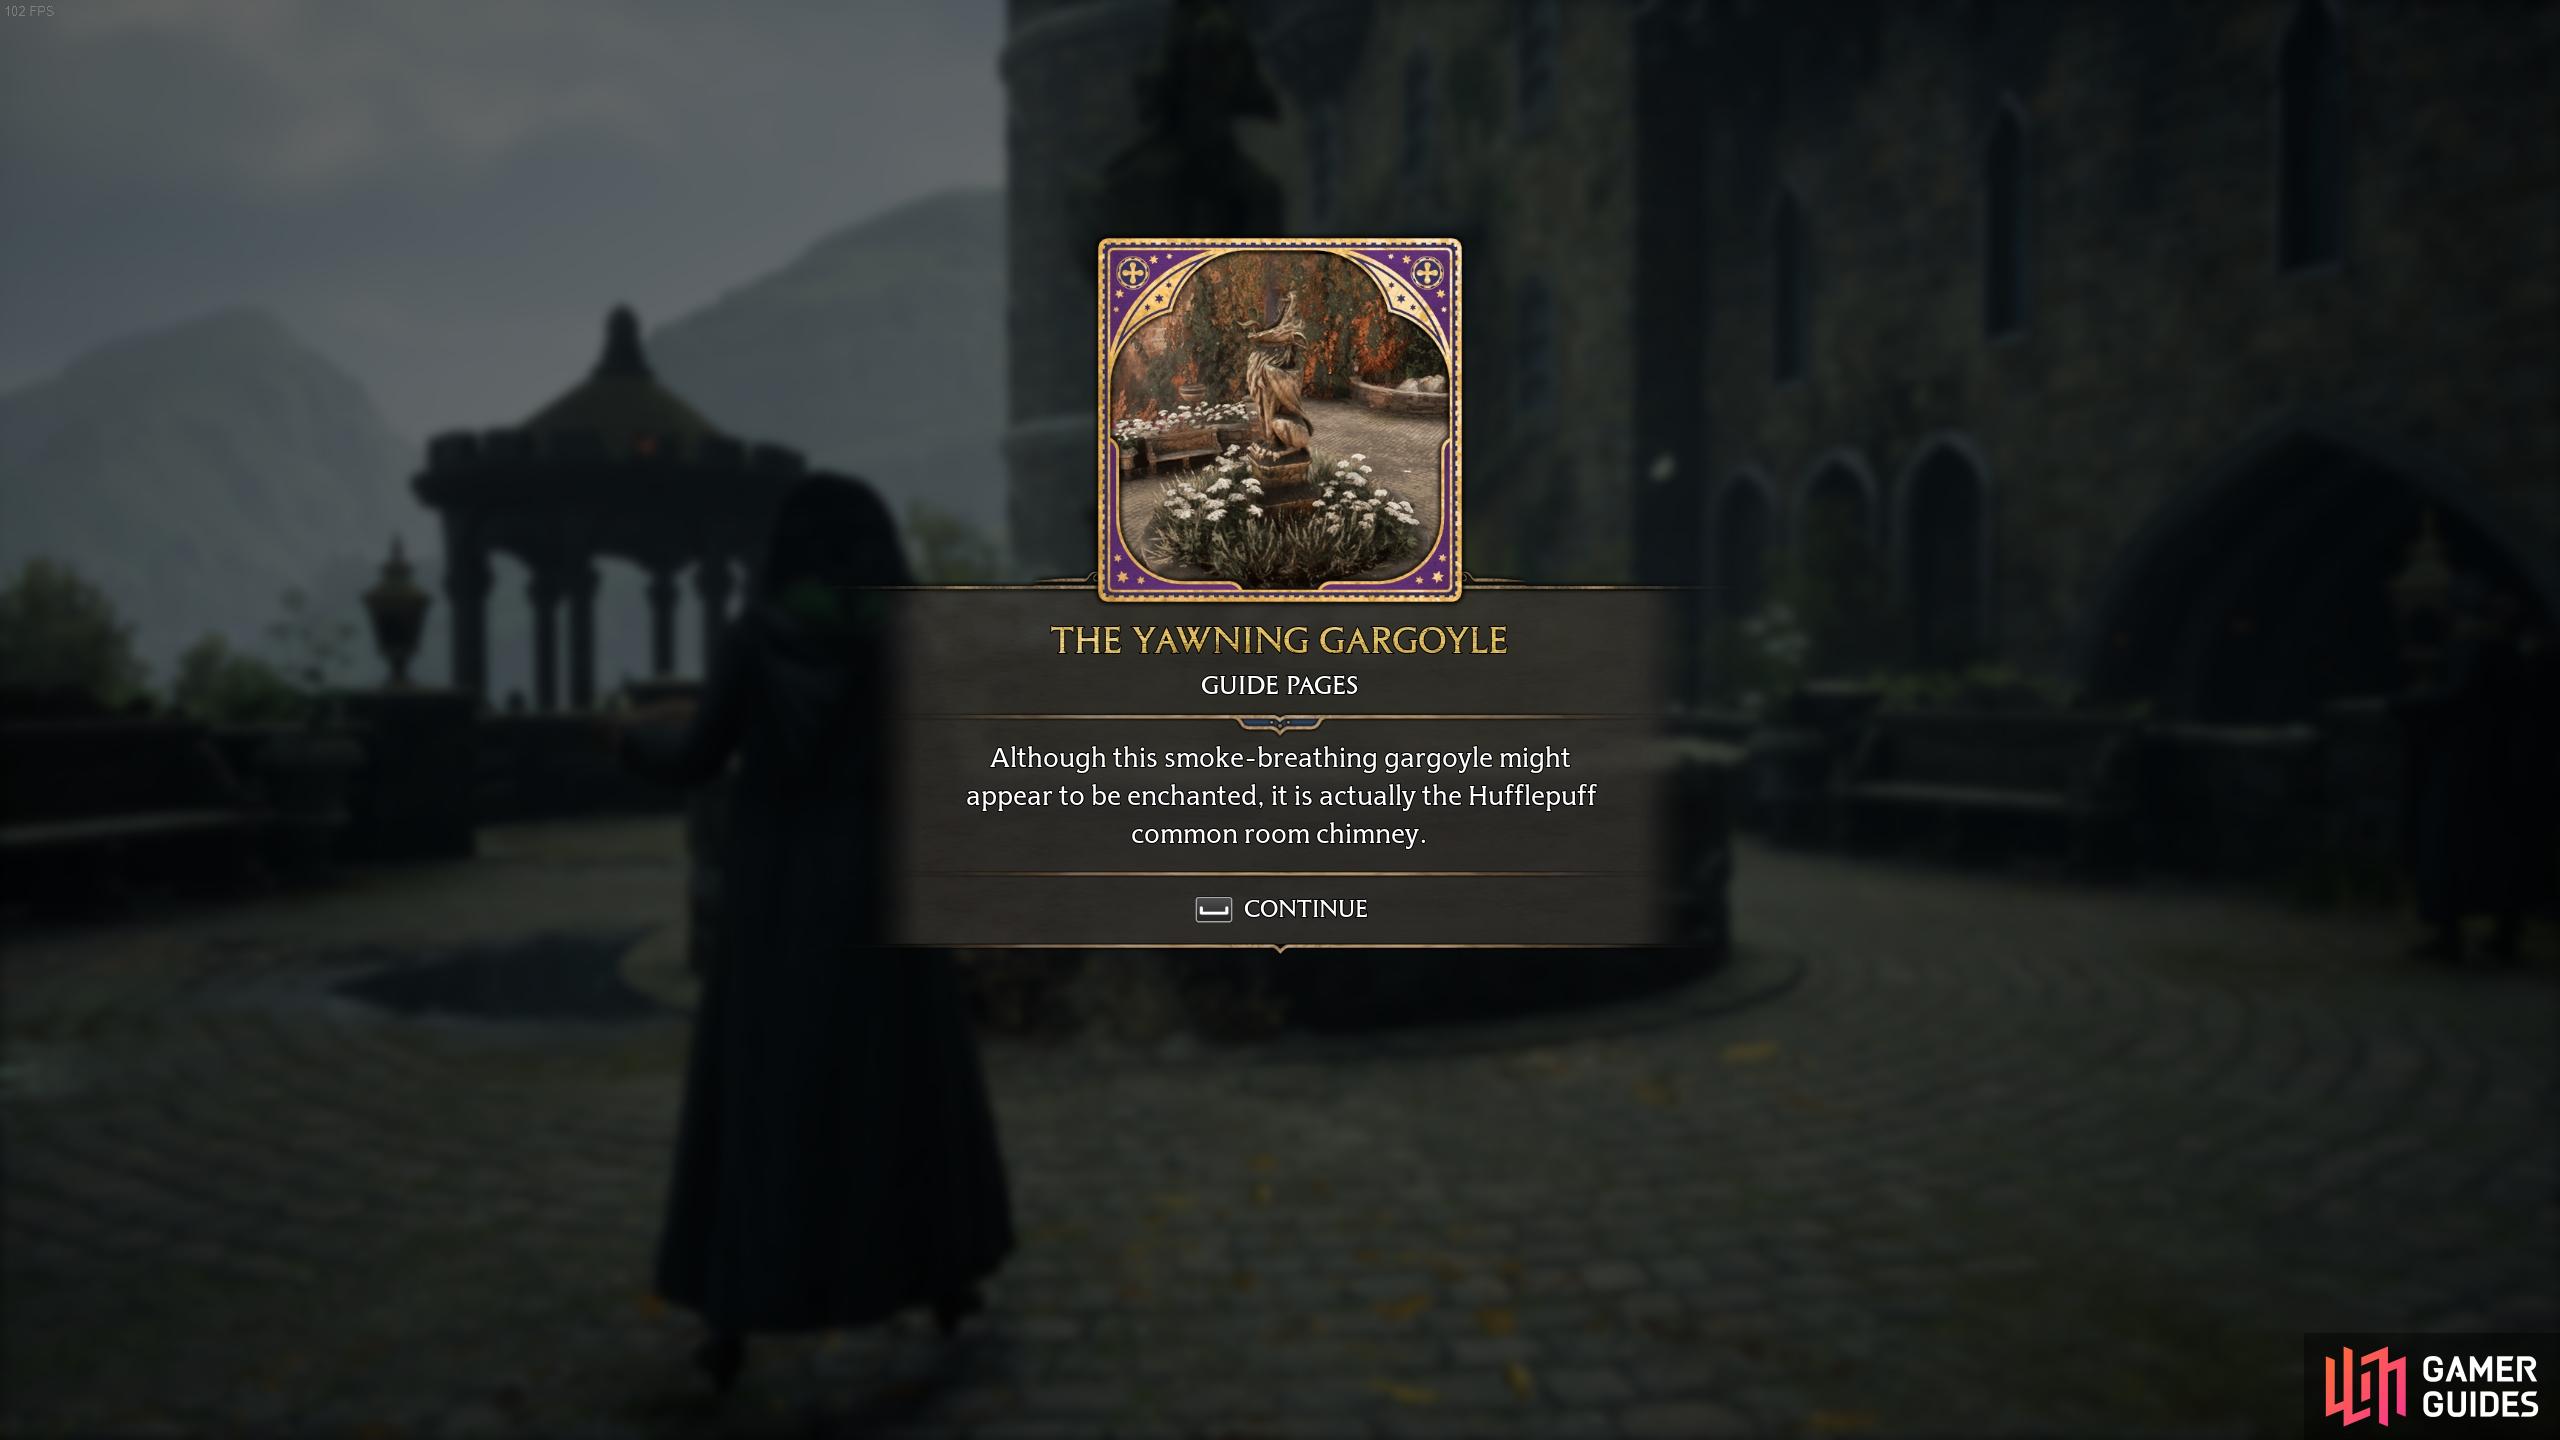
The description for the Yawning Gargoyle page.
Flying Field Guide Page - Hogwarts Dungeons the one i missed
Flying Field Guide Page - Hogwarts Dungeons the one i missed