
This page details how to complete the quest ‘The Elf, the Nab-Sack, and the Loom’ in Hogwarts Legacy. This is a very important quest that will unlock the Vivarium, Nab-Sack and the Loom for your Room of Requirement. If you haven’t already got the Room of Requirement, head over to our guide for how to unlock it!

Time to unlock the Vivarium and start catching your own beasts and upgrading your gear!
How to Unlock ’The Elf, the Nab-Sack, and the Loom
This quest will become unlocked after you’ve completed The Helm of Urtkot quest and also completed your first Beasts Class. After doing so, you’ll be prompted by Professor Weasley to return to the Room of Requirement to talk to Deek!
How to Use the Nab-Sack
The first thing that Deek will show you during this quest is the Nab-Sack - a magical bag that can be used to safely transport Beasts. The majority of this quest is actually taken up by going out and rescuing some beasts, which can be quite tricky in itself!
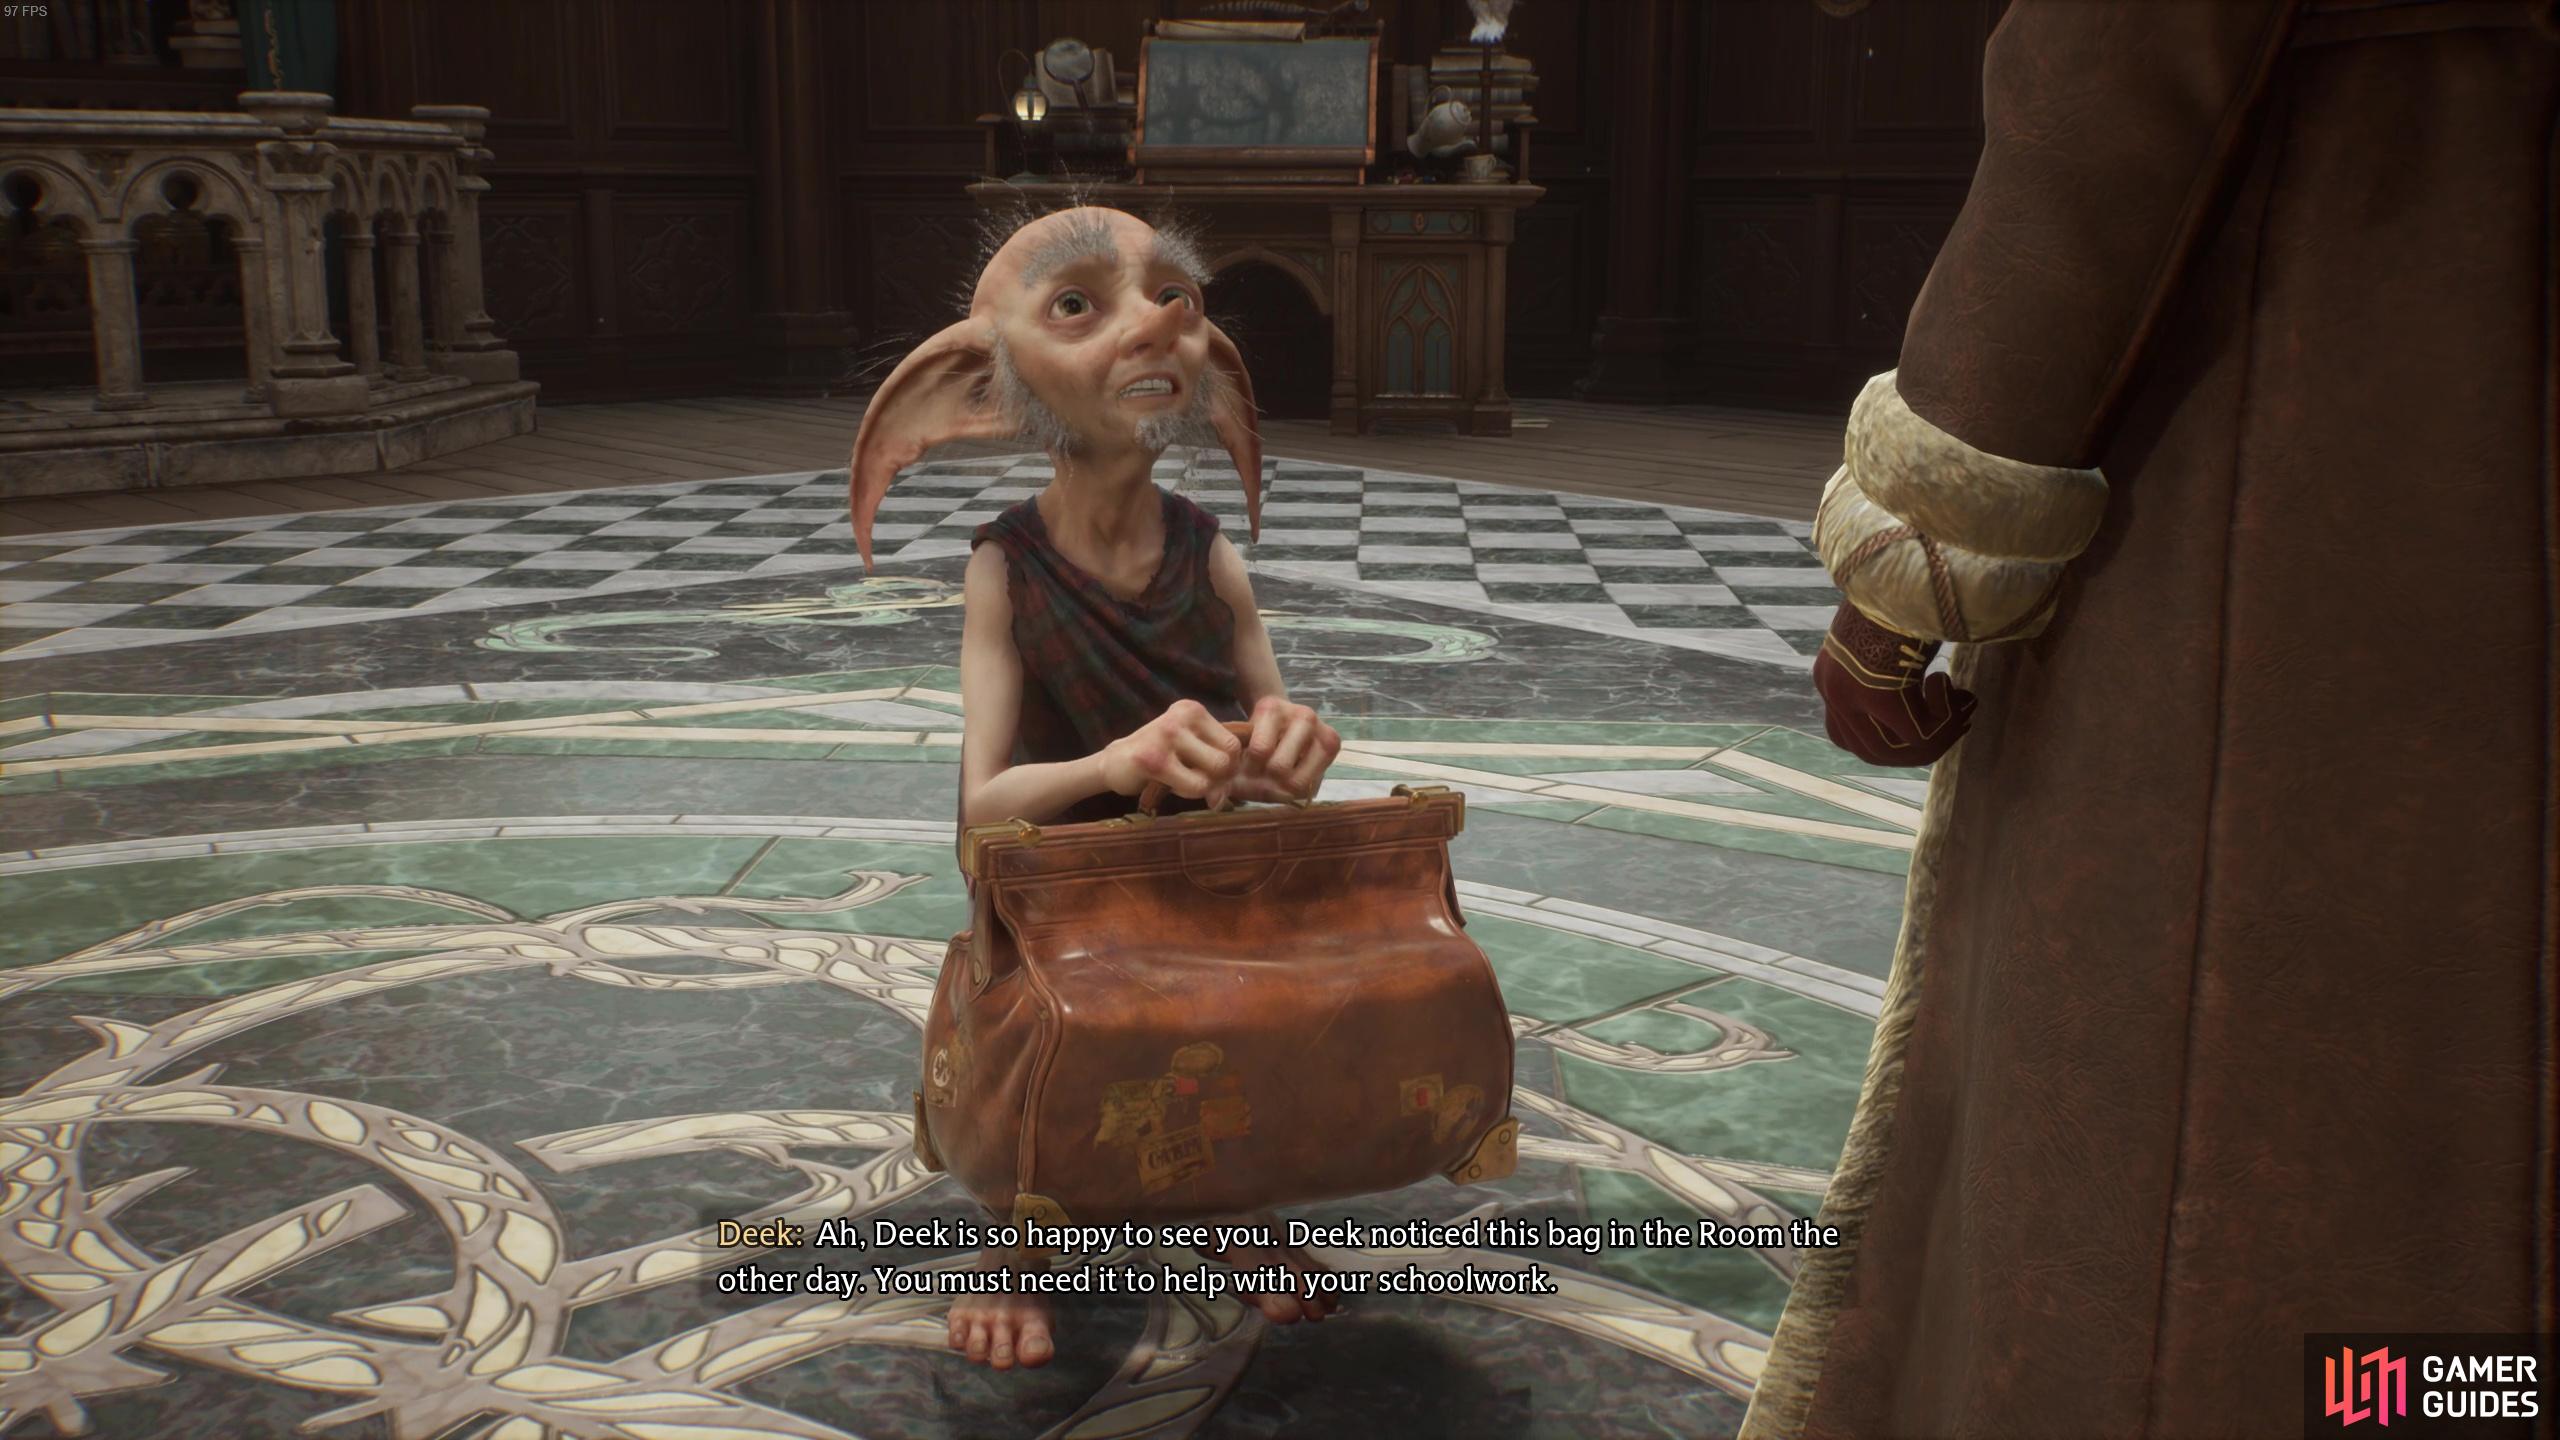
Deek will give you a nab-sack and you’ll also unlock the Vivarium after rescuing a few animals.
When you’re ready to go out and save some beasts, speak to Deek again and you’ll be transported to a ![]() Puffskein den outside the school. To catch a Puffskein using the bag, you’ll first need to equip it like a spell to your spell bar. If you’re playing story mode, you’ll only need to open the nab-sack nearby a beast and it’ll get sucked in! If, however, you’re playing easy, normal or hard mode, you’ll have a few more steps to complete in order to catch a beast.
Puffskein den outside the school. To catch a Puffskein using the bag, you’ll first need to equip it like a spell to your spell bar. If you’re playing story mode, you’ll only need to open the nab-sack nearby a beast and it’ll get sucked in! If, however, you’re playing easy, normal or hard mode, you’ll have a few more steps to complete in order to catch a beast.
When nearby a beast, use the nab-sack and watch the wheel fill up. When the wheel fills up, you’ll be prompted to press  /
/  /
/  . You’ll need to remain in close proximity to the beast whilst holding the button and then it’ll get sucked into the nab-sack. If it runs too far away (which is quite likely), then you’ll need to begin this process again.

You’ll need to get close enough to open up the nab-sack
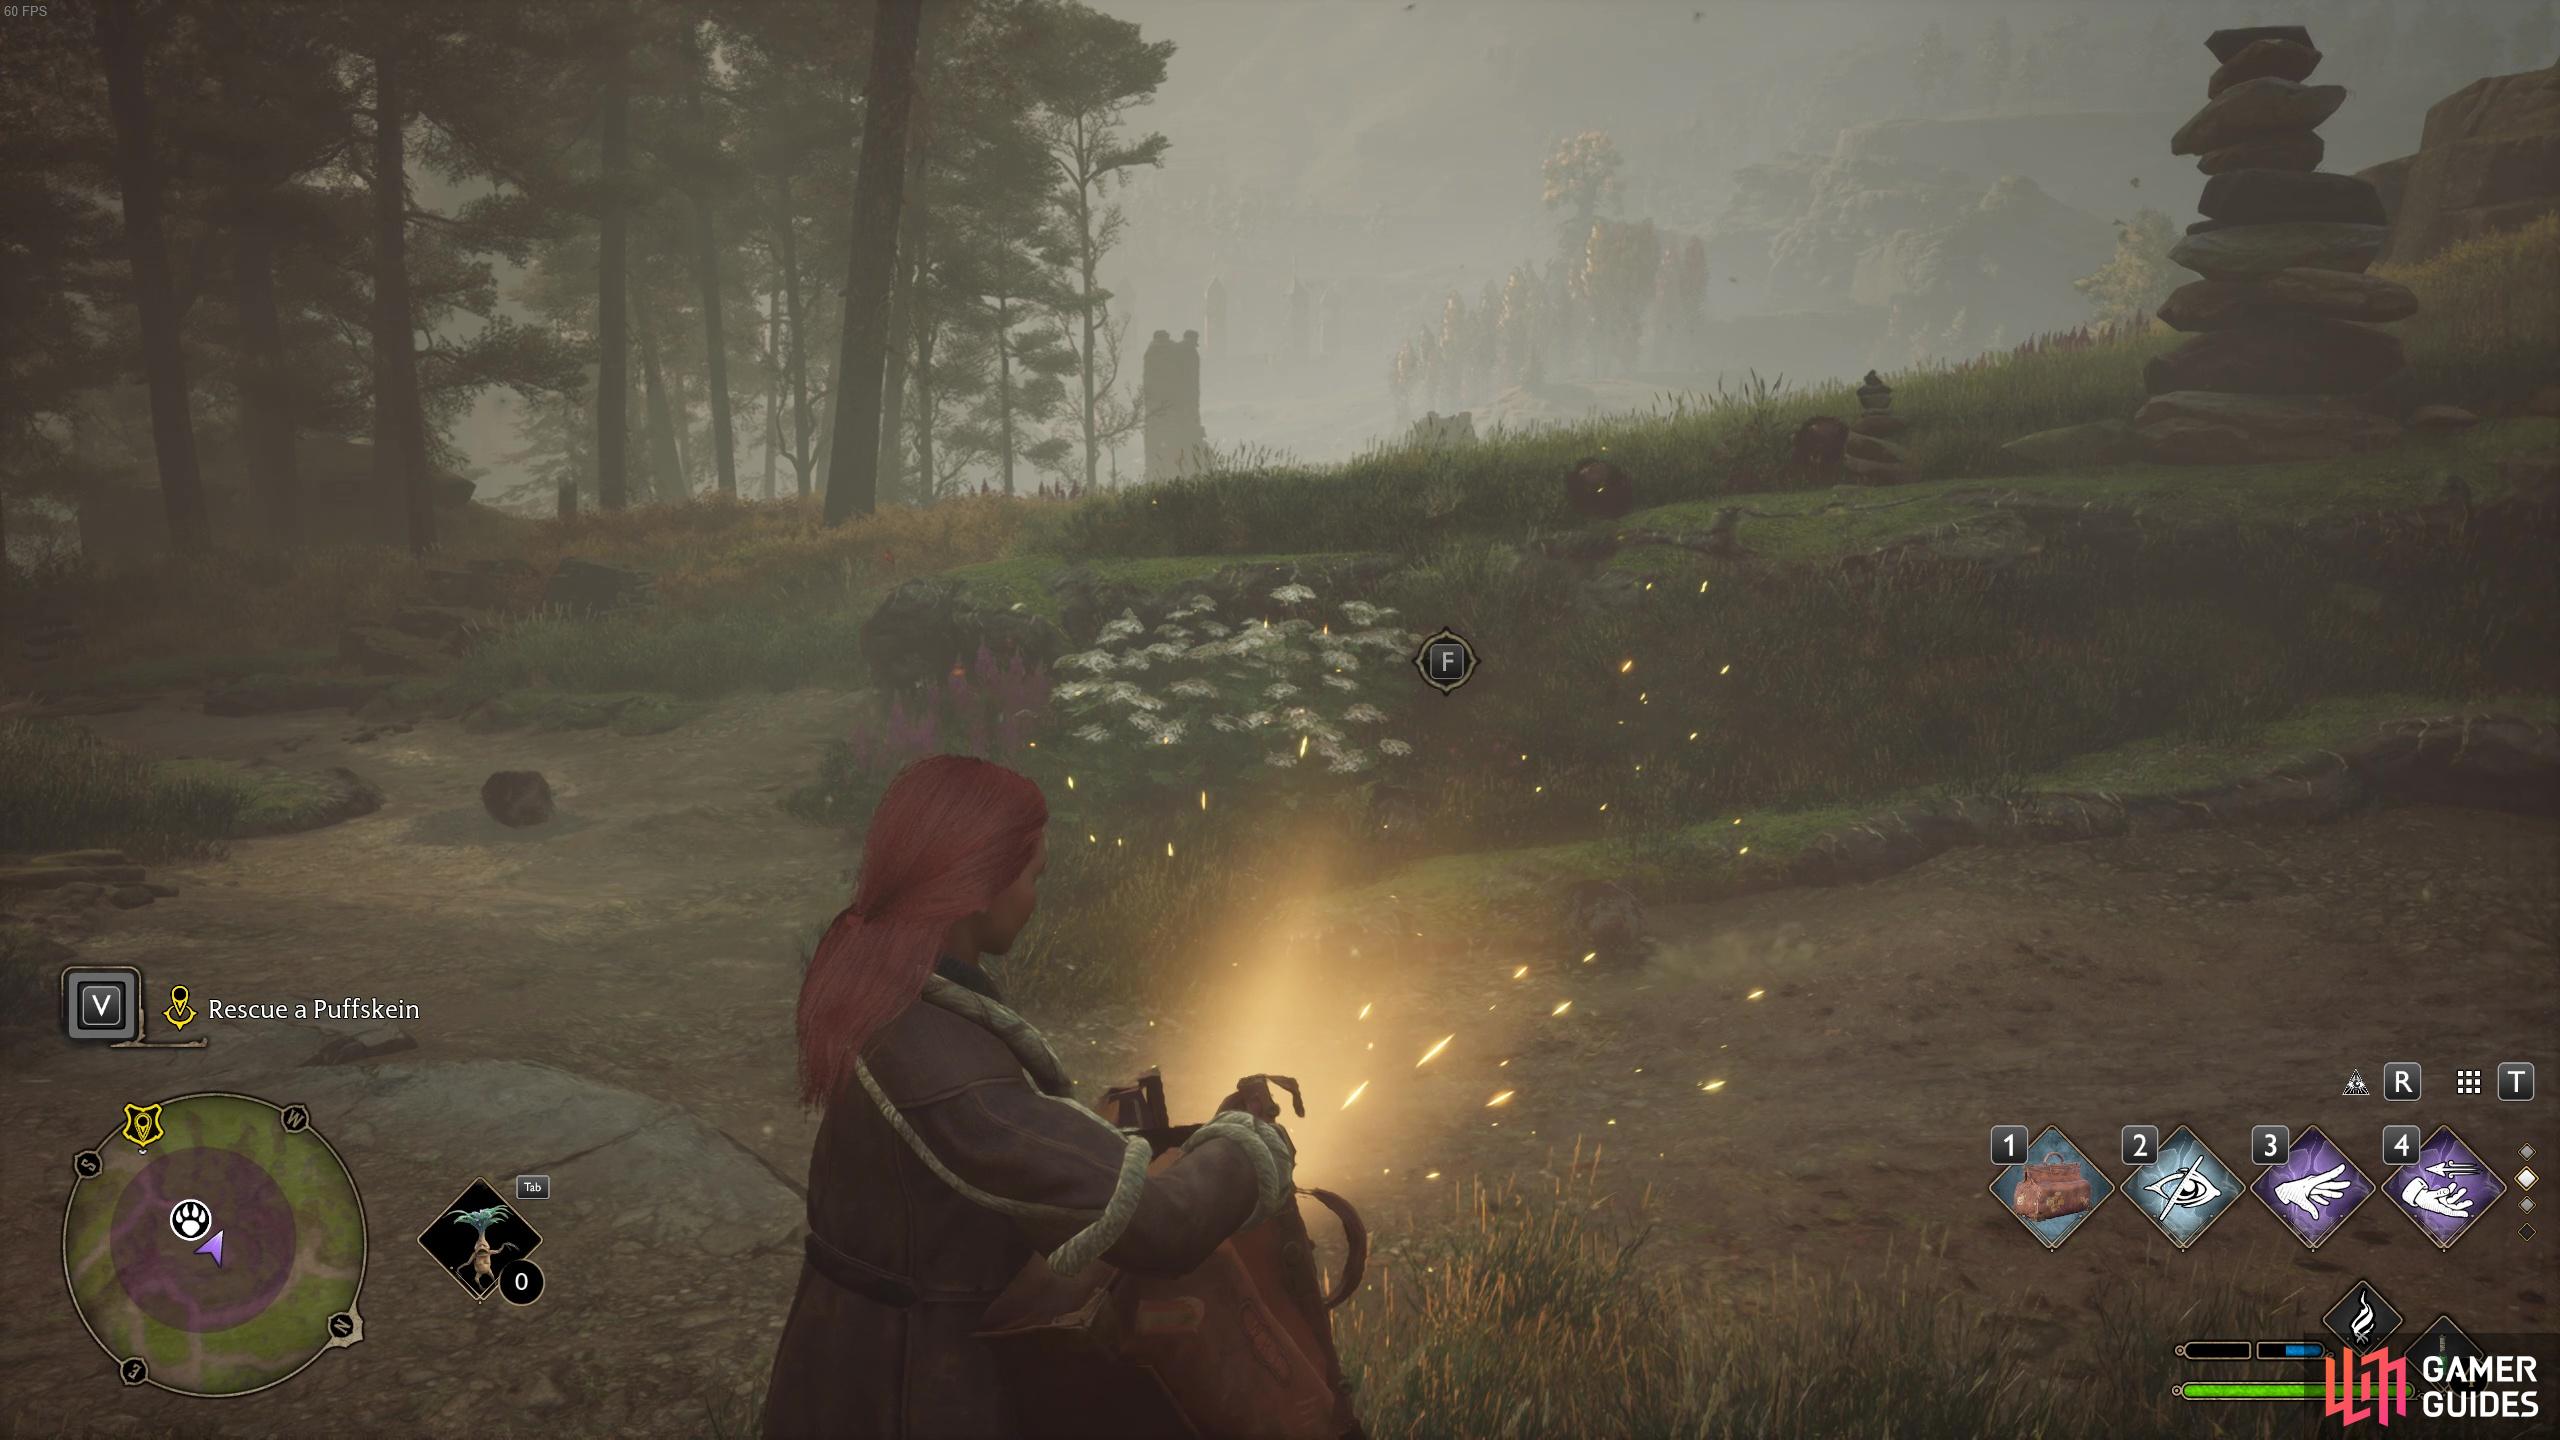
then stay close enough to fill the wheel and hit the button so that it sucks in the puffskein!
After catching a Puffskein, speak to Deek again and he’ll tell you to meet him at a ![]() Jobberknoll den, which can be found to the west of the
Jobberknoll den, which can be found to the west of the ![]() Forbidden Forest floo flame. A Jobberknoll is a bird like animal and will fly around when you try to catch it. You’ll likely find this beast trickier than the Puffskein. In fact, you’ll need to hold / / two times in a row, meaning there’s more time for the Jobberknoll to fly away. The best way to make sure you suck it in is to get as close as possible to it before using the nab-sack. Try using the
Forbidden Forest floo flame. A Jobberknoll is a bird like animal and will fly around when you try to catch it. You’ll likely find this beast trickier than the Puffskein. In fact, you’ll need to hold / / two times in a row, meaning there’s more time for the Jobberknoll to fly away. The best way to make sure you suck it in is to get as close as possible to it before using the nab-sack. Try using the ![]() Disillusionment Charm to get close without being detected! You could also use
Disillusionment Charm to get close without being detected! You could also use ![]() Levioso to hold them still for a short period of time!
Levioso to hold them still for a short period of time!
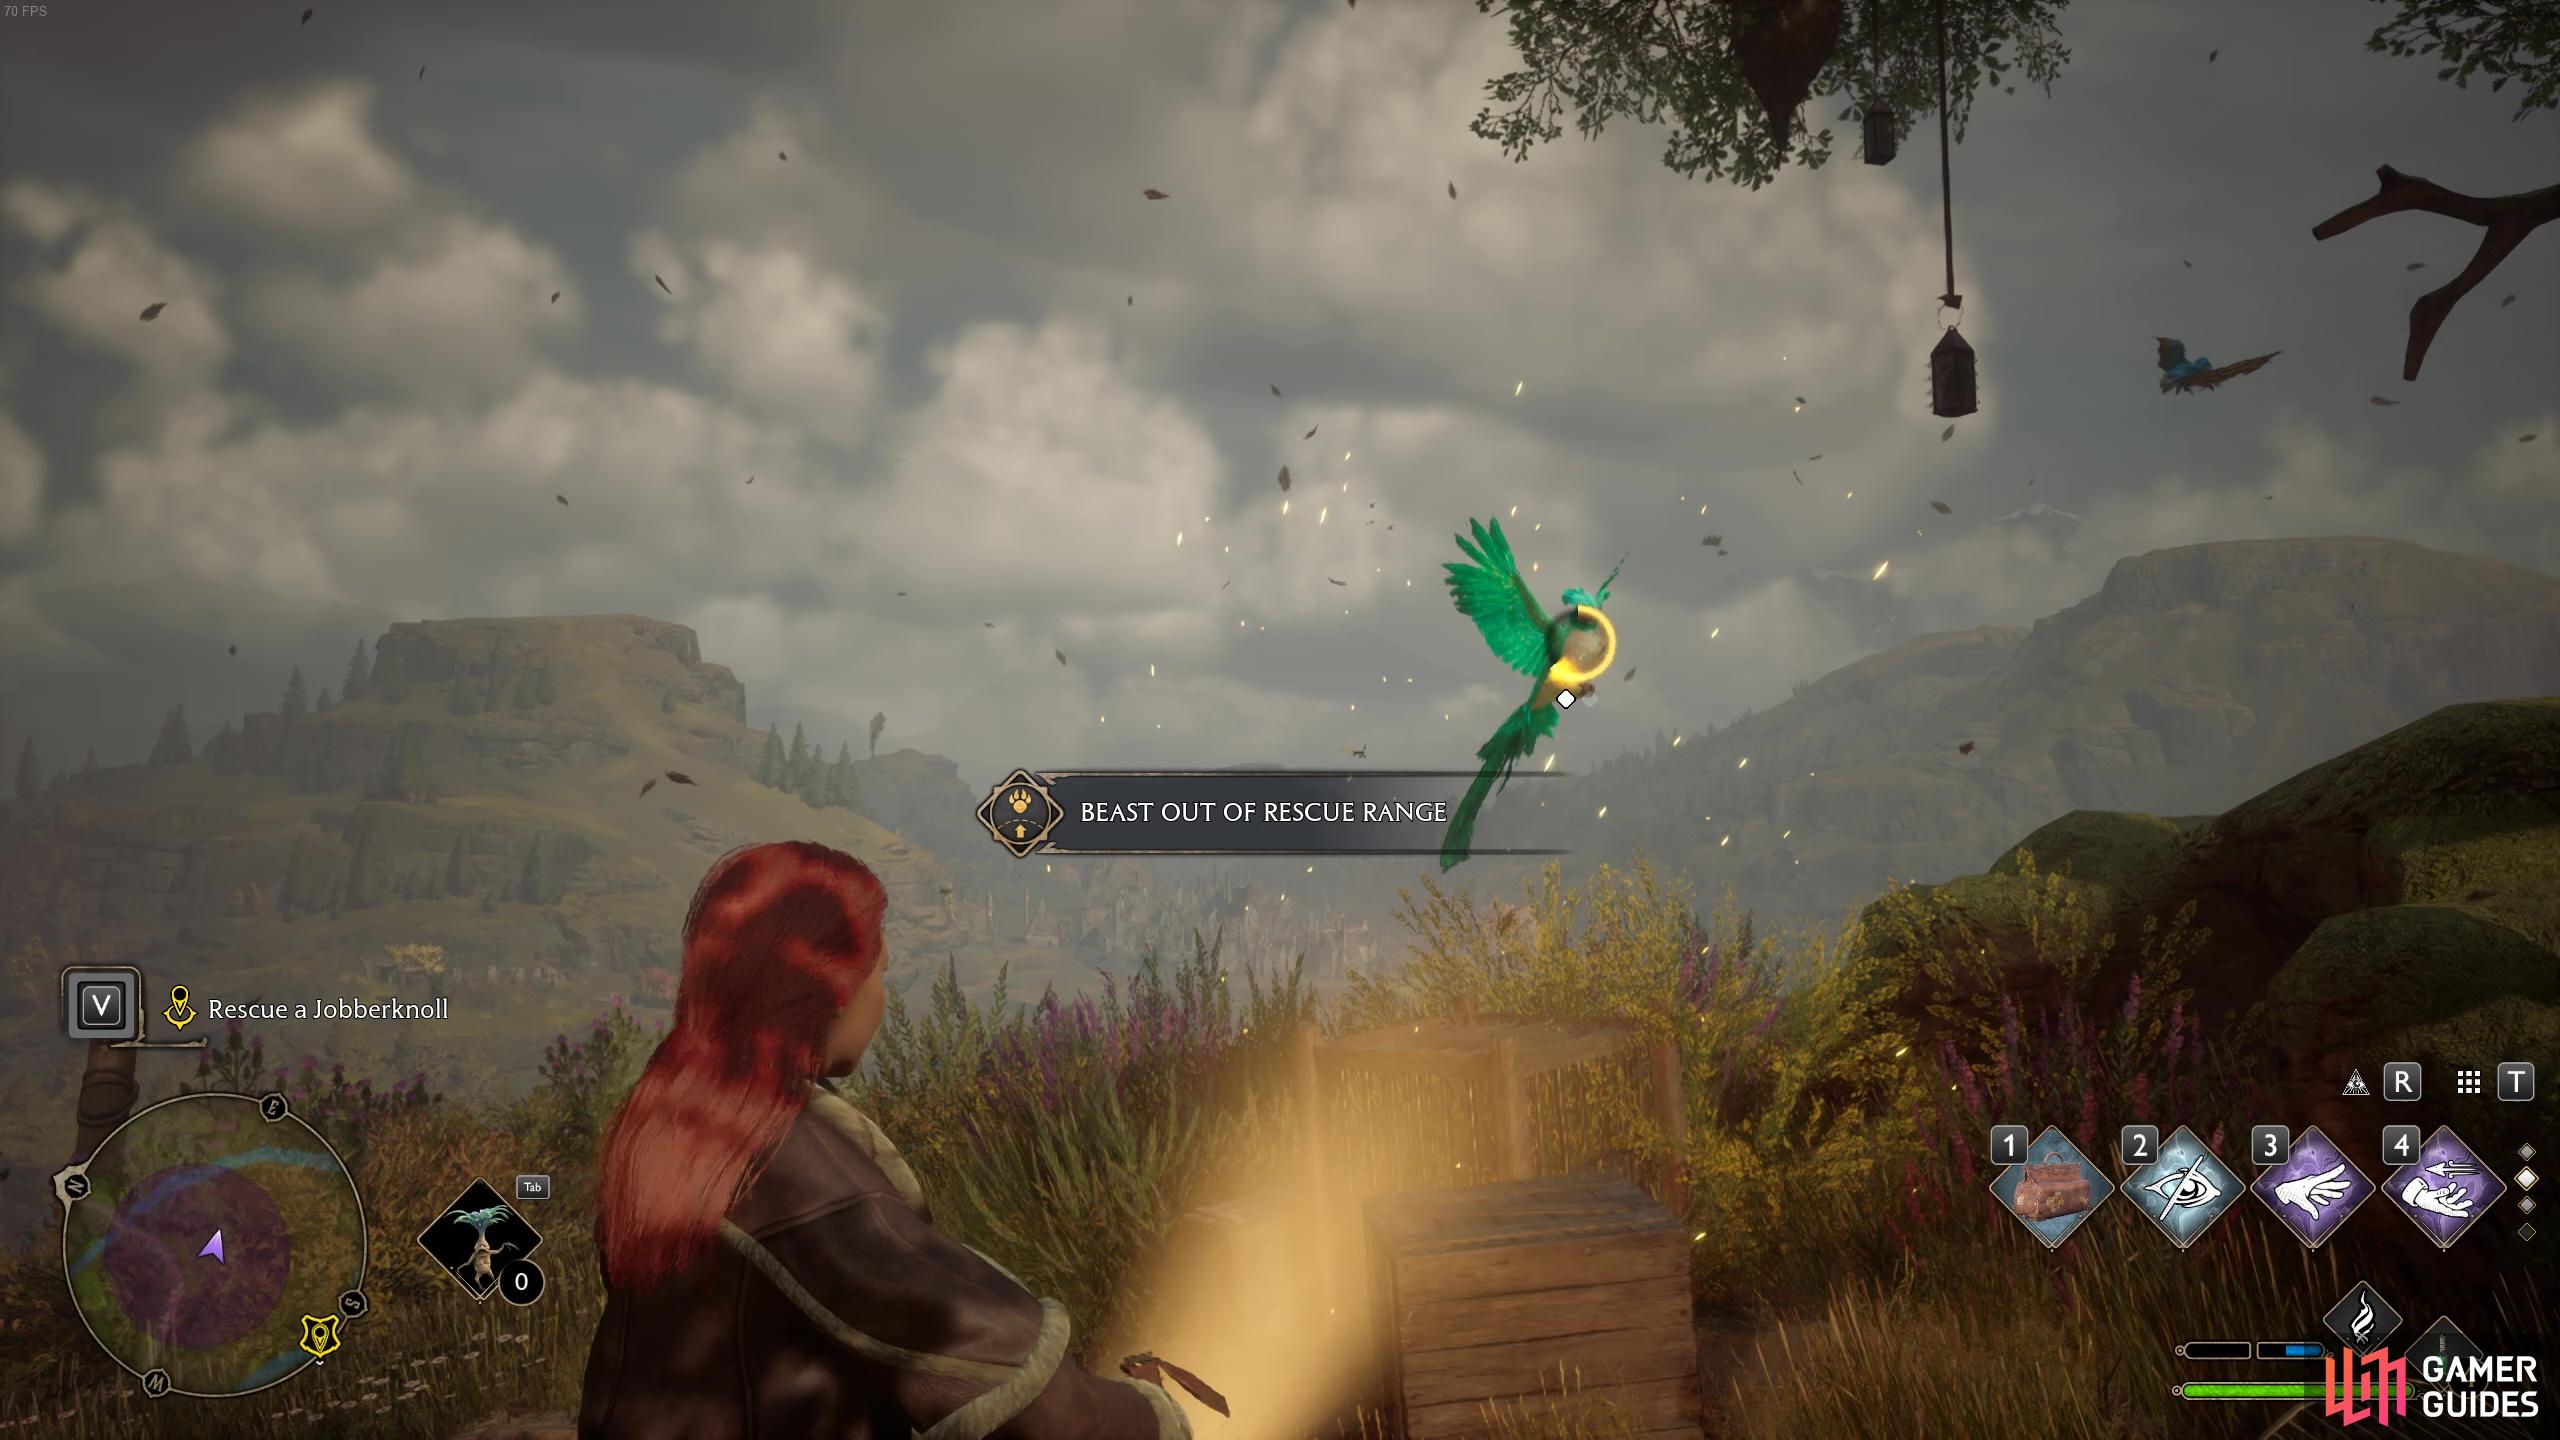
The Jobberknoll is harder to catch and will take a little bit more patience.
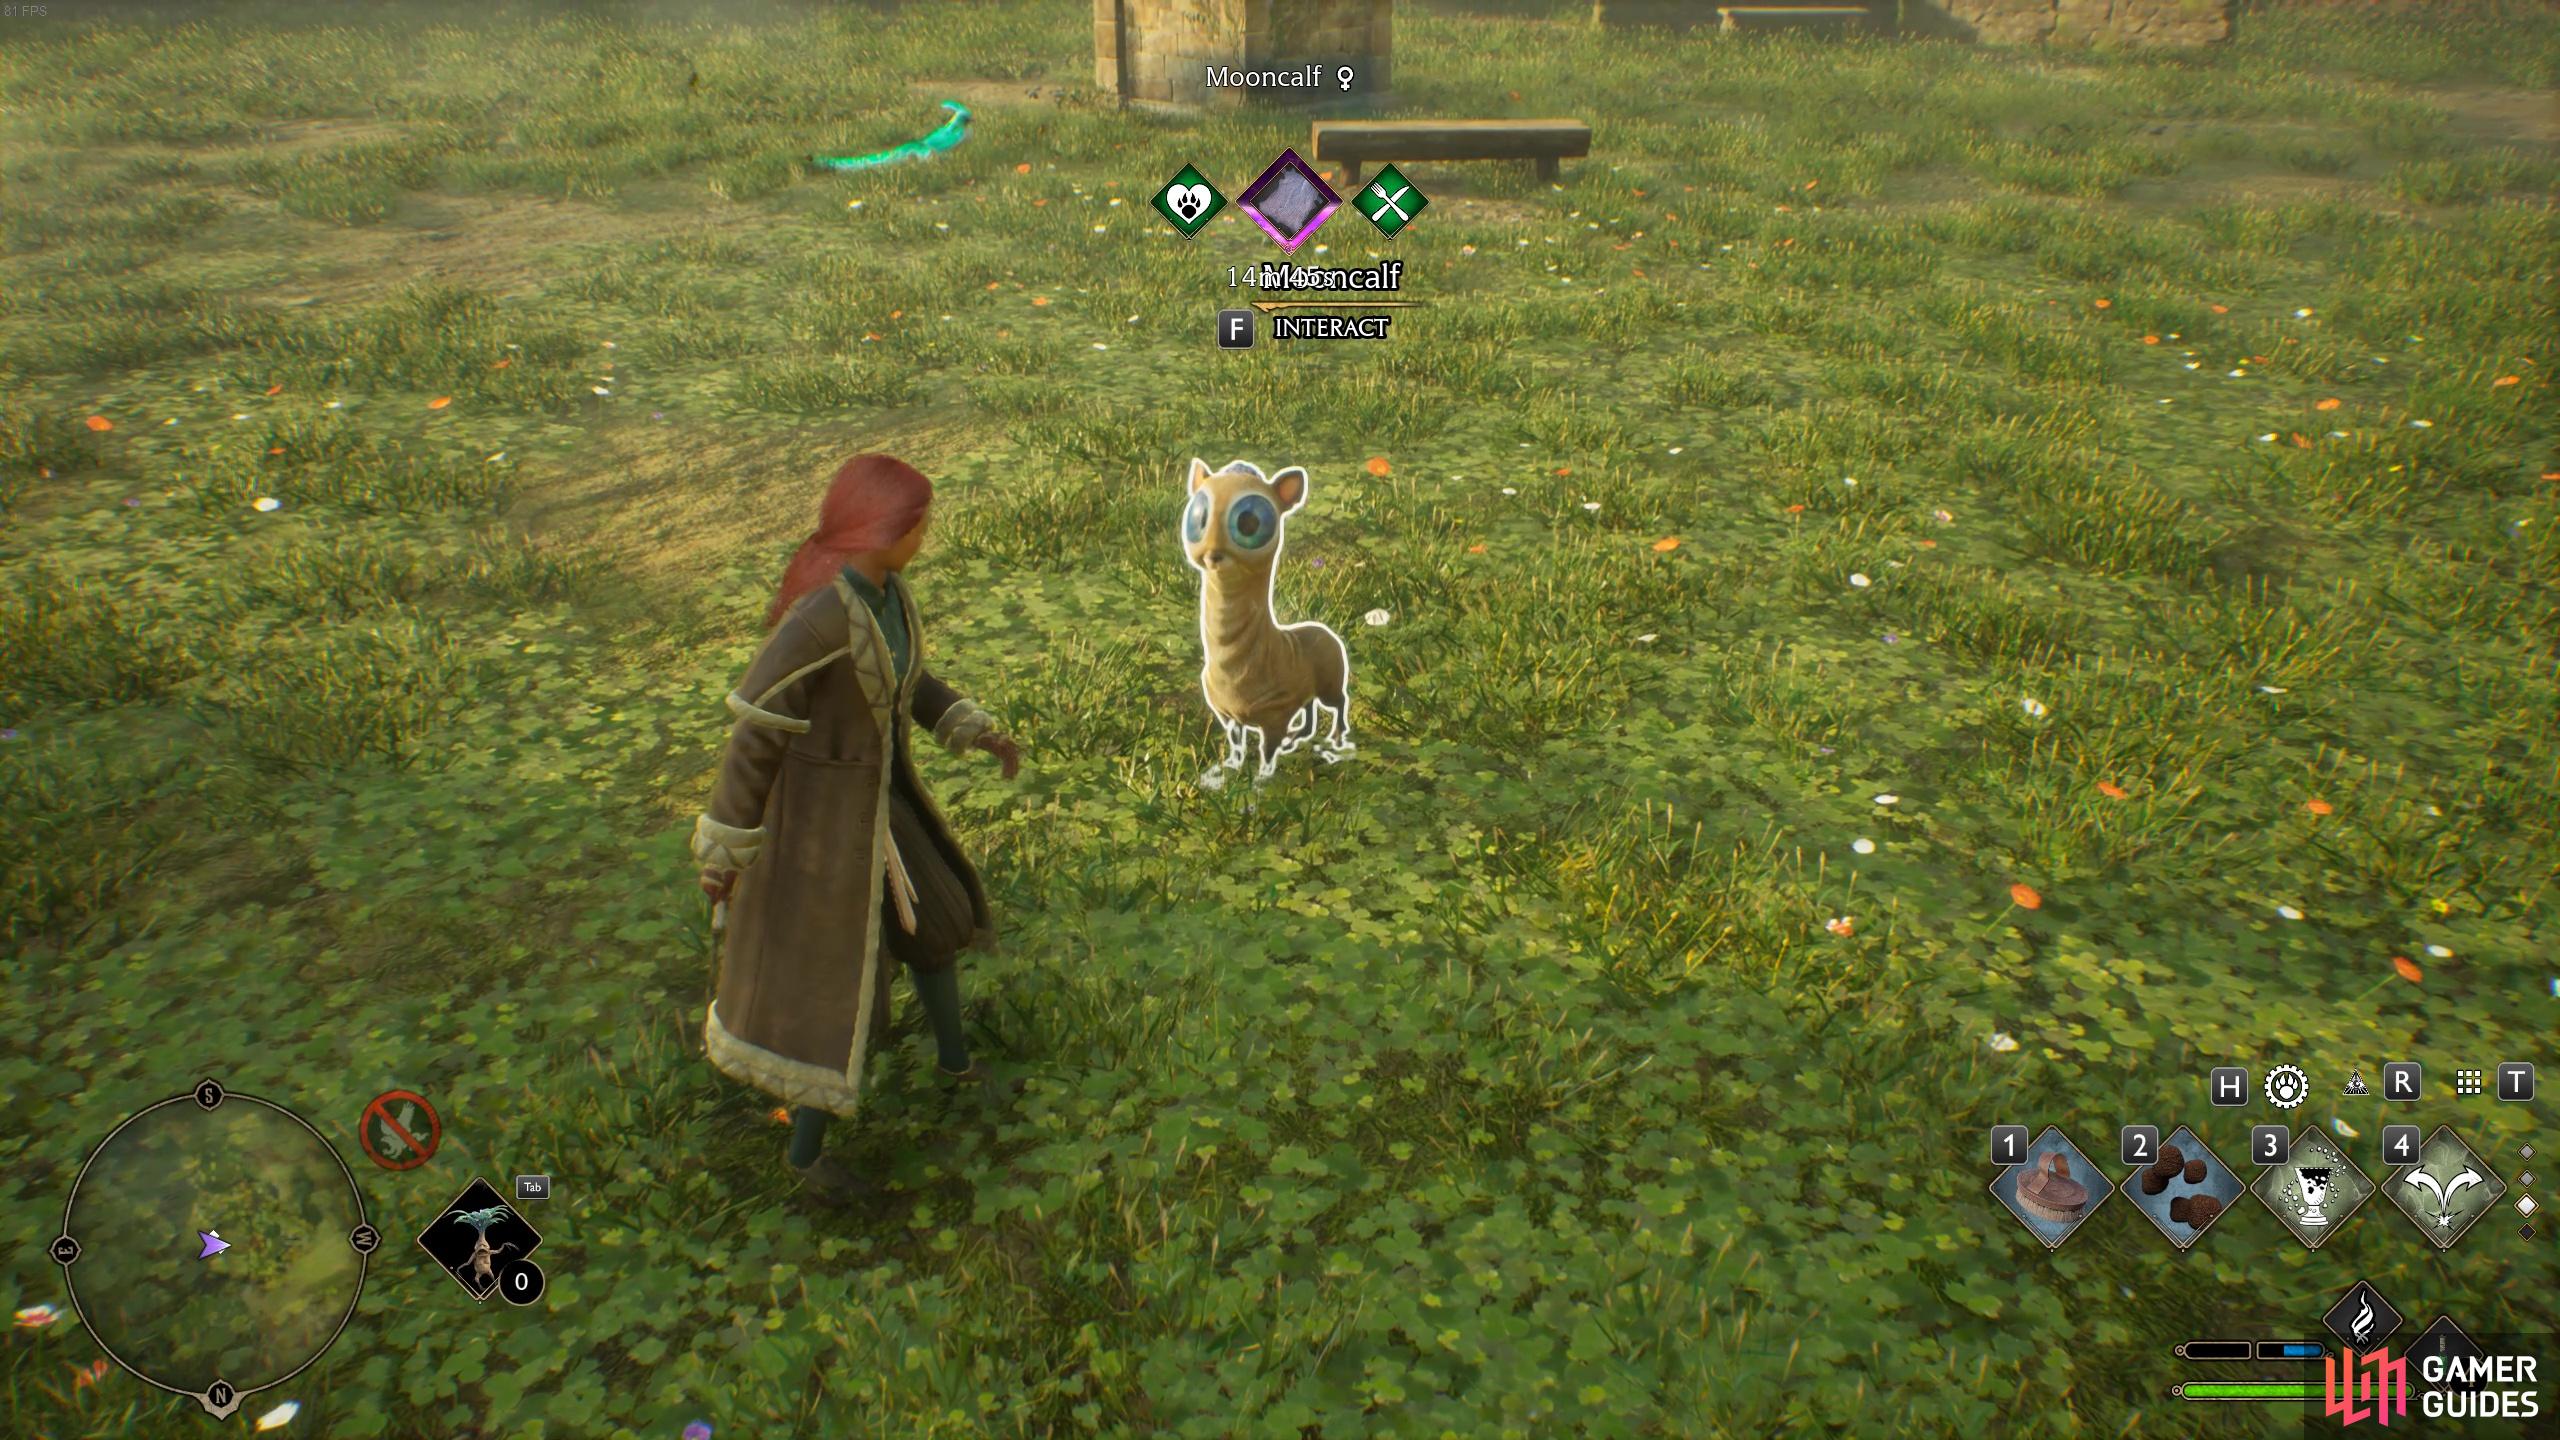
Once you’ve caught a Jobberknoll, you’ll need to speak to Deek again. There’s one more beast to catch - the Mooncalf. Head up the path a little up the mountain to meet Deek near the Mooncalf Den Floo Flame. These beasts only come out at night so you’ll need to wait until it’s dark to catch one. You can pass the time by opening up the map and choosing to change it to night time.
The Mooncalves are a lot trickier to catch than the Jobberknoll and the Puffskein. You’ll need to hold the / / button three times before your nab-sack sucks up the beast. You should definitely use the Disillusionment Charm trick to get as close as possible before using the bag. You could also try to corner it against a wall or a branch to limit its movement as much as possible. Don’t forget to use Levioso as well!
Once you’ve caught a Mooncalf, return to Deek and he’ll tell you to meet him back at the Room of Requirement.
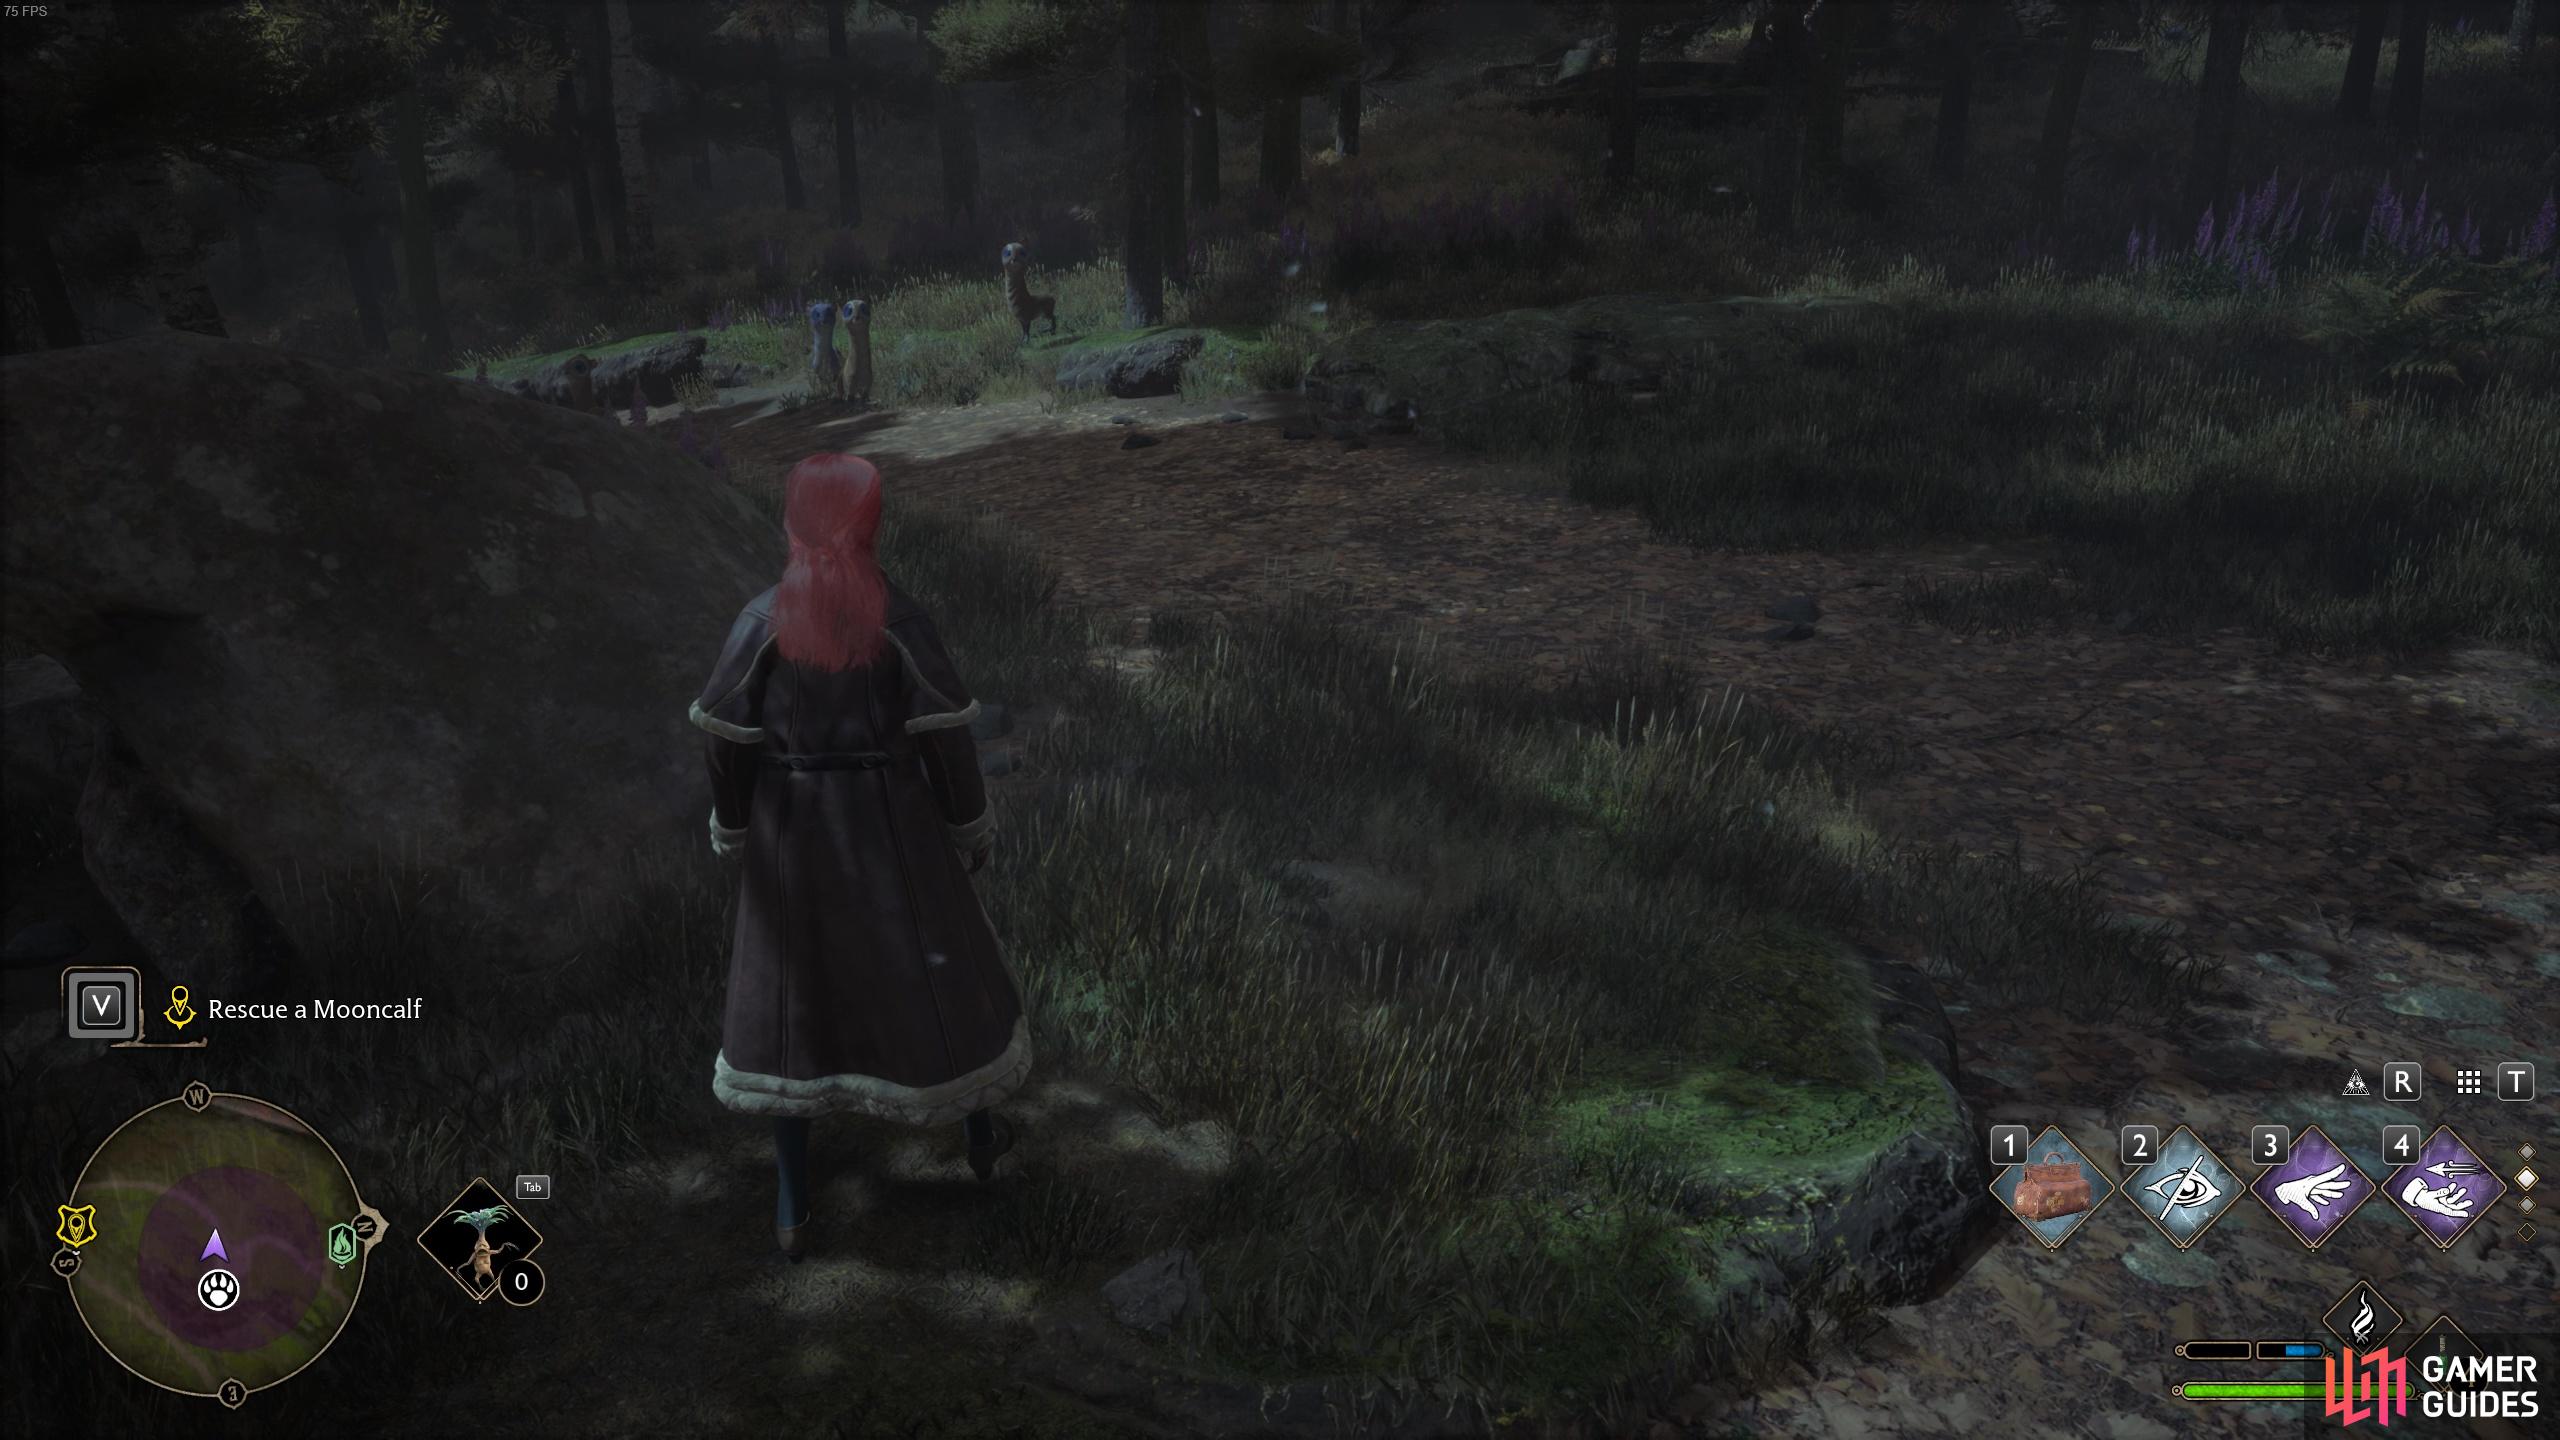
The Mooncalf are quite shy and even trickier to catch

try getting really close by using the disillusionment charm.
How to Use the Vivarium
The next time you head back to the Room of Requirement, Deek will prompt you to think of a place that you can keep your Beasts. The Room of Requirement will magically conjure up a vivarium. From the outside it looks like a small greenhouse, but when you pass through the door, you’ll find yourself in a huge open field surrounded by mountains and water!
Use the Vivarium to house rescued animals!
Here, you’ll be able to release your newly caught beast friends and they’ll be safe from poachers. After releasing them, Deek will tell you to collect some materials from each of the beasts. To do this, you’ll need to brush them and feed them, you’ll be able to collect the materials (there’s a timed cooldown before you can harvest from them again). From Puffskein, you’ll get ![]() Puffskein Fur, from Mooncalves you’ll get
Puffskein Fur, from Mooncalves you’ll get ![]() Mooncalf Fur and then Jobberknoll’s will drop
Mooncalf Fur and then Jobberknoll’s will drop ![]() Jobberknoll Feathers.
Jobberknoll Feathers.
You’ll be able to collect materials from a variety of beasts, and as Deek will tell you, you can use these materials to upgrade your gear! Once you’ve collected materials from each of your three Beasts, Deek will tell you to go back inside and place a Loom using the ![]() Conjuring Spell!
Conjuring Spell!
How to Use the Loom
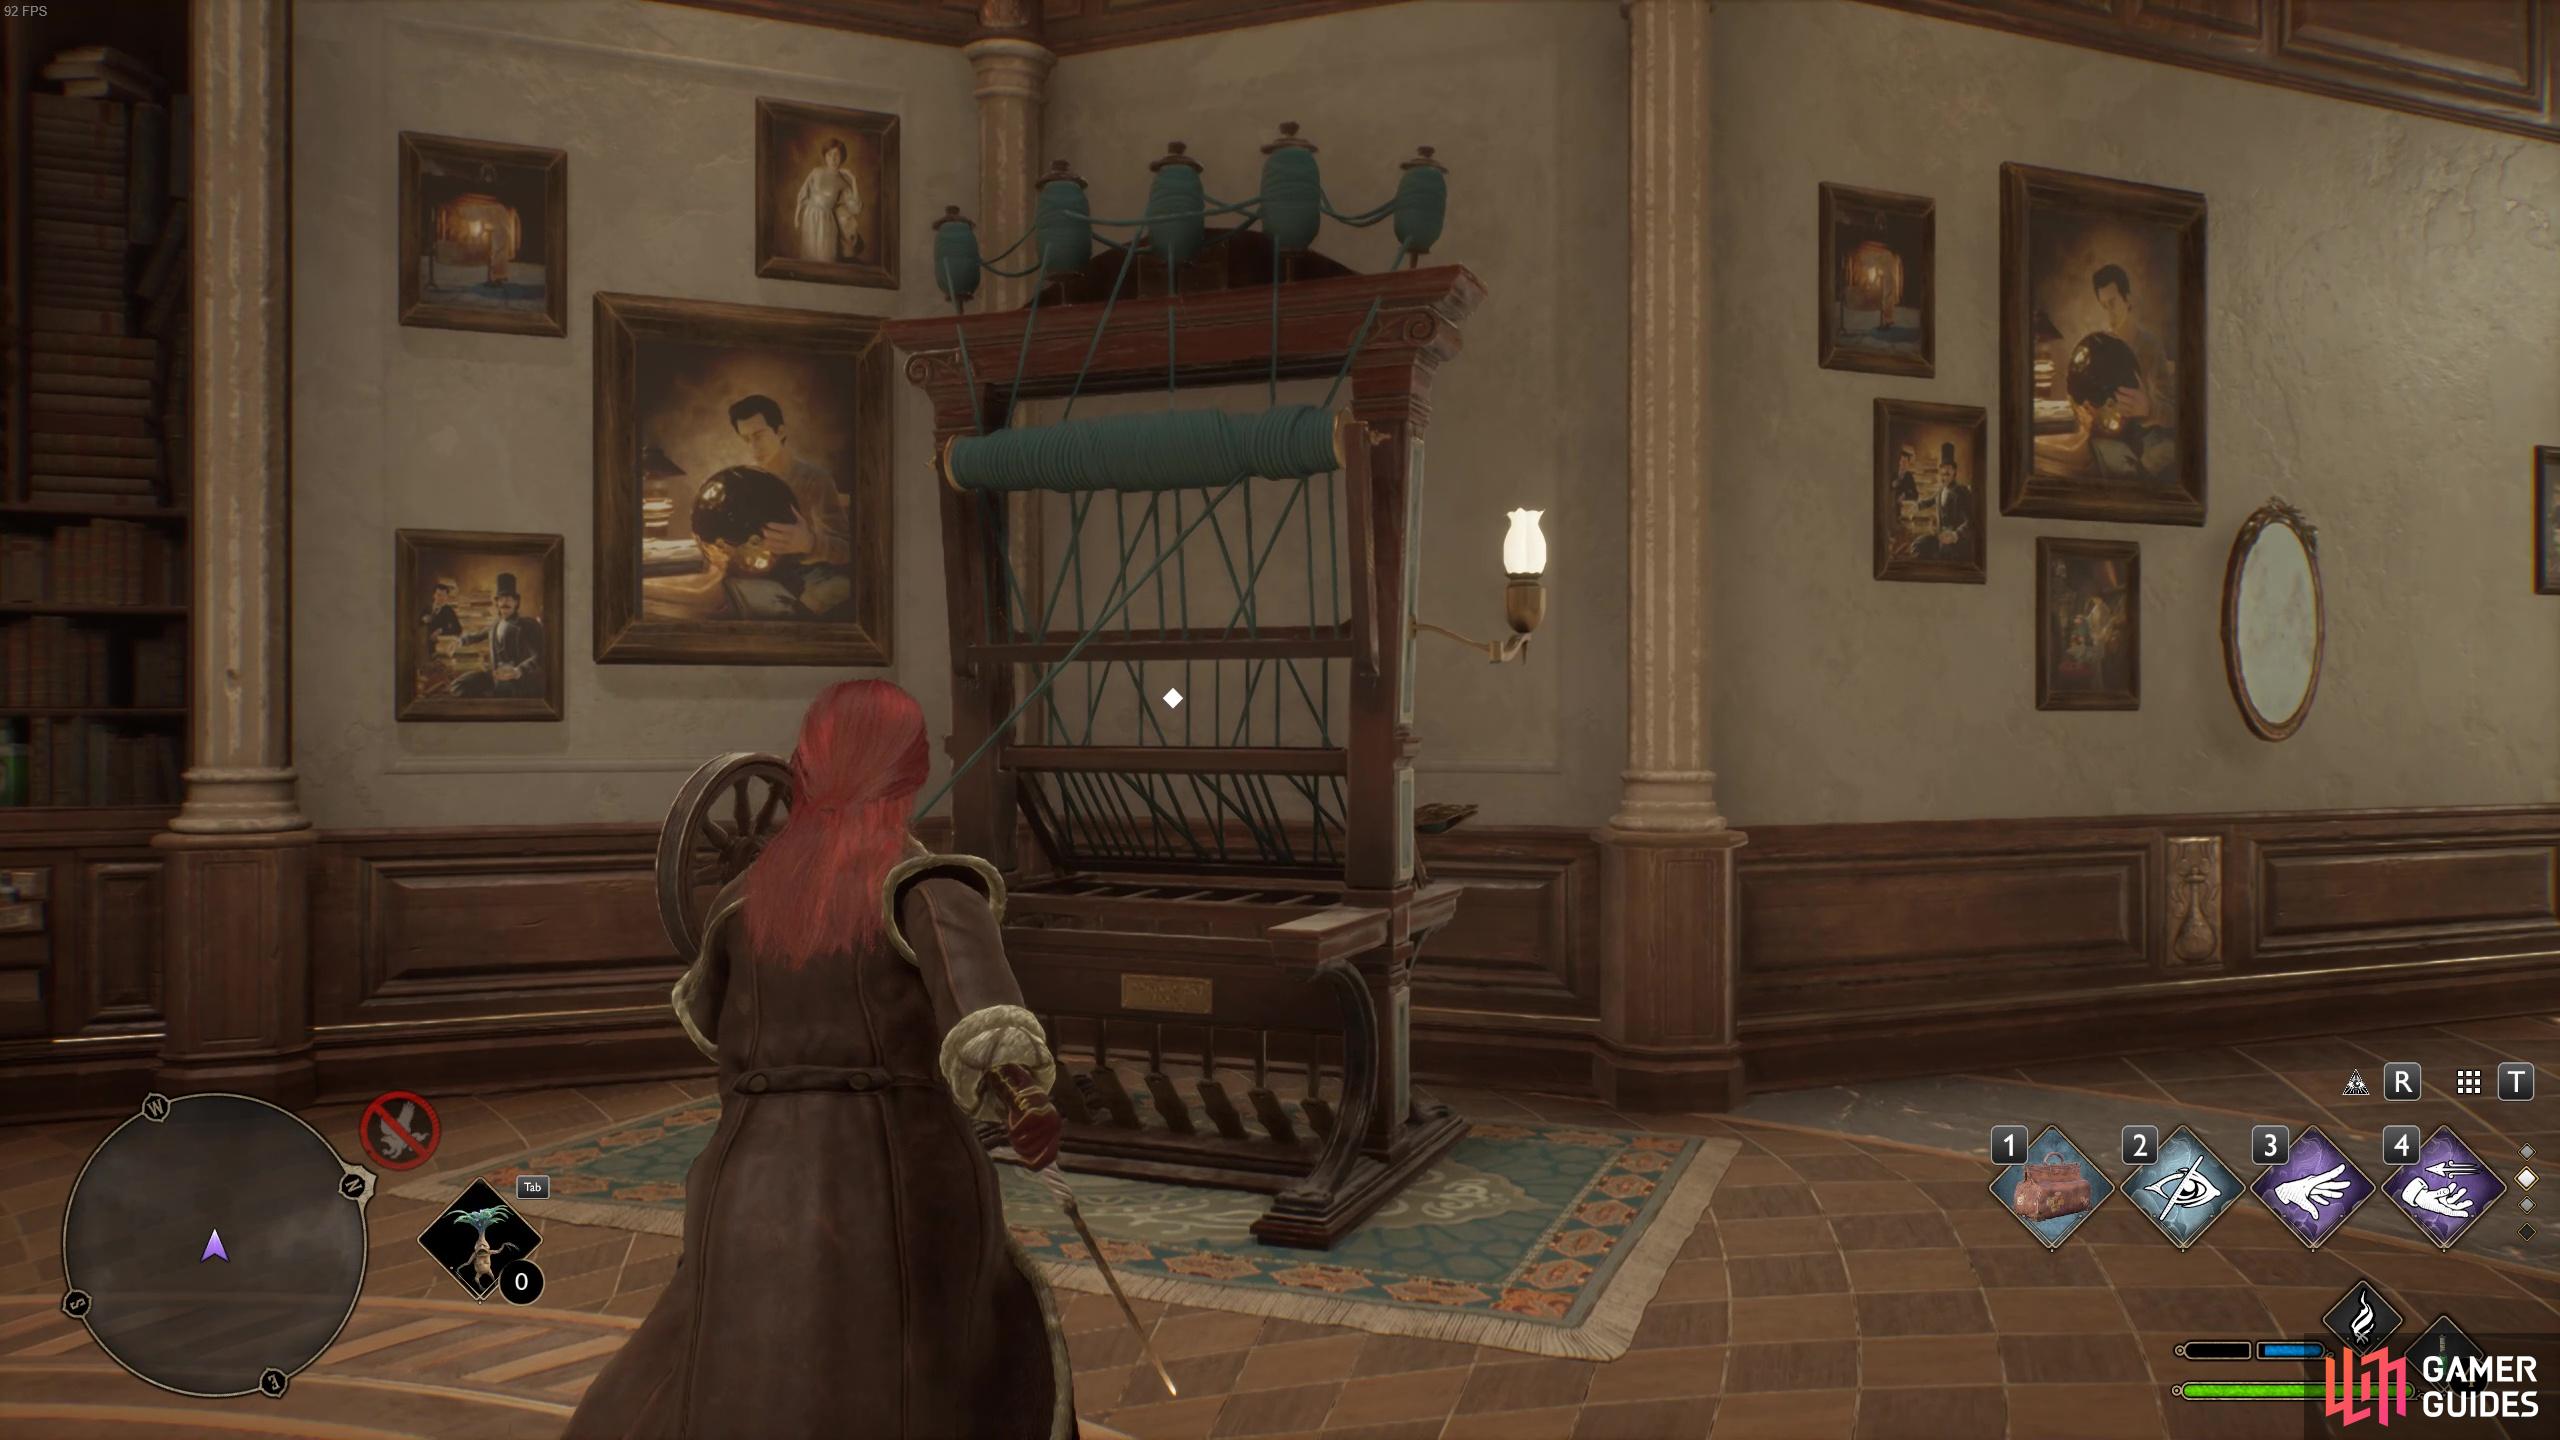
The Loom is a new bit of kit that’ll allow players to upgrade their gear!
The Loom is a piece of Machinery that can be used to upgrade your gear and also apply traits to them (if they have the slots). Upgrades will increase offence and defence stats, whilst Traits will give your items specific properties - i.e. increased defence from a specific enemy, or increased damage when using ![]() Incendio. Both upgrades and traits will require Beast materials, with different upgrades and traits requiring different materials. That means you’ll want to head out and get as many different Beasts for your Vivarium as possible!
Incendio. Both upgrades and traits will require Beast materials, with different upgrades and traits requiring different materials. That means you’ll want to head out and get as many different Beasts for your Vivarium as possible!
You’ll unlock more traits by completing enemy challenges! Additionally, some gear have slots for higher tier traits and some gear won’t have any slots at all. You won’t be able to use any traits on gear without traits and you won’t be able to apply a trait greater than the gear’s assigned tier slot.
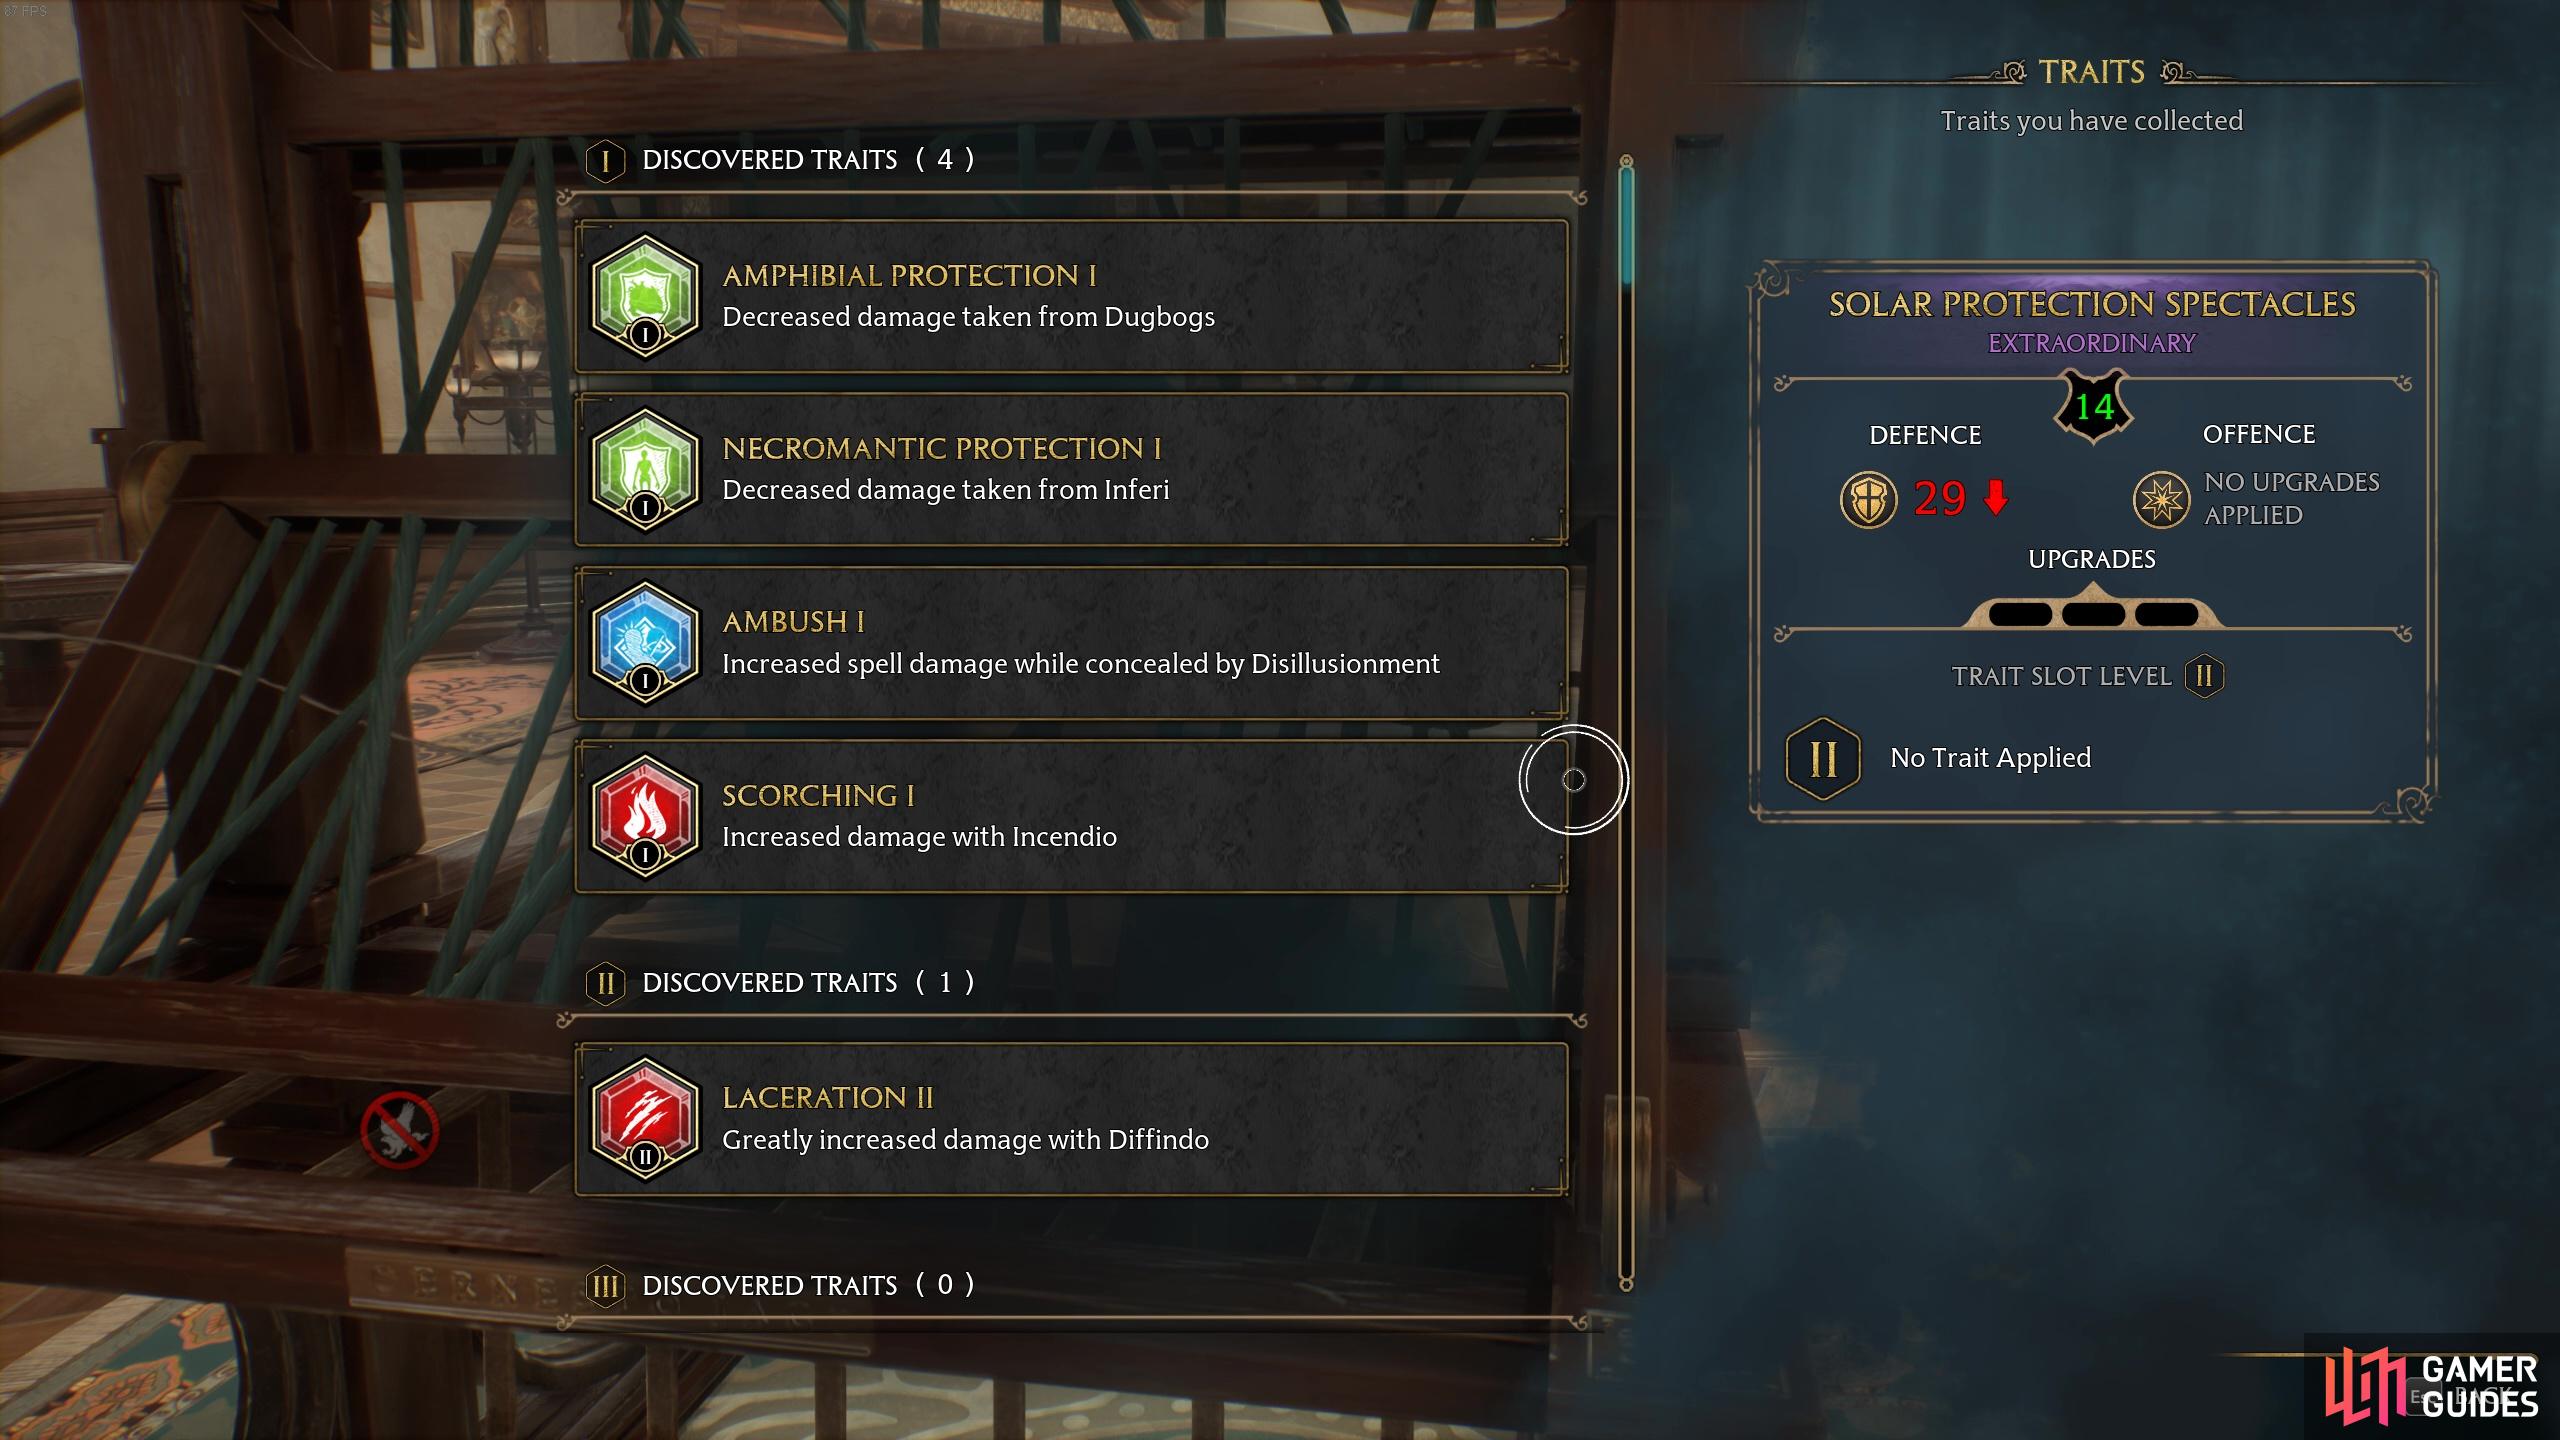
The Loom can be used to apply traits to gear with trait slots
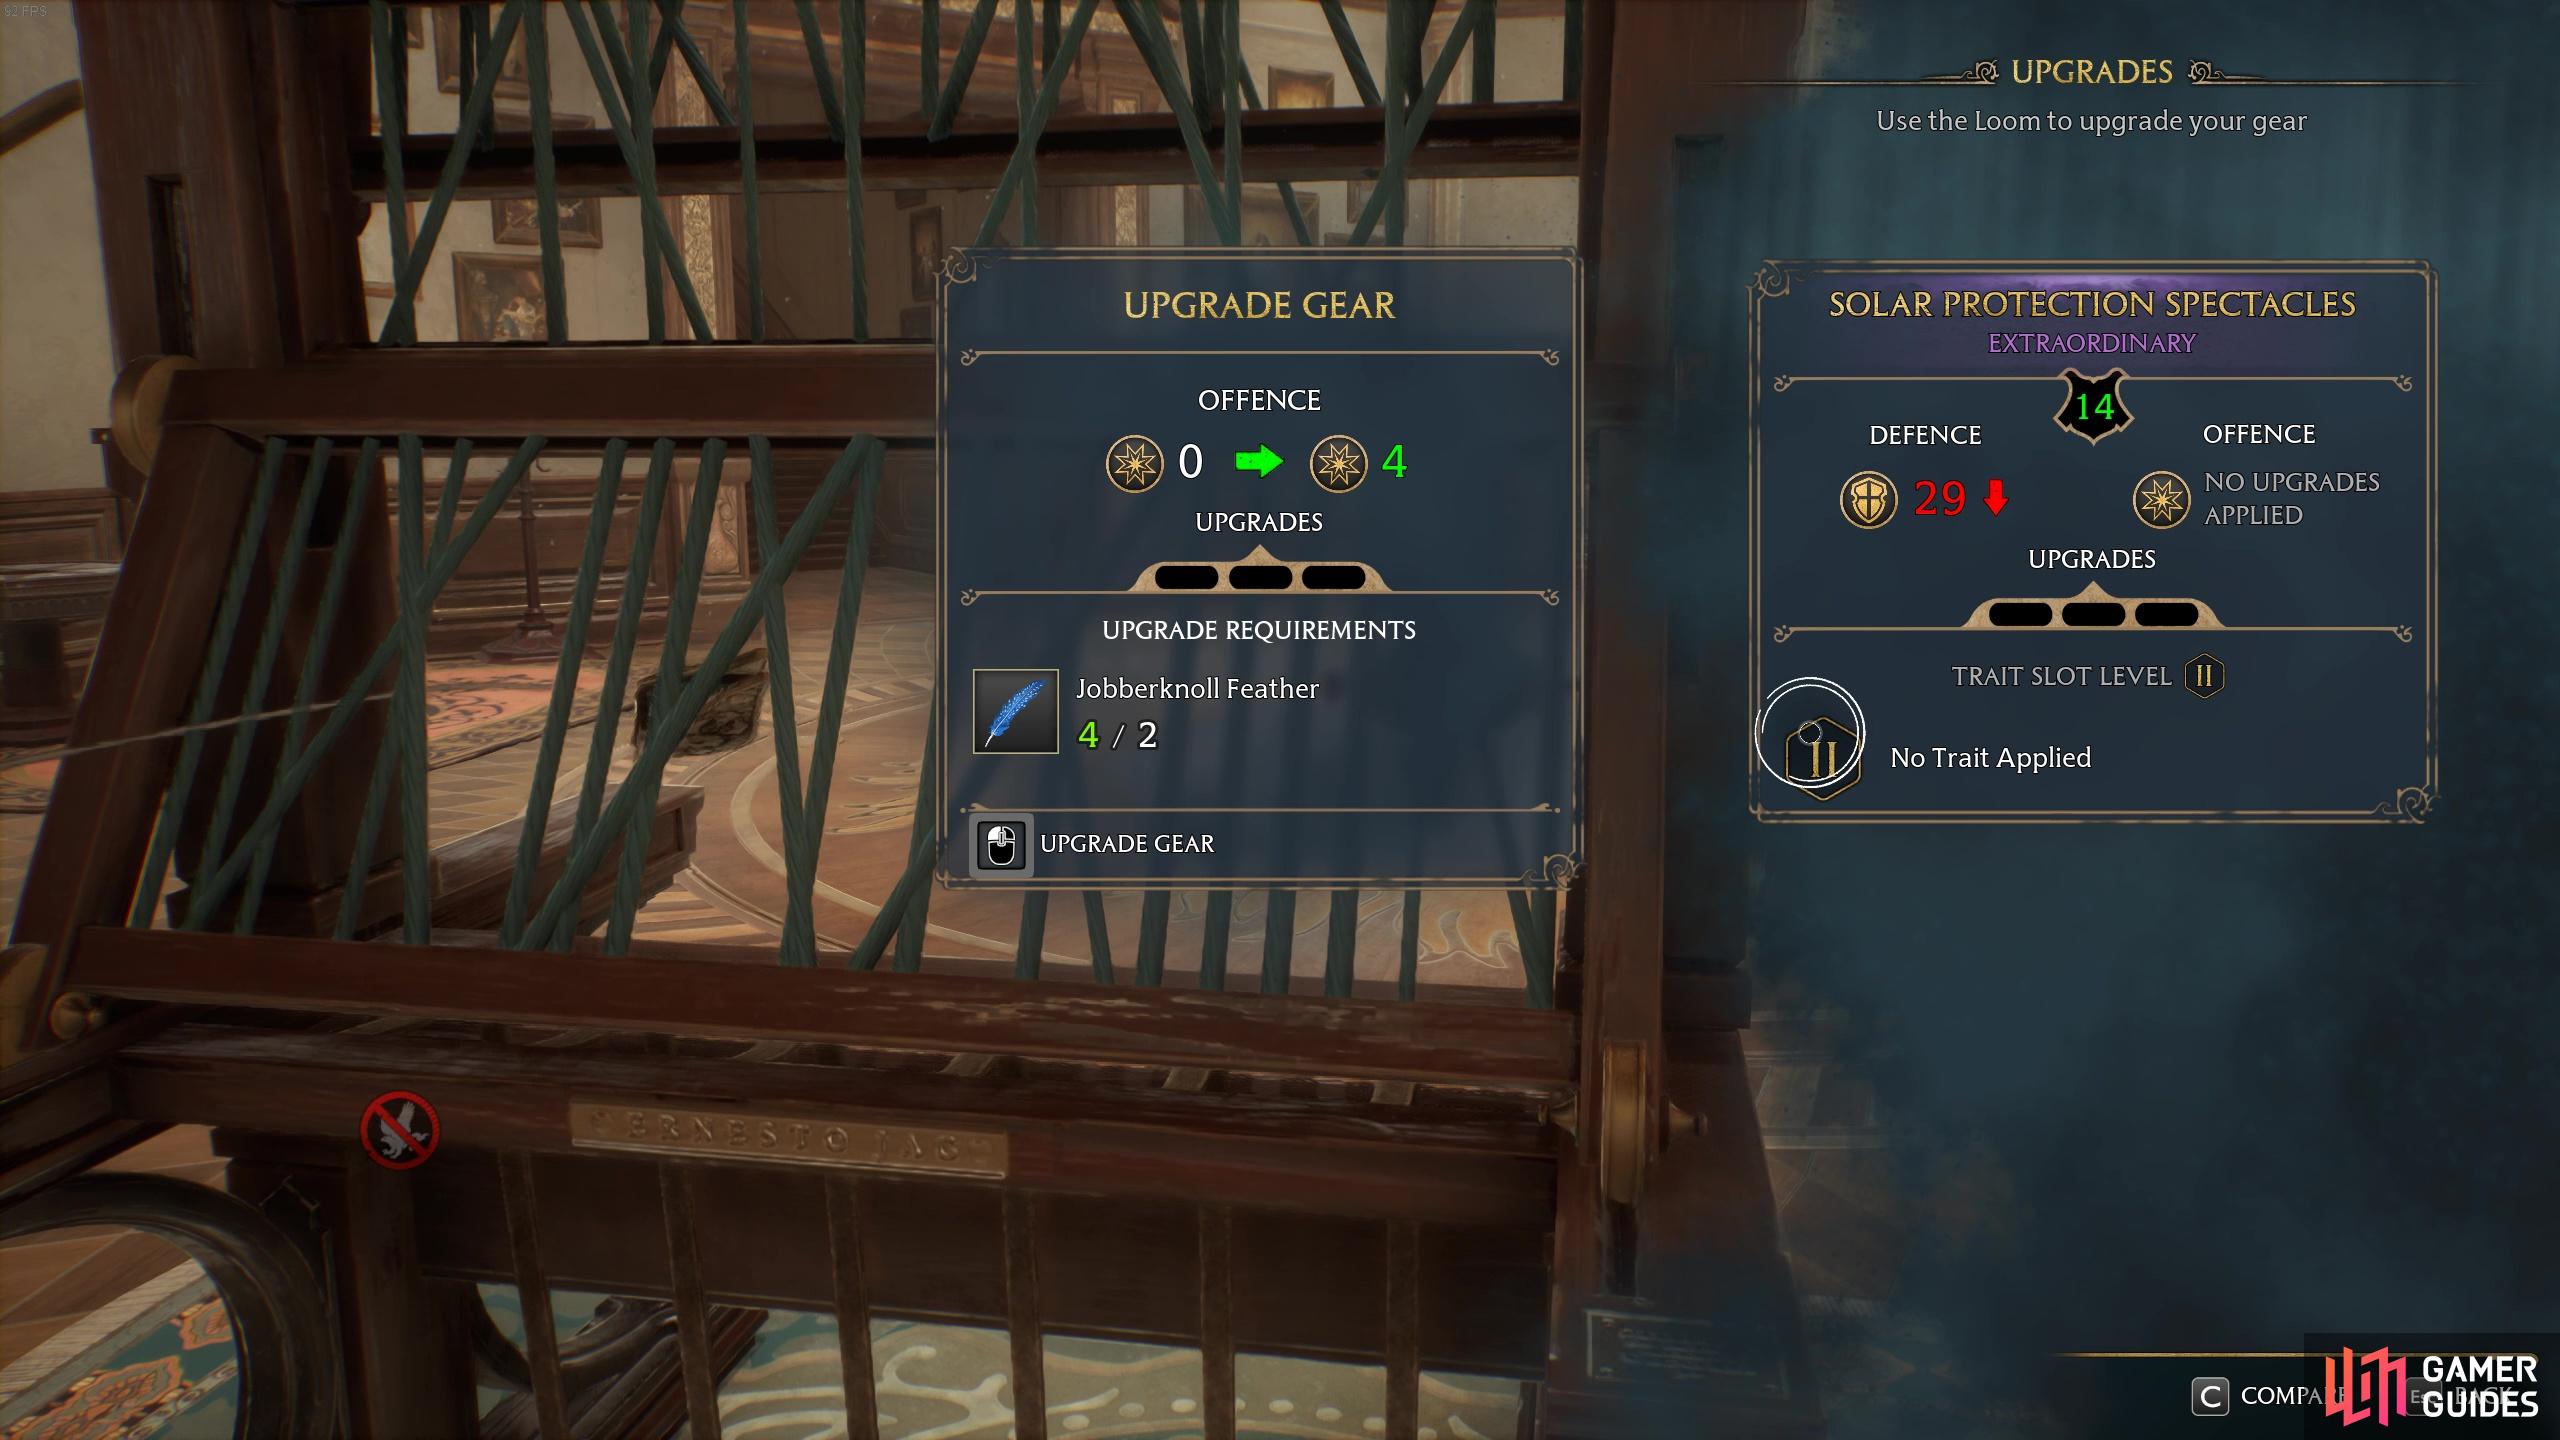
and it can also be used to upgrade gear.
No Comments