
In Xenoblade Chronicles 3: Future Redeemed, you will start the game with only a single Accessory slot on each character. To unlock the other two, you will need to hunt down key items, called Accessory Unlock Kits, which are hidden across the game’s world. There’s six characters in your party and each one has two locked accessory slots, so there’s a total of 12 Unlock Kits to hunt down.
Accessory Unlock Kit #1
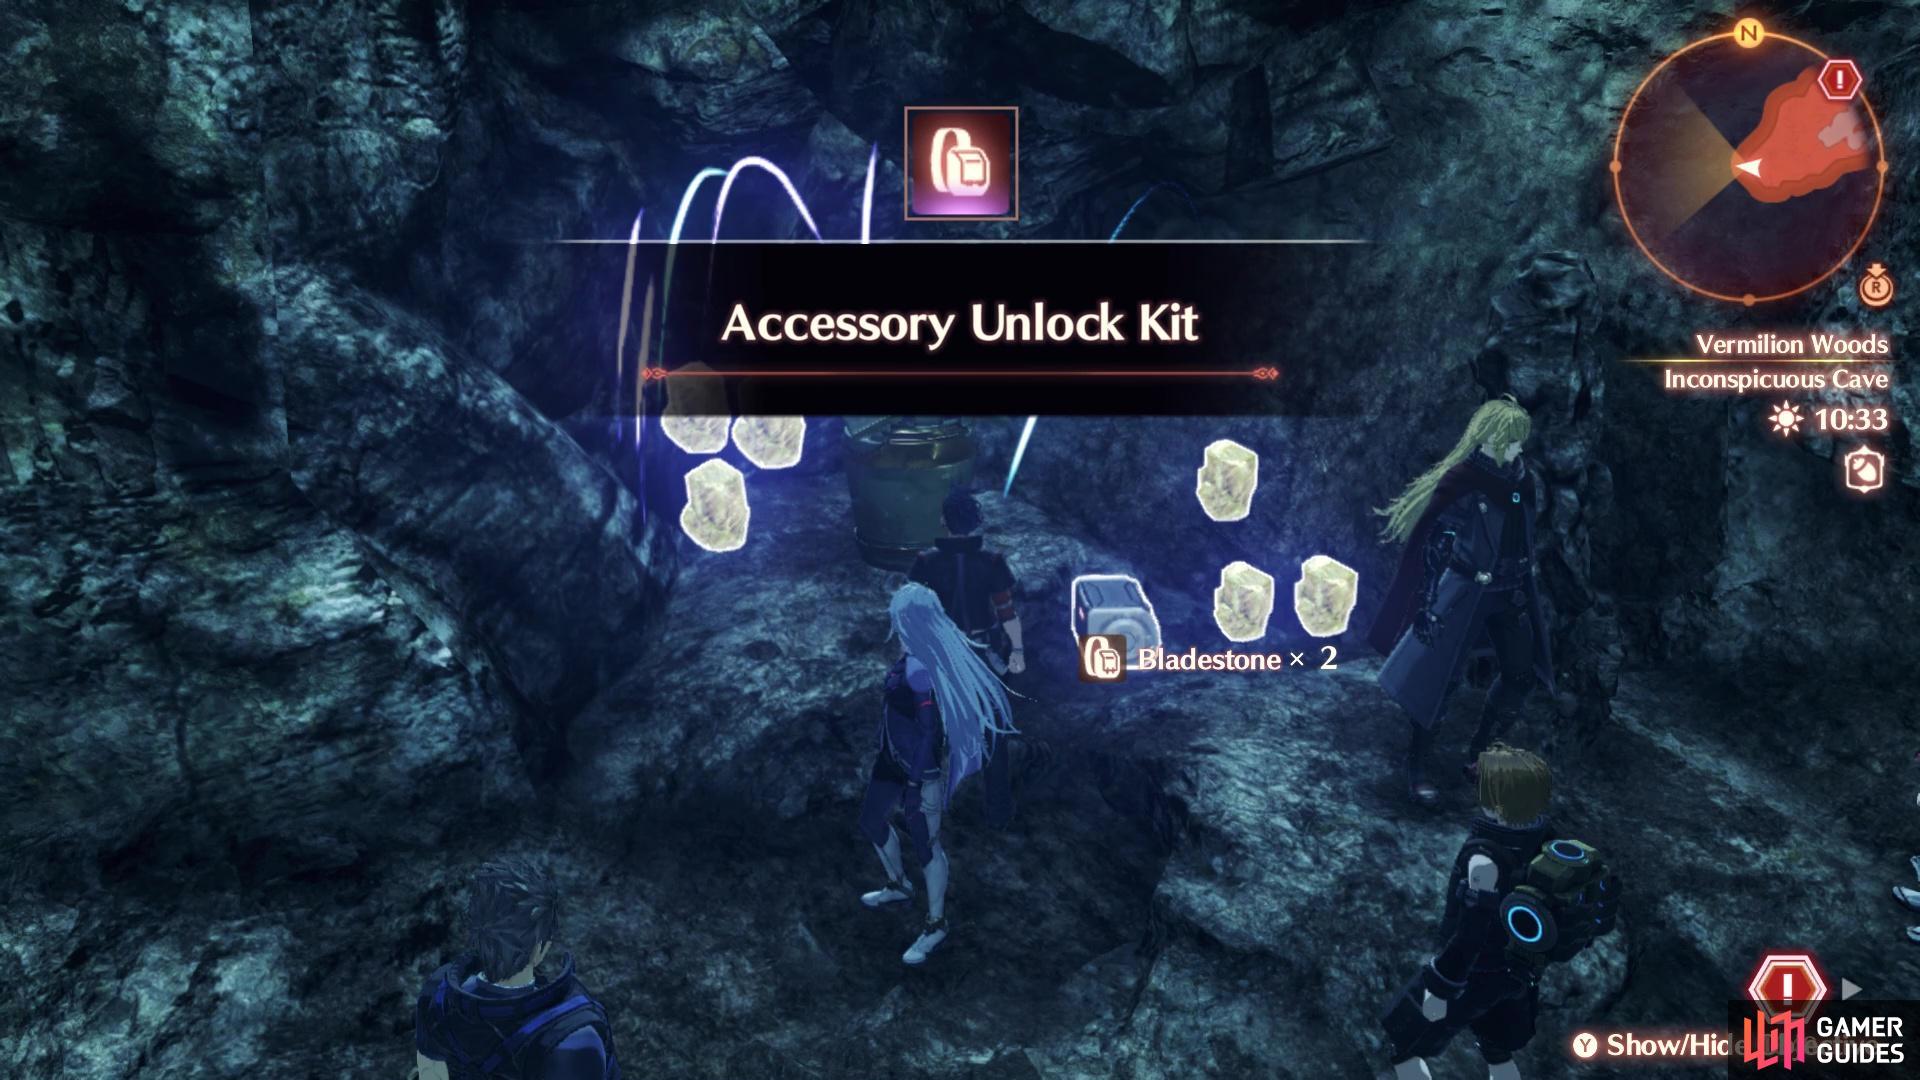
Open the Container at the end of the cave with the Prohibitor Guiseppe unique enemy
The first kit on this list is located in Vermillion Woods. Northwest of the Colony Gamma Wreckage, you will find a small cave. At the beginning of the game, it’s best to ignore this cave, as there is a Lv 23 Unique Enemy, named Prohibitor Giuseppe, guarding the entrance. That means you will need to come back here later, once you have sufficiently leveled your characters some. Once you have, defeat the Unique Enemy, then look for a Container at the western end of the cave. Open it up to get the Unlock Kit.
Accessory Unlock Kit #2
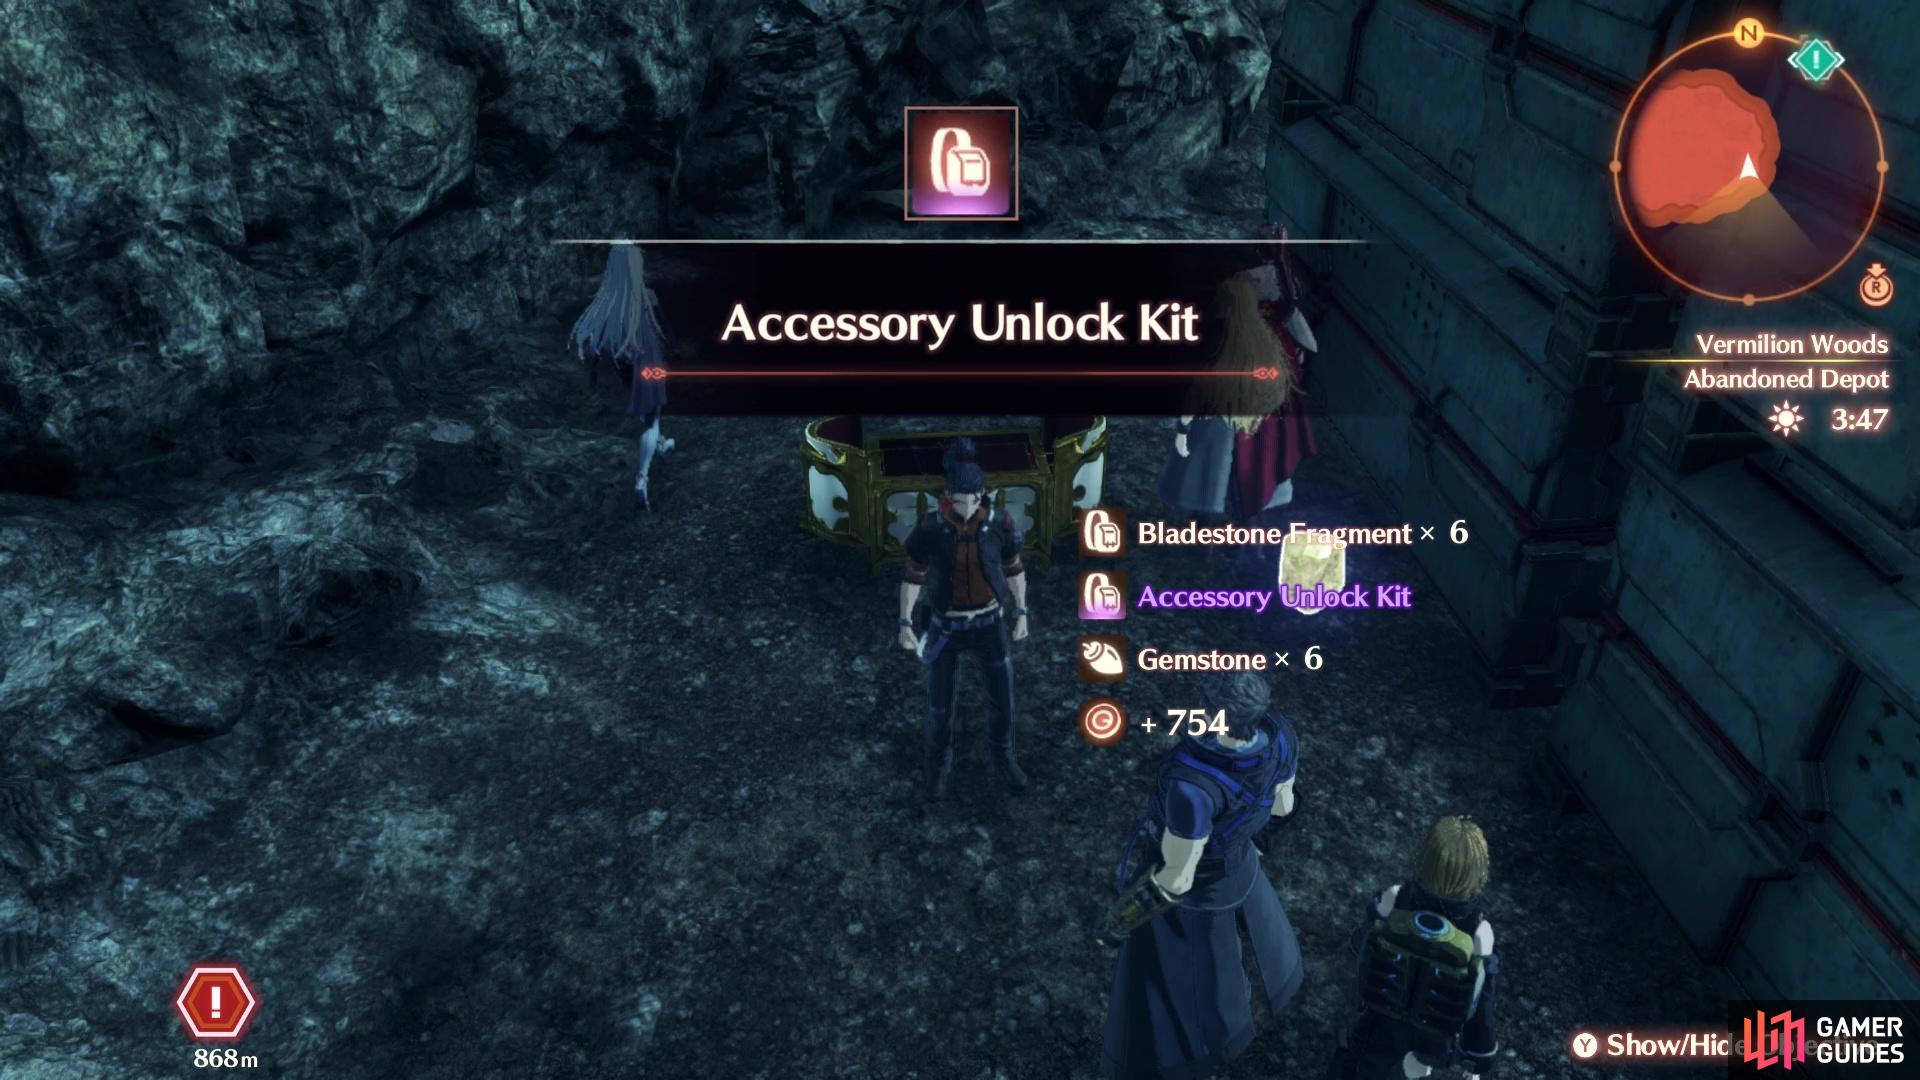
Look behind the crates in the Abandoned Depot for this Unlock Kit
Towards the beginning of the DLC, you will be asked by a Nopon to repair the elevator, which is a part of the main story. Once you do this, you will be able to take the elevator to the Aurora Shelf main area. Southeast of the elevator, once taken, will be a ladder on the edge of the cliff, which leads to a small cave, called the Abandoned Depot. Note that there are level 30+ enemies inside here, so you will need to come back later in order to get this. Upon clearing out the cave, there will be a Relic behind the containers in the back of the cave. Open the Relic to receive the Unlock Kit.
Accessory Unlock Kit #3
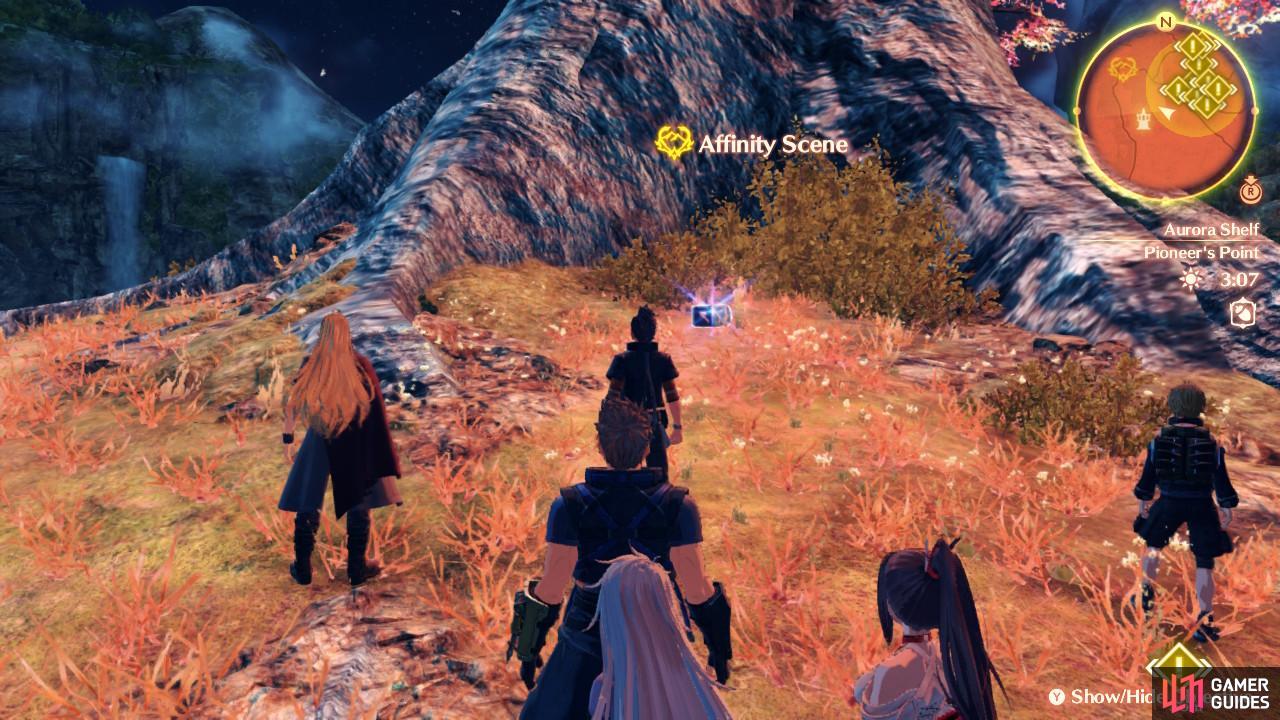
At the base of the tree at Pioneer’s Point is this kit
This is likely the first one you will actually get in the game, since it’s out in the open and not surrounded by higher leveled enemies. After fixing the elevator as part of the main story, you will reach the Aurora Shelf area. East of that elevator is the Pilgrims’ Rest Remains location and a little northeast of that is a hill, leading to the Pioneer’s Point landmark. There is a large tree here, at this landmark, and if you look at the base of the tree, you will find the Unlock Kit sitting in the open, as an item pickup.
Accessory Unlock Kit #4
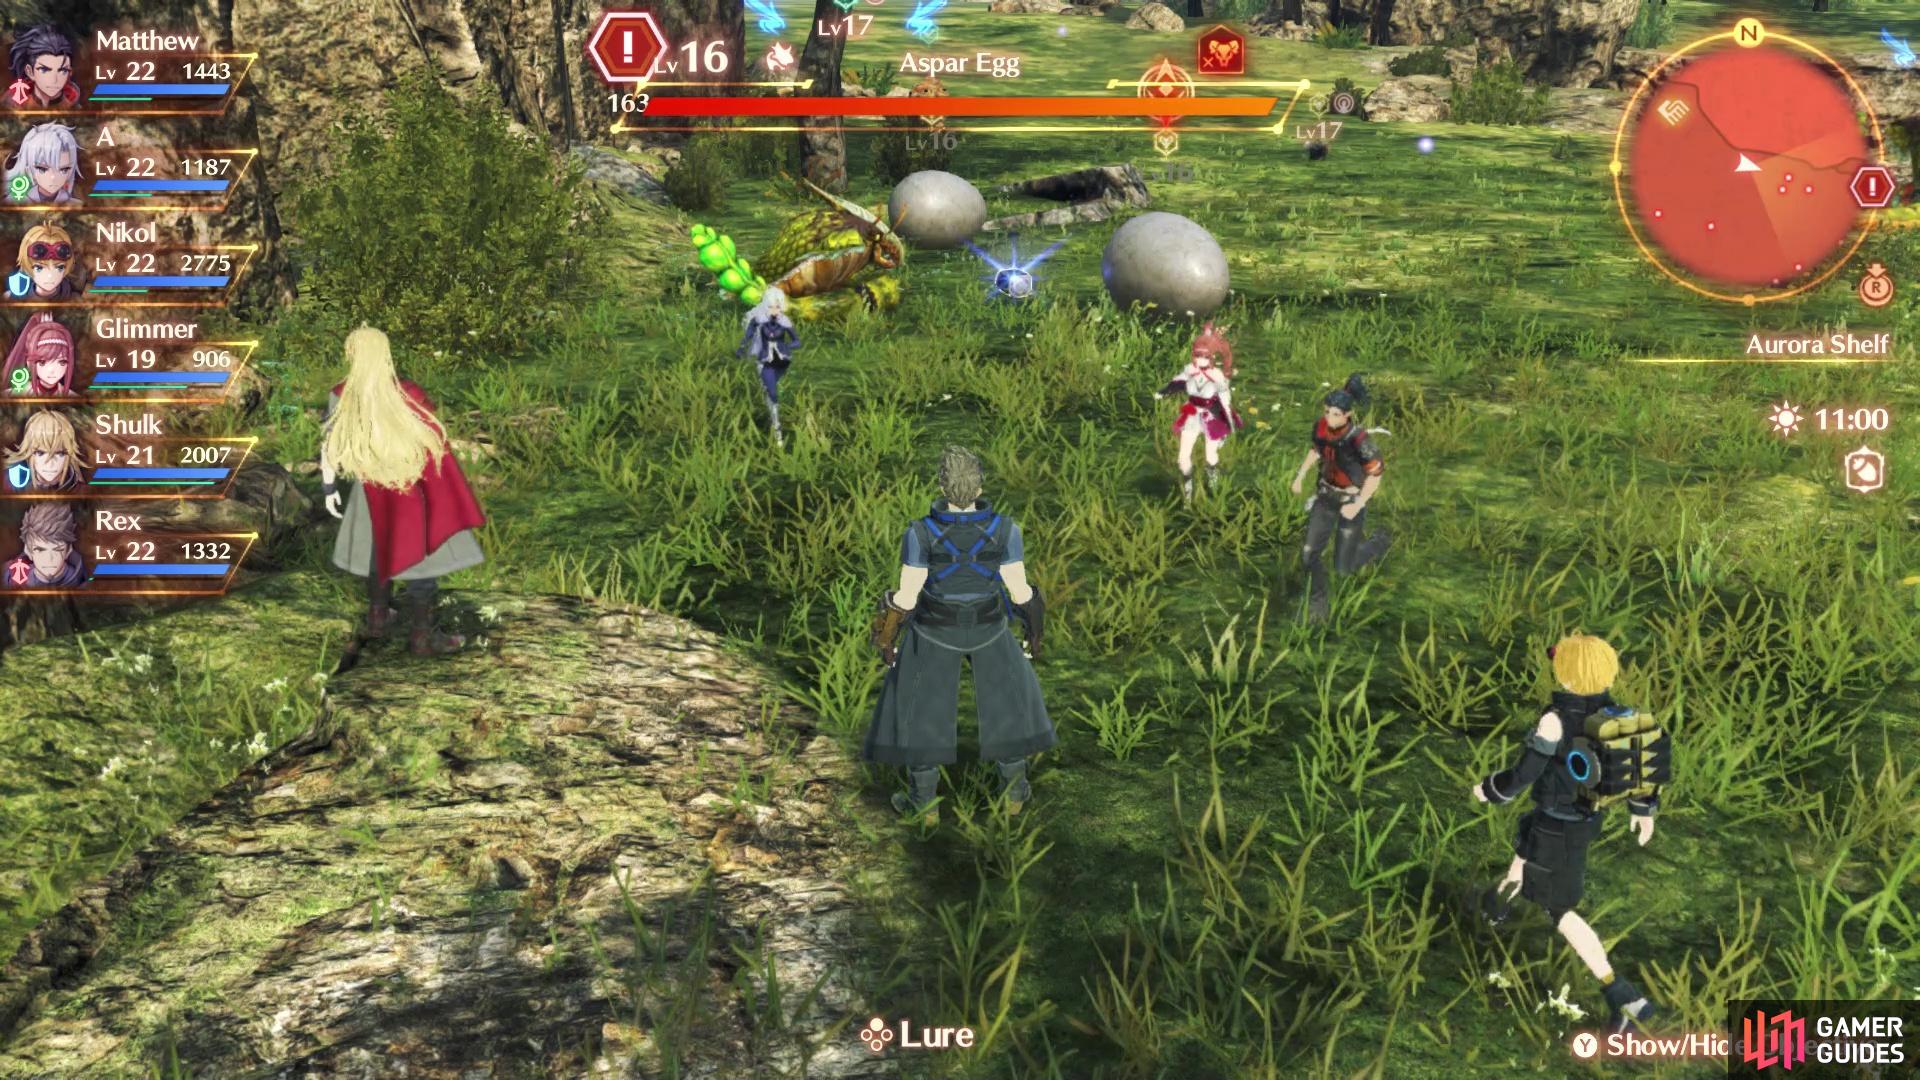
Be careful grabbing this kit, as it’s surrounded by enemies
Continuing on from the previous area, you will eventually head north and you will pass some Menaas Aspar enemies, as well as some eggs. If you’re a lower level or about the same level, it’s best to ignore this until a little bit later, especially if you’re just passing by it the first time. The eggs and sleeping serpent enemy are guarding the Unlock Kit, but each egg will hatch into three enemies, which makes it easy to get overwhelmed. If you stall a little bit, you will get your full party of six characters, which makes things a little easier to handle.
Accessory Unlock Kit #5

You’ll need to jump down to this pillar here
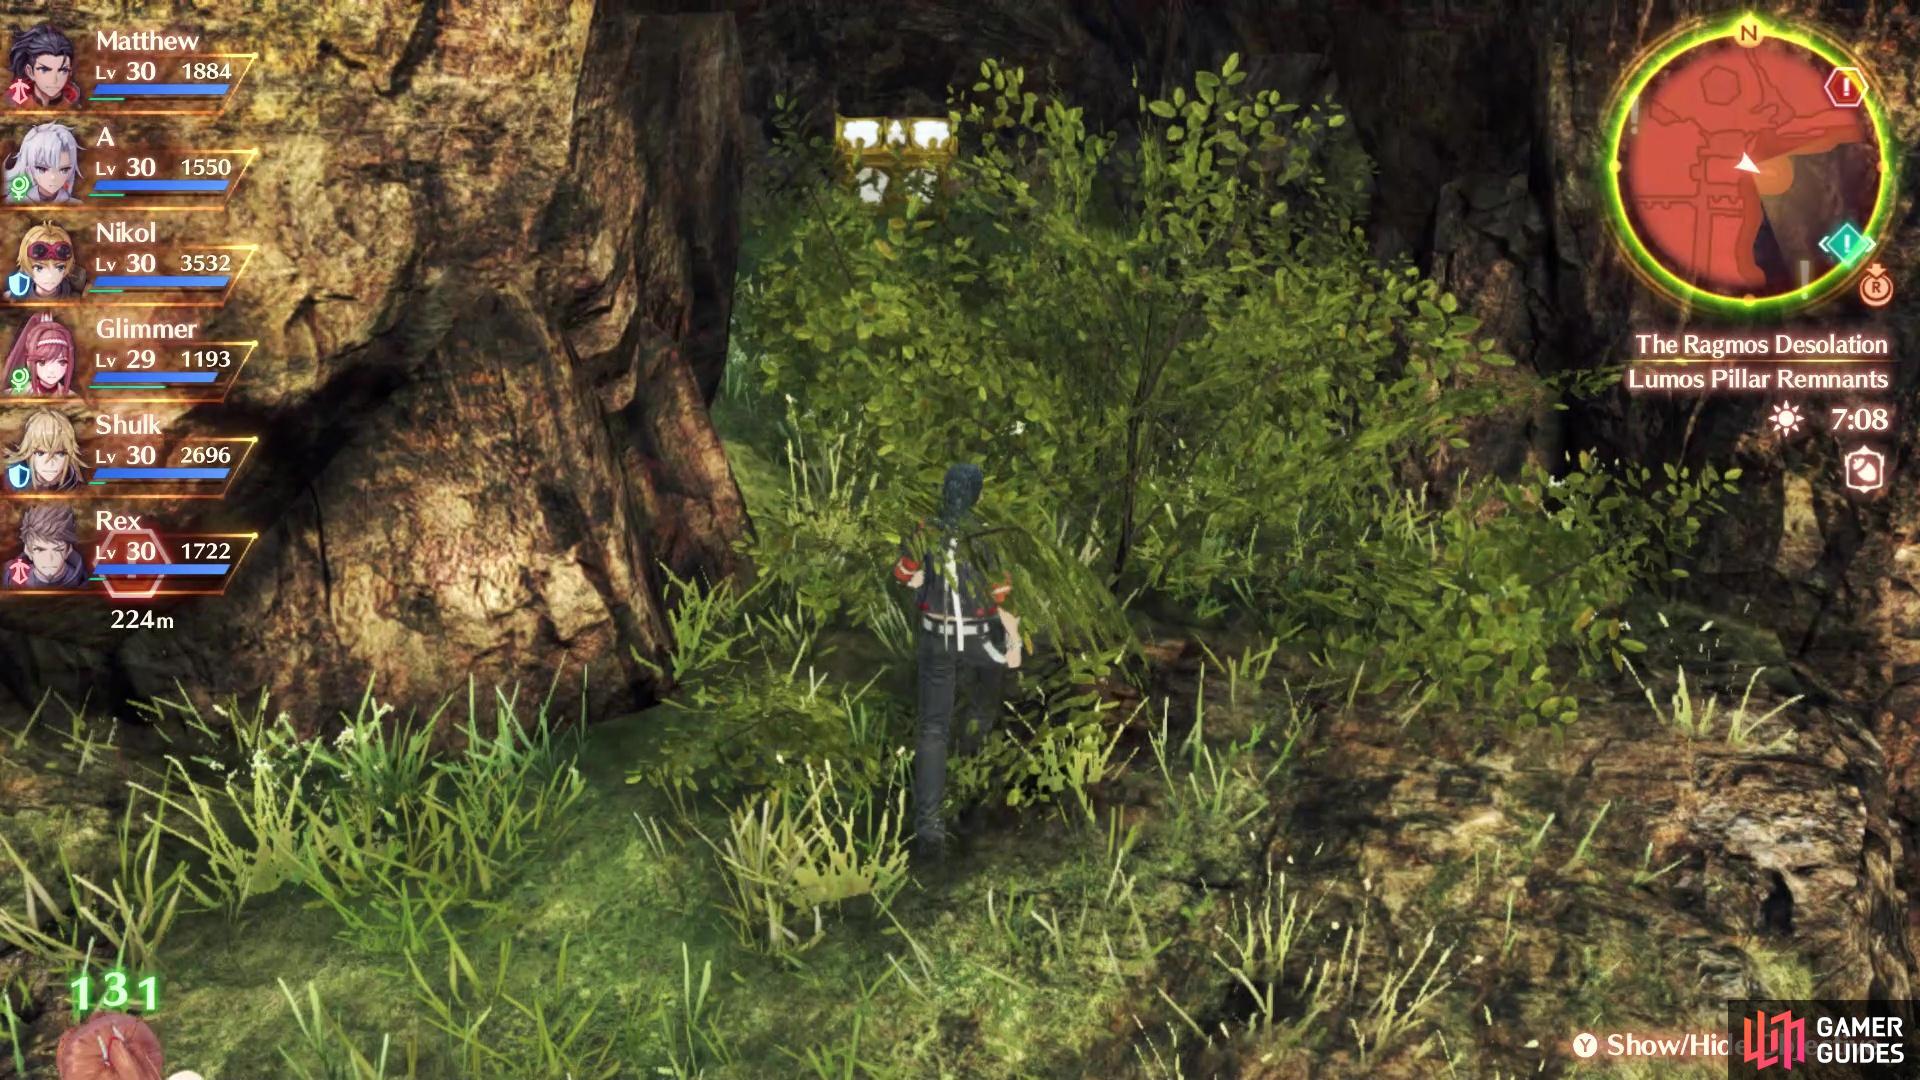
There will be a small cave with the Relic behind the bushes
This can be quite a tricky one to find, as it’s quite hidden. At some point during the main story, you will be able to construct Ether Slides, which will allow you to continue to the higher elevation to the west of Colony 9. Once you reach this area, head north and you will discover the Lumos Pillar Remnants location. Fight past the enemies and go to the top (there’s an Intervention here), then look over the northern edge to see some columns/pillars below you.
You will need to jump down onto the pillars, until you’ve reach the second set and can move to the nearby cliff. There will be a small cave here, that is housing a Relic chest, which is slightly obscured by some shubbery. Open the Relic to get the Unlock Kit. While you’re up in that spot, you can hop over to another nearby cliff to find an Ether Mast.
Accessory Unlock Kit #6

This Container in Zalmor’s Thawtunnels will have the Unlock Kit
Whenever you are on the main quest to gather some items for the Ether Lift, you will visit the Zalmor’s Thawtunnels location, which was previously blocked by some rubble. As you make your way through this large cave, you will cross a bridge after fighting some Igna enemies, where you should be able to spot a climbable wall on the southern side. Go ahead and head up that wall, then follow the path until you see a small alcove to your north. Inside this alcove is a Container that will be holding the Unlock Kit.
Accessory Unlock Kit #7
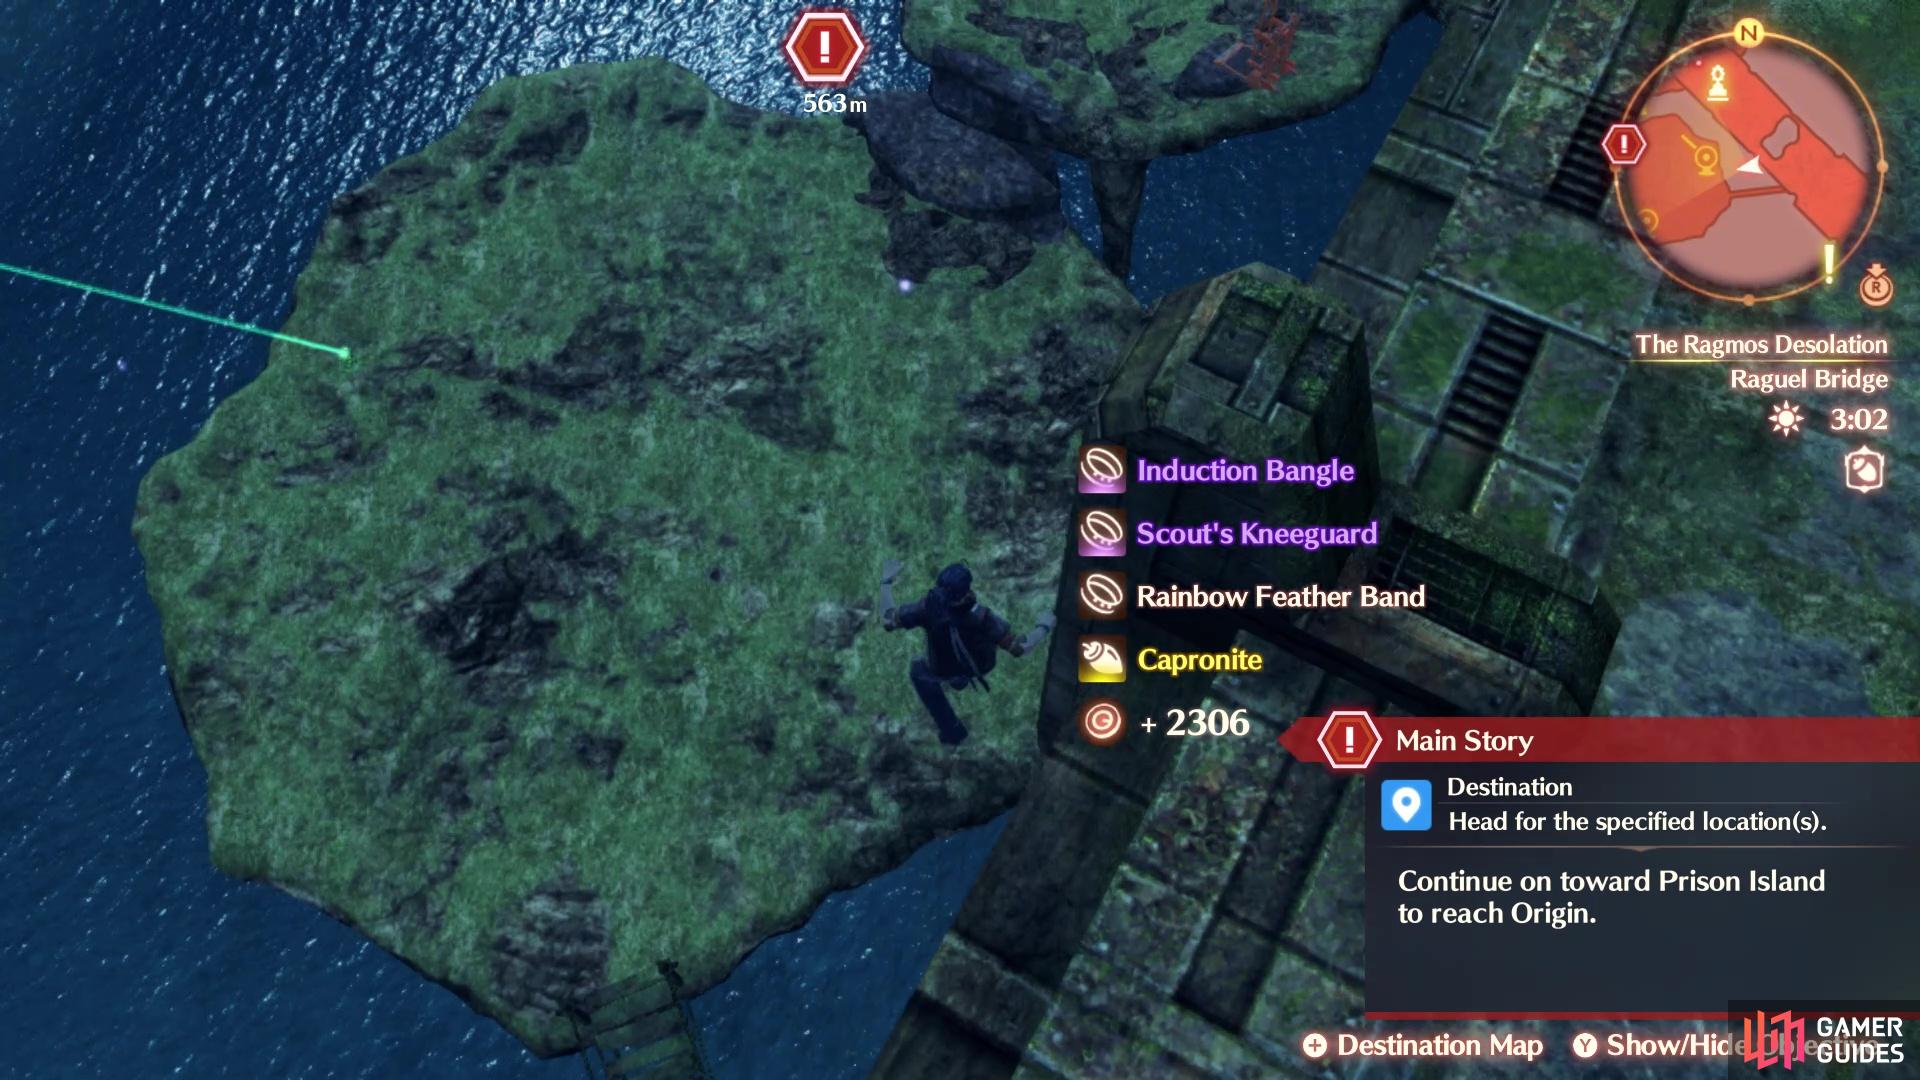
You won’t be able to get this Unlock Kit until you’ve gotten the ability to construct Ether Lifts. Once you do, you’ll gain access to the upper region of the Raguel Lake area. Start moving across the bridge, until about halfway, when you’ll run into the Surrogate Fitzpatrick Unique Enemy. Just a little before you get to that enemy, you can look over the western side to see a raised piece of land. Drop down to it, then head northwest, across the wooden bridge, and drop off to the next little island there. You should now see a Container, so open it to get the Unlock Kit, along with other goodies.
Accessory Unlock Kit #8
Once you reach the Black Mountains area of the game, you will unlock a new Standard Quest back in Colony 9, called If Walls Could Speak. Complete this quest to be rewarded with another Unlock Kit. This quest isn’t too difficult, since you just need to inspect various points on the map. While you can get this quest as soon as you have access to the Black Mountains, you will need to reach the Argan Cathedral Ruins to find one of the graffiti, with it being next to a Lv 45 enemy that might aggro you.
Accessory Unlock Kit #9
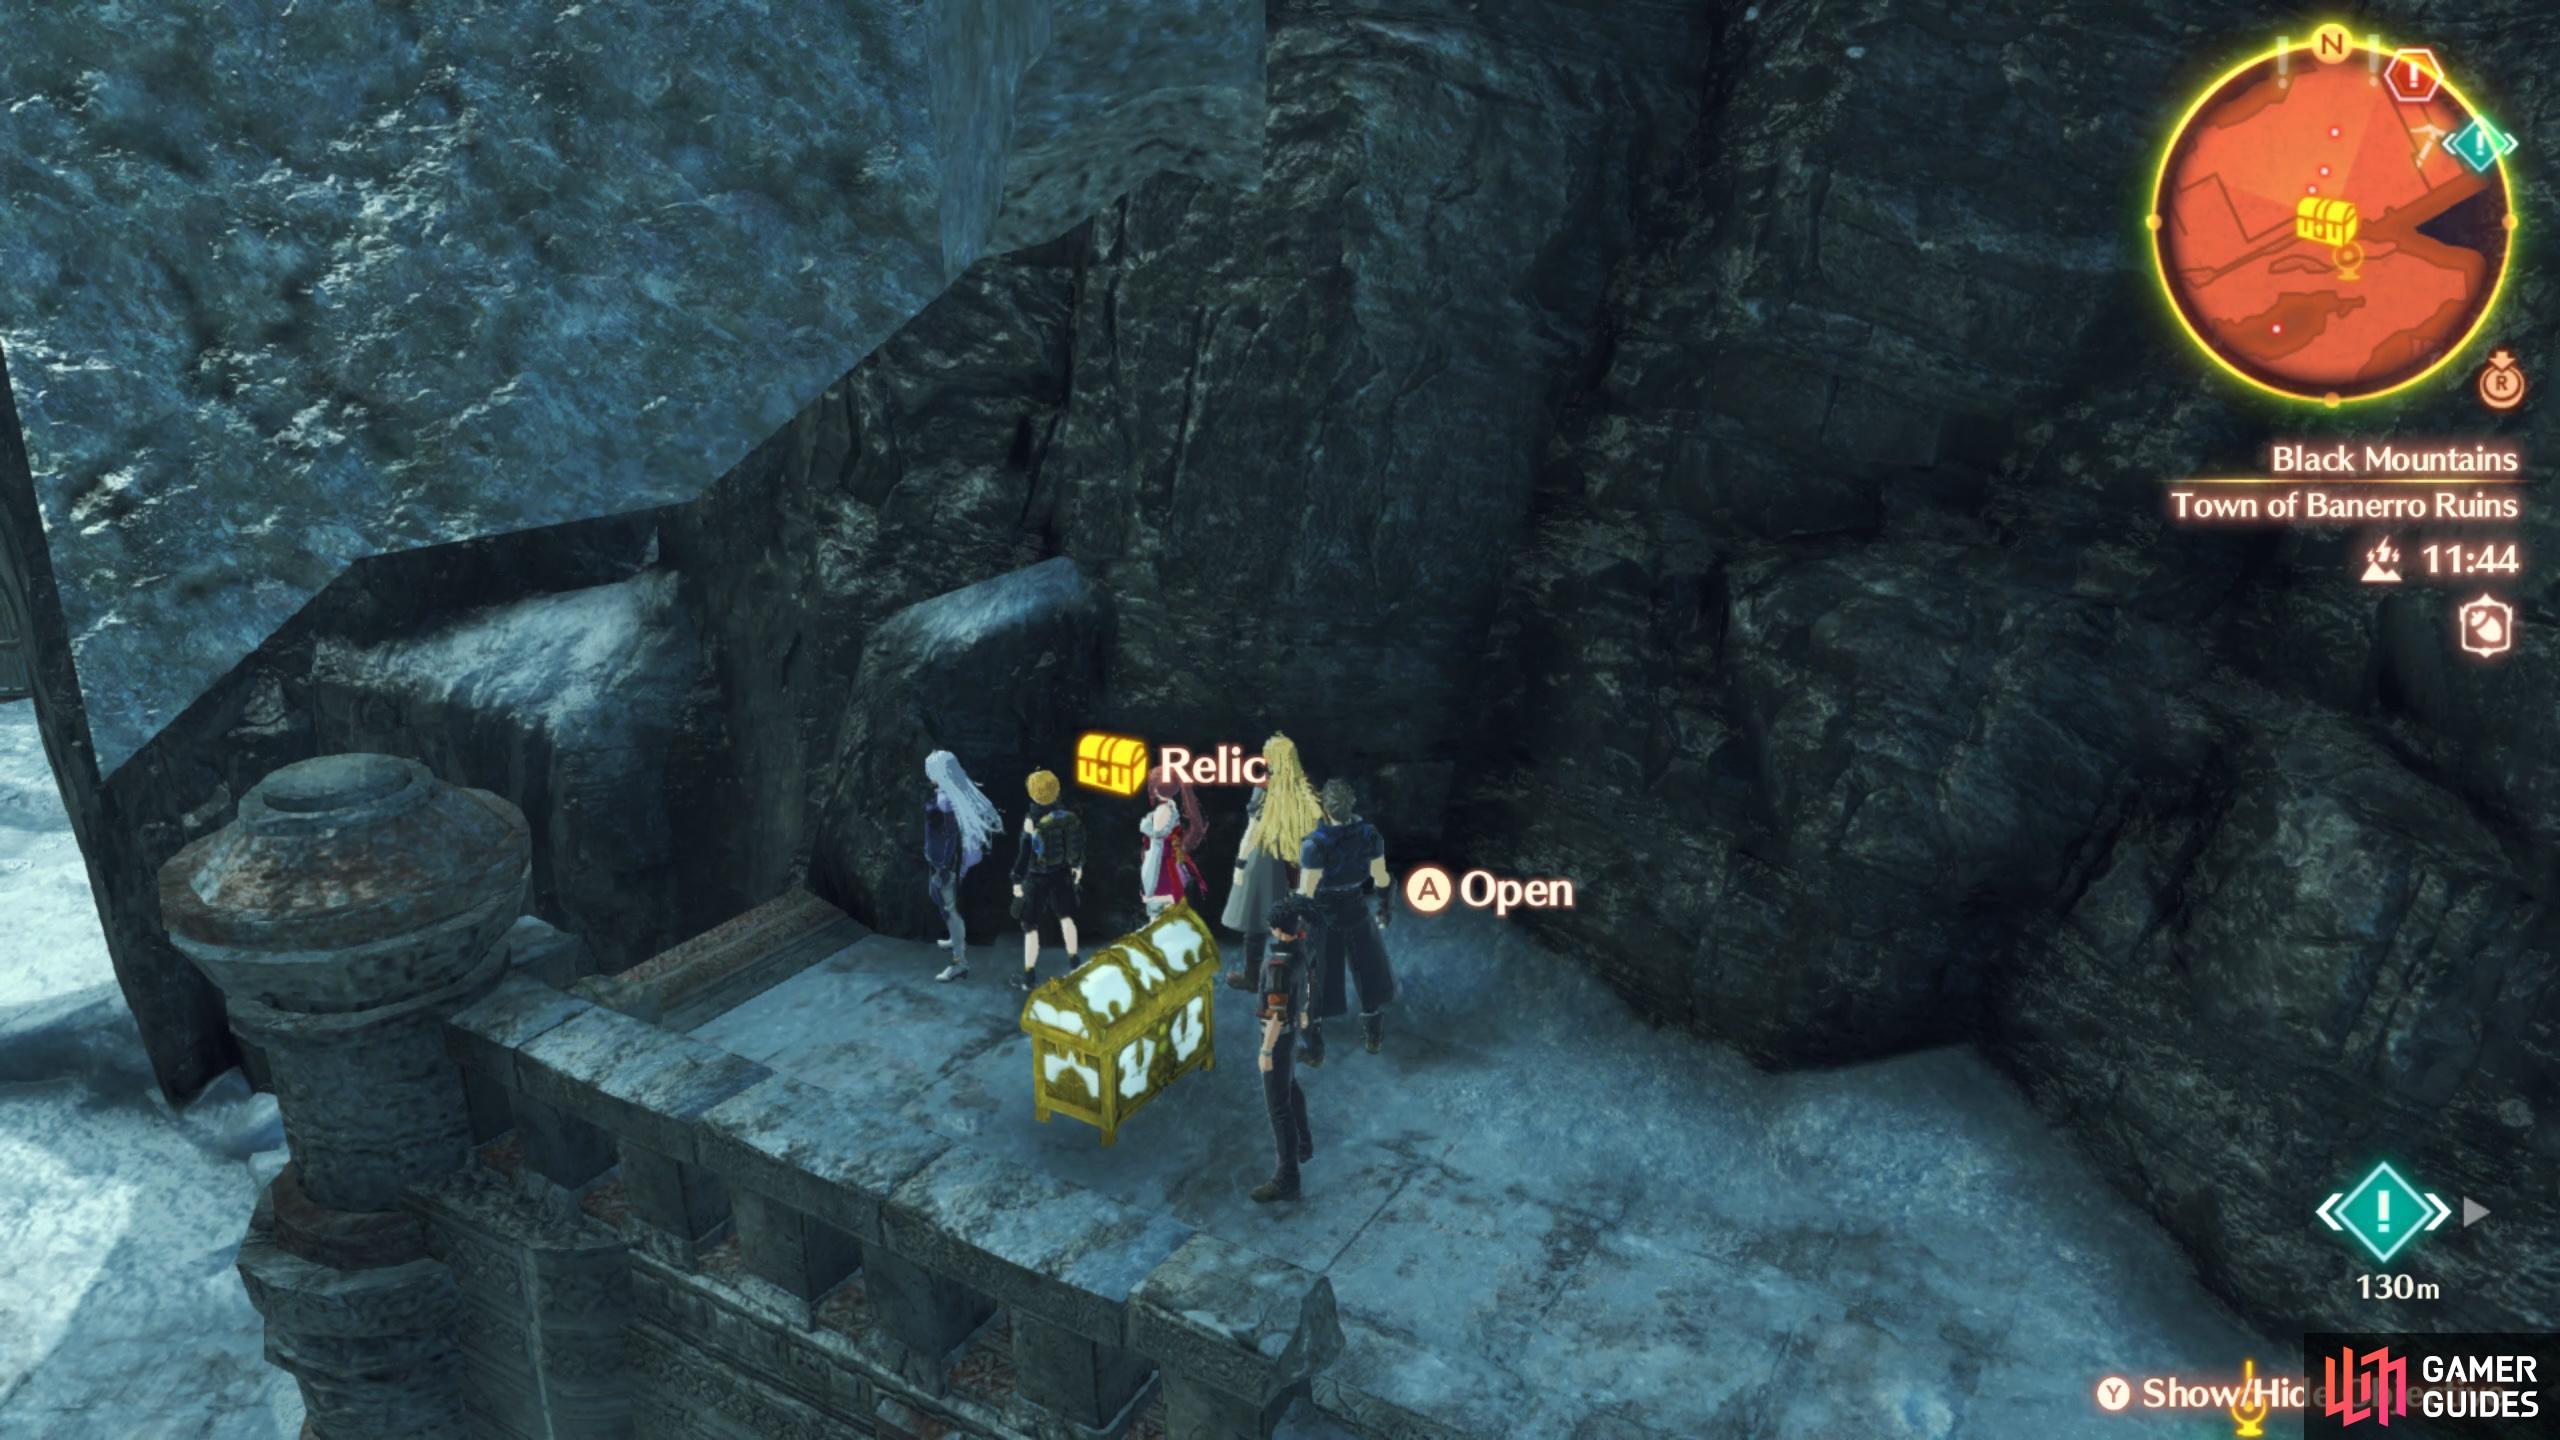
This Relic chest will be housing another Unlock Kit
The remaining four Unlock Kits will be found in the Black Mountains area. The first one is just past the initial large area, where you first land. From The Dragongate landmark, head up the path, but stop right when you see some stairs (they are very short ones). There will be another path opposite the stairs, which leads to an Ether Lift. Use your materials to construct the Ether Lift, then ride it to a ledge above, where you’ll find a Relic that yields the Unlock Kit.
Accessory Unlock Kit #10
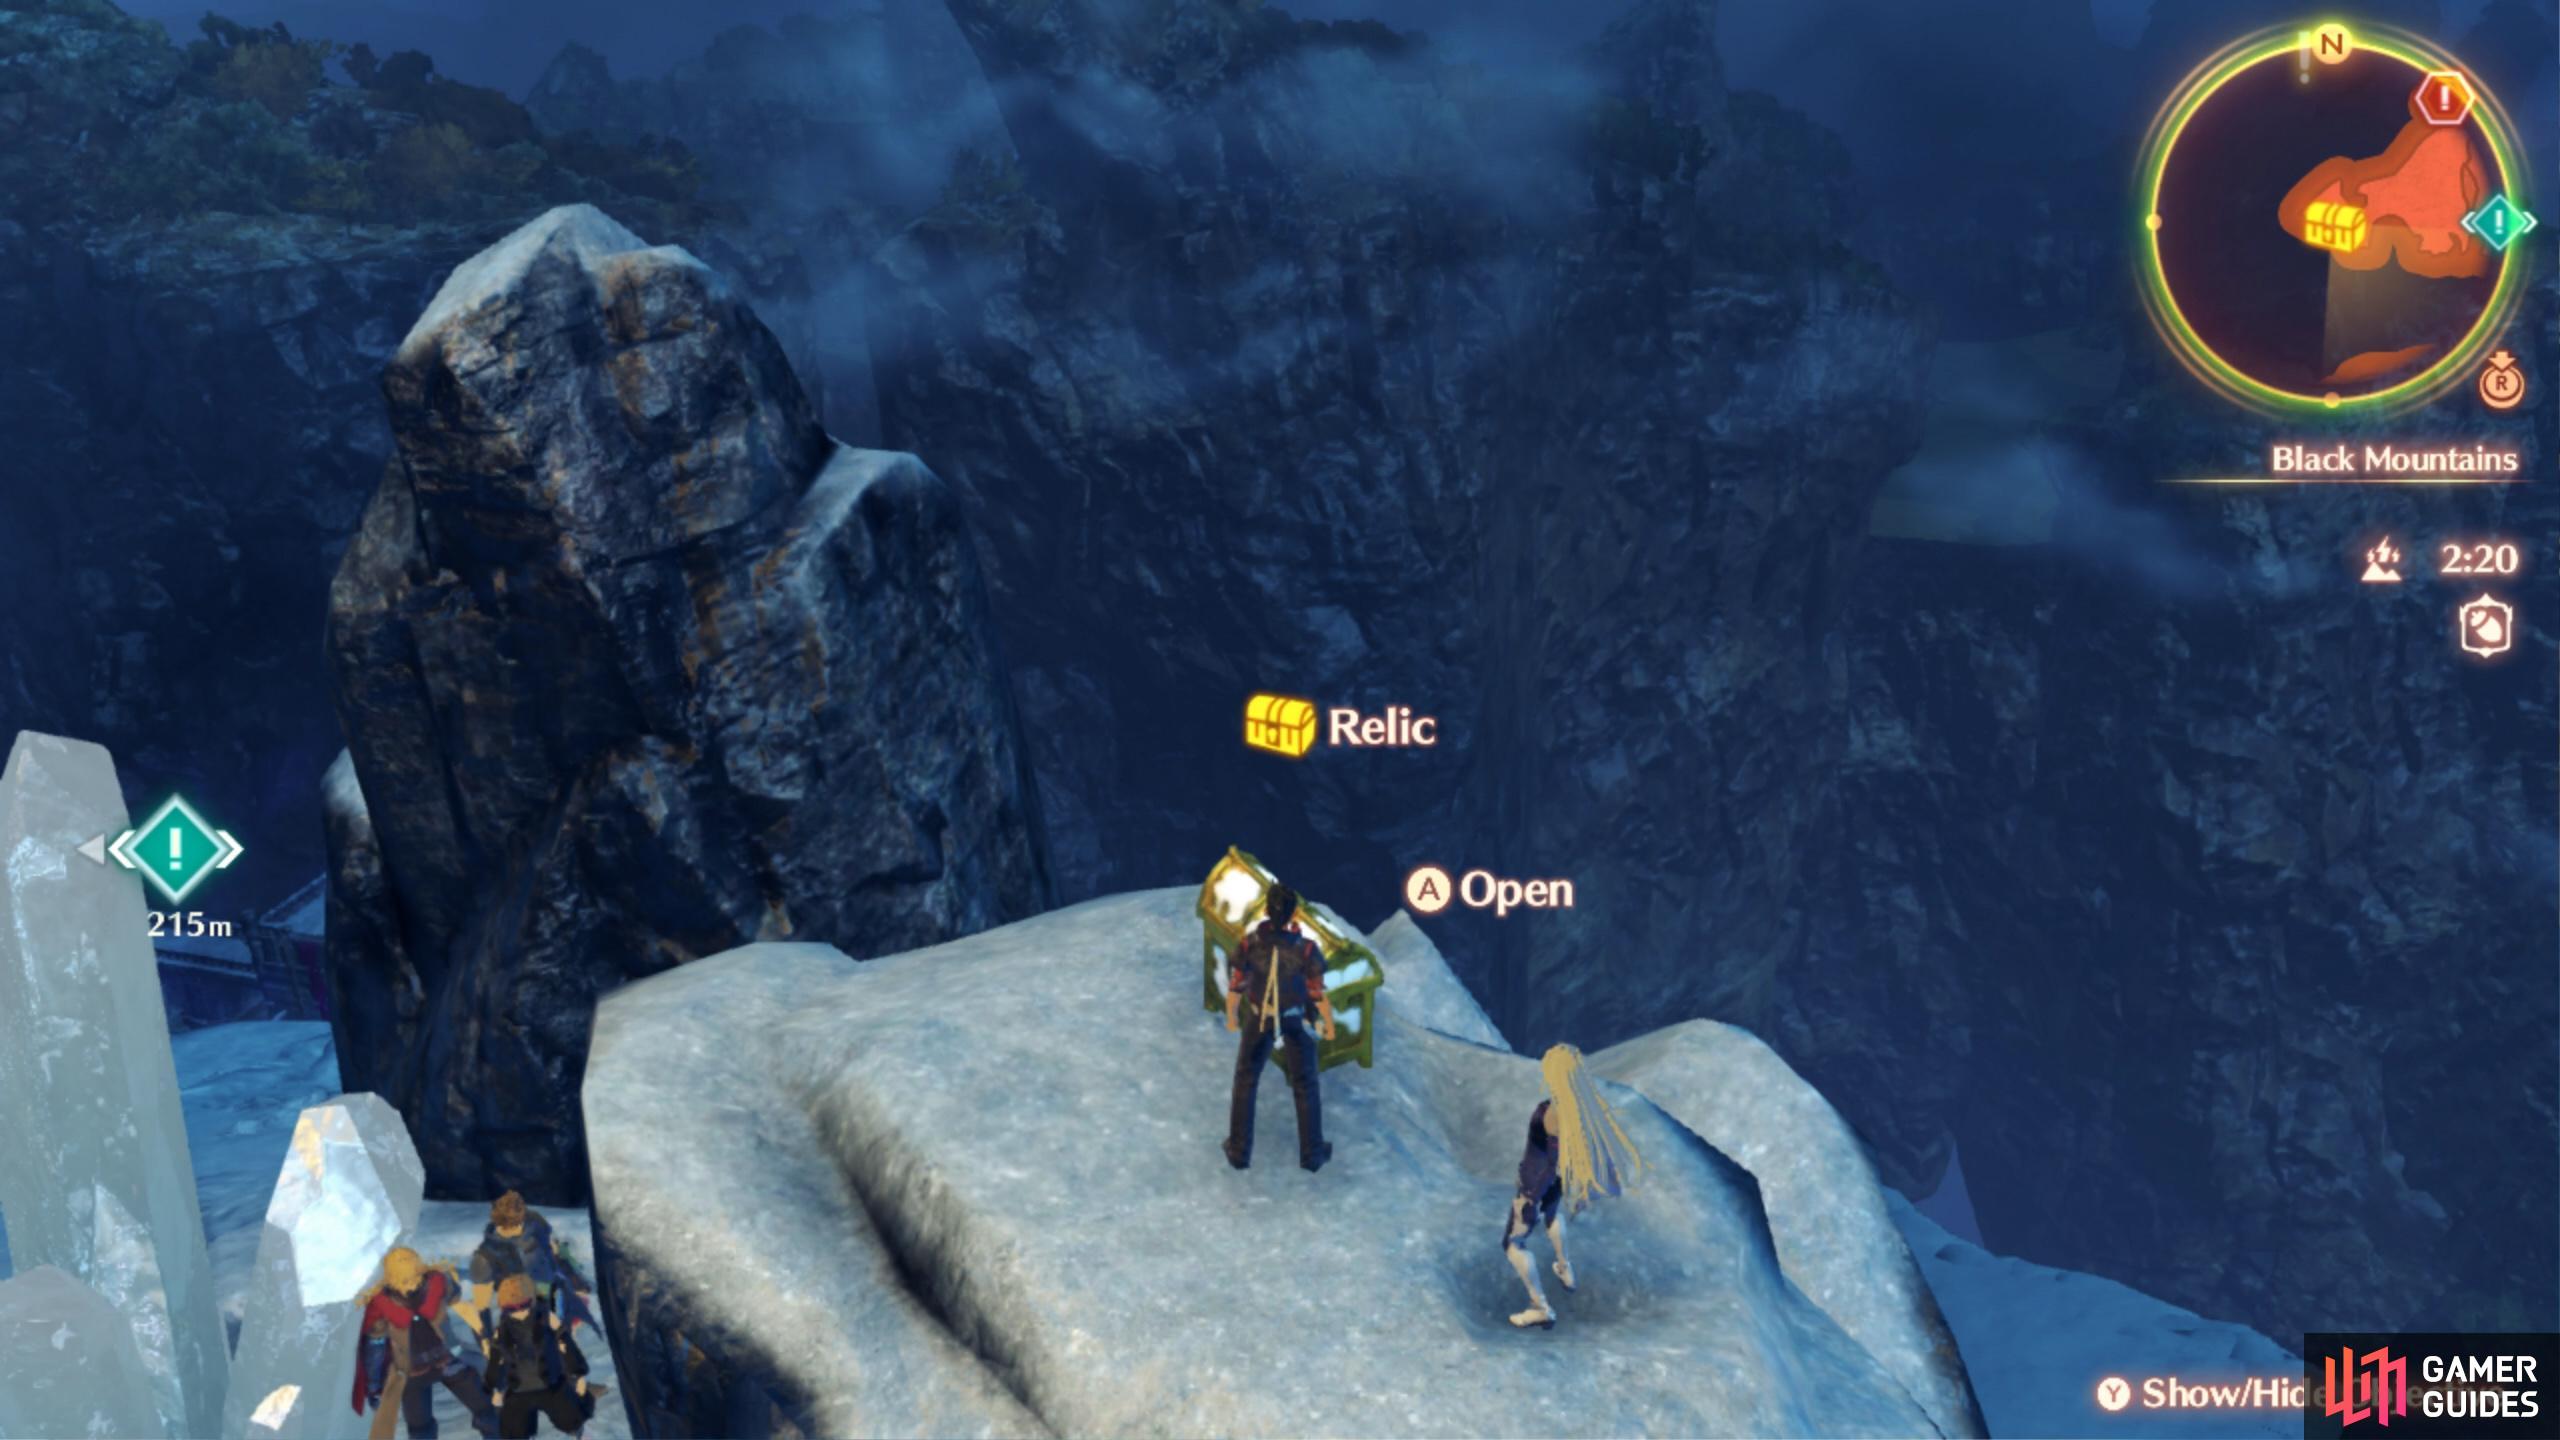
The Relic here, on this little hill, will contain the Unlock Kit
Continue on from the previous kit, and keep progressing through the Black Mountains, until you eventually reach the Mt. Nagul Viewing Deck landmark. This is right after the cave with the Dragon God Alcar unique enemy. At the landmark, you should see an Ether Slide right next to you, but ignore that and head southwest, along the narrow path. You should reach a small cave with an Intervention, but if you go out the other side, you should notice a spot where you can drop down. Do just that and climb the small hill there to find a Relic chest, which will yield the Unlock Kit.
Accessory Unlock Kit #11
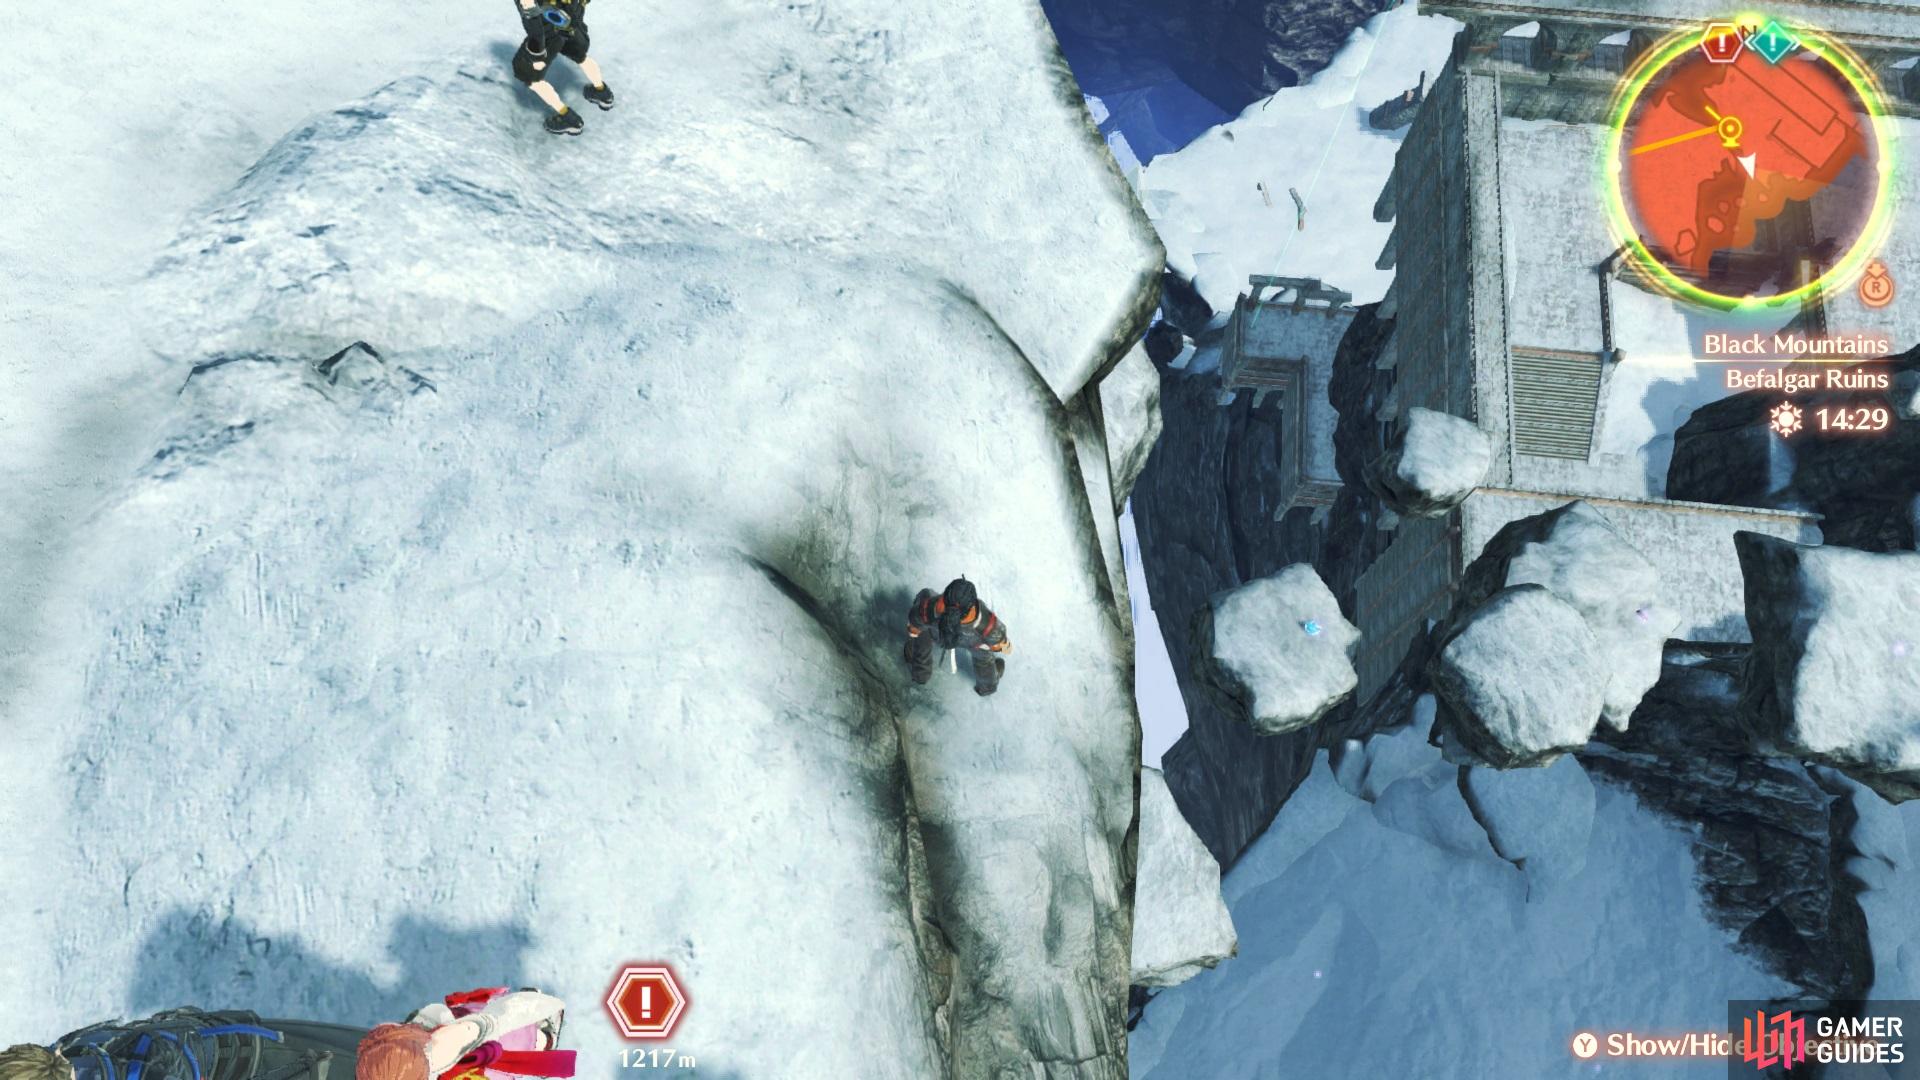
You’ll need to drop down onto the little islands from here

The Unlock Kit will be on the one with the ice crystals
Return to the Mt. Nagul Viewing Deck landmark and take the Ether Slide next to you, which will take you to the Argan Cathedral Ruins. As soon as you land, look over the edge of the nearby cliff to see some little floating islands. The Unlock Kit will be on the largest of these little islands, which will have some ice sticking out of it.
Accessory Unlock Kit #12
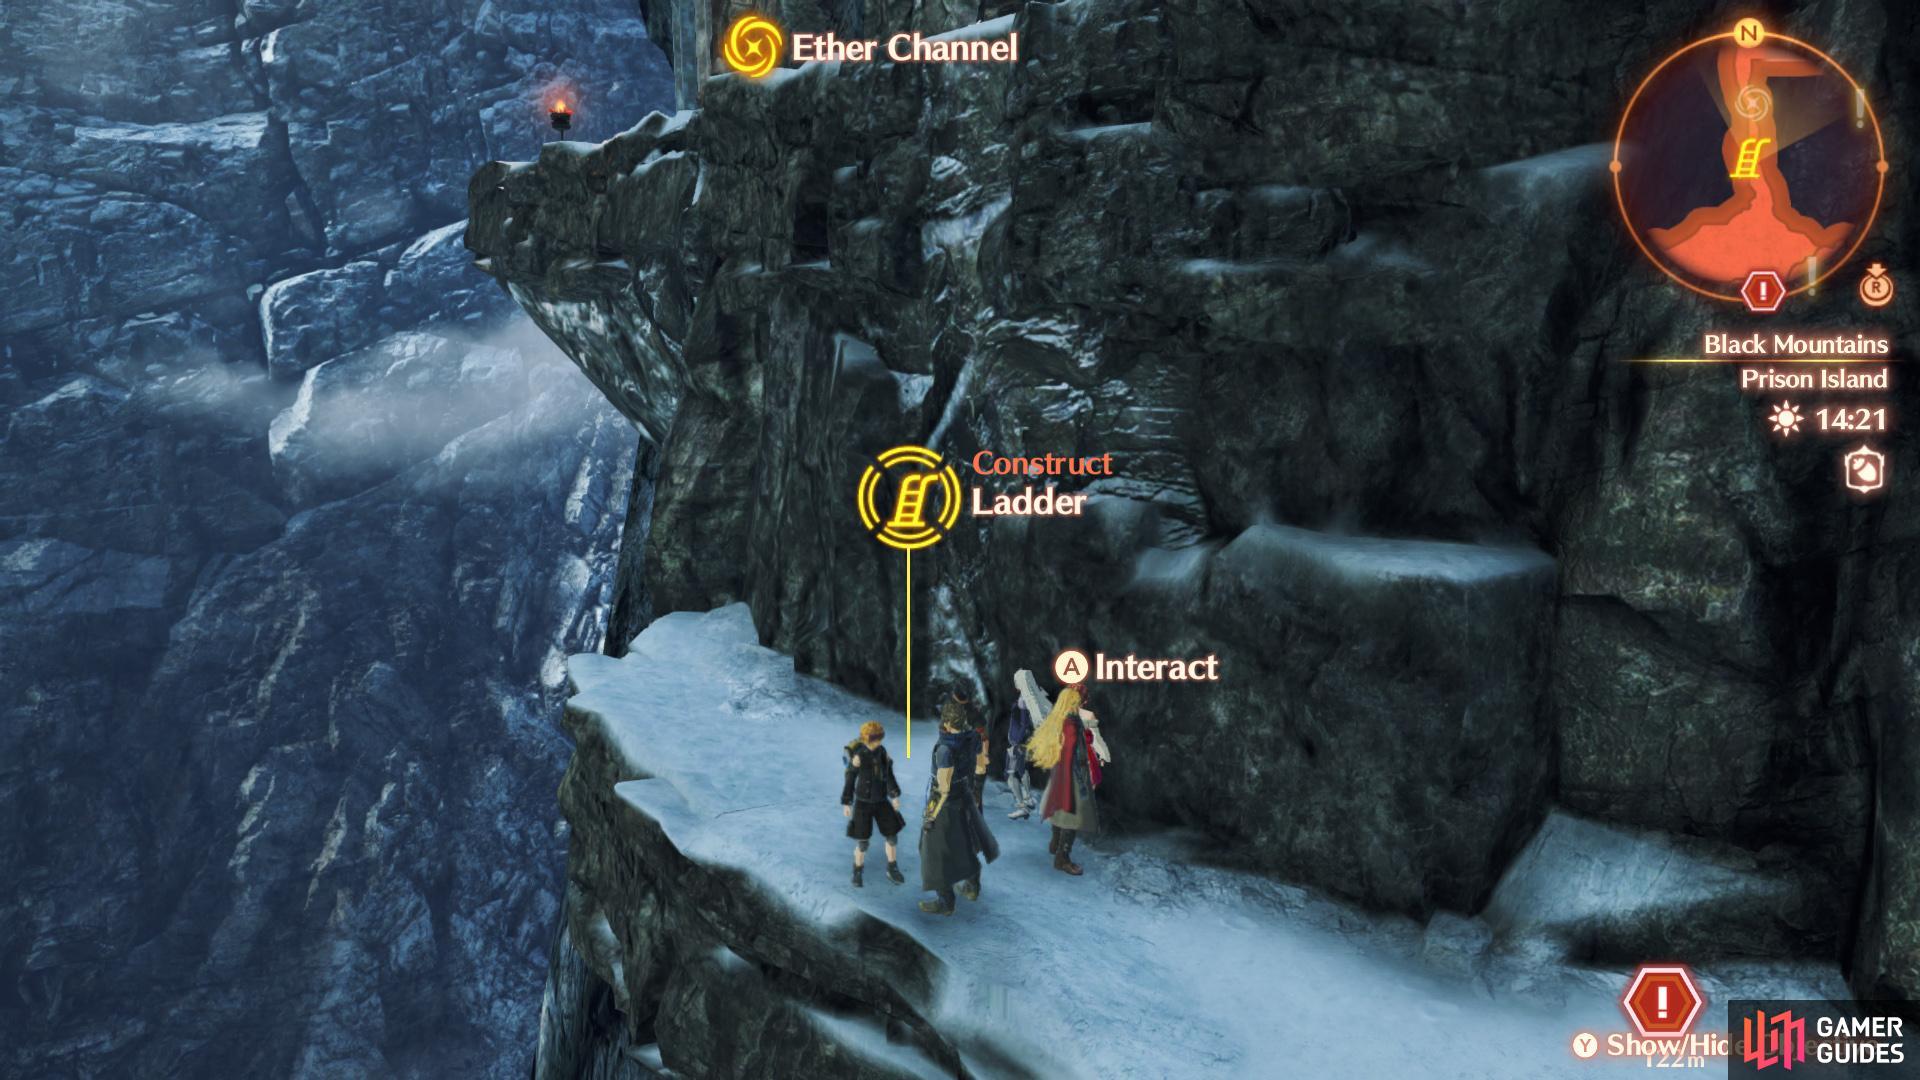
Repair this ladder here to gain access to the Secret Area
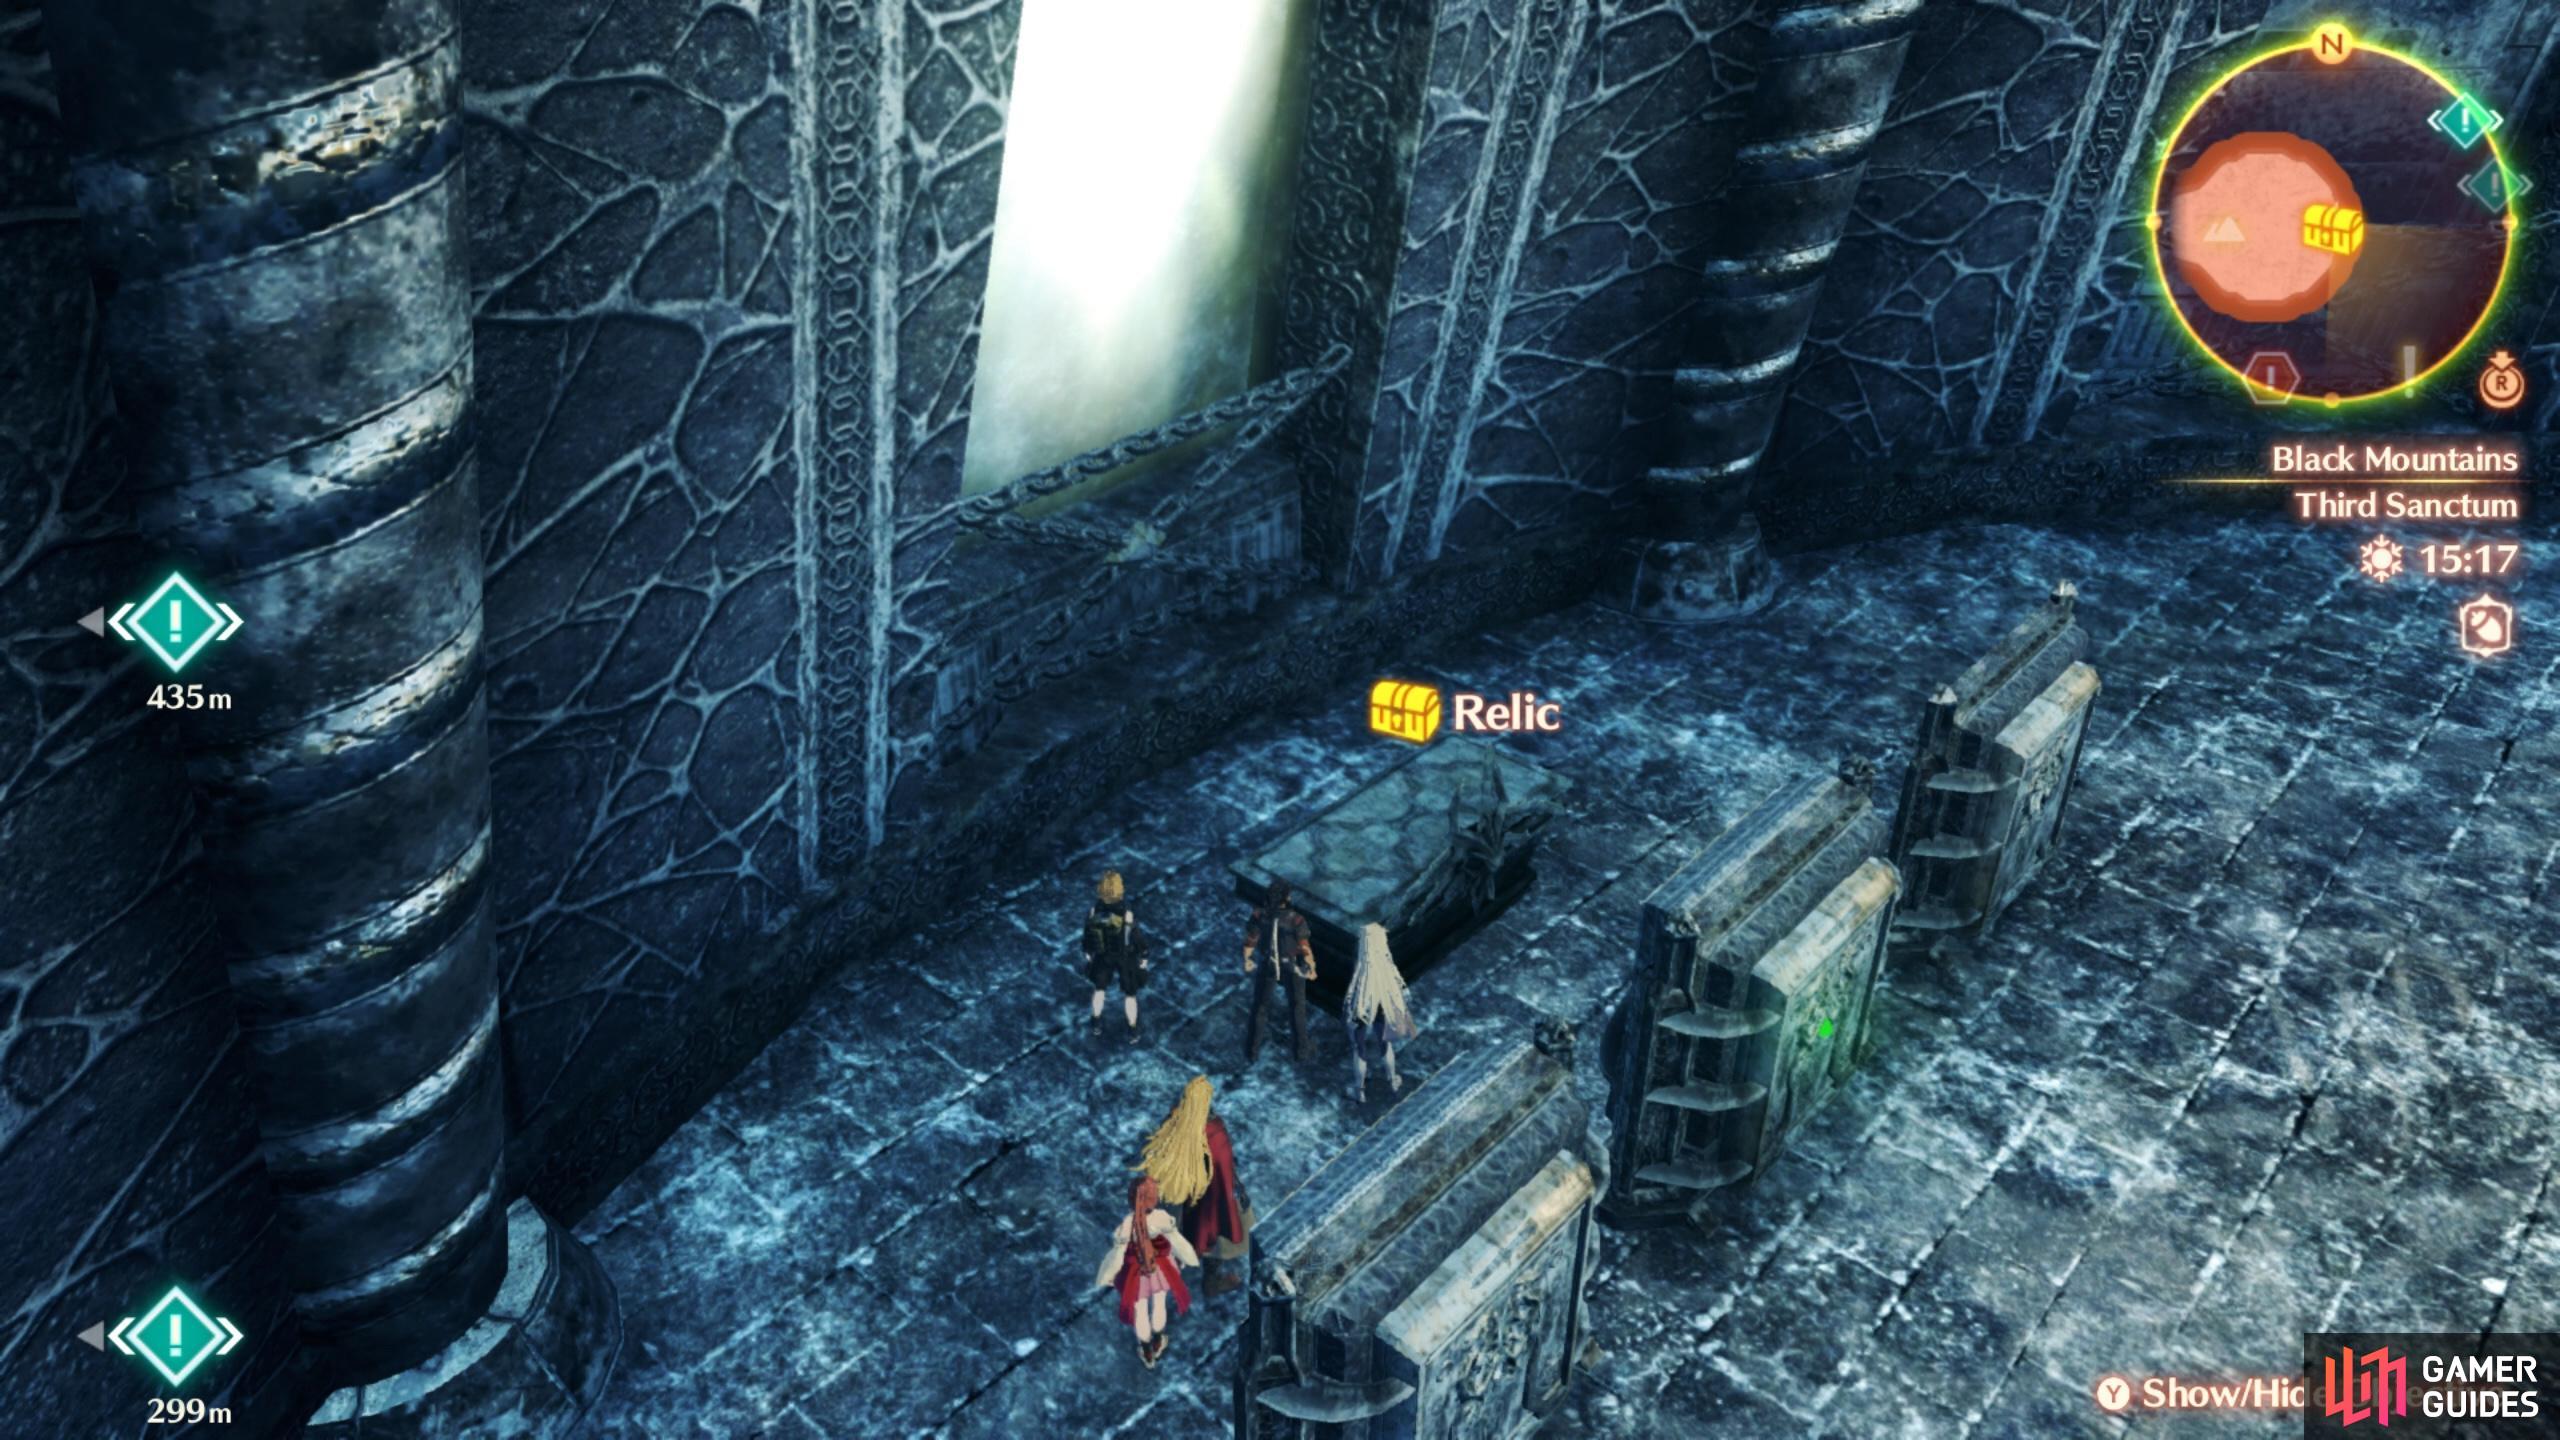
The Relic with the Unlock Kit will be behind the contraptions
The final Unlock Kit on this list is located in the Third Sanctum secret area, on Prison Island. Upon first arriving on Prison Island from Valak Mountain, follow the path past the Gravina Bridge landmark, until you reach a point where you have to construct an Ether Lift. Just north of that lift, you should see a broken ladder to repair. Do that, climb the ladder, and follow the trail to the Secret Area. Behind the contraption inside there, will be a Relic, which will contain the Unlock Kit.
No Comments