
This is a guide for The Desert Hulk Standard Quest in Xenoblade Chronicles 3.
Simply stumbling on the Desert Hulk with give you the quest
How to Start The Desert Hulk Standard Quest
Progress the main story, until you eventually reach Colony 4 and liberate it. You will then try to help out the Colony, sparking the Hero Quest, No Want of Courage. Once you finish that, you will be told to head south to the Ribbi Flats. East of this area of the region will be the Dannagh Desert, which is where you want to go. Continue north in this area, until you reach the Namba Mound Camp Rest Spot, then north of there will be the Raptor Perch landmark. The latter is where you will be starting from here, as it’s pretty close to the Ferronis Hulk. Head northeast from Raptor Perch to find the Ferronis Hulk, and getting close enough will start the quest.
How to Complete The Desert Hulk Standard Quest
When you first arrive at the Desert Hulk, you will see a bunch of enemies around it. Your goal is to defeat all of those enemies, all of which are level 35. There are only two types of enemies present here, Sky Ansels and Dragguia Ropls. All of them will aggro you if you get too close, but you will be able to fight them one at a time, unless another spots you. The biggest problem is that they are in a pretty close proximity to one another, and only a single Ropl is out and about. The rest of the Ropls are underground, with only parts of their backs exposed, meaning you won’t be able to target them.
To make matters a little worse, there will be one Elite Enemy of each type, with the Elite Dragguia Ropl being the one moving around the Ferronis. The best course of action would be to go after the Sky Ansels first, since they are all flying in a set pattern, and you don’t have to worry about them interrupting a fight with a Ropl. Once the Sky Ansels are gone, lure the Elite Dragguia Ropl away from the others, then you can just go one by one to try and get the others out of the ground.
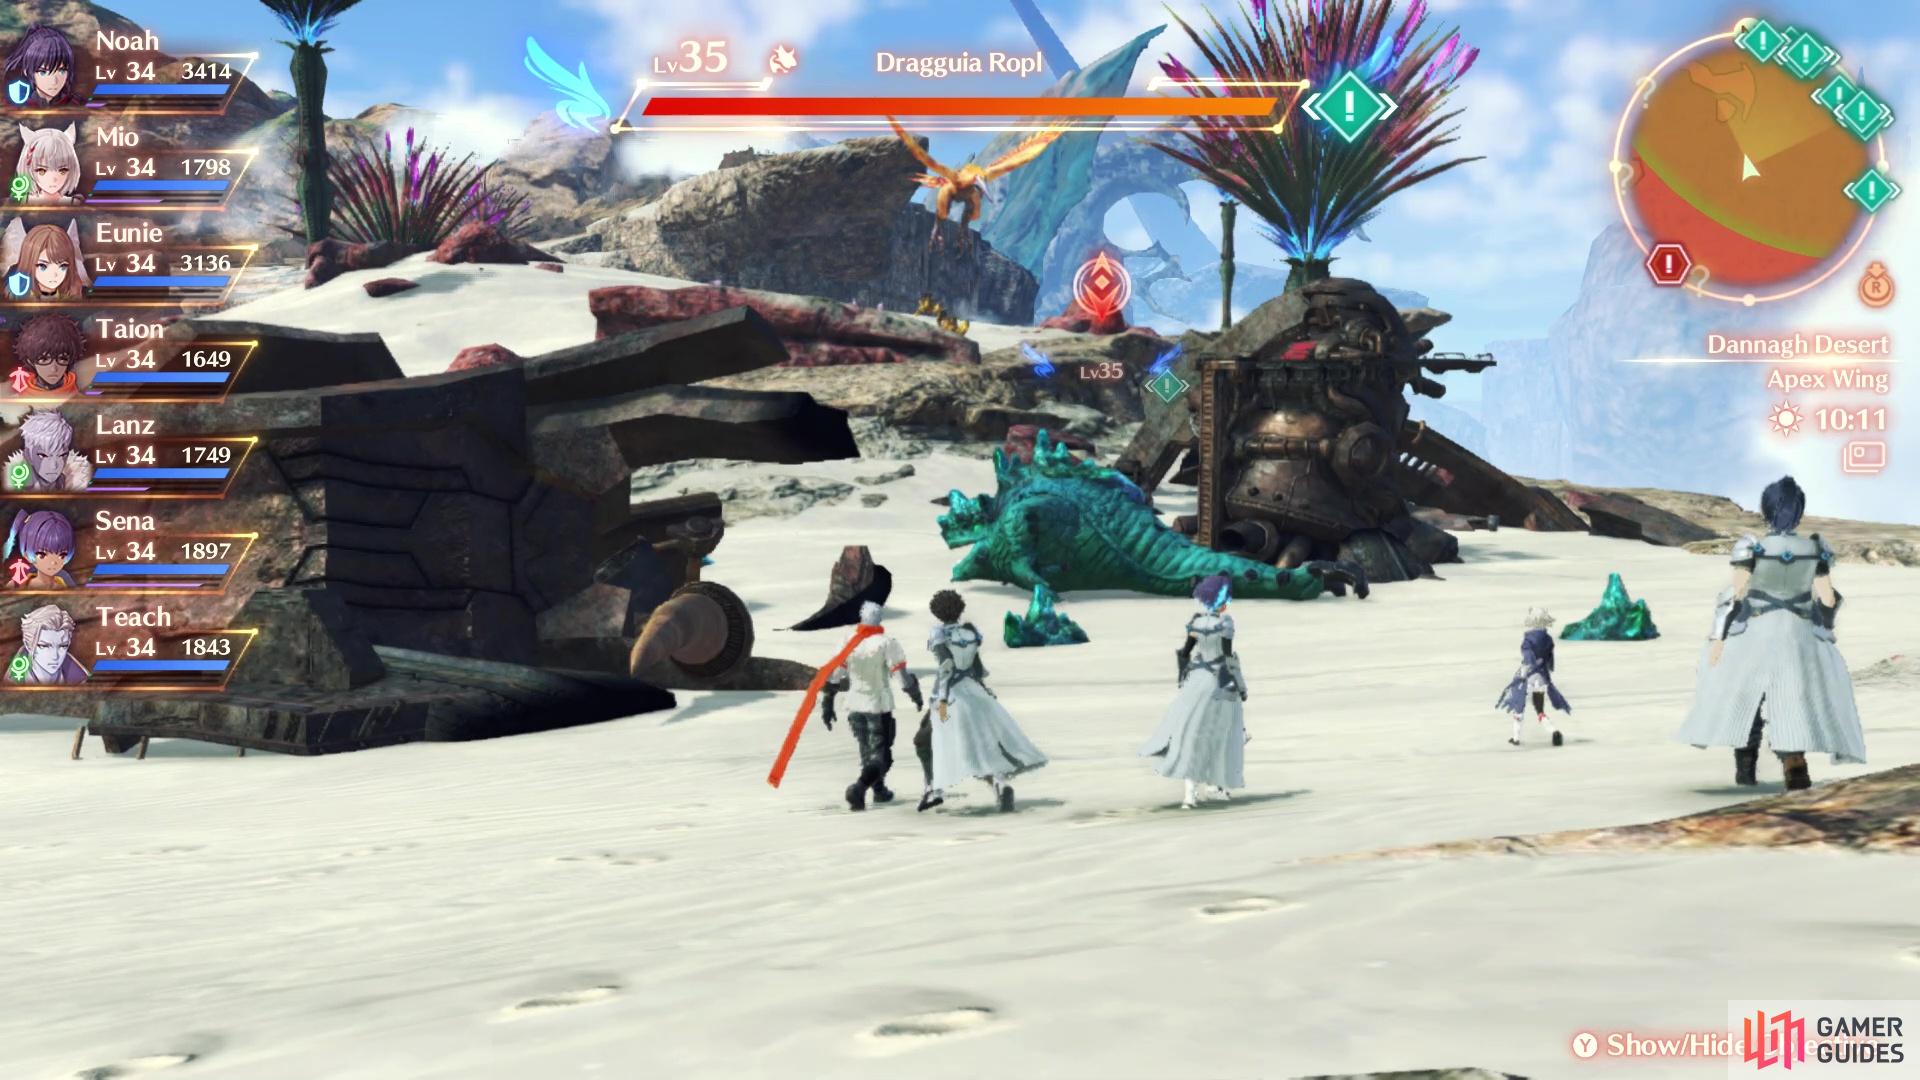
There are two Elite Enemies amongst the whole group
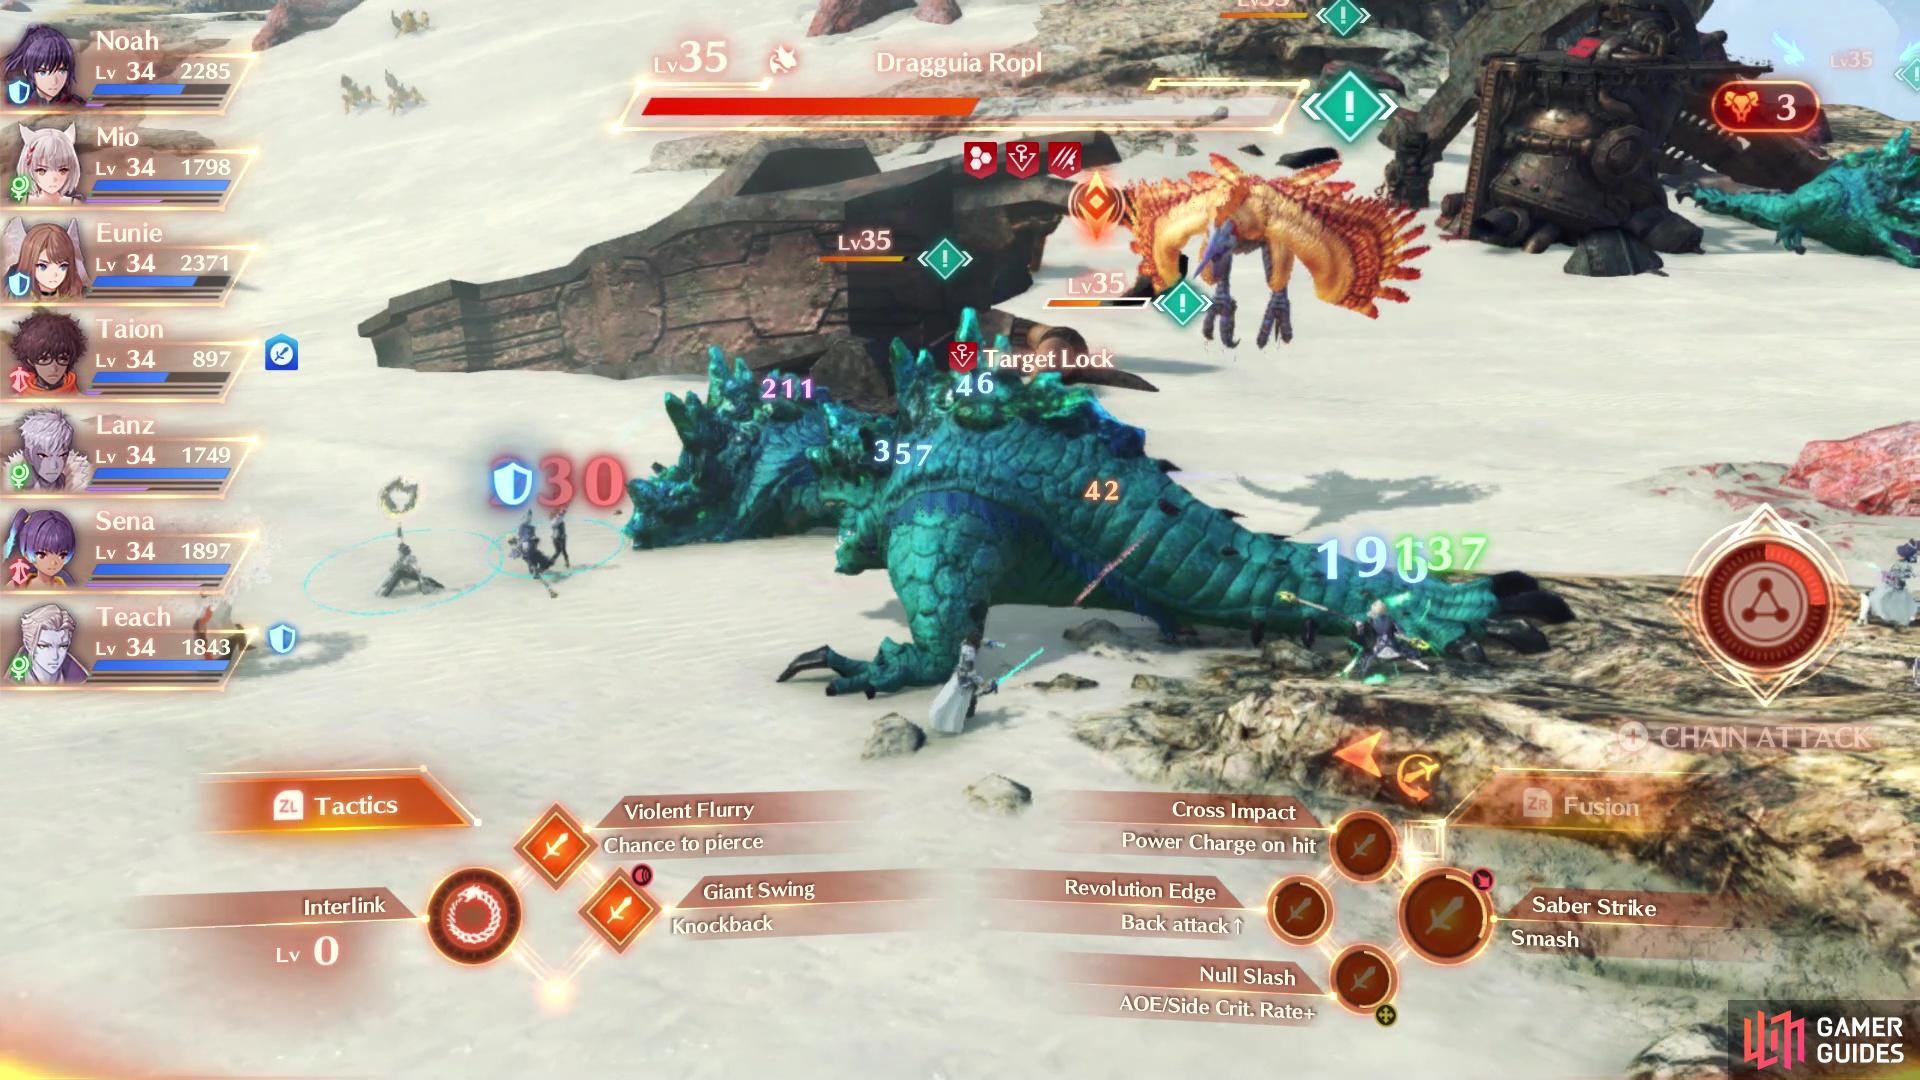
It’s very easy to get overwhelmed if you’re not careful
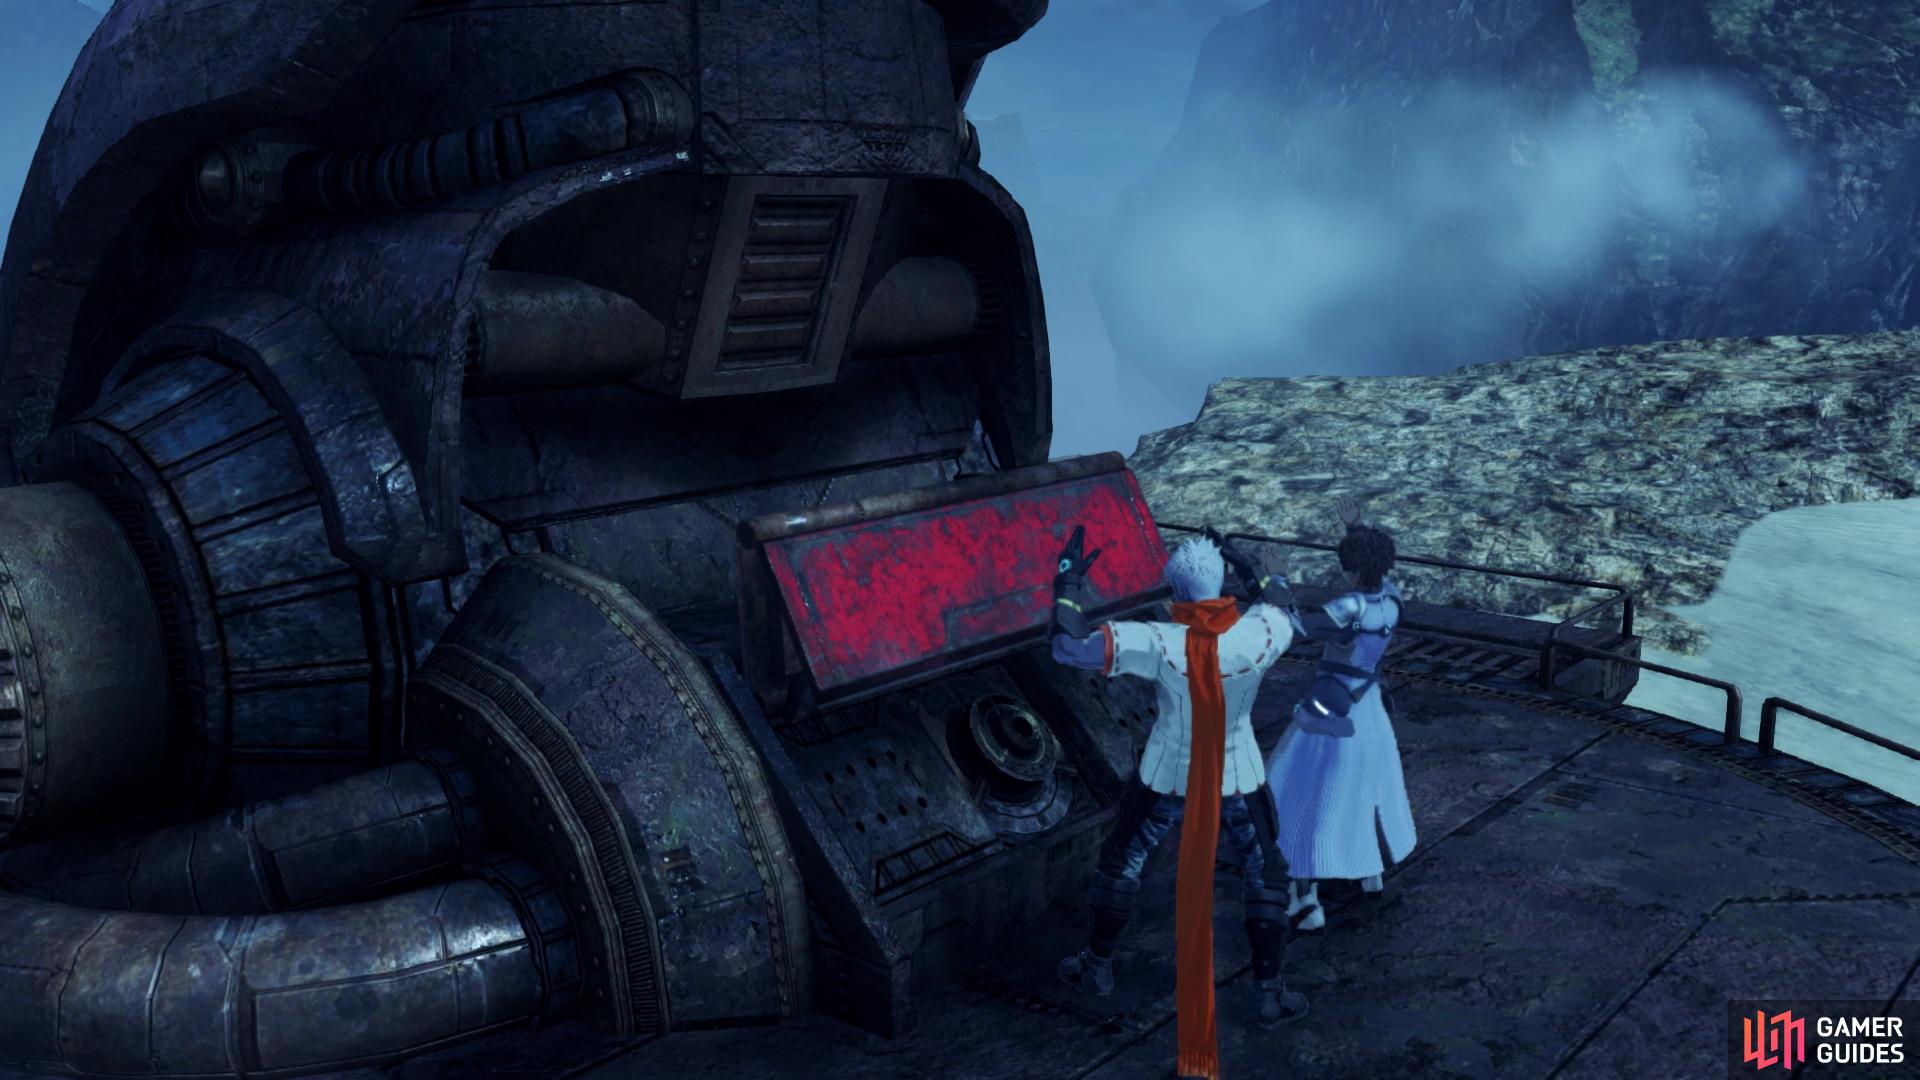
When you have defeated all 10 enemies, you can climb the ladders to the top of the Ferronis. Open up the shutter to expose the power node, then choose to install the Ether Canisters. Note it will take 20 of them to power up the Ferronis, so if you don’t have enough, go around and harvest the ether from the Ether Channels on your map. After getting the Ferronis back online, you will be finished with the quest. Don’t forget to open the two Containers for the abundance of loot, as well as try your chance at the Fabricator (this one costs 1,100 G each time to use it).
Quest Rewards
| EXP | Gold | SP | Rewards |
|---|---|---|---|
| 4,640 | 0 | 10 | – |
No Comments