
In Xenoblade Chronicles 3: Future Redeemed, one of the features is using Affinity Points you earn from exploring to learn and upgrade your characters’ skills. At the beginning of the game, you only have one set of skills to unlock, with the others requiring you to find Affinity Growth Unlock Kits. Similar to the other Unlock Kits, you will find these around the map, either as normal items, or in Containers/Relics, as well as sometimes rewards from doing Standard Quests. There’s a total of 12 of these Unlock Kits in the game.
Affinity Growth Unlock Kit #1
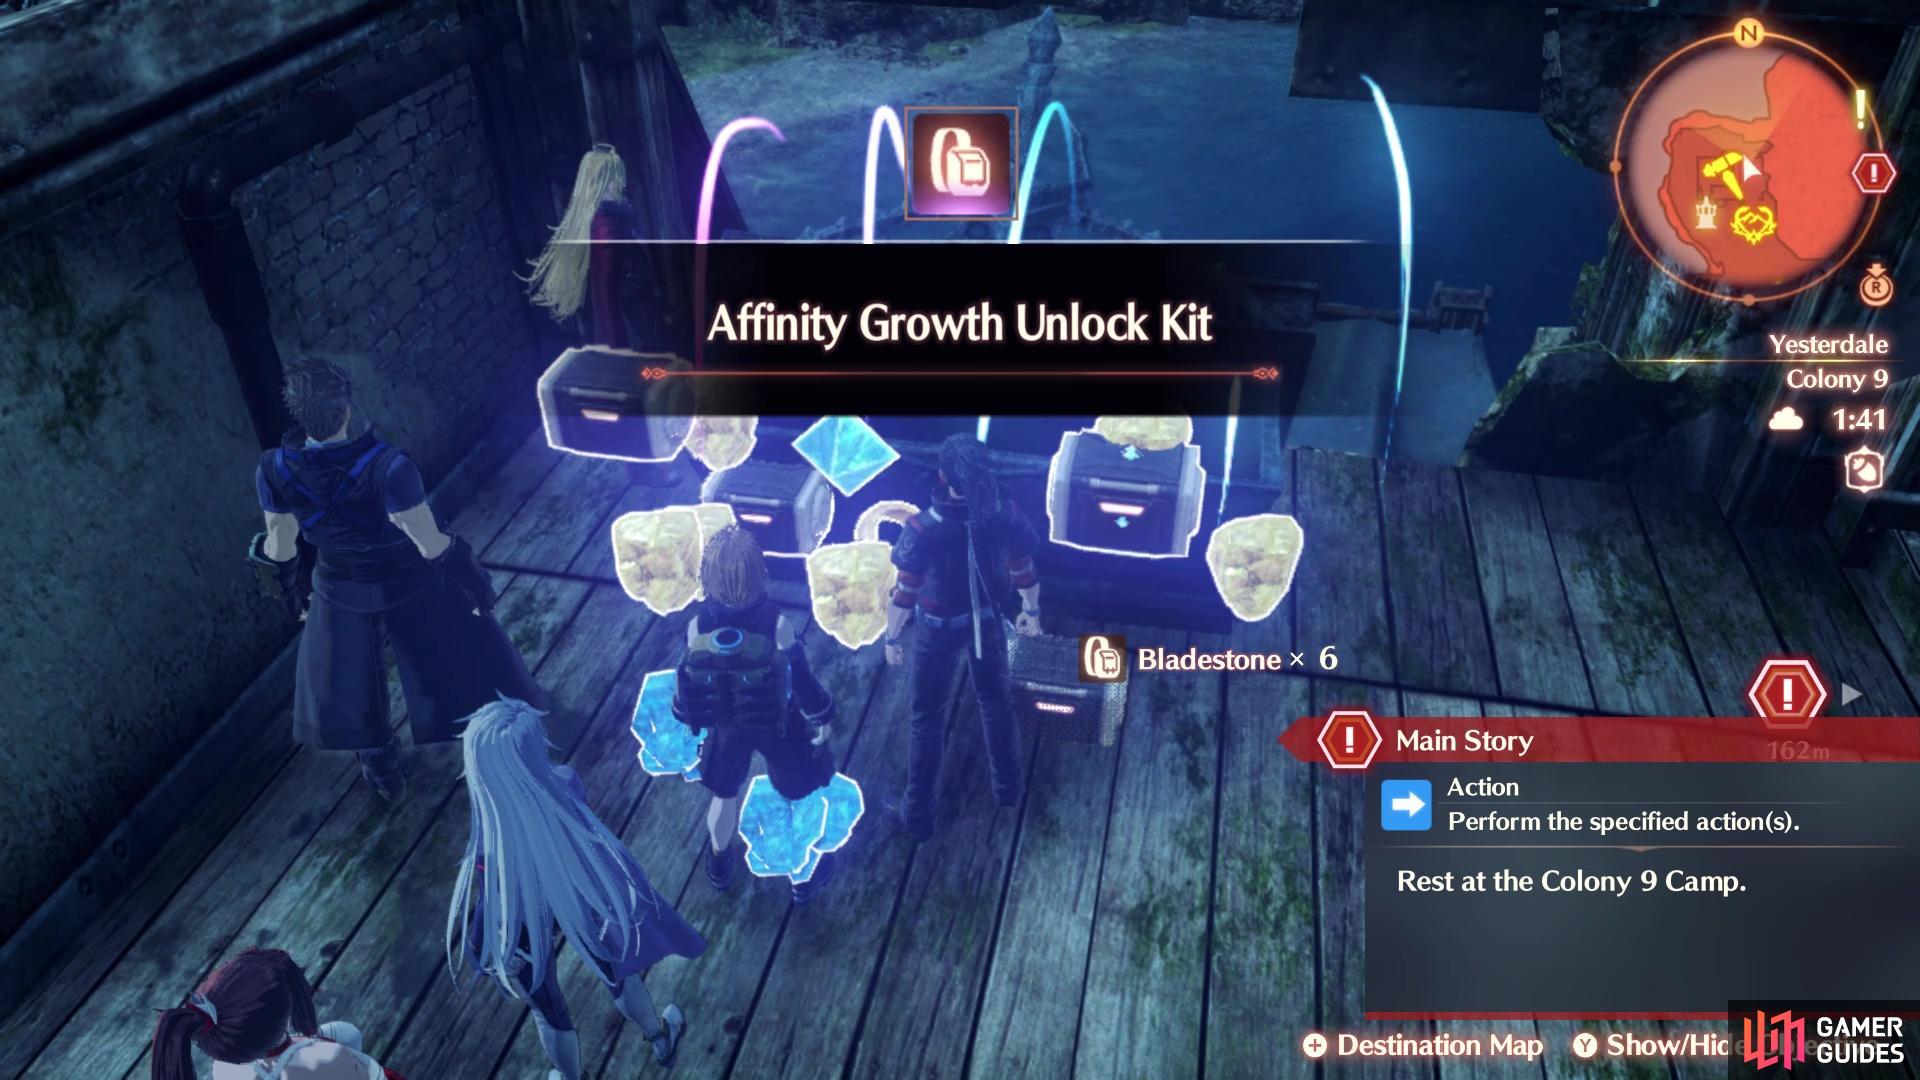
Check upstairs at Riku’s Workshop, on the balcony, for the Relic with this kit
The first Unlock Kit that you will likely come across and obtain is at Colony 9. As soon as you cross the bridge and enter the town, you will see a house to your north. Enter this house and head upstairs, then look for the opening up here to reach a balcony. That balcony is where you will find a Relic, so open it up to obtain the Unlock Kit.
Affinity Growth Unlock Kit #2
For the second Unlock Kit you will likely find next, you will need to do a Standard Quest. Once you have free control to explore Colony 9, head across the bridge on the eastern side of the place to reach the Ruined Tower Square. There, you will find some NPCs who will give you a quest to test out their automaton. You will be pitted against a level 22 enemy here, which isn’t all too difficult, as long as you are about the same level. Upon completing this quest, you will receive an Unlock Kit as a reward.
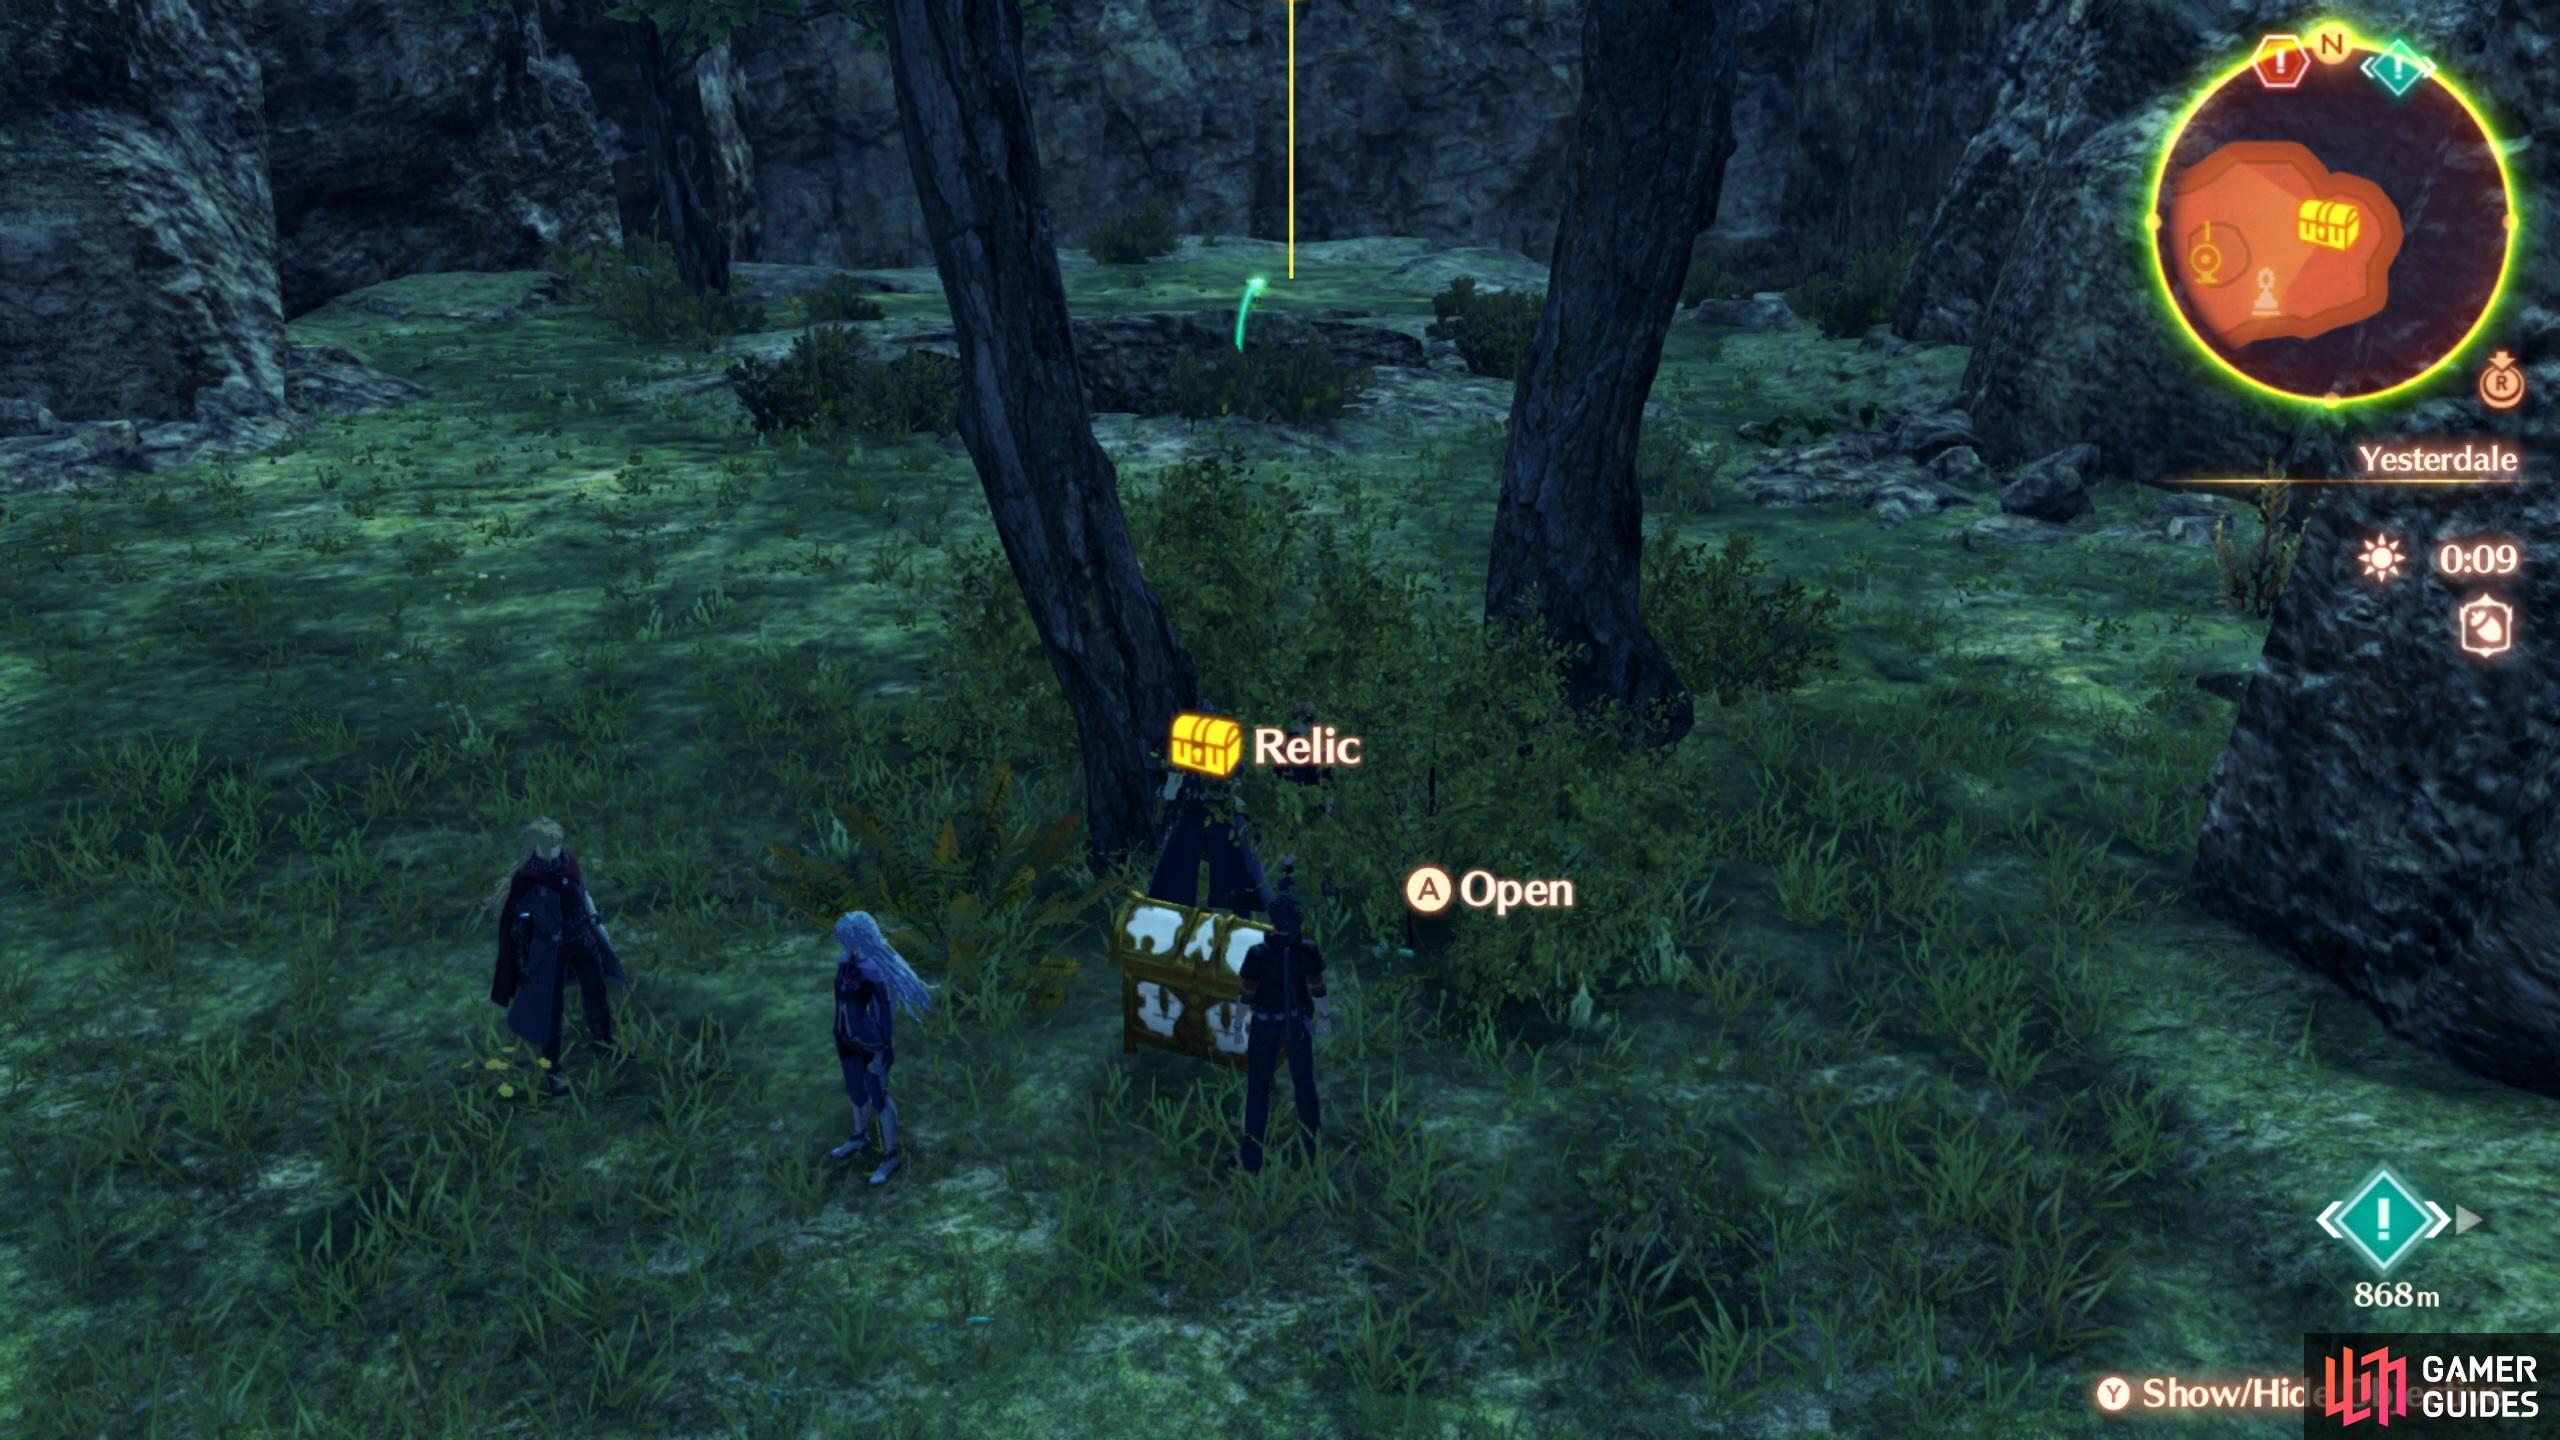
Affinity Growth Unlock Kit #3
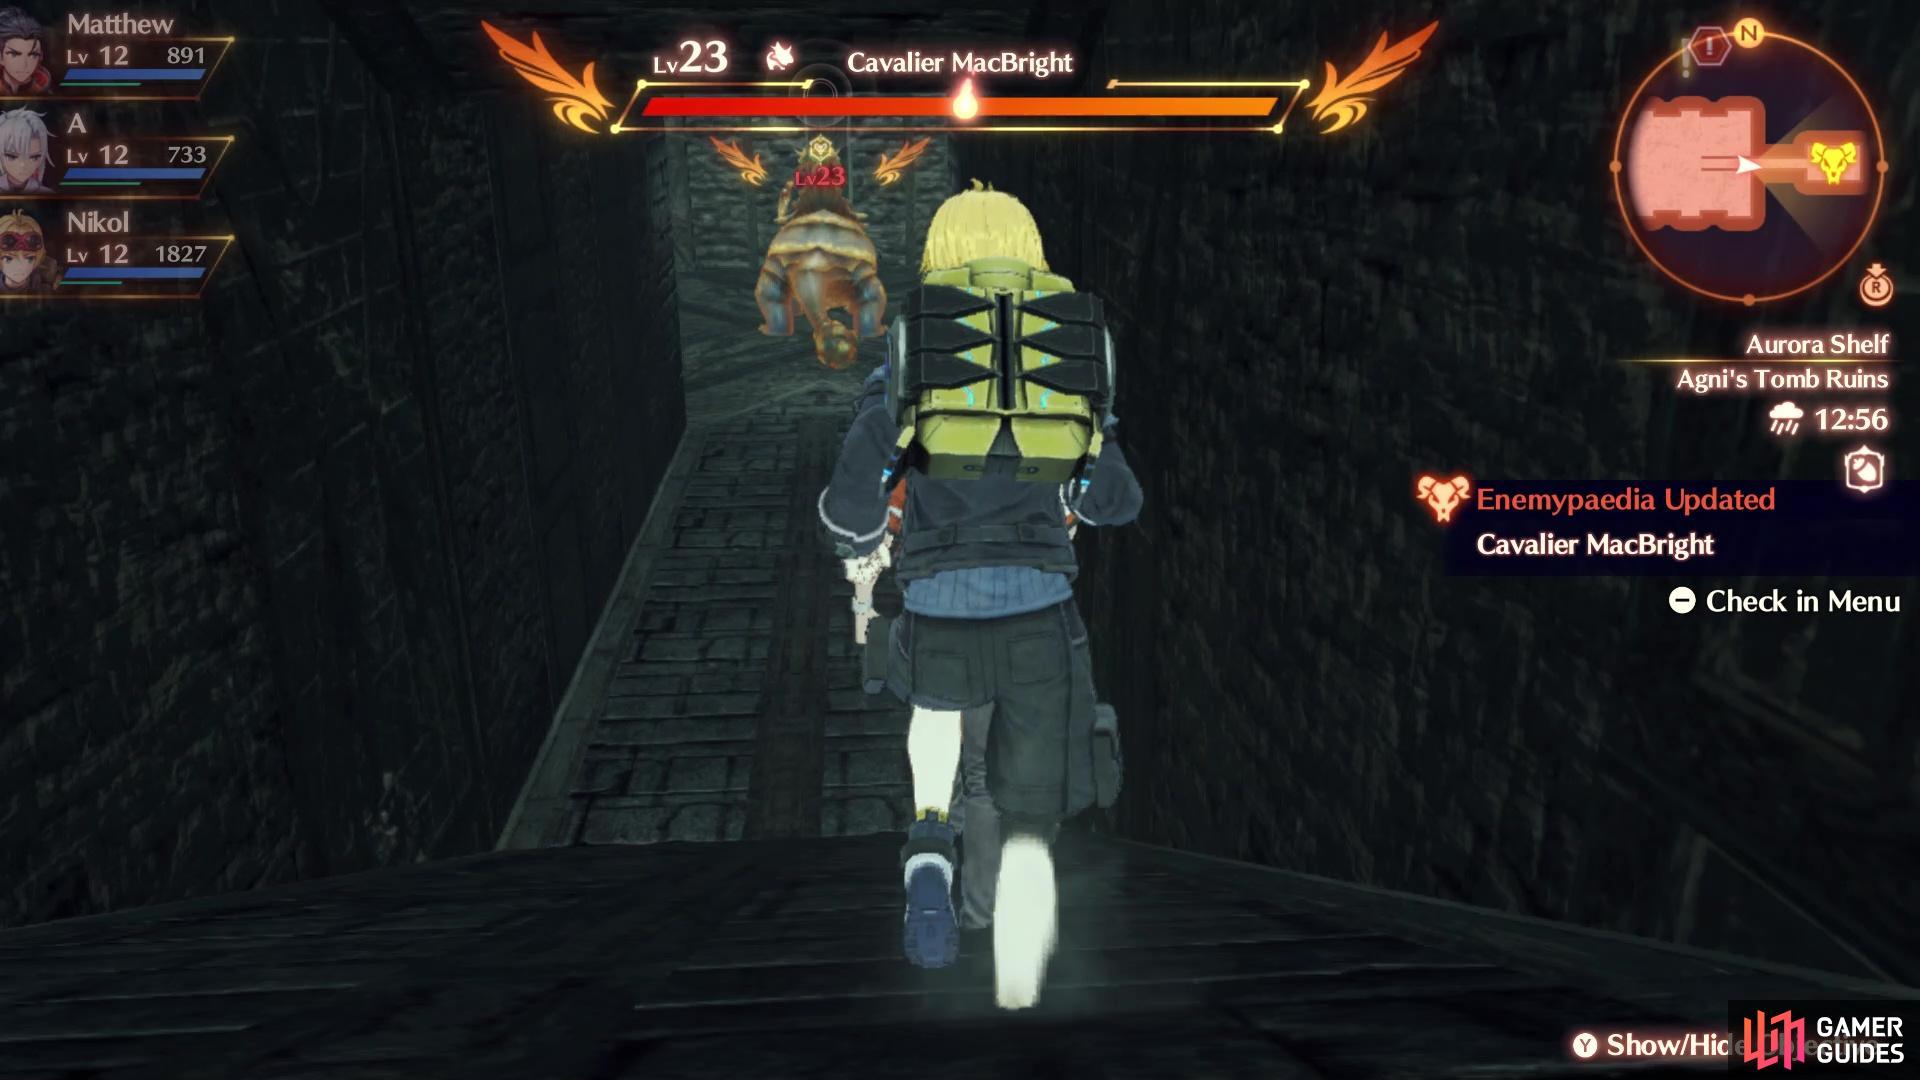
There will be a Level 23 Unique Enemy in the Agni Ruins
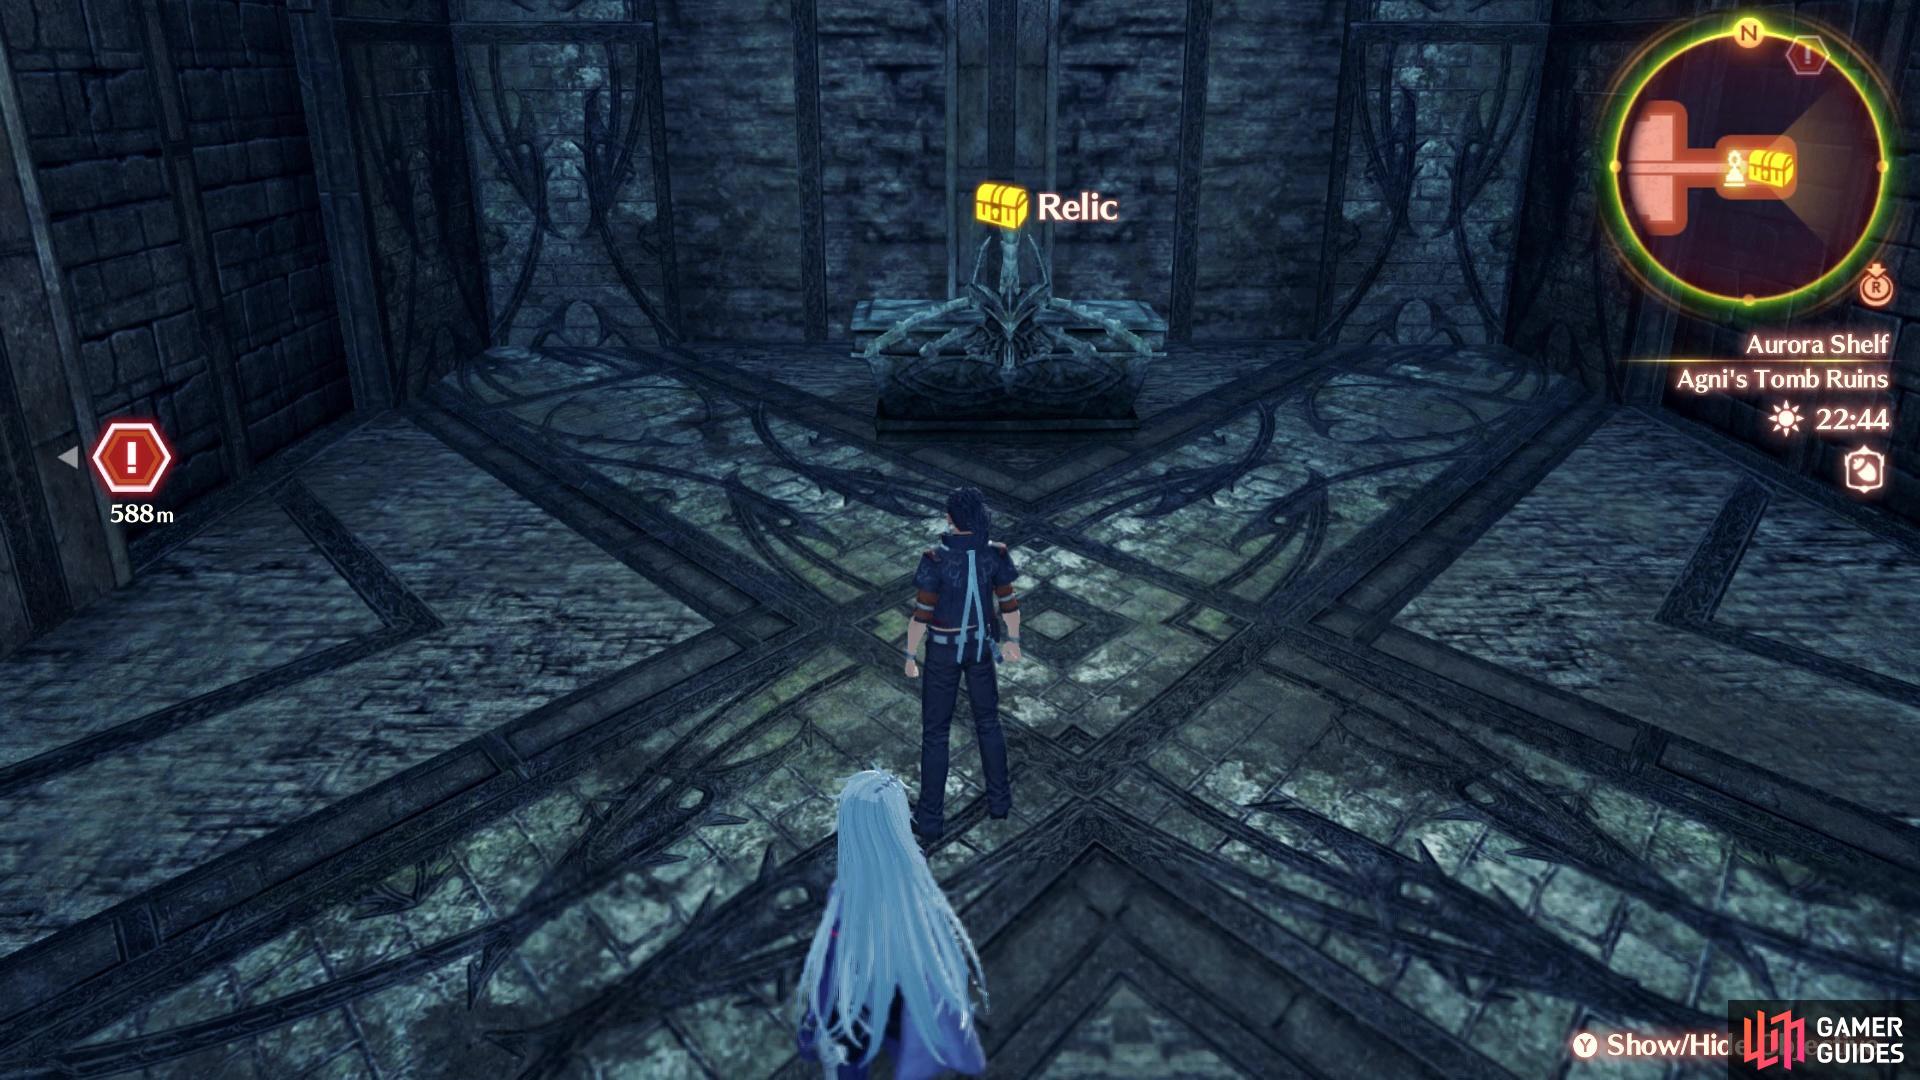
You’ll have to defeat it to gain access to the Relic with this Unlock Kit
It’s time to backtrack a little bit for this Unlock Kit. Head to the area where you took the repaired elevator not too far into the game, where the Elevator Landing Camp is located. There are two ways to enter the area where you need to go for this kit. The first is west of the Landing Camp, where there is a hill to go down that leads to a tunnel. You’ll have to fight through some enemies to reach Agni’s Tomb Ruins. The other method leads directly to the ruins, which will be east of the Landing Camp.
You’ll eventually get to the Three-Pillar Transept Ruins landmark, and if you look closely, there is a hole in the ground near it. Drop down the hole to find yourself in the Agni’s Tomb Ruins. There is a small room at the very end here, which has a Lv 23 Unique Enemy inside, named Cavalier MacBright. Defeat this enemy and behind it will be a Relic, which will be housing the Affinity Unlock Kit.
Affinity Growth Unlock Kit #4

This Unlock Kit will be on the rocks by the Gotrock Oracle Ruins
You will need to journey to the Gotrock Oracle Ruins for this one, which are located to the east of Colony 9. If you wait until later in the main story (Chapter 4), you will come here, but you can get here as soon as you have access to the area. On the northern side of this little piece of land, there are some rocks you can climb onto, so do that and continue going to the northern side of the area. Eventually, you should be able to see an item sitting on the rock there. Jump down to it to get the Unlock Kit.
Affinity Growth Unlock Kit #5

Go to the top of this tower at Lumos Garrison for this Unlock Kit
As part of the main story, you will unlock Ether Slides, which will allow you to reach some inaccessible areas, provided you can find one to construct in the area. The one you build during the story will lead you to the higher elevation just west of Colony 9. As you head north here, past the Lumos Pillar Remnants, you will turn east and have to pass the Lumos Garrison area. On the southern side, right when you first enter the area, you should see a tower that has a ladder on the side. Climb the ladder to the top of the tower to find the Unlock Kit.
Affinity Growth Unlock Kit #6
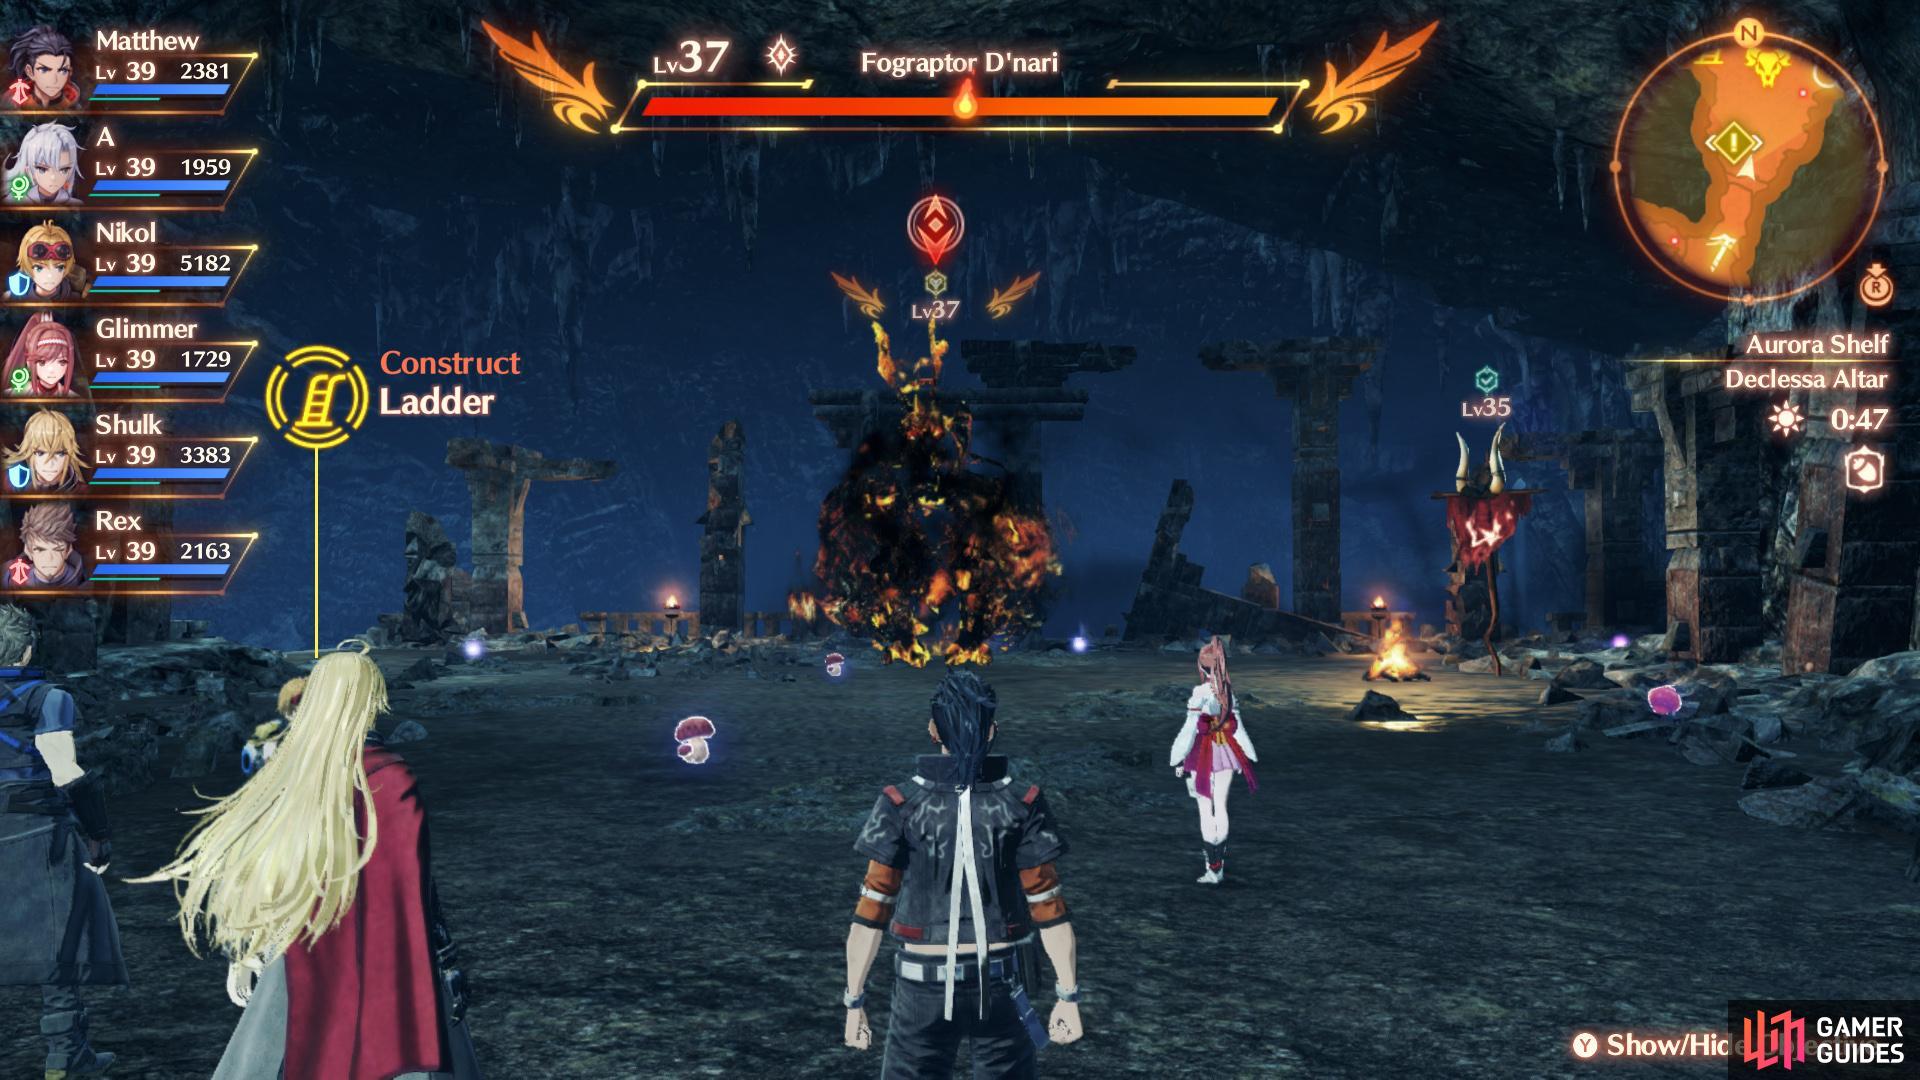
Go to the right of this Unique Enemy to find a path to the Secret Area
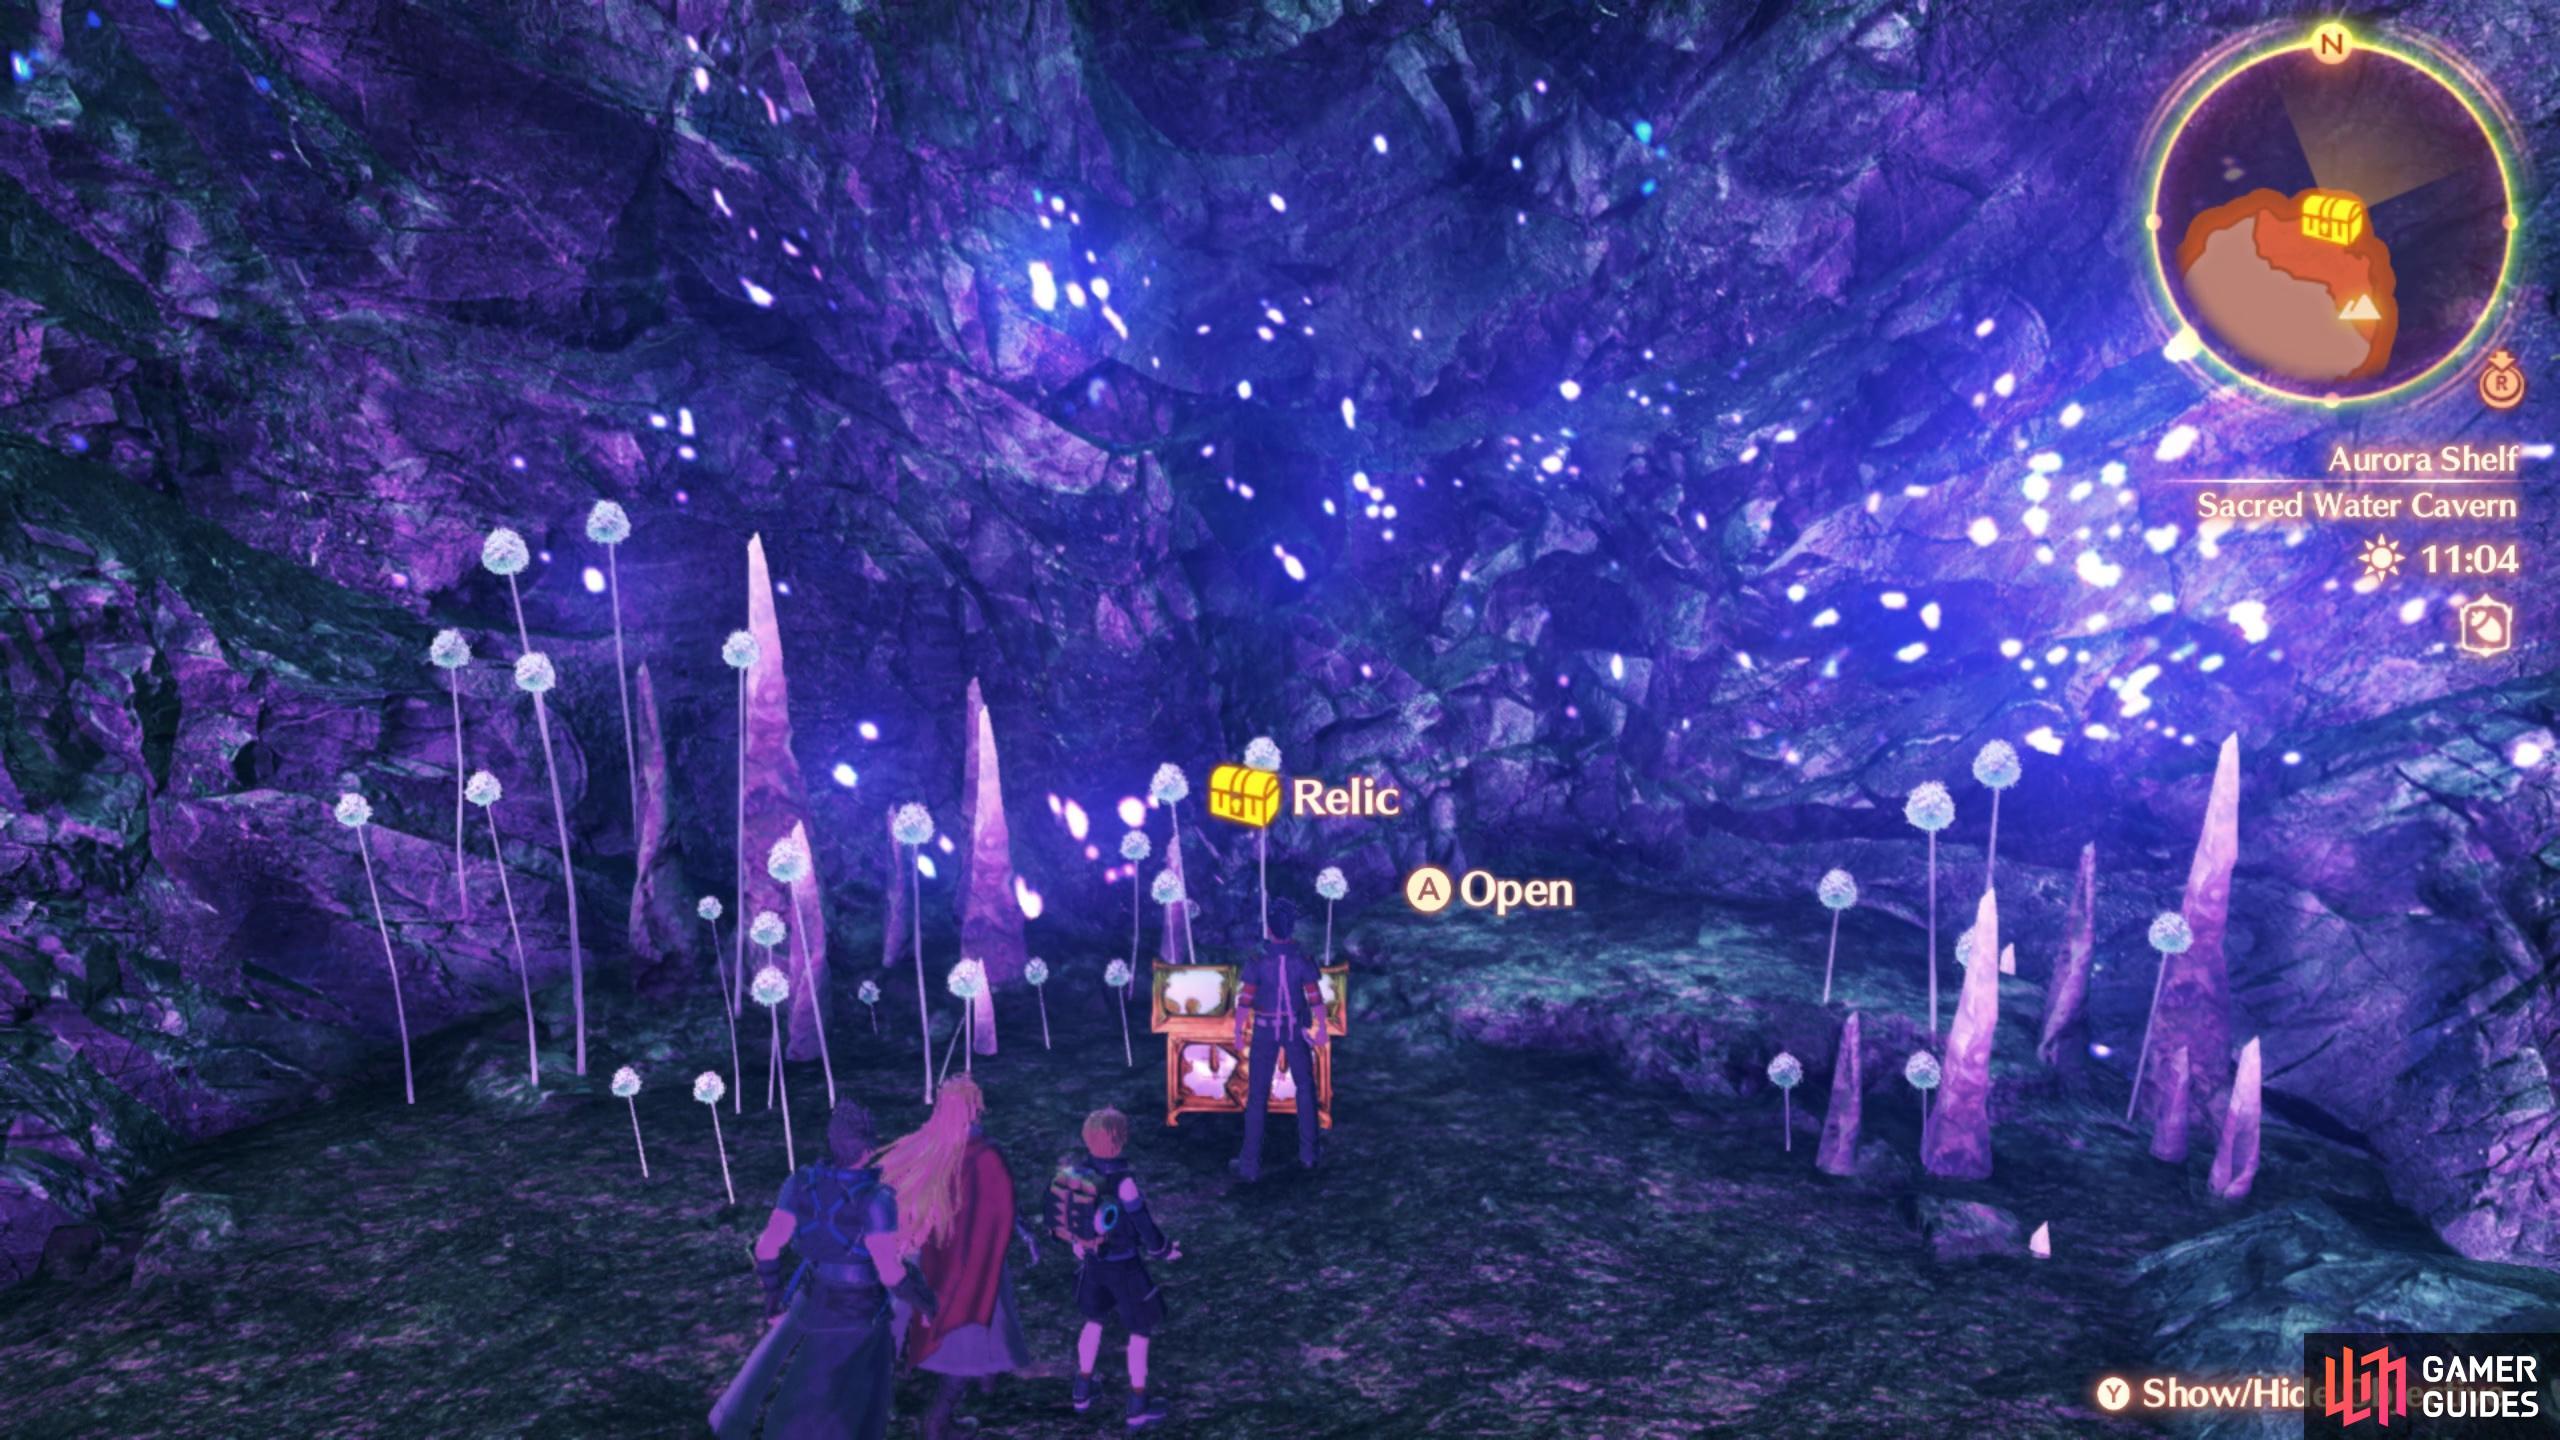
The Relic inside that Secret Area will have the Unlock Kit
Eventually, during the main story, you will have to go gather some materials to make Ether Lifts. This will lead you to a previously blocked cave southwest of the Pioneer’s Camp. On the western side of this cave, you should find a climbable wall on the southern side, which will bring you all the way up to a Unique Enemy, a Lv 37 Fograptor D’nari. On the eastern side of the arena with that enemy, you can jump over to the cliff you see, which leads to the secret area, Sacred Water Cavern. There will be a Relic in here, which yields the Unlock Kit.
Affinity Growth Unlock Kit #7
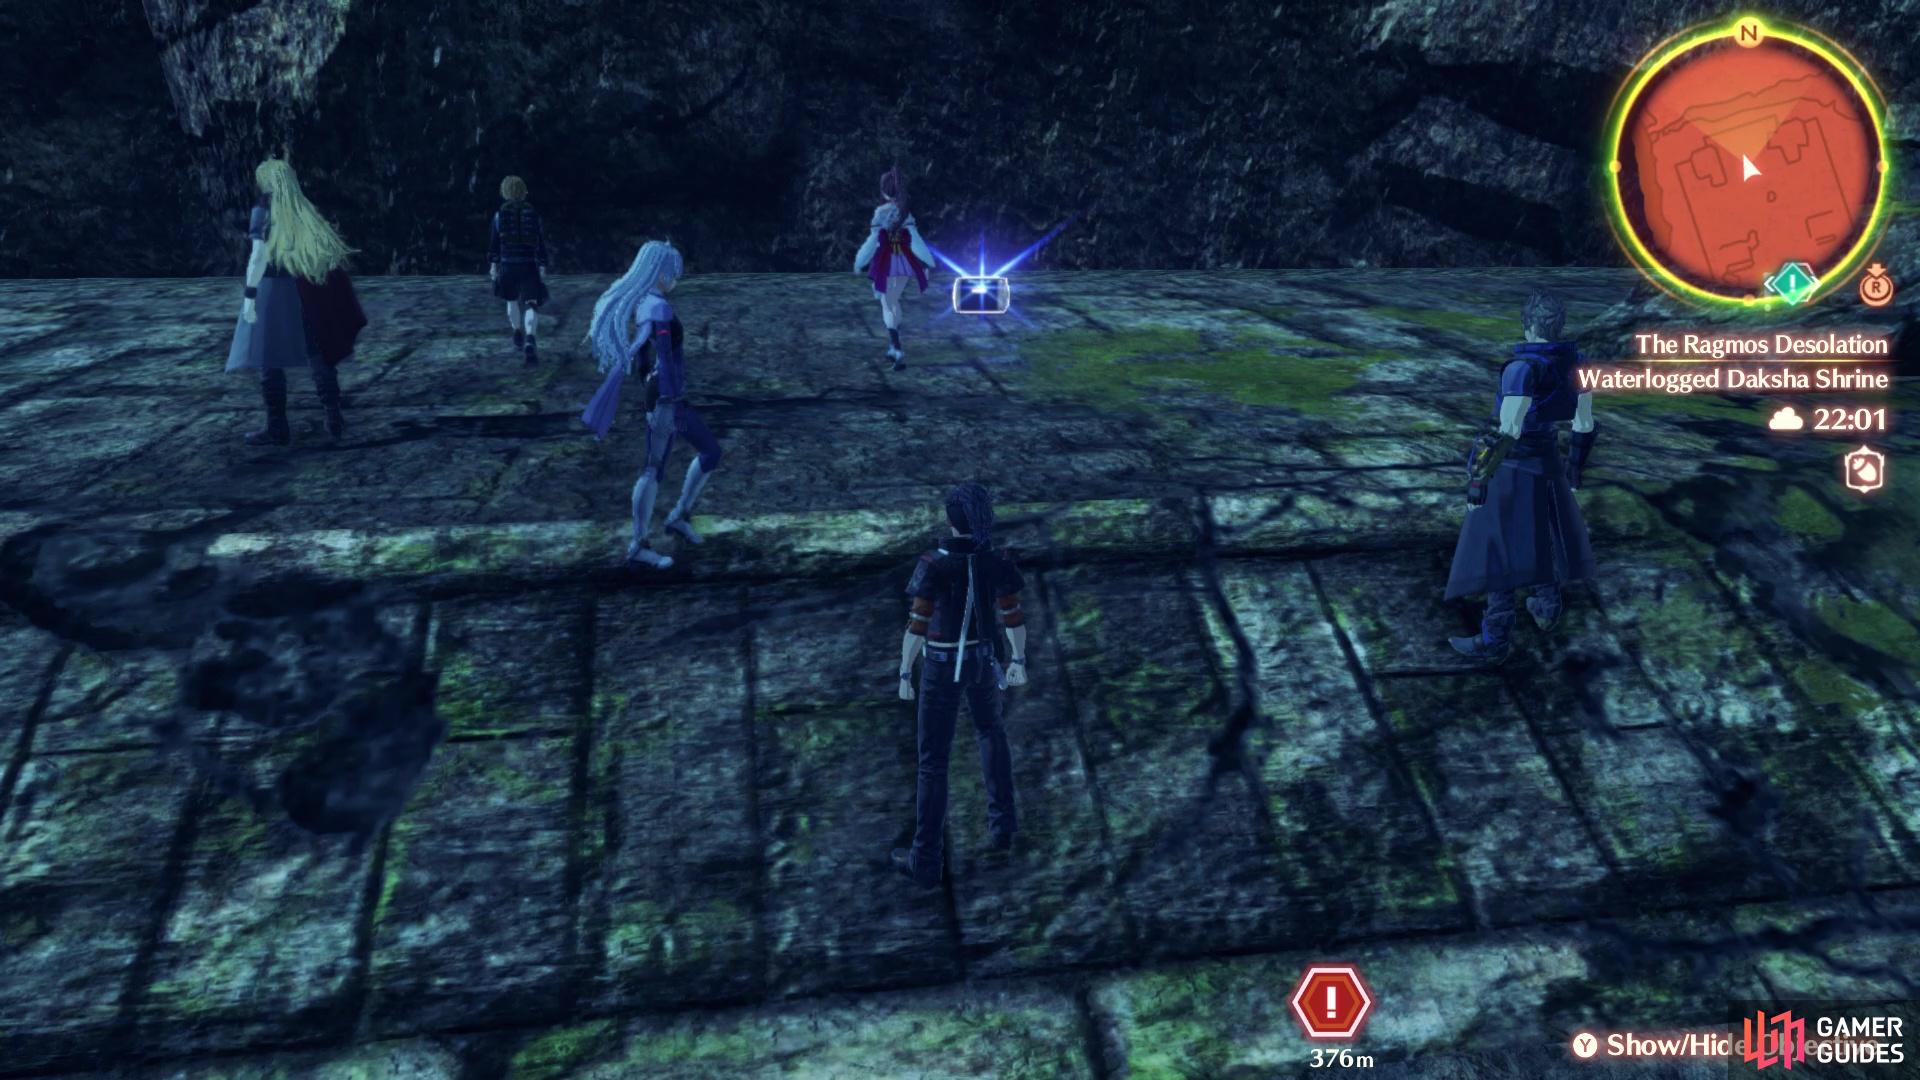
The Unlock Kit will be sitting in the open, on the altar
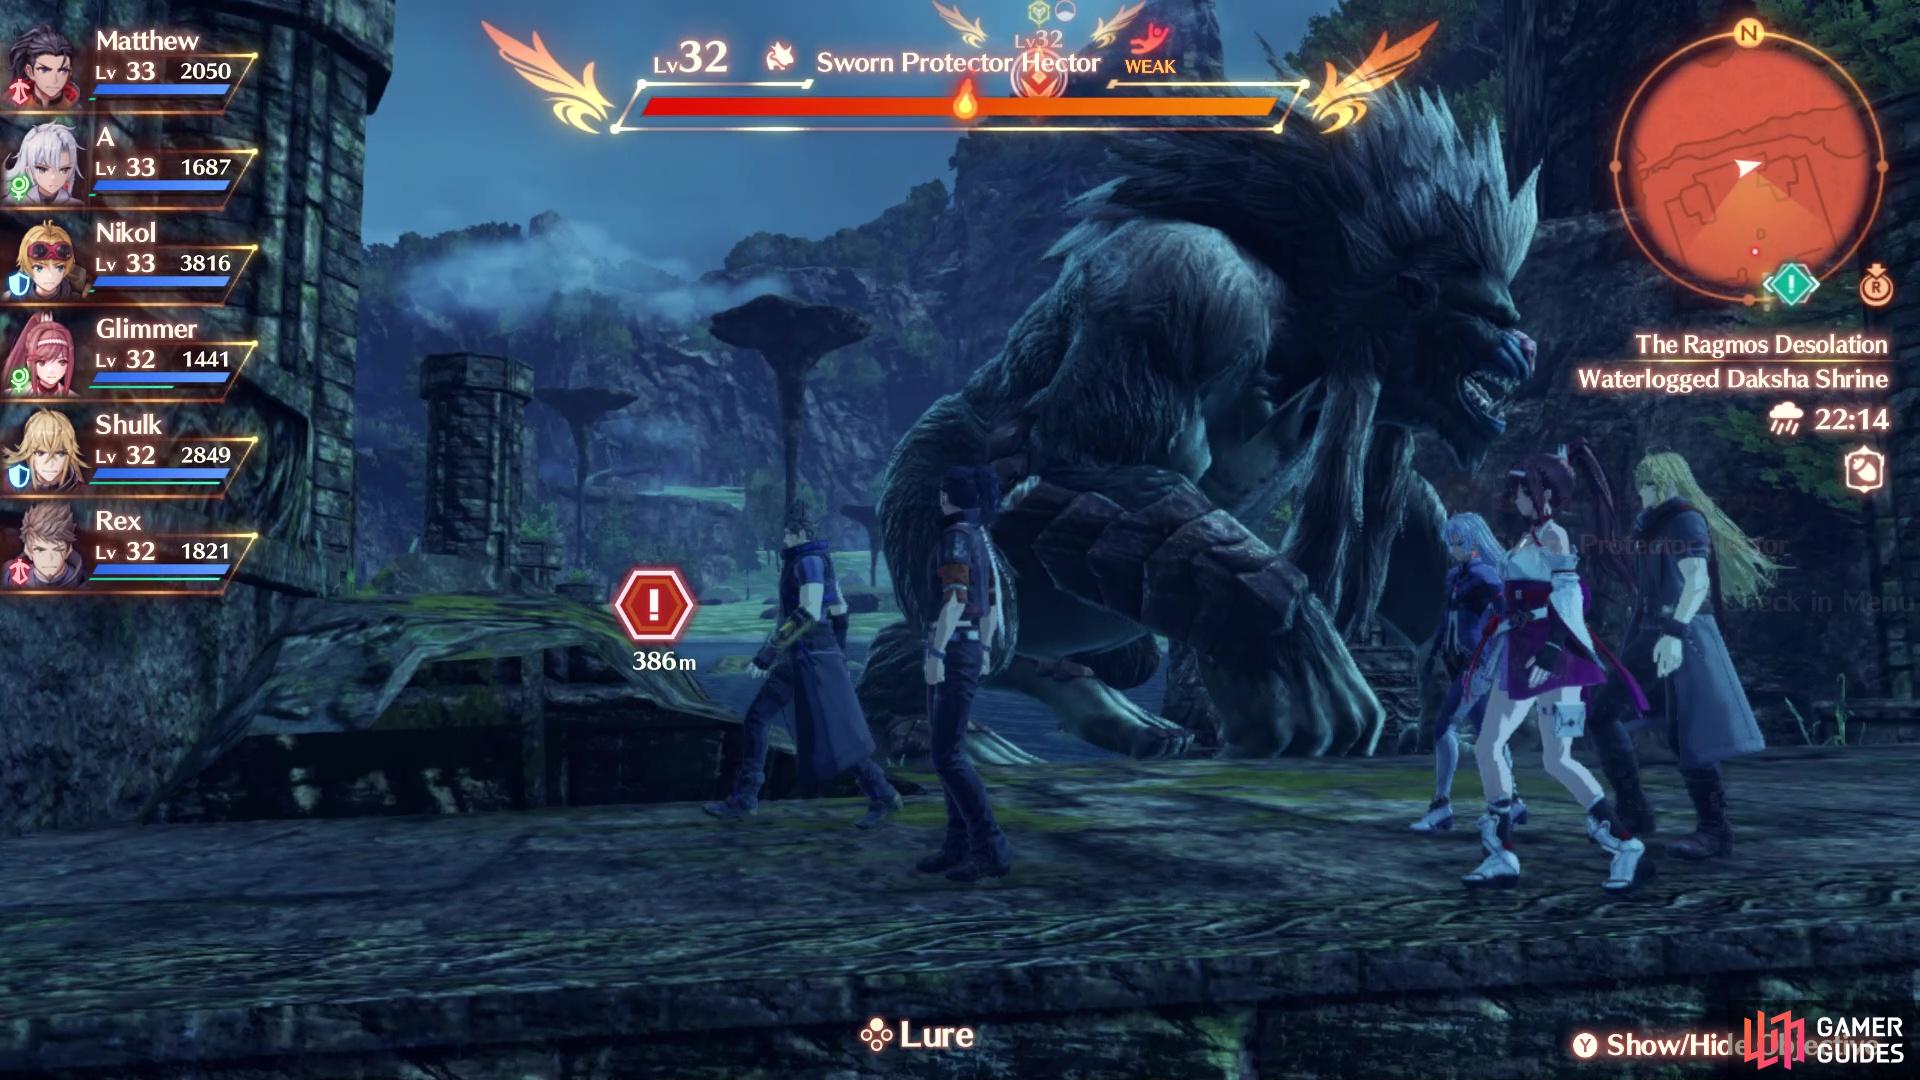
Be mindful that a Unique Enemy will appear behind you when you grab it
This Unlock Kit will be in the Raguel Lake area, which is just past the Lumos Garrison. In the northwestern portion of Raguel Lake is the Waterlogged Daksha Shrine and if you look closely, you can see an item sitting on top of it. This is the Unlock Kit, but as you go to grab it, some Igna enemies will appear. These are just normal enemies, so there’s nothing to worry about (there’s three of them). However, be very careful here, as a Unique Enemy will appear behind you. This enemy is Lv 32 and deceptively strong, with its name being Sworn Protector Hector. You don’t actually need to mess with it right then and there, as you can just grab the Unlock Kit and run away.
Affinity Growth Unlock Kit #8
For this kit, you will need to complete the Linka’s Birthday standard quest in Colony 9, which appears during Chapter 4. This will take you to Raguel Lake, where you need to defeat a Lv 39 enemy that can be a little challenging. Once you defeat the enemy, return to Colony 9 to complete the quest and get the Unlock Kit.
Affinity Growth Unlock Kit #9
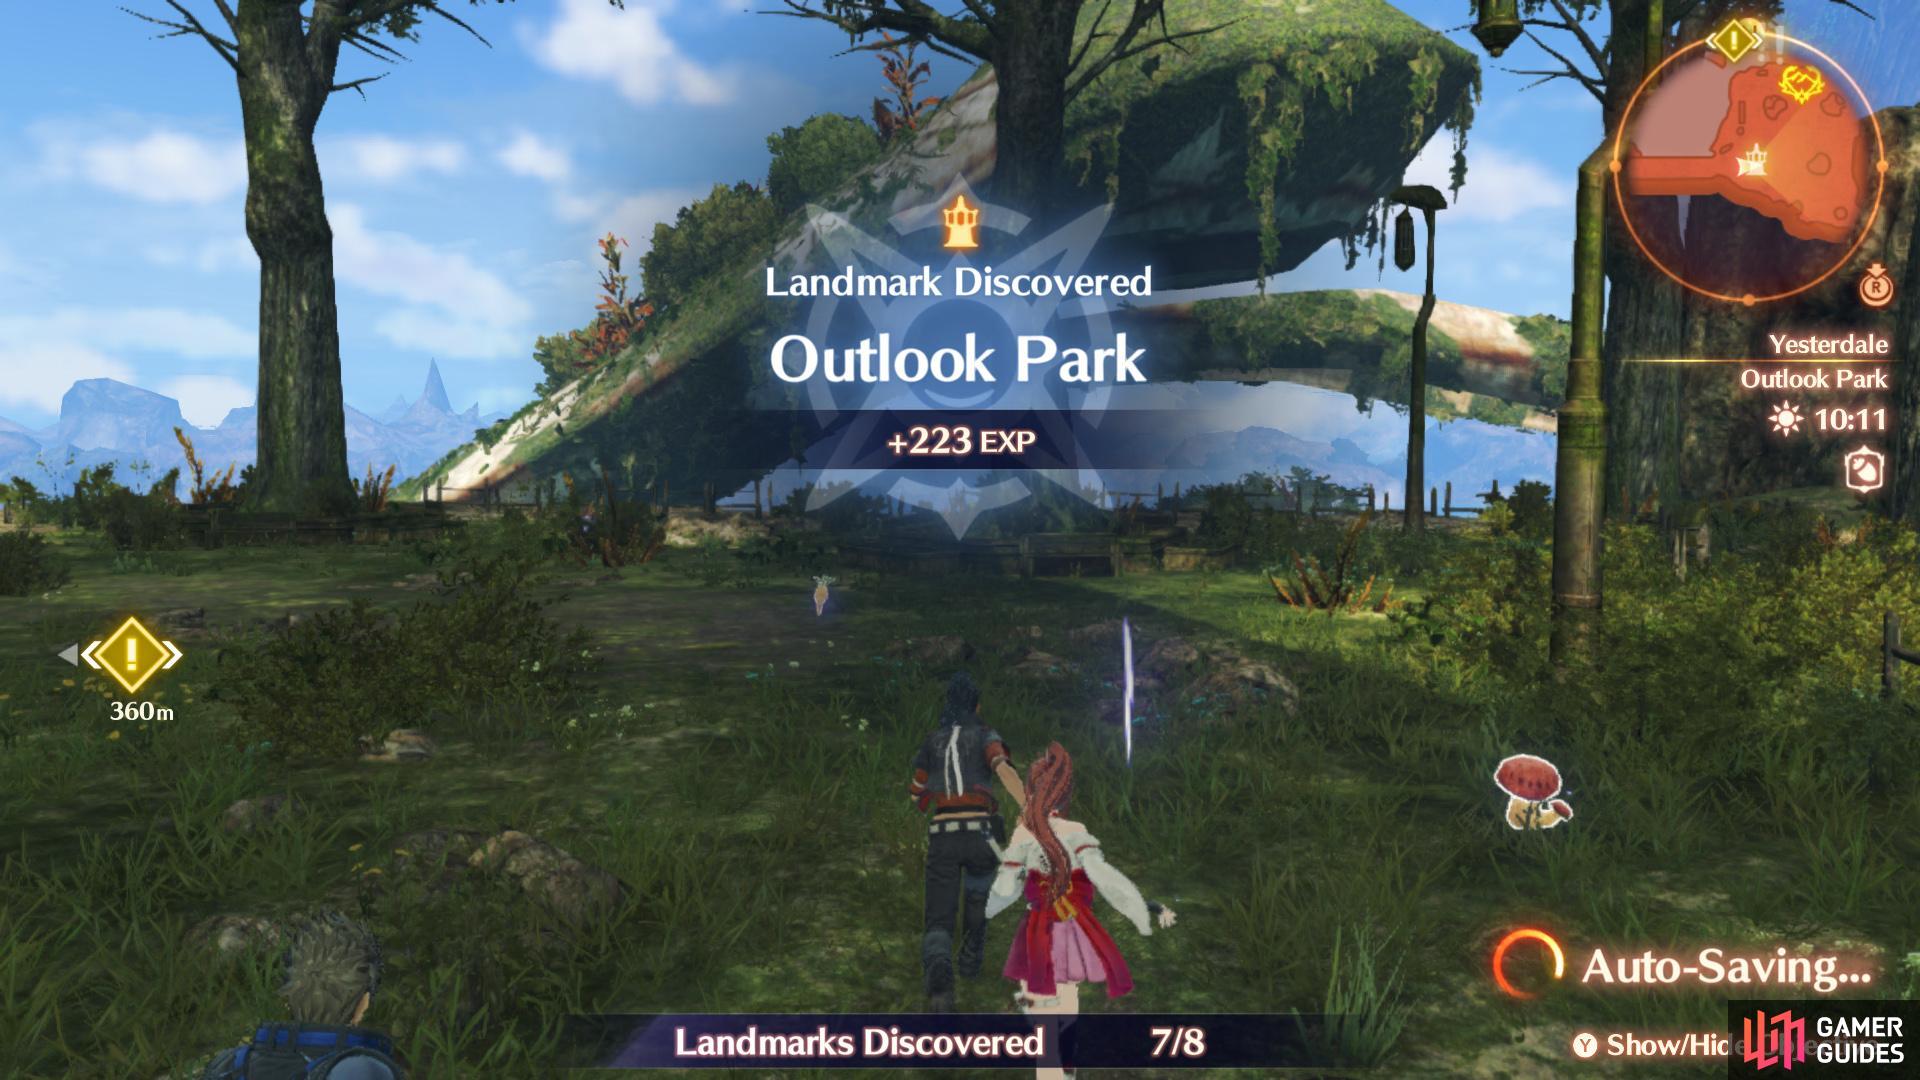
Jump into the water at Outlook Park
Eventually, use the Ether Lift to reach this area, with a Relic that contains the Unlock Kit
Upon unlock Ether Lifts, head to Colony 9 and exit it via the normal bridge on the western side. As soon as you leave, turn south and head that way, until you eventually reach a new area. If you follow the path all the way up, you will reach the Outlook Park landmark. Look down into the large hole in the middle to see some water below you, so jump down and into it to find the Lakeside Grotto location. On the opposite end will be a place to climb out of the water, as well as a construct site for an Ether Lift. Take the lift to arrive in a tiny island-like area near the Waypoint Sapling location. Look at the eastern end to find a Relic, which will be housing the Unlock Kit.
Affinity Growth Unlock Kit #10
The next two Unlock Kits will be accessible after you have the ability to construct Ether Lifts. Once you do, you will enter the Tephra Cavern and use an Ether Lift to shoot up to the Oracle Spire. This particular kit is a bit of a tricky one to get, as you will need to jump down twice to get to the particular spot. After arriving at Oracle Spire, cross the bridge there to enter an area with a bunch of Kevesi troops. Ignore those, as best as you can, and climb the stairs to the top of the area, where you should find a ladder to repair.

Do this and go up the ladder, where there will be a giant egg. This egg is actually a Unique Enemy (Lv 42 Many-Lived Derrick), but you don’t really need to mess with it now, if you don’t want. There is a tunnel on the southern side of this little area, so go through it to arrive at the Royal Green secret area. There will be a Relic here that has a different Unlock Kit, which is not what you want, of course. Look over the railing to see a spot to jump down to, with a bunch of shrubbery on it. Go ahead and do that (it shouldn’t kill you), then look for the fallen column on this platform.
At the end of this fallen column, you should be able to jump down to another spot. Note that you don’t need to land on the columns here, but the actual platform they are connected to here. Once you land on the platform, just follow it around to find another Relic, which will contain the Unlock Kit.
Affinity Growth Unlock Kit #11
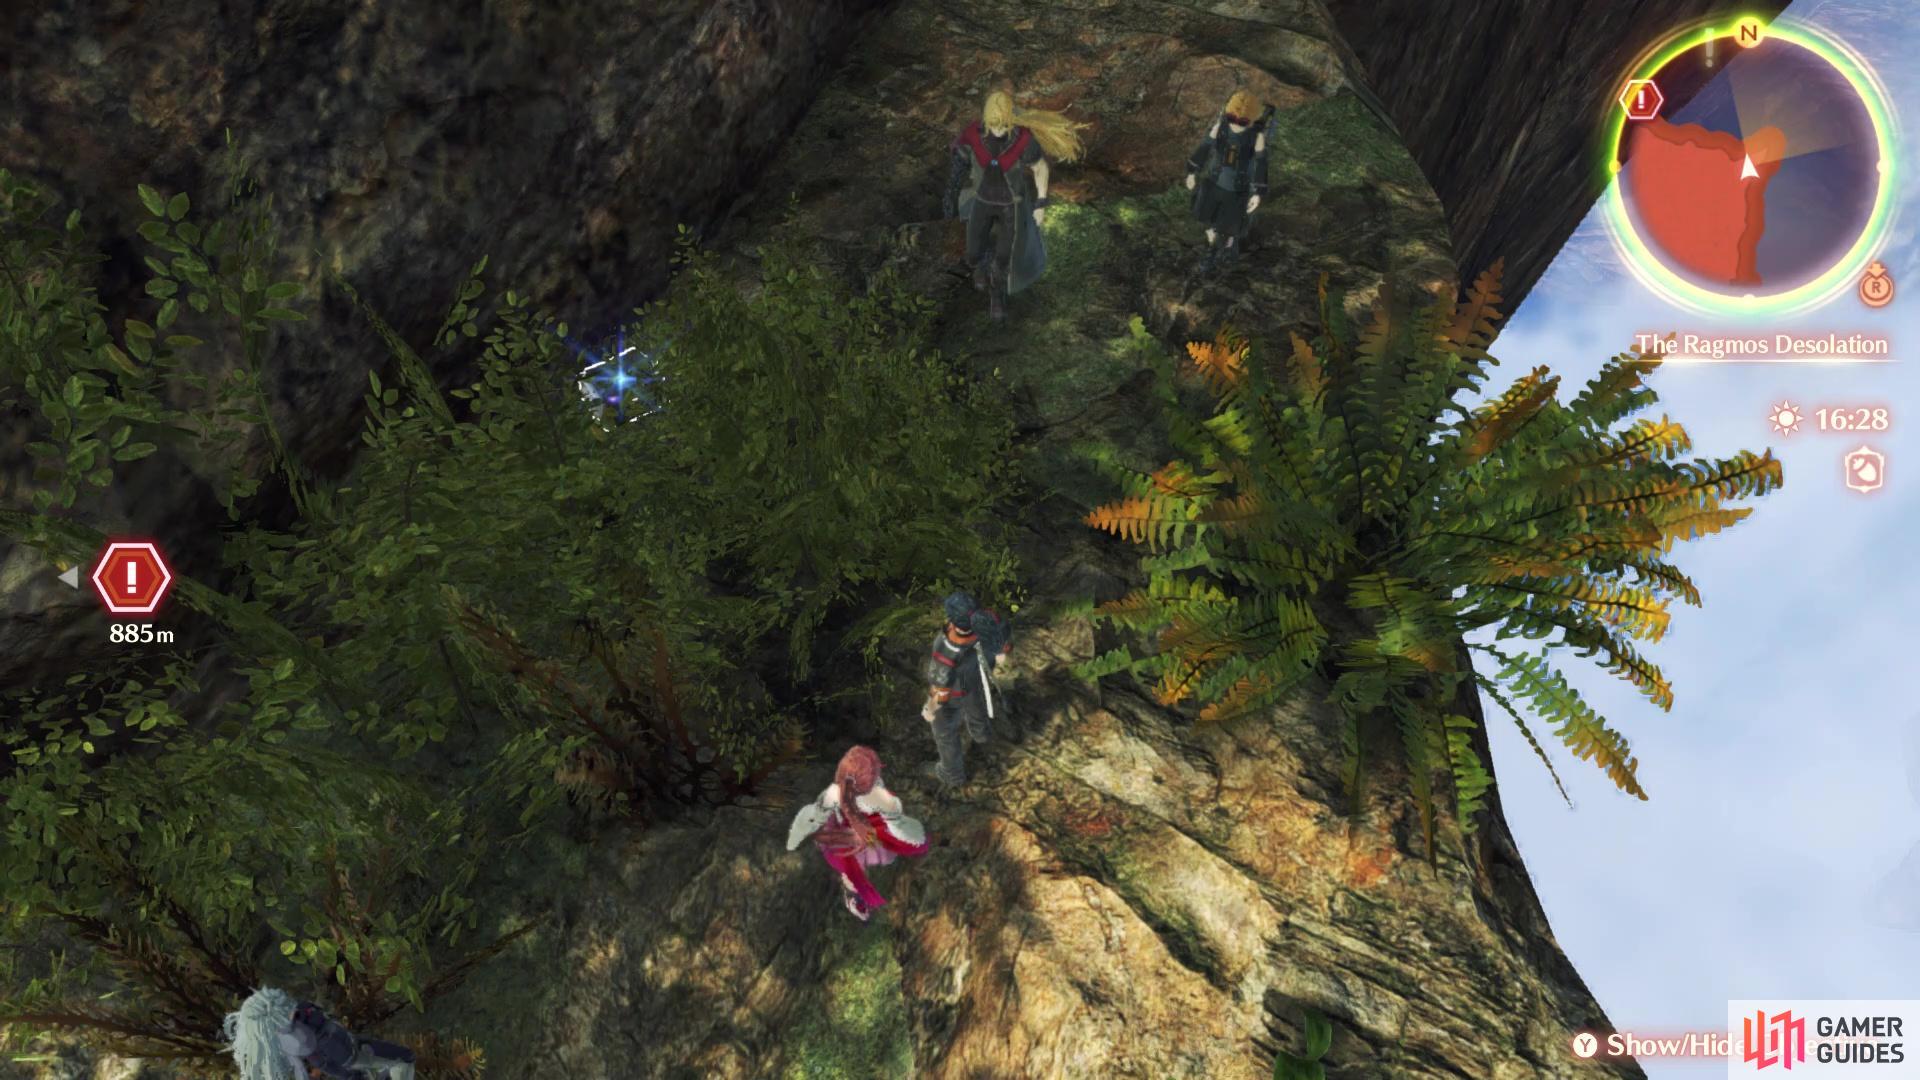
Check at the edge of this cliffside to find this Unlock Kit hidden amongst some bushes
Upon getting the previous Unlock Kit, teleport back to the Oracle Spire landmark and make your way through all of the Kevesi enemies. Look for the path that leads downward, to the more solid land. Once you are there, look for the path that takes you southwest, past the Fog Rift and to the Fallen Gate of Ulcaria landmark. Ignore that for now, since the path leading north out of there takes you to the upper portion of Raguel Lake. Instead, head directly east from that landmark, which will put you underneath the Oracle Spire area. Being mindful of the enemies here, since you can easily be overwhelmed by numbers, go to the northeastern corner, next to the cliff, to find the Unlock Kit being obscured by some bushes.
Affinity Growth Unlock Kit #12
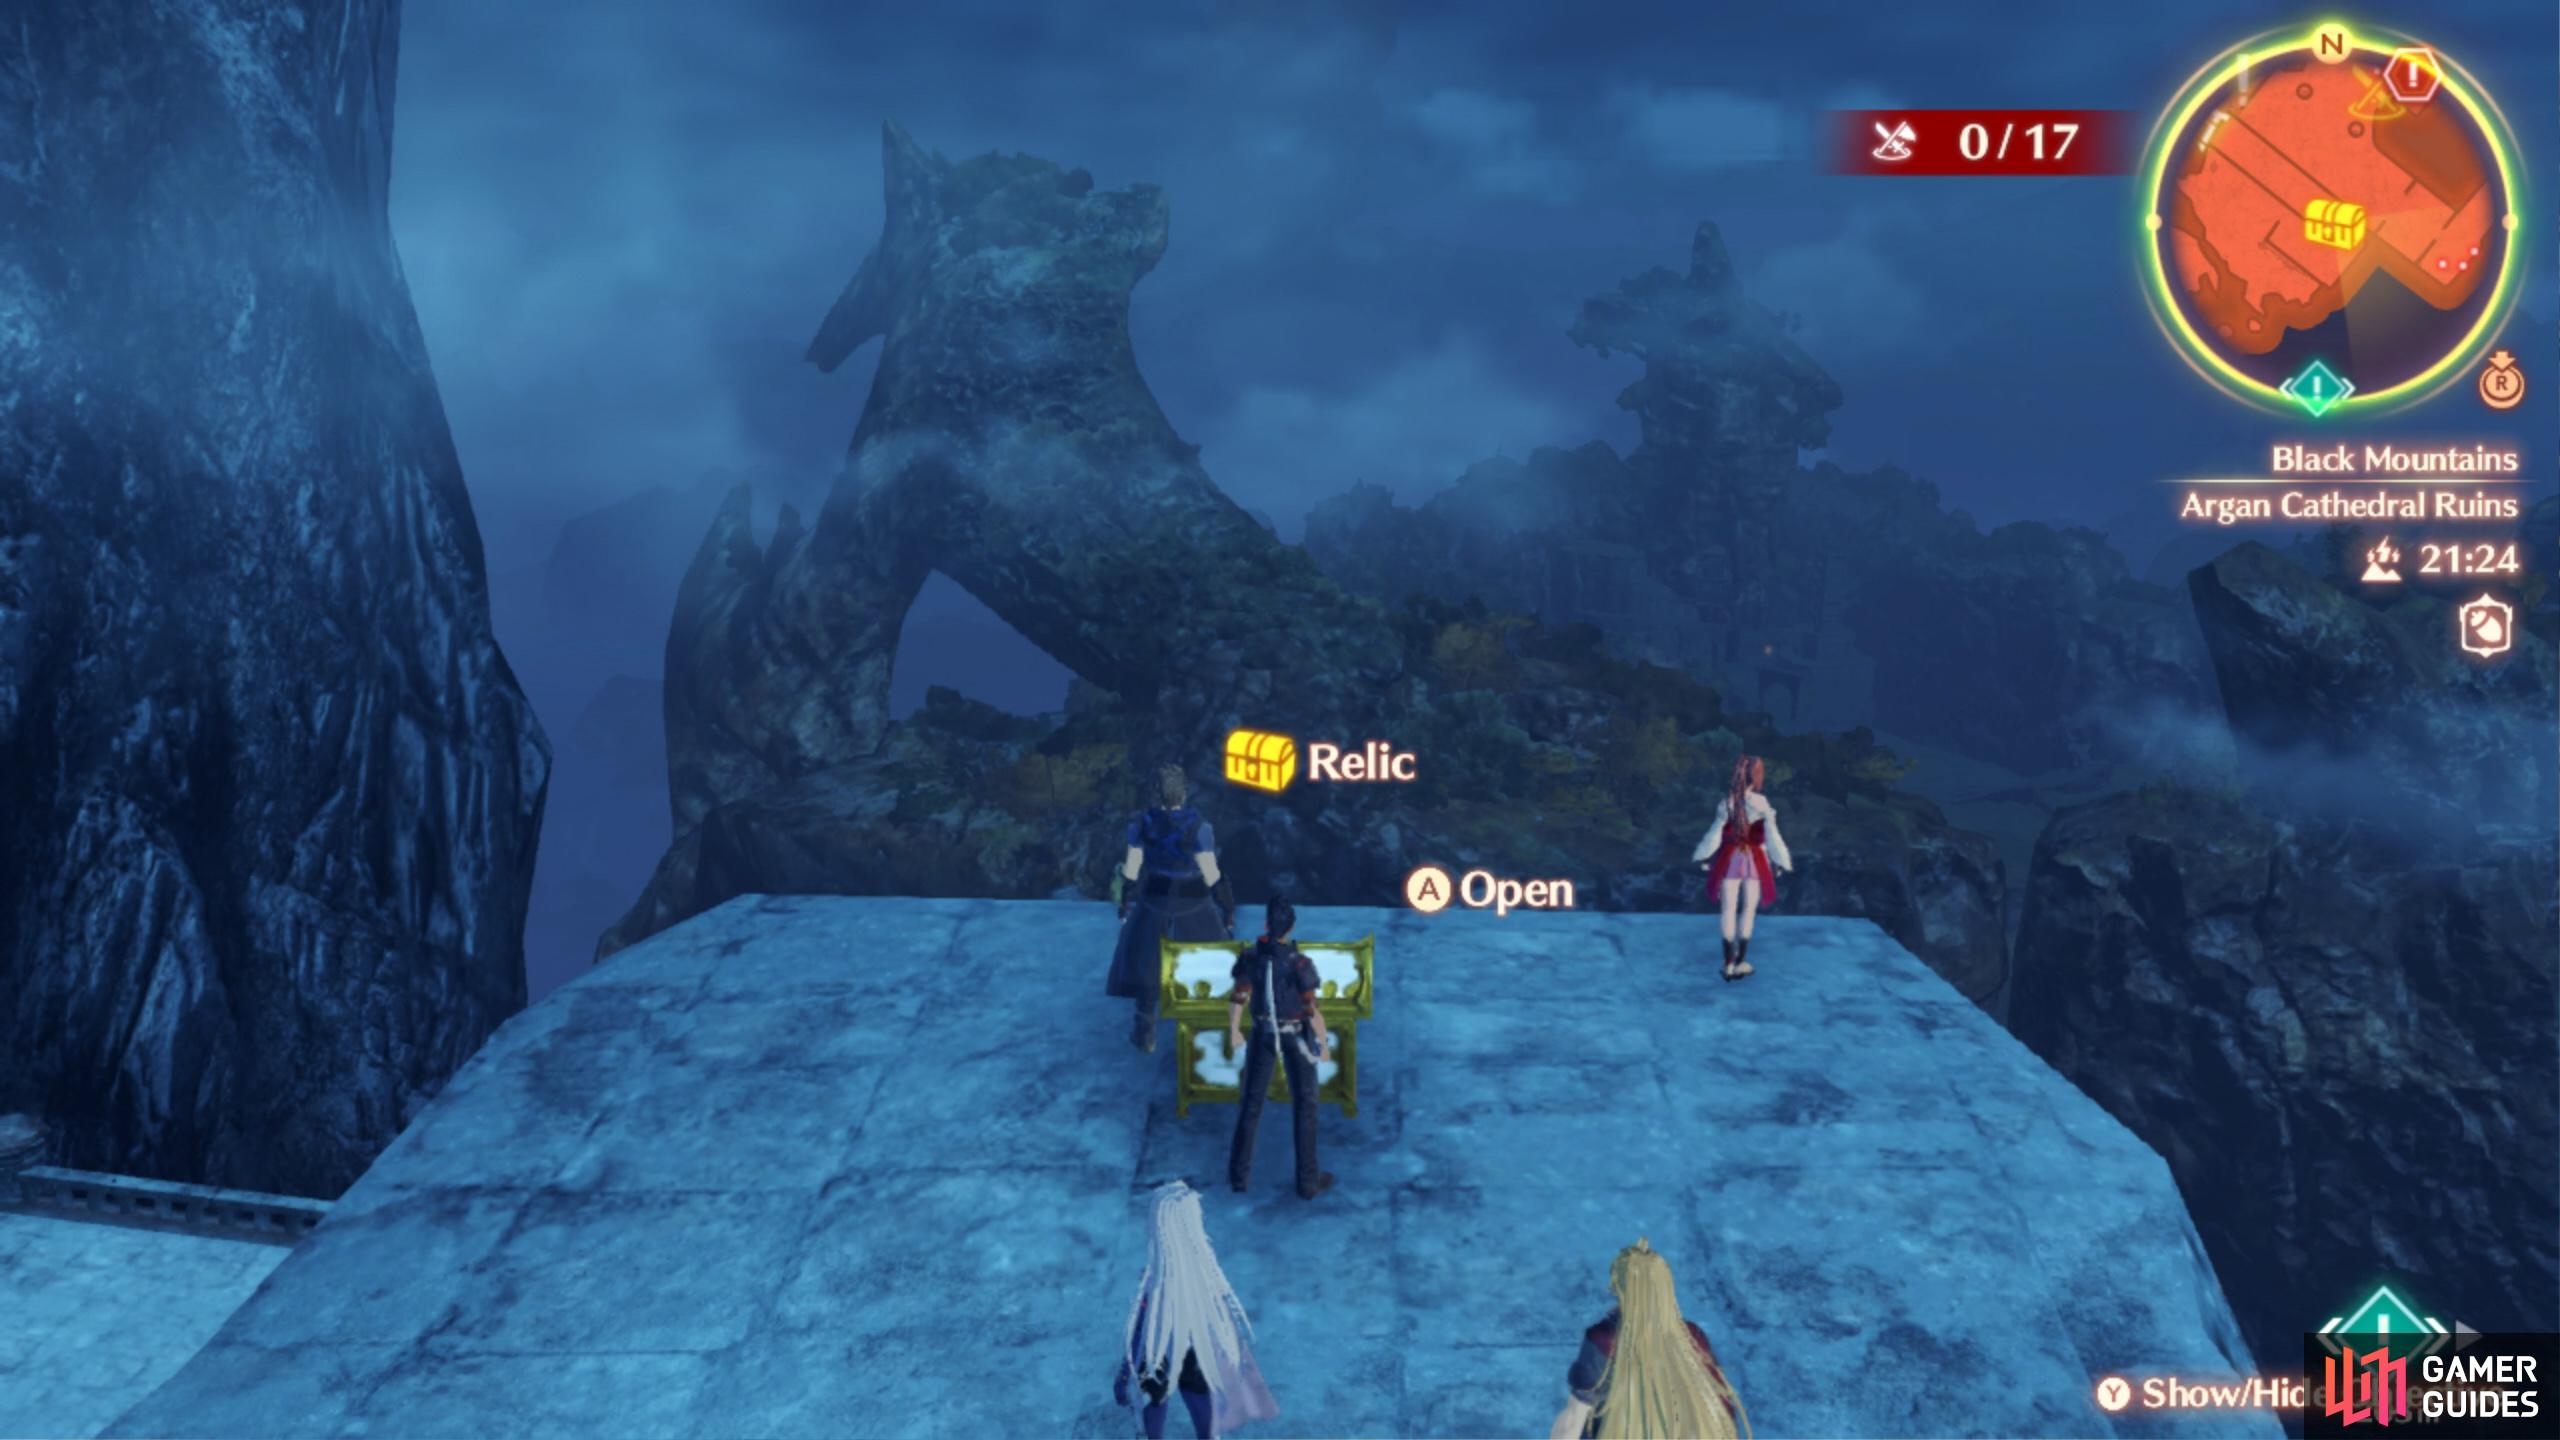
The Relic atop this wall here will contain the Unlock Kit
For the final Unlock Kit on this list, you won’t be able to get it until you have access to the Black Mountains. When you reach the Mt. Nagul Viewing Deck landmark, you will see two different paths to take, one of which is a series of small floating islands. After jumping across these, you will find some climbable walls, so get to the top to find yourself on top of a wall at Argan Cathedral Ruins. At the opposite end of this wall will be a Relic, which will contain the Unlock Kit.
No Comments