
You will face numerous bosses and enemies during the Xenoblade Chronicles 3 DLC, called Future Redeemed. The first thing you will do at the beginning of Chapter 3 is fight Moebius W, who can be somewhat of a tricky boss. This page will focus on how to make this boss a much easier experience.
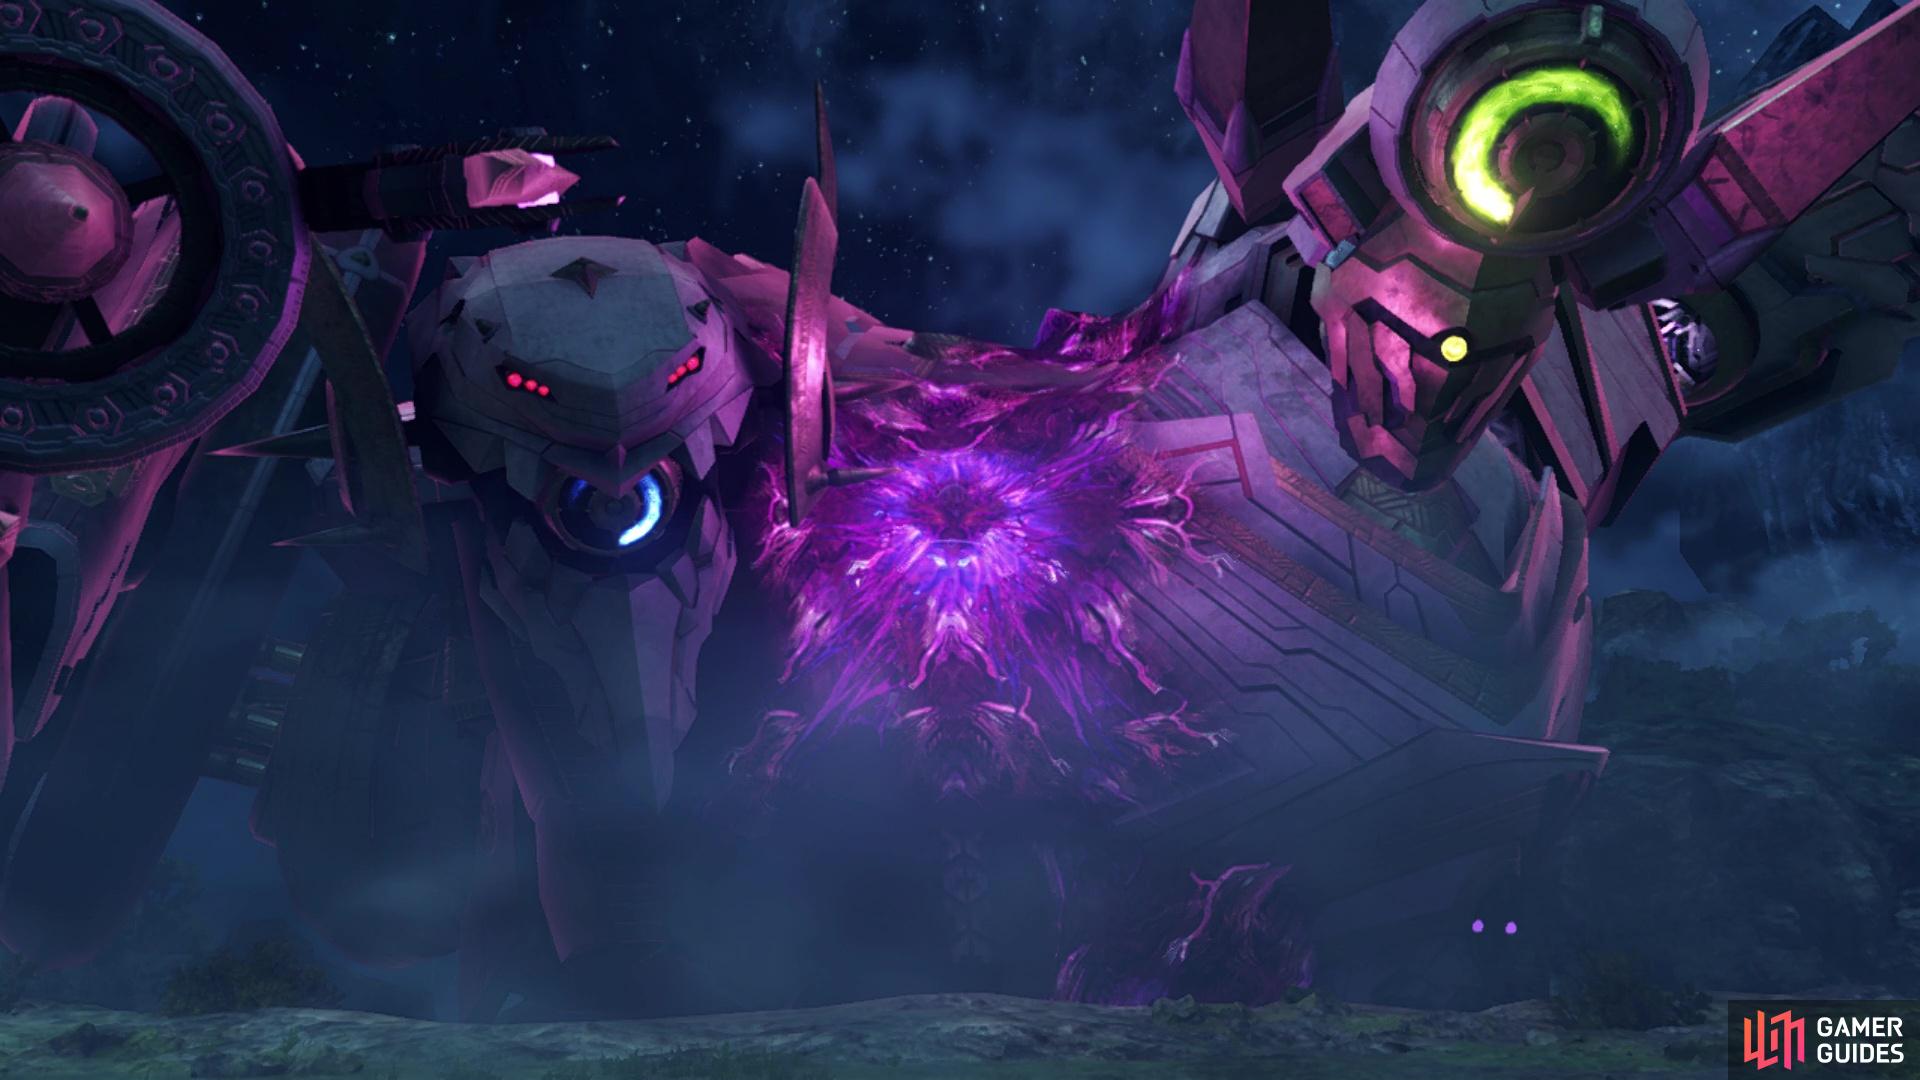
You will fight Moebius W at the beginning of Chapter 3
How to Beat Moebius W in Xenoblade Chronicles 3: Future Redeemed
| Name | Level | Type |
|---|---|---|
| Moebius W | 19 |  |
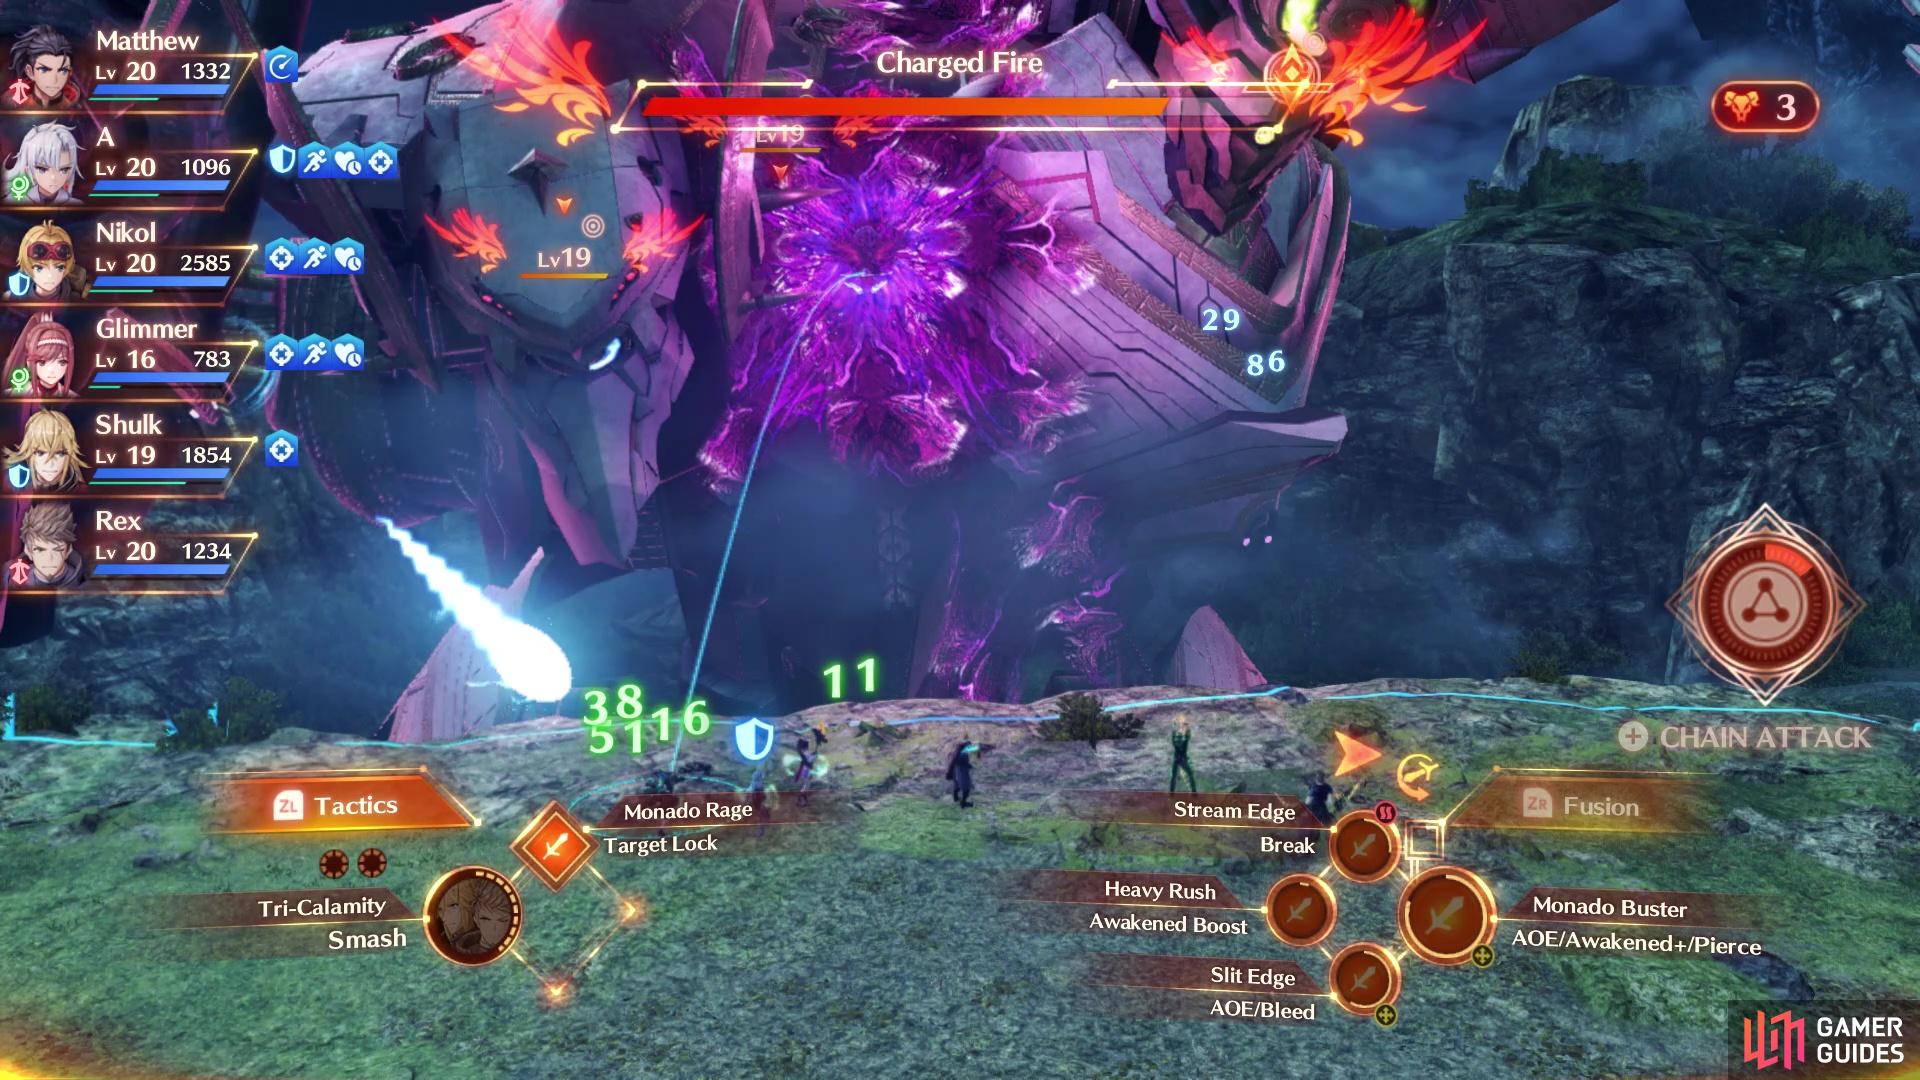
First and foremost, you will have a full party of six during the battle, which is your first opportunity to play around a little bit with finding a character to play. You have two Defenders, two Attackers, and two Healers, so it’s a pretty balanced party. At the beginning of the fight, you will automatically target Moebius W, but as you attack him, you will notice you’re not really doing any damage. The game is a bit tricky here, as this boss fight isn’t just your party versus one enemy, but three enemies. You will have both the Agnian Ferronis and Kevesi Ferronis as targets for your attacks.
Before diving into a strategy for this battle, let’s take a look at the attacks from this monstrosity:
-
Charged Fire: The Kevesi Ferronis will charge up a laser shot that hits a single target for okay damage.
-
Agnian Laser: Similar to the Kevesi one above, the Agnian Ferronis will charge a laser to hit a single target. This one has a chance to inflict Defense Down and Poison.
(1 of 2) The laser attacks from the two Ferronis shouldn’t prove to be too damaging
The laser attacks from the two Ferronis shouldn’t prove to be too damaging (left), Banish and Punish is annoying, as it can Break and Topple your party (right)
-
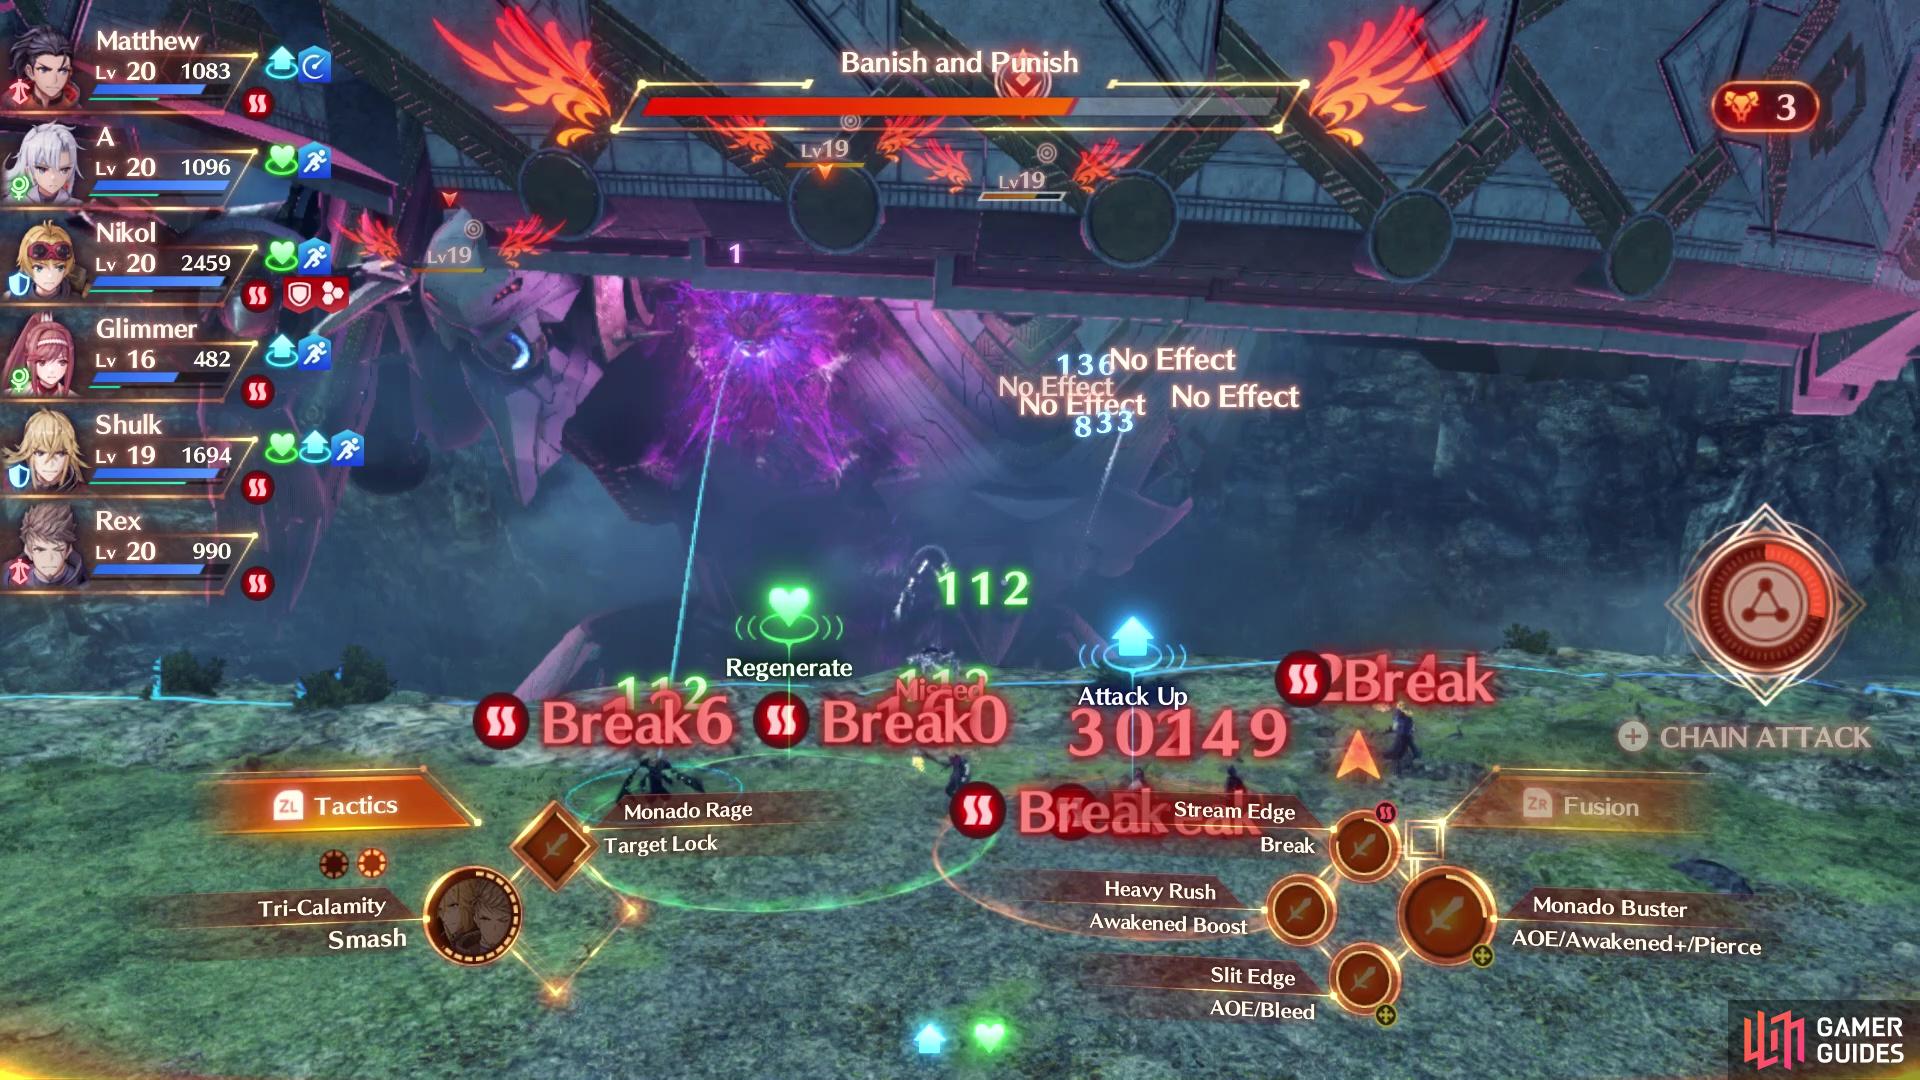
Banish and Punish: This attack is similar to the Banish from Sight in the previous boss battle, except there will be a two-hit attack with the arm. The first has a chance to Break, while the second one has a chance to Topple those afflicted with Break.
-
Emergency Boost: All three targets will receive a buff to Attack and Accuracy.
-
Kevesi Laser: The Kevesi Ferronis will charge up a laser, then shoot a multi-targeted one that hits the entire party for pretty good damage.
-
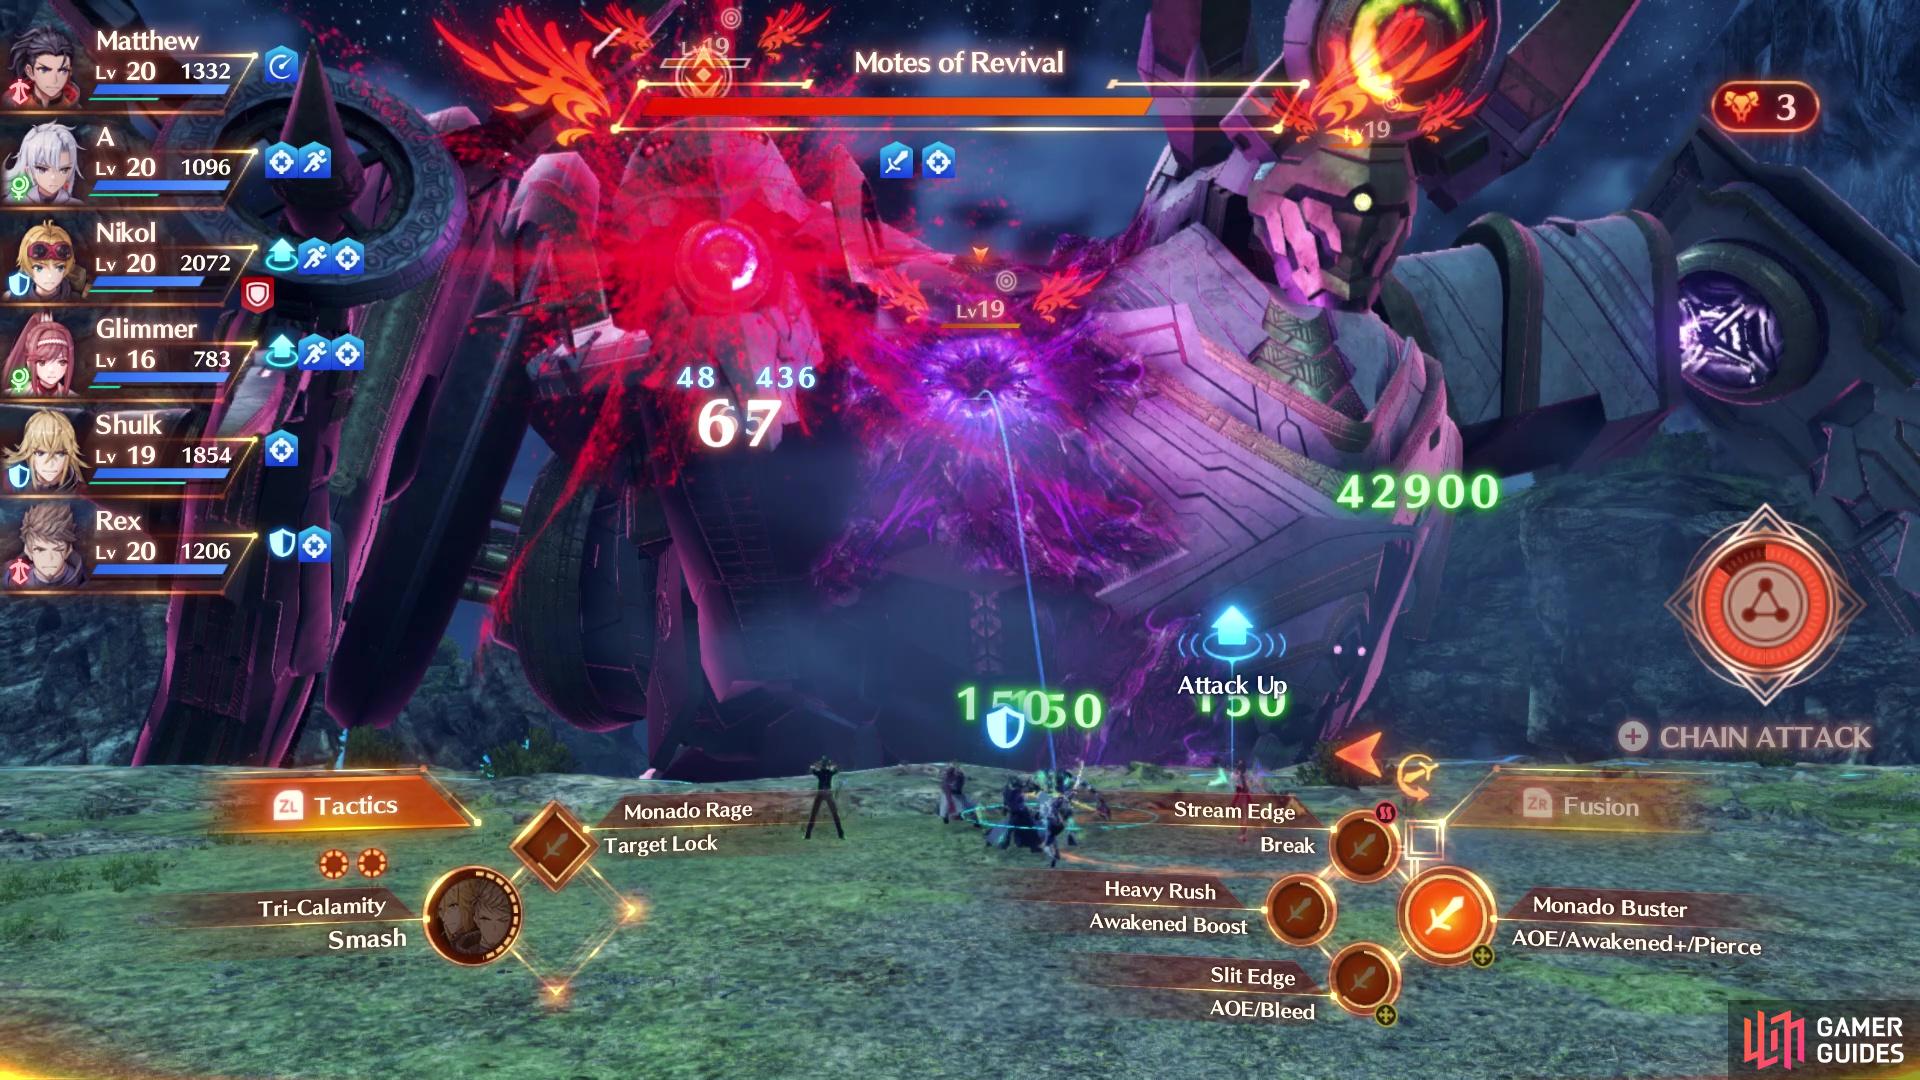
Motes of Revival: If one of the Ferronises has been defeated, this move will revive it with half health. Each one of the Ferronises can be used to revive the other, but it’s unclear if it’s possible for it to be used more than once.
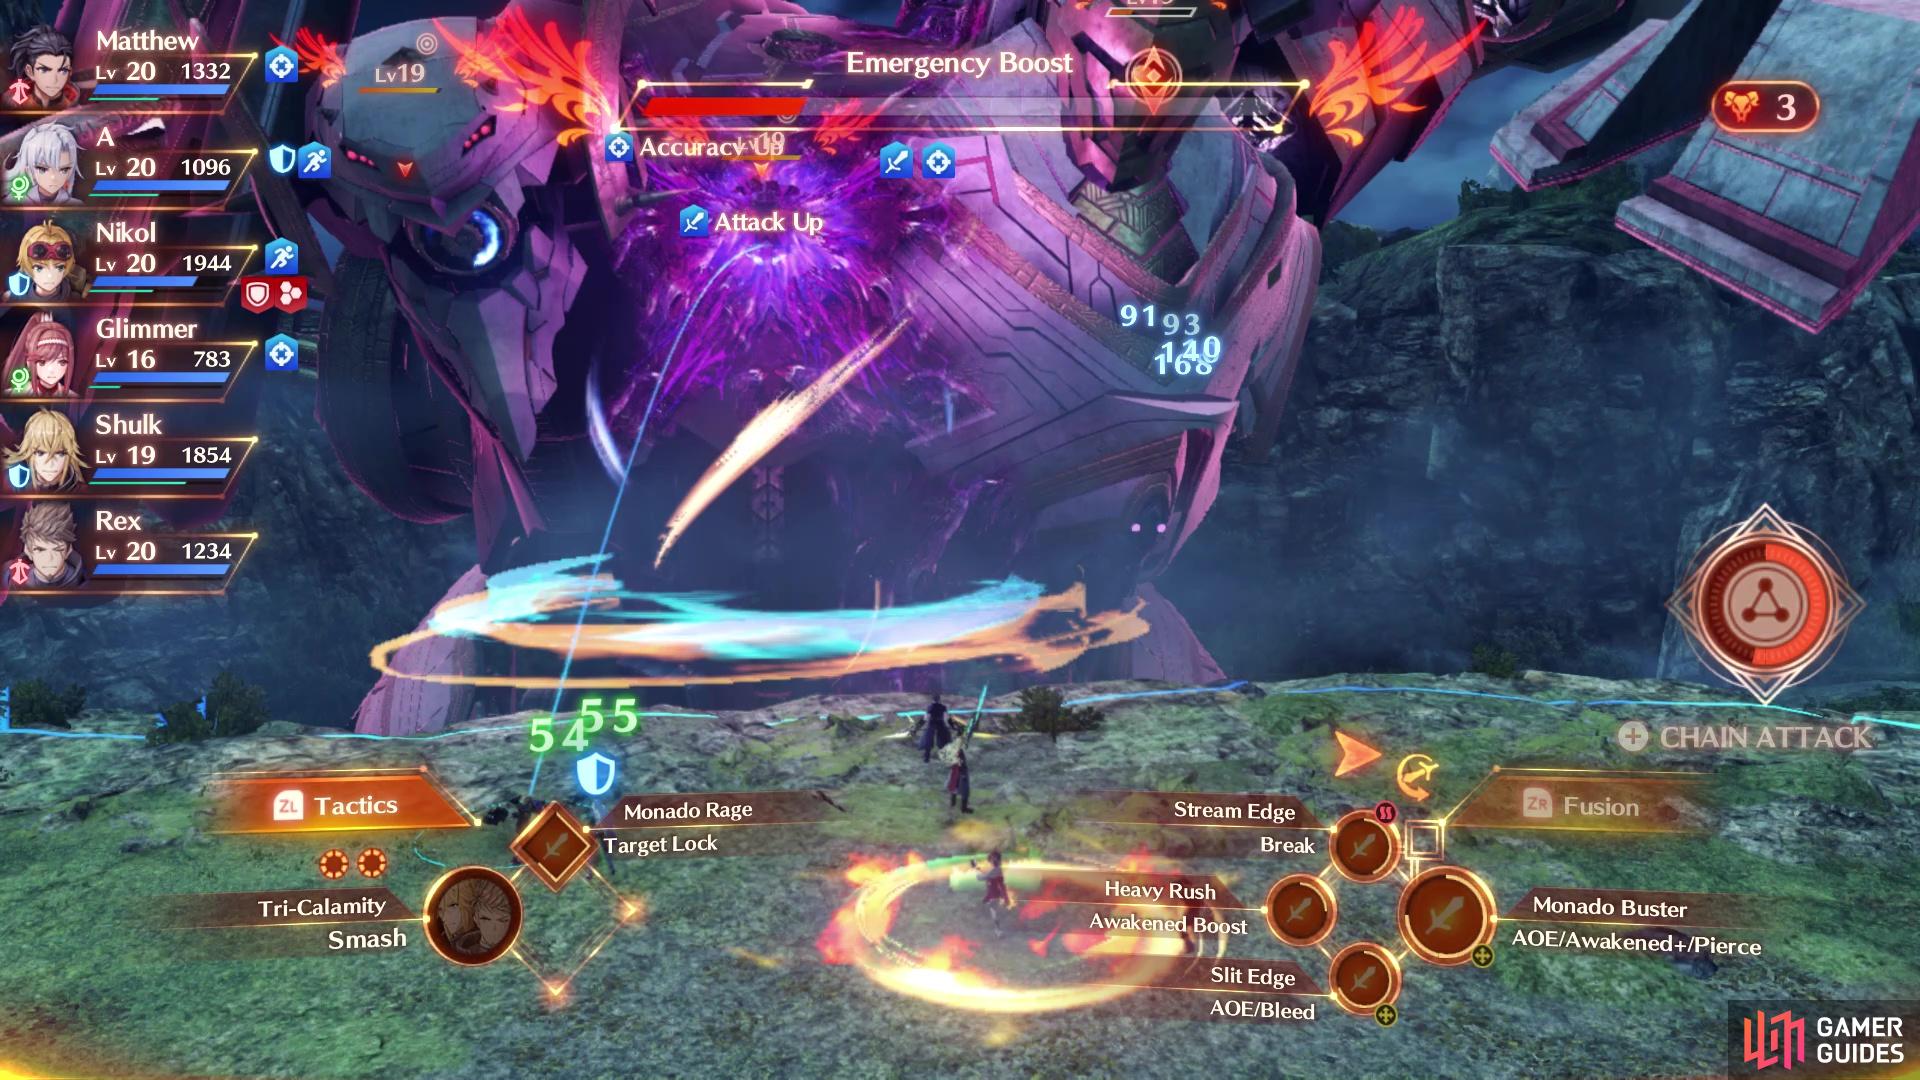
(1 of 2) Emergency Boost will buff up all enemies’ Attack and Accuracy
Emergency Boost will buff up all enemies’ Attack and Accuracy (left), The Ferronises can revive each other with Motes of Revival (right)
-
Doubled Destruction: Both Ferronises will begin charging, then shoot all kinds of lasers, attacking the whole party for major damage. As mentioned, both will need to be alive to do this attack.
-
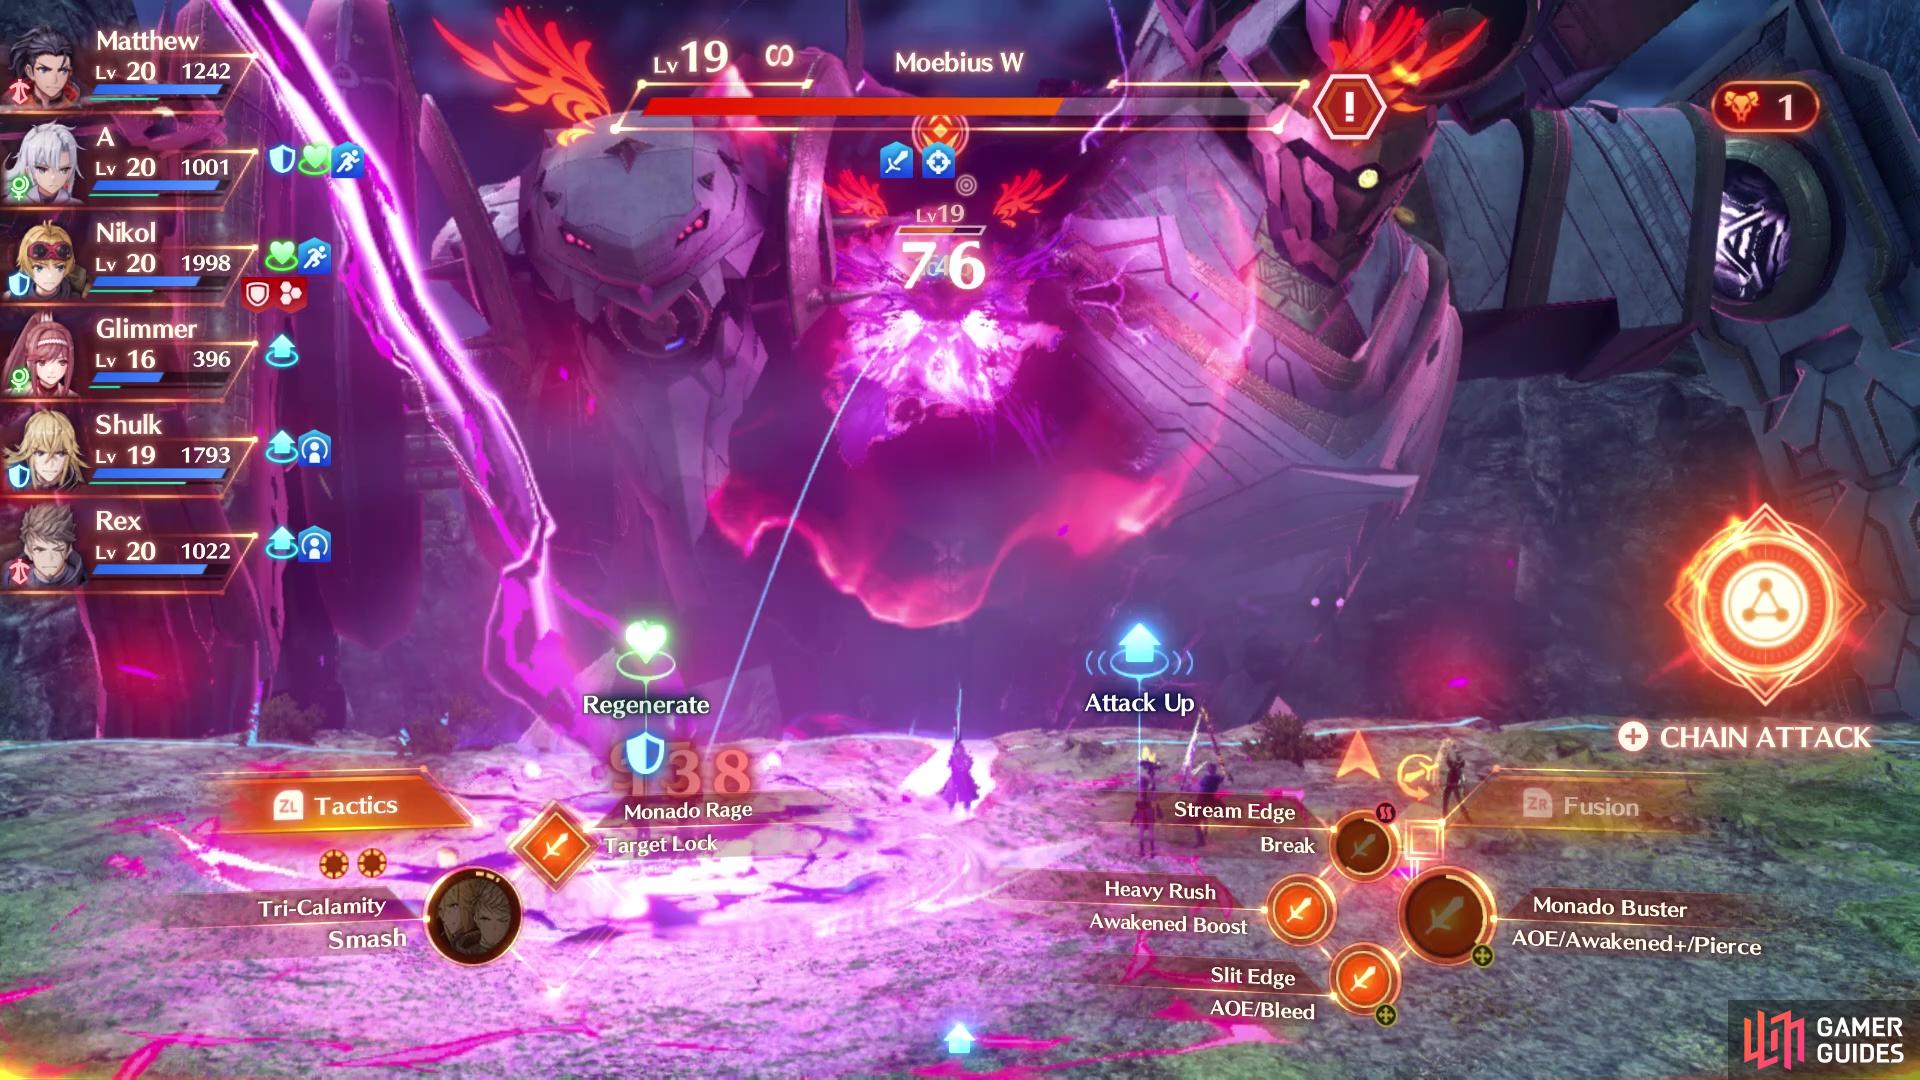
Limitless Lightning: This attack won’t be used until there’s only the Moebius left. Circles will appear on the ground and lightning will strike those circles. It seems the attack never ends and will continue until you defeat him.
As mentioned in the above paragraph, you will need to immediately target one of the two Ferronises on the sides of the Moebius and begin attacking them. Now, it should be noted that they can be revived, using Motes of Revival, so you may want to do a little thing to ensure this doesn’t happen. You could potentially concentrate on one of the Ferronises, whittle its HP down to almost nothing, then switch to the other and defeat it, before switch backing to the first and getting it before it revives the other.
The biggest problem with doing this is that you leave your party open to Doubled Destruction, a move that involves both of the Ferronises dealing pretty hefty damage to your party. The other solution is to fell one Ferronis and hope it doesn’t use the move above to resurrect the other. It should be noted that the Moebius won’t really be attacking you while the two Ferronis are alive, so you’re only technically fighting two enemies at once, in the first phase. Banish and Punish is a move you don’t want to see often, since it has the ability to inflict both Break and Topple (the second is worse, of course).

(1 of 2) Both of the Ferronis are susceptible to Break/Topple/Launch, so use them to your advantage
Both of the Ferronis are susceptible to Break/Topple/Launch, so use them to your advantage (left), The Moebius will only attack with lightning strikes when he’s alone (right)
Both Ferronis are susceptible to Break/Topple/Launch, which gives you some free damage time on them. In fact, you can time a Break/Topple, assuming it hits, to potentially stop the revival skill. The rest of the attacks from the two Ferronis aren’t too bad, as long as you keep your characters together enough for healing. Once you fell the two Ferronis, then Moebius W will be susceptible to normal damage. The only move he does is Limitless Lightning, which will continually make lightning strike the ground at the marked spots. The damage isn’t really all too much, so once you get past the Ferronises, then you should be able to quickly finish off the Moebius.
 Sign up
No Comments