Published Title Publisher
New Title Publisher
Updated Title
Published Title Score Editor's Choice
Published Title Score

Bravely Default

Purchase on Amazon

Game Settings

By
Vincent Lau

(1 of 2) You don’t NEED to change any settings, but it’s great to have the option, especially for those who like to customise their playing experience.

You don’t NEED to change any settings, but it’s great to have the option, especially for those who like to customise their playing experience. (left), (right)

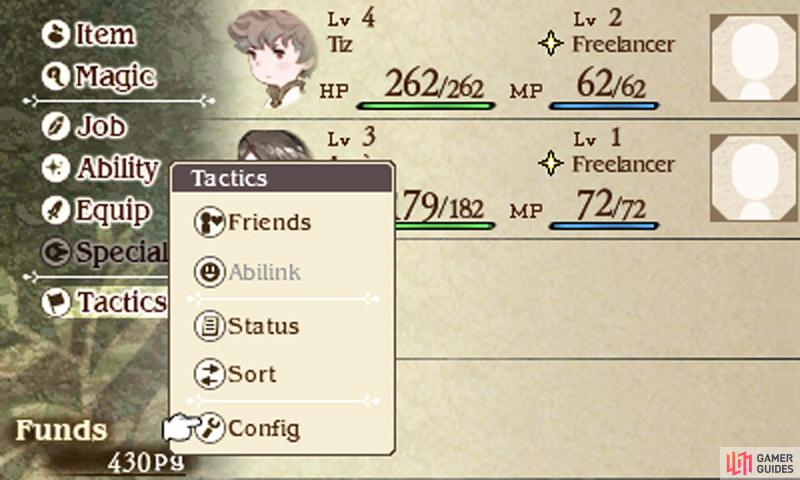
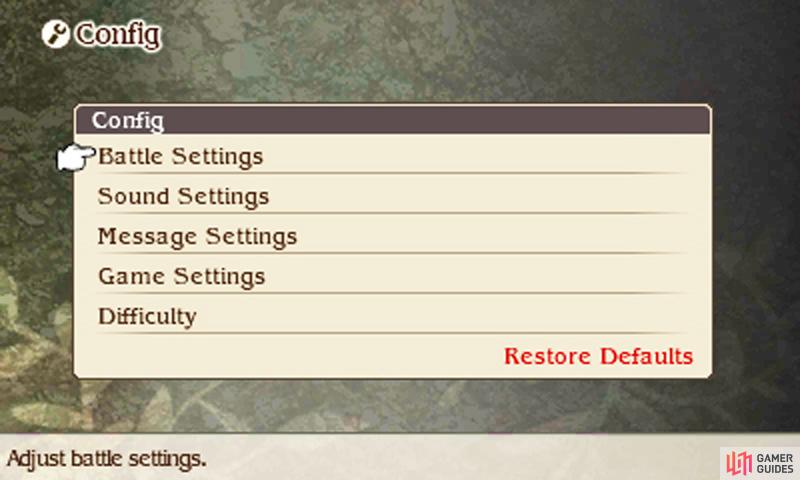
One of the best things about this game is that you can adjust a variety of settings to suit your preferred playing style. To change the settings, open the main menu (press X, START or SELECT when on the field) and go down to “Tactics” and then “Config”.

Battle Settings

Option Description
Confirm Turn Start If enabled, you must confirm all of your commands after inputting the last one. We advise you to disable this as it save you a button press each turn. However it can be useful for quickly revising commands for earlier characters.
Shortcut Settings Choose which of the L and R buttons to trigger Brave and Default
Update Data at Send If you change your Friend Summon, it will be updated right after the battle.

Sound Settings

Option Description
SFX Volume Adjust the volume of the game’s sound effects, like the menu blips and attack sounds.
Music Volume Adjust the volume of the game’s background music.
Voice Volume Adjust the volume of the spoken dialogue and battle grunts.

Message Settings

Option Description
Voice Settings Change the language of the spoken dialogue (English or Japanese).
Text Setting Change the language of the game’s text (six languages to choose from).
Message Speed Adjust the speed that the game’s dialogue and messages are displayed.
Auto-Play If enabled, dialogue will advance without requiring your input.

Game Settings

Option Description
L/R to Confirm/Cancel If enabled, you can confirm choices by pressing Right on the D-pad and cancel choices by pressing Left in addition to the A/B buttons.
Cursor Position If set to “Remember”, the game will retain the cursor’s placement for each character’s actions during battle. Otherwise it’ll begin at the top.
Autosave If enabled, the game will automatically save the game at certain points, usually when you change areas or floors. You can tell if Autosave is in progress by a feather pen icon in the top-left corner of the top screen.

Difficulty

Option Description
Destination Marker Displays the orange and blue exclamation marks on the map.
Gain EXP Gain experience points after winning a battle.
Acquire pg Gain pg (money) after winning a battle.
Gain Job Points Gain job points after winning a battle.
Difficulty Set the strength of enemies from Easy (weak) to Hard (strong).
Encounter Rate Set the rate of random battles from -100% (none) to +100% (double).
No Comments
Guide Information
  • Publisher
    Square Enix
  • Platforms,
    3DS
  • Genre
    RPG
  • Guide Release
    14 February 2014
  • Last Updated
    23 January 2021
    Version History
  • Guide Author
    Vincent Lau

Share this free guide:

Welcome to the most comprehensive guide to the Final Fantasy-esque JRPG from RPG veterans Square-Enix. Inside our essential guide to the entire game we’re leaving no stone unturned as we show you:

  • A complete breakdown of the combat and game mechanics.
  • How to rebuild Norende in record time (for the very best upgrades).
  • All of the Jobs and the craziest combinations to destroy all enemies with.
  • How to conquer the main story (and get the true ending).
  • Easy-to-follow tricks to pummel every boss into the ground with!
  • Every single item, weapon or piece of armor in the game.
  • A complete enemy bestiary (and what items you can steal from them).
  • Killer tricks needed to beat all of the ultra-tough Nemeses bosses.
  • Exclusive 720p HD videos.

Get a Gamer Guides Premium account: