
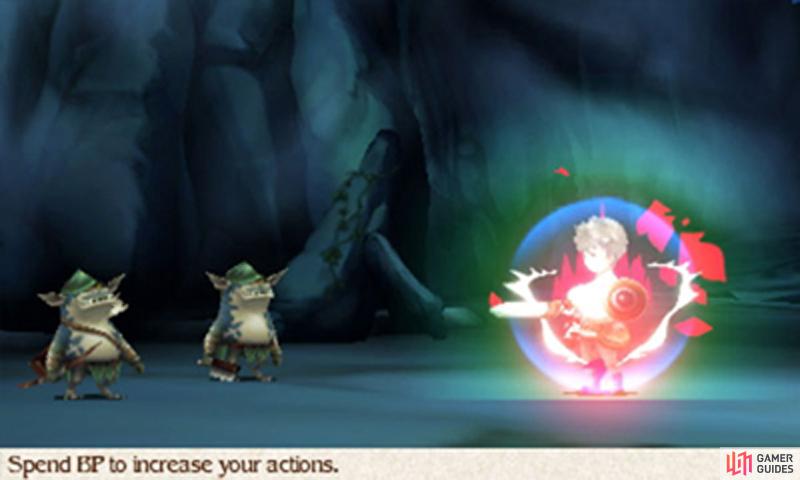
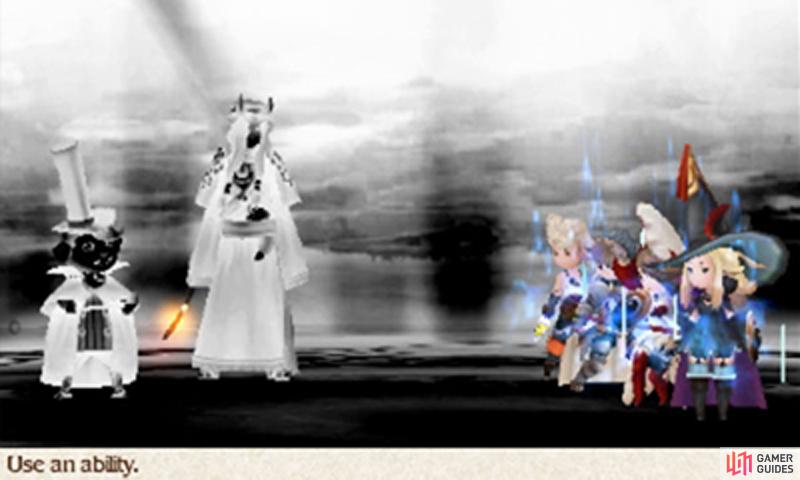
From here, the ante is upped as the number of enemies in battle increases slightly. The first battle inside the ravine will teach you about the Brave and Default system; read and follow the instructions carefully because–if you couldn’t tell from the game’s title–this system is crucial to the game!
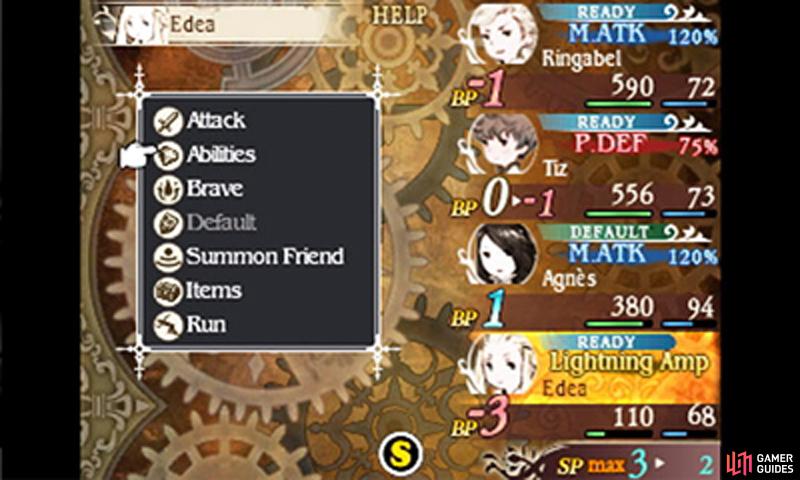
Brave and Default
To start with, try using Brave to increase the number of times you can attack; choose the Brave option once and instead of once per turn, you can attack twice per turn. However, you’ve used up one turn from the future, so you won’t be able to act the next turn, leaving you vulnerable to attack…
Next, try using Default to store up attacks. Choose Default and you’ll forfeit a turn, but you’ll take reduced damage and you’ll increase your BP (Brave Points) by 1. Now if you choose the Brave option once and attack twice, you won’t be left vulnerable for a turn because you have a spare turn to consume!
If all of this just goes over your head, just try playing around with the Brave and Default commands and you should get the hang of it before long–the main thing you may be left wondering is what’s the point of these commands? Why not just attack normally, once per turn?
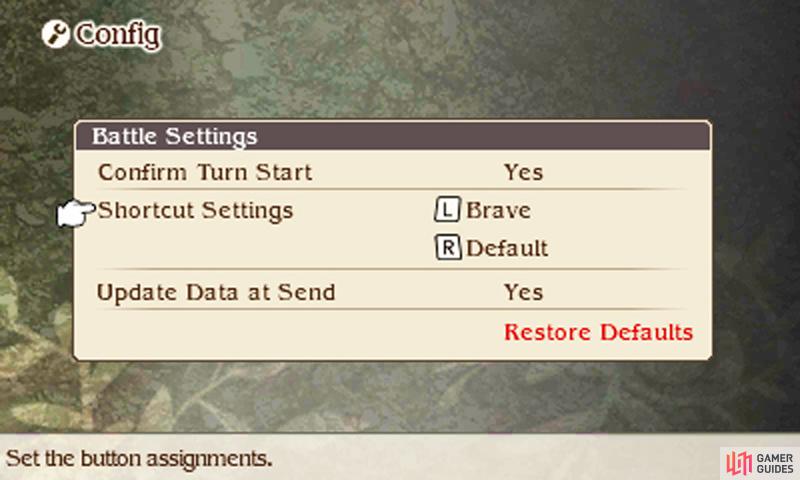
To speed up battles you can press L to Default and R to Brave (you can swap the buttons from the Config).
Consequences
Firstly, say, you know you can defeat an enemy in three turns. If you attack once per turn, you’re giving the enemy up to three chances to attack you. However if you Brave three or four times and then attack three or four times in one turn, you’ll only get attacked once or even not at all!
Trouble is, if you miscalculate and the enemy is still alive at the end, you’ll be vulnerable for a good number of turns, which can spell doom. So it’s very high risk, high reward, this Brave lark…
Secondly, what happens if you know the enemy is tough and won’t go down until several turns? There’s certainly no point spamming Brave at the beginning because you won’t kill the enemy. What about attacking once per turn? Is there a better method?
Well, you could use the Default command for three turns until you’ve reached max BP (3), then unleash all the attacks in one go with Brave. During the time you’re Defaulting, the enemy will still attack you ever turn, but for three turns you’ll receive reduced damage, which is better than receiving full damage for three turns!
Ravine Trail and Climb
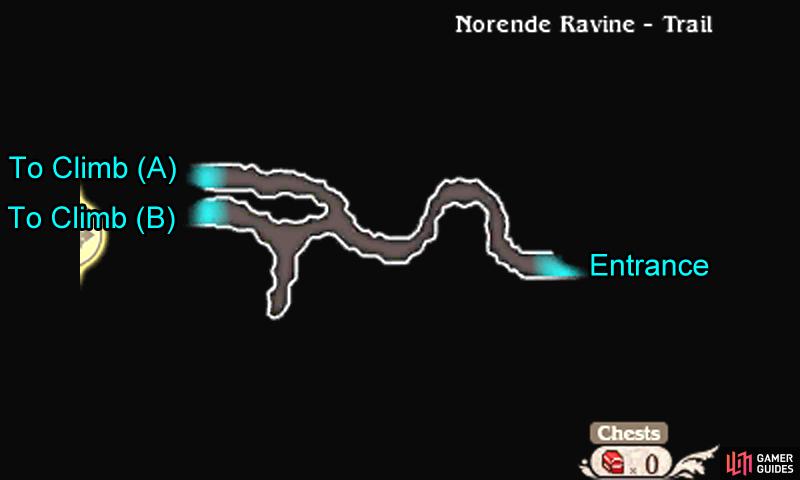
Once out of the battlefield, follow the narrow ravine trail left. If you check the bottom screen, you may notice the map is mostly empty to begin with; it will get filled in as you travel the dungeon, to keep you in suspense. Where there’s a fork, follow the bottom path to grab a chest containing a Potion. Next, follow the above path to reach the next area.
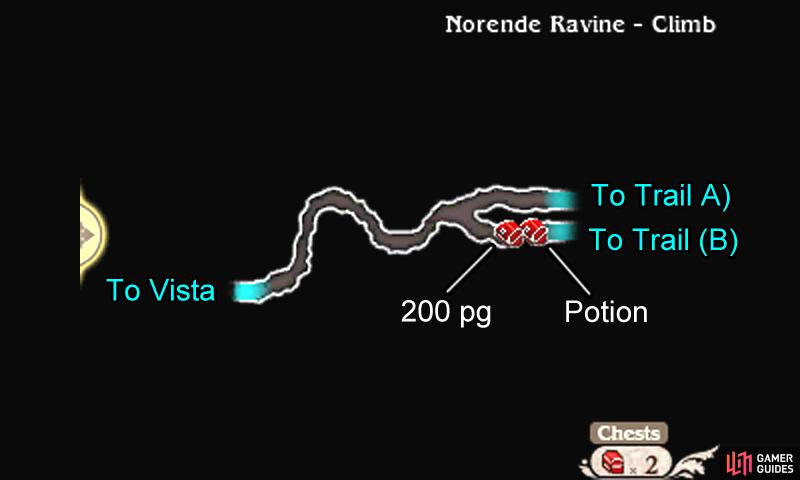
In the second screen, you’ll be at the ravine climb. Here, continue heading left, while cutting through the pesky goblins. Before long, there will be a fork in the path; go backwards along the bottom path to grab a chest containing 200 pg. From here, continue left all the way along the narrow climb to reach the next screen.
Ravine Vista

You’ll arrive at the vista for the third and final screen. Make your way ever leftwards to find the ever-cheerful Adventurer standing before the exit; speak to him to save the game. You will also receive the Strange Hourglass, which allows you to activate Bravely Second in battle.
The game will teach you abou Bravely Second and Sleep Points. This feature bothers some players, as you can buy Sleep Points (required for using Bravely Second) using real money. However, at no point in the game are you required to do this.
Bravely Second isn’t required at all, but if you use it well it can make your life much easier.
No Comments