
If you look above each pair of doors, you should see an engraved symbol. So if there’s a sun above a door, we’ll refer to it as a “sun door”.
To advance through these ruins you’ll have to use your noggin a little. On each floor, there are pairs of doors–one open and another closed and a crystal switch nearby to flip their states (the open door will close and vice versa).
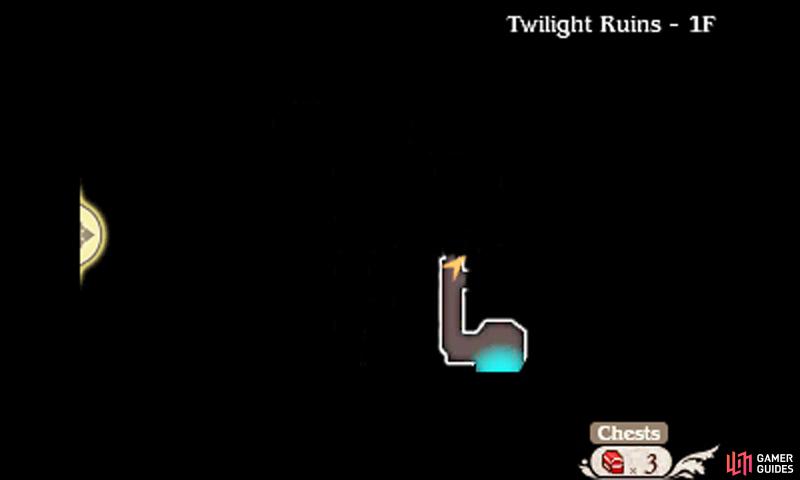
Floor 1

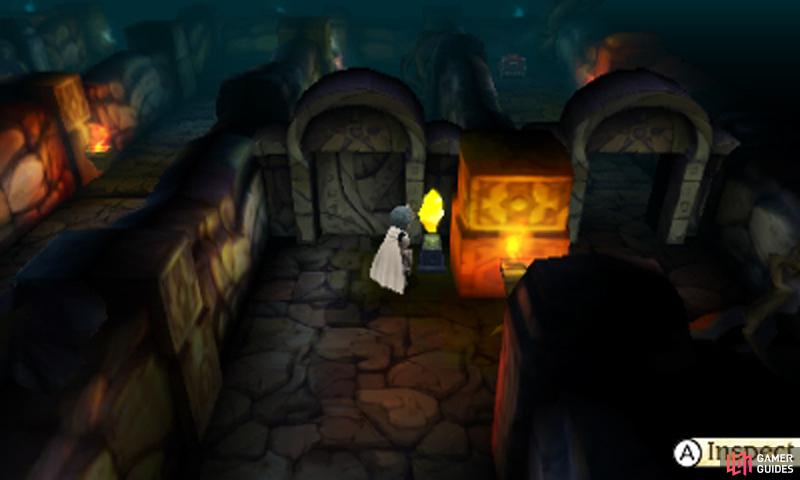
From the entrance, you will find a pair of star doors just ahead–go through the open star door to find a chest with a Hi-Potion inside. Next, inspect the yellow switch by the doors to close the right door and open the left door; then proceed through the newly opened door.
To the west, there is a pair of moon doors. Toggle the green switch to open the door to the chest containing an Ether. Inspect the green switch again to revert the doors to their original states, then proceed through the open moon door. At the junction, turn right for a chest with a Remedy and head left for the stairs to the next floor.
Basement Level 1; East

Downstairs, head on through the open star door ahead to find a treasure chest stuffed with 5000 pg. Next, inspect the yellow switch by the door to close the door above and open the door below; then follow the now-unobstructed passageway downwards.
Soon you’ll encounter a pair of moon doors, with a pair of sun doors ahead. Pass through the currently open doors to retrieve a Zeus’s Wrath from a chest. Next, toggle the red switch by the sun door, then return to the moon doors and toggle the green switch. The path to the left will now be open.
Beyond, there’s a junction after turning a bend; if you continue left from here, you’ll find naught but a dead end, so head downwards instead. Very soon, there’s another junction–head left for stairs to the next floor or continue down to discover a chest containing 1000 pg.
Basement Level 2

Further downstairs, there will be three paths ahead of you, although only one is open. First, head for the right-most star door and toggle the green switch past it to open the moon door ahead–beyond, there’s a chest with a Birch Bow inside. After claiming your treasure, toggle the green switch again to close the nearby moon door so your future path is open.
Secondly, toggle the yellow switch next to the right-most star door to open the star door to the far left. Past the new star door, toggle the blue switch to open the teardrop door ahead–beyond is a chest with a pair of Hermes Sandals inside. We recommend you equip these on your healer so they can heal before enemies attack.
When you’re done, toggle the blue switch again to close the door ahead and keep your future path open. Finally, take the central path, past the open teardrop door, and follow the path as it goes around the room.
When you reach the west side, there will be a pair of sun doors. Continue through the open door for a chest with an Ether inside. Finally, toggle the red switch to open the sun door on the left side–beyond is the stairs to the next area. For reference, there’s a blue locked chest in the bottom-left corner.
Basement Level 1; West

Now it’s time to make sense of this mess of doors. First, pass through the open star door to the right and, from there, the open sun door to the right, where a chest with a Turbo Ether awaits. Toggle the red switch to make the right sun door slam shut and open the sun door in the path to the left.
Follow the path left, past the open moon door and then the sun door to find a chest containing an X-Potion. Return to the moon door and toggle the green switch next to it to open the moon door in the branch to the left.
Make your way back to the beginning of the doors and toggle the yellow switch by the right-most star door to open the left-most one and then follow the branch left. Next you’ll come across a pair of teardrop doors; toggle the blue switch to open the teardrop door to the left, where you’ll find a chest with a Dark Charm at the end.
Finally; toggle the blue switch again and if you did everything correctly, the path ahead from the switch should be open. Beyond you’ll find the Adventurer and the dungeon’s exit. Once you’re clear, you’ll arrive at the hidden village, where a boss battle will soon begin…
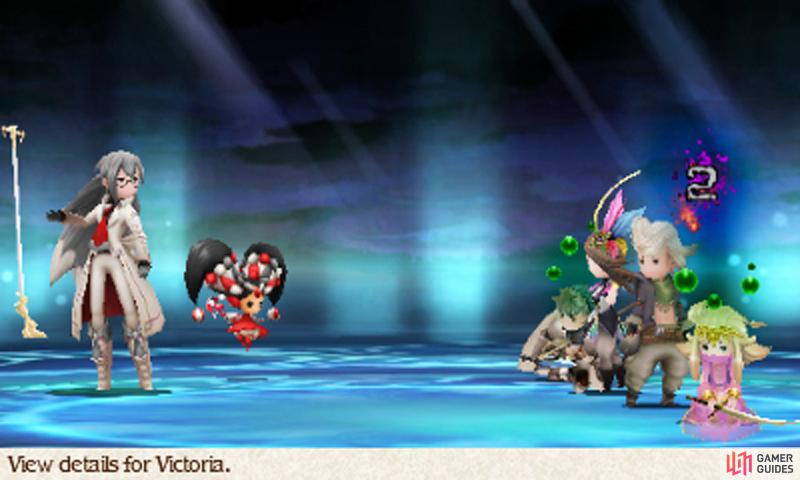
Boss: Victor and Victoria
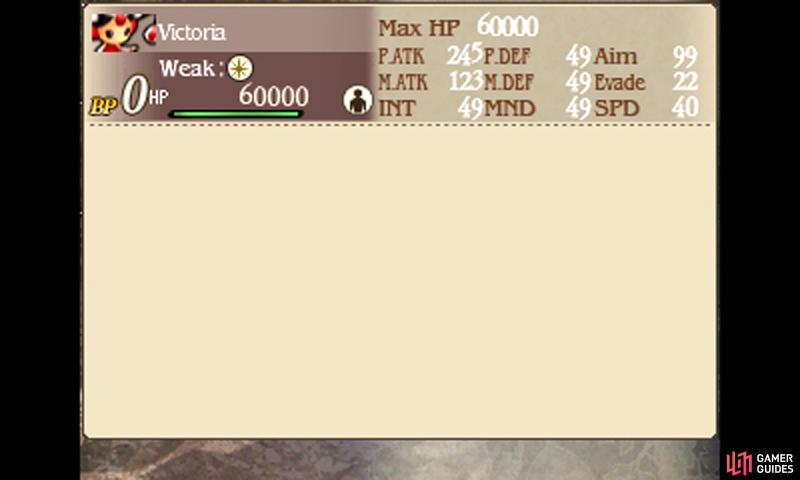
| Level | HP | Weak to |
|---|---|---|
| 45 | 80,000 (Victor), 60,000 (Victoria) | Dark (Victor), Light (Victoria) |
This battle is difficult because you can’t win. Victor and Victoria are absolutely insane for your current level, so don’t bother trying to defeat them–just try your best to stay in the game. Cast Rise and use Phoenix Downs if anybody dies; otherwise keep using Default and Cura.
Equip the Dark Charm on a character to offer some resistance against Victoria and cure Poison ASAP or you’ll receive massive damage from Exterminate. Survive for five turns and the duo will flee the scene, which is extremely fortunate for you, as any longer and you probably wouldn’t be able to hold up.
If you’re feeling plucky, you can try to steal from Victor (Amulet) and Victoria (Force Bracelet), but it won’t be easy given the limited time and the duo’s strong attacks. The items they’re carrying can be purchased later, so don’t feel obliged at all.
Should you have friends much further ahead, you can use their game-breaking friend summons to wipe out Victor and Victoria. Perhaps it’s possible you’re actually strong enough to defeat them… who knows? In any case, the end result will be the same whether you fell them or not.
After that dangerous encounter, it’s time to pack your belongings and return to the Temple of Water. No matter what happens, you have a task you must fulfil.
No Comments