
While you’re here, if you couldn’t afford all of the new weapons or armor before, now might be a good time to have another look.
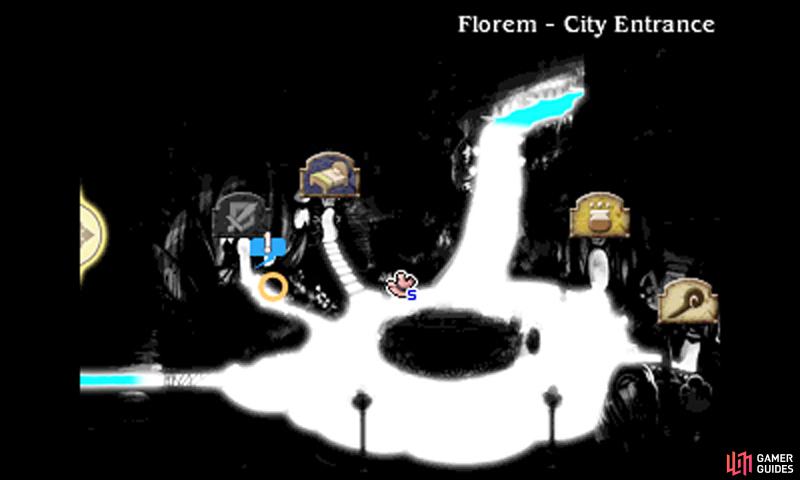
This sub-scenario appears alongside the Ranger one. First, head towards the top-left corner of Florem‘s city entrance and pay the Armory a hearty visit. You’ll learn that, in their search for the fabled spirit hairpins, two young girls have wandered off into the dangerous gardens west of the city.
Of course, being the noble hero you are, it’s your job to bring them back to safety. Exit Florem and head due west until you’re clear of the river, then meander your way to the north, where the blue exclamation mark lies.
To The Rescue!
Soon, you’ll encounter the two girls and already they’re in danger as a pack of monsters ambush them. You’ll now face six Alraunes at once–they may look cute, but they’re vicious little buggers, using Paralyzing Pollen to stun your characters (unless they’re wearing an Earthing Rod). Clear out the mob with fire attacks (Fira, preferably) for an easy victory.
With that little crisis averted, the girls thank you before gleefully continuing in the direction of the gardens. Brave little troopers aren’t they, despite the danger they were just in? Anyway, you’d best follow them or they’ll become food for the next pack of monsters…
Back on the world map, head in a north-westerly direction and you should find a large, cavern-like landmark standing out amongst the greenery–this is the entrance to Florem Gardens, your next dungeon.
South

Your trip in the gardens begins in the south part; follow the path anti-clockwise and you’ll find chests in the top-right corner (500 pg), center (Hi-Potion) and bottom-left corner (X-Potion). In the top-left corner there will be two exits next to each other–both will take you to the central part, but it may save time to take the right one first.
Central

Through the right exit, carry on right until you find a chest with a Tomahawk inside, then return to the previous area and take the left exit. Past the left exit, follow the path ahead and you’ll find two chests in the center (Ether and 1000 pg) and the exit to the next area in the top-left corner. To the right of the exit is another teasing locked chest.
Interior

Finally we come to the interior section; here, you’ll need to detour around a lot of purple flowers, although you’ll need to cross through to reach some of the chests. The chest in the bottom-left corner (Remedy) is clear of purple flowers, but you’ll need to cut across the flowerbeds to reach the chests in the center (Turbo Ether) and bottom-right corner (Tengu Yawn).
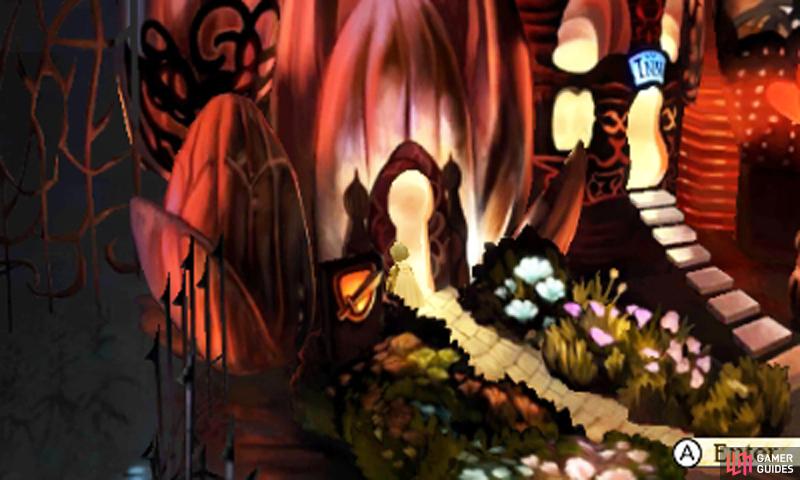
It may help to disable encounters while you cut through the flowers, in case you enter a battle with a disadvantage. At the very north, you’ll find the exit and the ever-helpful Adventurer. On the other side, you’ll emerge in the Florie’s Dwelling; this magical place is home to Florem’s guardian spirits, but evil lurks nearby…
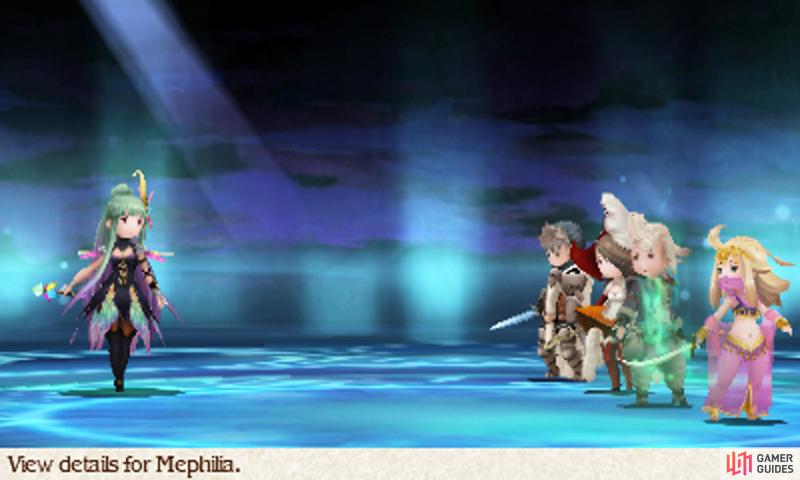
Boss: Mephilia Venus
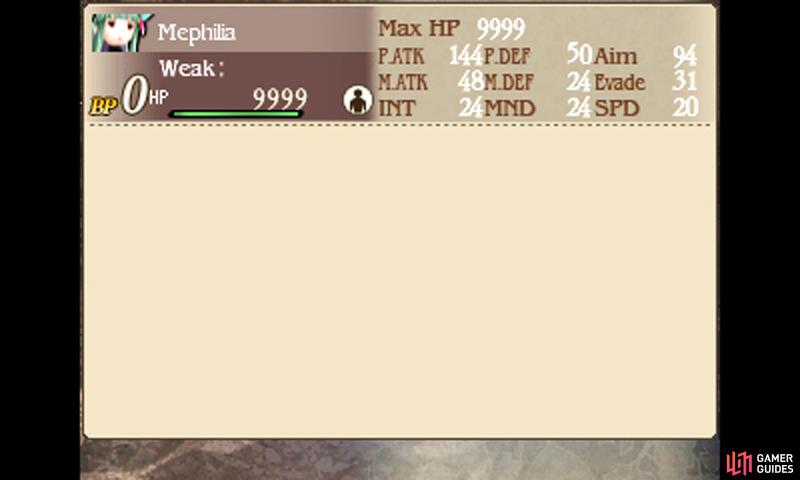
| Level | HP | Weak to |
|---|---|---|
| 25 | 9999 | Nothing |
The Summoner doesn’t look very threatening, but wait until you see the power of her destructive summons! About every three turns, Mephilia will summon Girtablulu, which does massive earth damage to your party. Be sure to Default before she lets loose her summon or you could get wiped out.
We recommend starting this battle with the best equipment from Florem and Cura available (requires a Level 6 White Mage) for optimum healing. It also wouldn’t hurt to have a couple of levels under your belt (we were Level 23, but you can easily get higher).
Hurting Mephilia isn’t hard–it’s keeping up with her damage that’s tricky. After summoning Girtablulu the first time, Mephilia will summon a Legion Impaler and Archer to back her up–slay them ASAP (thunder magic or sword magic is good against the Impaler).
The Archer can cause confuse with Chaos Arrow, ruining your plans. Otherwise, Default to build up your BP and unleash your attacks when it’s safe to do so (i.e. after she summons Girtablulu). Cura is a godsend in this battle–don’t hesitate to group-cast it twice when things are getting heated.
No Comments