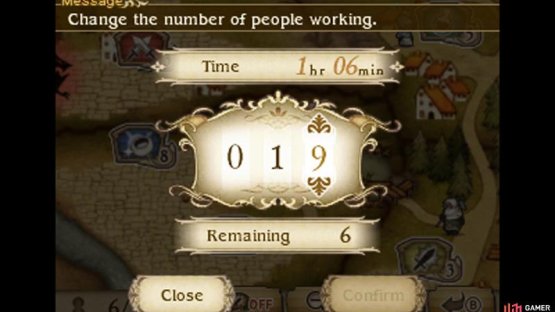
(1 of 2) As they say, “time is money”. So it’s a good idea to manage your time as efficiently as possible!
As they say, “time is money”. So it’s a good idea to manage your time as efficiently as possible! (left), (right)
You’ll notice (via our example below), that the time reduced by adding more villagers gets worse when you reach a certain point (meaning that chucking 20 people on one build isn’t the most efficient way of doing things). Whilst we’ll highlight what we think is the most efficient number of people to use; we’ll leave it up to you to decide how to prioritize your villagers with the data offered on the next few pages.
The Laws of Diminishing Returns
One key thing to note about the timescales aspect is that it’s not always best to use every person you have on a single building/access path. At some point; adding more people actually becomes a waste of time. Let’s take a look at an example to show you what we mean…
| Number of Villagers | Time Taken | Additional Time Saved |
|---|---|---|
| 1 | 9 Hours | N/A |
| 2 | 4 Hours 30 Minutes | 4 Hours 30 Minutes |
| 3 | 3 Hours | 1 Hour 30 Minutes |
| 4 | 2 Hours 15 Minutes | 45 Minutes |
| 5 | 1 Hour 48 Minutes | 27 Minutes |
| 6 | 1 Hour 30 Minutes | 18 Minutes |
| 7 | 1 Hour 17 Minutes | 13 Minutes |
| 8 | 1 Hour 07 Minutes | 10 Minutes |
| 9 | 1 Hour | 7 Minutes |
| 10 | 54 Minutes | 6 Minutes |
What the table above shows is that once you hit five villagers helping at once; the value of the additional helpers drops dramatically. Sticking five villagers on it will save you 7 Hours and 12 Minutes (compared to just using one villager), compared to using 10 and only saving 8 Hours and 6 Minutes .
So those extra 5 villagers are only shaving off an additional 1 hour and 6 Minutes . Clearly that’s not worth it, so it’s important that you’re not using more villagers than you need to on any given shop upgrade/access point.
| Number of Villagers | Time Taken | Additional Time Saved |
|---|---|---|
| 1 | 99 Hours | N/A |
| 2 | 49 Hours 30 Minutes | 49 Hours 30 Minutes |
| 3 | 33 Hours | 16 Hour 30 Minutes |
| 4 | 24 Hours 45 Minutes | 8 Hours 15 Minutes |
| 5 | 19 Hours 48 Minutes | 4 Hours 57 Minutes |
| 6 | 16 Hours 30 Minutes | 3 Hours 18 Minutes |
| 7 | 14 Hours 08 Minutes | 2 Hours 22 Minutes |
| 8 | 12 Hours 22 Minutes | 1 Hour 46 Minutes |
| 9 | 11 Hours | 1 Hour 22 Minutes |
| 10 | 9 Hours 54 Minutes | 1 Hour 06 Minutes |
Spotting a pattern here? Once again we see that after putting five villagers on the job; the time an additional villager saves starts to become less and less.
So in general the best person to time-saved ratio is five villagers per job . Keeping this in mind will maximize their value and minimize the time you need to spend on getting these game-changing buildings up quickly.
Once you’re nearing the end of rebuilding the village then it clearly makes sense to ignore this idea and just put as many people to work on a remaining area until it’s all complete.


No Comments