
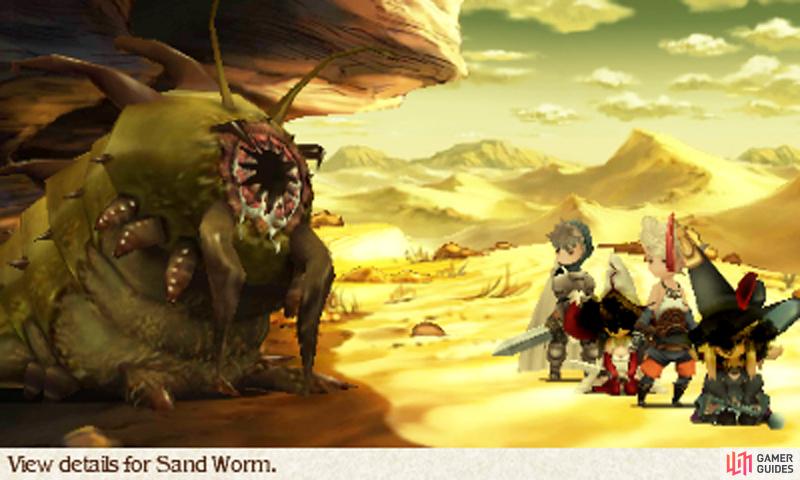
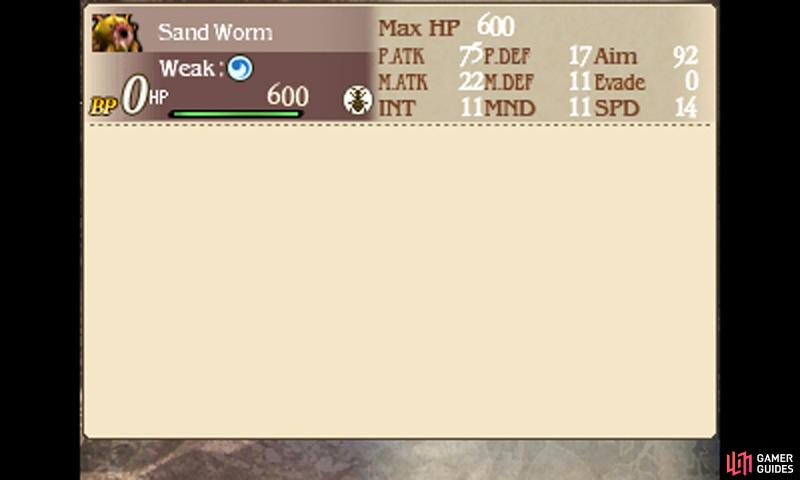
The Sand Worms are a real pain as they can blind your entire party in a single shot! Very annoying if it happens on the first turn.
To begin this sub-scenario, head for the blue exclamation in the city of Ancheim, to the far right of the city. You should find yourself standing in front of a large building by the edge of town–go inside and you’ll meet Profiteur of the local merchantry.
Next, leave the building and inspect the water well immediately to the left; a merchantry soldier will stop you and tell you to go to the oasis outside of town. Exit the city and set a course west towards the next blue exclamation mark, where the oasis is located.
Enter the oasis and you’ll encounter a civilian fleeing from a pack of thieves–and the thieves are right behind you! Fortunately, the thieves don’t want to pick a fight, but you’re not just going to let them walk off, right?
Back outside on the world map, chase the thieves by heading for the new blue exclamation mark further west, until you spot a cavern on the side of the mountains. Enter and you’ll be inside Harena Ruins–a dungeon not for the faint-hearted.
Floor 1

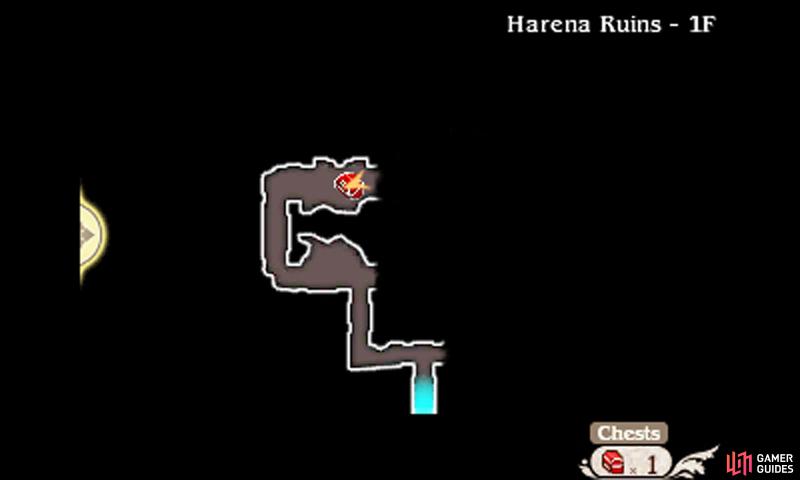
To start things off; make your way to the top-right corner to discover a flight of stairs leading down to an isolated room. As you turn the corner towards the chest, make sure to run as you turn or you’ll get blasted by black gas from the statue ahead, causing blind to all characters.
Open the chest to find a Star Pendant (negate poison). If your characters get hit by the gas, use the White Mage‘s Blindna or Eyedrops to see again. When you’re done looting the chest, return up to the first floor and head for the top-left corner this time.
After the initial junction, you’ll turn two corners. Pass this, there’s a gas-spewing statue just ahead and a chest containing a measly 1 pg. Yay!? Continue following the path and you’ll find a second set of stairs leading down.
Try to open chests while standing away from the statues. Because the gas can still blind you as you’re opening a chest (and the text prompt appears on-screen)!
If there are only two enemies in a group, unleash four attacks on the first turn with two to three strong characters to dispose of them. If there are three, you’ll need to use your judgement–three strong characters all attacking four times can take them out most of the time.
When facing a group of Great Caits and Sand Worms, kill the Sand Worm quickly or you may get blasted by a Sandstorm critical… At times, you may wish to go into negative BP even though the battle will continue, leaving you immobile, just to remove some annoying enemies.
Basement Level 1

Downstairs again, watch out for a statue just below, which spews gas leftward. Begin by heading left where there’s a chest containing one Echo Herbs. Next, follow the path down until you reach a junction. From here, head right, but keep to the bottom of the path.
At the end, there’s a chest, but also a statue spewing gas leftward. Stay near the bottom and you’ll avoid the gas; wait till the gas finishes spewing, then grab the chest, containing a healthy 1500 pg. Next, head left and take the first passageway going south. Be sure to run straight down as there’s a statue ready to spew gas in your face.
Past the corner; there’s a chest containing a Clothespin (negates Sleep). From the statue, head left and keep to the bottom again to avoid another pesky statue at the end. At the next junction follow the path down to find stairs leading further down.
Basement Level 2

Downstairs, you’ve got a long road ahead of you still, but the end is almost within sight. If you’ve been relying on White Magic for healing, you might find your MP running dangerously low. At this stage, you may want to switch to Potions for healing HP instead.
If you have the Thief’s Knife equipped, you can use it in battle via the Item command to steal items from enemies AND do damage.
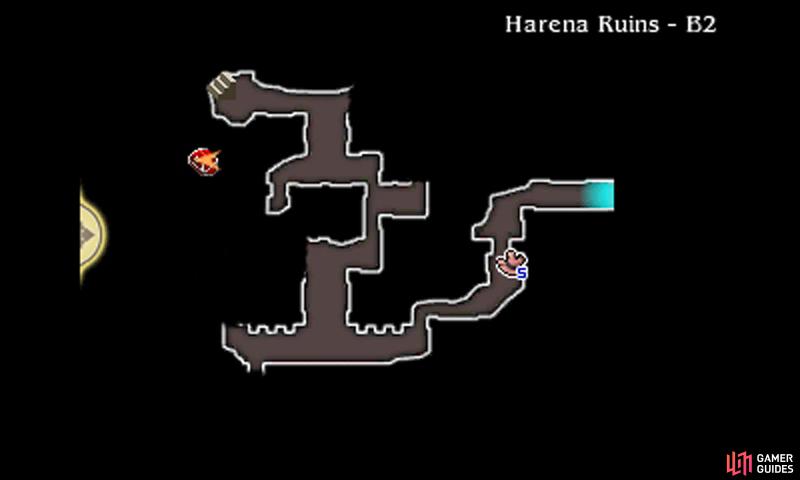
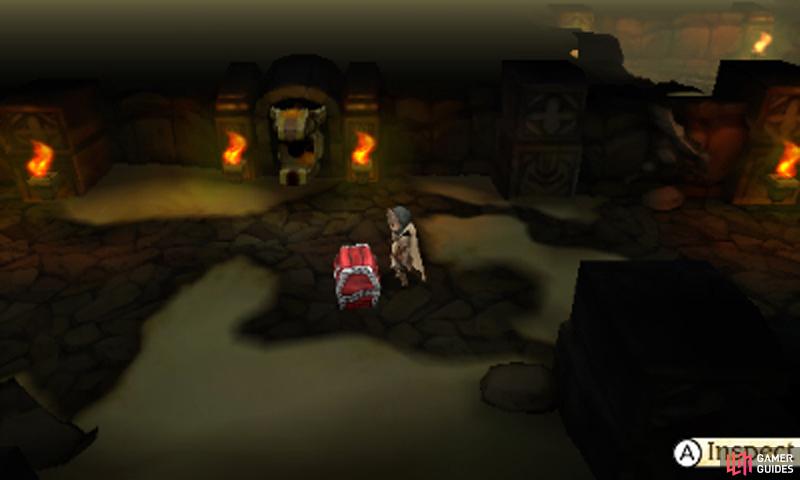
Next, make your way right, minding a gas-spewing statue in the corner, looking down. Follow the path right to find a chest containing an Ether–useful if you need to restore MP. As you head down, you should come across another of those blue locked chests; if you’ve forgotten, you can’t open these until MUCH later in the game.
Head further down from the chest and you’ll come across an unfriendly sight–a junction with rows of gas-spewing statues on both routes. Take a deep breath and first run left; don’t pause for a breather! At the end, you’ll want to run to the left of the chest to avoid the very last statue. Crack open the chest to find yourself a pair of Thief Gloves.
With your vision back to normal, you can continue with the onslaught of attacks. After grabbing the chest, you now have to run all the way back… Halfway along the way, take the passageway down to find a chest containing an Iron Bow. Finally, it’s time to run the other direction… but it’s not so bad, as there are only three statues.
Once you’ve caught your breath, speak to the Adventurer and prepare for the coming battle. Oh yes, as if the dungeon wasn’t an ordeal enough, you have to battle a big bad boss too! Exit via the right and you’ll appear in the Thieves’ Den–a veritable treasure trove. Atop the stairs, where the blue exclamation mark is, you’ll find your mark or has he found you?
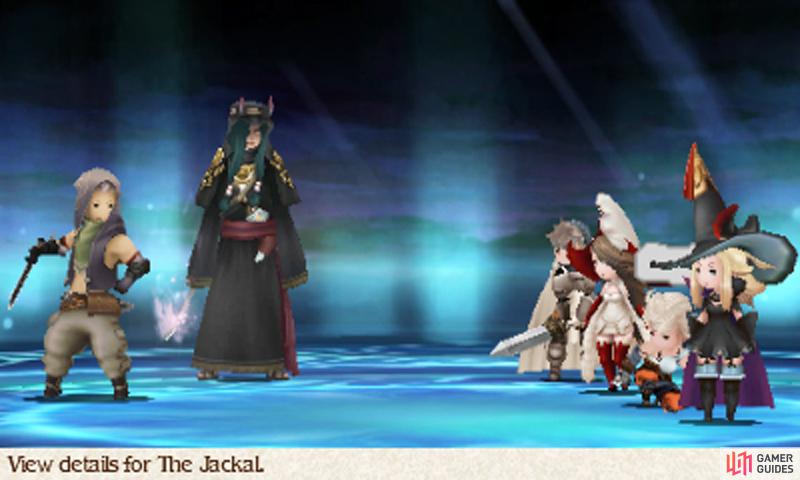
Boss: The Jackal and Khint
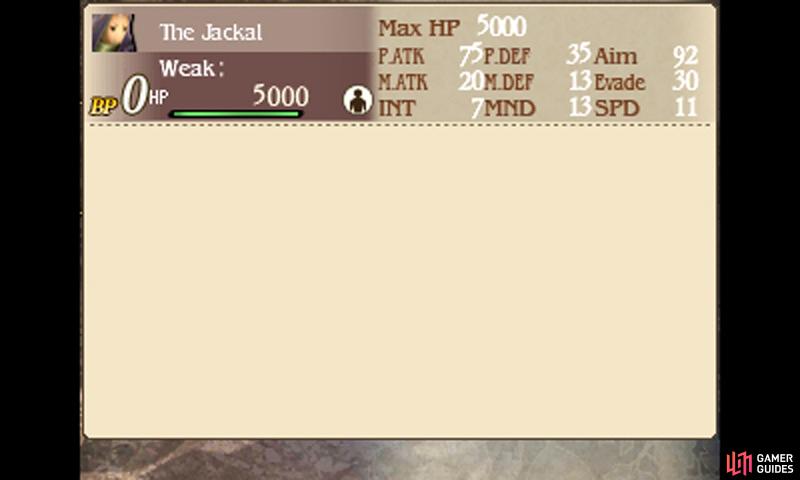
| Level | HP | Weak to |
|---|---|---|
| 13 | 5000 (Both) | Nothing |
In this battle, you have to face two tough dudes. Unless it’s necessary, avoid attacking Khint, as he’ll leave midway through the battle. Instead, Default until The Jackal Braves, then pile your attacks onto him (but don’t go into negative BP).
An excellent way to speed up this battle (and many of the early bosses) is to unleash all your Special Moves from the start, as well as summoning any (strong) allies you’ve met or downloaded over the internet. This’ll cause massive damage straightaway and make the battle considerably easier/shorter.
Having exhausted your aces, continue to pummel The Jackal with your strongest abilities (such as the Knight‘s Stomp); avoid using normal attacks because of the Thief’s high Evade. If you can spare the MP, you’ll likely do more damage with Black Magic, since The Jackal and Khint both have low magic defence.
Once The Jackal or Khint goes below half HP, Khint will flee the battlefield–so if you only damage Khint, you’ll have wasted your attacks. If you have any Hi-Potions on you, The Jackal can steal them and then use them later to restore his or Khint’s health. Be sure to sell all your Hi-Potions before the battle, like we warned you!
After driving off Khint, the battle will become easier. Now The Jackal will Brave three times and attack four times during one turn–be sure to Default to withstand his onslaught. Then heal your party and Brave three times yourself. If you have a Knight with the Two-Handed ability, now is the time to Stomp to victory.
With the thieves out of business, you might think it’s case closed. Not quite, as Ringabel flashes a suspicious note that seems to tie a certain merchant to the thieving ring. Ooh, the plot thickens…
No Comments