
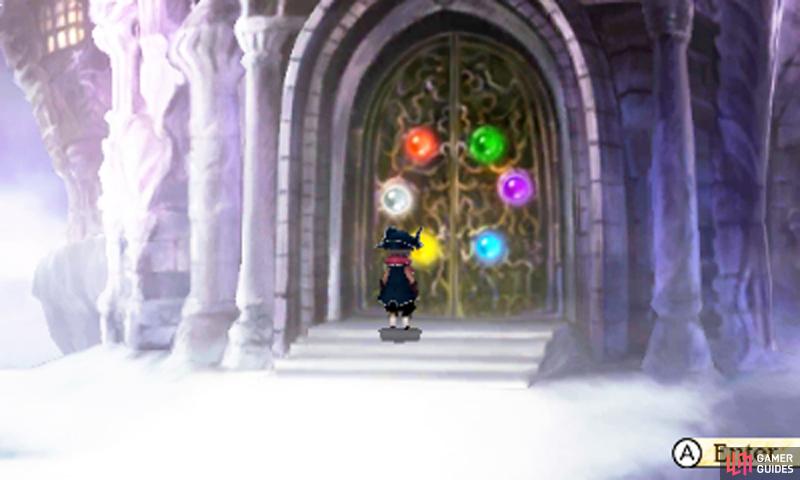
Have the garlic at the ready; we’ve got a Vampire to stake!
So how did you like your dragon-slaying side-adventure? To reward your valiant efforts, you can now explore Vampire Castle–possibly the toughest dungeon in the game–and fight one of the toughest bosses to boot. What joy! However, like always, we’ve got your back; just make you’ve got enough stakes and garlic, alright?
Floor 1

From the entrance, head left and immediately hug the wall along the bottom to discover a secret passageway leading to a chest with a Bloody Blade (use it as an item to imbue your weapon with Drain). Next, head for the top-left corner to find a blue locked chest (which you can’t open now, of course).
While you’re here, follow the corridor right from the entrance towards a chest in the bottom-right corner (not in the dead end to the left) that contains a Dragon Fang. Finally, head straight up from the entrance to meet DeRosso and learn about one of his fancy paintings. Afterwards, head left from the painting to grab a Safety Ring or right to find stairs leading up.
To not get totally mauled, give your party appropriate protection against fire (Fire Charm or the Black Mage’s Abate Fire), charm (Rebuff Locket or the Performer’s Charm Immunity) and confuse (Peace Ring or Swordmaster)‘s Confuse Immunity). Even with these defenses, you still need to weather the monsters’ damage.
Ninjas with Utsusemi are good for evading physical hits, while multi-hitting attacks should be used against the Cerberus to avoid Payback. If you’ve been grinding or have awesome Abilinks, Arcanists are great with their Exterminate and Twilight, but you’ll need Group-Cast All from a Level 14 Black Mage for best results.
Floor 2

Up on the second floor, turn right at the first junction, after going around the corner, to find a chest containing a super-awesome Hermes Shoes–this vital piece of footwear raises your Agility by 20 points and should be fitted on your healer. Head back a bit and follow the remaining corridor down and left, while being thoroughly creeped out by the sound of bats.
Upon reaching the junction, turn left to find a chest with a Black Belt and turn right to find another painting. From here on, you can choose to inspect the paintings to learn more about the history of Luxendarc. Personally we love the history lessons, but don’t feel obliged to listen if history’s not your favorite subject.
Head left from the painting to find more stairs leading up–this is going to be a long climb, just letting you know.
Floor 3 and 4

On the third floor, head straight down to find the Soul of Thamasa inside a treasure chest at the end. Next, go backwards to the junction prior and follow the corridor to the right, as it twists and turns all over the place, eventually leading you to the third floor’s painting. As before, the stairs to upstairs can be found near the painting–this time on the right side.
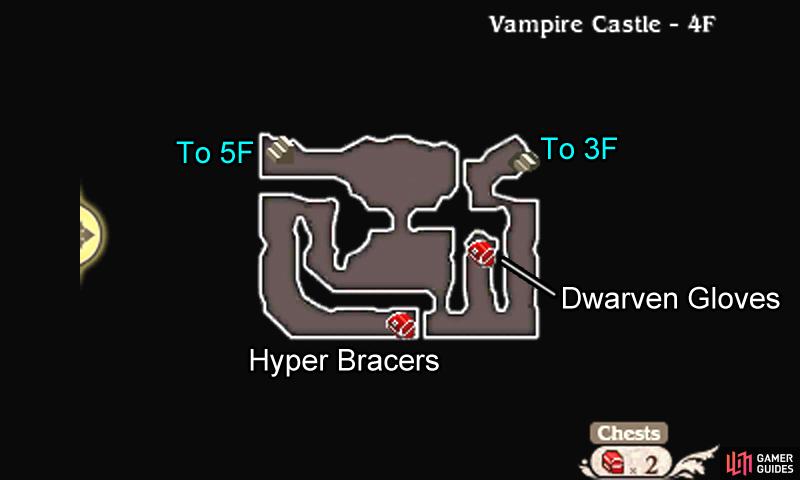
Up on on the fourth floor, we hope your legs are still with you. Follow the corridors as they bend around, until you reach a junction by the bottom-right corner. Here, head up to uncover a pair of Dwarven Gloves from a dusty chest and then continue left from the junction. Not long afterwards, another junction rears its head.
This time, head left to find a chest containing a powerful Hyper Bracers or head up to reach the fourth painting.
Floor 5+

On the fifth floor, immediately turn right to find a set of Magic Armlets locked away in a chest. Next, continue down from the stairs and stop at the junction by the south. At this vital point, go up to recover Lamia’s Tiara (negates Charm) from a chest or go right to reach the fifth painting and stairs.
Further up, on the sixth floor, turn right at the junction by the south to obtain a potent Megalixir from a chest. Then follow the corridor left, as it twists and turns and teasingly takes you to the sixth painting. Finally, we come to the seventh floor of this gigantic castle. By the south, the seventh painting awaits and in the top-right corner, a chest containing a Lilith’s Rod.
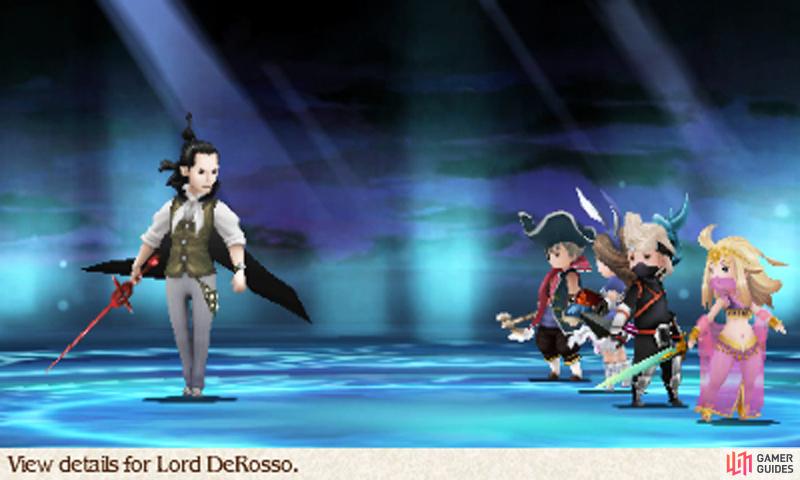
To the left, the Adventurer stands waiting (obviously not afraid of being turned into a bloodsucker) and beyond, Lord DeRosso wishes to make your acquaintance (watch your necks, everybody!). Approach the Vampire and you’ll be given the choice to battle–this is the game’s way of telling you that he’s super strong!
Boss: Lester DeRosso
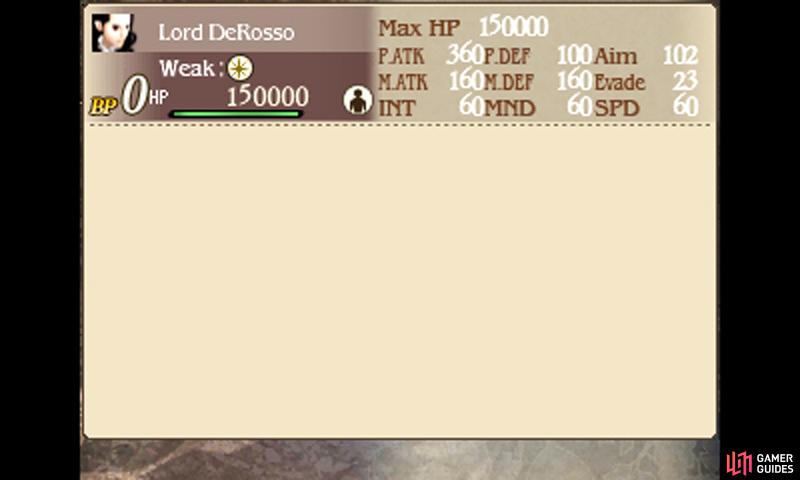
| Level | HP | Weak to |
|---|---|---|
| 60 | 150,000 | Light |
DeRosso’s casual demeanour belies his mad fighting skills; the Vampire holds nothing back and can rip through your party if you’re careless. He will use Battle Thirst to steal one BP from a character–try not to end a turn with -1 BP as DeRosso may steal BP and leave a character immobile.
Once he has one BP in storage, he will Energy Burst (sound familiar?) the next turn to deal heavy damage. He’s also not above using Bone Crush to cause damage equal to your lost HP (fatal if you have less than half HP) and Graviga to chop off around 3/4 of your party’s health (with a good chance of missing).
In terms of strategy, you can actually use the Rampart strategy like you did with the dragons, but your Ninja and Performer must have high speed to outspeed DeRosso (the Hermes Shoes and 20% Speed ability will come in very handy).
The main thing to watch out for is Graviga, which–since it’s magic–doesn’t get blocked by Rampart or Utsusemi, but if you keep your party healthy (above 3/4 HP), it should be easy to work around. Also be wary of DeRosso stealing BP from your Rampart user or Performer.
For offense, light magic is good (although Holy requires a high level White Mage), as are weapons infused with light (Excalibur or Holy Lance) or the Templar’s Radiant Blast. Compared to the dragons, DeRosso is slightly less predictable and his Graviga can catch you by surprise.
However his Battle Thirst and Energy Burst combo is super-easy to anticipate and thus avoid. He also has a massive amount of HP, so will take longer to slay, but just hang in there and watch your commands carefully! A little slip up and failing to cast Rampart could be fatal!
If you check D’s Journal and the Bestiary contained within, you can tell which abilities can be drained by the tell-tale arrow brackets around abilities. Now that you have the Vampire job, it might be a good time to tour Luxendarc and grab a few monster abilities for your own… Here’s a list to get you started–aren’t we kind?
Genome Abilities Currently Available
- Curse: Wraith (Ancheim at night), Magician (Underflow; second half)
- Spray: Deathfish (Flo-Cheim inner sea; between Florem and Ancheim)
- Venom: Red Flan (Underflow; first half)
- Wing Scales: Great Moth (Miasma Woods, Vestment Cave)
- Dual Attack: Catamount (Witherwood)
- Chomp: Valtora (Eisen region)
- Paralyzing Pollen: Alraune (Florem region)
- Fireball: D’gon (Witherwood)
- Earthquake: Soil Eater (Eisen region)
- Sandstorm: Sand Worm (Ancheim, Harena Ruins)
- Gastric Juices: Gastric Worm (Everlast Tower; upper floors)
- White Wind: Aero Lantern (Temple of Wind)
- Lullaby: Treant (Florem region)
- Hellfire: Cerberus (Vampire Castle)
- Firaja: Belphegor (Nemesis), Beelzebub+ (Nemesis)
- Blizzaja: Belphegor (Nemesis), Mammon (Nemesis)
- Thundaja: Belphegor (Nemesis), Asmodeus (Nemesis)
- Aeroja: Lucifer (Nemesis)
No Comments