
A guide on how to complete Mah Eliya Shrine, found east of Zora’s Domain. This shrine is one of three associated with the Ex Champion Mipha’s Song DLC quest.
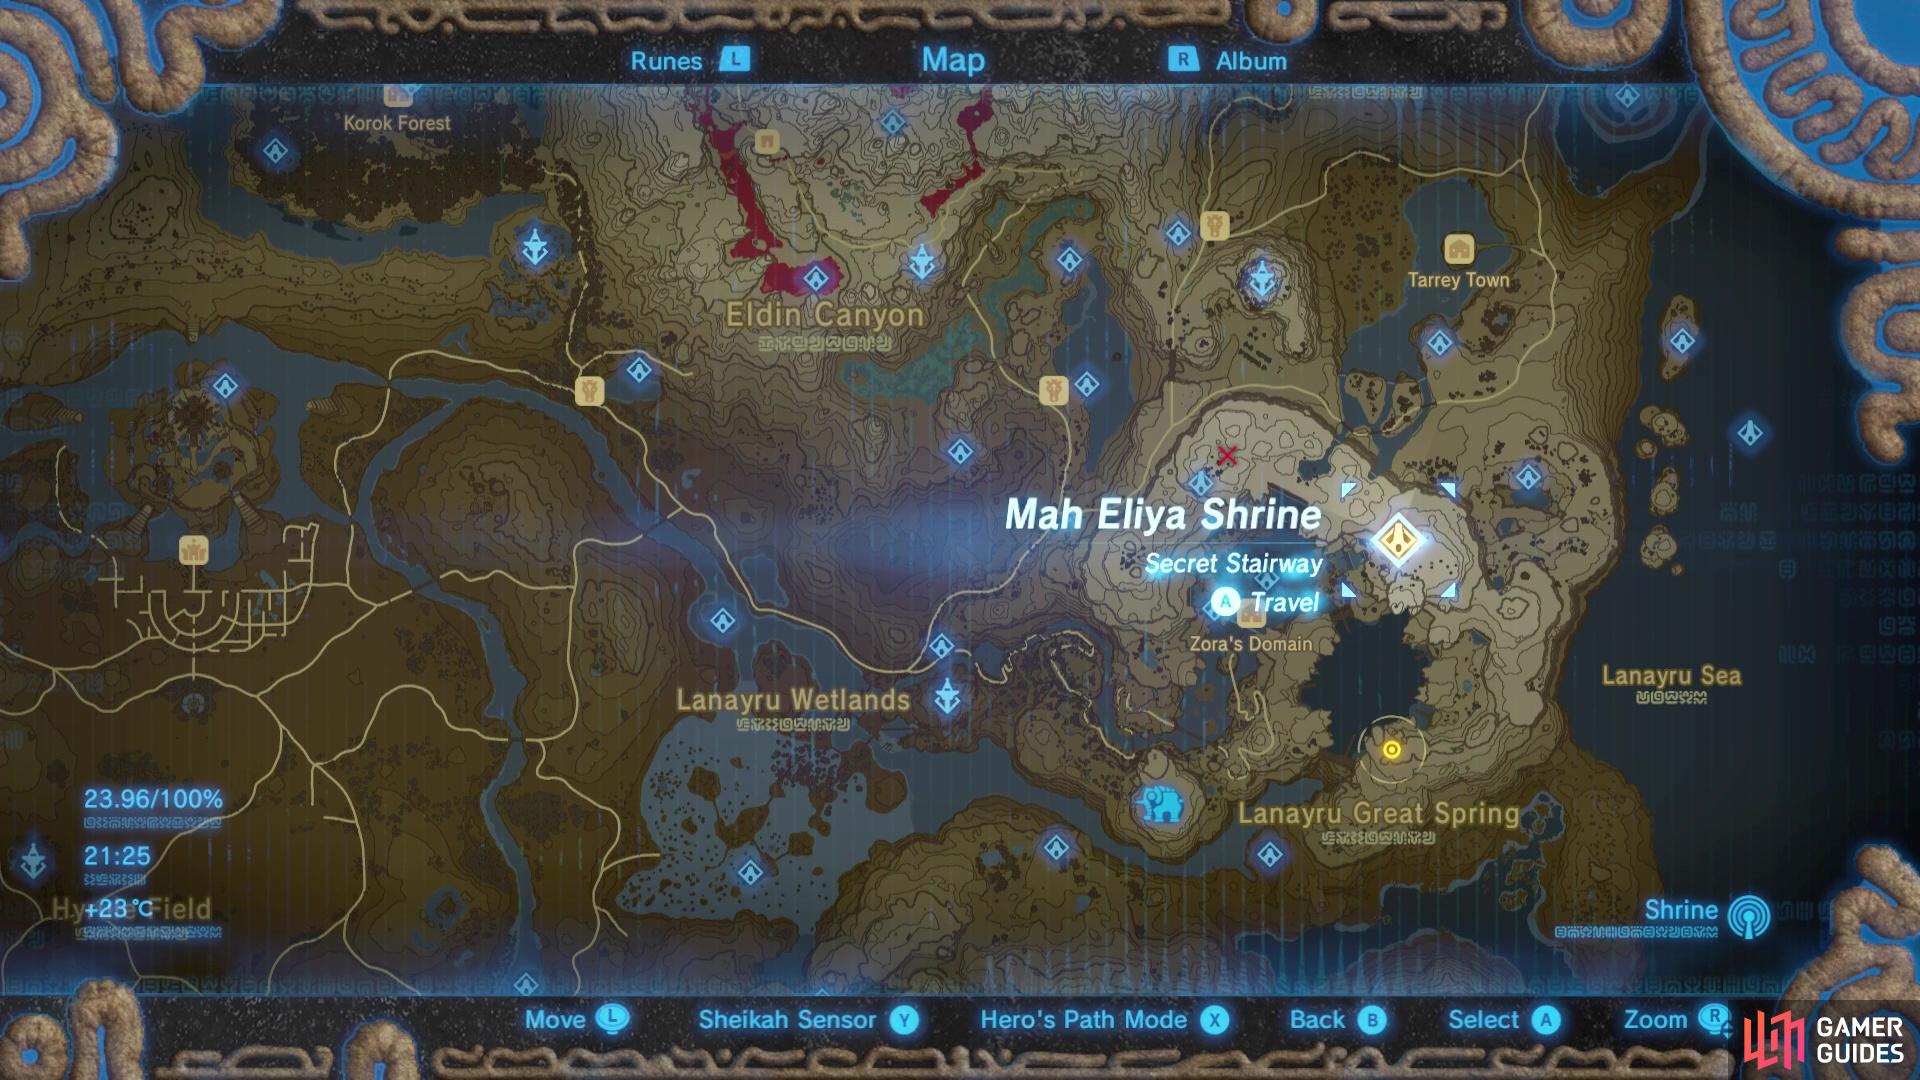
This shrine is found east of Zora’s Domain

and is titled ‘Secret Stairway’.
How to “chase rings of the waterfall”
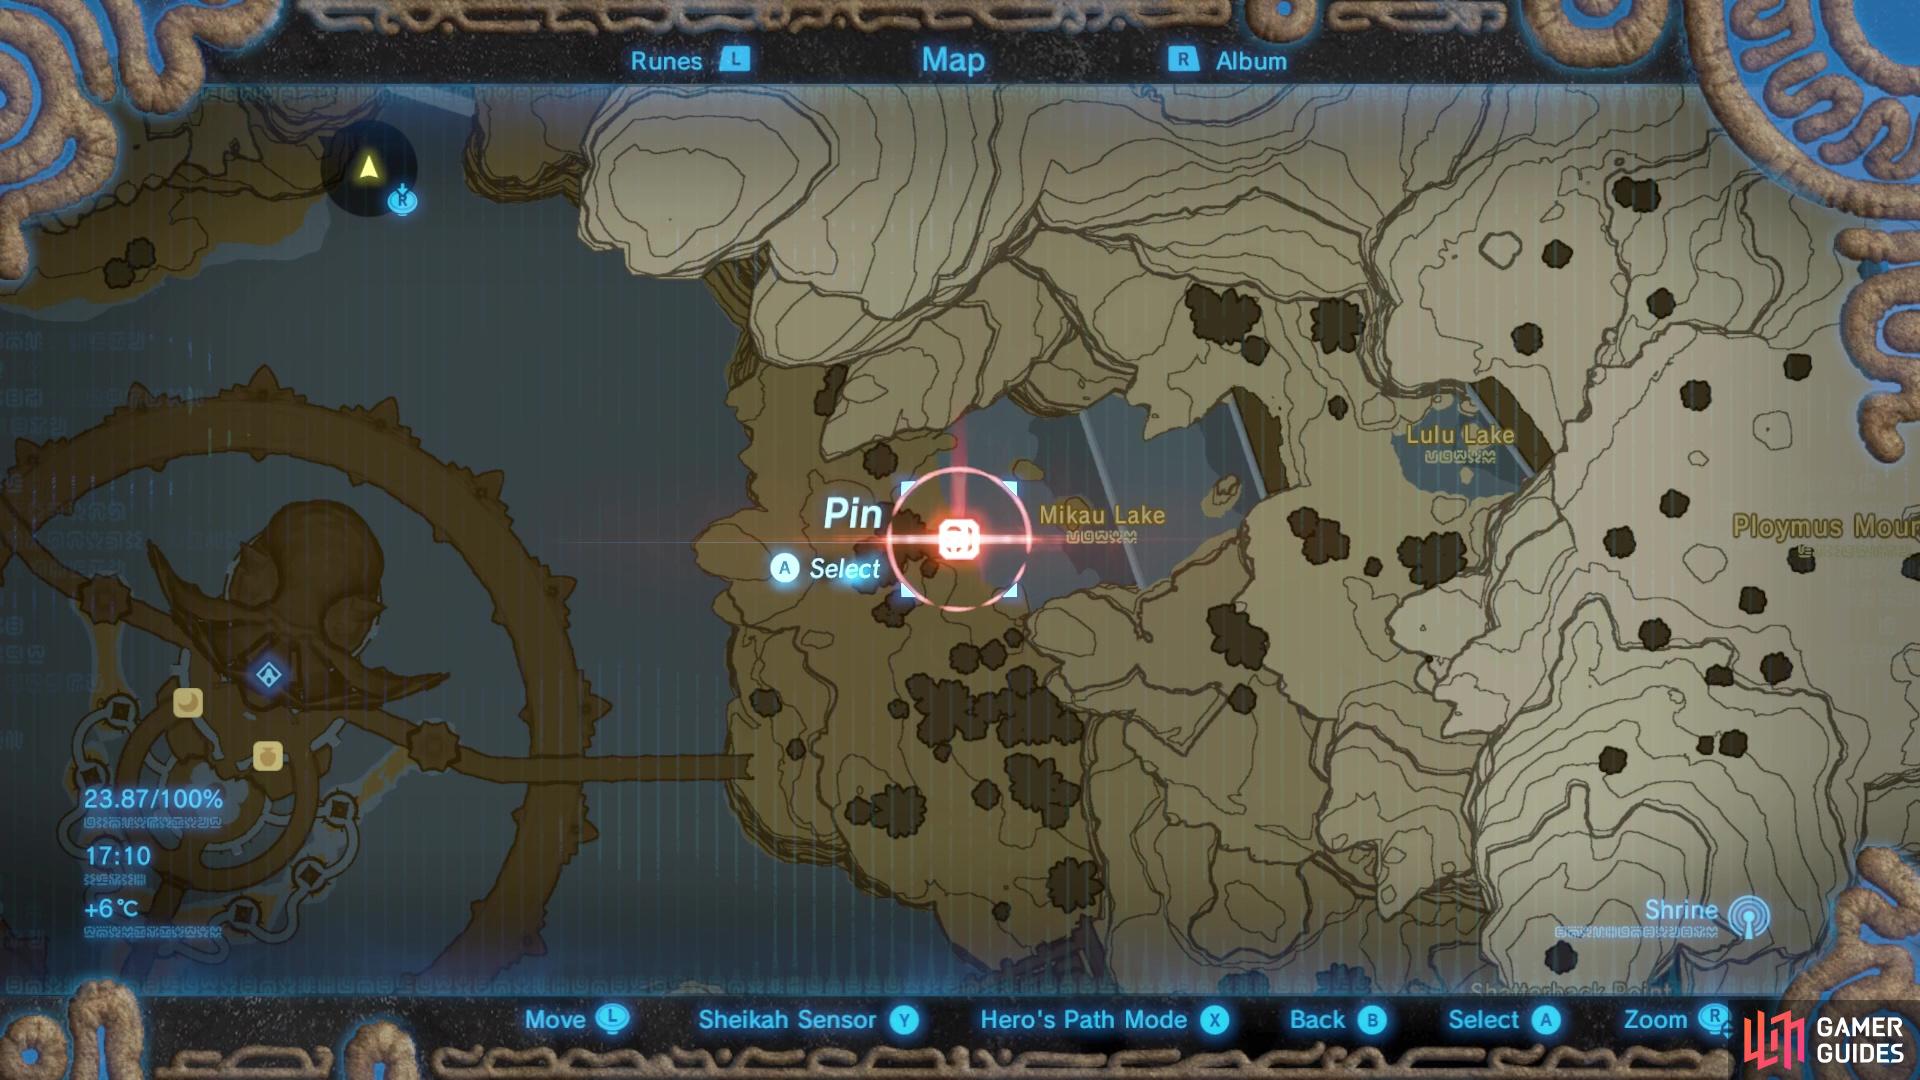
Head to this location and you’ll spot your first blue ring!
This is the third shrine that Kass offers a clue to, and he mentions having to swim through some rings up a waterfall. Now, to do this, you’ll need to equip the Zora Armor (torso) so you can swim up waterfalls. Next, head over to Mikau Lake, found east of Zora’s Domain. As you approach Mikau Lake, you’ll spot a blue ring. Pass through it then quickly head towards the waterfall and line yourself up with the next ring before you press A to swim upwards. As you swim up this first waterfall you’ll pass through two rings.
Head up the waterfall and make sure your route aligns with the blue rings.
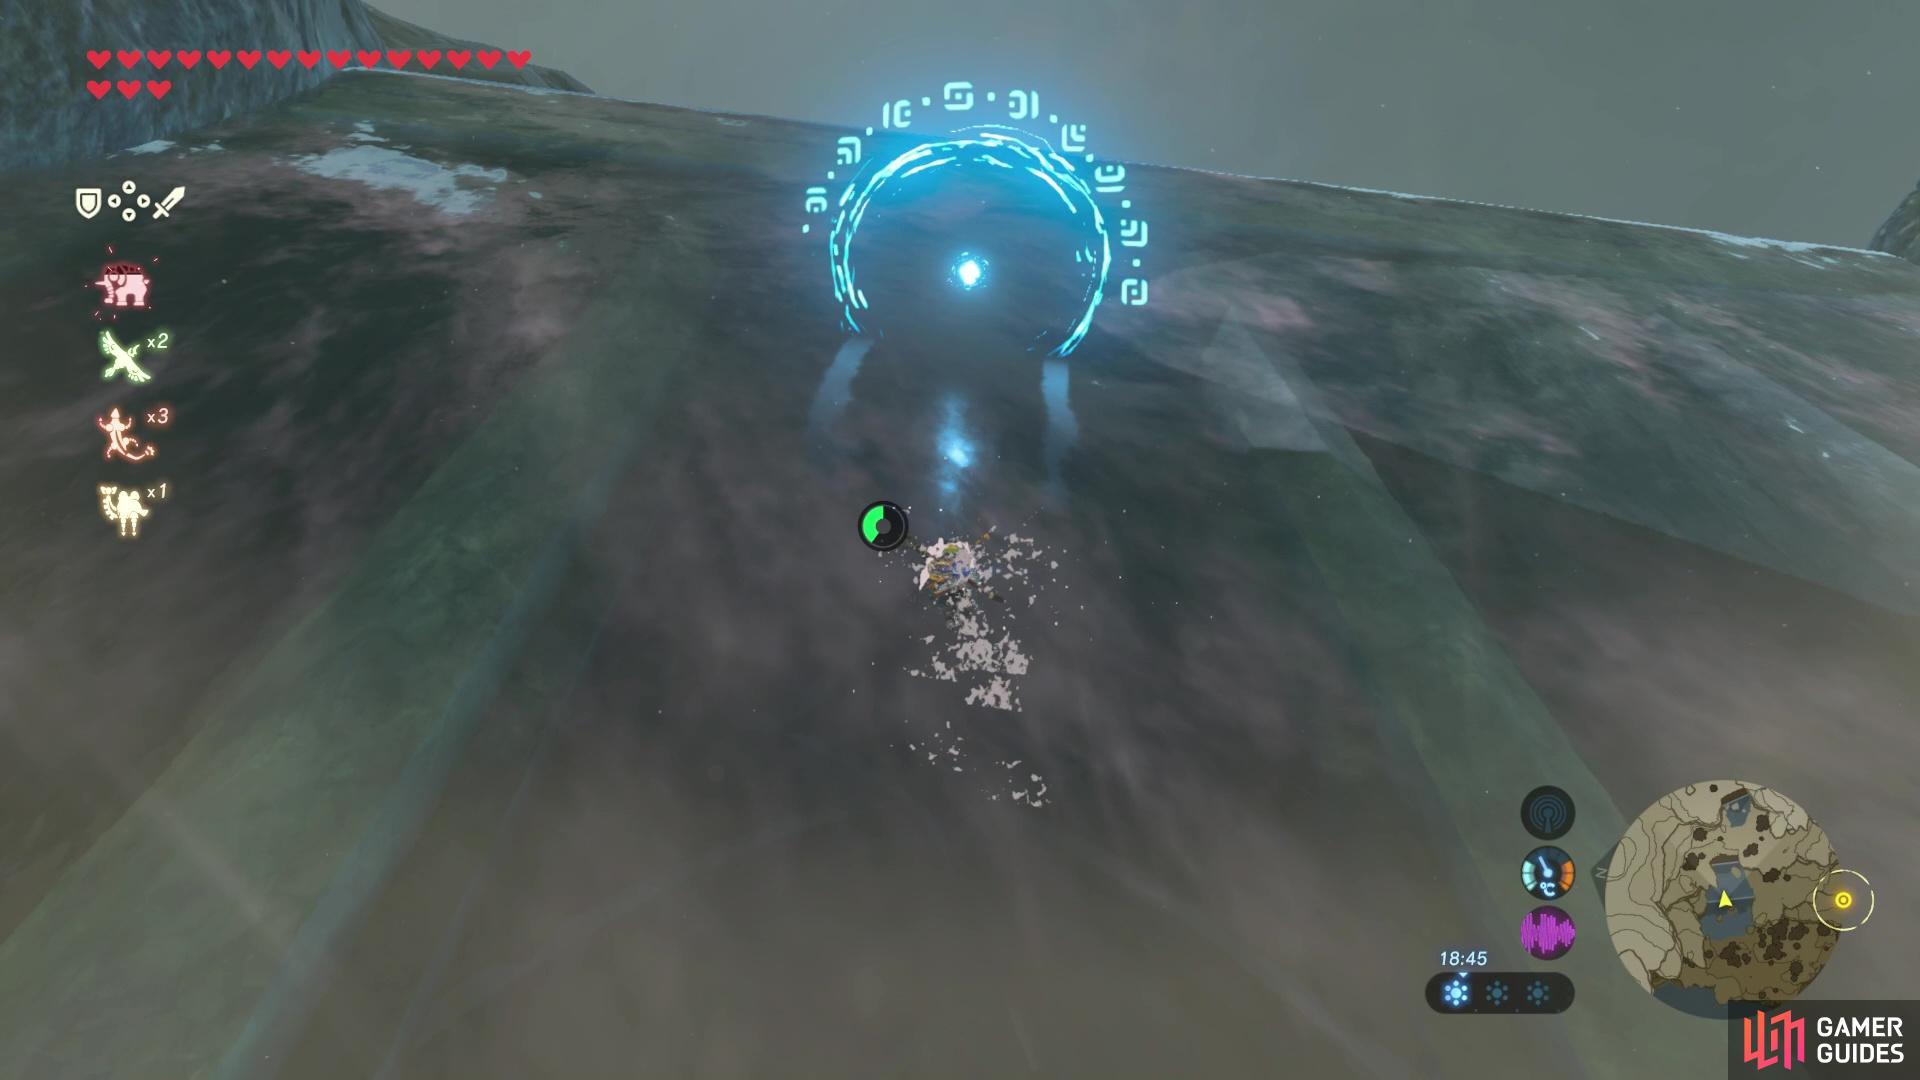
As you spring from this first waterfall, veer right with your paraglider to align yourself with the blue ring that’s right before the second waterfall. Then paraglide down and drop right before the blue ring at the base of the waterfall and press A to swim upwards again. You’ll head through three rings as you head up the second waterfall.
Once you’ve finished with that second waterfall, you’ll fly upwards and you can paraglide through another ring as you head towards the smaller lake. You’ll then want to run over to the lake to reach the ring in the lake, then swim forwards towards the waterfall to swim through three more rings.
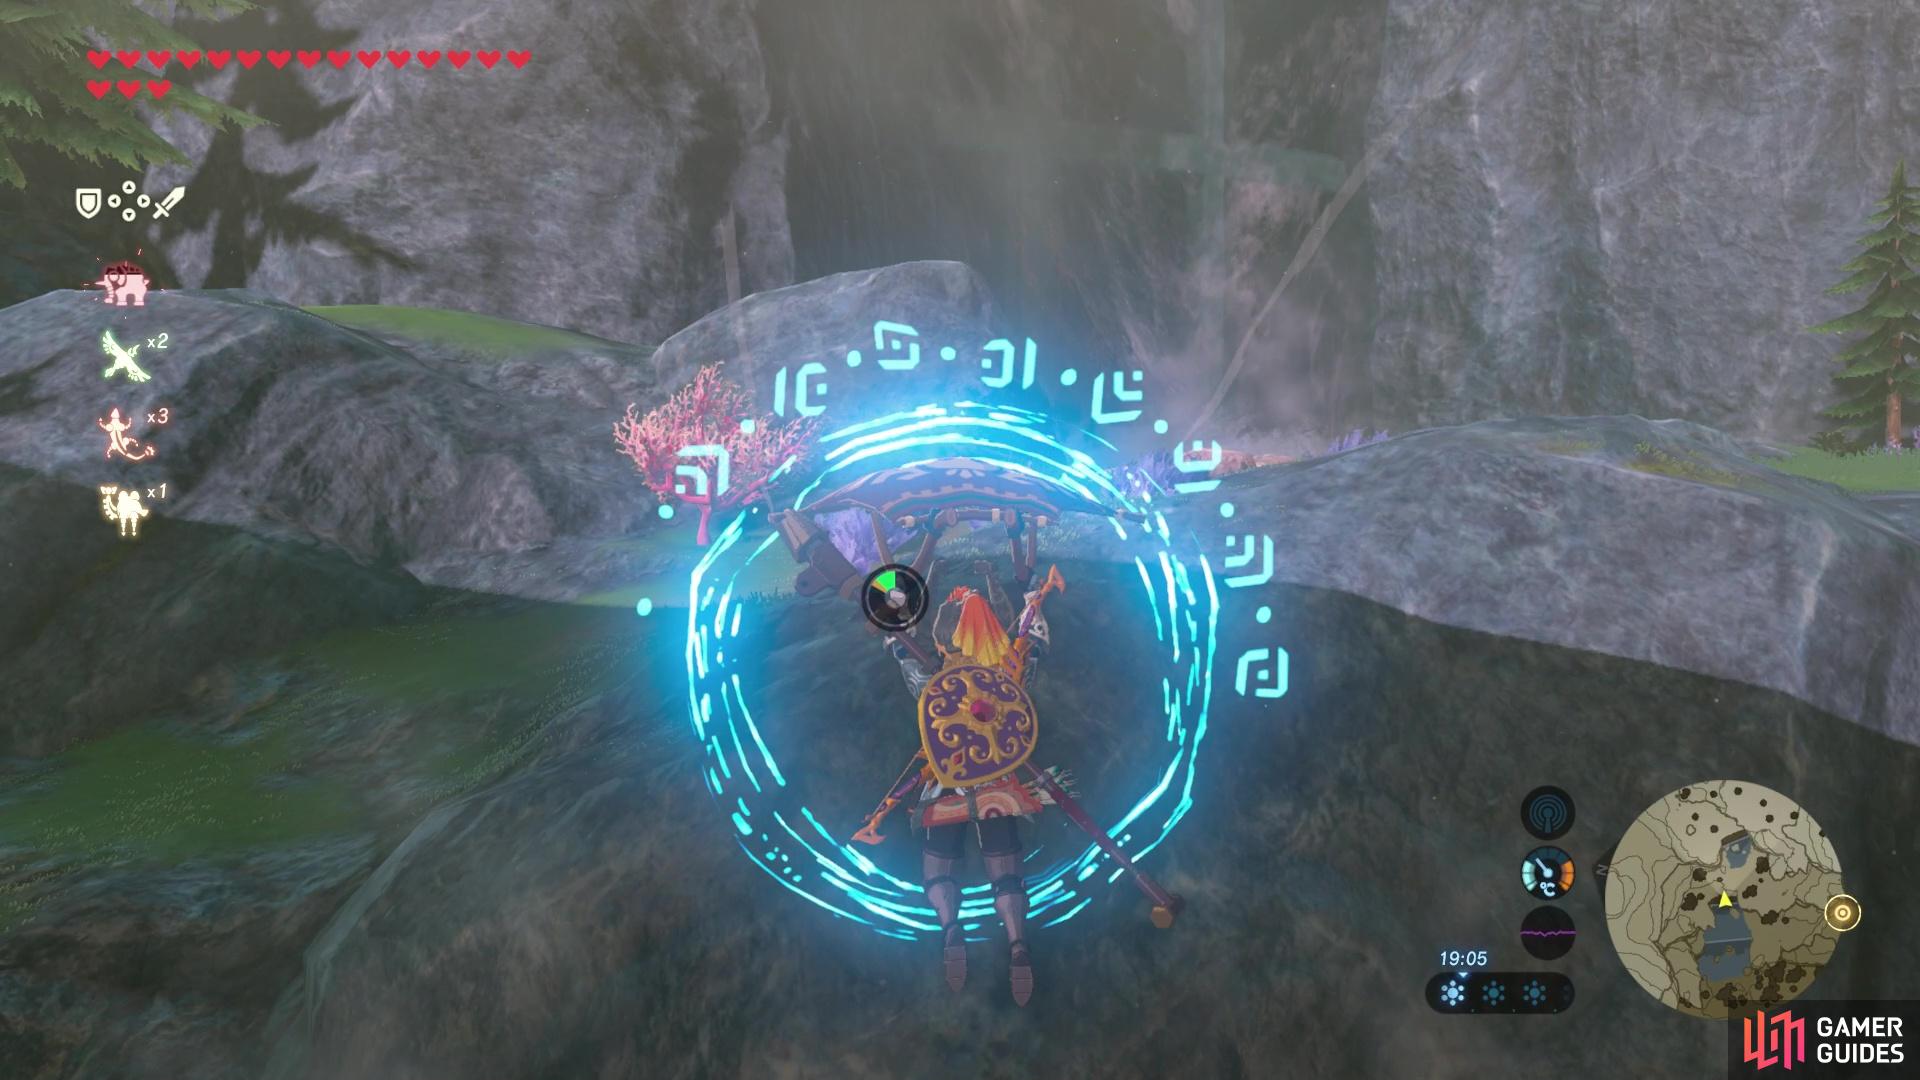
At the end of the final waterfall, you’ll have a final large and ornate ring to pass through in order to unlock Mah Eliya Shrine.
How to Complete Mah Eliya: Secret Stairway
This puzzle can be slightly infuriating to solve, but luckily, you’ve come to the right place! The puzzle is even trickier to figure out if you want the treasure, but if you know the correct placement of blocks, it’s not really that much harder to grab the treasure.
Firstly, head over to the metal blocks, and place a cryonis ice block on the ground beneath the left metal block. You can then climb up the blocks onto the ledge to the left. Here, you can grab a third metal block, but this one is a cube whilst the others are cuboids. Drop it down onto the ground using magnesis and head back onto the bottom level of the shrine.
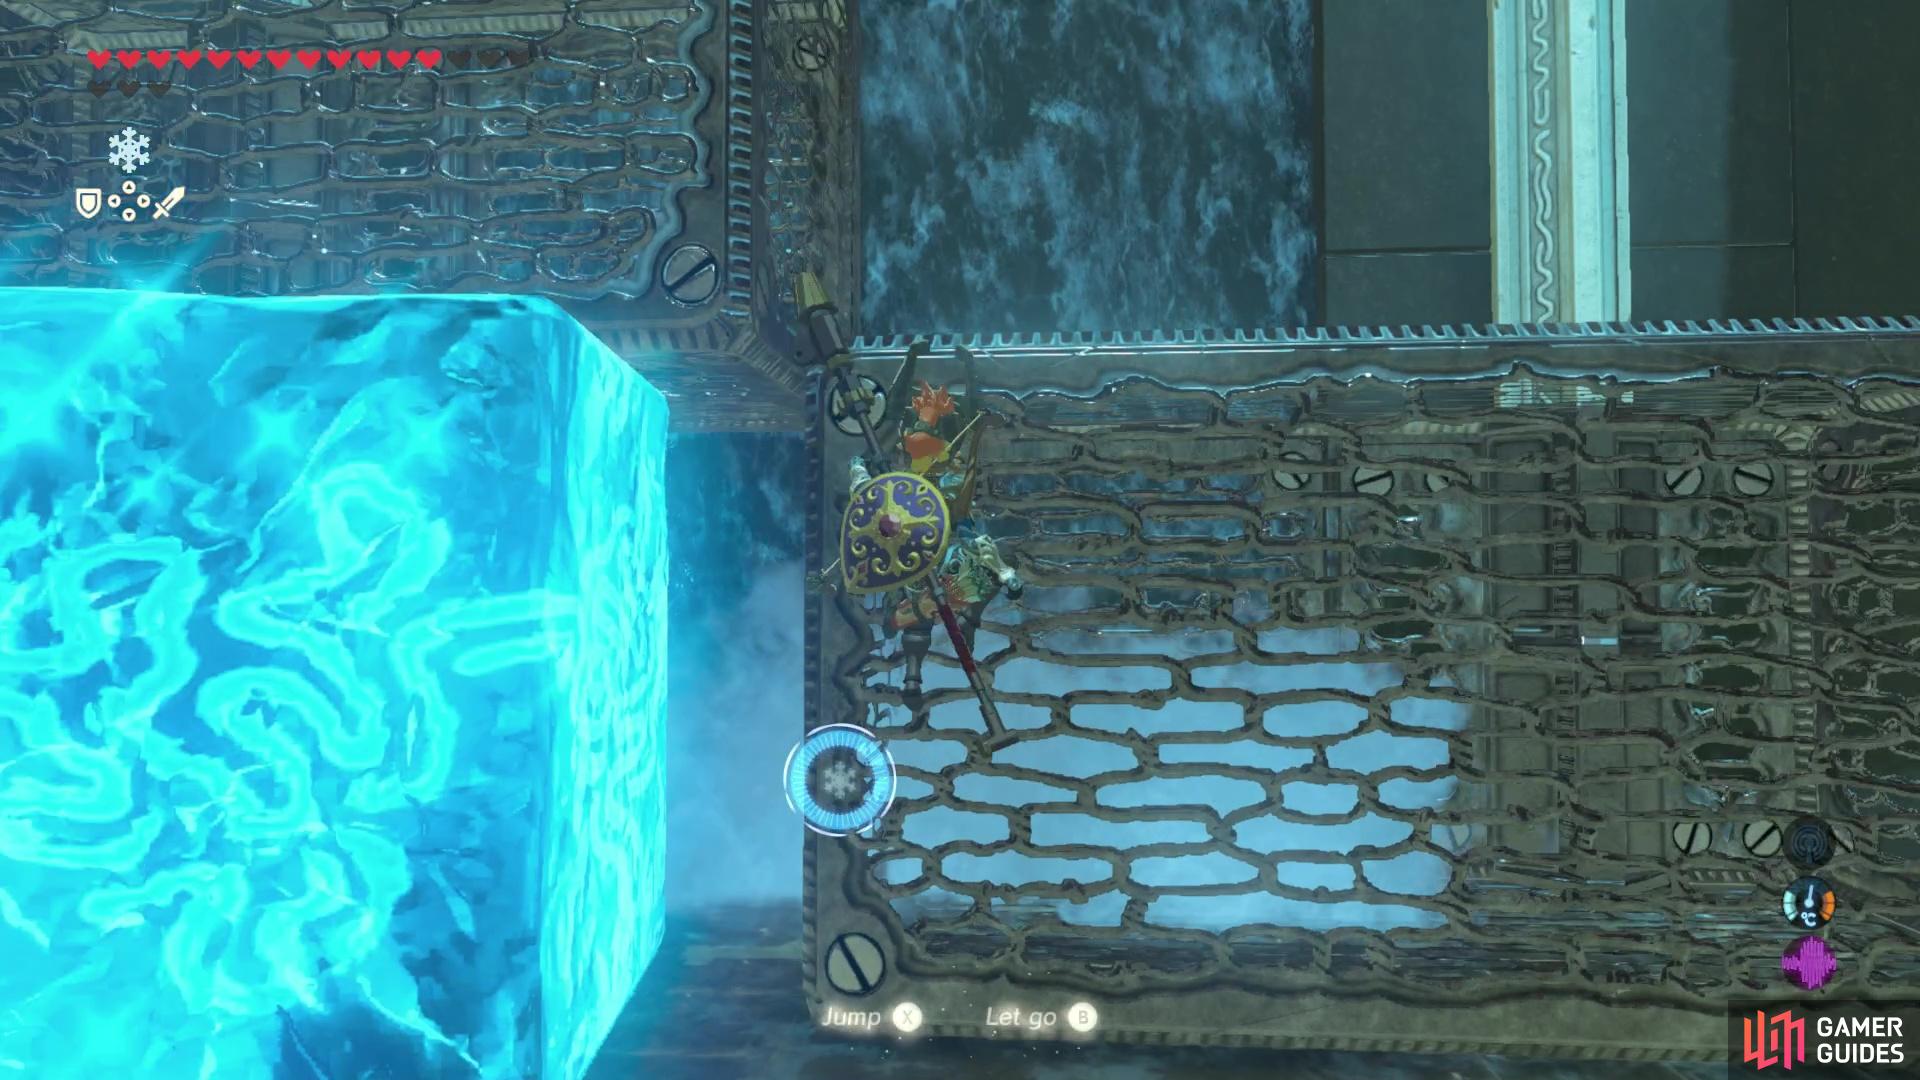
Make a mini staircase with the blocks to reach the platform on the left.
Next, place a cryonis block beneath the right hand metal block so that the two cuboids are level with each other. Use the metal cube to push up the left metal block and then wedge the cube between the left and right cuboids to make a stairway. We’re not done yet though! If you want to just leave the shrine and forget about the treasure, just do that last step but with the right cuboid rather than the left so you can reach the platform on the right side.
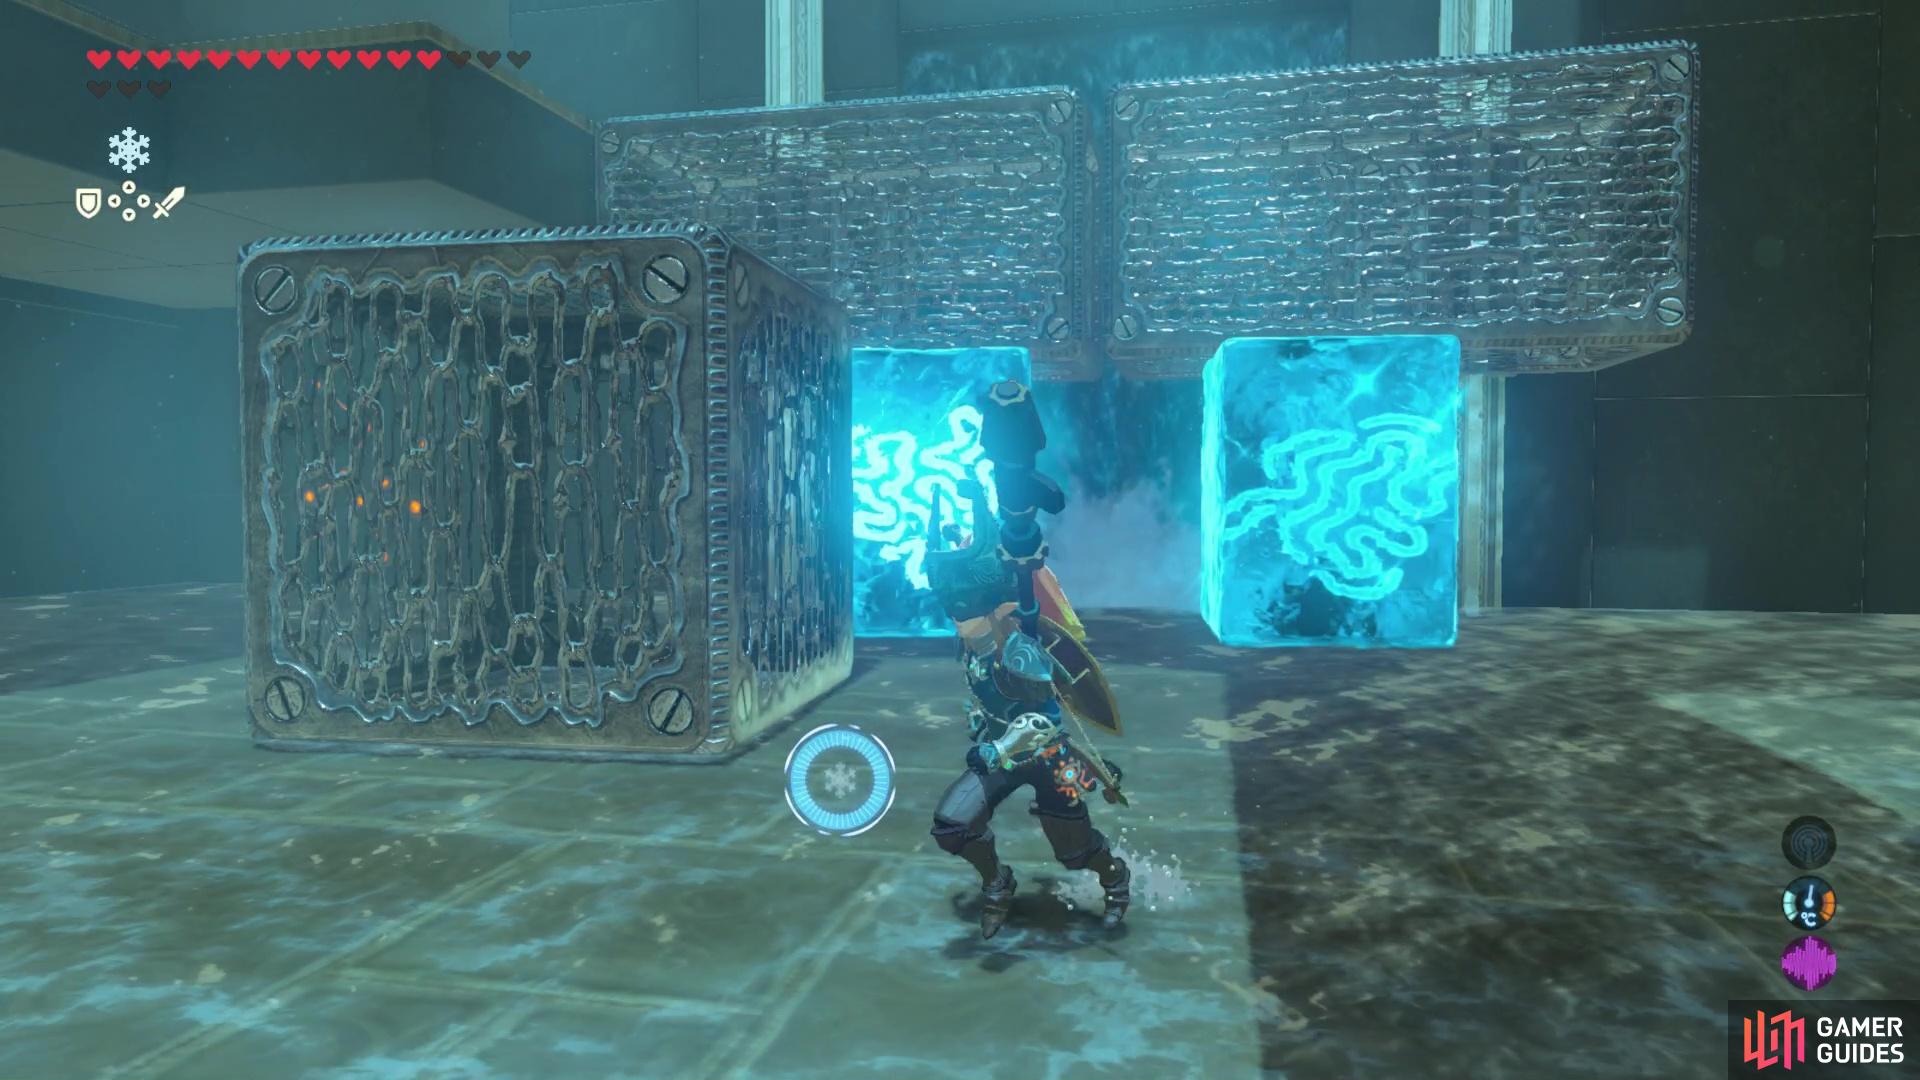
Place another cryonis block beneath the second cuboid
then place the metal block between the two cuboids.
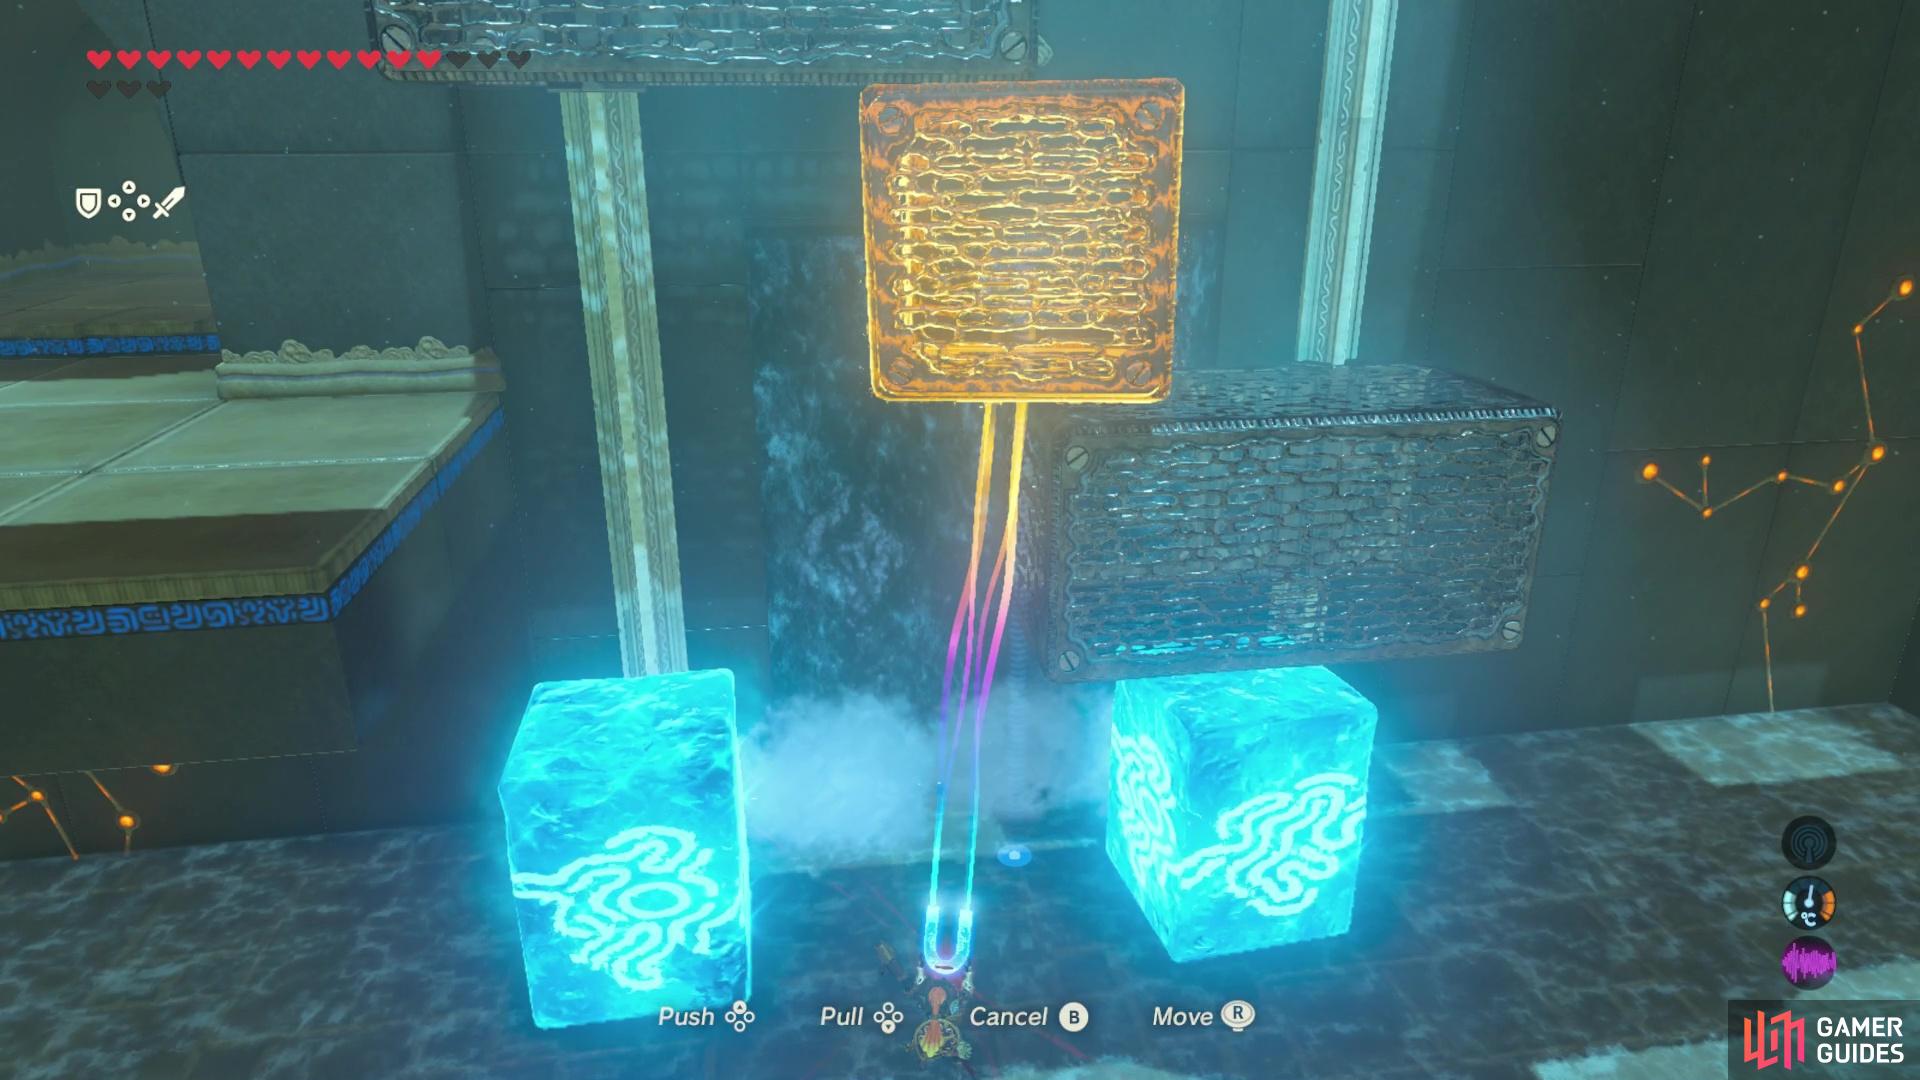
Now create an ice cube with cryonis beneath the left cuboid so that the cuboid supports the metal block and you can then freely move the metal cube. Use magnesis to bring the cube back to the ground and then bring it around to the right side of the right cuboid and push upwards then position the cube so that it is beneath the right cuboid.
Then, continue moving the cube upwards and to the left until its position in the center and you’re able to push both cuboids up simultaneously and then wedge the cube between those and the ice cube.
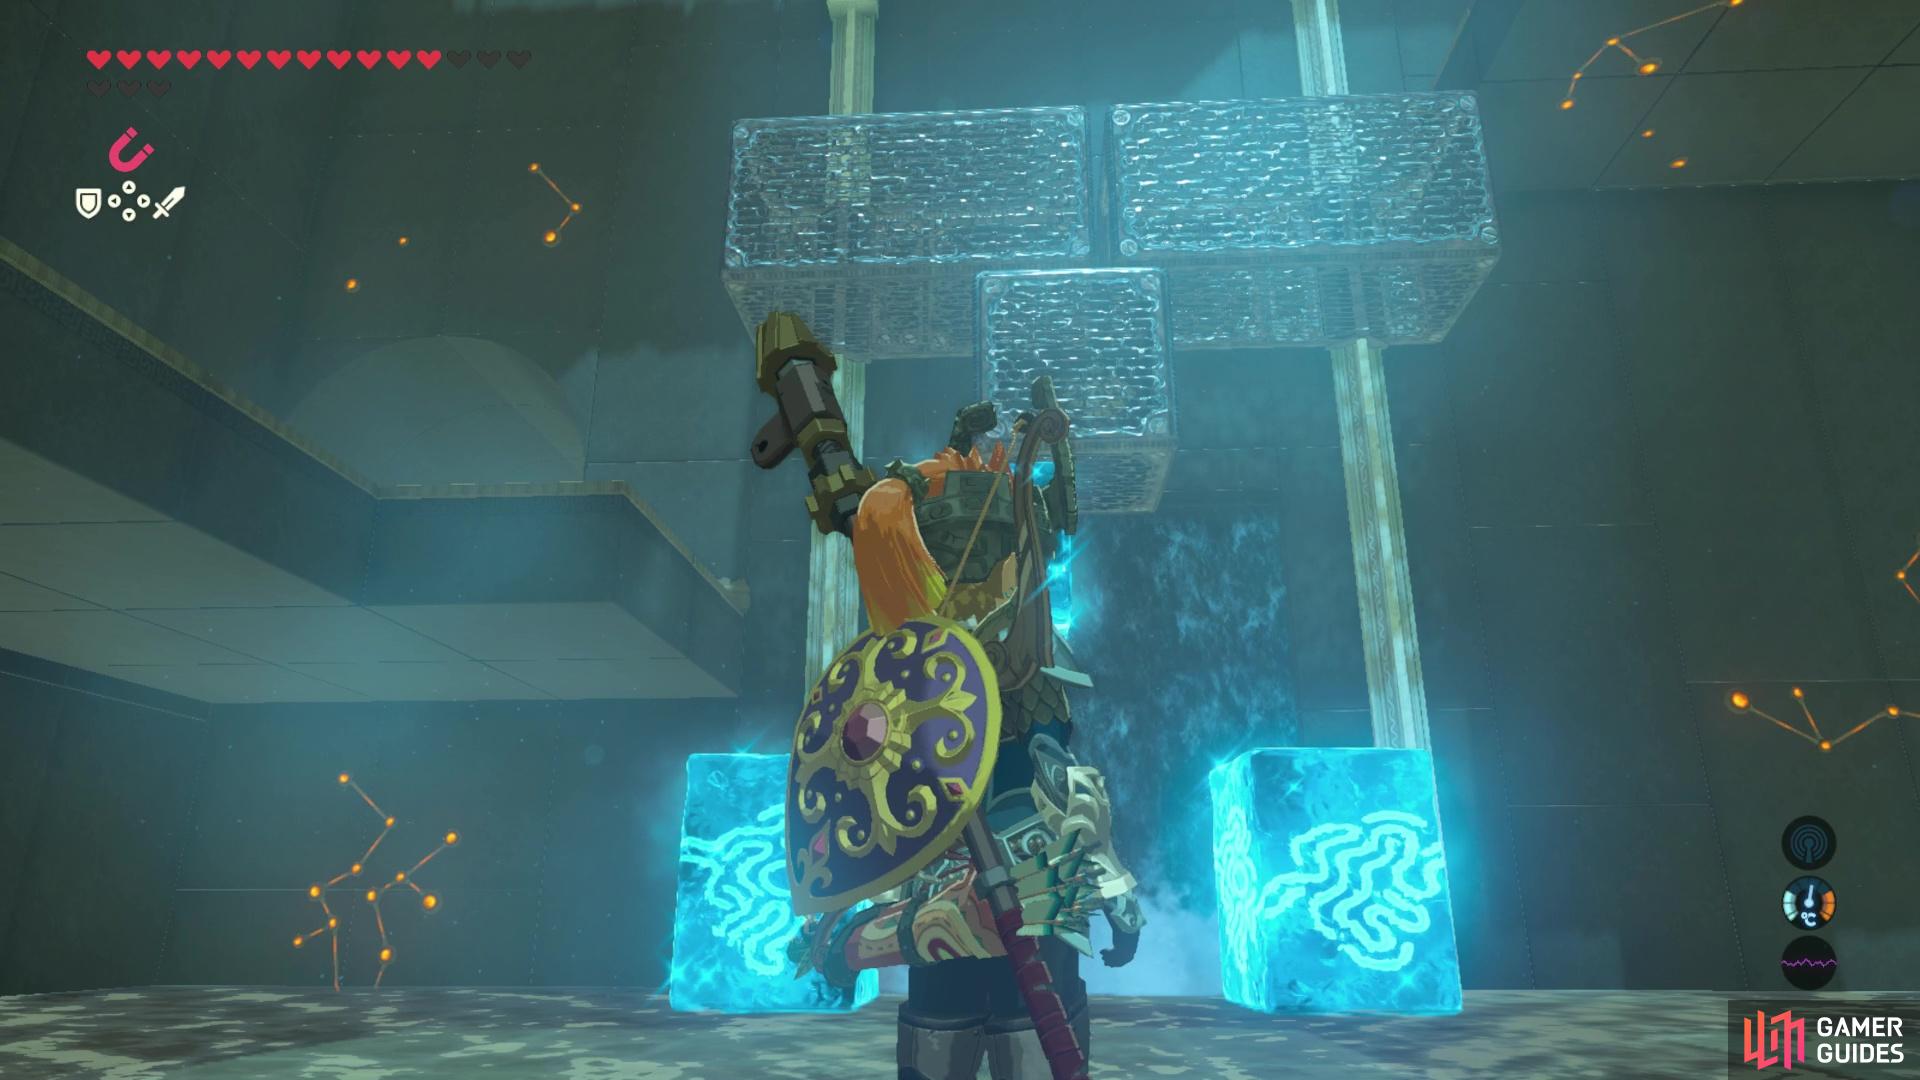
Place an ice cube beneath and move the metal cube away.
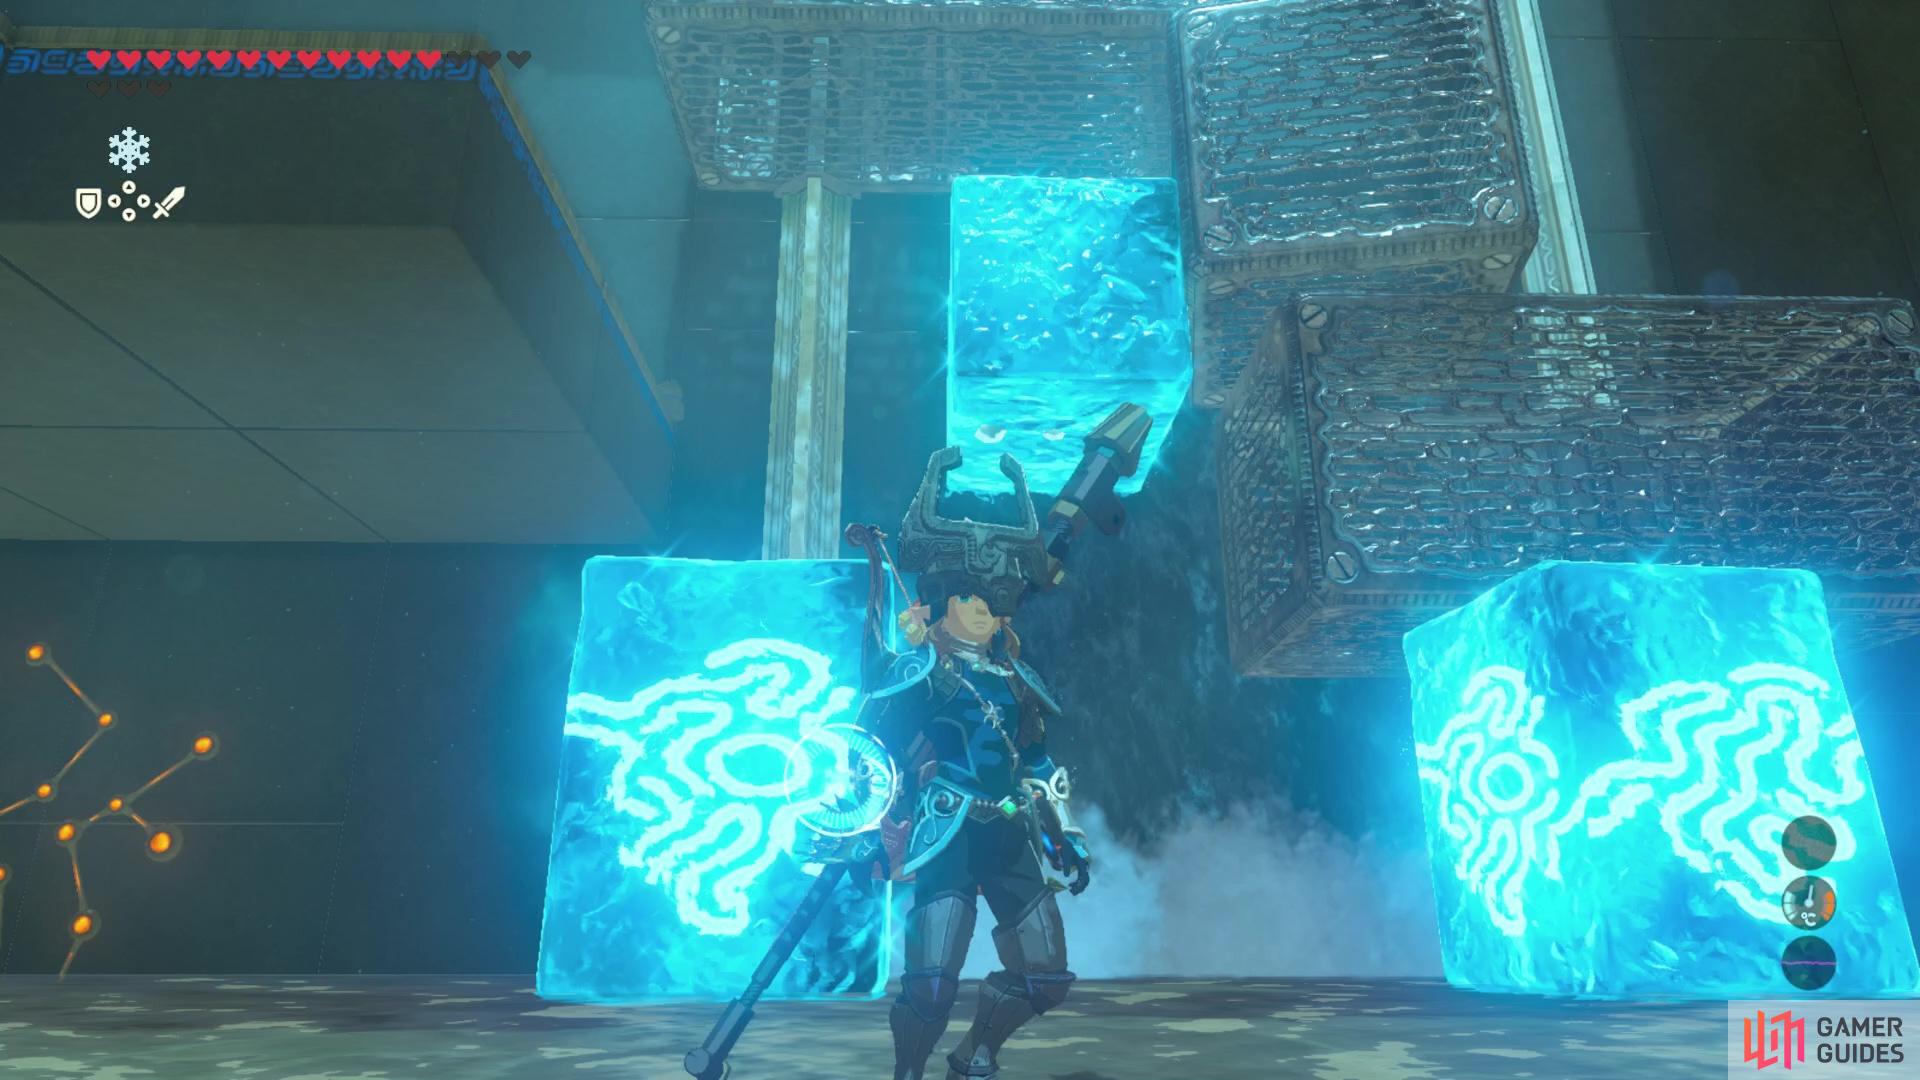
You’ll probably want to make some new ice cubes so you can reach the weird new structure. Just make sure you don’t accidentall destroy the ice cube propping up the whole thing. Manually delete the two cubes at the bottom and then create some new ones to utilise as climbing blocks to reach the metal cubes.
Then you can head all the way to the top of the metal cubes then stand right at the edge of the left cube and use magnesis to pull down the treasure chest from the super high shelf. You can then loot it for a Royal Shield with Durability Up! After looting that treasure, head to the right to finish up the shrine and collect your final Ruta’s Emblem!
No Comments