

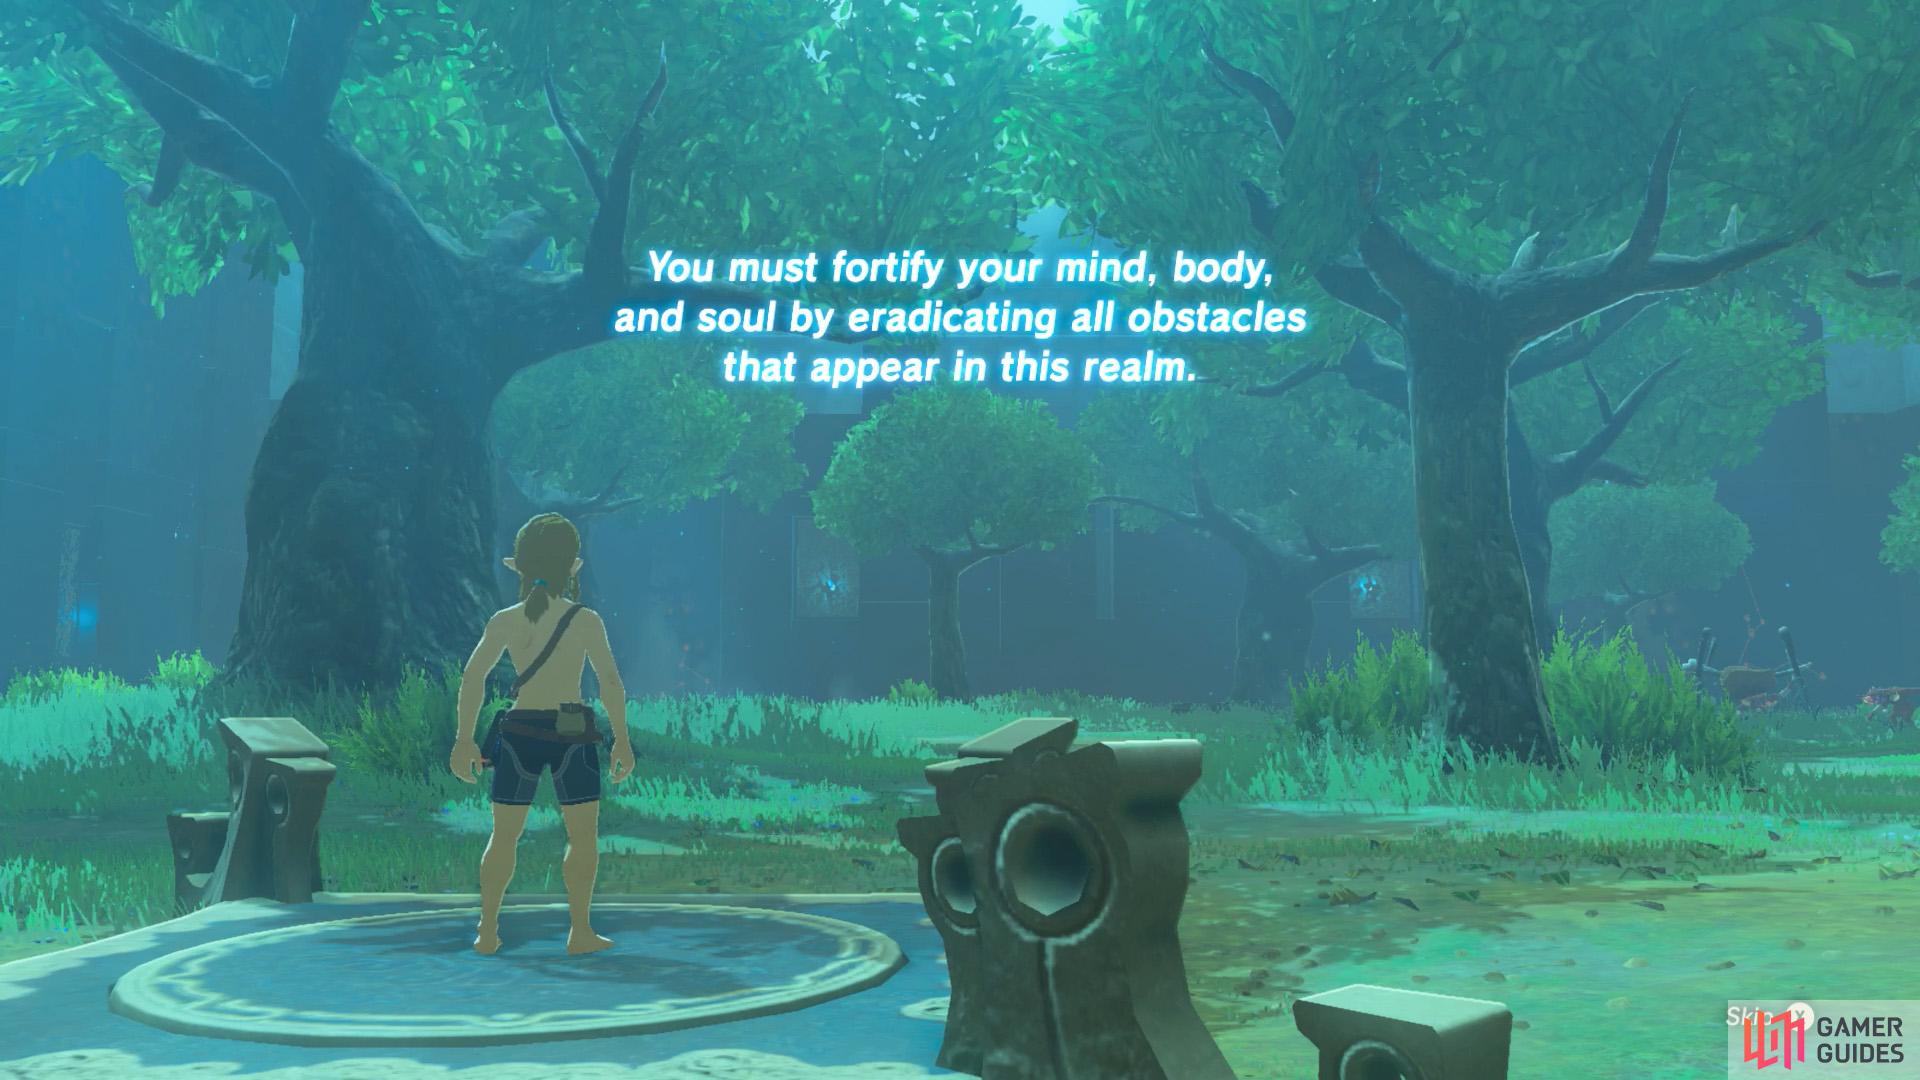
A mysterious voice will beckon Link to the Great Deku Tree.

Thus begins a long and arduous trial like no other!
The Trial of the Sword is a tough-as-nails gauntlet introduced in the first half of the Expansion Pass. It can be accessed as soon as you’ve obtained the Master Sword in Korok Forest.
How to Begin
Once you have the Master Sword and the DLC, Link will hear a telepathic message informing him to speak to the Great Deku Tree. The next time you return to the Master Sword’s pedestal at Korok Forest, the Great Deku Tree will explain everything.
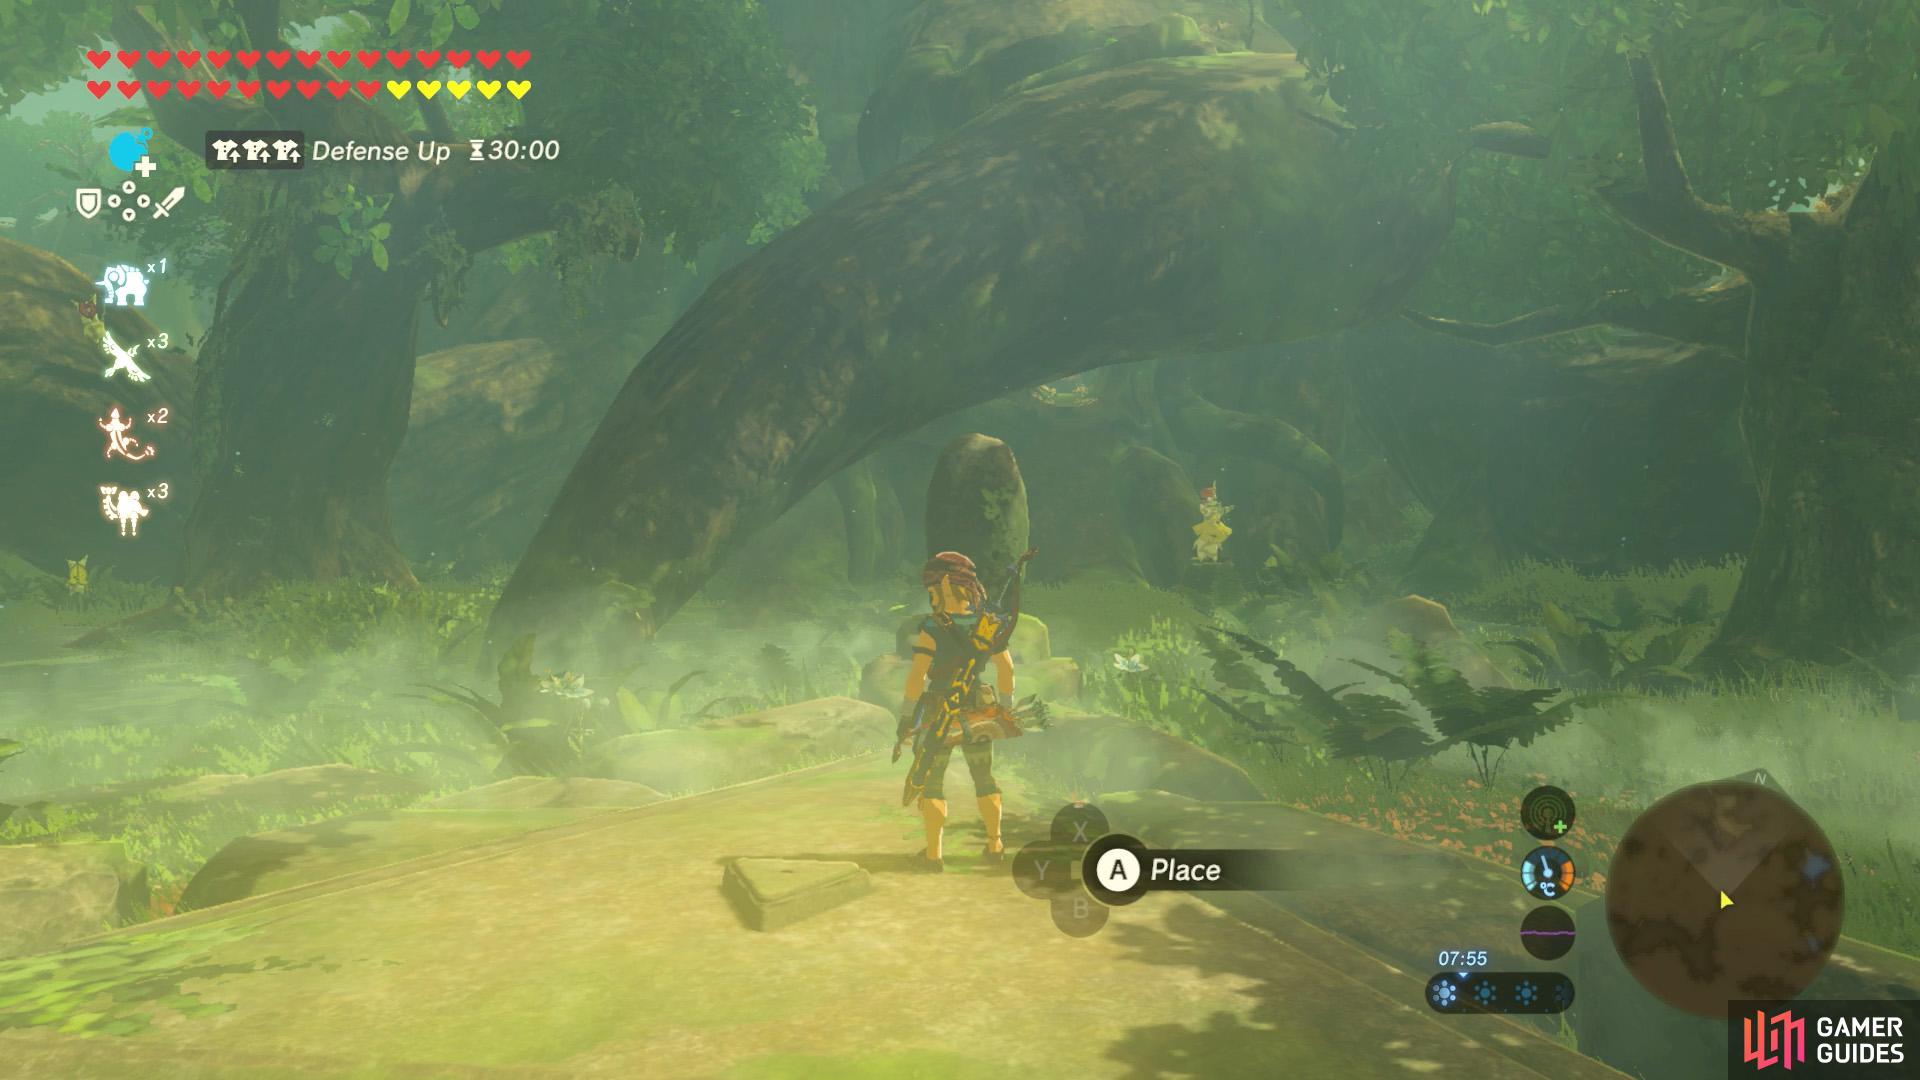
Place the Master Sword back in the pedestal to begin the trials.
We hope you enjoy seeing naked Link!
By returning the Master Sword into the pedestal, Link can access a set of trials separate from the outside world. Upon completion of the trials, the true power of the Master Sword will be unlocked, increasing its attack power.
Setup and Rules
The trials take place across a number of underground floors. There are three trials altogether.
| Name | Number of Floors |
|---|---|
| Beginning Trials | 13 |
| Middle Trials | 17 |
| Final Trials | 24 |

Be sure to set aside a lot of free time, as each trial features 10+ consecutive floors.

During a trial, you cannot save your game.
When you enter a trial, you’ll temporarily lose all your weapons, armor and items, as well as the Champions’ powers. The only things you’ll keep are:
- Your current health (including temporary max hearts)
- Your current stamina (including temporary stamina wheels)
- Any food effects before you entered
This means you’ll have to tackle the floors using the items you gain along the way. Which by the way, you don’t get a lot of, so you have to be extremely resourceful. Also, since you don’t have armor, enemy attacks will really hurt.
To make things even harder, you cannot save while in the middle of a trial. You can only save after you reach the end. If you need to take a break, you can use the Nintendo Switch’s sleep function. But if you’re playing on the Wii U, er, good luck.
Reward

At the end of a trial, the Master Sword awaits.
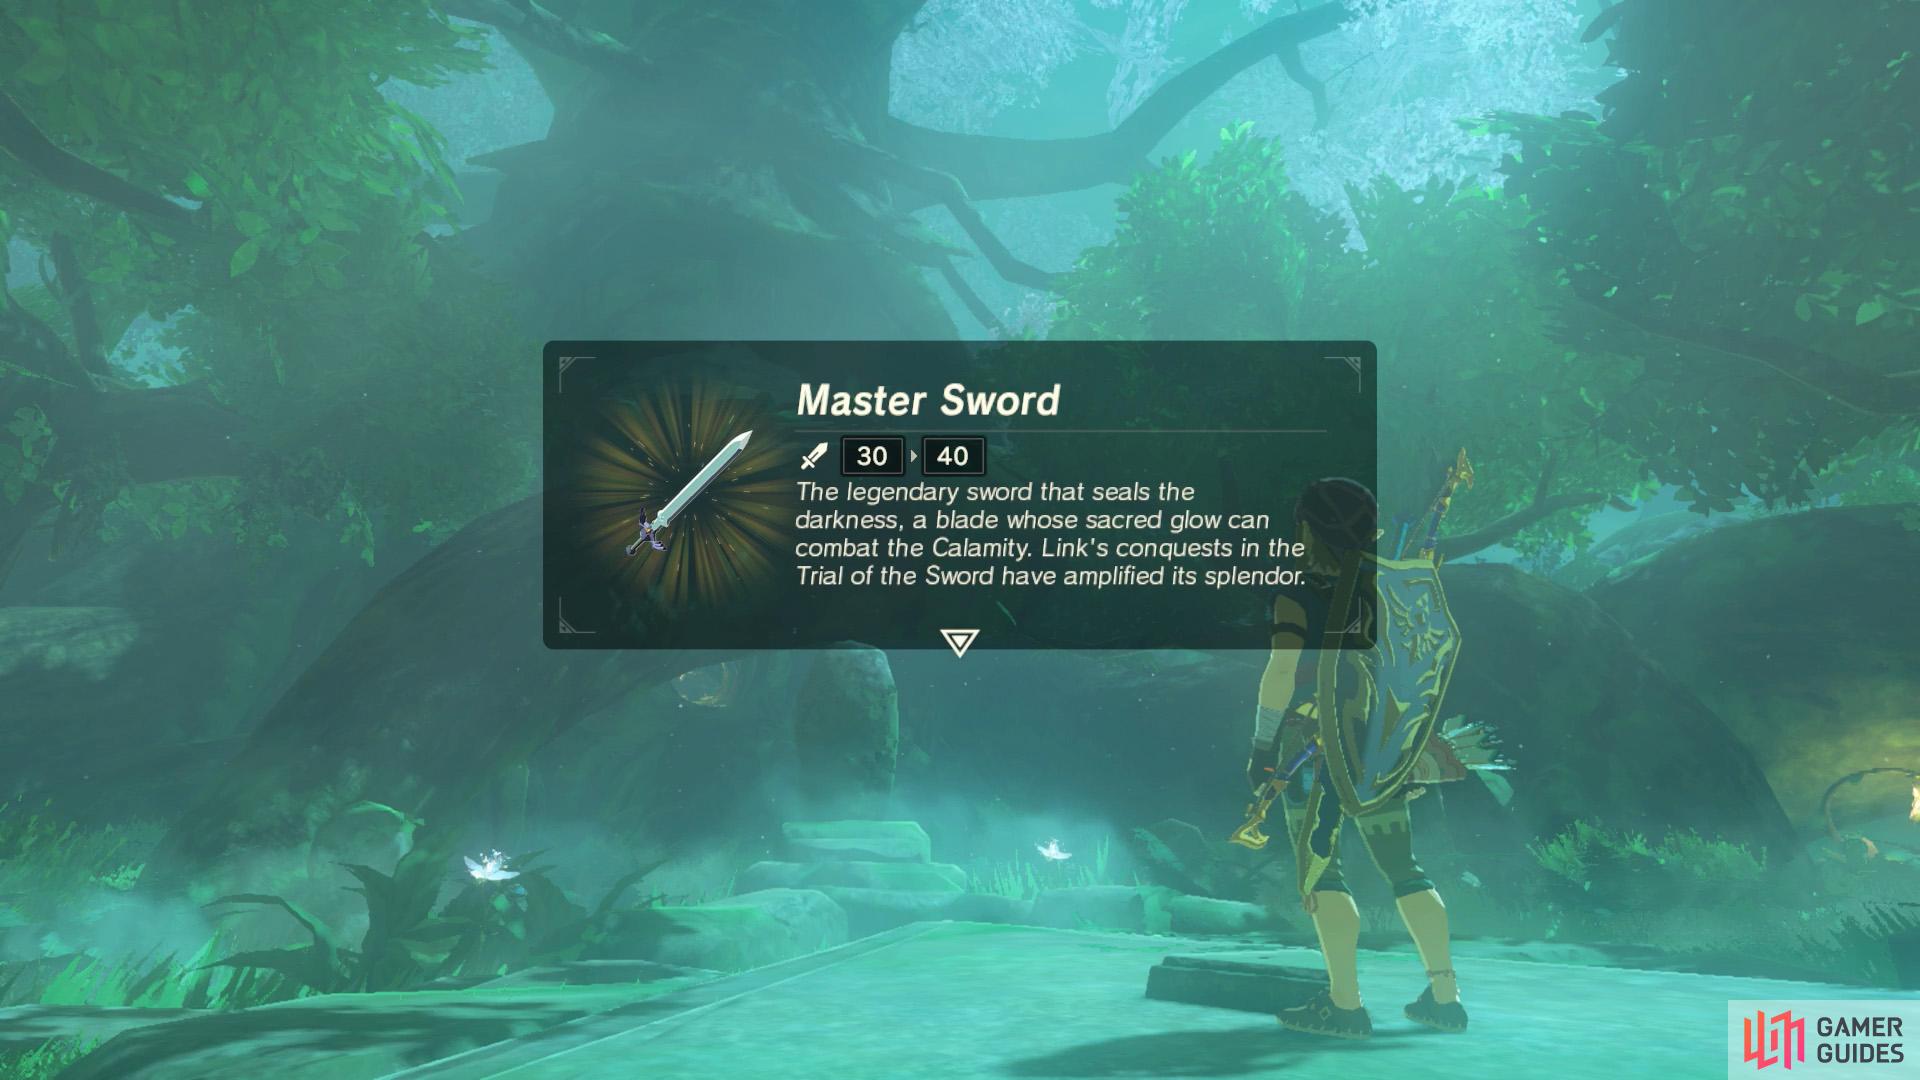
Upon the first completion of a trial, the Master Sword’s attack will rise by 10.
Completing one of the three trials for the first time will boost the Master Sword’s attack power by 10 points, for a maximum of 60 attack. Beating the Final Trials will also massively improve its durability (from 40 to 188). But there’s no way to stop the Master Sword from running out of power.
Tips
Just in case… If you’ve just recently returned to Breath of the Wild after a long hiatus and thought to try out the DLC, do not jump straight into Trial of the Sword! The trials are hard and expect you to be at your peak, not when you’re trying to relearn the gameplay.
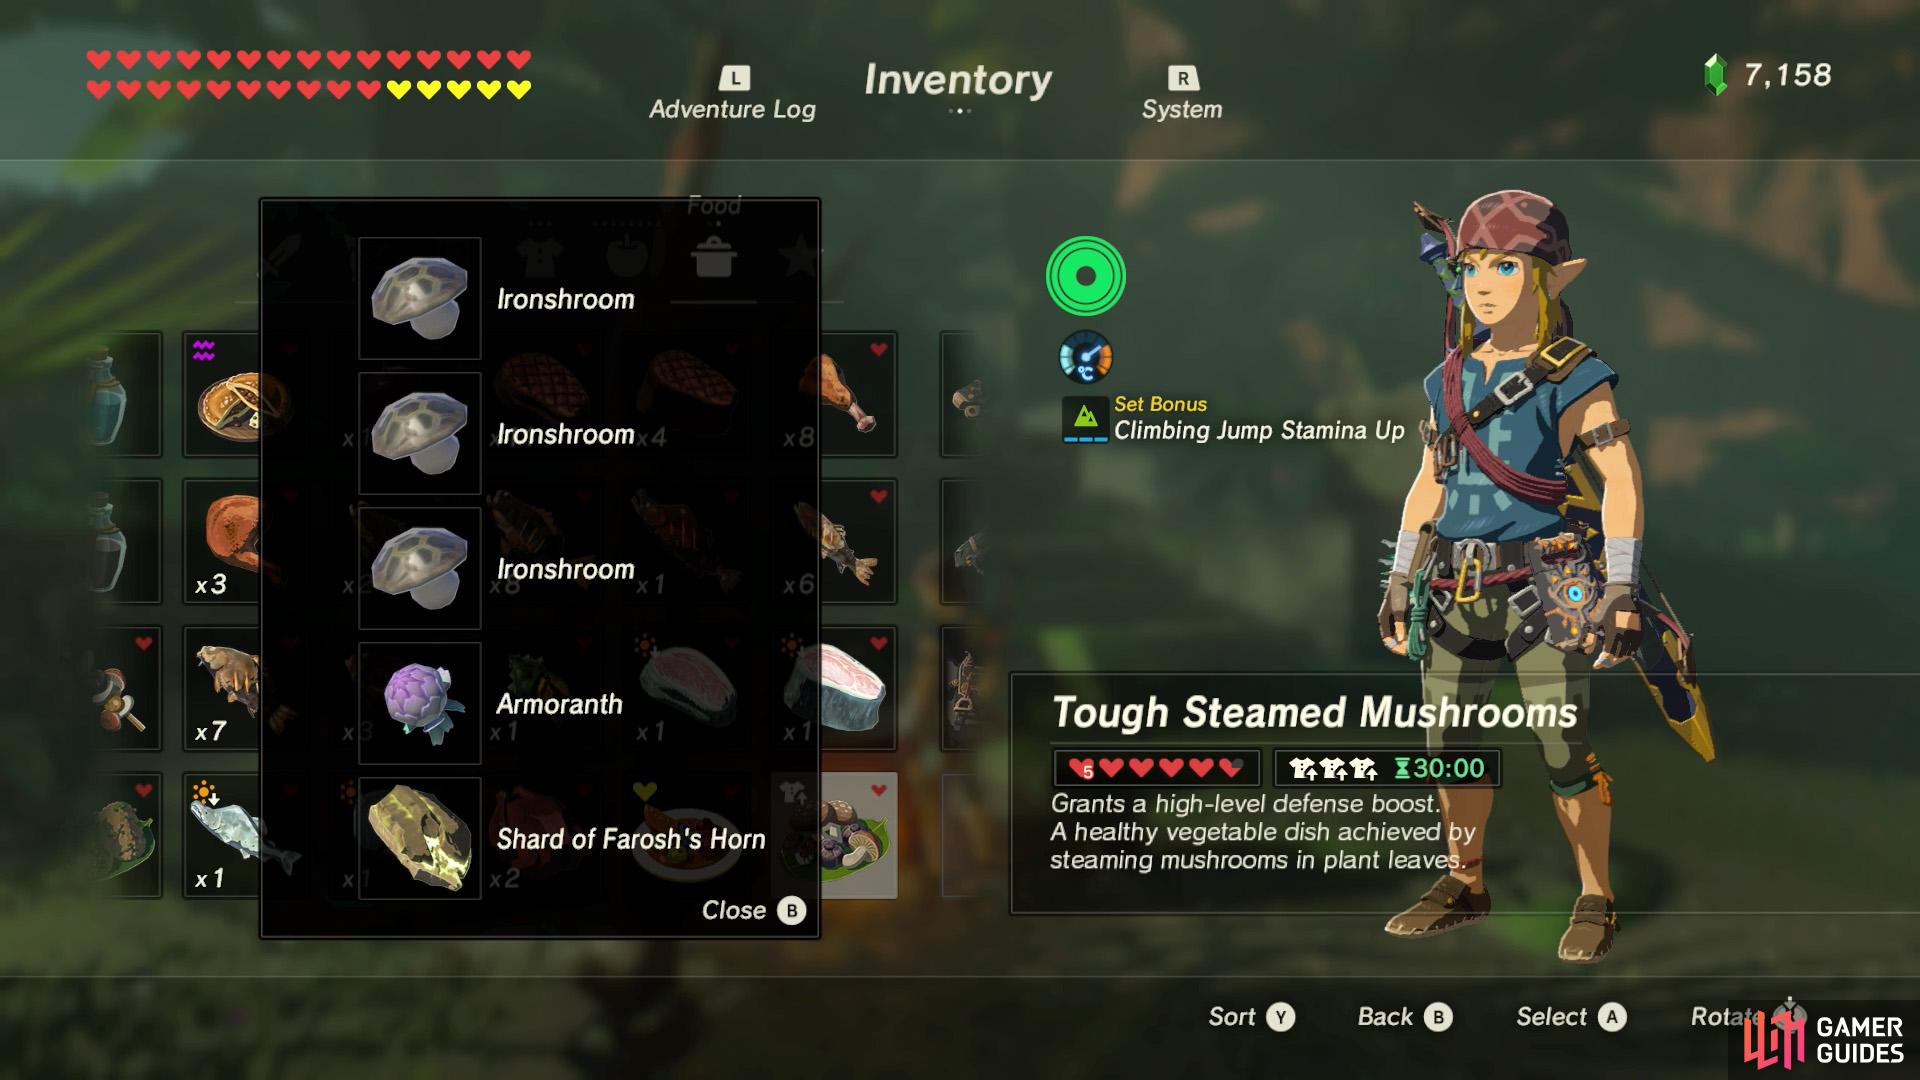
Here’s a sample dish for those worried about receiving a scratch or two.

Eat the meal before entering the trial and you’ll keep the buff!
Anyway, when you think you’re ready to attempt the trials, there is one way to make your experience more stress-free. As outlined above, food effects will persist, so long as you eat before entering the trials. Therefore you could cook a meal that lasts a really long time and provides a powerful buff.
For instance, any meal cooked with a horn from one of the three dragons (eg. Shard of Farosh’s Horn) will set the duration of the meal to a whopping 30 minutes. Now, unless you’re super-speedy, this won’t last for an entire trial, but it should apply for a large proportion of it.
Next, you need to think of what food buff you want. For those who are rather clumsy, we’d recommend defense buffs. To get the maximum Level 3 buff, you need 7 points worth of defense points, which can be achieved with, say, 3 Ironshrooms and 1 Armoranth. The 5th item has to be a horn, so it lasts for 30 minutes.
If you’re confident about your dodging skills or you’re playing on Master Mode, where enemies take ages to die, consider attack buffs. Likewise, you need 7 points worth of attack points to get the Level 3 buff. This can be done with 3 Razorshrooms and 1 Mighty Thistle, for example. Again, cook these together with a horn to maximize the duration.
No Comments