
Fenrir
BOSS ANALYSIS : Ugh, I hate these guys… One of his attacks is Fangs of Ruin, which is just nasty physical damage. Then there’s Fangs of Chaos - it will Confuse you and rip off 93.75% of your current HP. So it won’t kill you, but let you kill yourself. Finally, there’s Fangs of Hell, which is an instant KO to you, regardless if you have Deathproof or Ribbon. Yup, 297+ Dark Matters for nothing … well, there’s Confusion.
MAIN STRATEGY : Basically, expect to lose this fight without Ribbon/Confuseproof and Auto-Phoenix in your armor. Ribbon is good to stop Chaos Fangs’ Confusion to result in a self-death, and Auto-Phoenix stops Fangs of Hell. You’ll also likely want Auto-Potion and Auto-Protect - Auto-Potion with X-Potions helps to ward off Fangs of Ruin, and Auto-Protect more so.
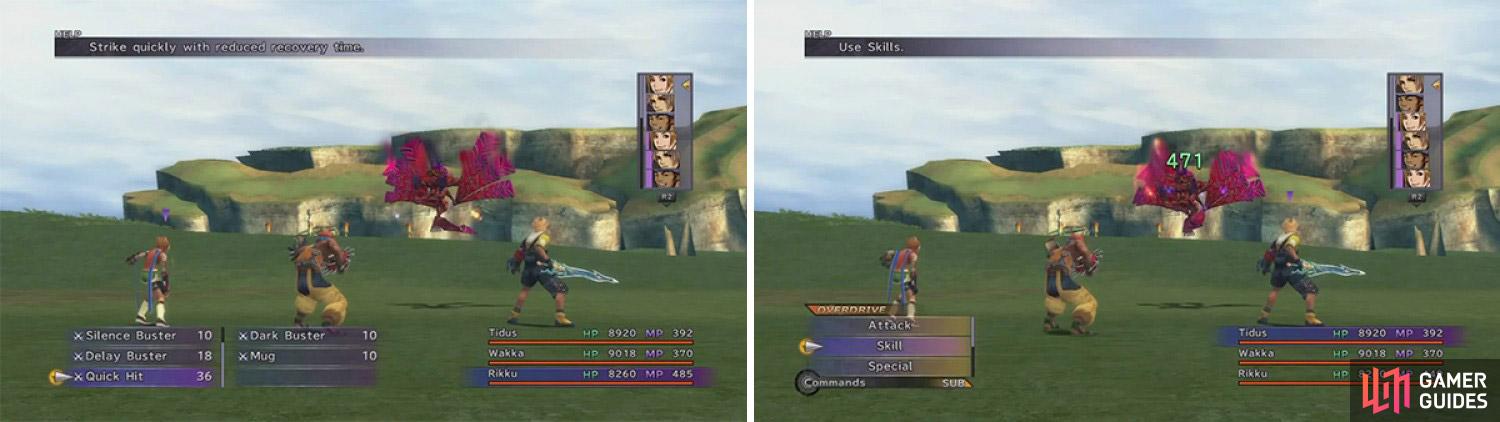
Anyhow, open the fight with what you don’t have of Hastega and Protect before you start to wail on it. Hitting it hard is pretty impossible, especially if you go the magical route - and that’s assuming you had enough Accuracy to hit him in the first place. I kept missing when I had 220+.About the only way to hit it for me was a couple of high-Strength (~190) Blitz Aces that ended up slaughtering this puppy. If you earnestly expect to be able to put up a non-Overdrive offense, you need to go physically and hope to God some of your Quick Hits hit, because that’s about the only way to do it - at least Quick Hit can give you a chance to respond after.
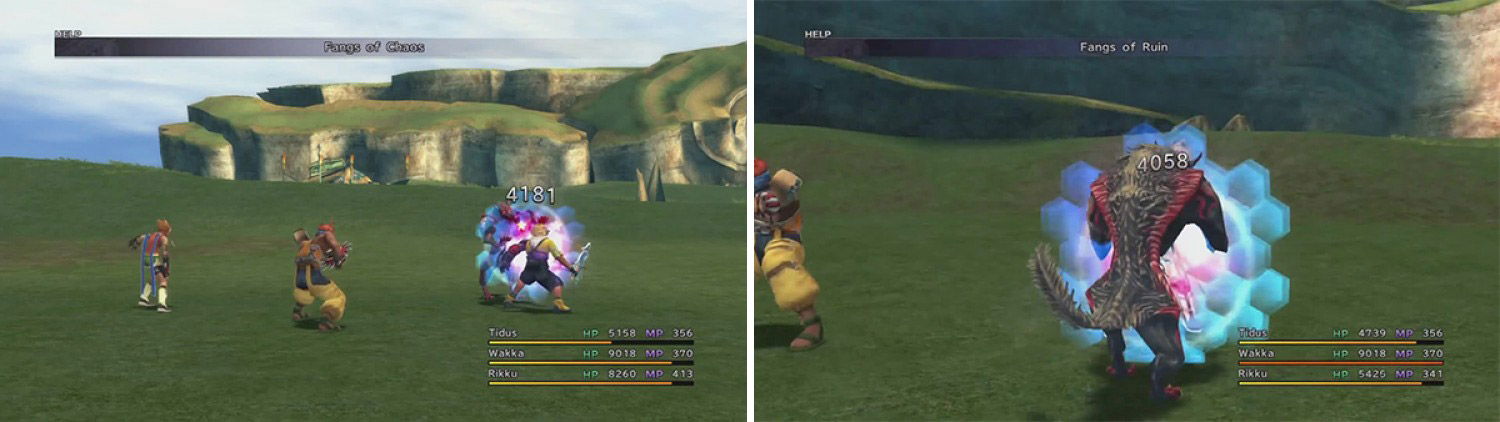
Fenrir has very high agility so your attacks will miss a lot of the time. Watch out for Fangs of Chaos.
Ornitholestes
BOSS ANALYSIS : There’s not much to say about this guy’s offense. You can expect Poison Touch; it’s the worst of the two attacks, tearing off 75% of your current HP and inducing Poison if you can’t prevent it. Drain Touch is basically a physical-damaging Drain spell.
MAIN STRATEGY : Not a lot to say about this one; you’ll need a high-Accuracy, high-Agility offense to be able to get anywhere with this guy, though. Have Protect from the start to halve some of the nastier damage and then get someone to use Hastega - both, of course, only if you need them. You might actually benefit in this fight from having someone use Aim a few times to boost up your Accuracy, but, beyond this, heal when needed.
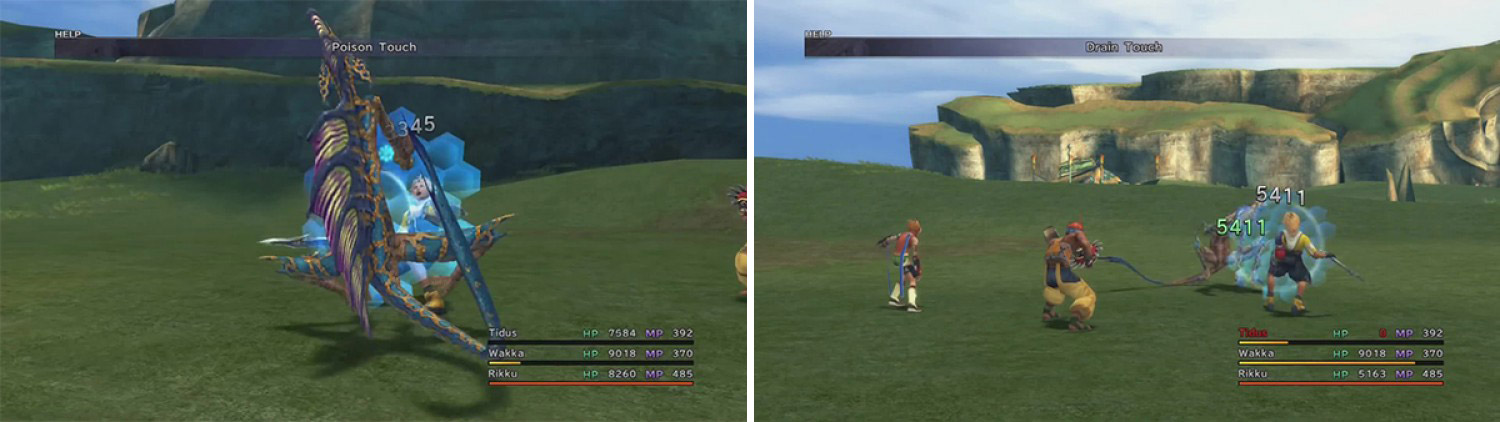
Drain Touch and Poison Touch are the main attacks but aren’t too powerful.
Pteryx
BOSS ANALYSIS : Yeah, this thing only has 100,000 HP. Must be a reason! … No, not really. It uses two attacks. One of them is a basic Beak attack that hits a character and causes a delay in their next turn, while Beak of Woe can hit one or everyone and induce Curse. It also ignores Protect.
MAIN STRATEGY : You ought to be fine here, really, if you’ve been fighting other Species/Original Creations. It doesn’t have exorbitant Evade or Strength (though Auto-Protect is nice), and the statuses are meager at best - relying on Overdrives is only really for the desperate, but at least they’re 100% accurate. So, basically, do a lot of damage quickly: Quick Hit him to death.
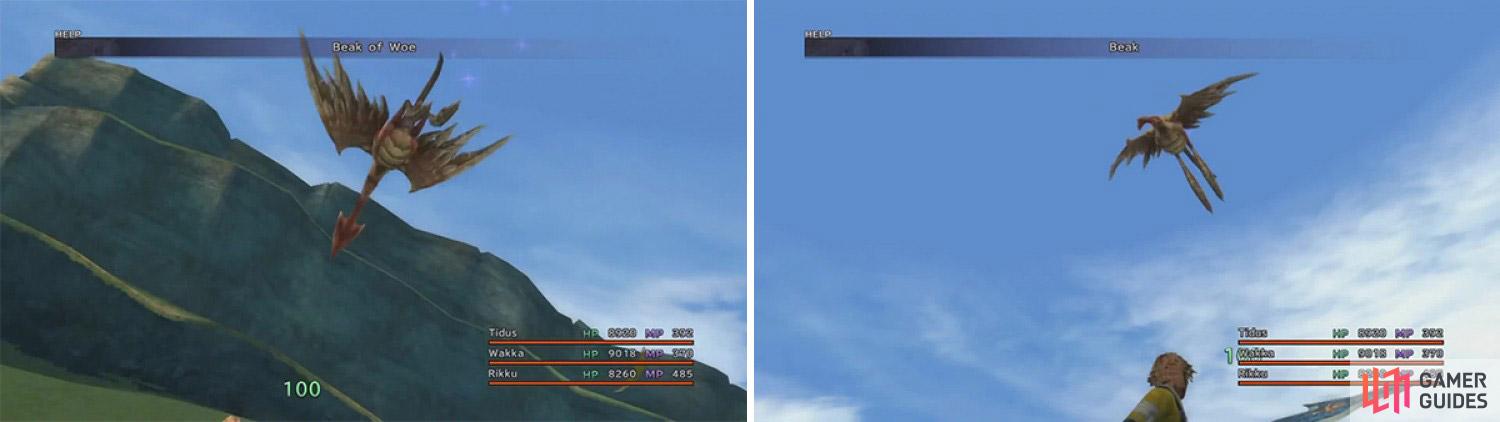
Beak of Woe will be used to inflict Curse on everyone. Once everyone is Cursed, it will revert to the normal Beak attack.
Hornet
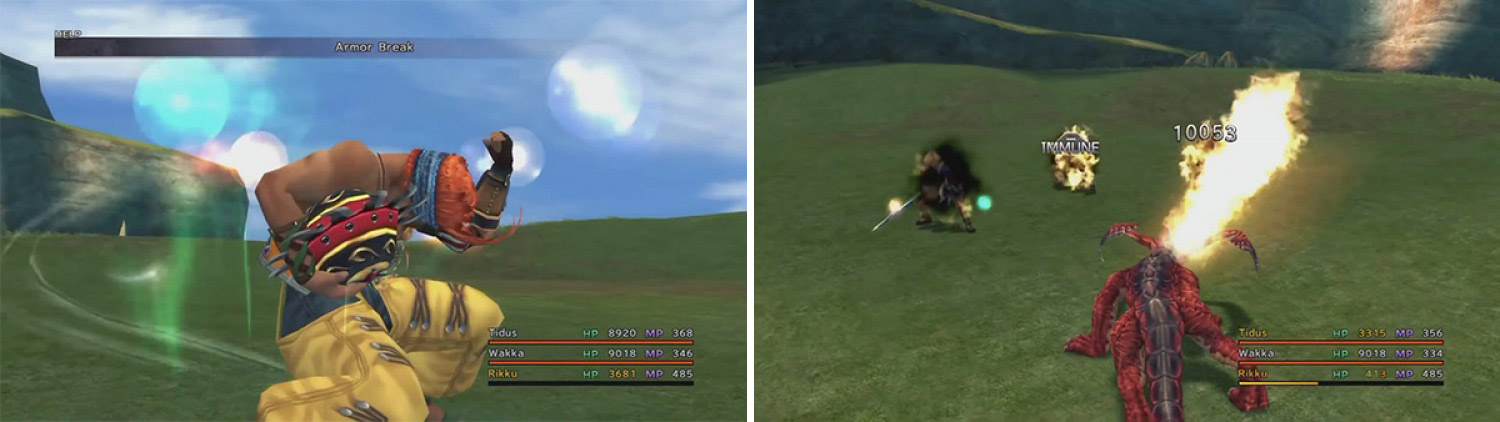
BOSS ANALYSIS : A pretty expectable offense. You’ll see a basic physical - it’s main danger - that can deal damage and induce Silence, Darkness, and Sleep, each for three turns … assuming you survive the instant-death part of it with Ribbon/Deathproof. Yeah, it’ll kill you without those. It can also use Venomous Stab or Bewitching Stab for damage and Poison or Confusion, respectively. Then there’s a self-Curaga.
MAIN STRATEGY : “Come in with Ribbon or die” - that’s the motto of this boss. wields a flyswatter
Begin by throwing up Hastega and Protect if they’re not Auto’d on your weapons. Haste especially will be needed, since that 102 Agility is no joke; even with only 63 Strength, if he starts getting in multiple consecutive attacks, you are in TROUBLE. After that, throw up Reflect on the boss. You shouldn’t be using a magical offense here anyhow; if you’re going to anyways, be sure to hit it directly with Ultima or to Reflect magic from yourself. You can also Silence it (95% chance) if you prefer.
After that, go into using Full Break or Banishing Blade - this should halve its Strength, Defense, Magic (‘cause that’s all it relies on ), and Magic Defense to 32 (16 with Protect), 35, 44, and 48, respectively. Not so harmful now, is he? From there, just start throwing up Quick Hit and he’ll go down semi-quickly.
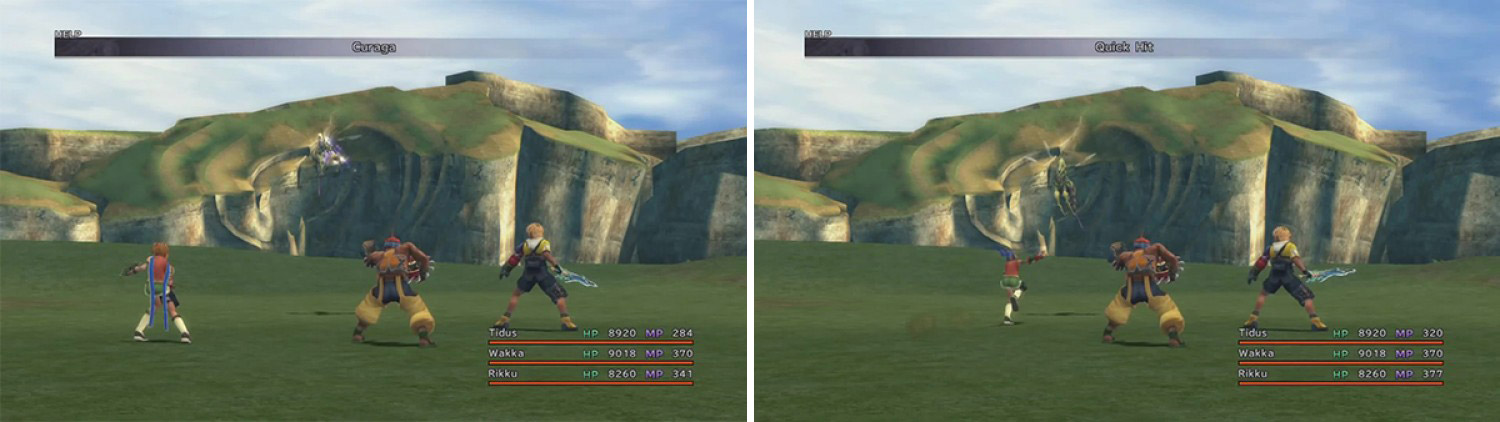
Curaga doesn’t do much and if you are protected from status ailments, you will have no trouble dealing with Hornet.
Vidatu
BOSS ANALYSIS : …? All you’ll see from the Vidatu are Osmose and Ultima. Osmose is probably just there to gather more MP for the Ultima since it is rather costly, but … wow.
MAIN STRATEGY : Disconsidering the fact that you can OHKO this boss? When you begin your offense, keep in mind that it has NulAll, so nothing elemental ever hits it, and there’s Regen, in case that surprises you. The main problem with this boss is its sheer bulk; 230 Defense and Magic Defense makes this the  Shuckle of FFX HD. (No, seriously, even Shuckle has a base 230 Def./Sp.Def in Pokémon.) If you open with Full Break or Banishing Blade, you’ll halve its Strength, Defense, Magic, and Magic Defense to more comfortable levels - 6, 115, 39, and 115, respectively, making Ultima laughable.
For the most part, just weaken him, put Hastega on yourself if you lack Auto-Haste, and use Quick Hit for a while.
Vidatu is one of the easiest bosses here. If you hit hard enough, you will breeze through without seeing Ultima at all.
One-Eye
BOSS ANALYSIS : This boss only has two attacks. There’s Black Stare, which hits for physical damage and can induce Curse to a single person. The other attack is Shockwave; it magically hits everyone and can induce Slow, Confusion, Sleep, Darkness, and Silence.
MAIN STRATEGY : Auto-Haste is imperative in this battle because the odds are basically 50% for this fiend using Shockwave to Slow you, and Ribbon is also imperative to stop the other ailments caused by it. After these two are installed onto your armor, all you have to worry about is simply damage that … oh, wait, Auto-Potion with X-Potions. Okay, never mind, Quick Hit/Overdrive away!
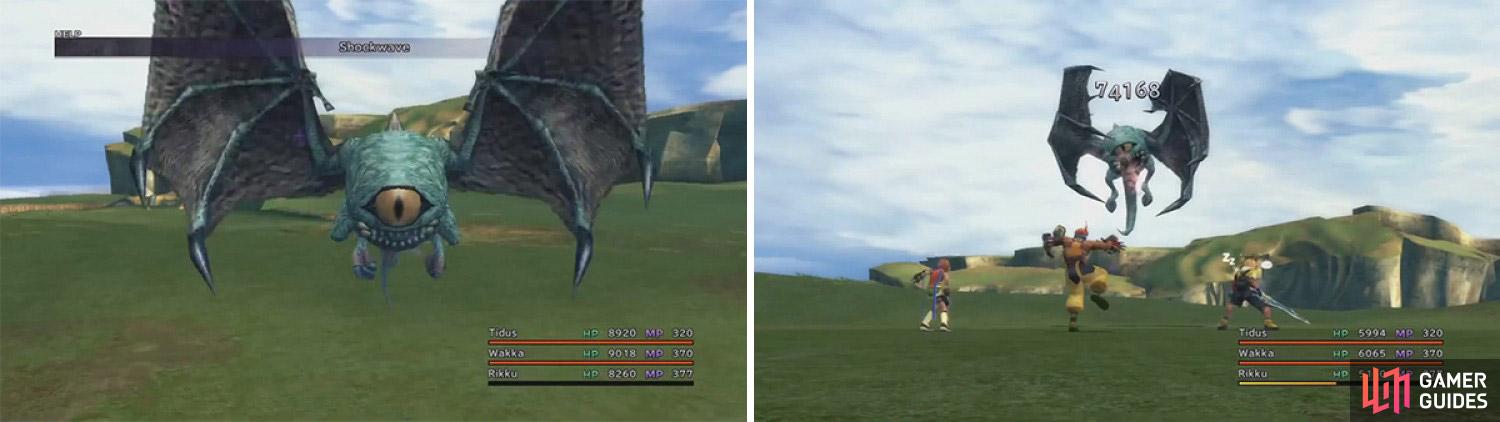
Shockwave is the worst of the lot but with sufficient protection, One Eye is a piece of cake.
Jumbo Flan
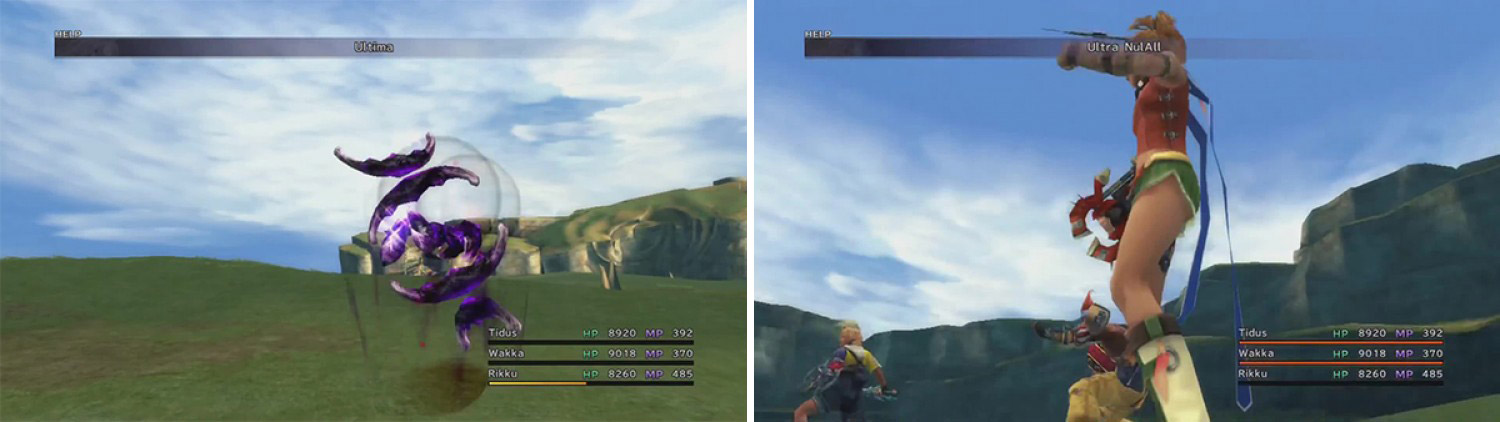
BOSS ANALYSIS : You can probably expect what you’ll get under this offense: Firaga, Blizzaga, Thunderaga, Waterga, Flare, and Ultima are the main things you’ll be hit with. The Jumbo Flan also semi-creatively uses Reflect on you, then later goes to bounce Regen or Curaga off of you onto it - don’t bother trying to fool it either; Dispelling it just causes it to avoid healing itself. Crap. But, yeah, it’s all magic here.
MAIN STRATEGY : I HATE this … uh … gelatinous blob thing! You cannot hit it physically (although Blitz Ace oddly worked), you cannot hit it elementally without hitting it, you cannot hit it directly with any magic without bouncing it off yourself due to its perma-Reflect, and it has 1.3 million HP. Geez…
Open with Hastega/Auto-Haste and, then hurry up and put Reflect on someone and begin Doublecasting Flare off of them. Also cast Slow on the Reflected person to bounce it to the Flan. After that, you can Dispel the Reflect on that someone and more properly Doublecast Ultima on the Flan, which pierces that Reflect; it’s not a lot more damage (+17%), but it’s something. From there on out, you basically have to just rely on Auto-Potion or Curaga for your healing while that 1,300,000 HP slowly grinds down … down … down … down … down …
ALTERNATE STRATEGY - ANIMA : Before this battle, you will need to have Anima if you plan to use this strategy (obviously enough). It is also recommended for her to know Haste and Regen, and Shell as well if you’ve yet to boost her Magic Defense significantly. Curaga would also be nice for emergencies. Open the battle with Anima throwing up Regen and Haste, in that order, then Shell as is applicable; this will allow her to regenerate her HP over time (lessens the need for Curaga) and get in a lot of turns, offensively. So, what does one do on those turns?
As it happens, Anima’s Pain is not classified as a physical (which would be nulled) or a magical (which would be Reflected) attack, allowing you to directly deal damage to the Jumbo Flan. Thus, it’s as simple as that with a good-’nuff Anima: self-buff, Pain, Pain, Pain, Pain, Pain, Pain…
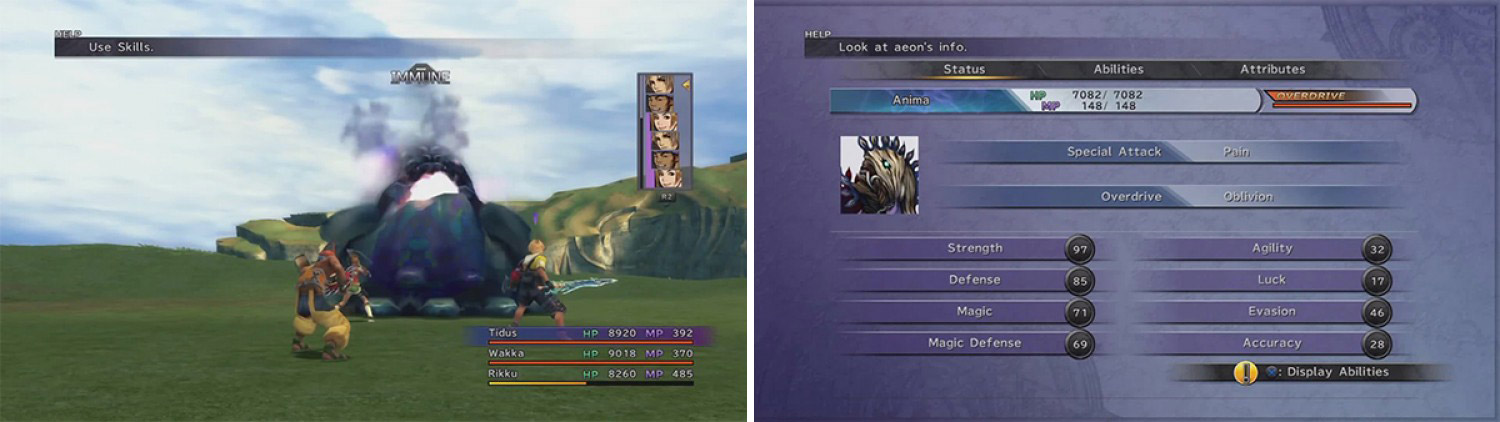
Jumbo Flan is pretty tough. He is completely immune to physical attacks and pretty much immune to direct elemental attacks. Anima is the easiest strategy as Pain will go through the defenses.
Nega Elemental
BOSS ANALYSIS : The Nega Elemental has a pretty basic, all-magic offense - Firaga, Blizzaga, Thundaga, Waterga, and Flare, with Ultima coming as a counterattack to anything you do to it.
MAIN STRATEGY : Without exception, open the fight with Reflect - this will send most of those painful spells back at Nega. He will be healed by most of them except Flare, but it’s relatively minor; you should be able to out-damage that bit of it. Ultima you can’t Reflect, so you’ll need to heal after it. But, overall, not a lot to say - throw up Reflect, then Doublecast Flare/Ultima to death. Remember to bounce the Flares off yourself, though, as Nega can Reflect itself.
Nul-All is very useful for this fight as the attacks are very strong. Reflect helps to avoid the worst of them.
Tanket
BOSS ANALYSIS : What a crappy offense - it can do a basic physical and it can also doing a slightly-faster basic physical. Both of these, however, cause Berserk and delay your next turn. Ouch. They’re also not too friendly at over 100 Strength.
MAIN STRATEGY : Well, first things first - without Berserkproof or Ribbon, you can have troubles here. Auto-Haste and Auto-Protect also very good. Beyond that, though, it’s mostly one of those heal-and-attack battles. Evade & Counter can be useful for dodging the attacks, at least. Be sure to use Armor/Full Break, too, to halve the boss’s 100 Defense to 50, then start barraging it with Quick Hit. This will become extremely vital at under 50% HP, too, as the boss will focus a lot on its Rush Attack, which seems to speed up its next turn like Quick Hit does, which will slowly kill you at low Agility if you can’t keep up. To be honest, the Overdrive set is the way to go for this one.
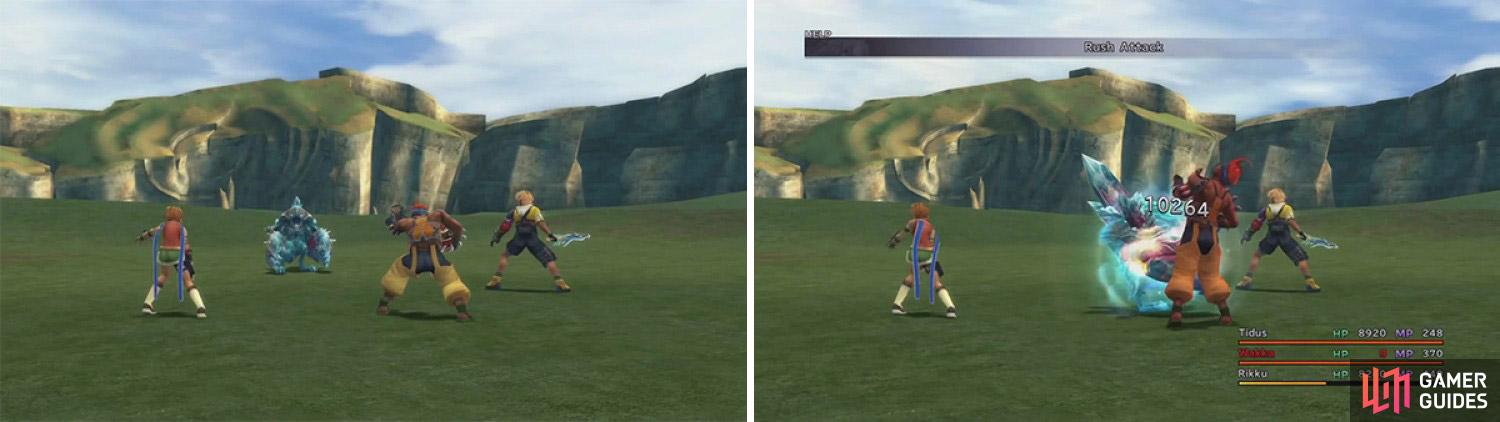
This guy is pretty rubbish. Other than one attack, he’s nothing to worry about. Auto-Phoenix will allow you to keep attacking if you do get K.O.ed.
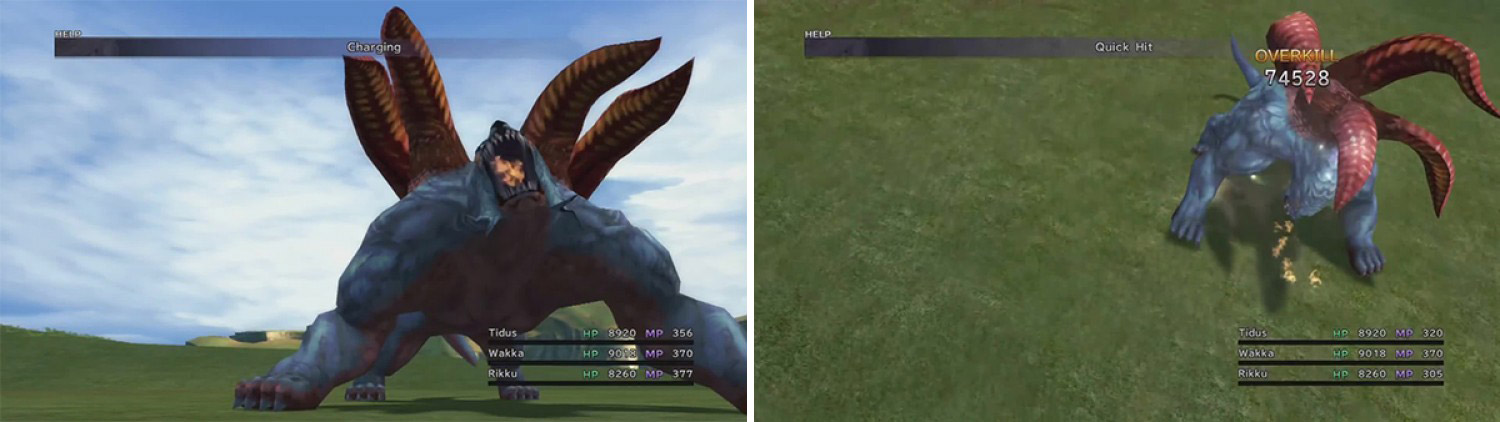
Fafnir
BOSS ANALYSIS : Fafnir is a nasty guy, but at least he has a set pattern of moves. He opens first with a basic physical attack. On the next turn, he does an Attack to one guy, hits everyone for Ice damage, and then Attacks another guy, all in the same turn. On turn three, he uses the same thing, but using Fire damage; on turn four, then same thing, but Lightning damage; and an Attack on turn five and loop from there. We’re talking an average of 2.2 attacks per turn.
MAIN STRATEGY : Due to the sheer amount of damage flying around, having Auto-Protect and Auto-Shell or opening with Hyper Mighty G (yes, nothing less than that type of opening) will be VITAL to your survival. Also open with Hastega and Auto-Life, and maybe Regen - though, honestly, the less time you can spend on this setting-up bit, the better. If you happen to already have Auto-Protect, Auto-Shell, and Auto-Haste, then Rikku opening with Ultra NulAll also saves a ton of time (NulAll, 5 each of Cheer, Focus, Aim, Reflex).
As you begin, start by blowing up NulFrost, NulBlaze, and NulShock, in that order, and refilling the empty holes when they come. This will take a load off of your damage since those Triple Attacks’ elemental portions hit everyone. If you can keep up with him, you’ll end up nullifying a lot of the damage yourself through the Nul-spells and Auto-X-Potions. You’ll also want to open with Full Break or Banishing Blade to halve this beast’s stats (38 Str or 19 with Protect, 15 Def, 55 Mag or 28 with Shell, 65 MDef). That done, you can get onto the real offense - due to the significantly smaller Defense, it will be better to use a lot of Quick Hit, since physical attacks here on average deal 333% more damage.
Nul-All will once again be very useful here. His physical attack isn’t too bad but the elemental attacks are devastating.
Sleep Sprout
BOSS ANALYSIS : You’ll learn to hate this guy in due time if you can’t OHKO him. Why? The move Goodnight causes damage to everyone and puts Sleep, Poison, Berserk, and Armor/Power Break on them. (BTW, you don’t block Breaks with Ribbon.) There’s also a number of basic Black Magic spells you’ll see: Firaga, Blizzaga, Thundaga, Waterga, Flare, and Ultima. So, nothing unexpected there, but all the damage here is magical and that’s a pretty high Magic stat, wouldn’t you say? Its main strategy is to halve your physical damage so that you can’t really strike at its 167 Defense (Power Break, you see?), and you can’t Break it, either…
MAIN STRATEGY : Anyhow, what to do when the battle begins? Well, you better have First Strike on someone and Yuna out of the initial party on the off-chance you’re ambushed; if you are, there’s the Goodnight attack and you’re pretty screwed because, even with Ribbon, you’ll still get your Strength and Defense halved through Power Break. (Though, now that I think about it, why does it bother with Armor Break if it has no physical attacks?) You’ll also see Goodnight if you ever attack physically, so, ouch….
Open your fight with Aeon cannon fodder if you must, but otherwise throw up Shell and Hastega. Reflect wouldn’t be too bad (in addition to Shell, since Goodnight is magical and nonreflectable, as is Ultima) to throw back some spells. Once that’s done, go for Quick Hit if you have Ribbon and are willing to stand the Goodnight’s damage (though you definitely won’t Quick Hit again). Otherwise, Flare, Ultima, and the like work good. It won’t take long to fall, I assure you … you can just Trio of 9999 this guy away if you must!
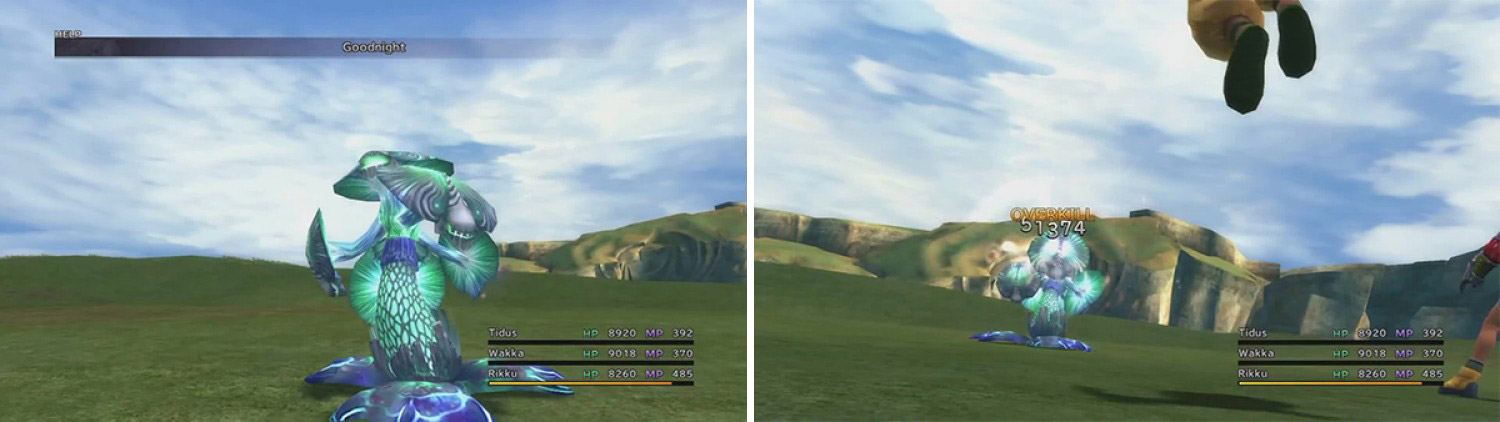
Goodnight will basically make this fight almost impossible for you so First Strike is essential. You should be able to one hit kill it before it gets a chance to attack.
Bomb King
BOSS ANALYSIS : … It’s a Bomb, what’d’ya expect? It can use Fira and Firaga for its main elemental magic spells, as well as a physical attack. You’ll also see Ultima, of course, though their power is mediocre for the Monster Arena Creations. You’ll also see the boss grow like a normal Bomb in response to being hit (takes three hits here), although this is seemingly aesthetic as, unlike normal Bombs, the boss doens’t blow up after the fourth hit. Growing does have a minor purpose, though, in advancing the boss’s offense from Fira to Firaga to Ultima, so look out for that … or abuse thereof, as to be discussed later.
MAIN STRATEGY : Nothing special to begin with. I seriously recommend opening the fight with three Quick Hits, before anything else. This will make the Bomb King grow once, changing his offense to Fira in lieu of his physical attack. We can nullify Fira, but not a physical attack - in fact, the whole strategy below relies on buffing up while nullifying any antagonizing attacks for the SOLE purpose of defeating this boss as fast as possible before a good Ultima can get in.
Since the Bomb King is limited to Fira and a basic physical at the start, take your sweet time buffing with Hastega, Shell, Protect, Regen, and Auto-Life - hey, may as well, since we rarely get such good chances. Heck, spamming NulBlaze may not even be too bad an idea. Or you can have Rikku throw up Hyper Mighty G or Ultra NulAll - depending on what your armor abilities are (nothing really important for HMG, and Auto-Haste/Protect/Shell/Regen for Ultra NulAll to get some stat boosts). Trust me, you’ll be happy about this buffing time later, especially if you go around and throw up lots of Cheer and Focus, too…
I’m not kidding. Do it.
After it’s done, begin to bash the crap out of the Bomb King - but wait until literally just after his turn to do so. Again, if you hit him, he grows and his offense increases to Firaga and then to Ultima - you don’t want to be hit by Ultima in lieu of Fira just because you had to get in two Quick Hits, right? AFTER the boss’s Fira, go into a Quick Hitting frenzy - do nothing but Quick Hit, as you’ll not be countered until the boss eventually gets to use Ultima. Hopefully, with Break Damage Limit and some high Agility, you might not even have to SEE a non-nullified attack.

This guy is just a super powered Bomb. Bomb King will not grow bigger if you counterattack. Ultima is the most destructive spell so avoid it.
Juggernaut
BOSS ANALYSIS : The Juggernaut uses only a few attacks. It can use a basic attack for some damage, and it can use Crush Spike to instantly kill, or to damage if you have Deathproof/Ribbon. There’s also Salvo, which takes a turn to charge, and the charging begins after the Juggernaut uses its fourth Crush Spike. Salve is basically some nasty Fire-elemental damage to everyone.
MAIN STRATEGY : Ribbon/Deathproof and Fireproof/Eater are essential for this fight. … Well, Fire Eater isn’t really, but it’s nice to absorb Salve, eh? In any case, you have enough time before it’s fired to put up NulBlaze if you want. Anyhow, there’s not much to say. Open with what you don’t have Auto’d of Hastega/Protect, then simply go into some Quick Hits and heal as needed. (Don’t expect to get in anything magical, since the Juggernaut is immune to all magic.) You may want to put up Full Break or Banishing Blade to halve his offenses and defenses, each quite significantly (49 Str, 70 Def, 35 Mag, 31 MDef). Be sure to use NulBlaze at some point before a Salvo is fired, and that’s pretty much it - eventually, he’ll go down.
Juggernaut isn’t that fast so if you are speedy, you can kill it before it unleashes its strongest attacks. Armour Break is very useful if you can place it on him.
Ironclad
BOSS ANALYSIS : The Ironclad is essence of bulkiness, boasting 220 Defense, 180 Magic Defense, and a whopping 2,000,000 HP, more than any other Species or Area Creation, any normal FFX enemy, some Dark Aeons, and … ah, you get the message. Anyhow, the boss’s attacks are rather weak: there’s Reppageki (hits one), Bushinzan (all), and Shinryudan (one). He actually uses them in that order, too. The first two are about the same in power, with the Shinryudan being about 50% stronger. They’re like 15~25 altogether in their base power, by the way; most good magic is stronger. It’s not important, but it shows you how much this guy relies on tanking you rather than fighting mano a mano.
MAIN STRATEGY : Of course, when I fight a tank, regardless of the RPG, it almost always loses. Open the fight with what you lack of Hastega, Protect, Regen, and Auto-Life - if you must, Hyper Mighty G saves a few turns. (Shell isn’t needed, since all the boss’s attacks are outright physicals.) Also be sure to use Full Break or Banishing Blade on him to halve his Defenses; you won’t get Power Break through (and Magic Break is useless), but it again saves some time. From there on out, use Quick Hit if you want the physical offense, though Flare and Ultima are smarter as they’ll deal ~22% more damage and can be Doublecasted. A simple but lengthy fight, really.
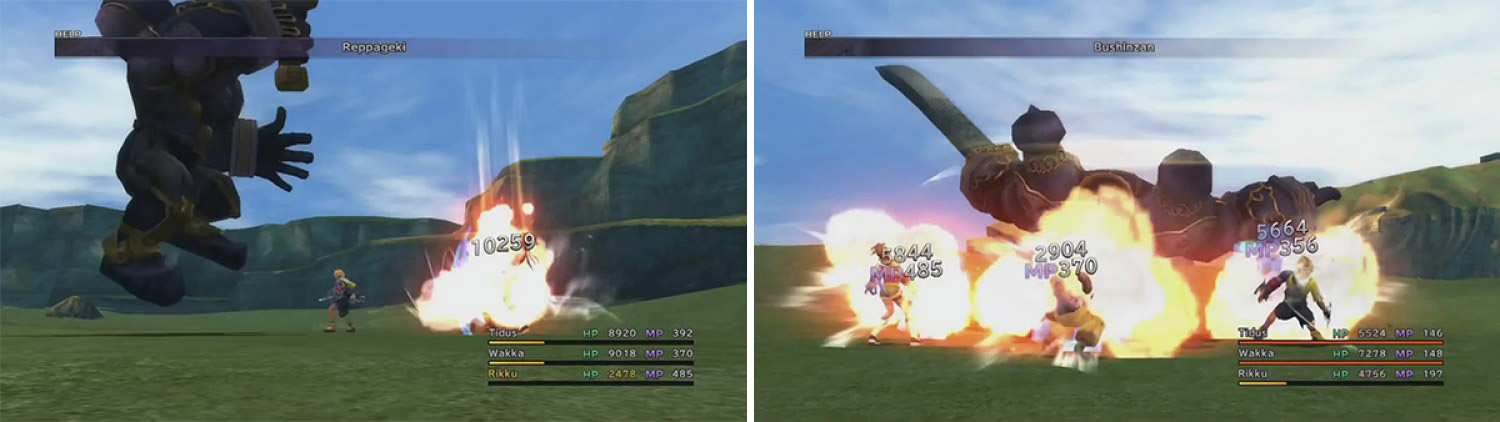
Ironclad will use Reppageki as a counter attack and Bushinzan will hit all but steal all of your MP too. Protecting against physical damage is a must.
No Comments