


| Location | Respawn Time | Element |
|---|---|---|
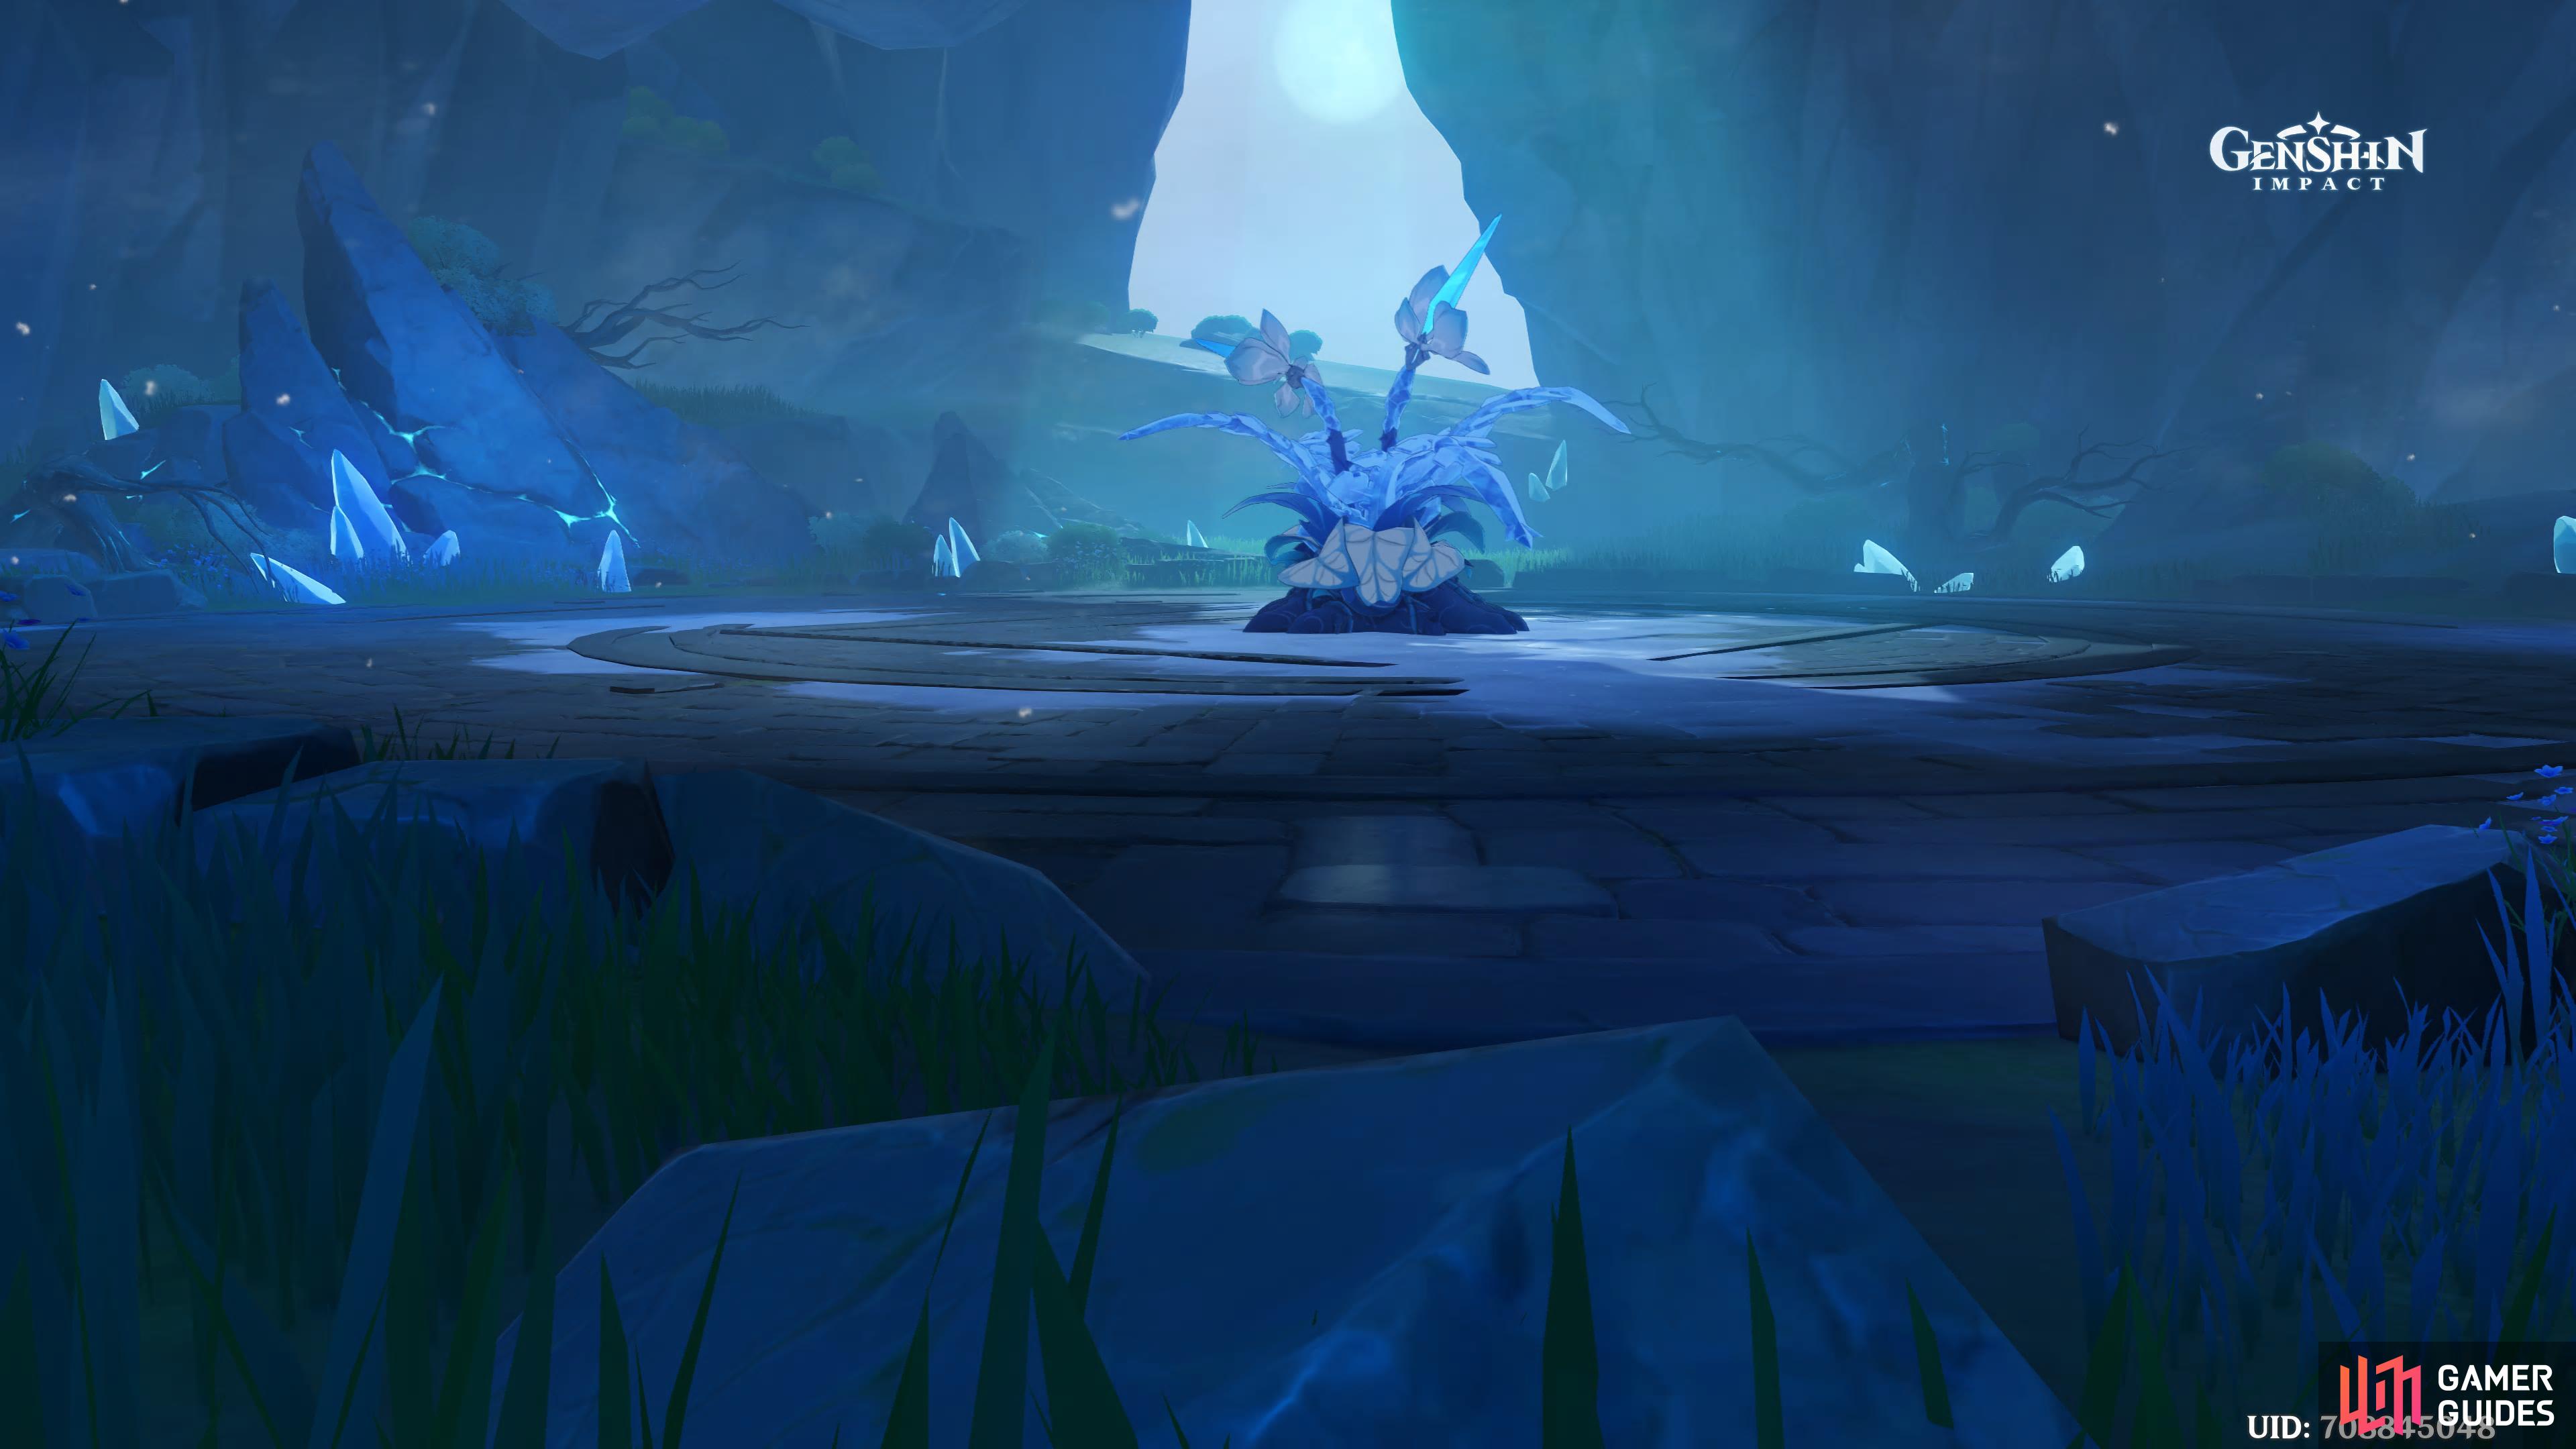
| Falcon Coast, Mondstadt | 5 minutes (Instant, if you teleport away and back again) |  Cryo Cryo |
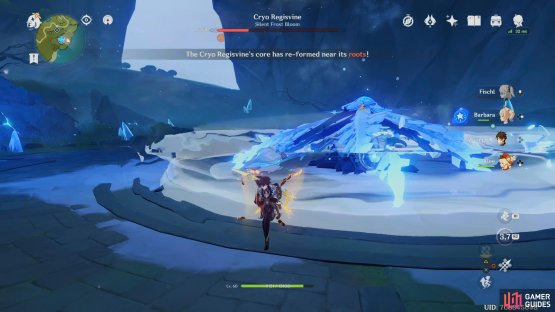
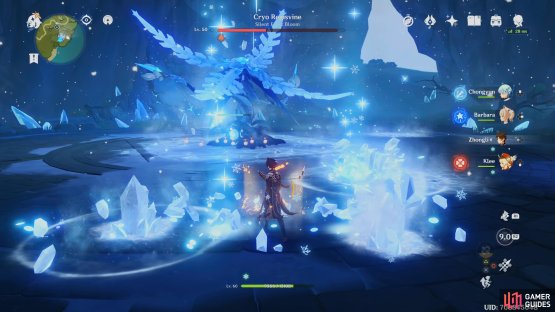
A monster formed from a vine that was imbued with the essence of biting frost within the Ley Lines. Some studies hold that plants are like organs of the world, harmonizing the turbulent elemental energies of the Ley Lines. Concrete examples of this phenomena are Mist Flowers, Whopperflowers and the like, which brim over with elemental energy. In certain circumstances, certain plants will turn into creatures of monstrous size and intent — such as the Cryo Regisvines — over the course of many years.
Rewards
| World Level | Boss Level |  |
Common Ascension Material | Artifacts | |
|---|---|---|---|---|---|
| I | 37 | 30 | 3,450 |        |
|
| II | 41 | 30 | 3,650 | |
|
| III | 50 | 35 | 3,850 | |
|
| IV | 62 | 35 | 4,125 | |
|
| V | 72 | 40 | 4,450 | |
|
| VI | 83 | 40 | 4,725 | |
|
| VII | 91 | 45 | 5,200 | |
|
| VIII | 93 | 45 | 6,000 | |
Description
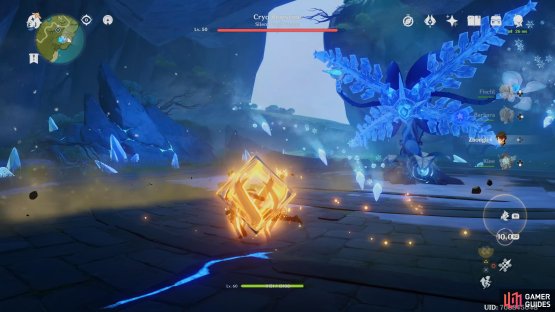
The Regisvine family are your go to place to obtain your character Ascension Materials because they will always drop two of them depending on what Regisvines (or Hypostasis) you fight including some artifacts. The Regisvines are huge Whopperflowers which have alternating weak points at their “Root” (the base of the stem) and their “Corolla” (on top of it).
Root Phase attacks
This phase is started if the last weak spot that was destroyed was its Root.
Twin Ice Beam
The Regisvines tendrils will start to glow indication a cross shaped attack incoming, dodge towards it to avoid it, sometimes you can dodge to the side as well.

(1 of 2) Sprint towards the beam and dodge towards the boss just as the beam approaches you
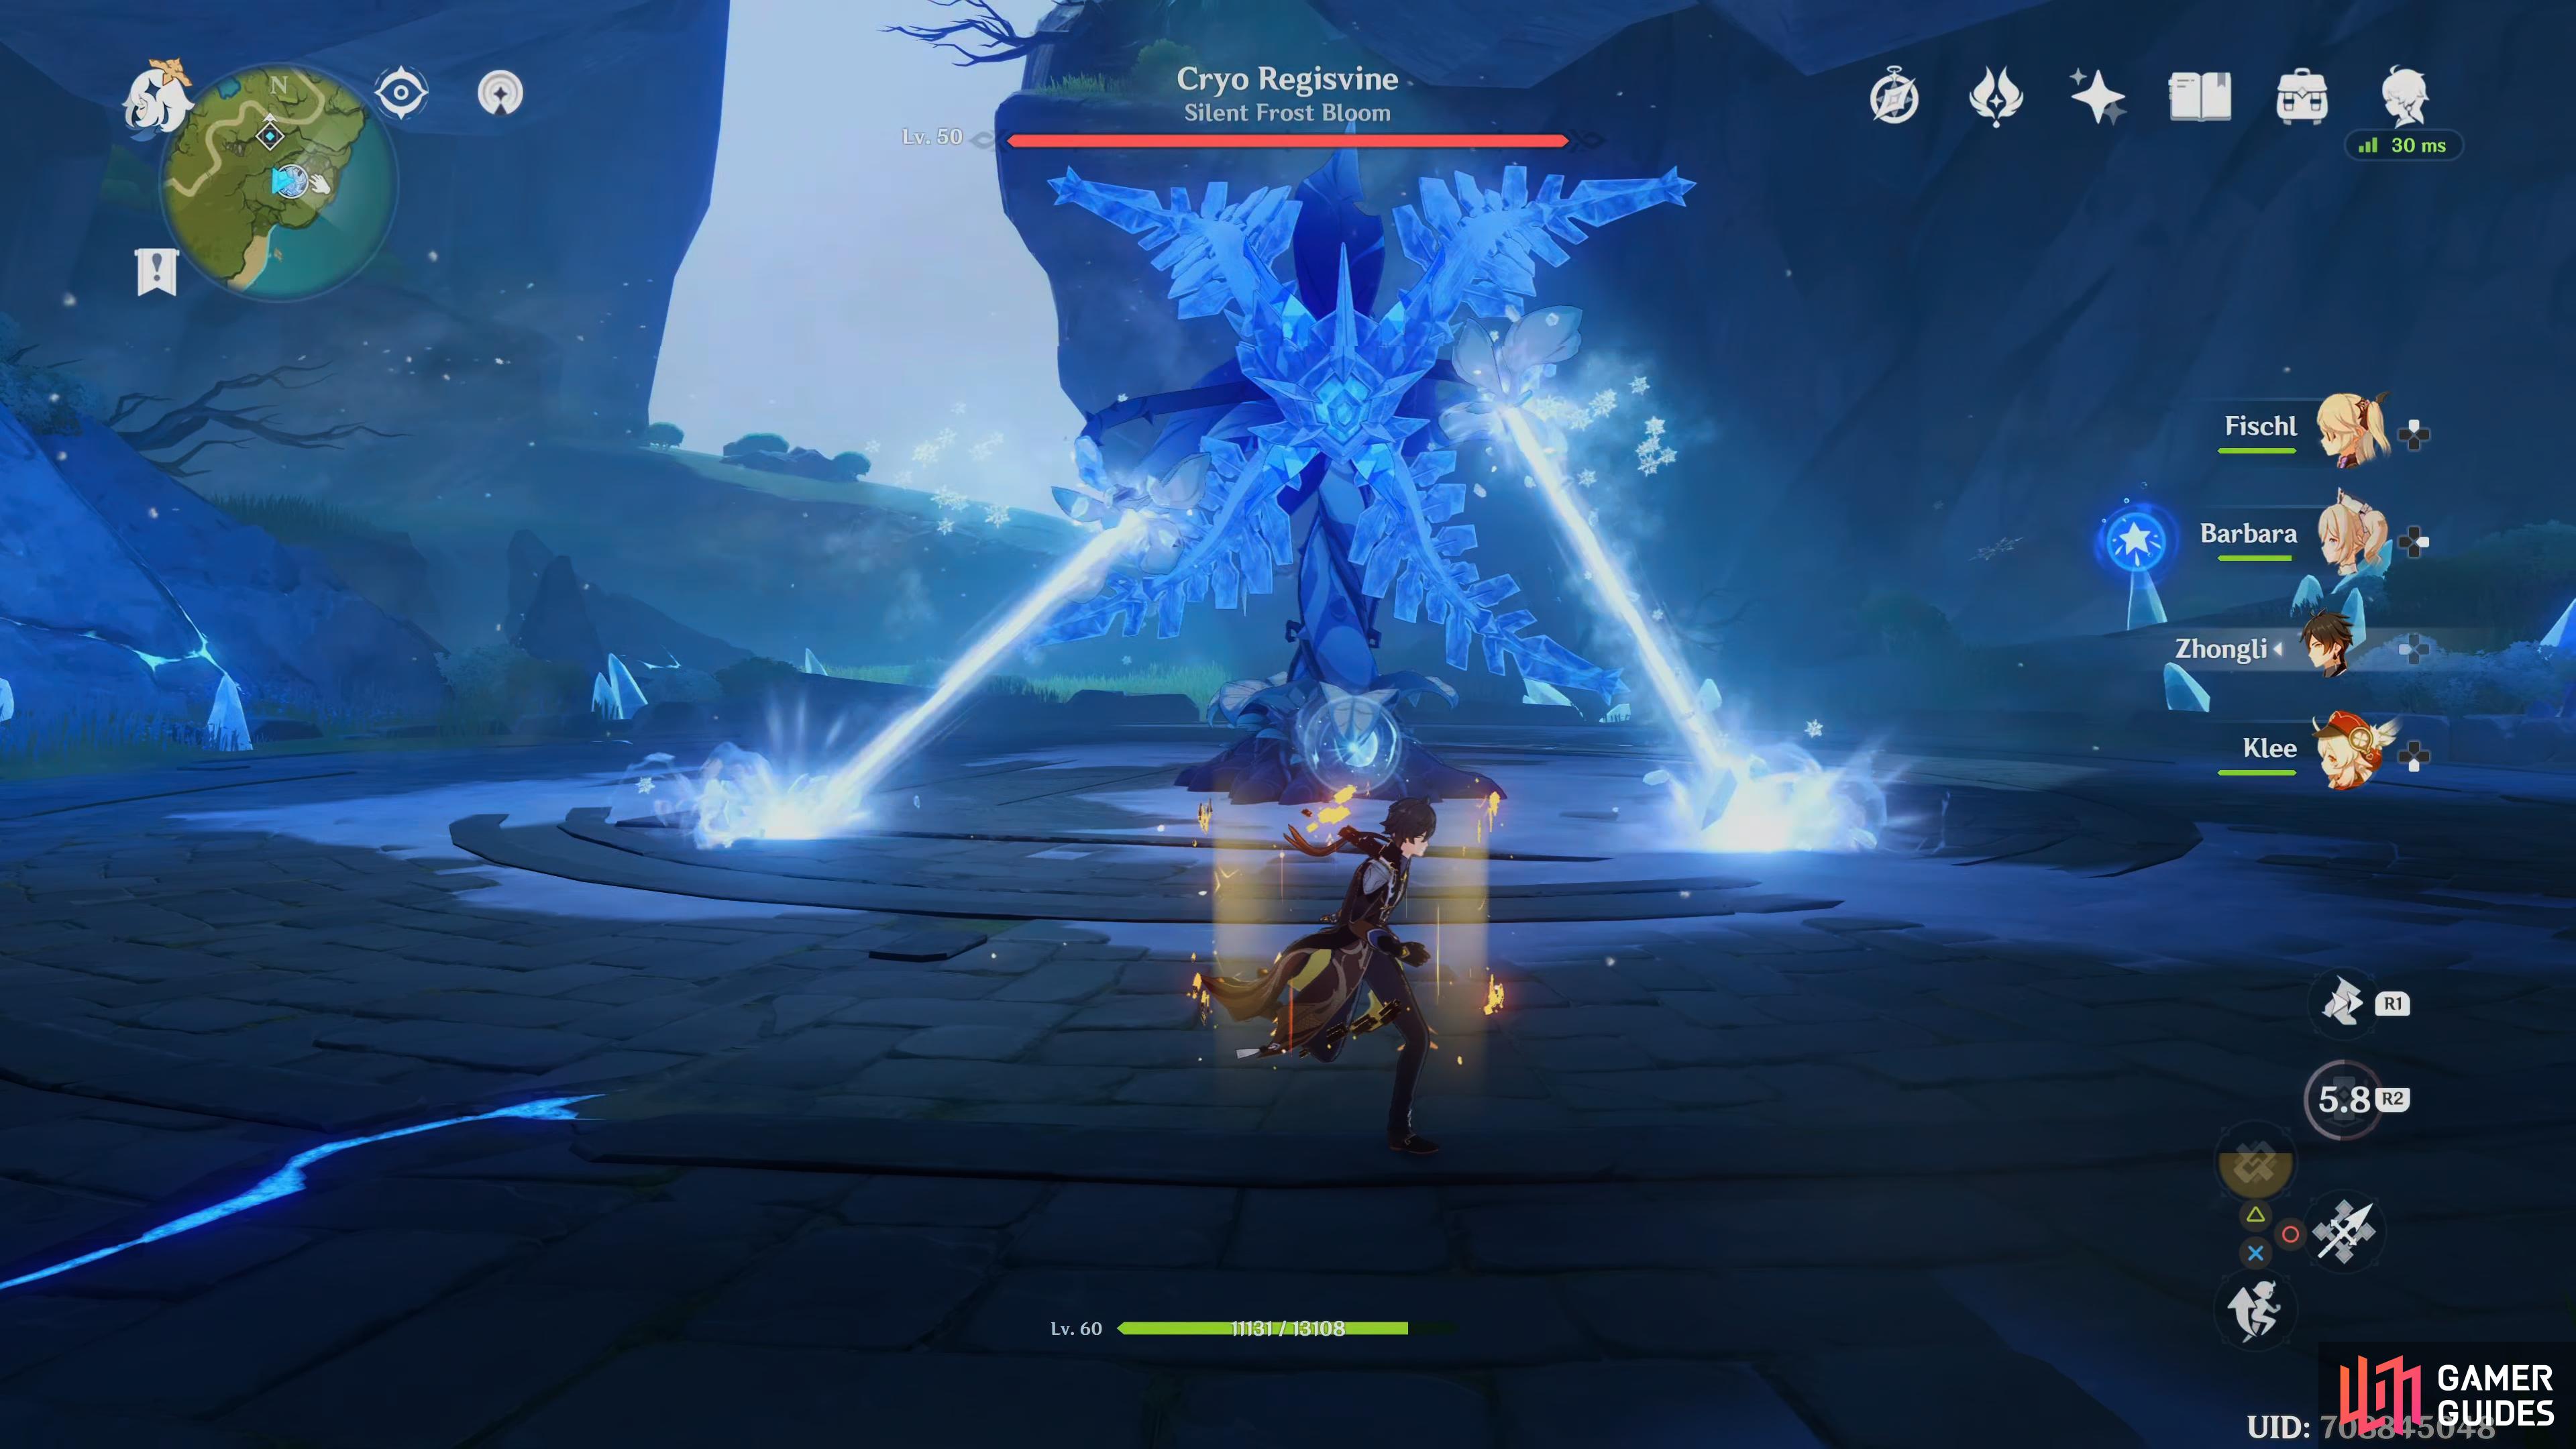

Sprint towards the beam and dodge towards the boss just as the beam approaches you (left), the boss will shoot out two barrages of homing icicles from each tendril. (right)
Homing Barrage
Raising its tendrils again but not glowing and at less height means the boss will launch a barrage of mini homing icicles for minor damage, avoid this by running one direction then forward a bit and then to the opposite direction. Due to its low damage, getting hit by this won’t do too much.
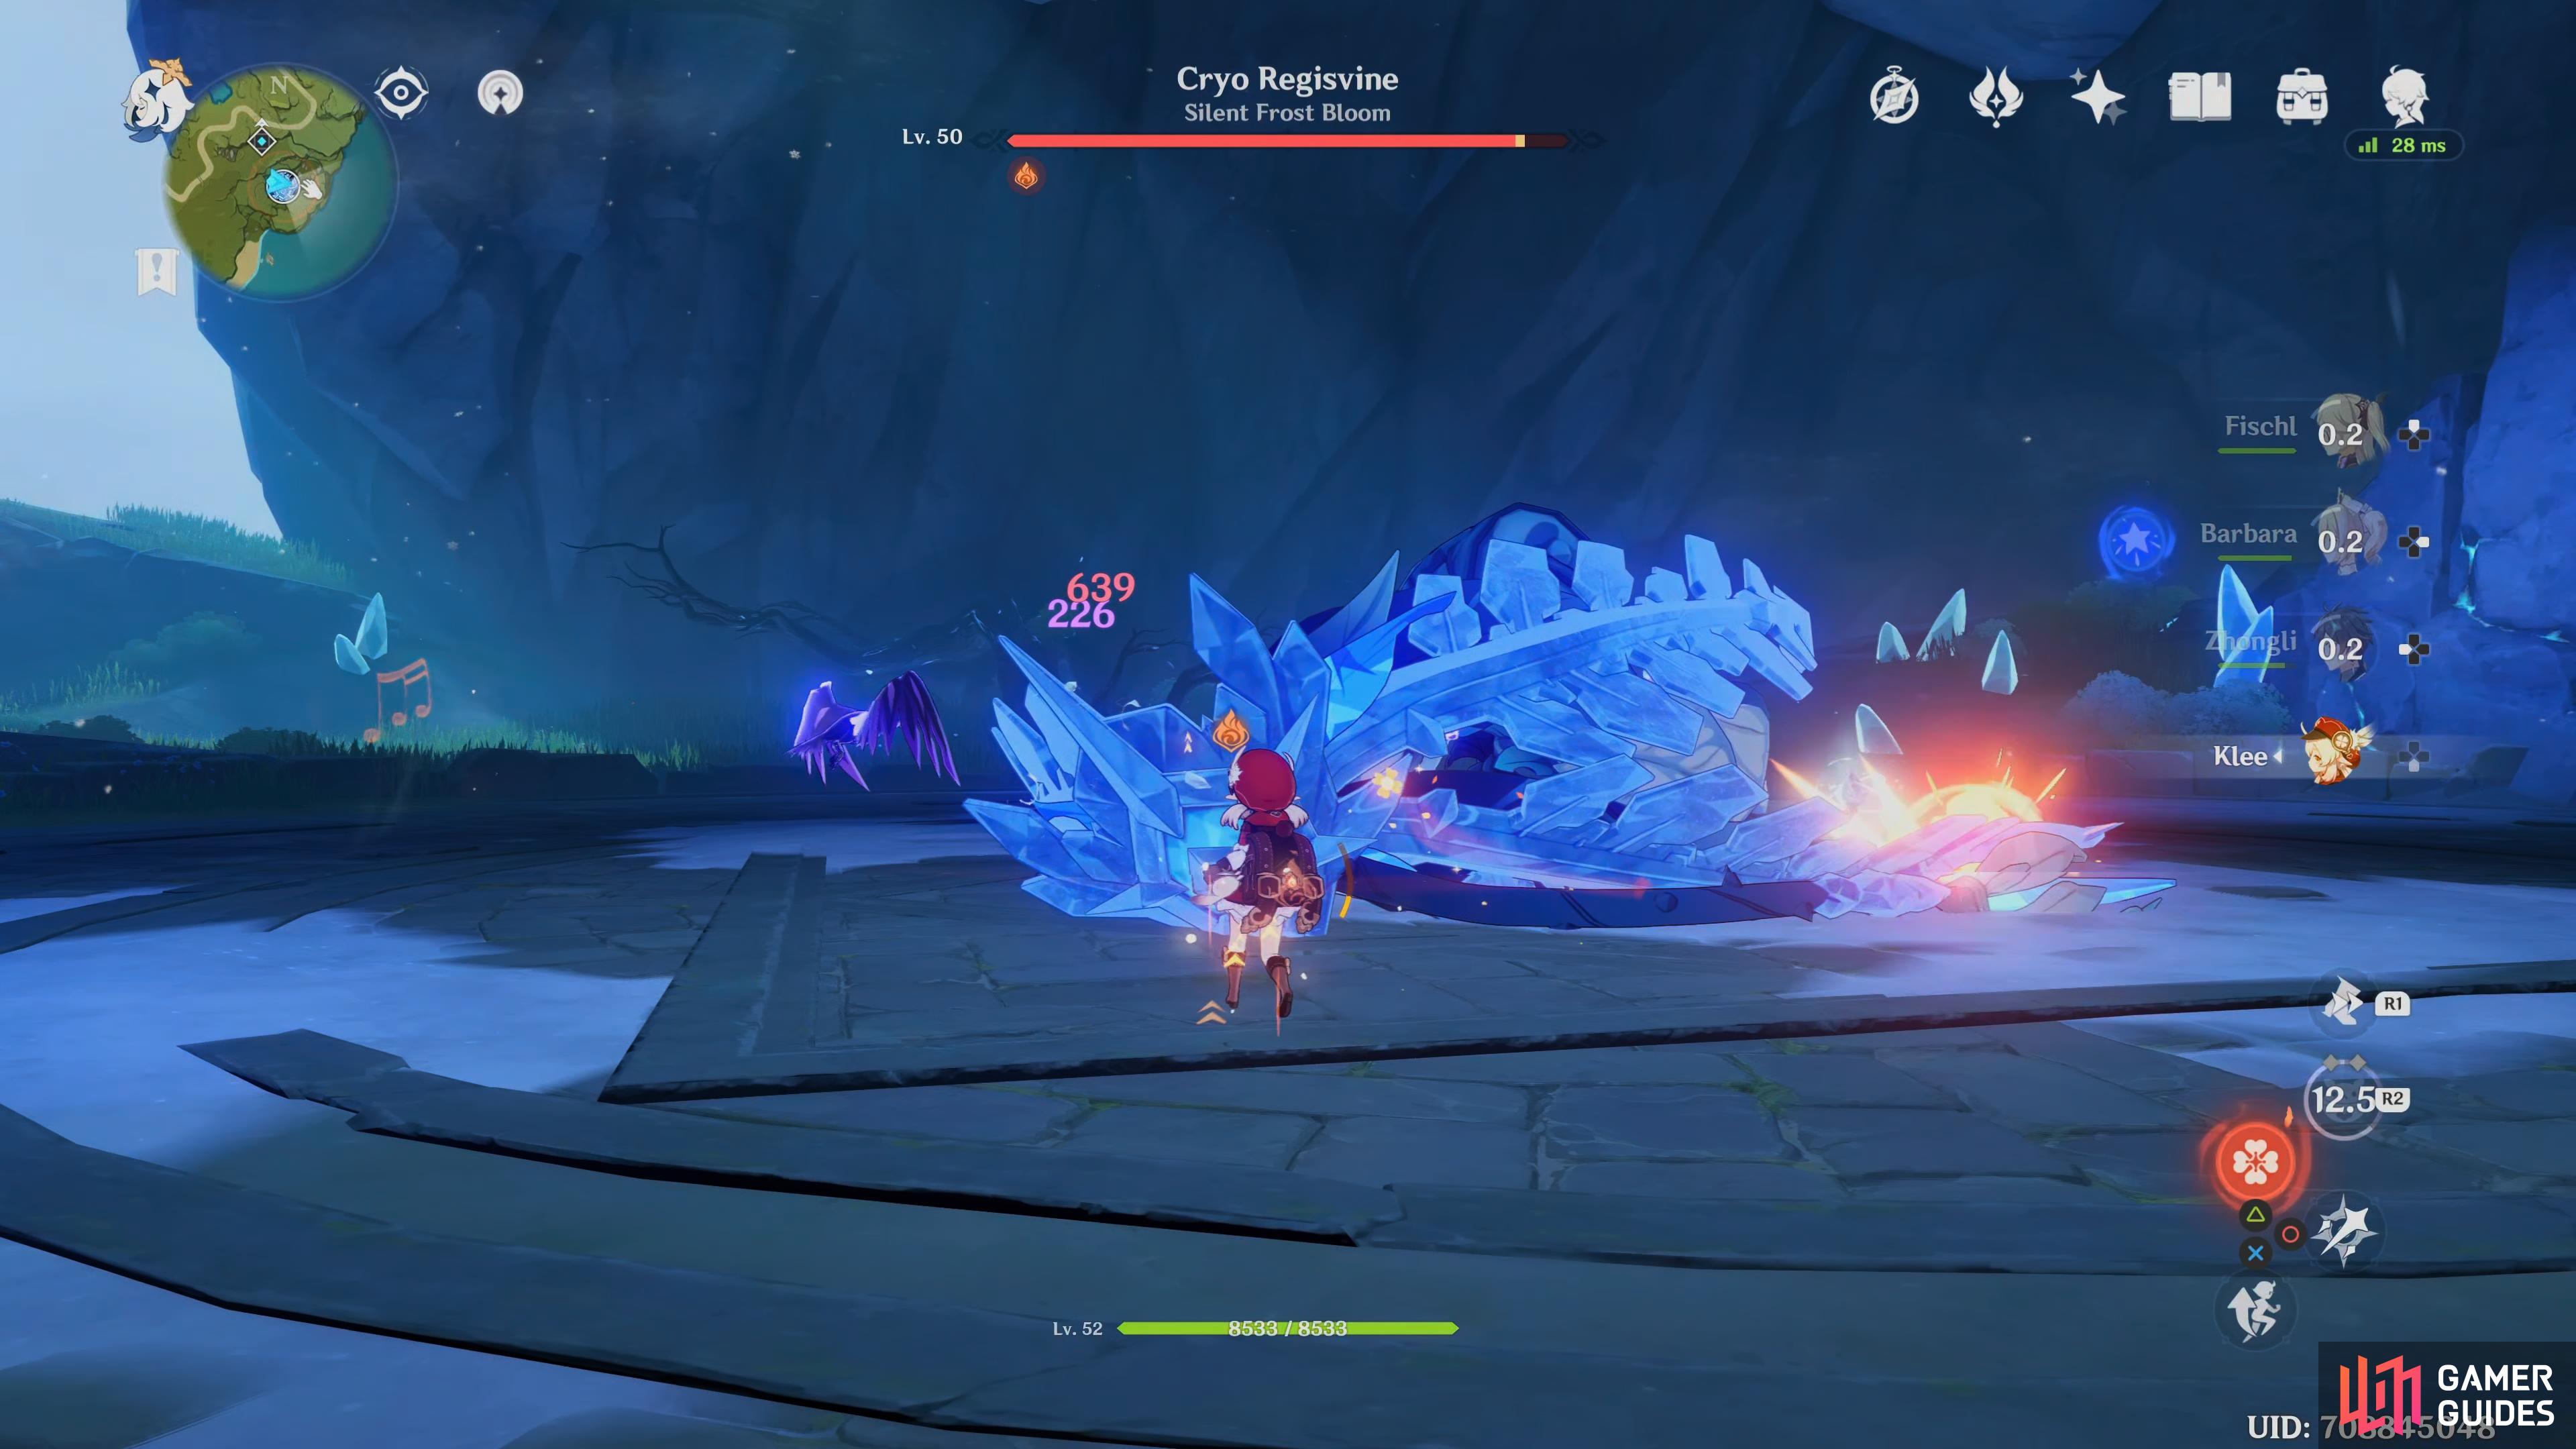
Slam Combo
The boss will launch two swipes at you, ending with a slam, avoid this by dodging backwards during the swipe and then to the side for the slam.
(1 of 2) The Boss will perform a two-hit swipe combo and end it with a slam


The Boss will perform a two-hit swipe combo and end it with a slam (left), Back away to avoid this attack and avoid the Cryo left there afterwards. (right)
Spinning Sweep
The boss will raise its body and then spin around close to itself, leaving Cryo on the floor. Back up to avoid the attack and use ranged until it dissipates.
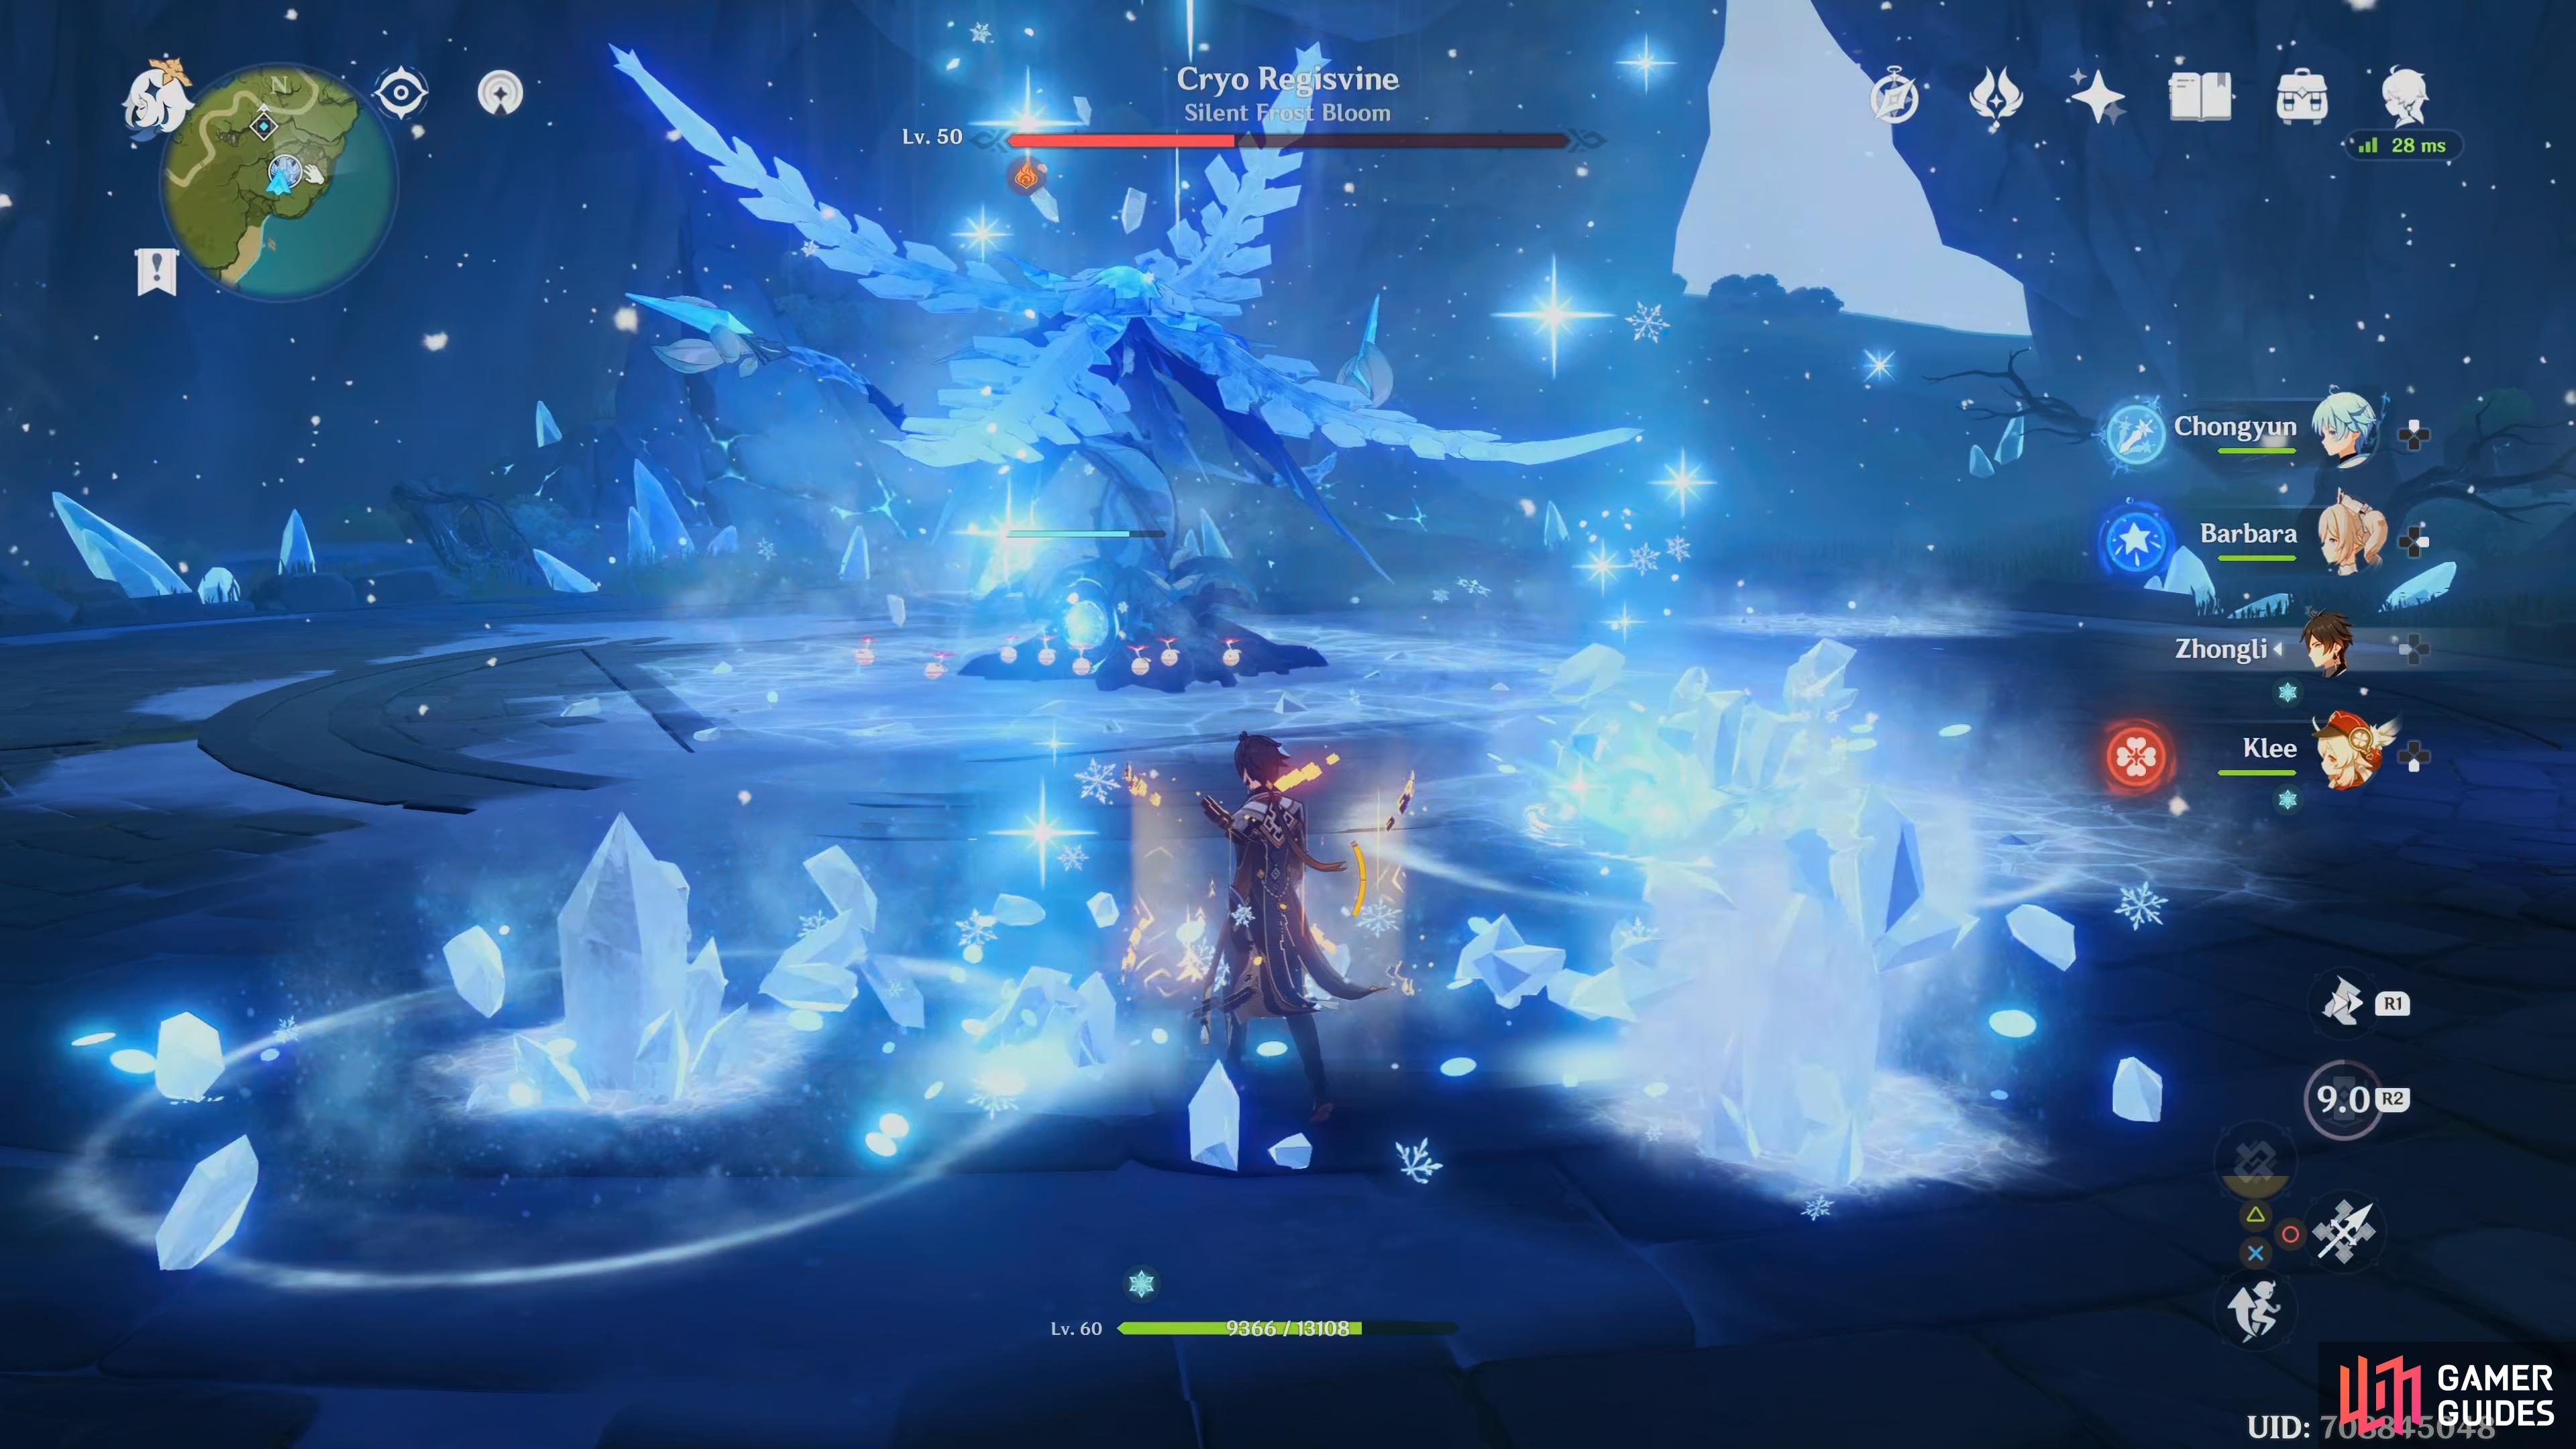
DPS Phase
Once either the shield on the Corolla or the Root has been broken, the boss will fall helplessly to the ground, unable to act. This is where all your Pyro and Electro damage comes into play with some melee for fun, attack its head with all you’ve got to deal as much damage as possible, after about 10 seconds or so, it will sweep around itself and deal major damage to anyone within its reach and then return back to its normal attacks depending on which shield you broke.
When you break one of the bosses shields, it will hit the floor, this is the DPS Phase.
Corolla Phase attacks
This phase is started if the last weak spot that was destroyed was its Corolla.
Rotating Slam
After channeling the attack for a brief moment, the boss will slam down three times, each slam will target the player and shoot out ice spikes in a line. To avoid this, get close and dodge the same direction after each slam.


(1 of 2) Three slams which target the your last location, keep close and keep dodging to one direction
Three slams which target the your last location, keep close and keep dodging to one direction (left), although it only hits the once, this comes quicker and thus harder to dodge. (right)
Giant Slam
Similar to the Rotating Slam the boss will just do this once but it’s quicker and will hit harder, dodge to the side to avoid it.
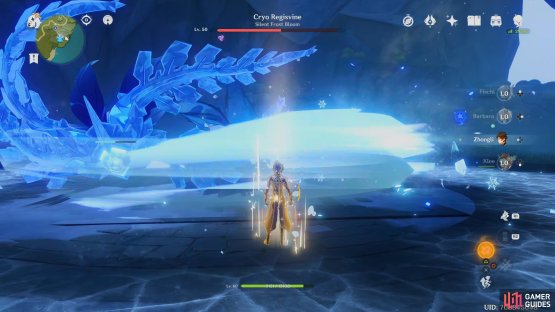
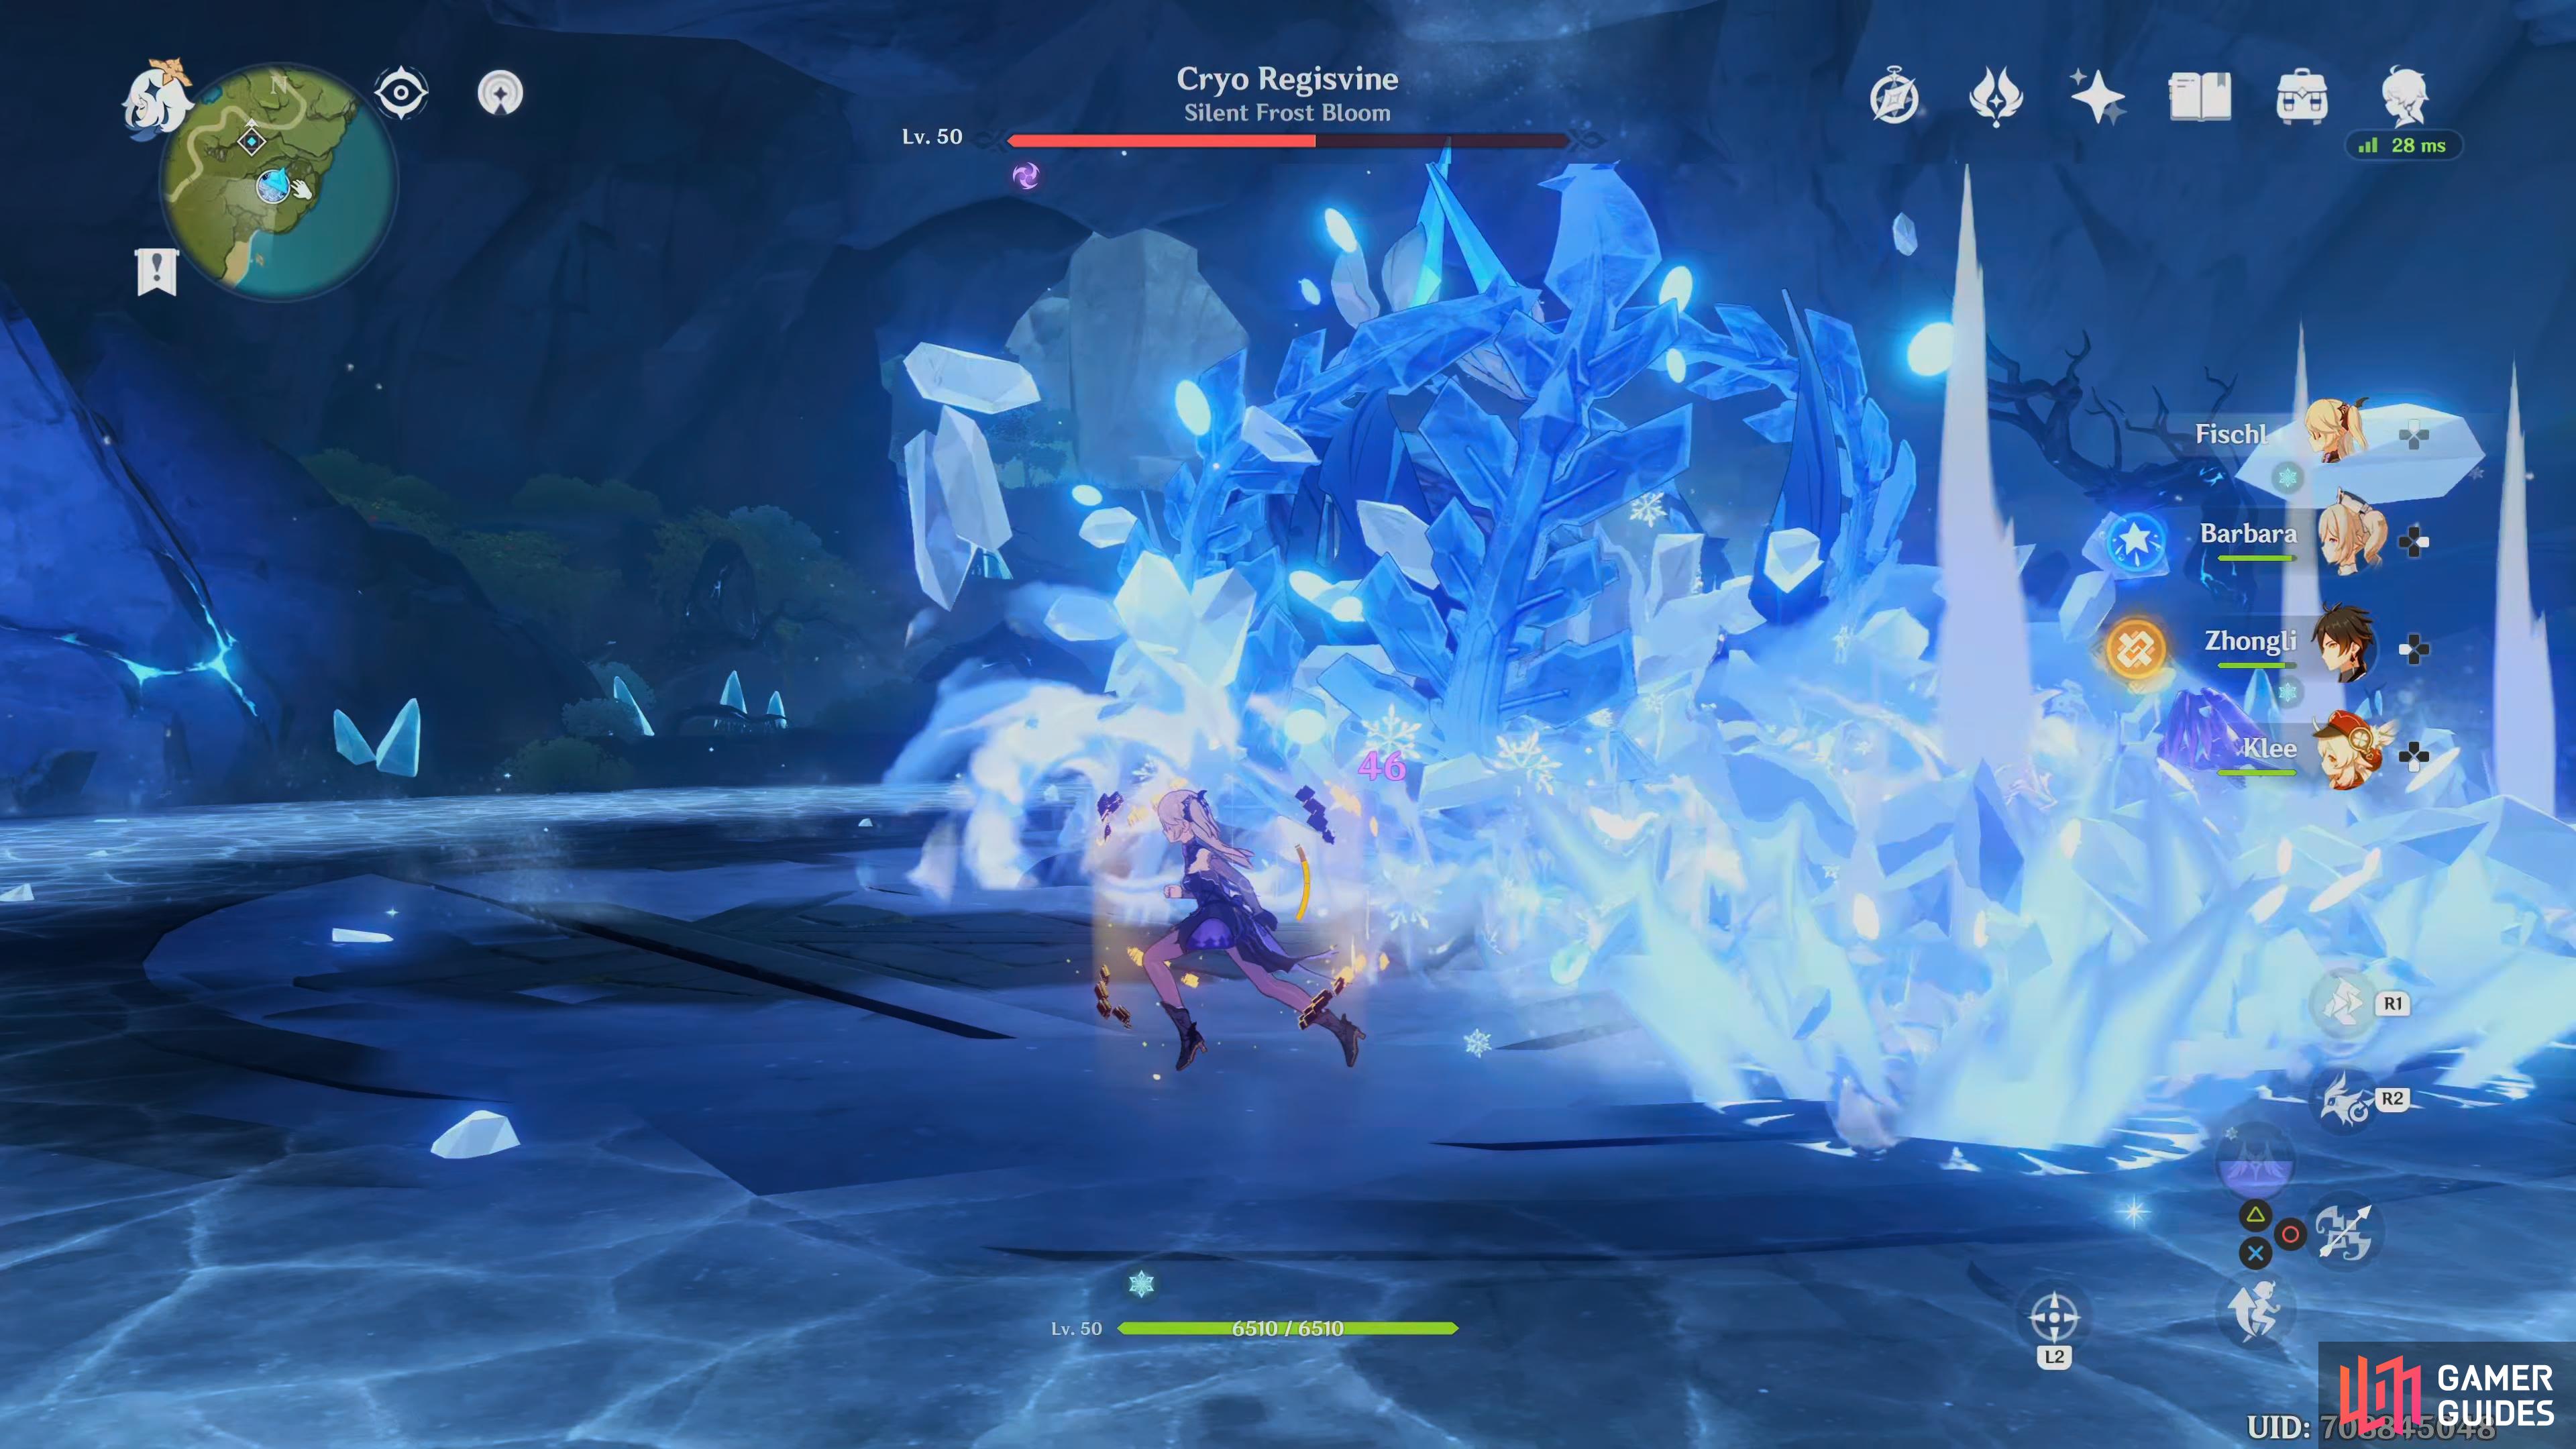
Blizzard
Blizzard is the most intensive part of the fight due to the constant barrage of icicles dropping down on you, this is indicated by small circular AoE markers aiming ahead of where you are currently running, running in a small circle, dodging if it ends up right under you. Noelle or Zhongli can provide defense with their shields to negate some of this damage.

(1 of 2) Blizzard will leave small AoE markers on the floor where they will hit
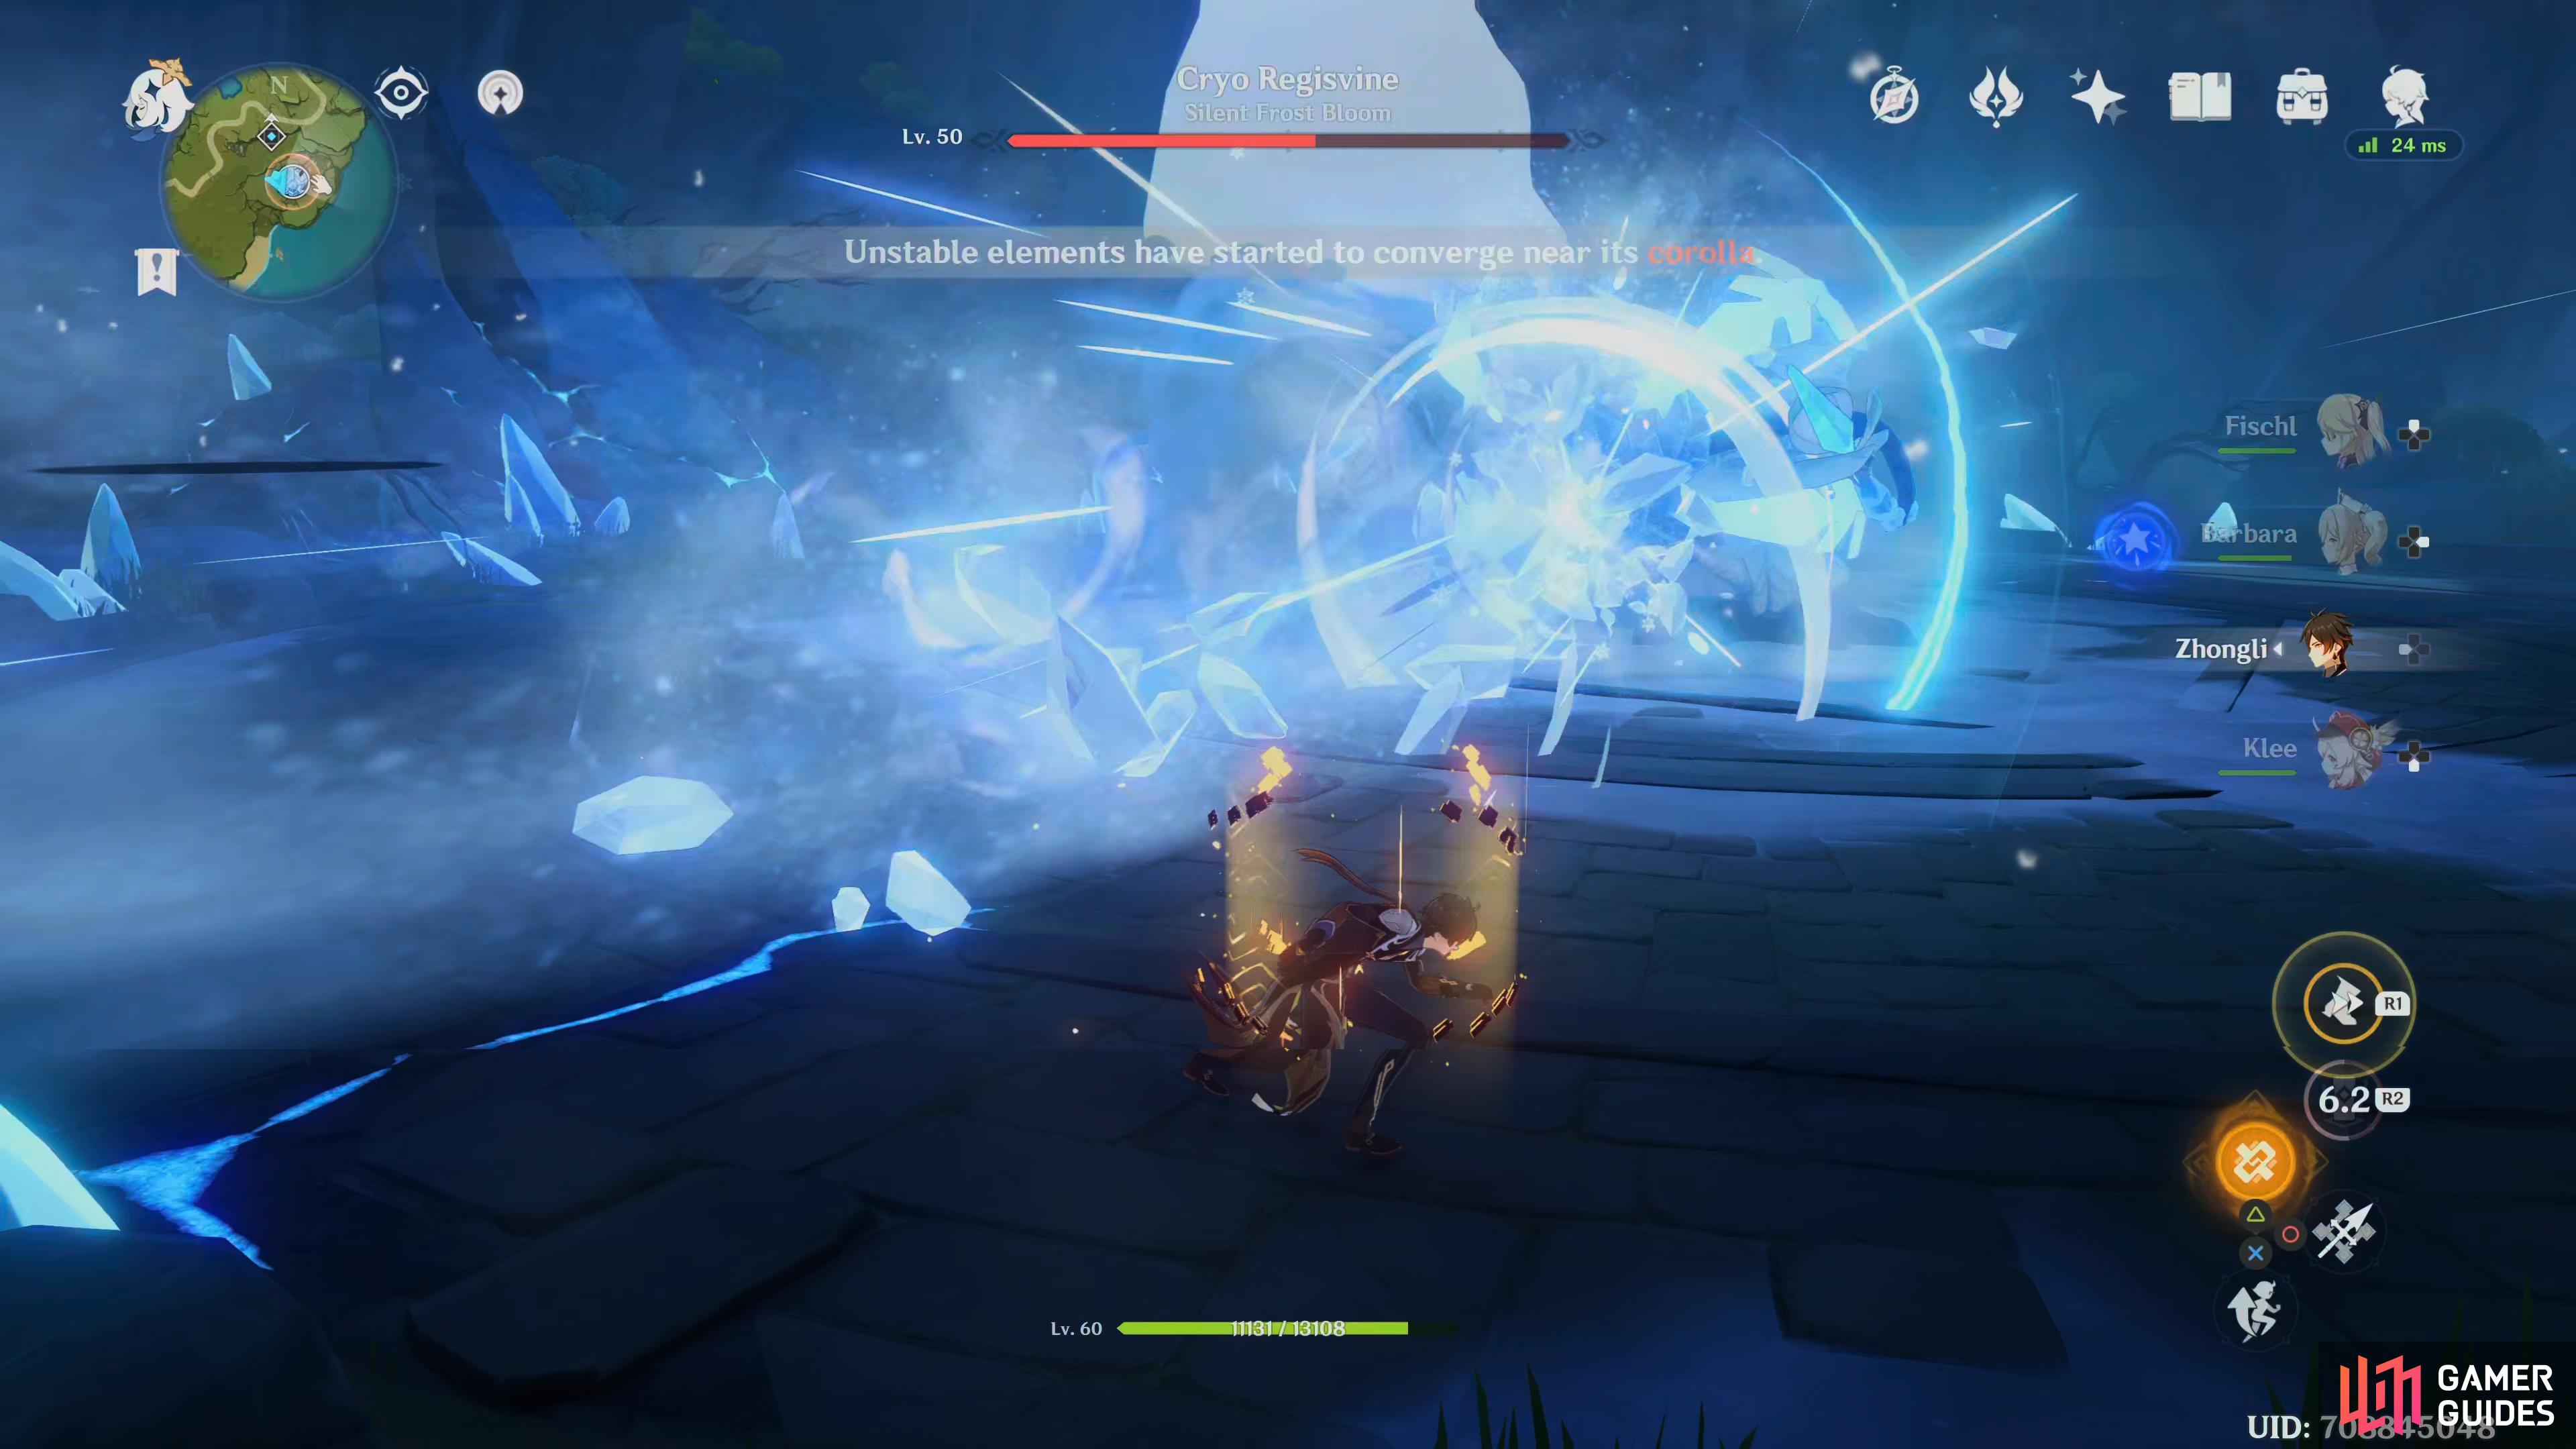
Blizzard will leave small AoE markers on the floor where they will hit (left), Circular Beam rotates around the entire outside of the arena, leaving behind Cryo on the floor. (right)
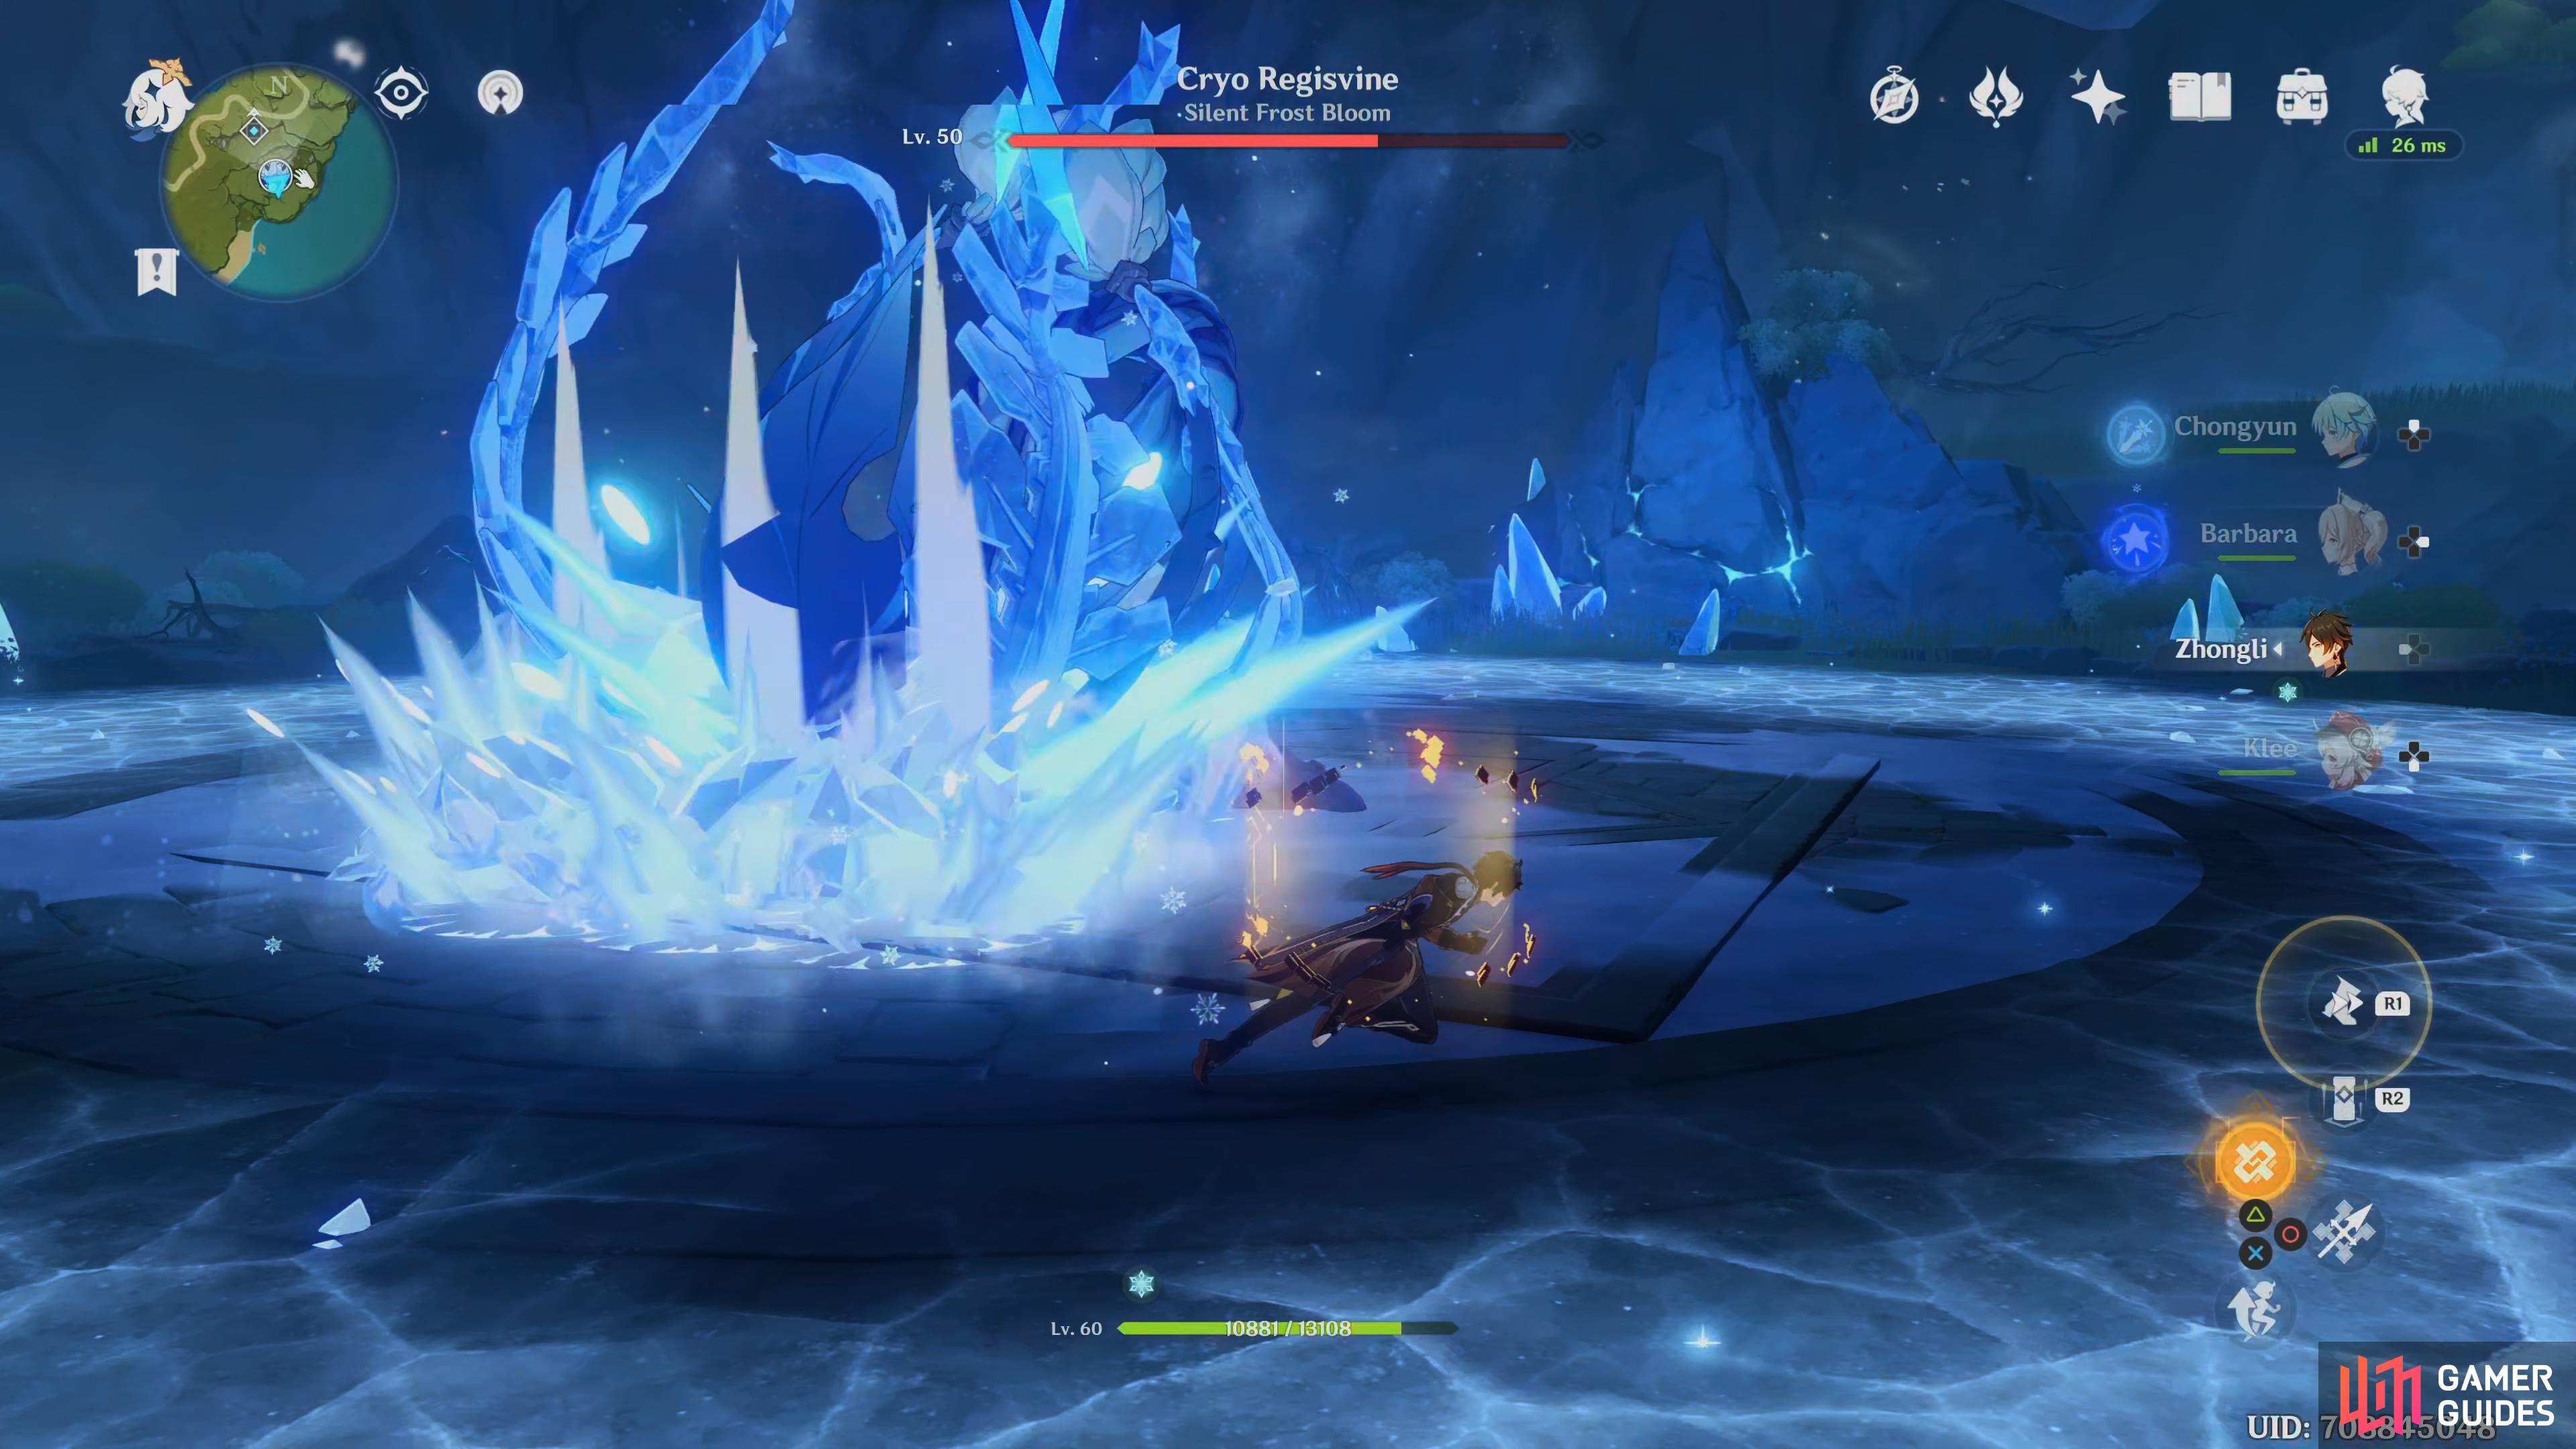
Circular Beam
At times the boss will spin around and unleash a Cryo beam attack around the entire arena which cause the floor to turn to Cryo around the outer ring damaging you if you are on it. To avoid the beam, get close, and then dodge through the beam at the last second the opposite way the beam is coming from.
Strategy
Bringing along a party that has at least two Pyro users, one preferably being Amber (or another Archer) will make this battle a lot easier. Party members like Diluc, Klee are great here whilst members like Noelle or Zhongli can provide defense with their shields, if you bring along a Healer, make sure it’s not Barbara because her Elemental Skill will cause you to become Frozen.
The idea behind this battle is by destroying its shield which alternates between the Root and the Corolla, this will put the boss into the DPS Phase where all your damage will come from. Amber (Or another Archer) is best used to take out the Corolla’s shield with their Charged Shots and your other Pyro user should take out the Roots Shield.
At times throughout the fight, the boss will make certain parts of the surface Cryo, if you are on this, your health will start ticking down, so avoid this at all times.
Victory
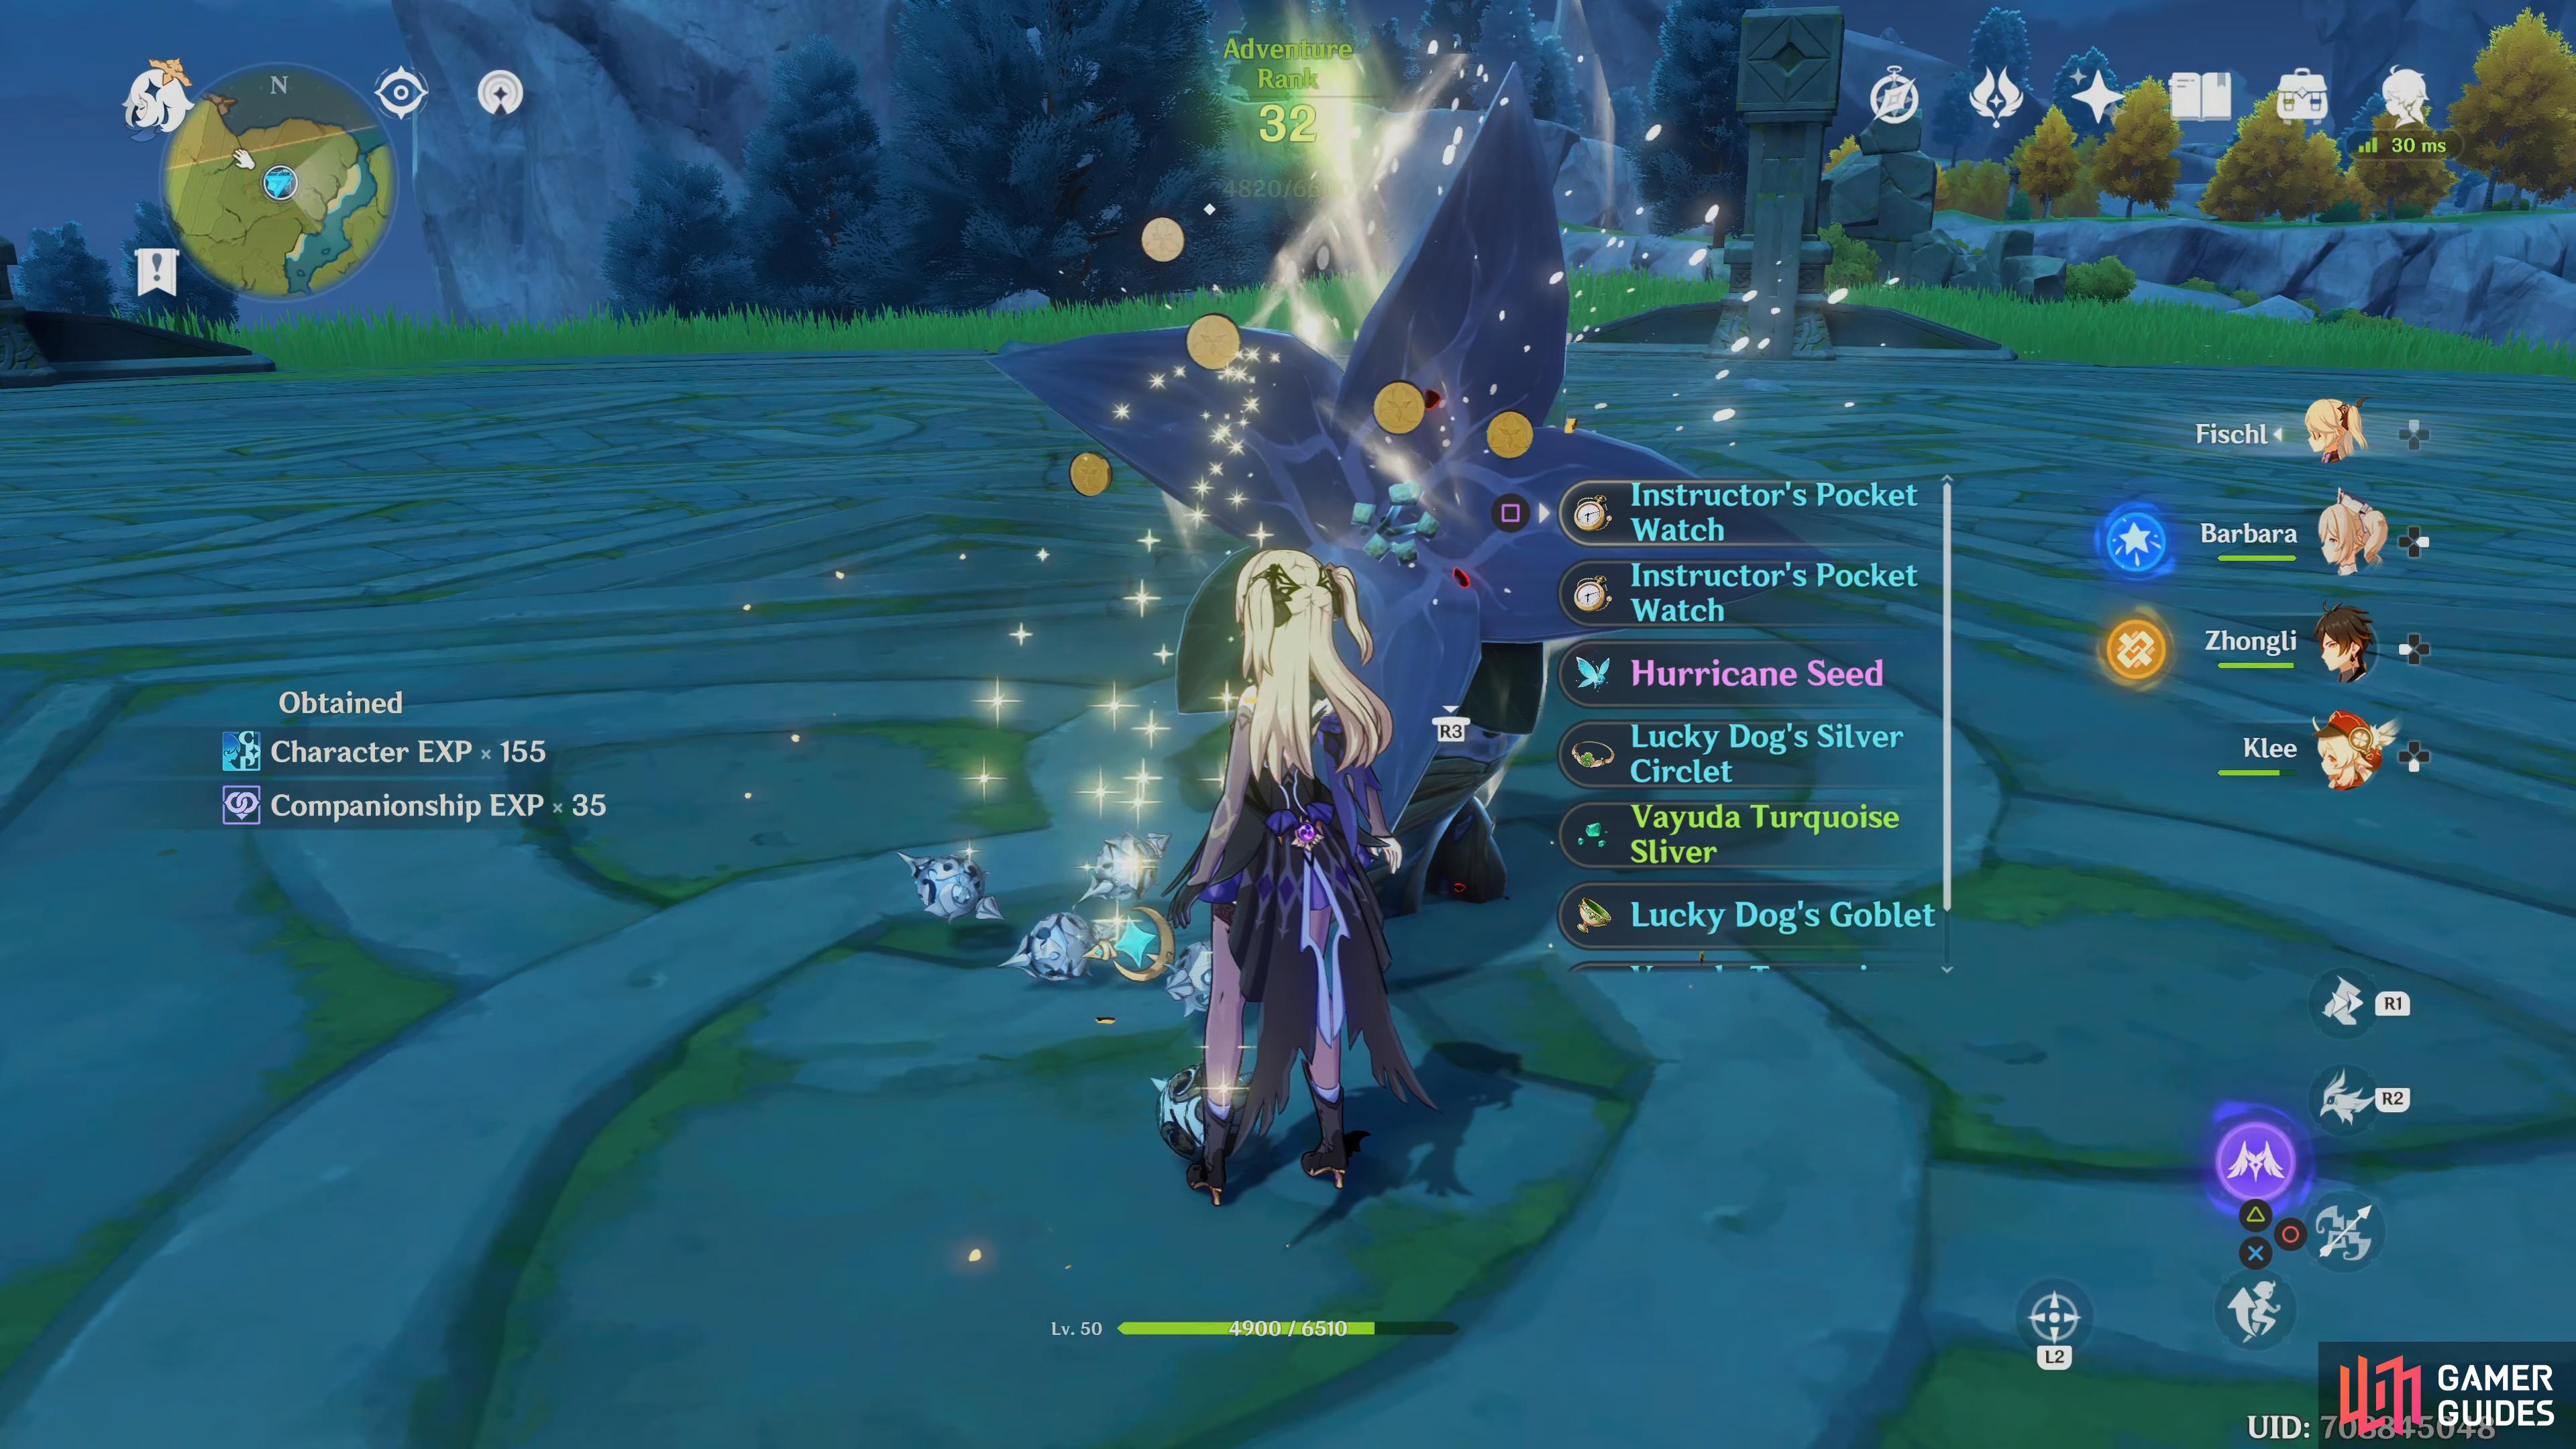
Use the Original Resin to obtain your rewards.
Upon completion you must touch the Trounce Blossom and spend 60 Original Resin to claim the boss rewards. The drops consist of Artifacts and Character Ascension Materials. You’ll only have to wait five minutes to attempt the boss again or you can teleport to another location and back again for an instant respawn.
No Comments