
How to defeat the Algorithm of Semi-Intransient Matrix of Overseer Network boss and it’s reward drops. Below are the attacks the boss uses and how to easily defeat it. Remember that you will need to bring an Electro character with you.
Matrix Location
| Location | Respawn Time | Element |
|---|---|---|
| Hypostyle Desert, Sumeru | 5 minutes | Physical Damage |
A perpetual motion machine that rules over the many constructs scattered throughout the desert. It seems that the lonely ruler’s will still indwells this device.
Perhaps due to a friend’s teachings in a dream or perhaps because he coveted the power of the holy ones in the skies, the king created mysterious devices that should not exist in this world before founding his realm in these lands.
Amidst the ruins of the city of a thousand pillars, the ancient crystals still reflect the glory of the golden paradise, though none now live who remember the king’s dreams.
Rewards
| World Level | Boss Level | Experince | Mora | Common Ascension Material | Artifacts |
|---|---|---|---|---|---|
| 1 | 37 | 138 | 3,450 |   |
   |
| 2 | 41 | 144 | 3,650 | |
|
| 3 | 50 | 155 | 3,850 |   |
|
| 4 | 62 | 166 | 4,125 | |
|
| 5 | 72 | 178 | 4,450 | |
|
| 6 | 83 | 189 | 4,725 |       |
|
| 7 | 91 | 200 | 5,200 | |
|
| 8 | 93 | 200 | 6,000 | |
|
Description
The Algorithm of Semi-Intransient Matrix of Overseer Network is a boss located in the Sumeru Desert area. Like other machine-based bosses, it uses attacks similar to that of Ruin Machines, and it inflicts physical damage. Instead of elemental-based moves. The boss is also able to break itself up into multiple parts and go invisible.
The Matrix drops the Light Guiding Tetrahedron an ascension material that is needed to level Candace up to level 90.
Attacks and Abilities
Laser Zone Attack
Laser Zone
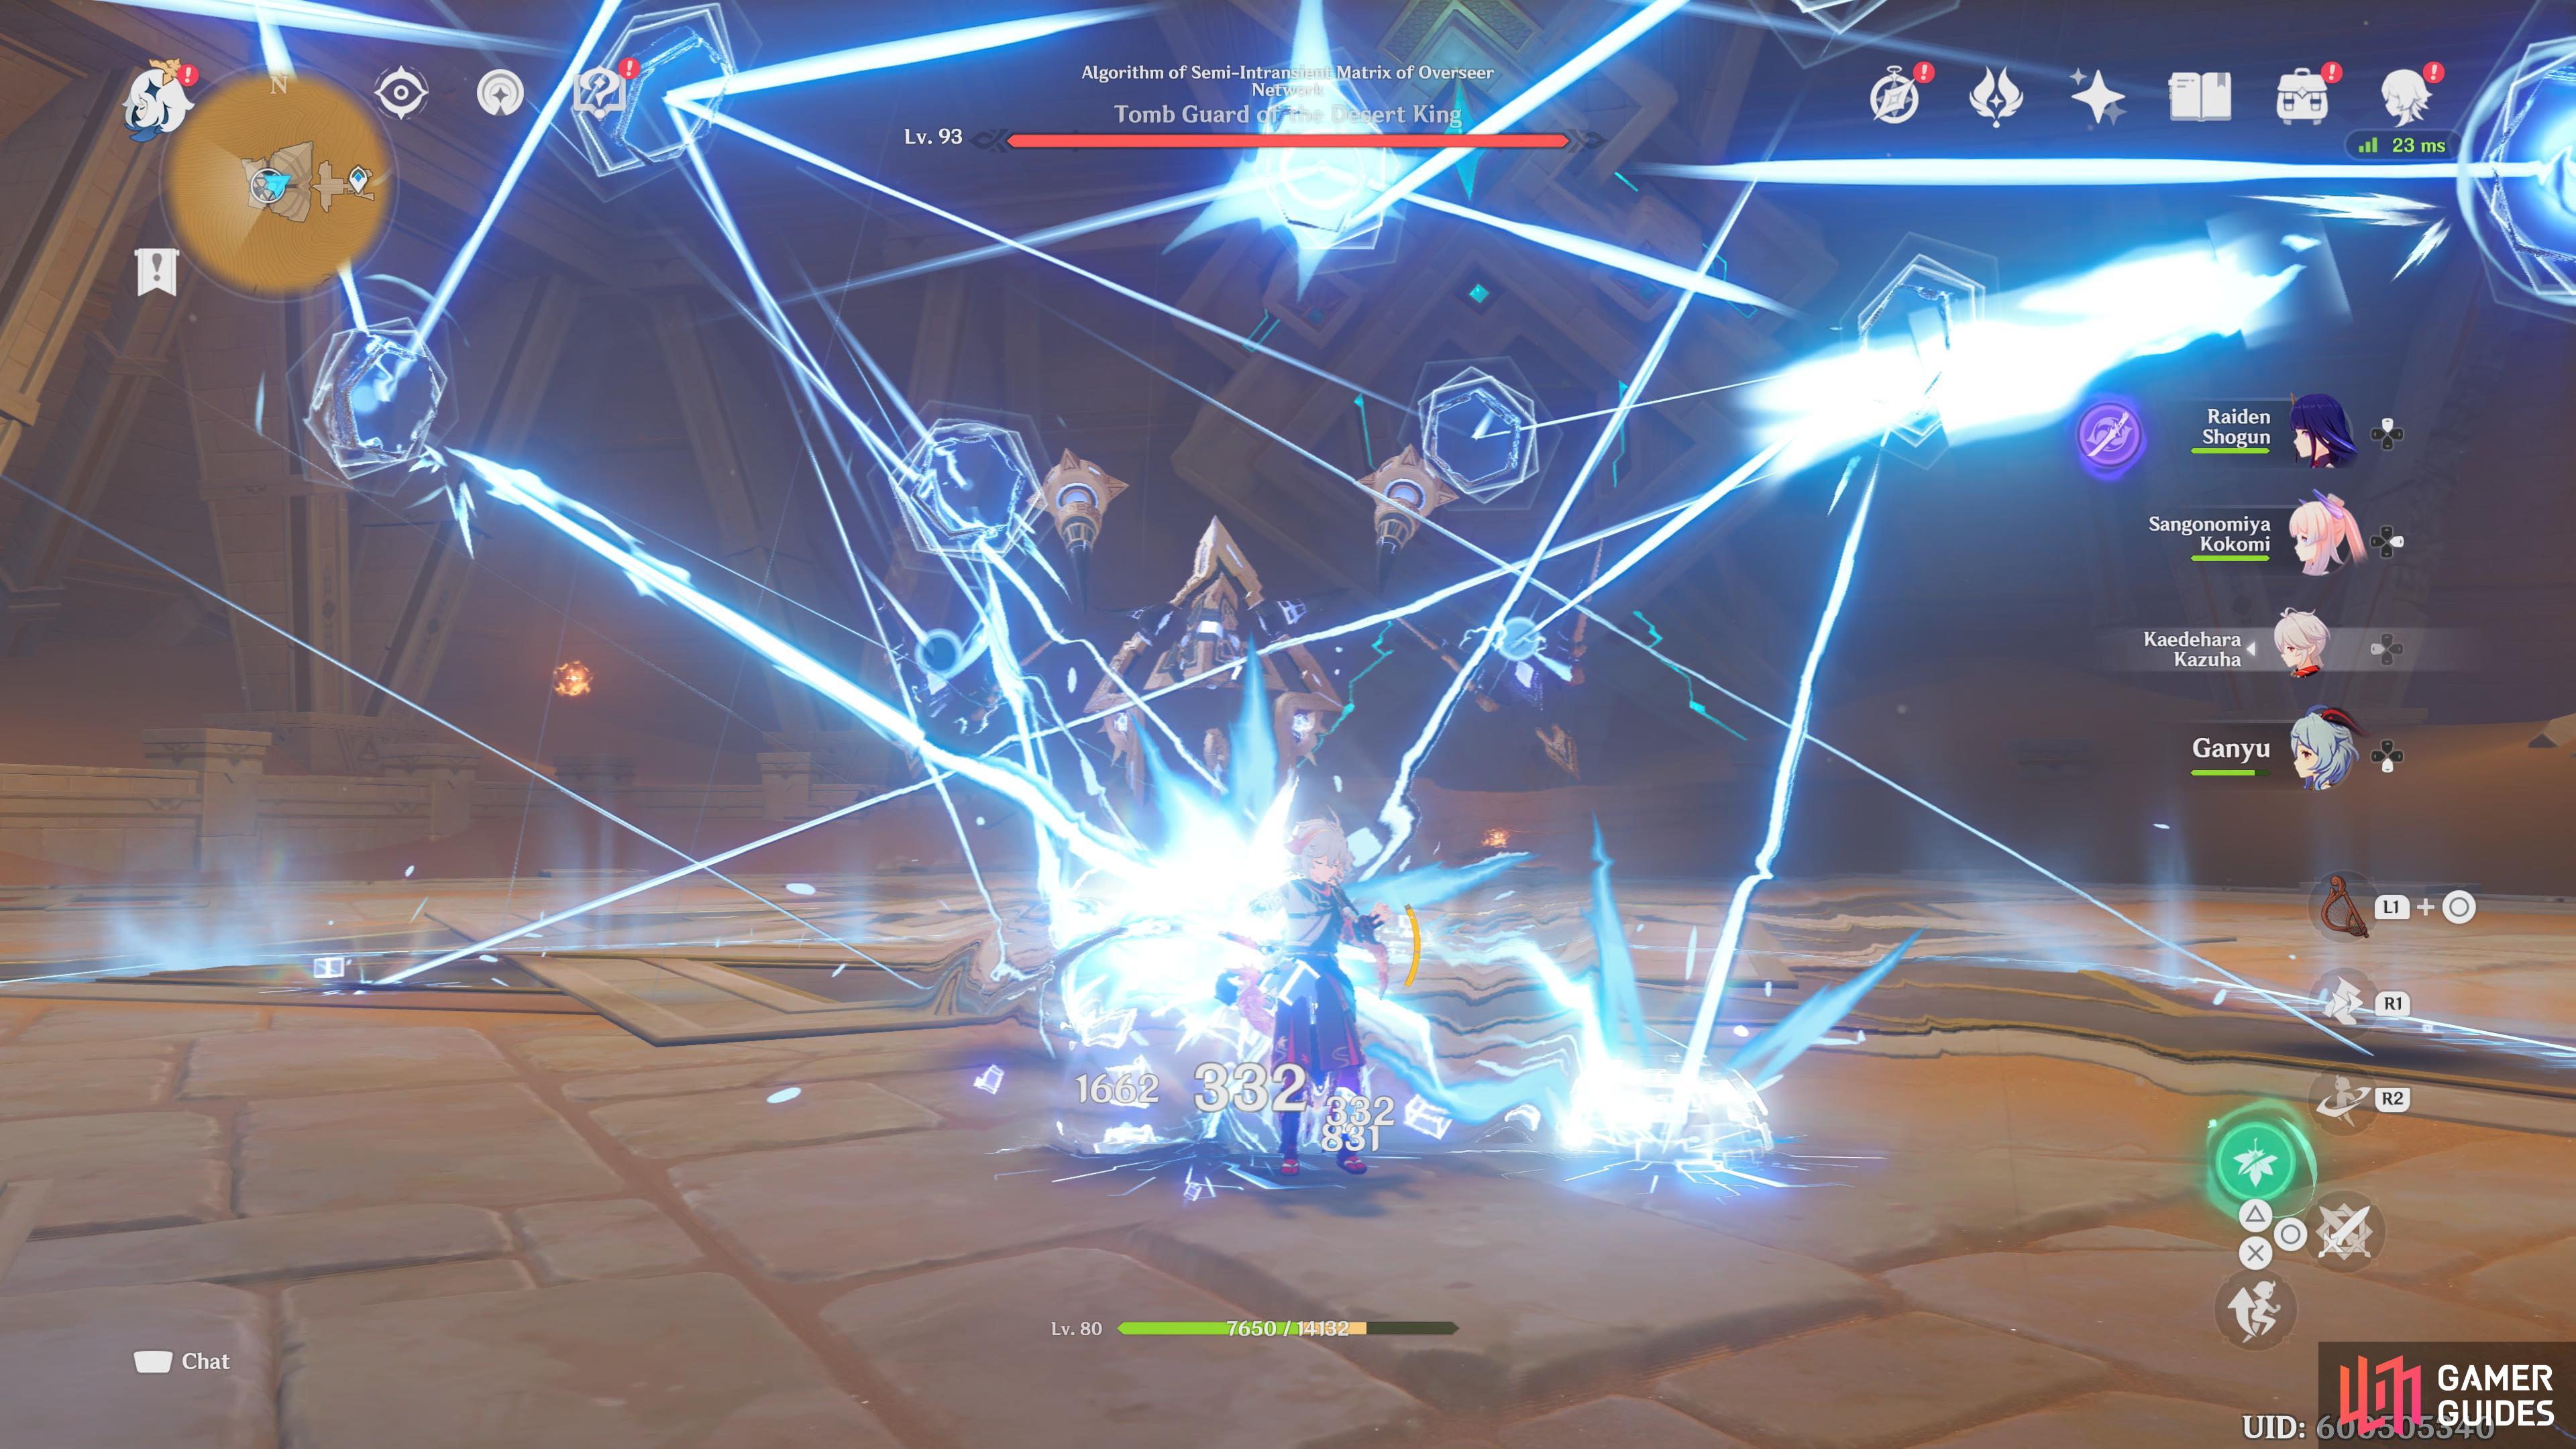
This is the Matrix’s starting move and will be used only when you first engage the boss. It shoots a flurry of lasers all over the field, each dealing 50 percent of the boss’s attack as damage.
Invisible State
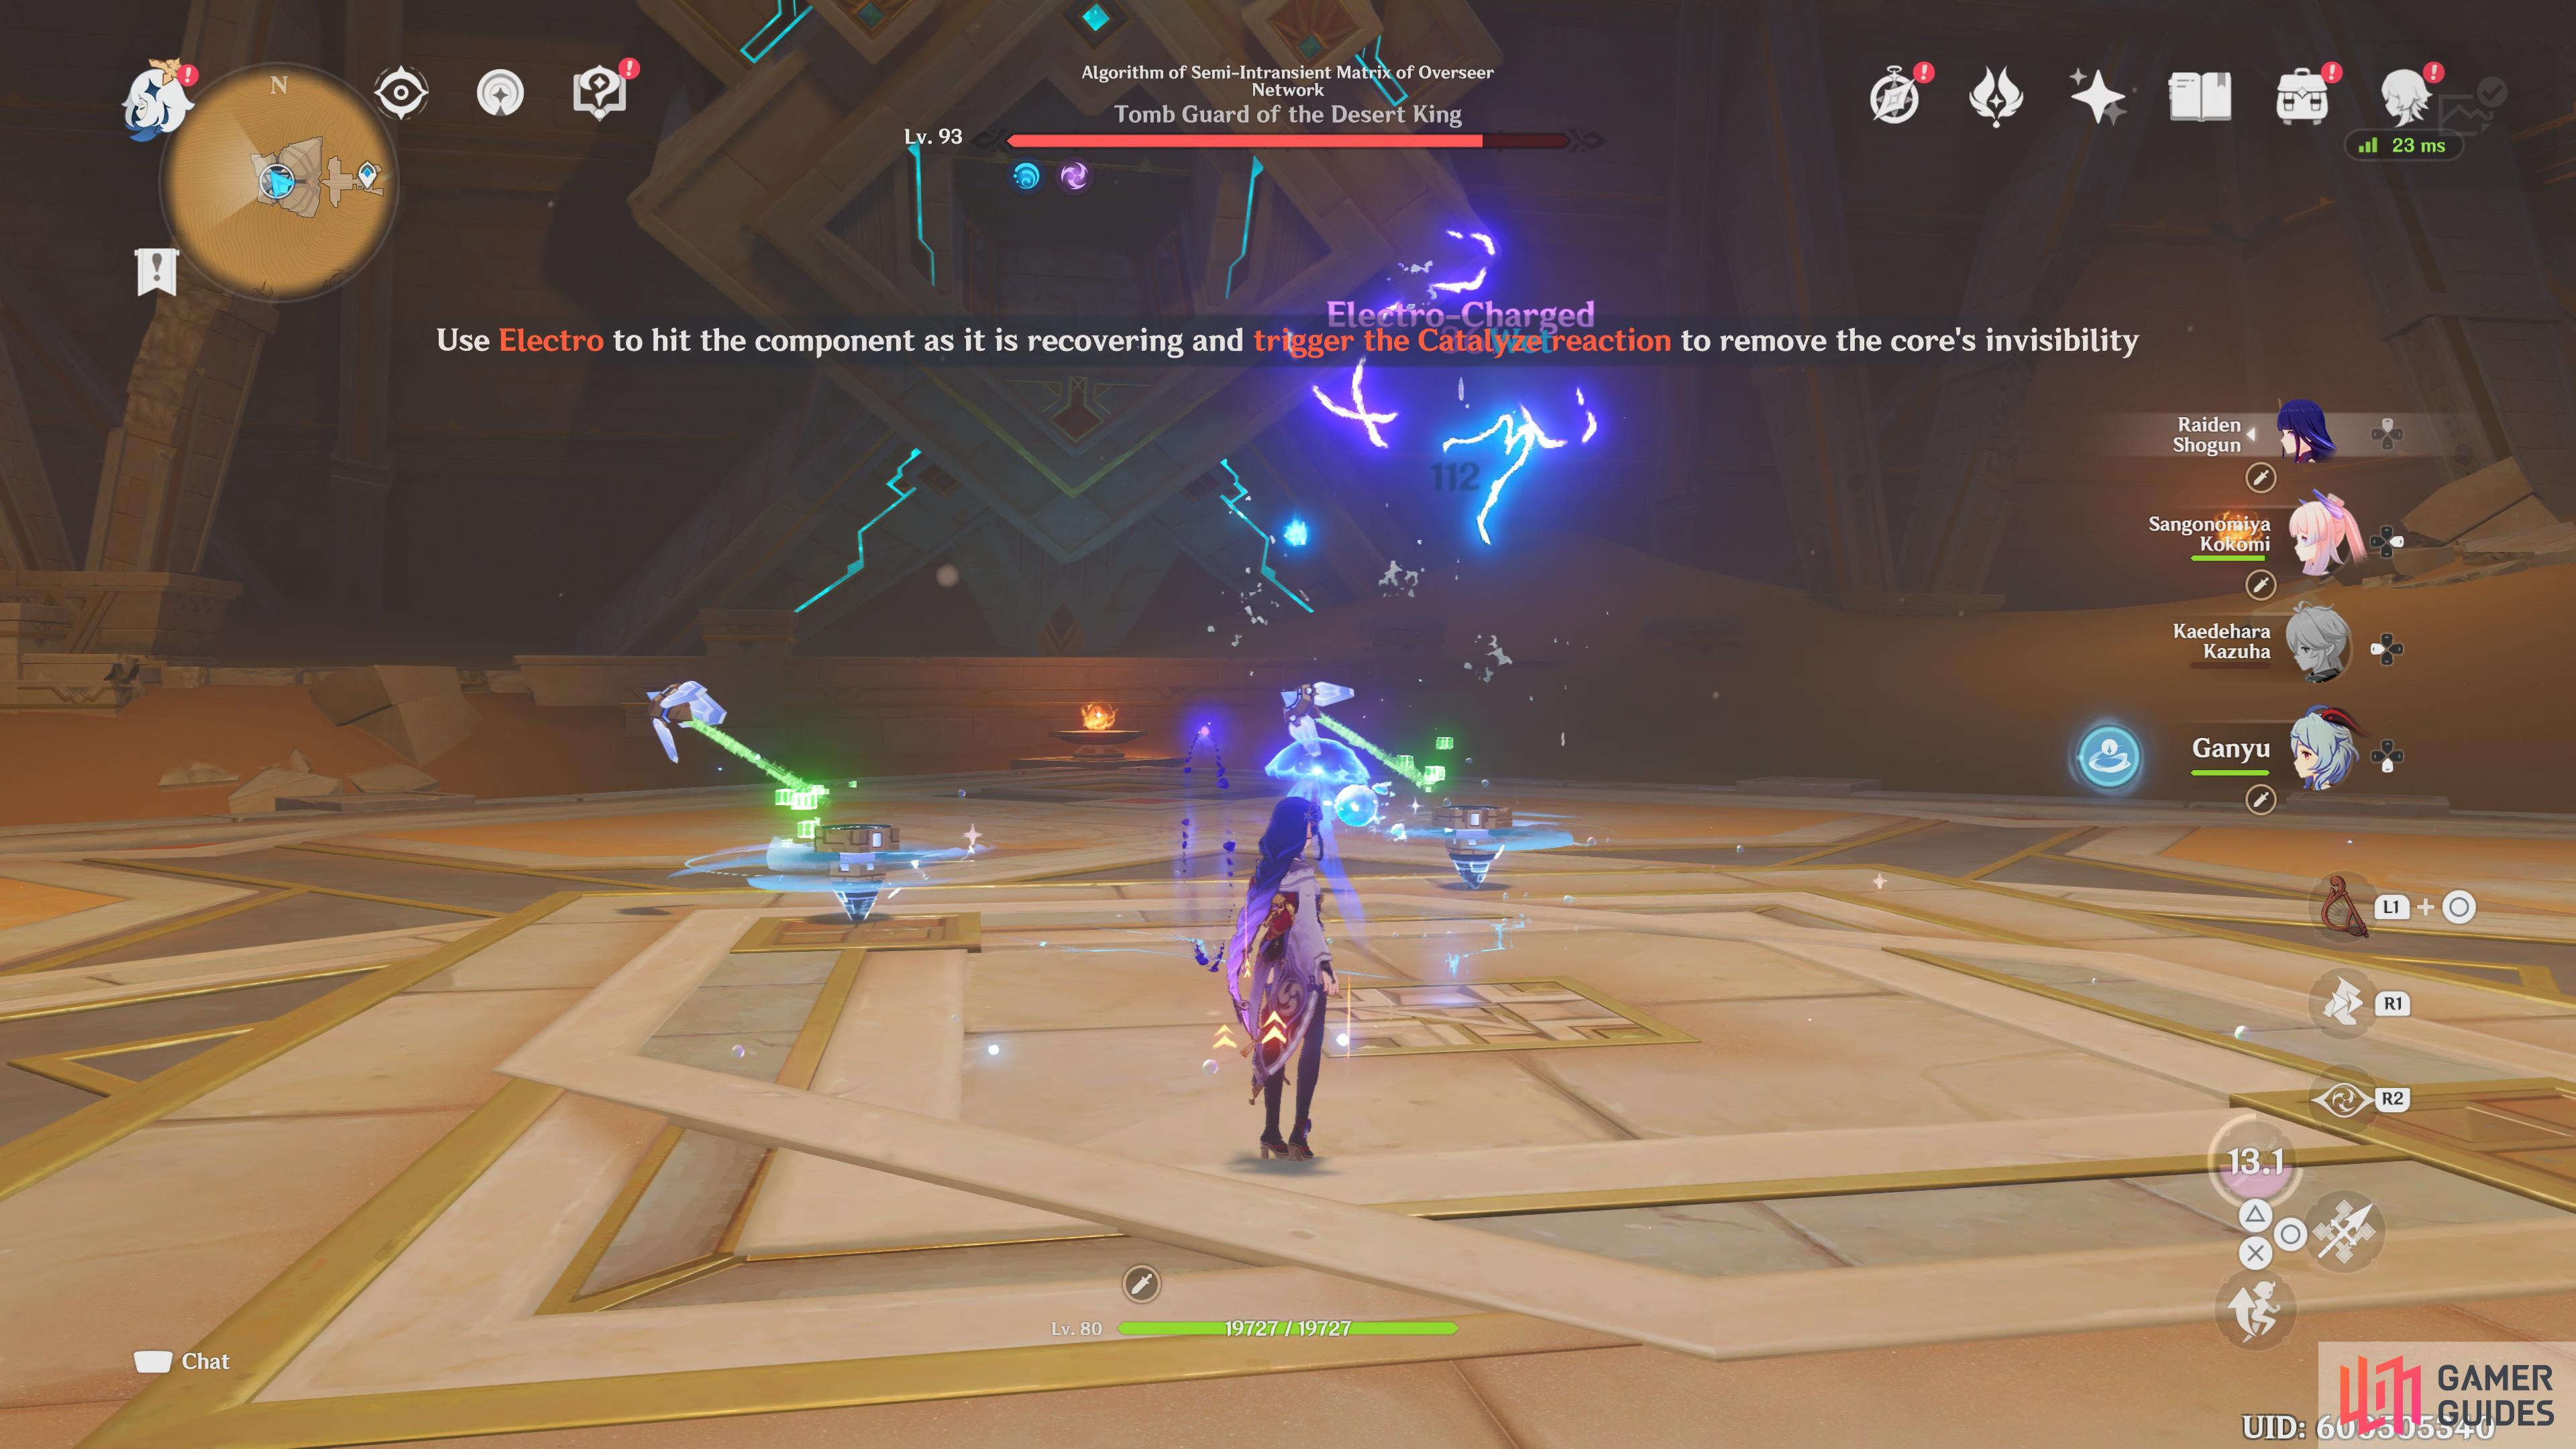
Martix Invisible State.
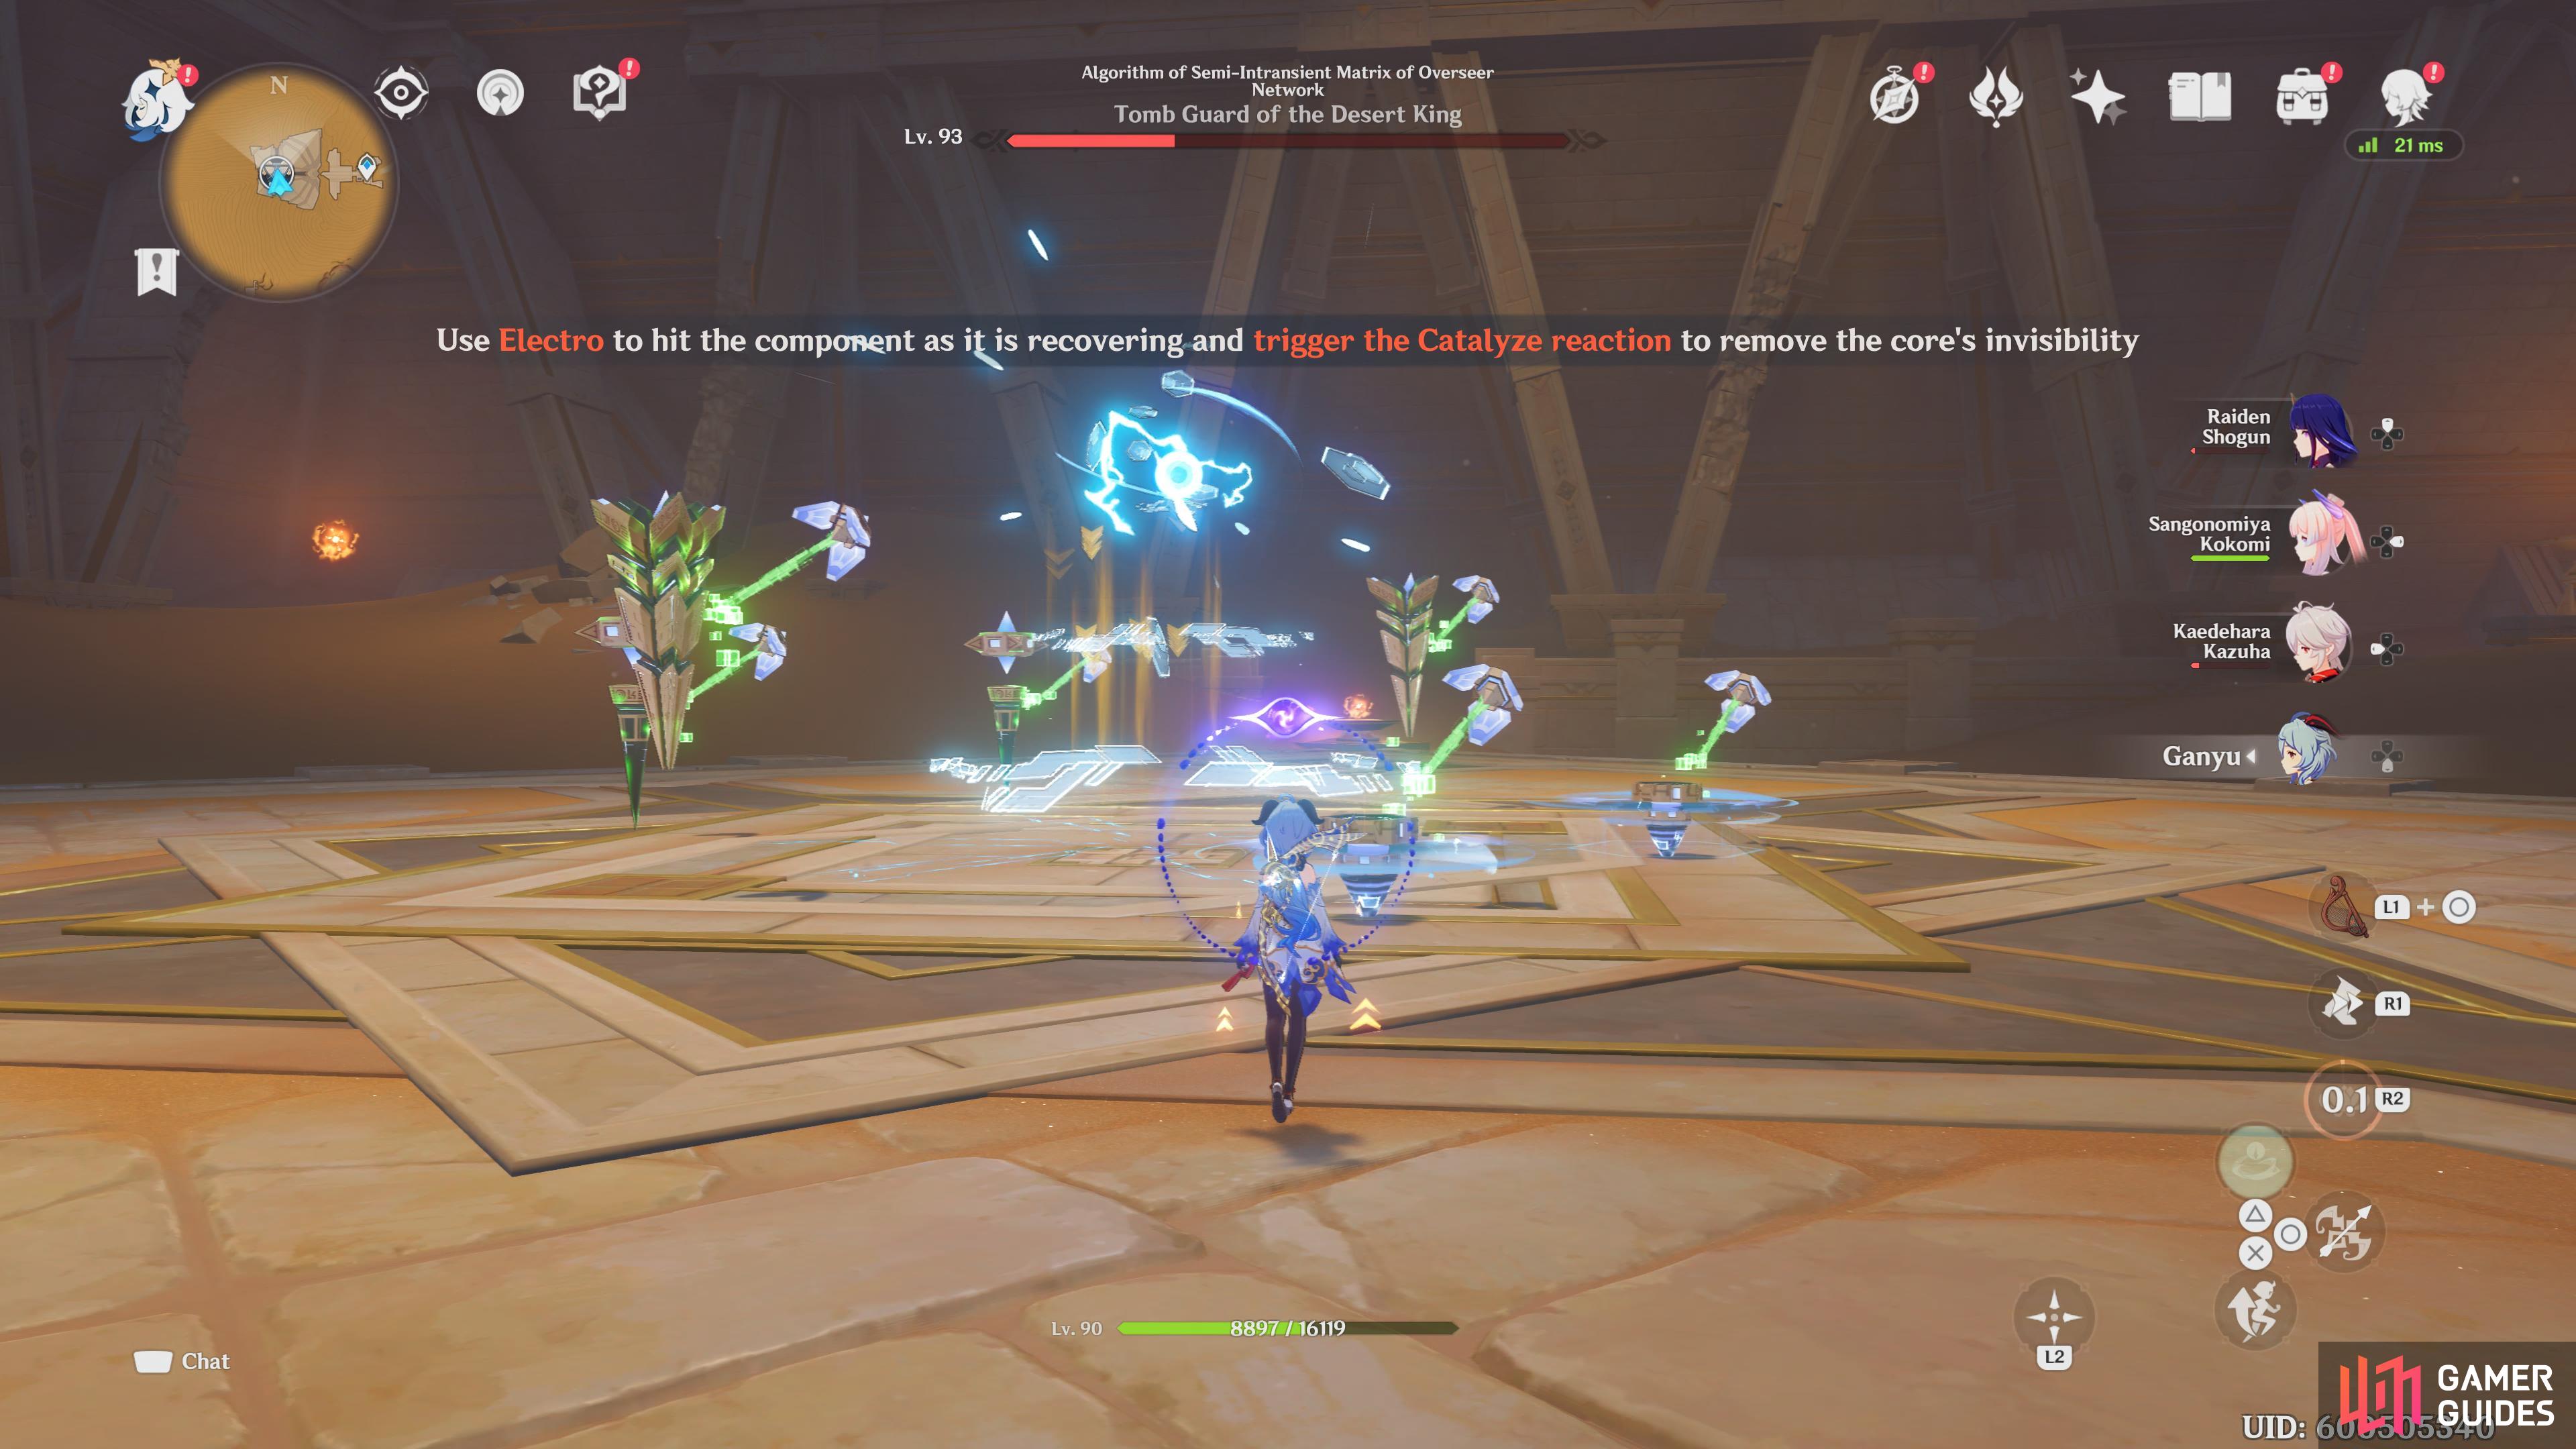
This attack will start with the Matrix breaking off into three different types of parts.
- Repulse: Follows the player around the arena, dealing 50 percent damage upon hit.
- Prospect: Fire lasers at the player as an attack that deals 50 percent damage.
- Reshaper: These parts slam onto the battlefield dealing 50 percent damage in a small AoE. The attack is indicated by a blue hexagon before landing. When both Reshaper parts are near each other, they will also create a laser that deals 20 percent attack damage when touched.
You will need to destroy the separate parts of the Matrix at this stage. When a part is destroyed, the Matrix turns invisible, and damaging one of the on-field parts with Electro will down the boss, leaving it open for attacks.
In addition, if you trigger the quicken reaction on the invisible Matrix, it will become stunned.
Repulse
A close-range attack that moves you away from the Matrix using a shield and deals 40 percent damage.
Reshape
A bolt of energy will strike the ground dealing up to 70 percent of the boss’s attack as AoE damage. This attack will happen each time the Matrix recovers from being paralyzed, and the ground where the bolt strikes are marked with a blue hexagon.
Prospect
Fires a beam at the player from the middle of the Matrix, dealing 100 percent of the boss’s attack. This attack also will only occur after the boss has been paralyzed.
Tracking Laser
A laser follows the player across the arena, dealing 70 percent damage per hit. This attack occurs when Electro is not used during the end of the invisible phase.
Laser Barrage
A Plethora of lasers is fired in front of the Matrix, dealing 50 percent damage per hit. This attack will only trigger if you do not hit the boss with Electro when prompted to do so.
Missle Blast
The Matrix releases a missile that deals 100 percent of the boss’s damage. This attack is another that occurs if you do not use an Electro attack when prompted to.
Overclocked Attack
Overclocked Matrix.
If you allow the Matrix to remain in its invisible state, then it will begin to release shockwaves that deal 100 percent damage across the arena. The boss will be paralyzed after using this attack, and you can stop it by hitting one of the charging parts with an Electro attack.
Recommended Party
To defeat the Matrix, you will at least want to have one slot dedicated to an Electro character on your team. This is due to the invisible state that will need to be broken with an Electro fueled attack. Characters such as Raiden Shogun, Fischl, and Lisa will easily help you down the machine.
In addition, The Matrix does move around quite a bit, so being able to have targeted or AoE attacks like Ganyu’s burst will help to make quick work of the machine.
Strategy
There is nothing too complex about the Matrix. Make note of the machine’s attacks above and keep moving on the battlefield to lessen the damage you take. You will want to watch for the in-game prompt that lets you know to use Electro to break the Matrix’s invisible state and down the boss. Whatever you do, don’t forget to break the parts of the machine and use Electro to stop powerful attacks from occurring.
After the boss is on the ground, go all out with your elemental skills and bursts to make quick work of it.
No Comments