
The Amo-ne Lightroot in The Legend of Zelda: Tears of the Kingdom is one of the most difficult to find in the game, since you need to make your way through some tricky gloom pools and avoid some tough enemies along the path. However, once you know where to go through the Lake Hylia Chasm, you should be able to get there with a few attempts at most. We’ll show you exactly how to find the lightroot on this page.
How to Reach the Lake Hylia Chasm in Zelda TotK
The first thing you need to do before you can reach the ![]() Amo-ne Lightroot is make your way to the
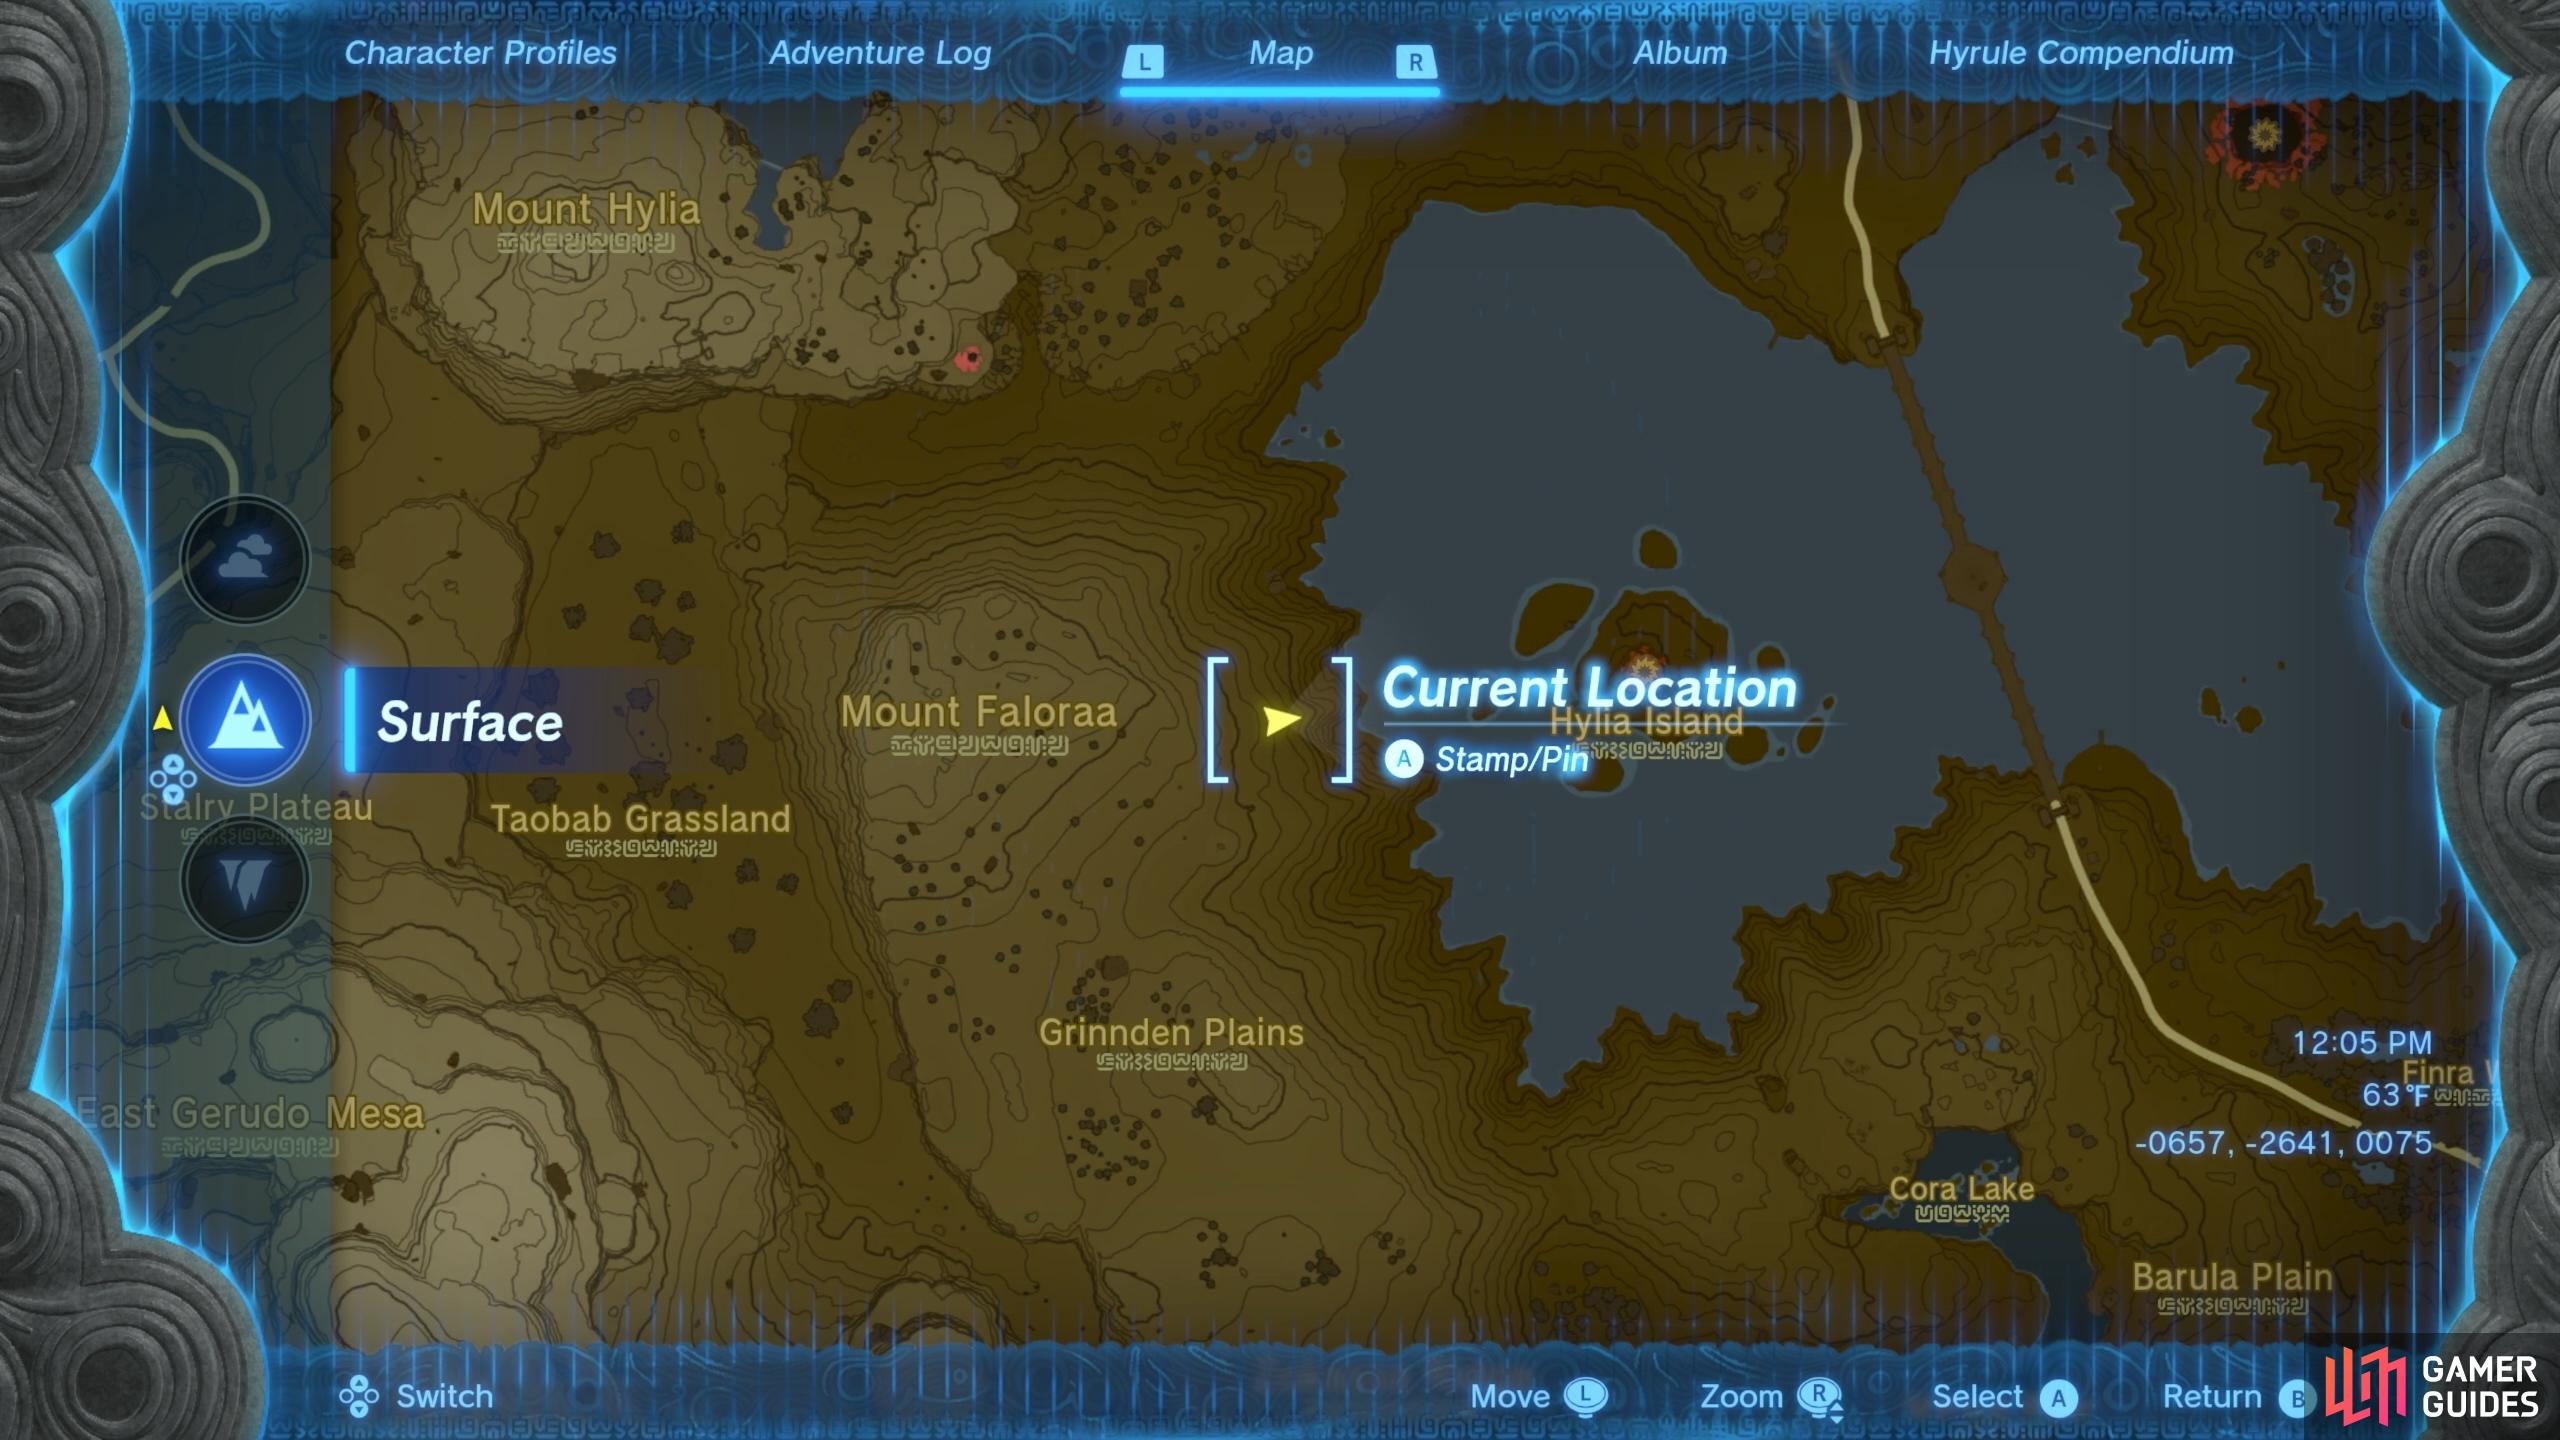
Amo-ne Lightroot is make your way to the ![]() Lake Hylia Chasm (Map Marker), which is located in the southern part of the Surface map, as shown using the map marker above. Once there, go to the hillside just west of the chasm and make your way to a point near the top. From here, you can use your
Lake Hylia Chasm (Map Marker), which is located in the southern part of the Surface map, as shown using the map marker above. Once there, go to the hillside just west of the chasm and make your way to a point near the top. From here, you can use your ![]() Paraglider to fly towards the chasm entrance, then stop to recover your stamina before diving into the chasm to reach the Depths below.
Paraglider to fly towards the chasm entrance, then stop to recover your stamina before diving into the chasm to reach the Depths below.
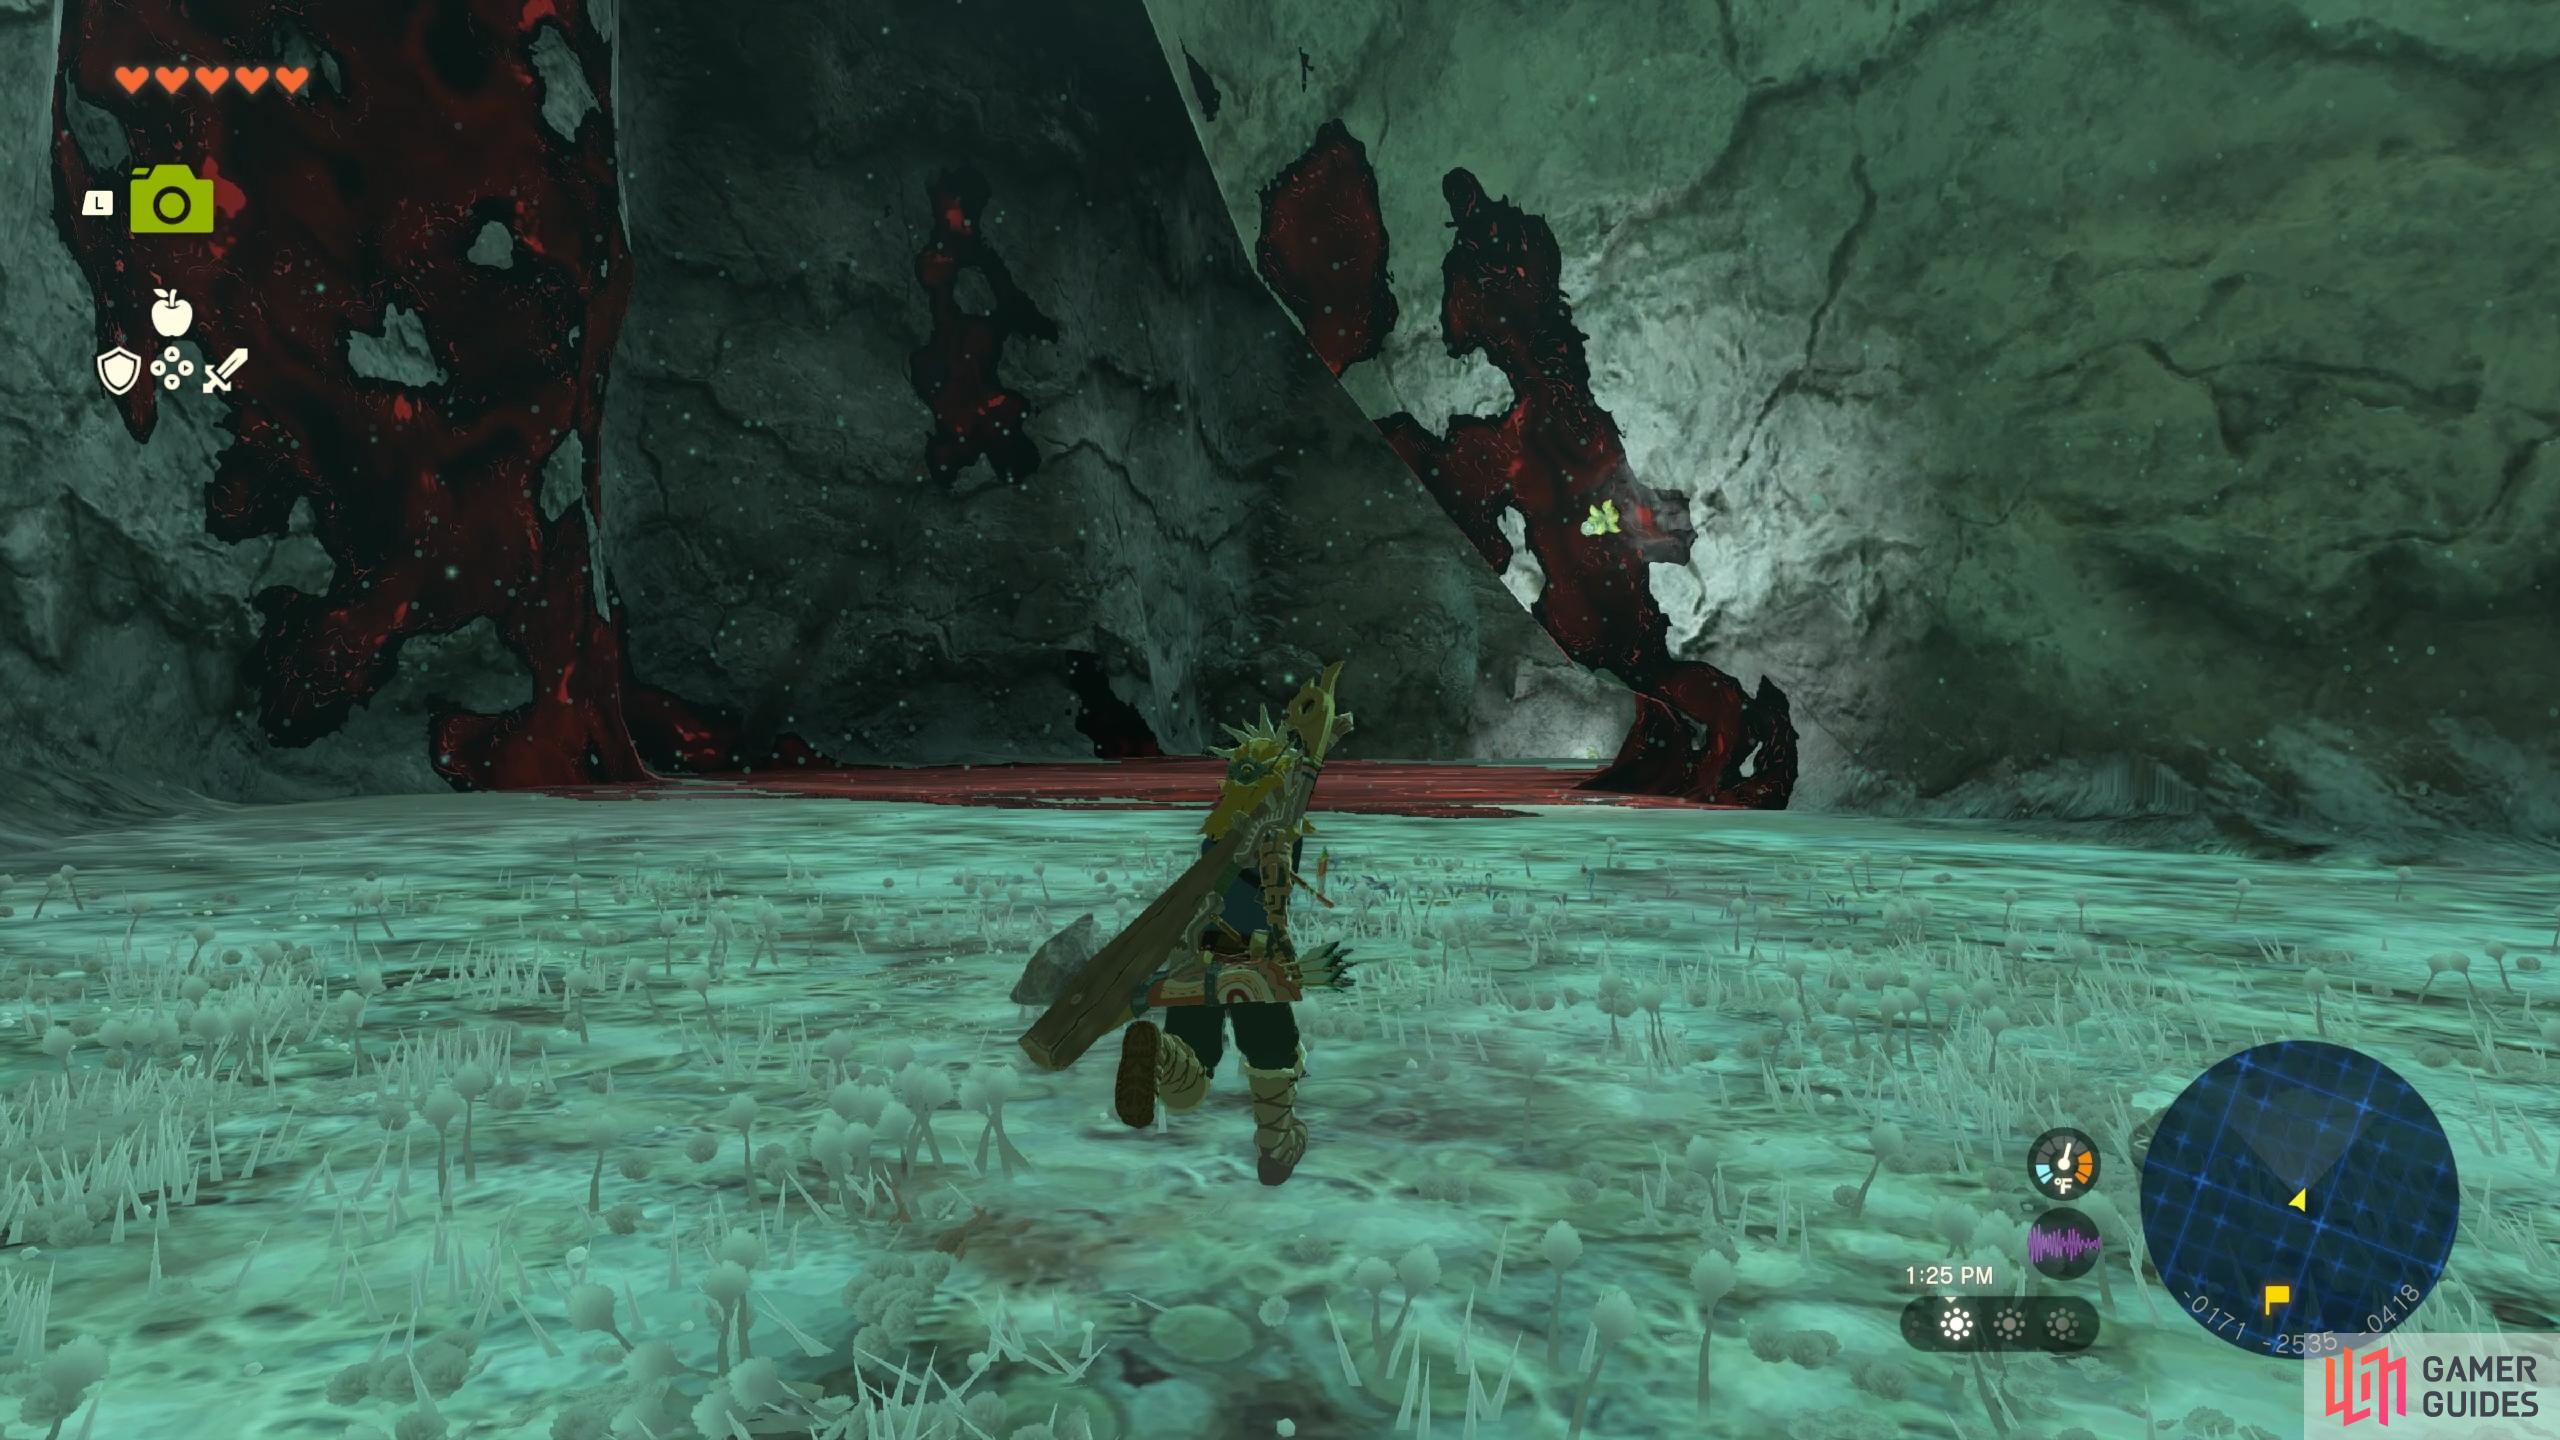
As you make your way down into the depths using the Paraglider, look out for signs of gloom on the ground. These should faintly glow in red so you’ll know where to avoid, and you should be moving northeast as the chasm opens up at the bottom. Try to find a dark spot here to land, then start firing regular ![]() Brightbloom Seeds or
Brightbloom Seeds or ![]() Giant Brightbloom Seeds in the direction of the northeast on your minimap. You should begin to see a path forward here, but much of it is covered in gloom so you need to make sure that the area is properly lit so you can make your way around it.
Giant Brightbloom Seeds in the direction of the northeast on your minimap. You should begin to see a path forward here, but much of it is covered in gloom so you need to make sure that the area is properly lit so you can make your way around it.
How to Get to the Amo-ne Lightroot in the Depths - TotK
As you move through the depths towards the northeast from the point where you dropped down the Lake Hylia Chasm, be ready to encounter some enemies who might emerge from the gloom. It’s a good idea to take the time to kill them here rather than run on, since you will need to consider carefully how you’re going to avoid the gloom in front of you. After dealing with the enemies (or running by them if you’re feeling brave), make good use of the Paraglider to fly over some of the larger pools of gloom here. You can jump over some of the smaller puddles, or climb around them on the surrounding walls if necessary.
You will benefit from having a few upgrades to your stamina here, since the longer you can maintain climbing in some of the trickier spots, the better. You can also make use of climbing equipment such as the ![]() Climbing Gear Map Marker or
Climbing Gear Map Marker or ![]() Climbing Boots Map Marker, so consider getting these if you’re having trouble climbing around the gloom at first.
Climbing Boots Map Marker, so consider getting these if you’re having trouble climbing around the gloom at first.
Once you’re through the worst of the gloom, the path forward will eventually lead you to the Amo-ne Lightroot, so you can’t really miss it. However, if you want to see this path in video form, be sure to check the short below.
No Comments