
Shrines are one of the core gameplay elements in The Legend of Zelda: Tears of the Kingdom. Scattered throughout Hyrule, shrines typically require you to solve some sort of puzzle or combat trial, upon the completion of which you’ll be rewarded with a ![]() Light of Blessing and potentially equipment. Once completed, the shrine will also serve as a fast travel point. Since completing shrines will make your character stronger and provide exploration footholds, it’s essential that you conquer them whenever possible. This page will provide a walkthrough for
Light of Blessing and potentially equipment. Once completed, the shrine will also serve as a fast travel point. Since completing shrines will make your character stronger and provide exploration footholds, it’s essential that you conquer them whenever possible. This page will provide a walkthrough for ![]() Tsutsu-um Shrine.
Tsutsu-um Shrine.
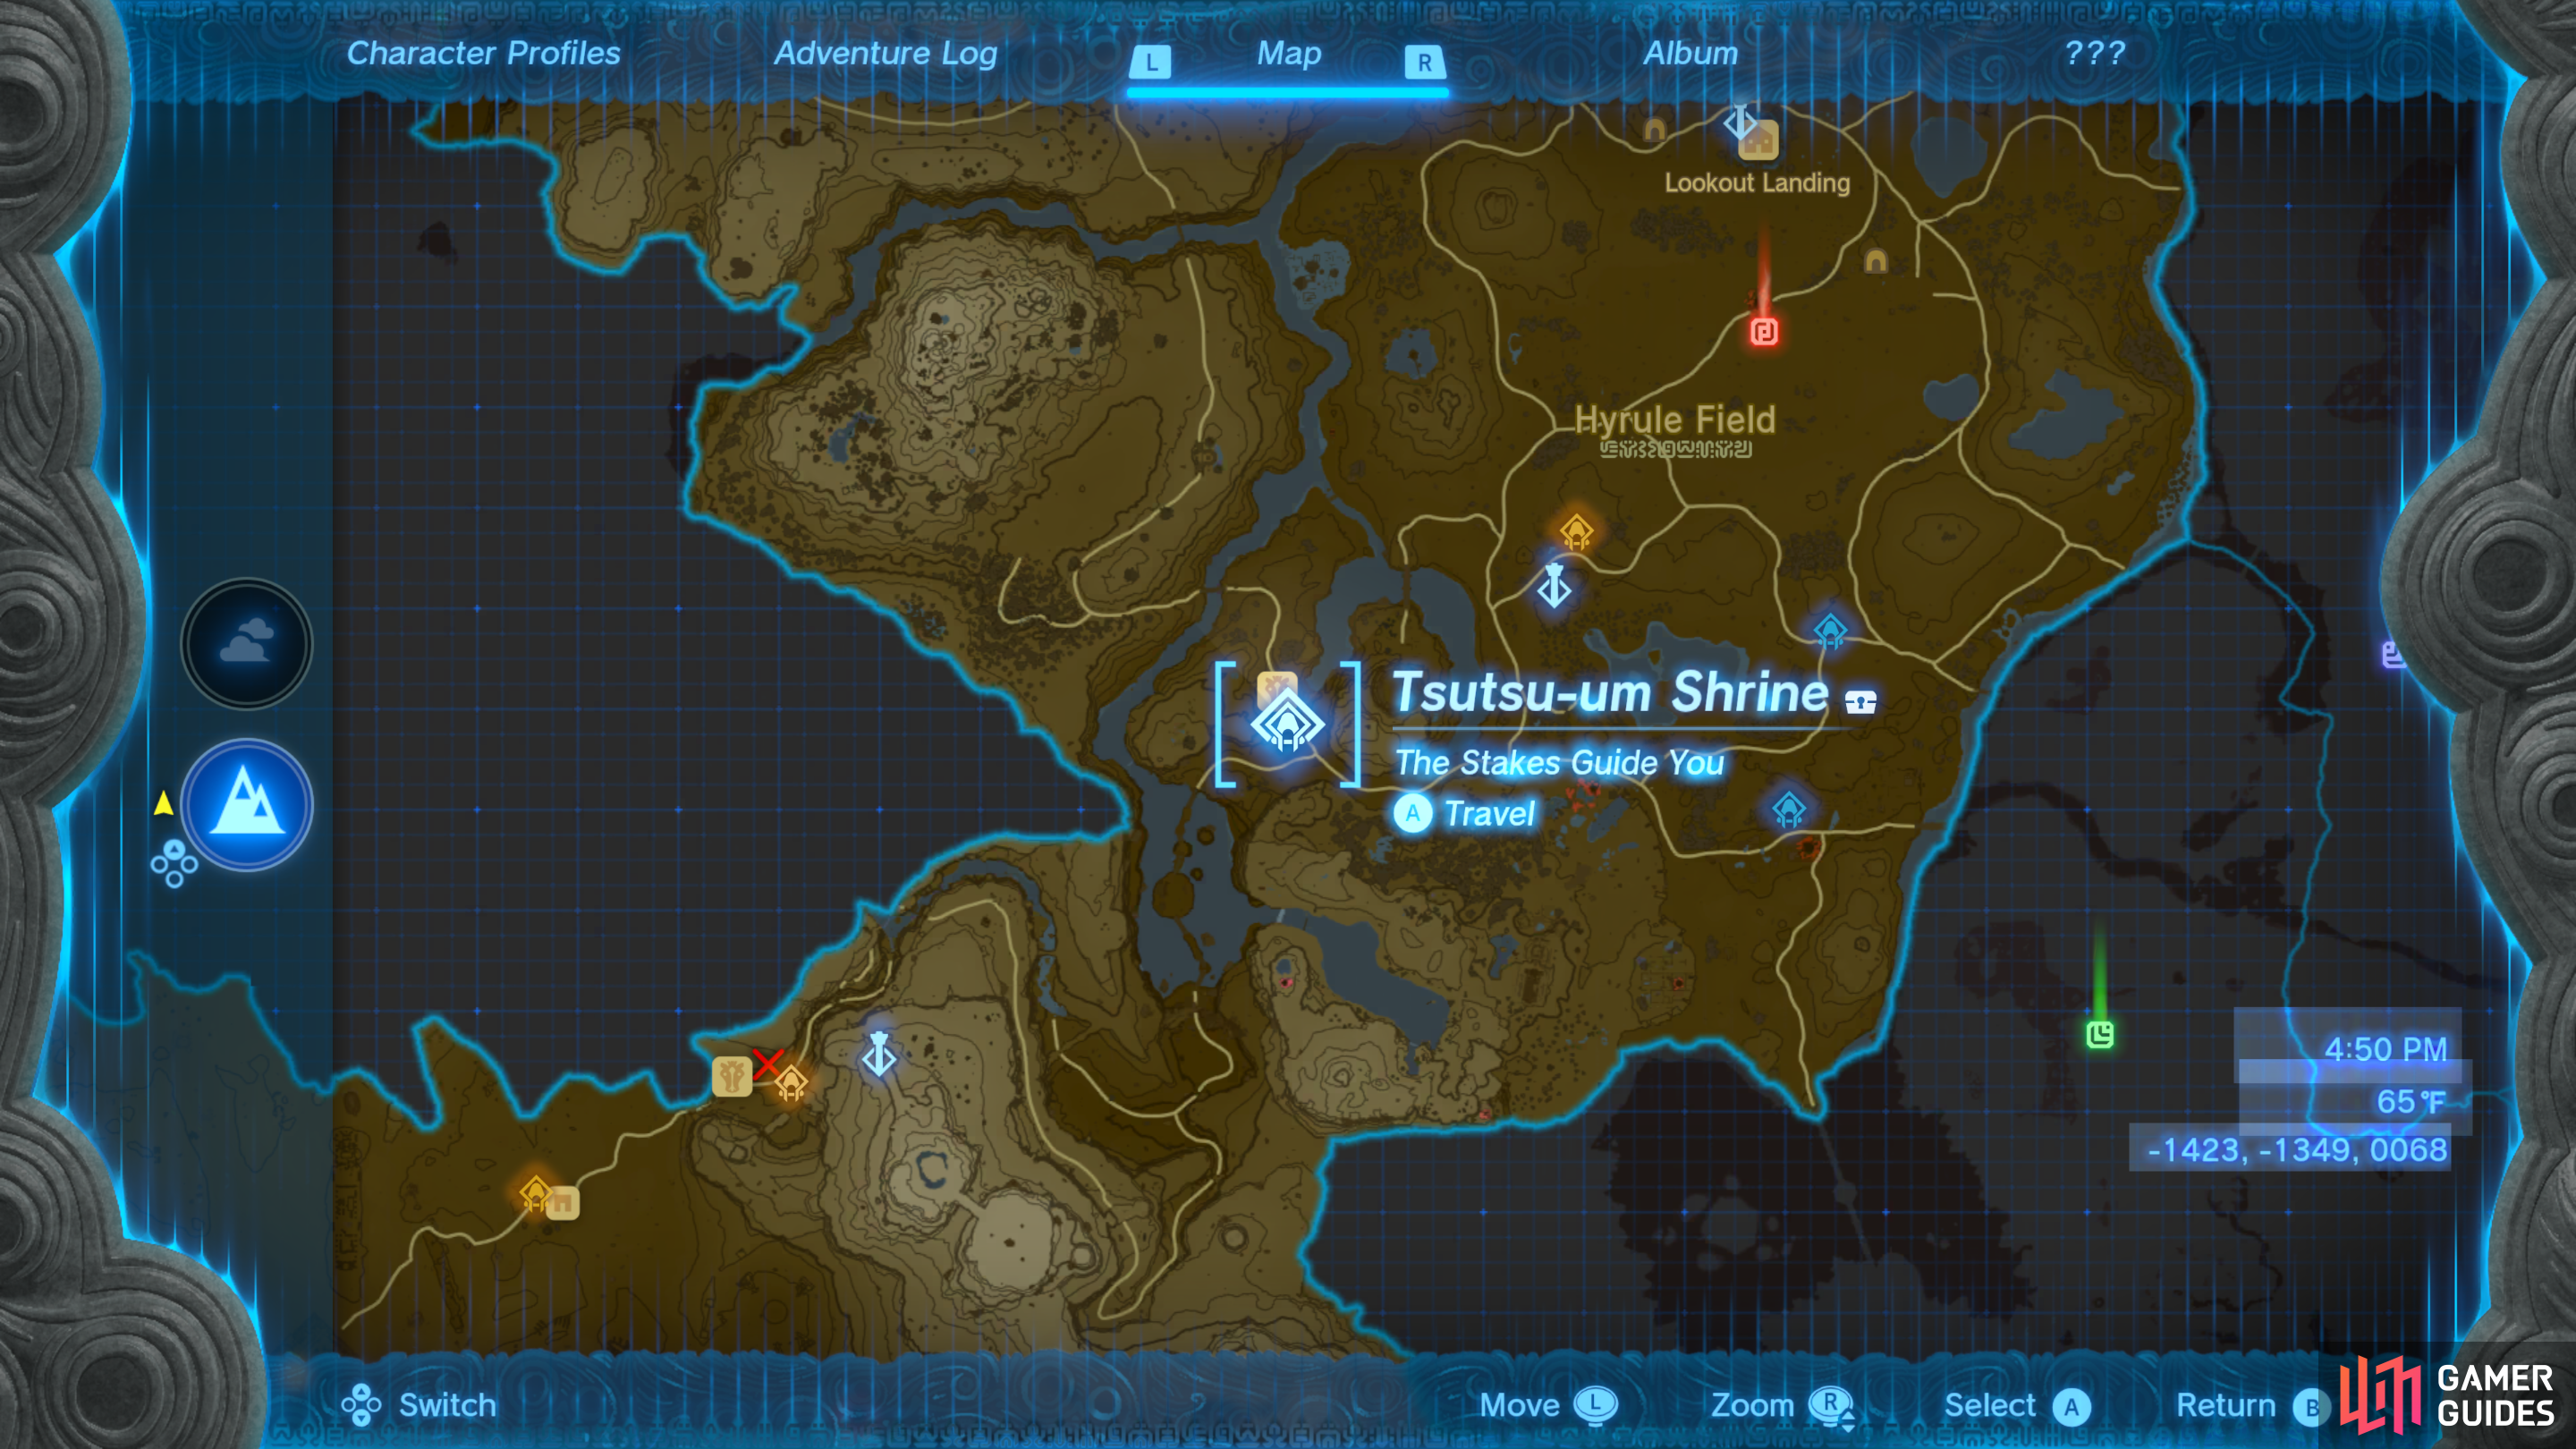
Tsutsu-um Shrine can be found along the southwestern reaches of Central Hyrule.
Where to find Tsutsu-um Shrine in Tears of the Kingdom
Located at the far southwestern edge of ![]() Central Hyrule, near the boundary to the Gerudo region, you’ll find Tsutsu-um Shrine southwest of the Hyrule Field Skyview Tower, on a hill overlooking the Outskirt Stable. A bit of climbing should suffice to get there.
Central Hyrule, near the boundary to the Gerudo region, you’ll find Tsutsu-um Shrine southwest of the Hyrule Field Skyview Tower, on a hill overlooking the Outskirt Stable. A bit of climbing should suffice to get there.
Attach a platform to a stake embedded in a moving pillar,
to create a makeshift elevator.
How to Complete Tsutsu-um Shrine in Tears of the Kingdom
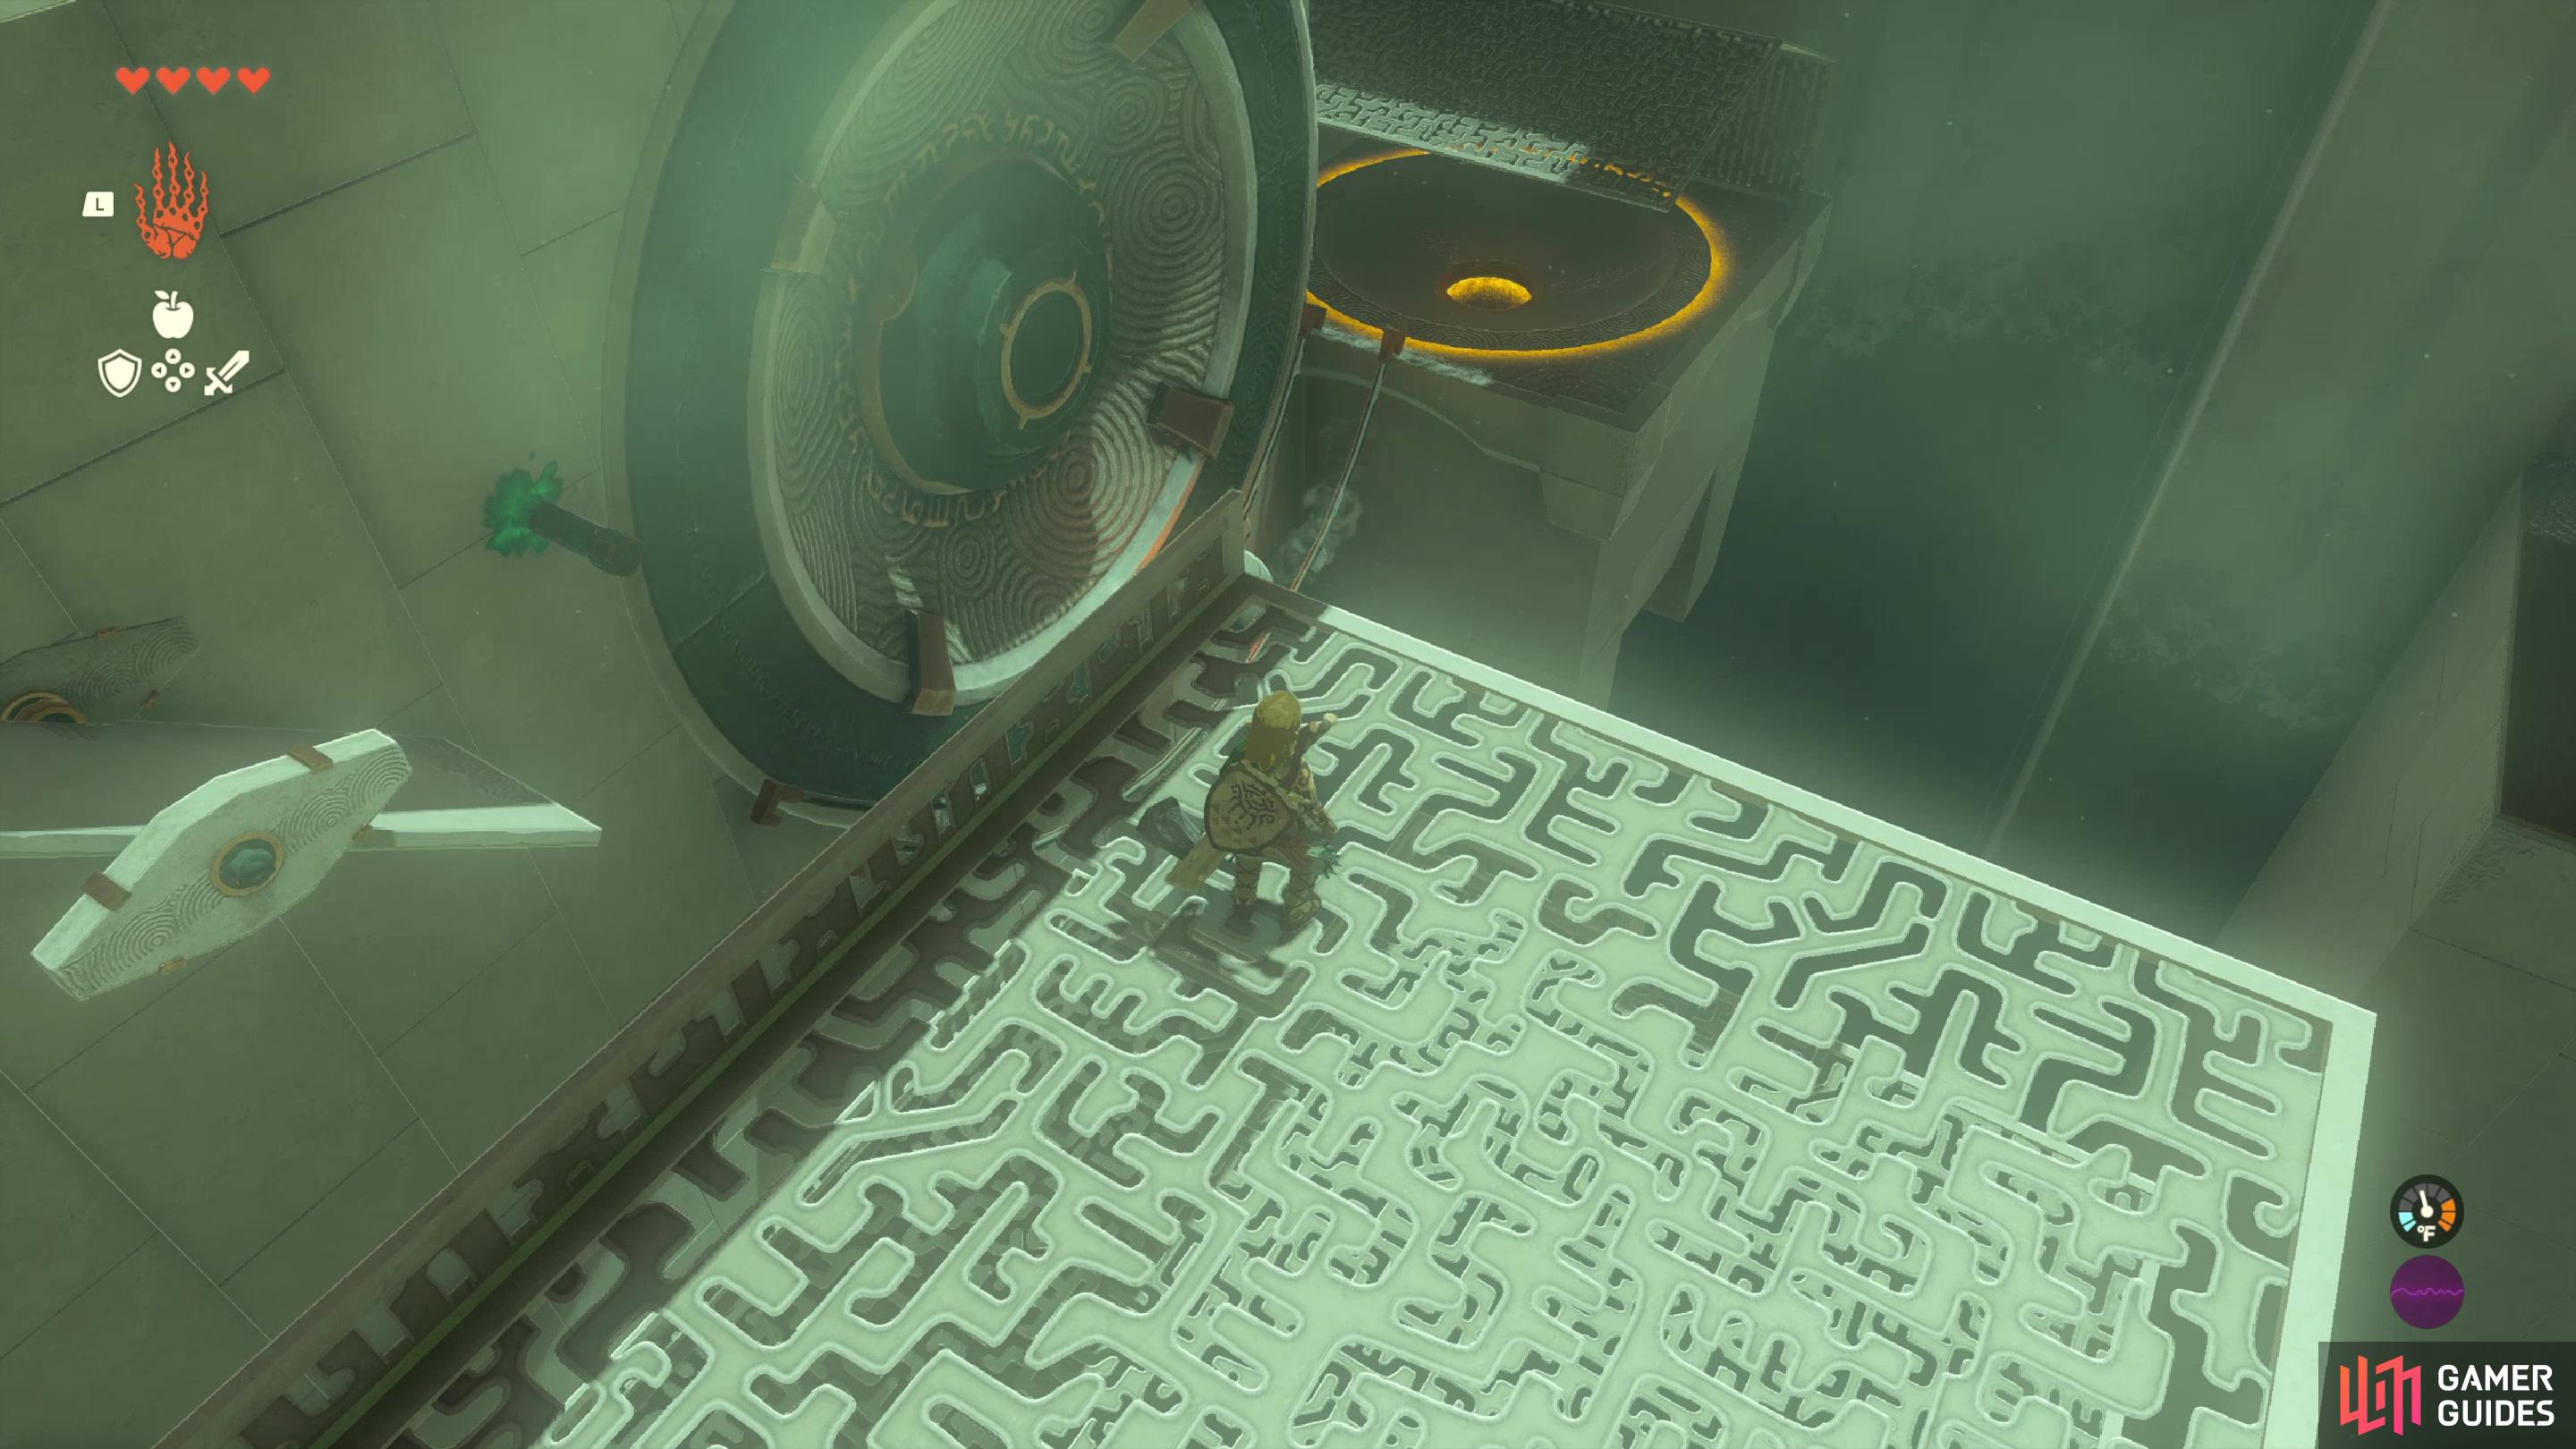
Enter the shrine and head downstairs to find the main shrine chamber, where you’ll find a spinning wheel, a rotating lever, and an orb constantly rolling itself to oblivion ahead of you, while to the left you’ll find a pillar constantly rising and lowering. To your left is a sealed door. Your goal in this shrine is to get the orb into a pit past the spinning wheel, and you’ll need to use a variety of stakes and platforms to achieve this. As with most shrines there are likely multiple solutions to the puzzle, so we’ll just include one that worked for us.
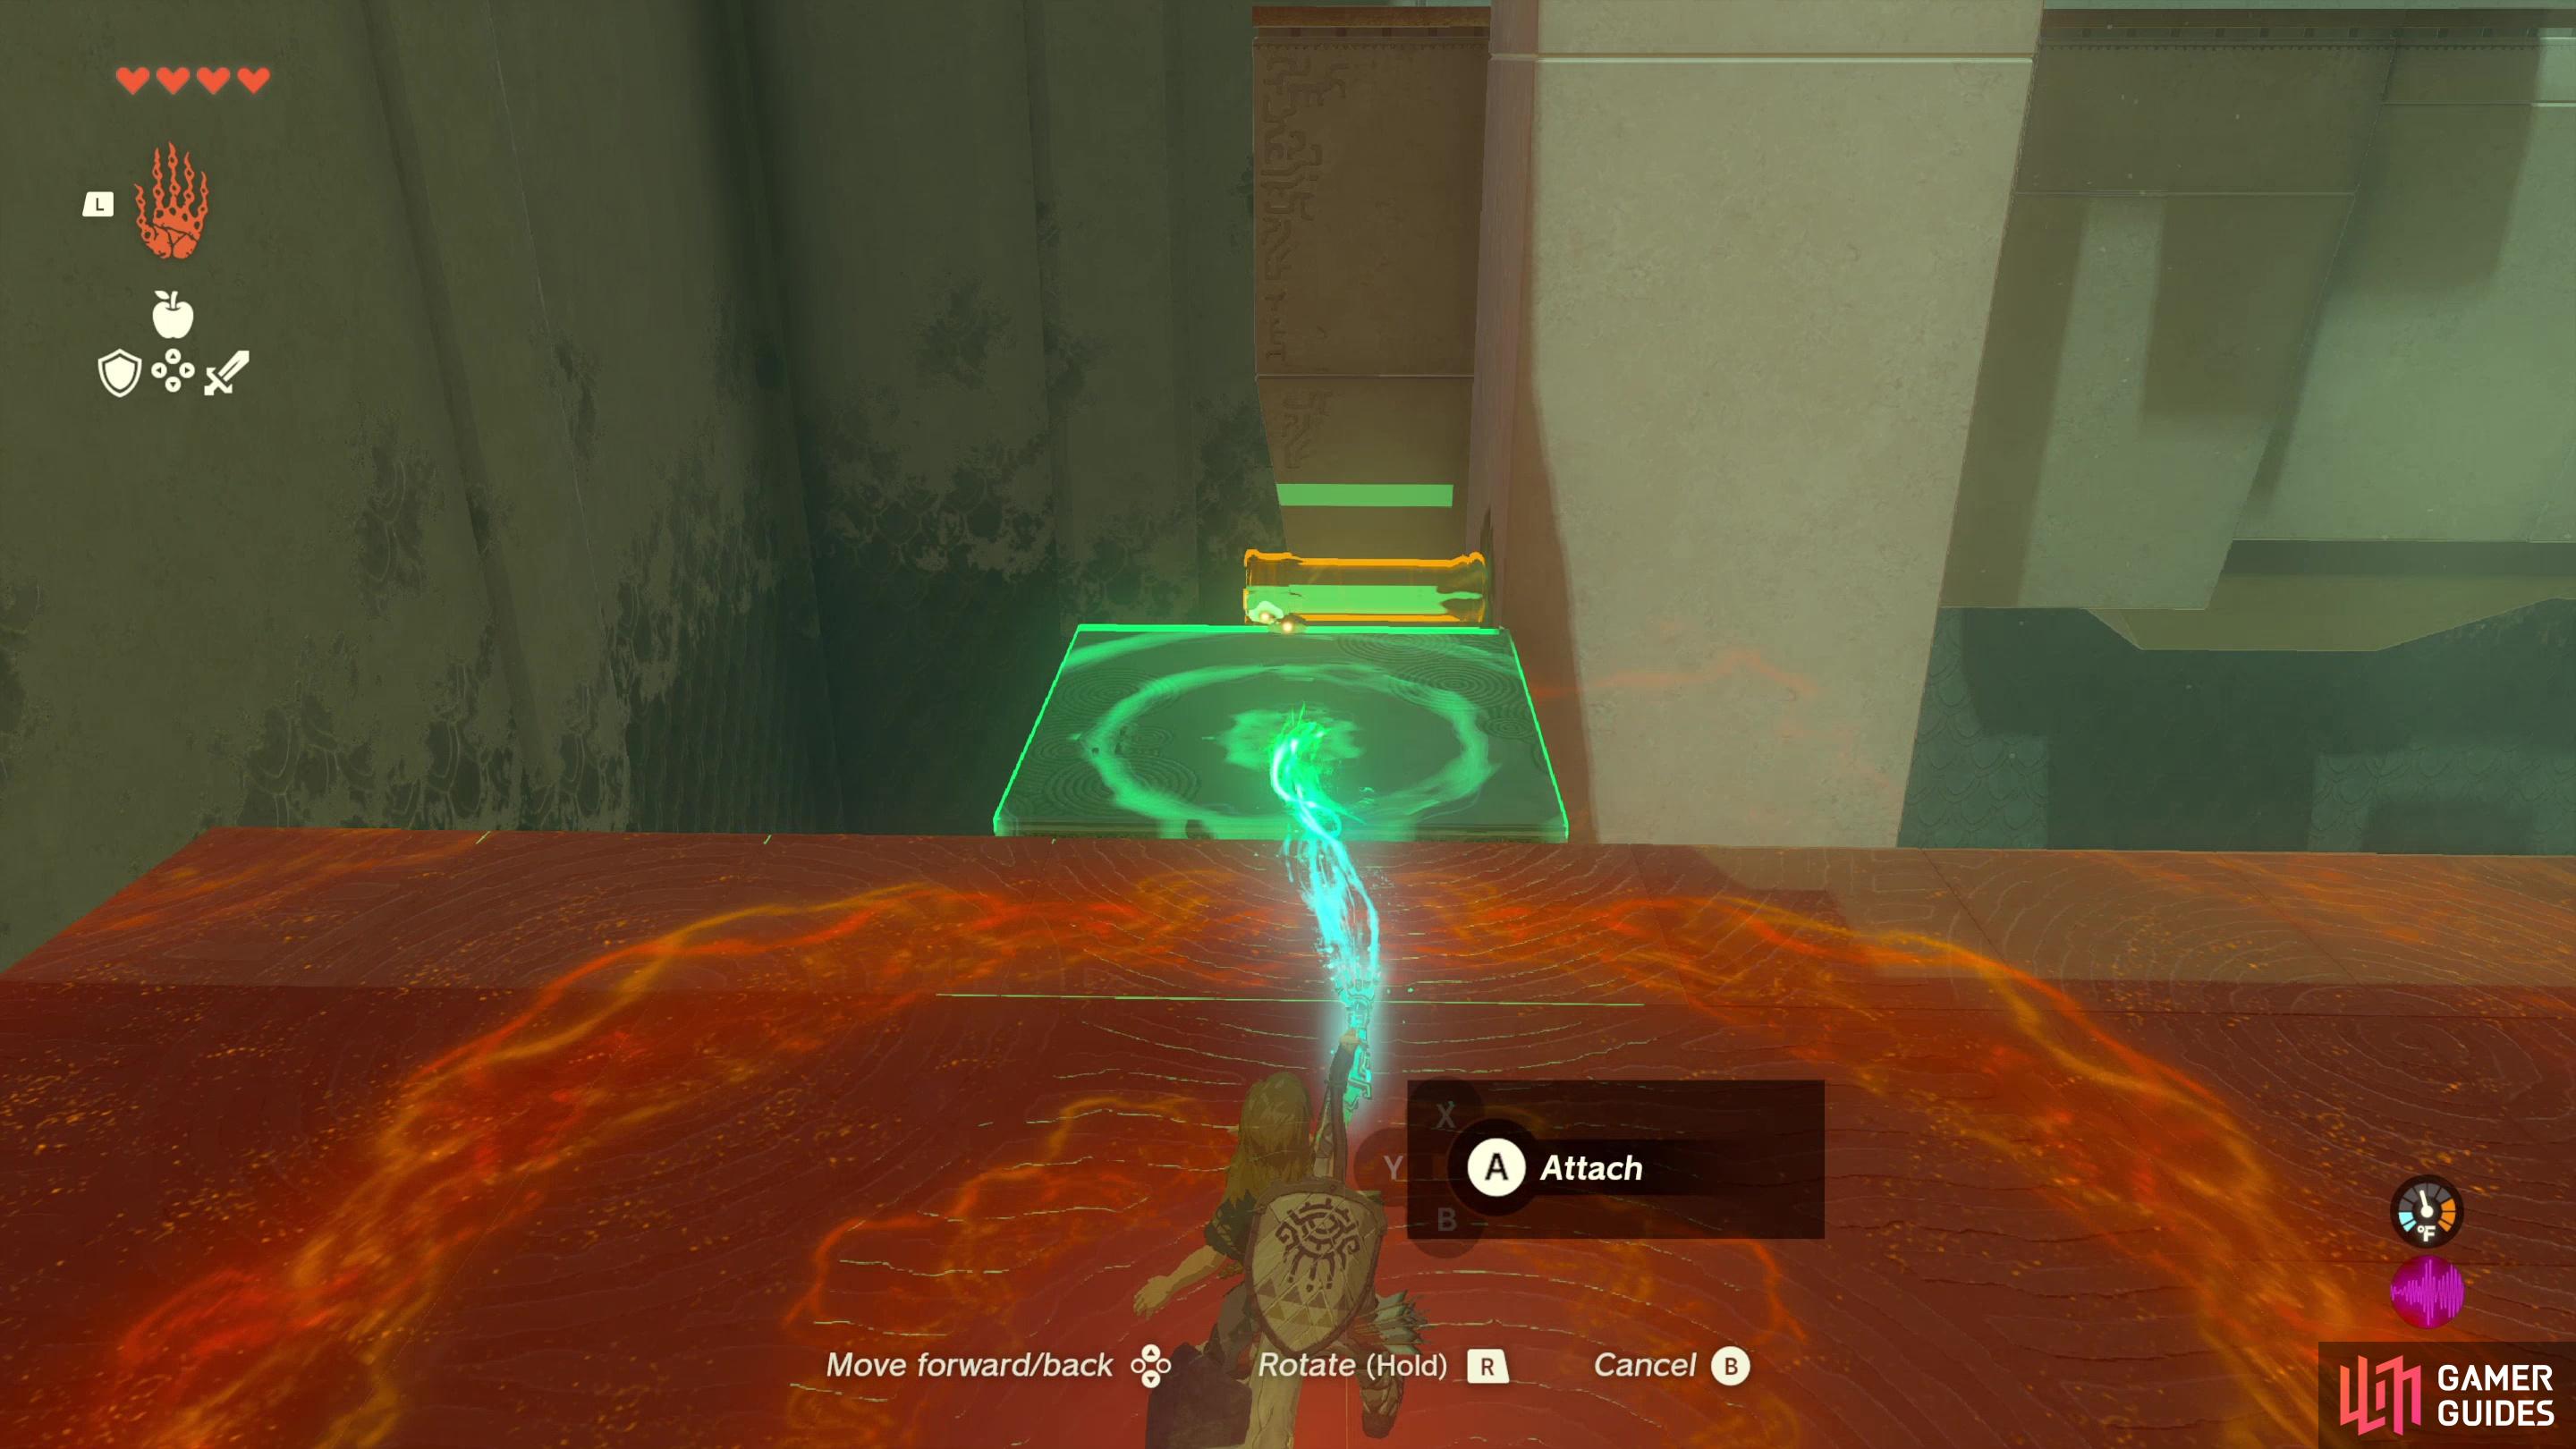
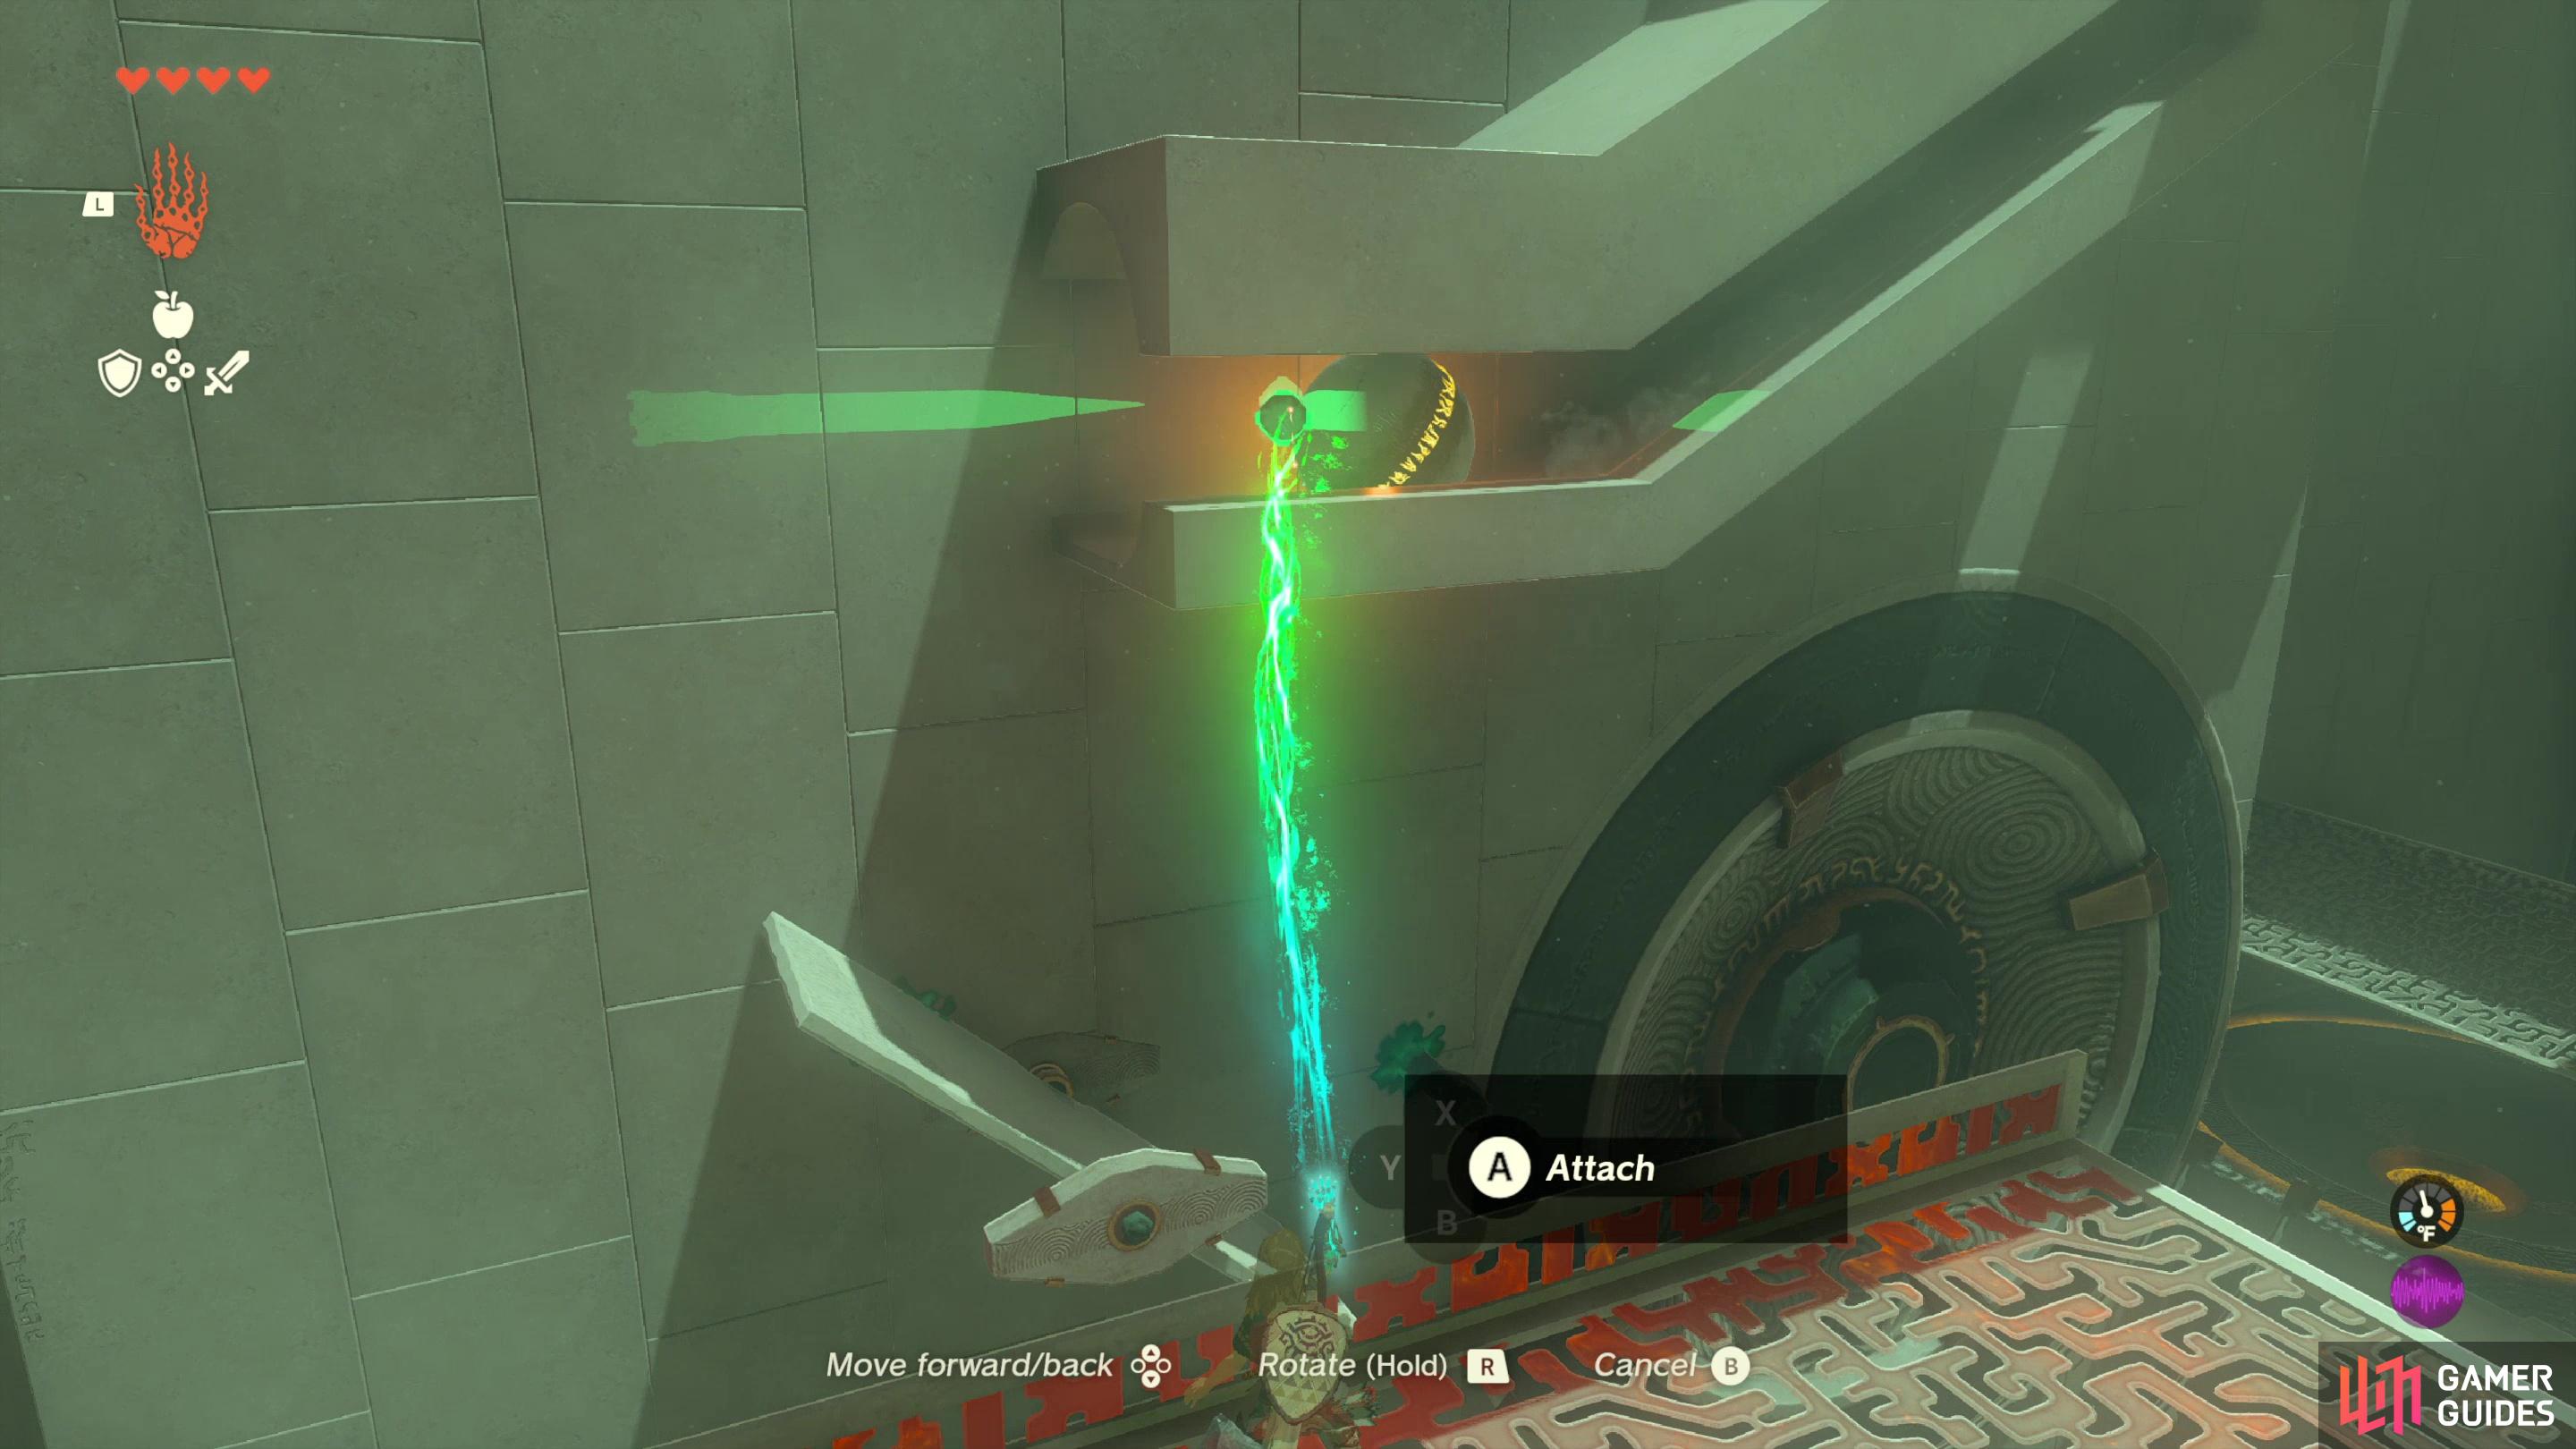
First, turn left towards the rising and lowering pillar and note the stake on the side. There’s also a stake with a platform attached on the floor nearby, and an unadorned platform sheet.. Use ![]() Ultrahand to grab the platform on the ground nearby then attach the stake sticking out of the pillar to create a rudimentary elevator. Wait for your newly created contraption to lower, then jump on the platform, wait for the pillar to rise, then glide over to the ledge beyond the pillar.
Ultrahand to grab the platform on the ground nearby then attach the stake sticking out of the pillar to create a rudimentary elevator. Wait for your newly created contraption to lower, then jump on the platform, wait for the pillar to rise, then glide over to the ledge beyond the pillar.
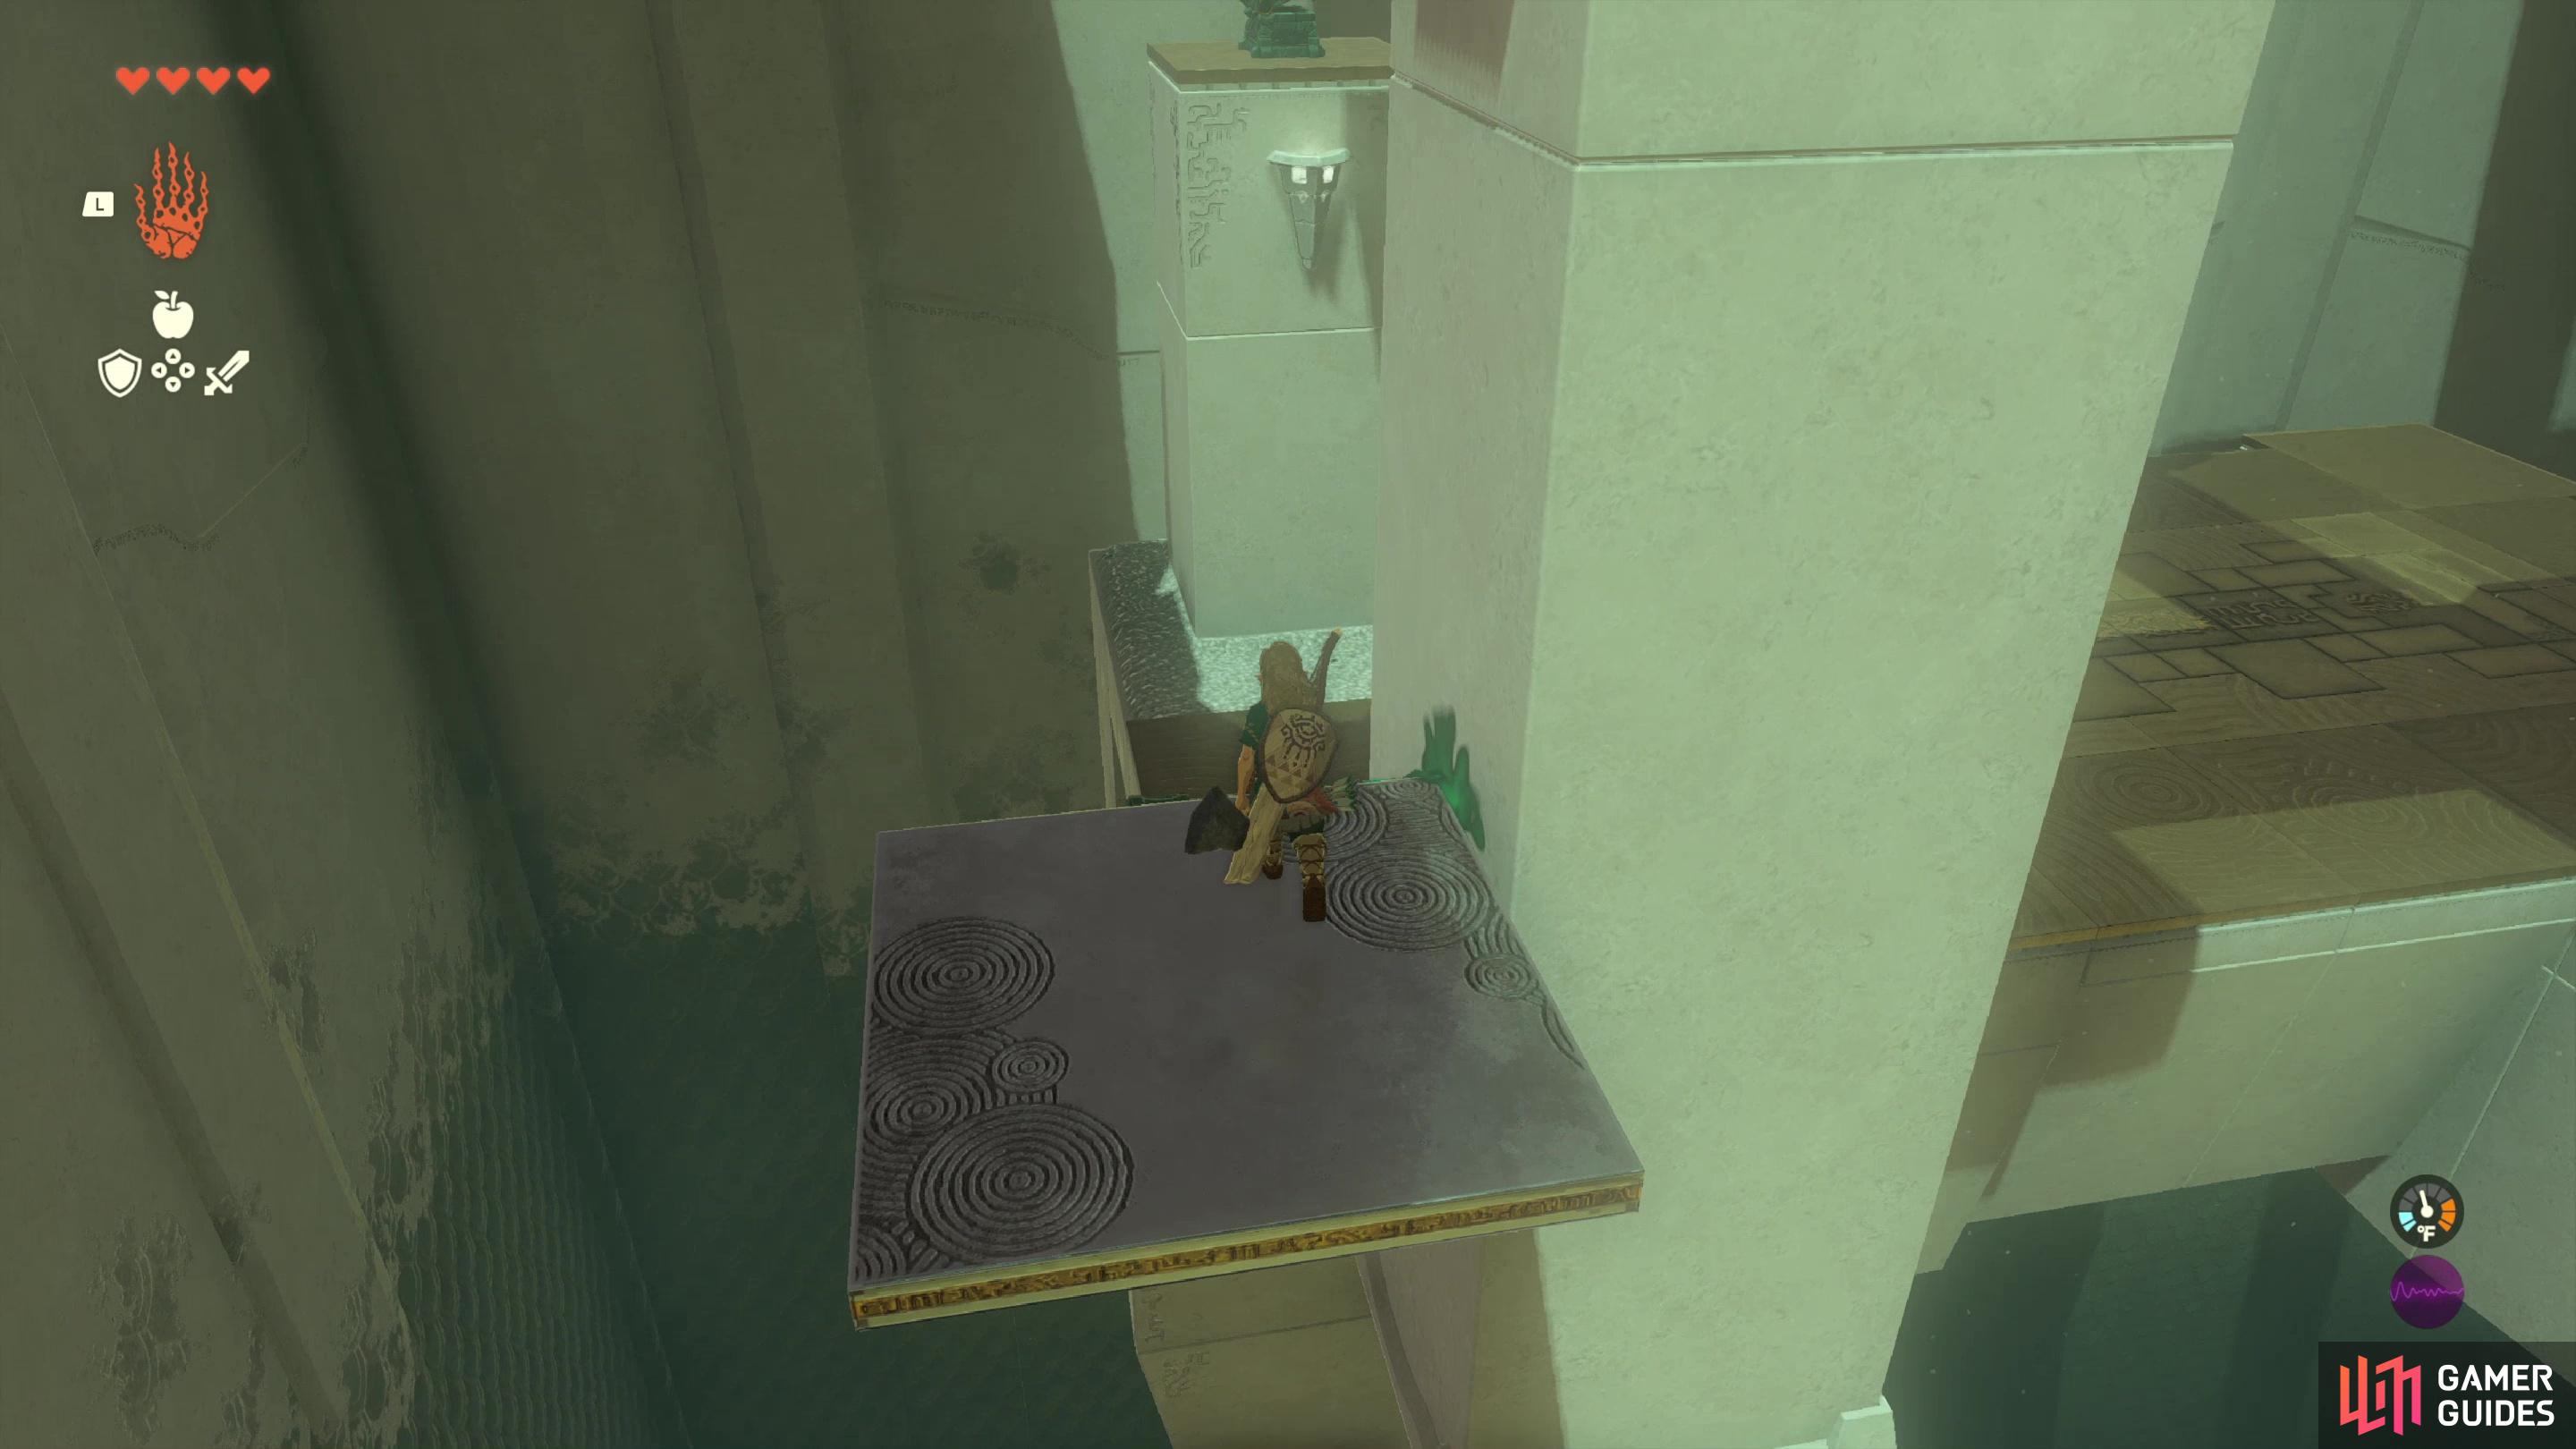
Once on this ledge, turn right and you’ll find a fan creating a torrent of wind. Jump on it and deploy your glider to fly up, then land on a pilar to find a chest with ![]() Arrows x5 inside. Return to the fan and use it to glide over to a pair of floating platforms opposite the wheel, the top one of which is smaller than the bottom. Land on the upper of these two platforms and turn to face the nearby wall to see three stakes, one of which you’ll probably need to be on the lower platform to reach, but you only need two.
Arrows x5 inside. Return to the fan and use it to glide over to a pair of floating platforms opposite the wheel, the top one of which is smaller than the bottom. Land on the upper of these two platforms and turn to face the nearby wall to see three stakes, one of which you’ll probably need to be on the lower platform to reach, but you only need two.
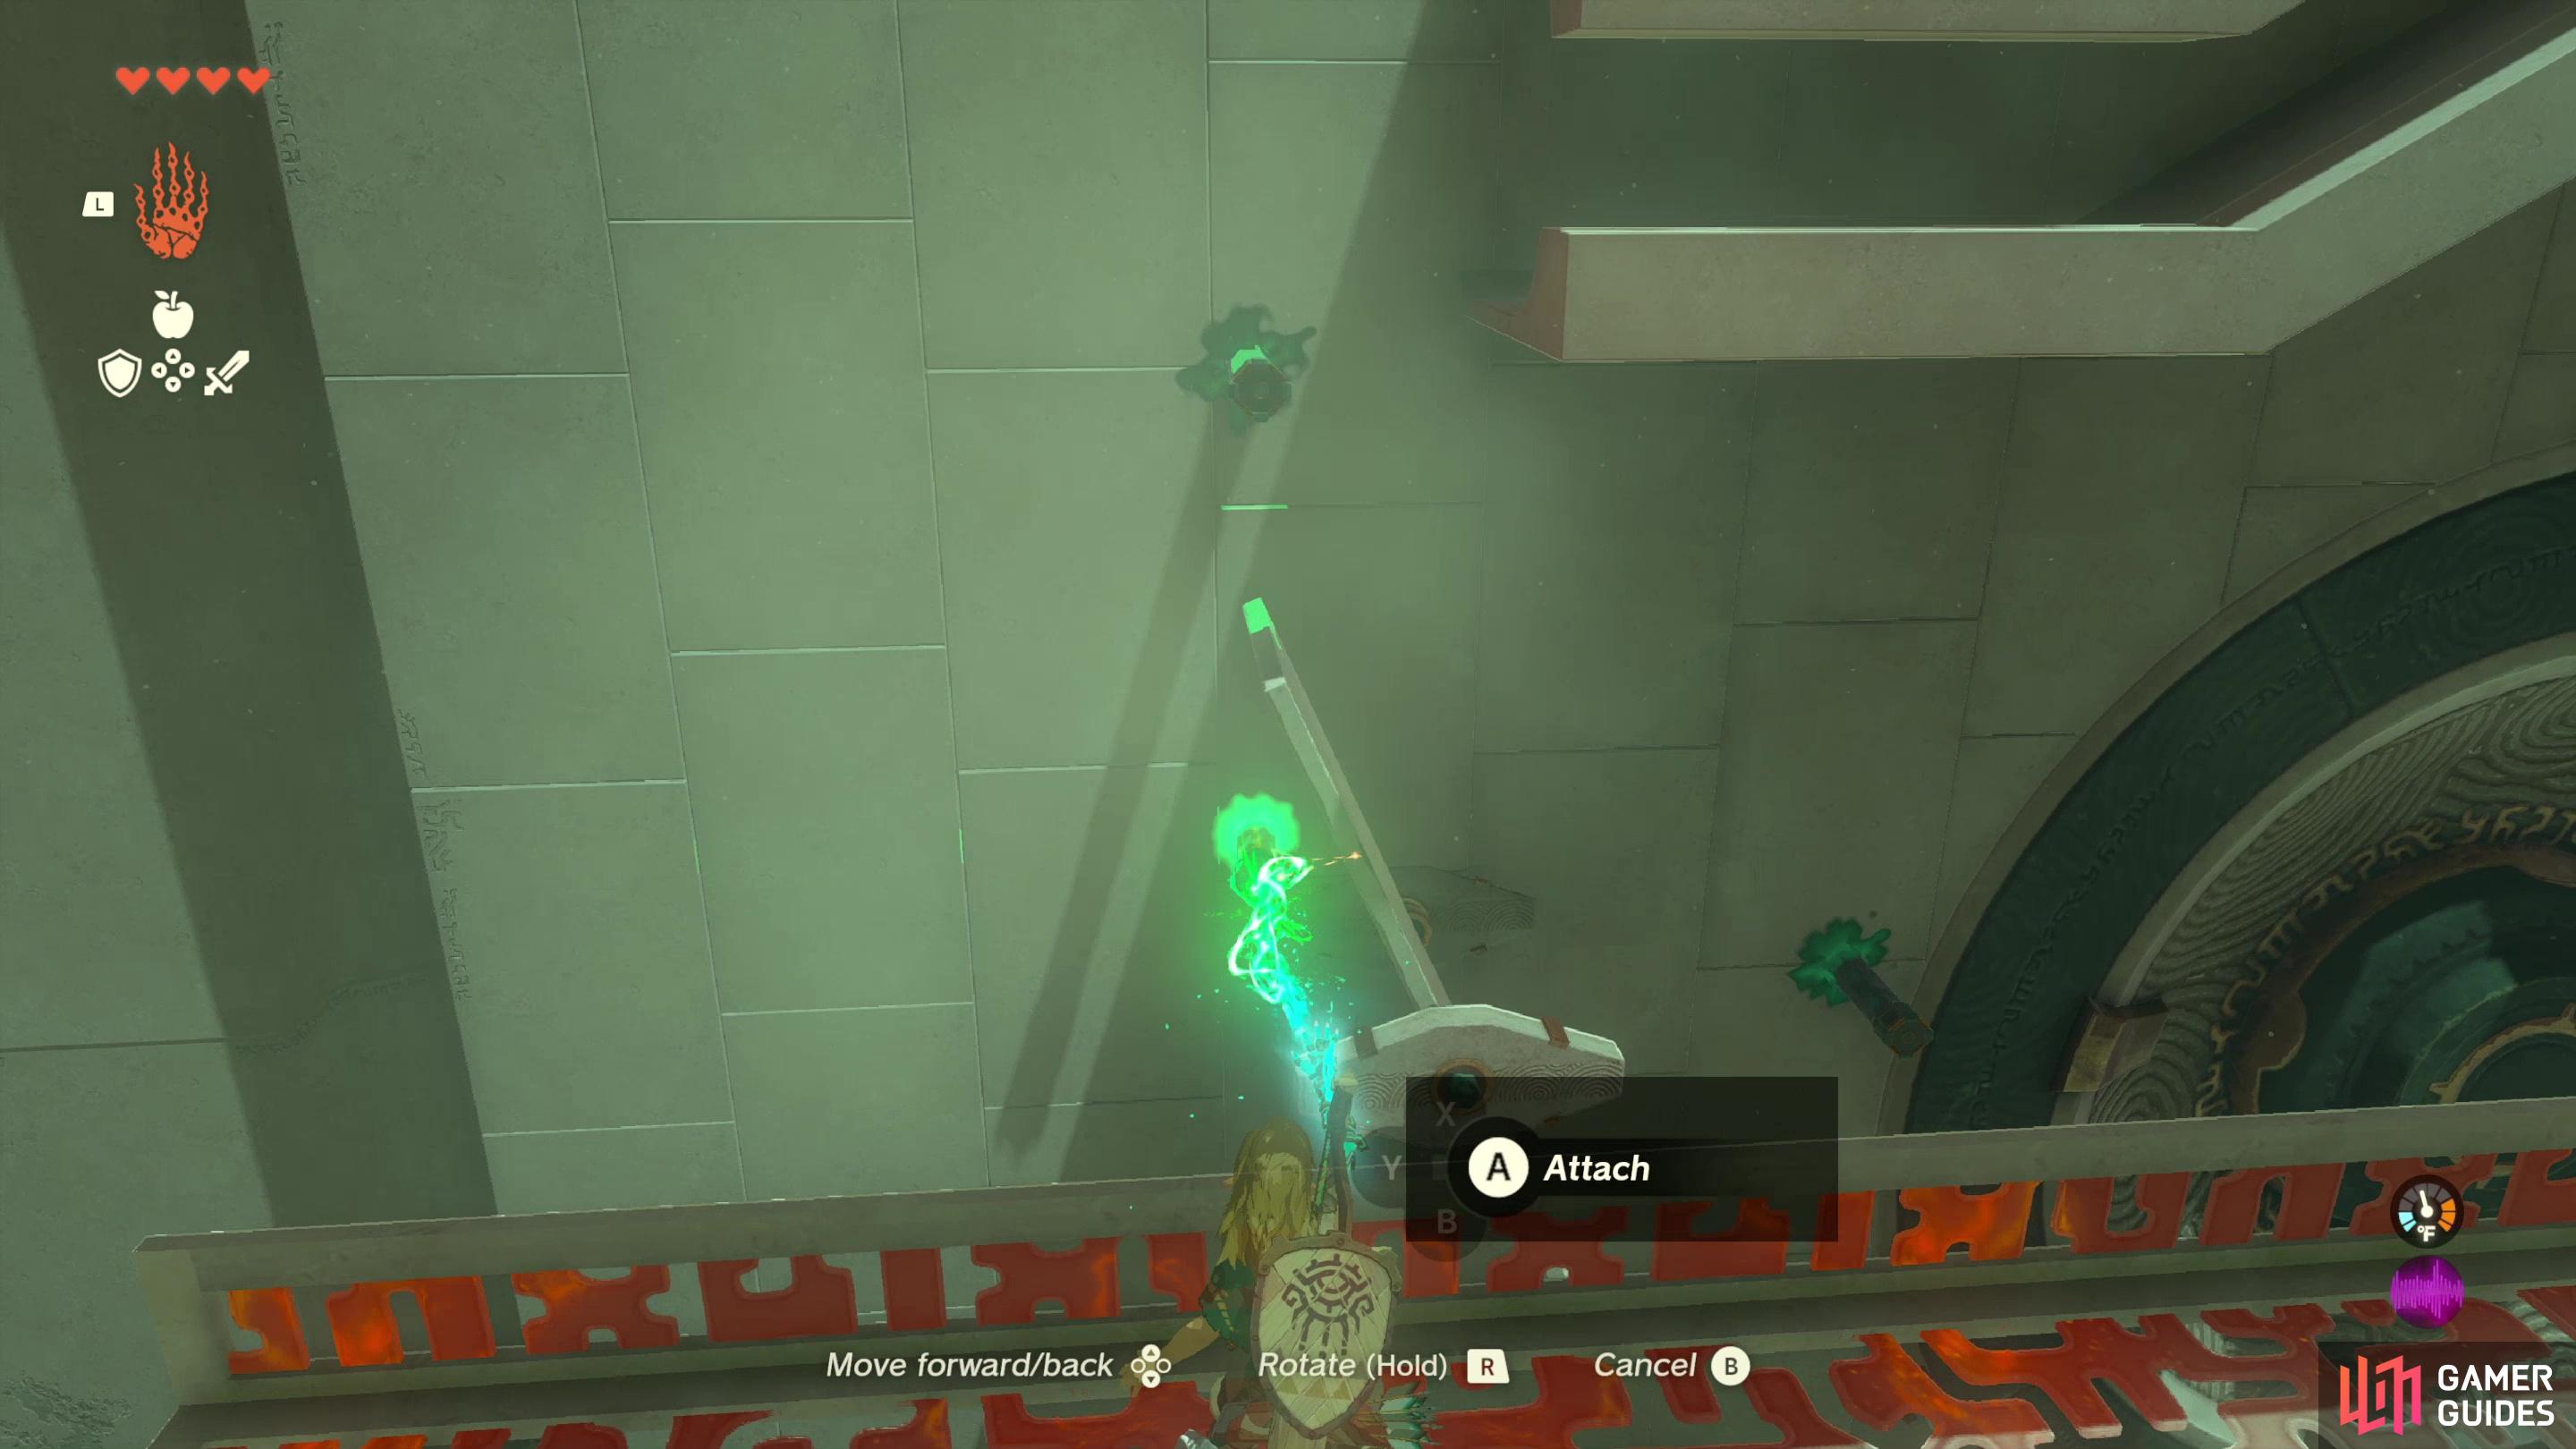
Use one stake to stop the lever, creating a ramp to some rails under the nearby spinning wheel,
then stall the ball with a second stake.
First, grab a stake and move it into the path of the rotating lever. Make sure it is perpendicular to the wall, and when the lever is close to the stake, attach it. This should jam the lever - aim for roughly a 135-degree angle so it forms a ramp leading from under the falling orb on one end and onto some rails running under the spinning wheel on the other end. Now all you have to do is get that orb down to the lever-ramp.
This is actually easier than it looks. Use Ultrahand to grab the stake on the wall in the path of the falling orb and just drag it into the chute the orb rolls down. It should collide with the stake, lose momentum, and fall down onto the lever-ramp and from there roll down onto the rail under the spinning wheel.
(1 of 3) Once the ball is on the rails under the spinning wheel, glide over the bowl beyond said wheel.
The orb is near the destination, but now it’s stuck. Don’t worry, some stupid brute force will actually suffice here. Look over towards the bowl past the spinning wheel where you need to get the orb (it’s glowing yellow, so it shouldn’t be hard to spot). Just jump and glide over there - try to land on the bowl itself, not the cage roof above it. Once you’re in the bowl, use Ultrahand to grab the orb out of the railing under the spinning wheel and just… move it onto the edge of the bowl platform. Once there, use Ultrahand to move it into the bowl proper (if you weren’t able to do so from the railing) and let gravity guide the orb into a hole at the bottom of the bowl. It glows green and the gate near the entrance opens. Huzzah! Now you just need to get back…
This, too, is actually simpler than it seems. Just use ![]() Ascend to reach the roof of the cage above the bowl, and from there jump and glide over to the ledge by the entrance. Go through the now-open gate and interact with the glowing green disc at the end of the shrine to obtain your prize - a Light of Blessing.
Ascend to reach the roof of the cage above the bowl, and from there jump and glide over to the ledge by the entrance. Go through the now-open gate and interact with the glowing green disc at the end of the shrine to obtain your prize - a Light of Blessing.
No Comments