
Physics play an even bigger part in Tears of the Kingdom compared to its Breath of the Wild predecessor thanks to the various new abilities that have been introduced with this iteration. In shrines,
The ![]() Ekochiu Shrine in particular delivers a physics based puzzle that requires you to both use your knowledge of how physics work in combination with using Link’s powers in order to overcome it.
Ekochiu Shrine in particular delivers a physics based puzzle that requires you to both use your knowledge of how physics work in combination with using Link’s powers in order to overcome it.
If this sounds a little out of your depth don’t worry, with this guide we’ll be detailing exactly how to complete the Ekochiu Shrine, removing any of the difficulty this one possesses.
Where to Find Ekochiu Shrine in Tears of the Kingdom
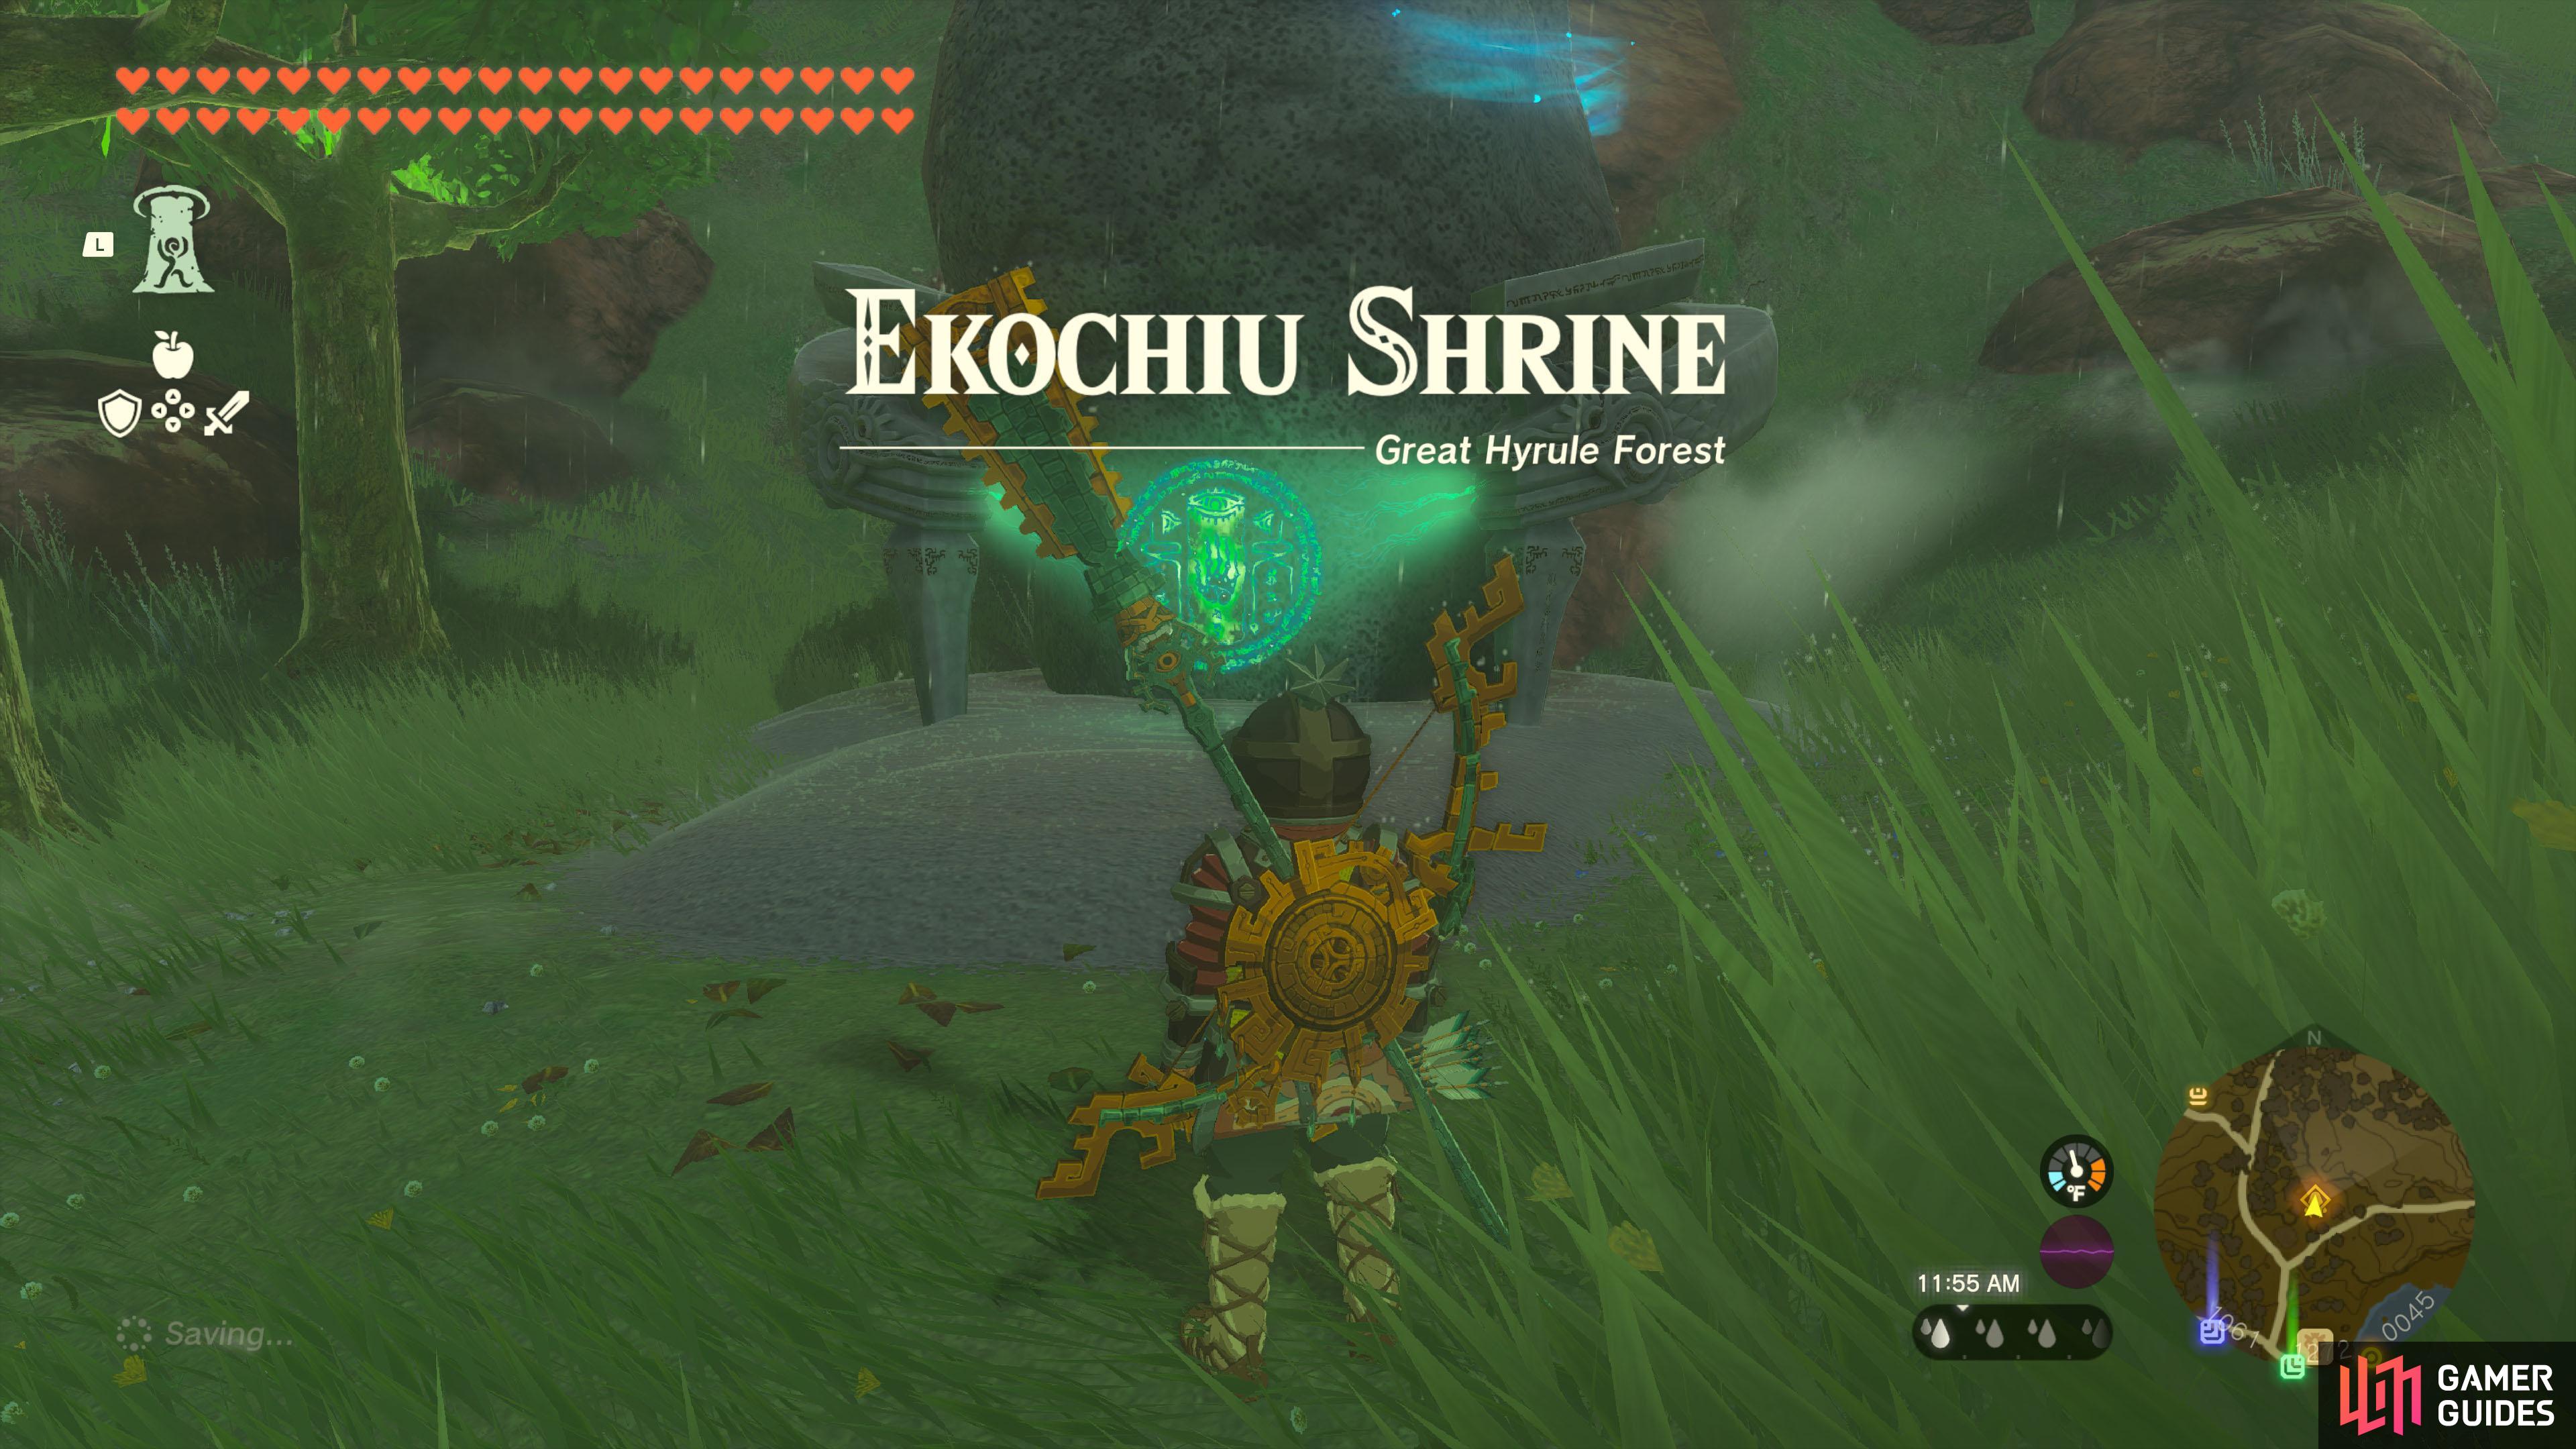
The !Ekochiu Shrine entrance
For the Ekochiu Shrine location, you’ll be looking to head toward the south side of Minshi ![]() Woods, north west of Pico Pond. It’s also just slightly north of Woodland Stable, a landmark that you have likely unlocked.
Woods, north west of Pico Pond. It’s also just slightly north of Woodland Stable, a landmark that you have likely unlocked.
However, if you’re still having issues, here is a direct map marker on our interactive map.
How to Complete Ekochiu Shrine in Tears of the Kingdom
The name of the challenge in Ekochiu Shrine is Rise And Fall and this certainly translates into what you’ll need to be doing to get it completed. This is due to the fact that you’ll be utilising ![]() Recall for the vast majority of time with the puzzles presented here.
Recall for the vast majority of time with the puzzles presented here.
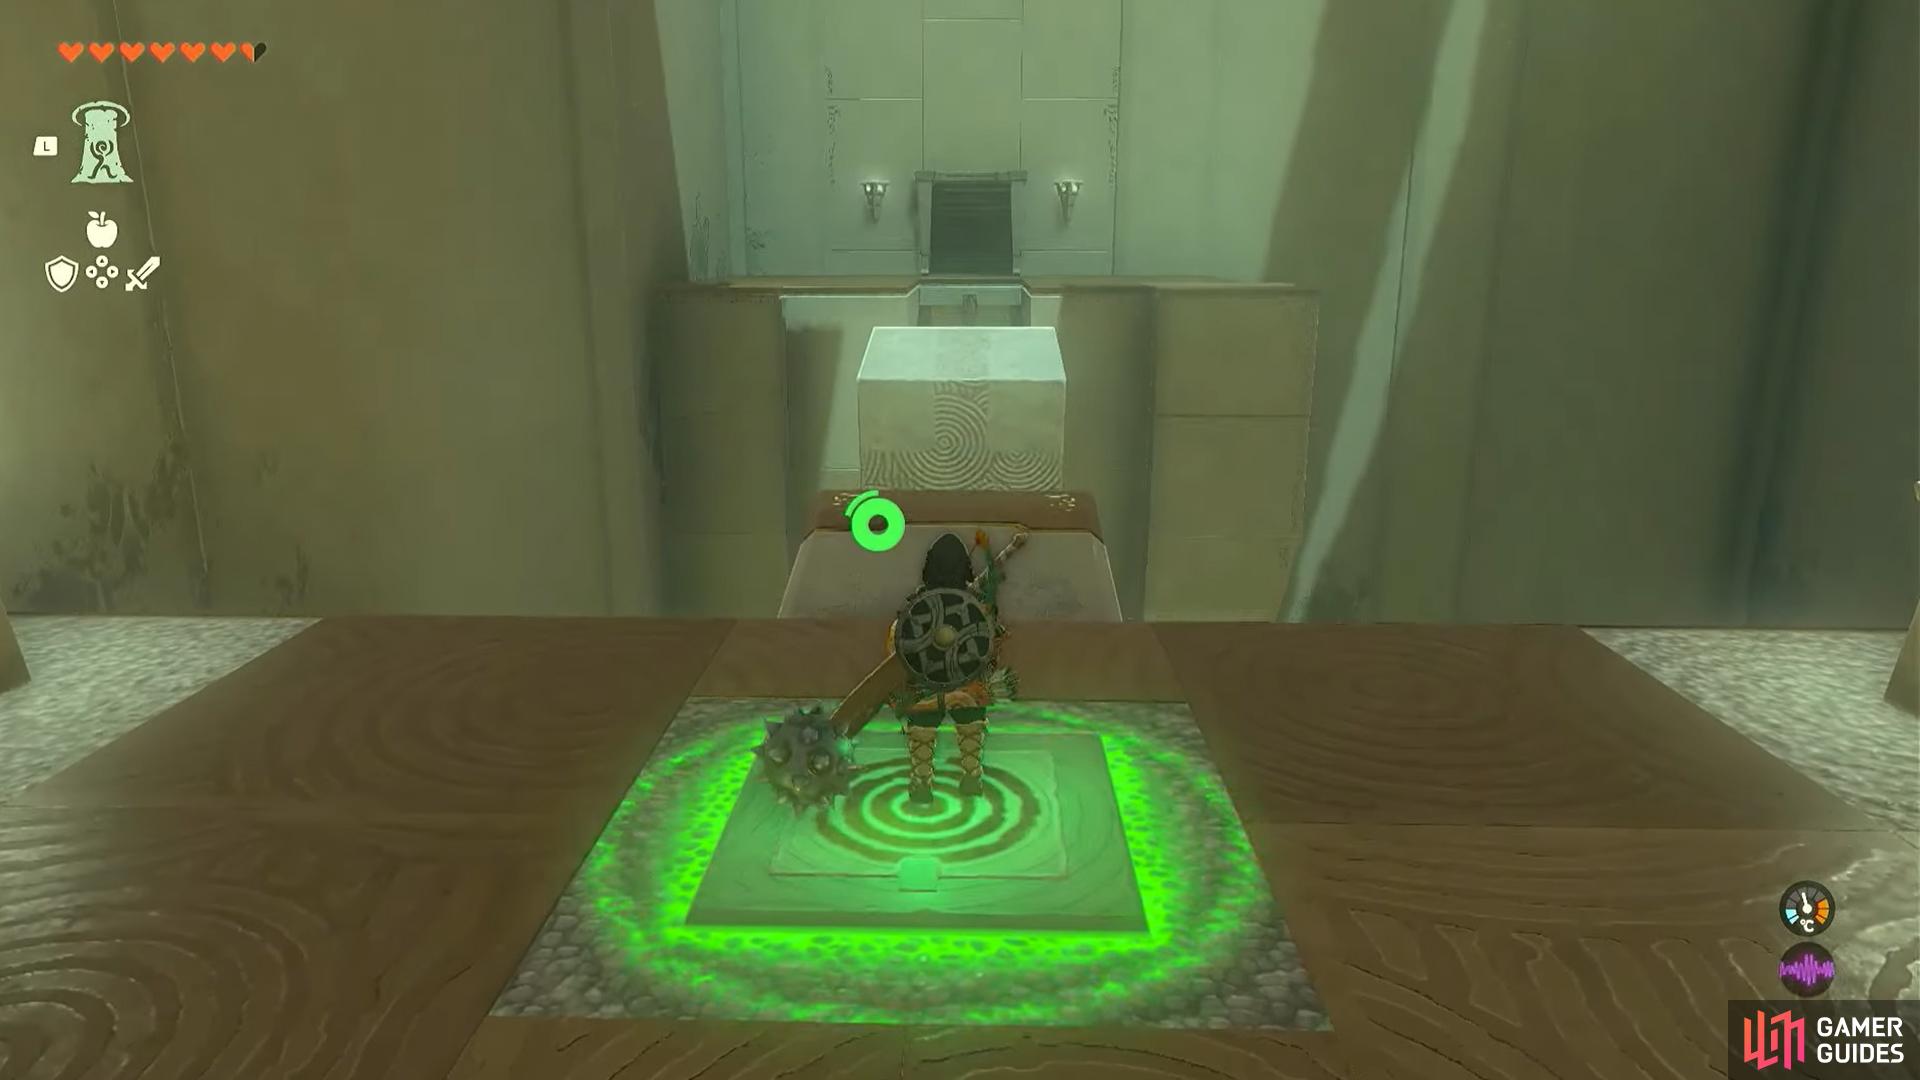
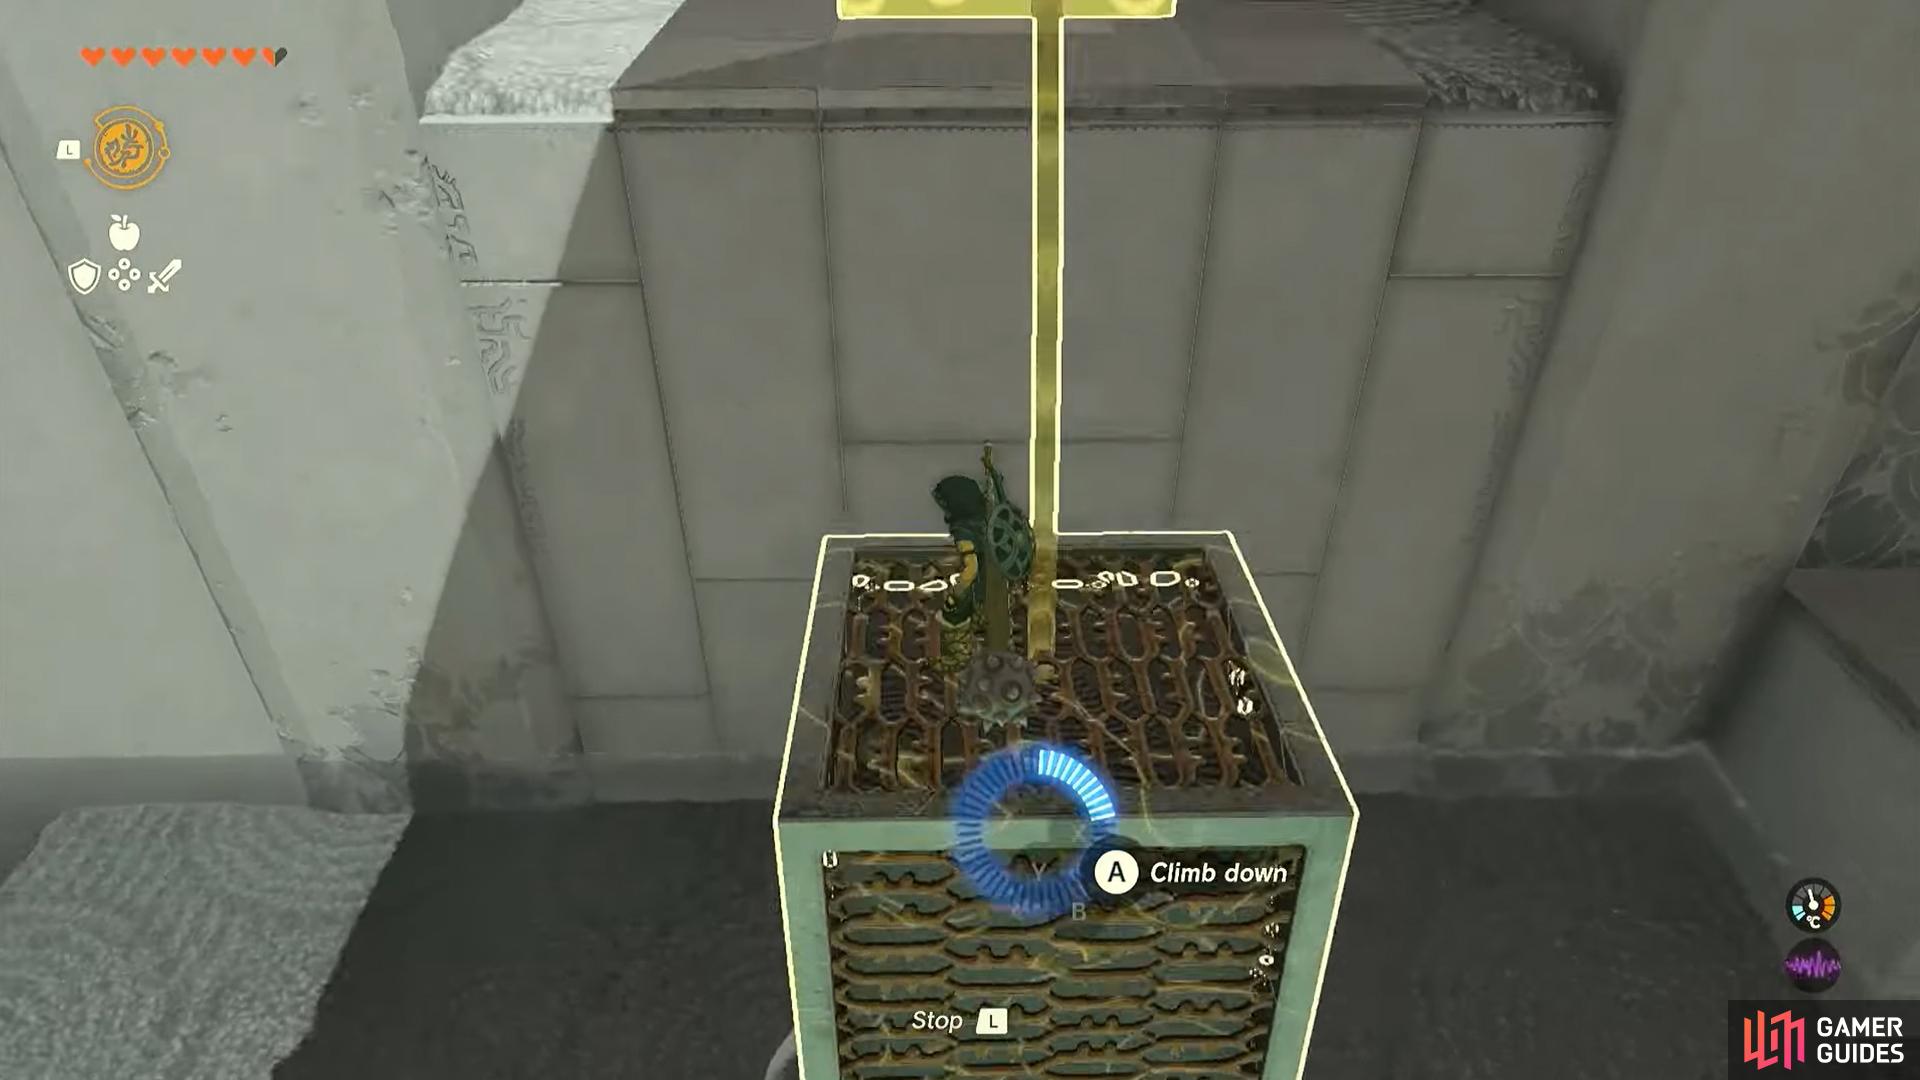
Looking to the first of these puzzles, you will initially have to position yourself on the square button at the front centre of the room. This will trigger the block that is on a rail to go up and down. To get across the large, looming gap, you will have to stand on the button, make the block go to the top and then step off, allowing it to return to its starting position. After this, stand on the block and use your Recall ability which should send you up the rail and safely over to the other side. Head through the gap and onto the next puzzle.
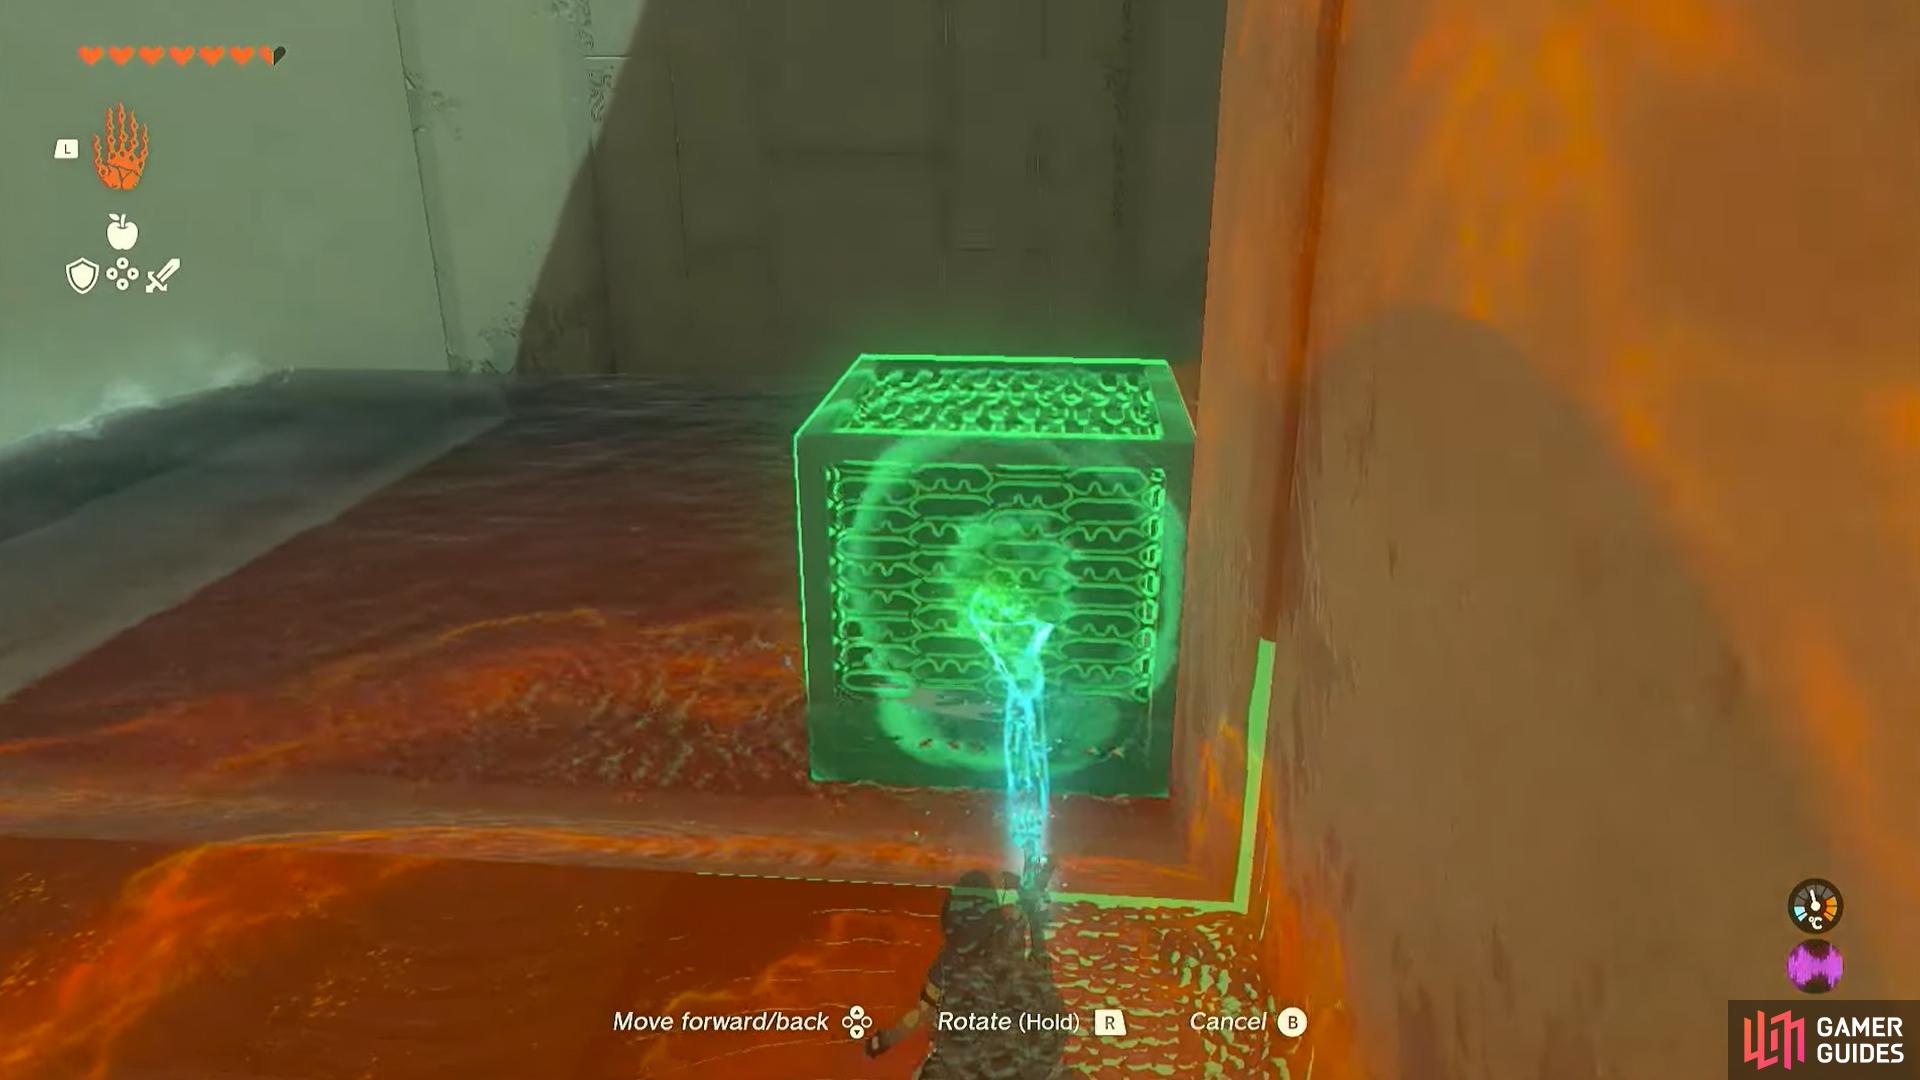
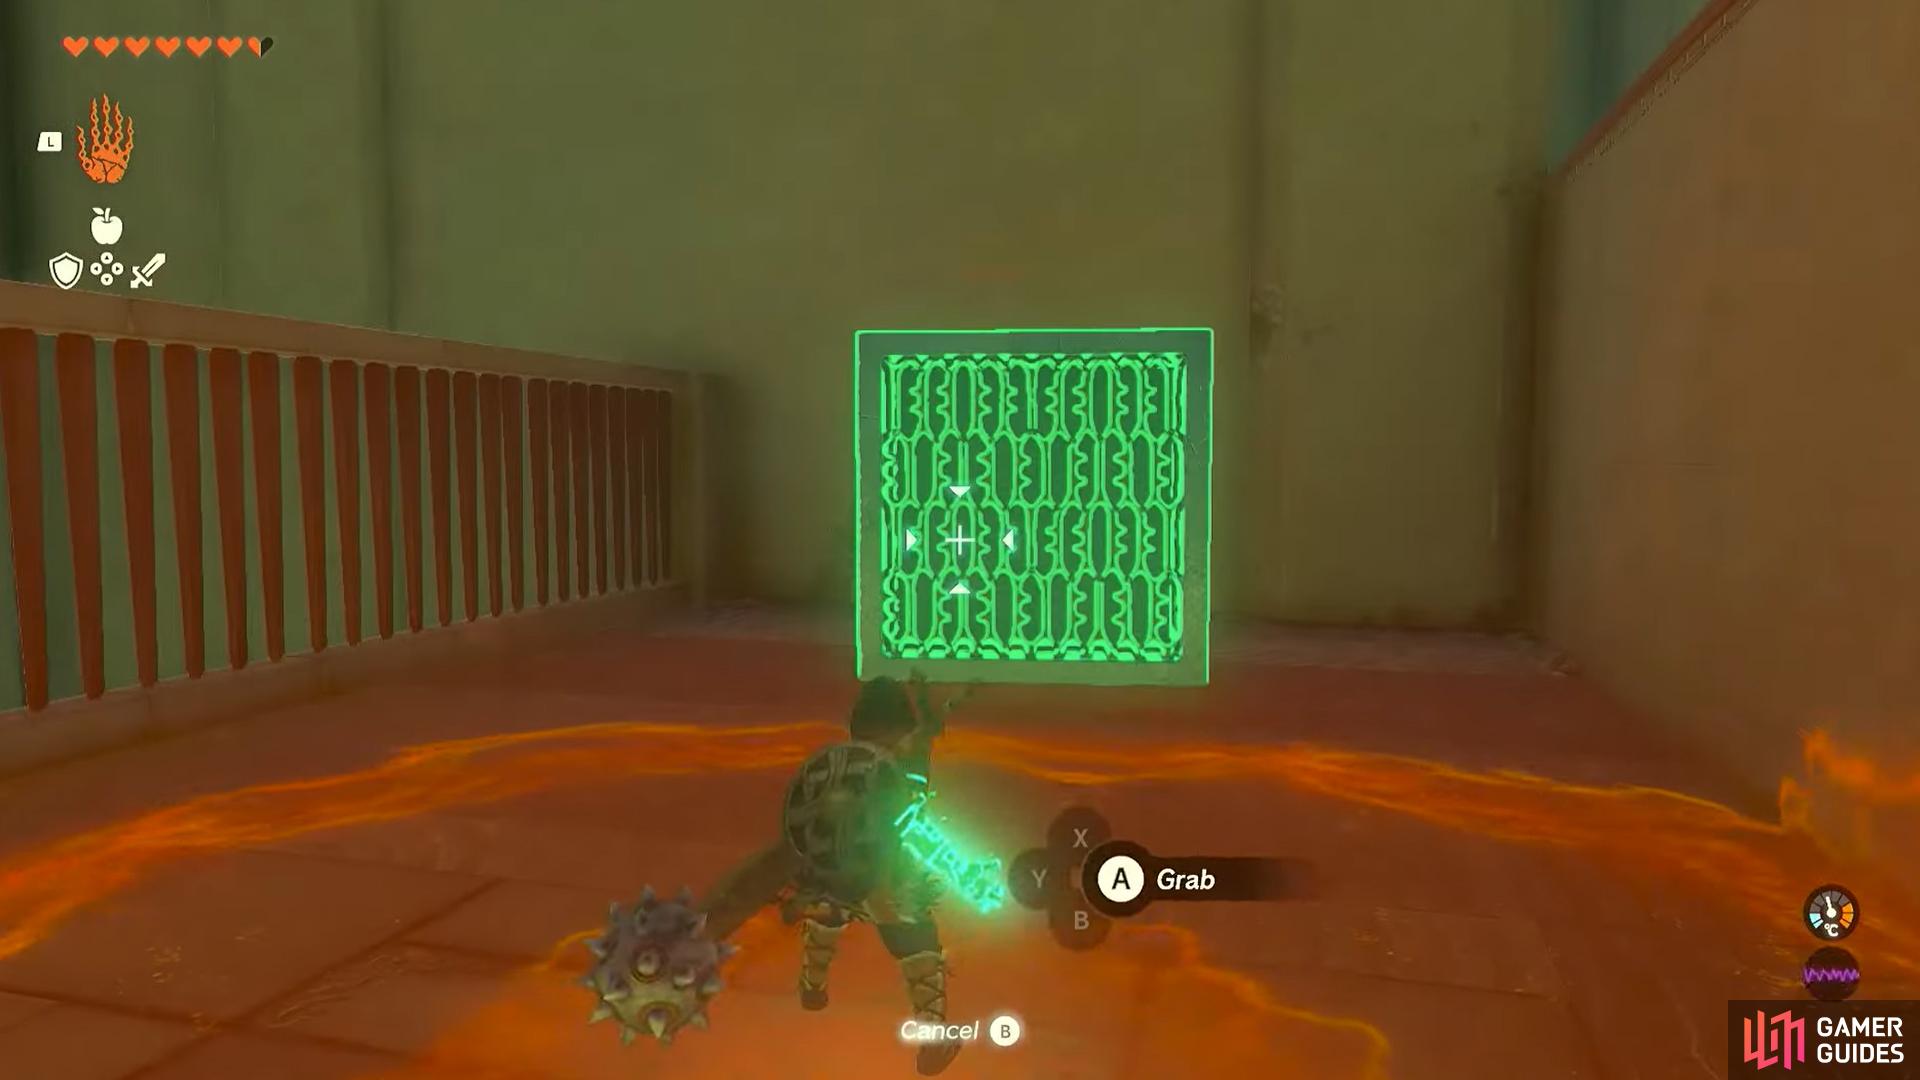
This one is a little more complicated as there’s both a moving block and water involved, as well as a hidden chest. Once the block drops down and towards you, grab it with ![]() Ultrahand before it heads off down the waterfall. Position this block to the right hand side of this water where it should be at a similar level to a small platform. Let go of Ultrahand and quickly switch to Recall before the block moves too far away, allowing you to have enough time to climb onto the right area where the aforementioned hidden chest is located. Open this to receive a shield.
Ultrahand before it heads off down the waterfall. Position this block to the right hand side of this water where it should be at a similar level to a small platform. Let go of Ultrahand and quickly switch to Recall before the block moves too far away, allowing you to have enough time to climb onto the right area where the aforementioned hidden chest is located. Open this to receive a shield.
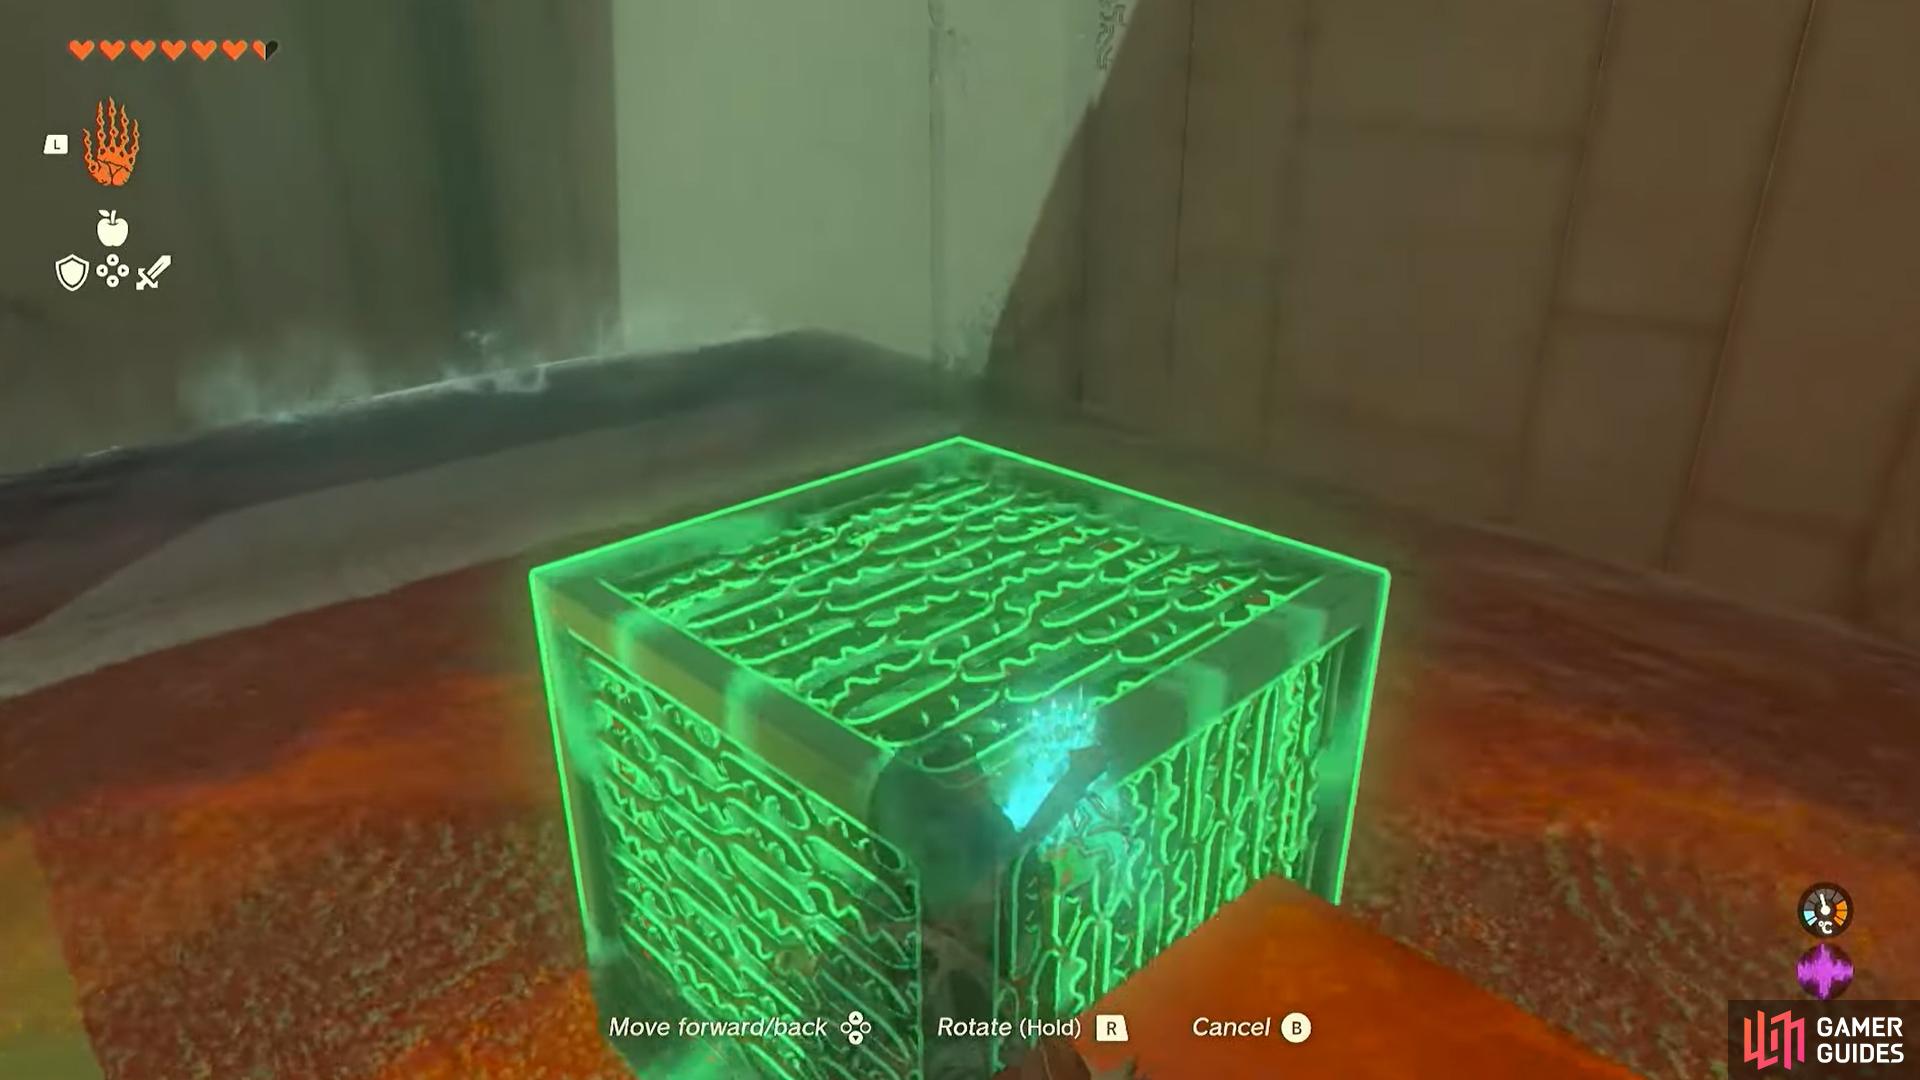
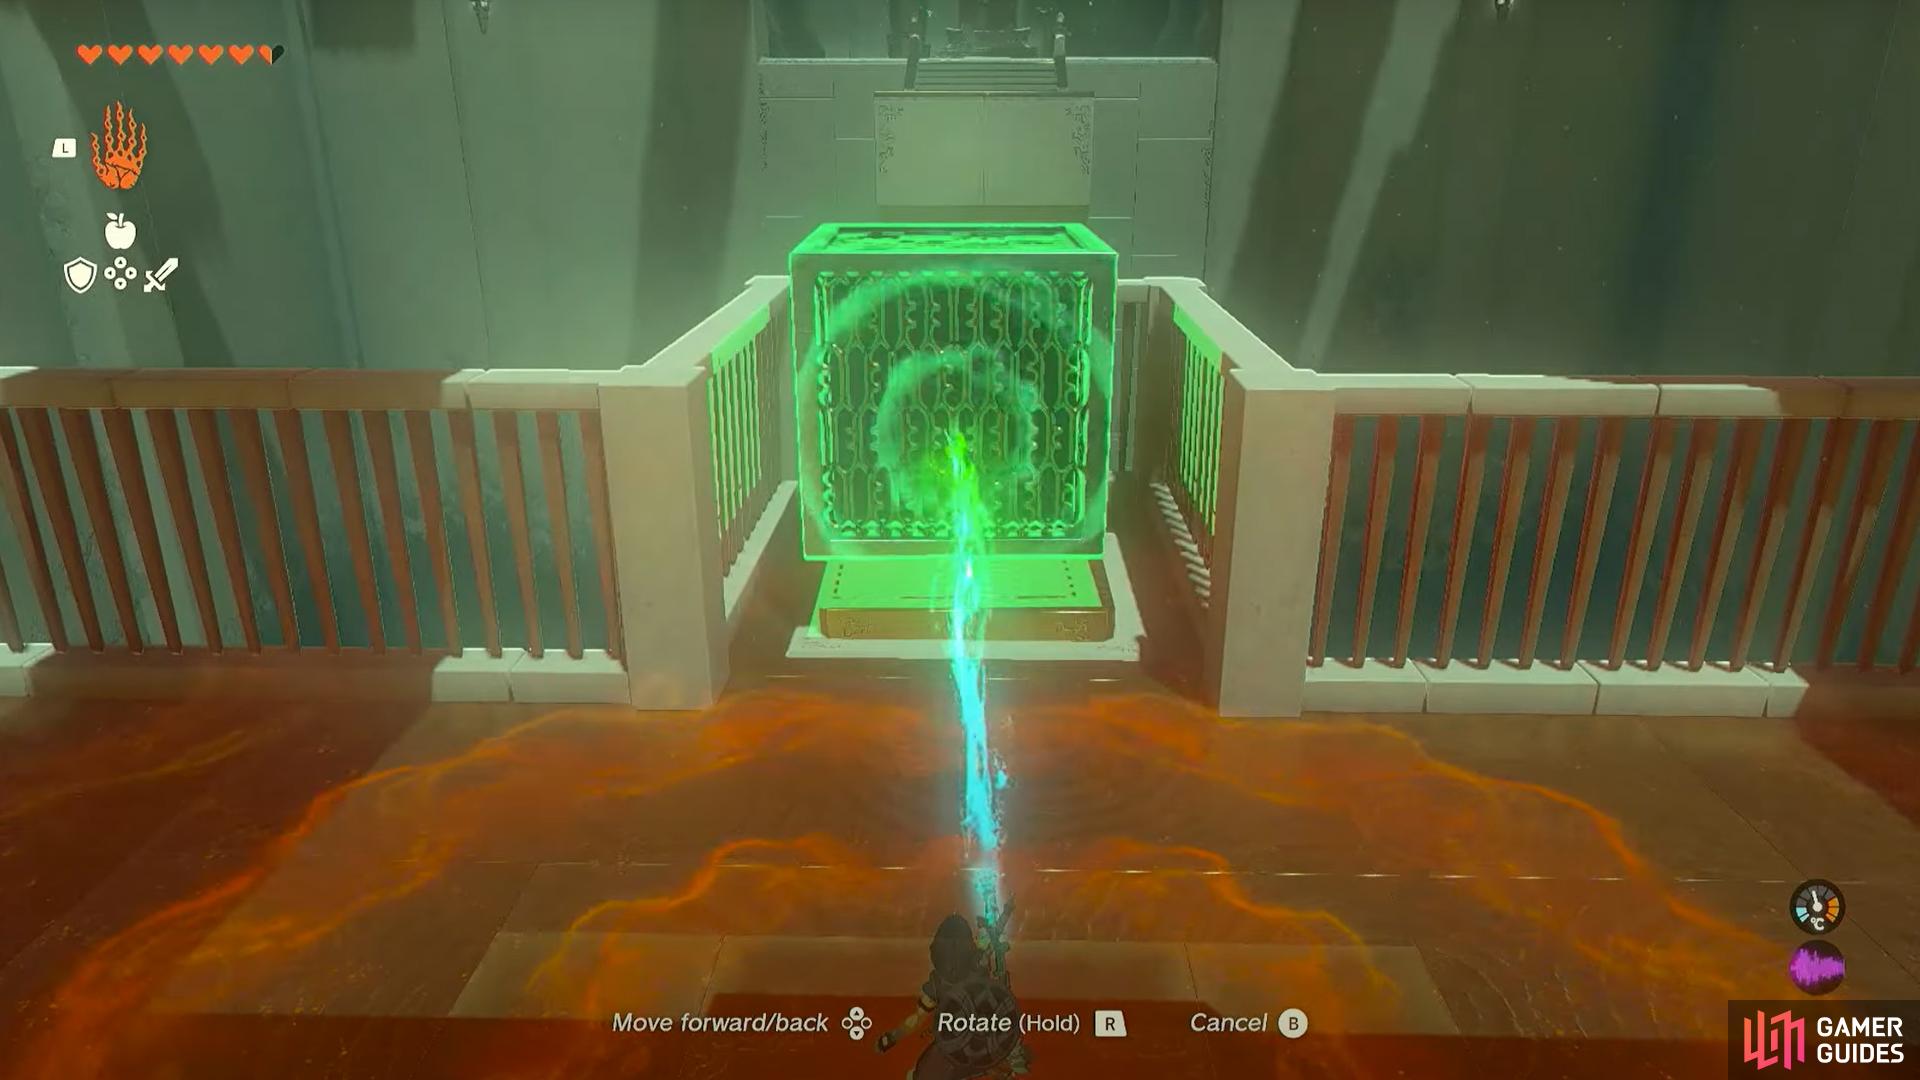
After, grab the block with Ultrahand once more and pull it toward you. Then, use Recall again, giving you the opportunity to jump onto the block before it makes its way back and up to the next area. While this concludes the second puzzle, you will need this block for the next stage.
Pulling the block closer with !Ultrahand
Using !Recall to make it up to the next part
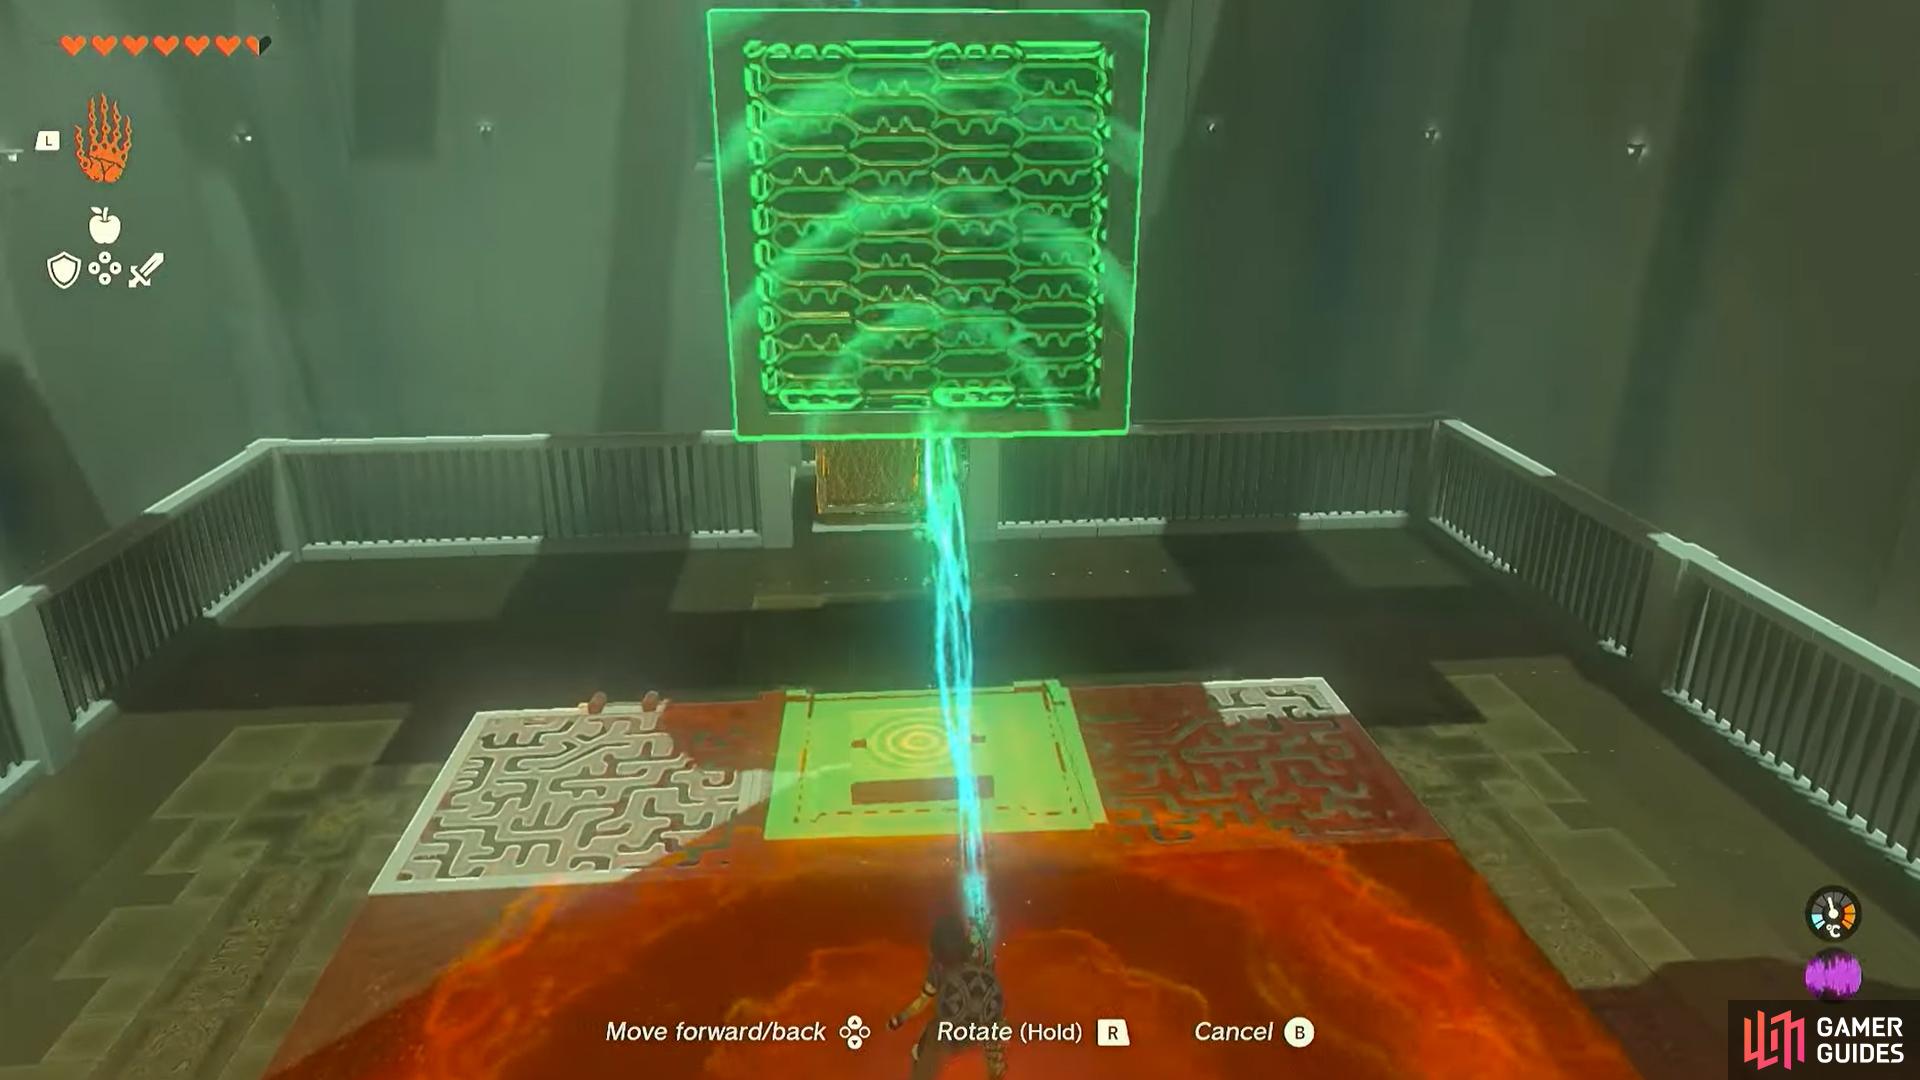
For this third and final puzzle of the Ekochiu Shrine, drop down to the right side where a second block will be available to use. Grab this with Ultrahand yet again and place it directly in the middle of this area atop of what looks like a small gold platform.
Picking up the block on the right
Placing it on the platform
Turn around and use the ladder to get back up to your previous position. Grab that first block that you use for the second puzzle with Ultrahand and drop it on top of the switch from a height. This will then fire the other block you placed into the air, where you might think you’ve completed this area, but there is one final step.
Use Recall on the block you dropped onto the switch and quickly drop down, running toward the other block and climbing on top. If you managed to do this in time, you will be launched into the air, allowing you to simply glide down to the final part of the shrine. Then, simply collect your Blessing of !Light and onto the next challenge.
No Comments