
Shrines are one of the core gameplay elements in The Legend of Zelda: Tears of the Kingdom. Scattered throughout Hyrule, shrines typically require you to solve some sort of puzzle or combat trial, upon the completion of which you’ll be rewarded with a ![]() Light of Blessing and potentially equipment. Once completed, the shrine will also serve as a fast travel point. Since completing shrines will make your character stronger and provide exploration footholds, it’s essential that you conquer them whenever possible. This page will provide a walkthrough for the Morok Shrine.
Light of Blessing and potentially equipment. Once completed, the shrine will also serve as a fast travel point. Since completing shrines will make your character stronger and provide exploration footholds, it’s essential that you conquer them whenever possible. This page will provide a walkthrough for the Morok Shrine.
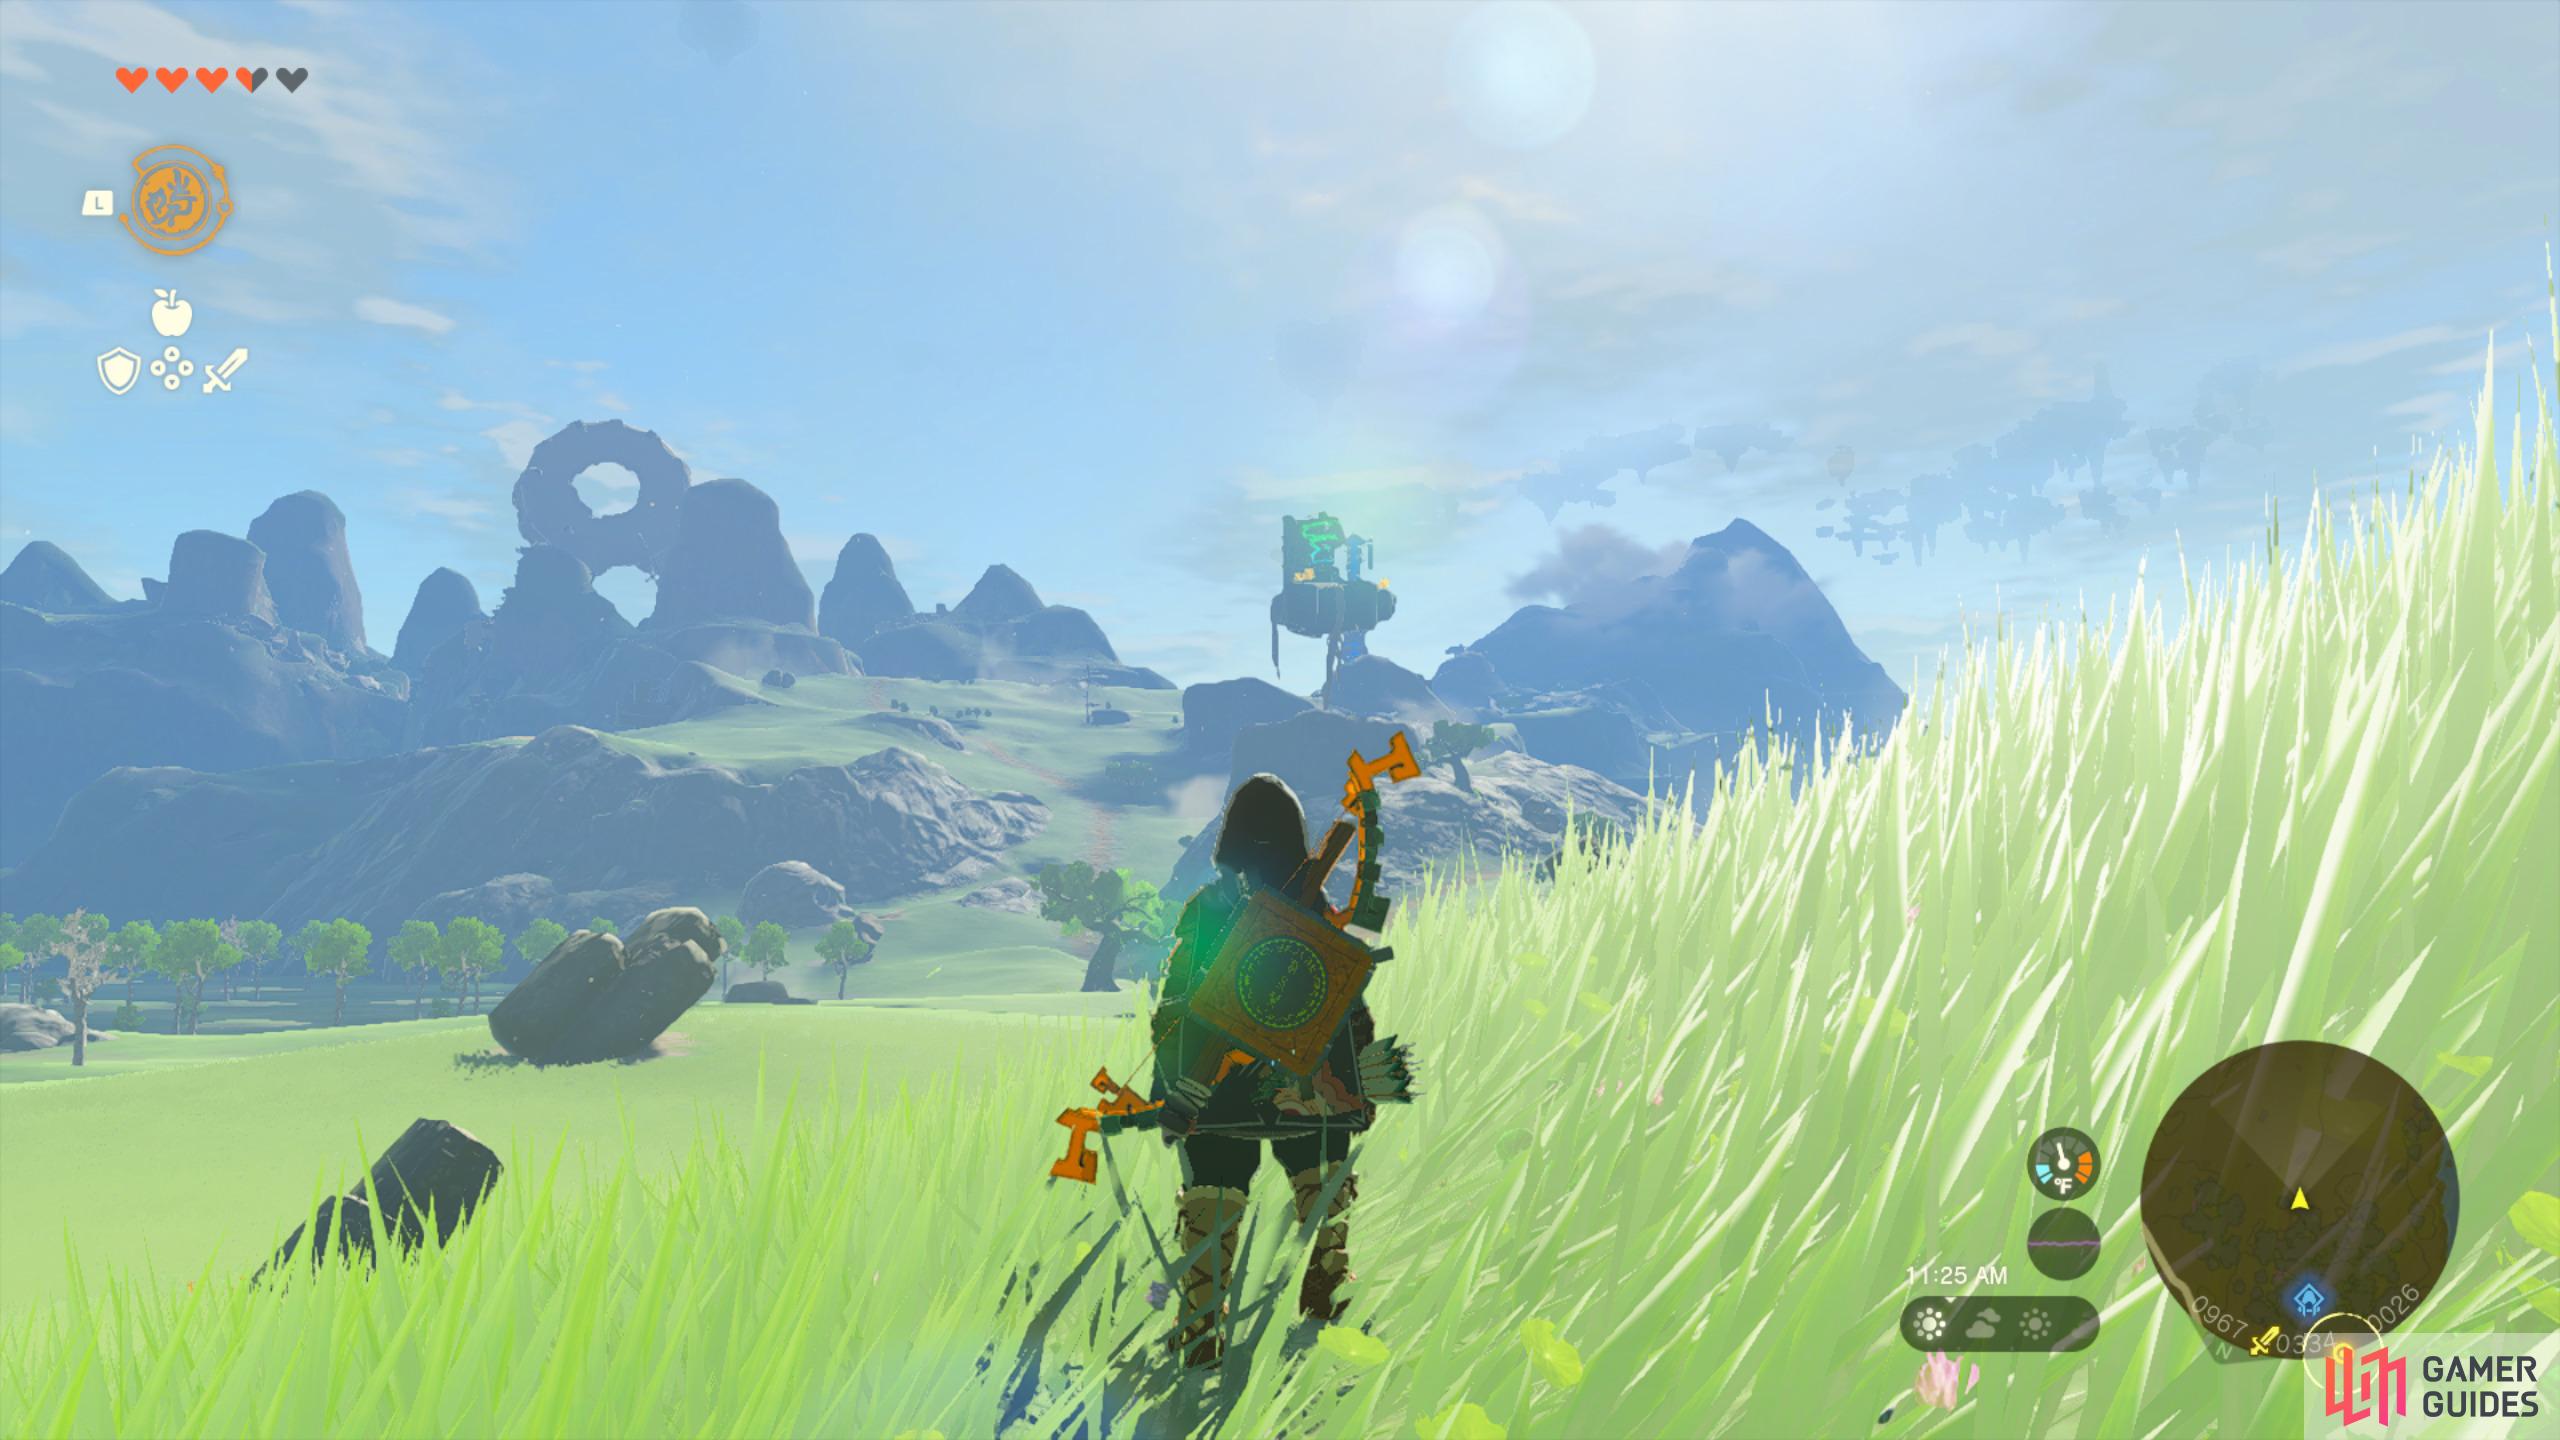
You can see the Morok Shrine floating in the distance.
Where to Find Morok Shrine in Tears of The Kingdom
You’ll be able to find the Morok Shrine in Lanayru Wetlands, ![]() Central Hyrule (map marker) which is to the east of
Central Hyrule (map marker) which is to the east of ![]() Lookout Landing. It can be easily reached by gliding down from the Lookout Landing Skyview Tower. Alternatively, you can fast travel to
Lookout Landing. It can be easily reached by gliding down from the Lookout Landing Skyview Tower. Alternatively, you can fast travel to ![]() Tukarok Shrine walking east. The Morok Shrine can be found sitting on a floating island.
Tukarok Shrine walking east. The Morok Shrine can be found sitting on a floating island.
There are two ways you can reach it and that’s by either climbing up the wooden branch, but it’ll use a lot of Stamina, so you’ll need to upgrade your Stamina or have food that restores your Stamina. Alternatively, you hop onto one of the floating blocks and use ![]() Recall to be lifted above the island and glide down.
Recall to be lifted above the island and glide down.
How to Complete the Morok Shrine in Tears of the Kingdom
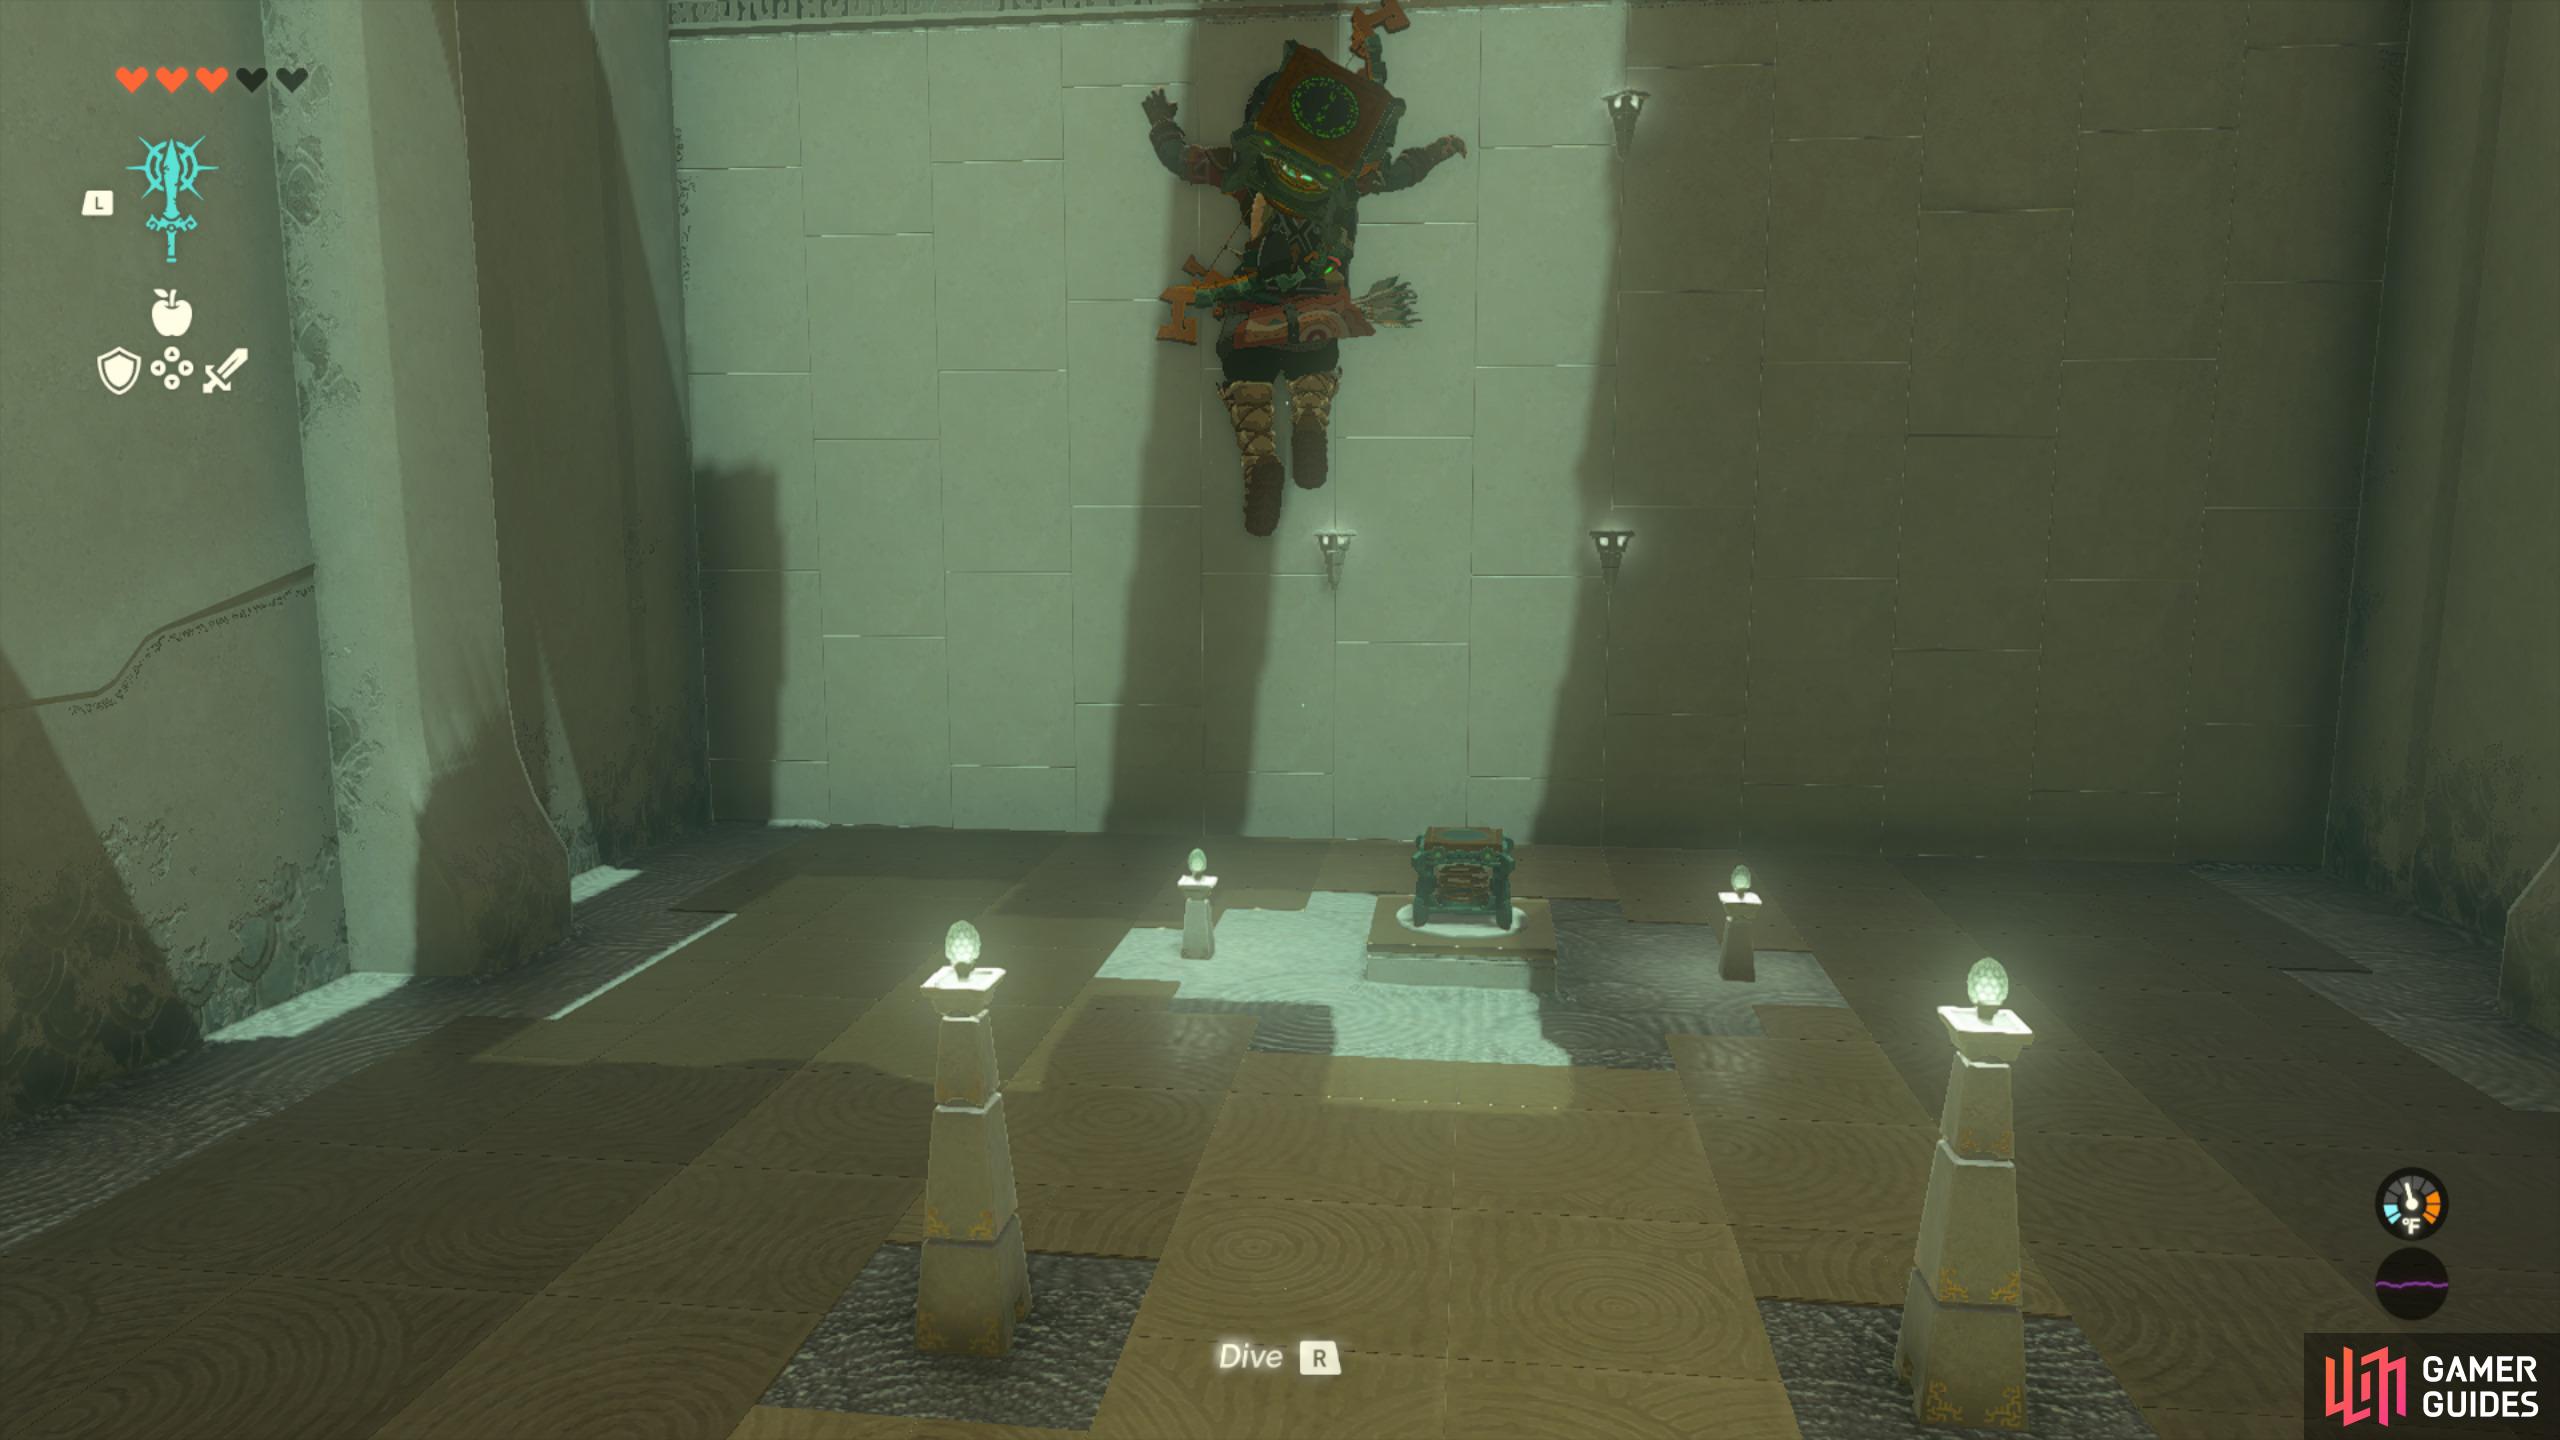
When you enter the shrine, step on the moving block at the back and wait for it to boost you up into the air and glide down to the next floor. From here, you’ll want to step onto the launchpad and strike it, then you’ll be boosted up into the sky again and glide across. You’ll now notice that this wall is a lot bigger and one launchpad won’t be enough, so we’ll need to get the launchpad that’s locked behind a gate on the left.
In order to do this you’ll want to grab the Spring that’s directly ahead of you with ![]() Ultrahand, then angle it to the right and place it in the middle of the two tilted platforms. Hop onto the spring and strike it, then you’ll be boosted to the right side. Here you’ll want to do the same thing with the spring, so it’s facing the center of the room, then place the small ball on it before striking it.
Ultrahand, then angle it to the right and place it in the middle of the two tilted platforms. Hop onto the spring and strike it, then you’ll be boosted to the right side. Here you’ll want to do the same thing with the spring, so it’s facing the center of the room, then place the small ball on it before striking it.
If done correctly, the ball should land into the hole and open the gate leading to a double spring. Now you’ll want to combine it to the single spring and then climb on top. Strike it and you’ll be boosted into the sky, then you see a ledge with a chest that contains a ![]() Sneaky Elixir. Finally, drop back down and use the spring again, then glide over to the altar and collect your Light of Blessing.
Sneaky Elixir. Finally, drop back down and use the spring again, then glide over to the altar and collect your Light of Blessing.
No Comments