
The Legend of Zelda: Tears of the Kingdom brings along some new additions, such as Geoglyphs which give you interesting cutscenes related to what happened to ![]() Princess Zelda. This page will navigate you through the necessary steps to finding all 12 Dragon Tears.
Princess Zelda. This page will navigate you through the necessary steps to finding all 12 Dragon Tears.
All Dragon Tear Memory Locations
| Memory | Location |
|---|---|
| Where Am I? | Map Marker |
| An Unfamiliar World | Map Marker |
| Mineru’s Counsel | Map Marker |
| The Gerudo Assault | Map Marker |
| A Show of Fealty | Map Marker |
| Zelda and Sonia | Map Marker |
| Sonia is Caught By Treachery | Map Marker |
| Birth of the Demon King | Map Marker |
| The Sages’ Vow | Map Marker |
| A King’s Duty | Map Marker |
| A Master Sword in Time | Map Marker |
| Tears of the Dragon | Map Marker |
All Geoglyphs Locations in Tears of The Kingdom
Dragon Tear Location #1 - Where Am I?
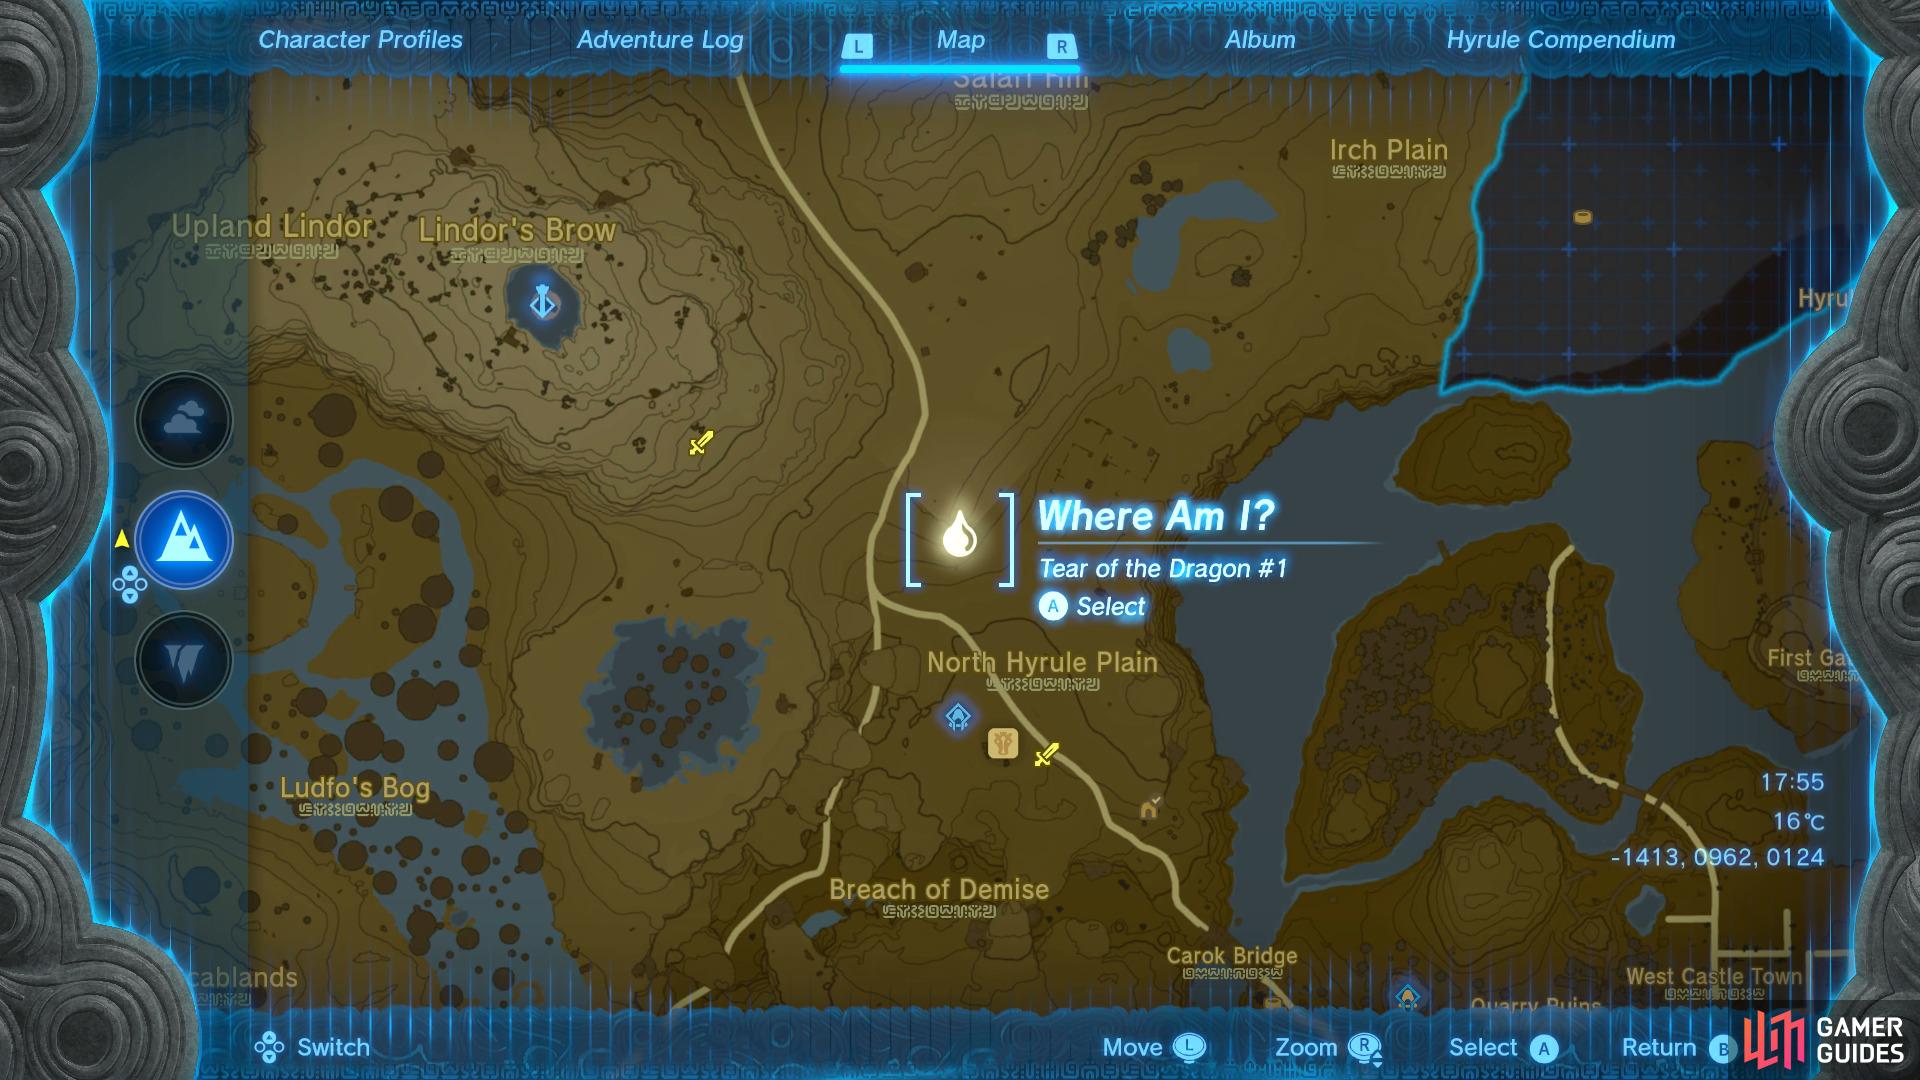
Head to this location on the map
and you’ll find the tear near the head of the geoglyph
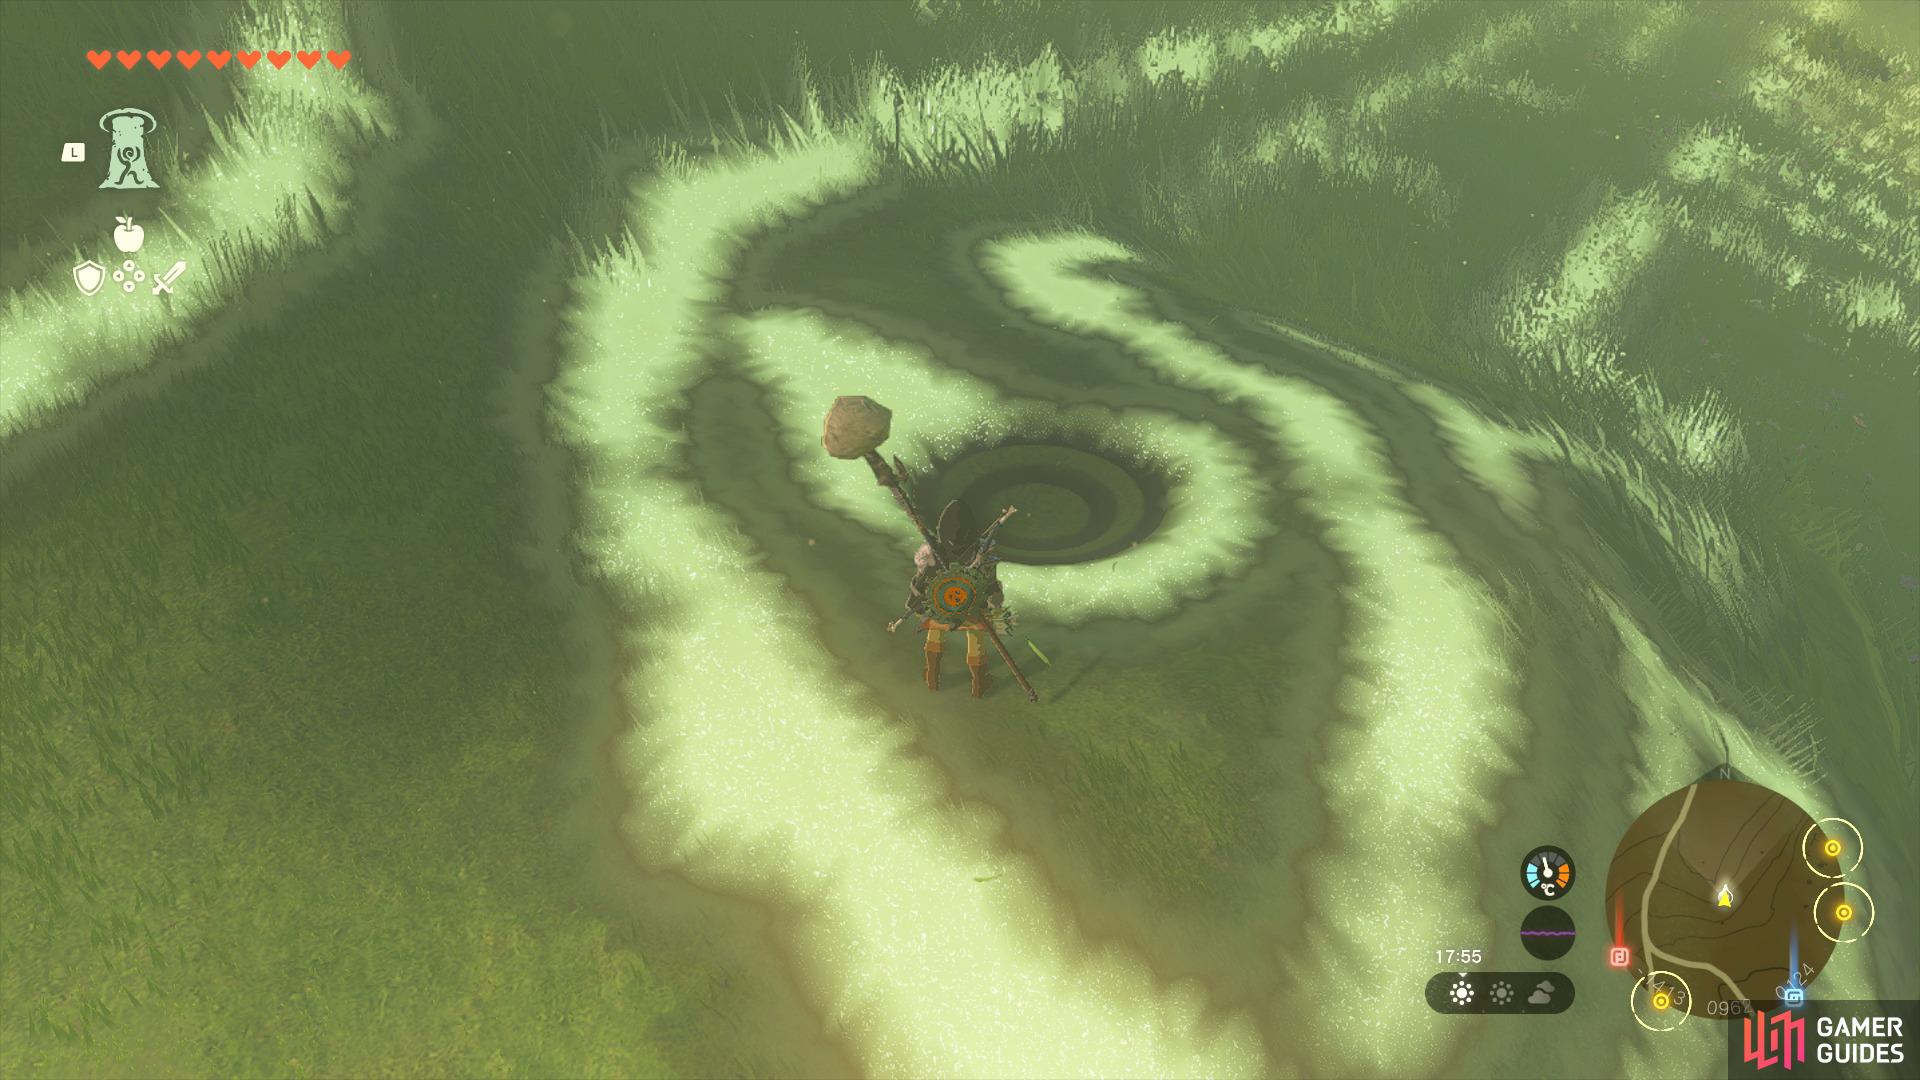
In order to find the first tear you’ll want to fast travel to the New Serenne Stable, then you’ll want to head up the hill until you reach the coordinates -1413, 0962, 0124. Interact with the small pool of water to trigger the cutscene Where Am I? This Dragon Tear will be acquired automatically during the Impa and The Geoglyphs Main Quest.
Dragon Tear Location #2 - An Unfamiliar World
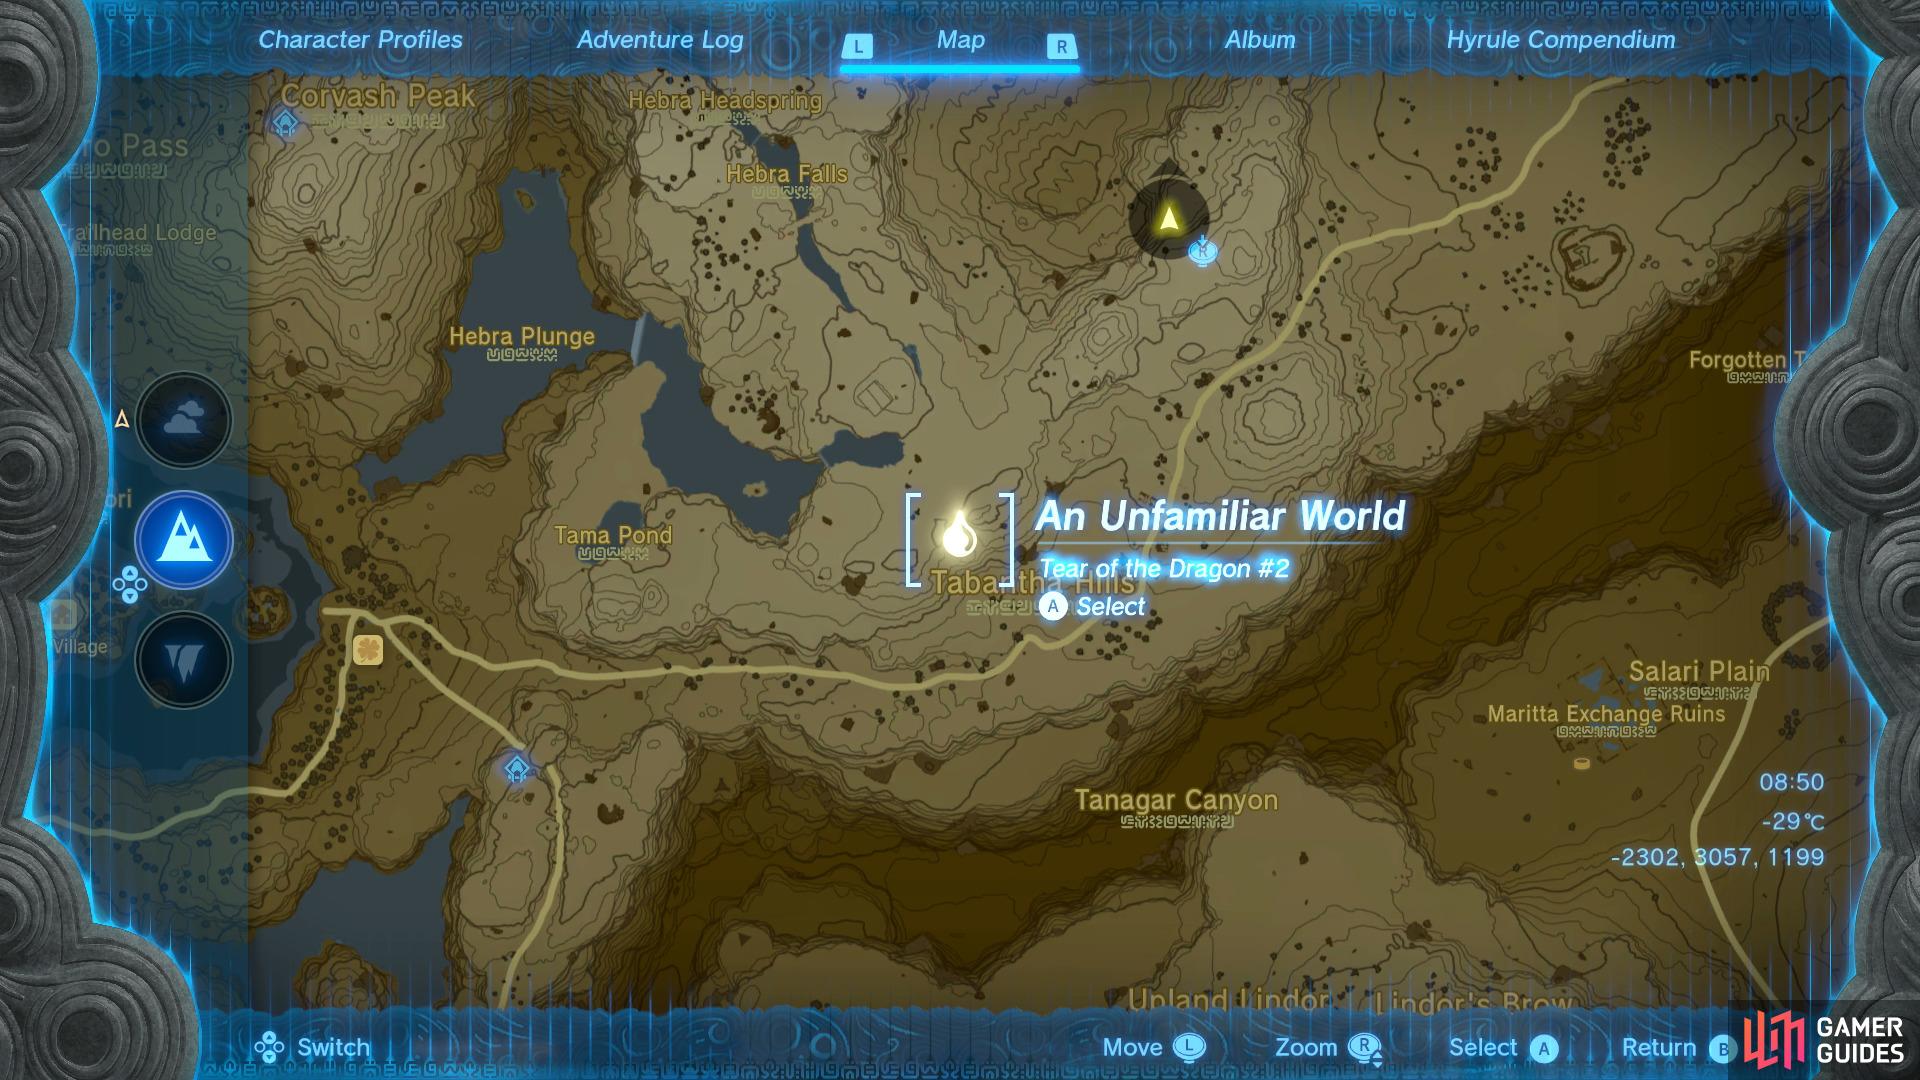
Head to this location on the map
to find the tear in the center of the geoglyph.
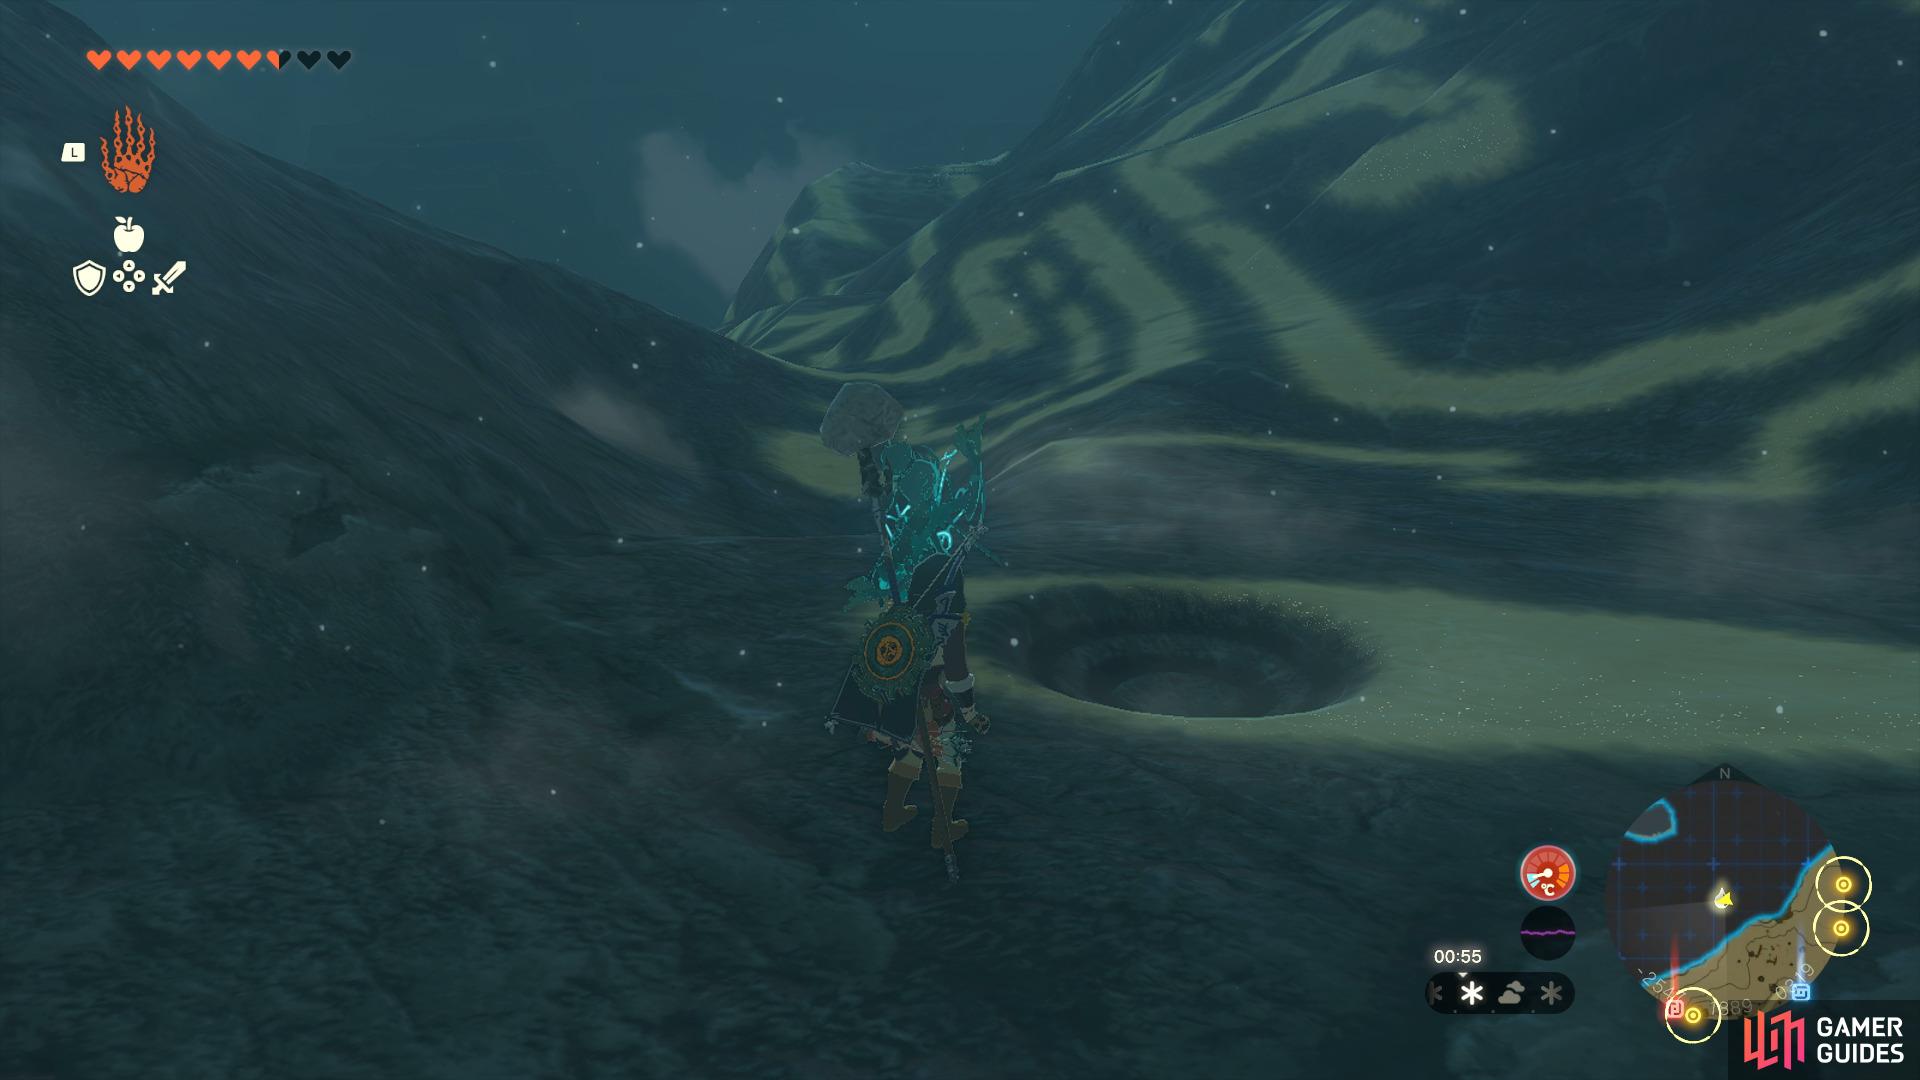
At this point onwards you’ll need to find the geoglyphs on your own, so you’ll want to make your way over to Tabantha Hills which is located to the east of Rito Village. However, you’ll need to purchase some Cold Resistance Food or purchase the Armor from Rito Village. When you’re prepared, glide down from the Lindor’s Brow Skyview Tower. When you arrive you’ll want to climb up to the top of the hill until you reach the coordinates -2549, -1888, 0319. Interact with the small pool of water to trigger the cutscene An Unfamiliar World.
Dragon Tear Location #3 - Mineru’s Counsel
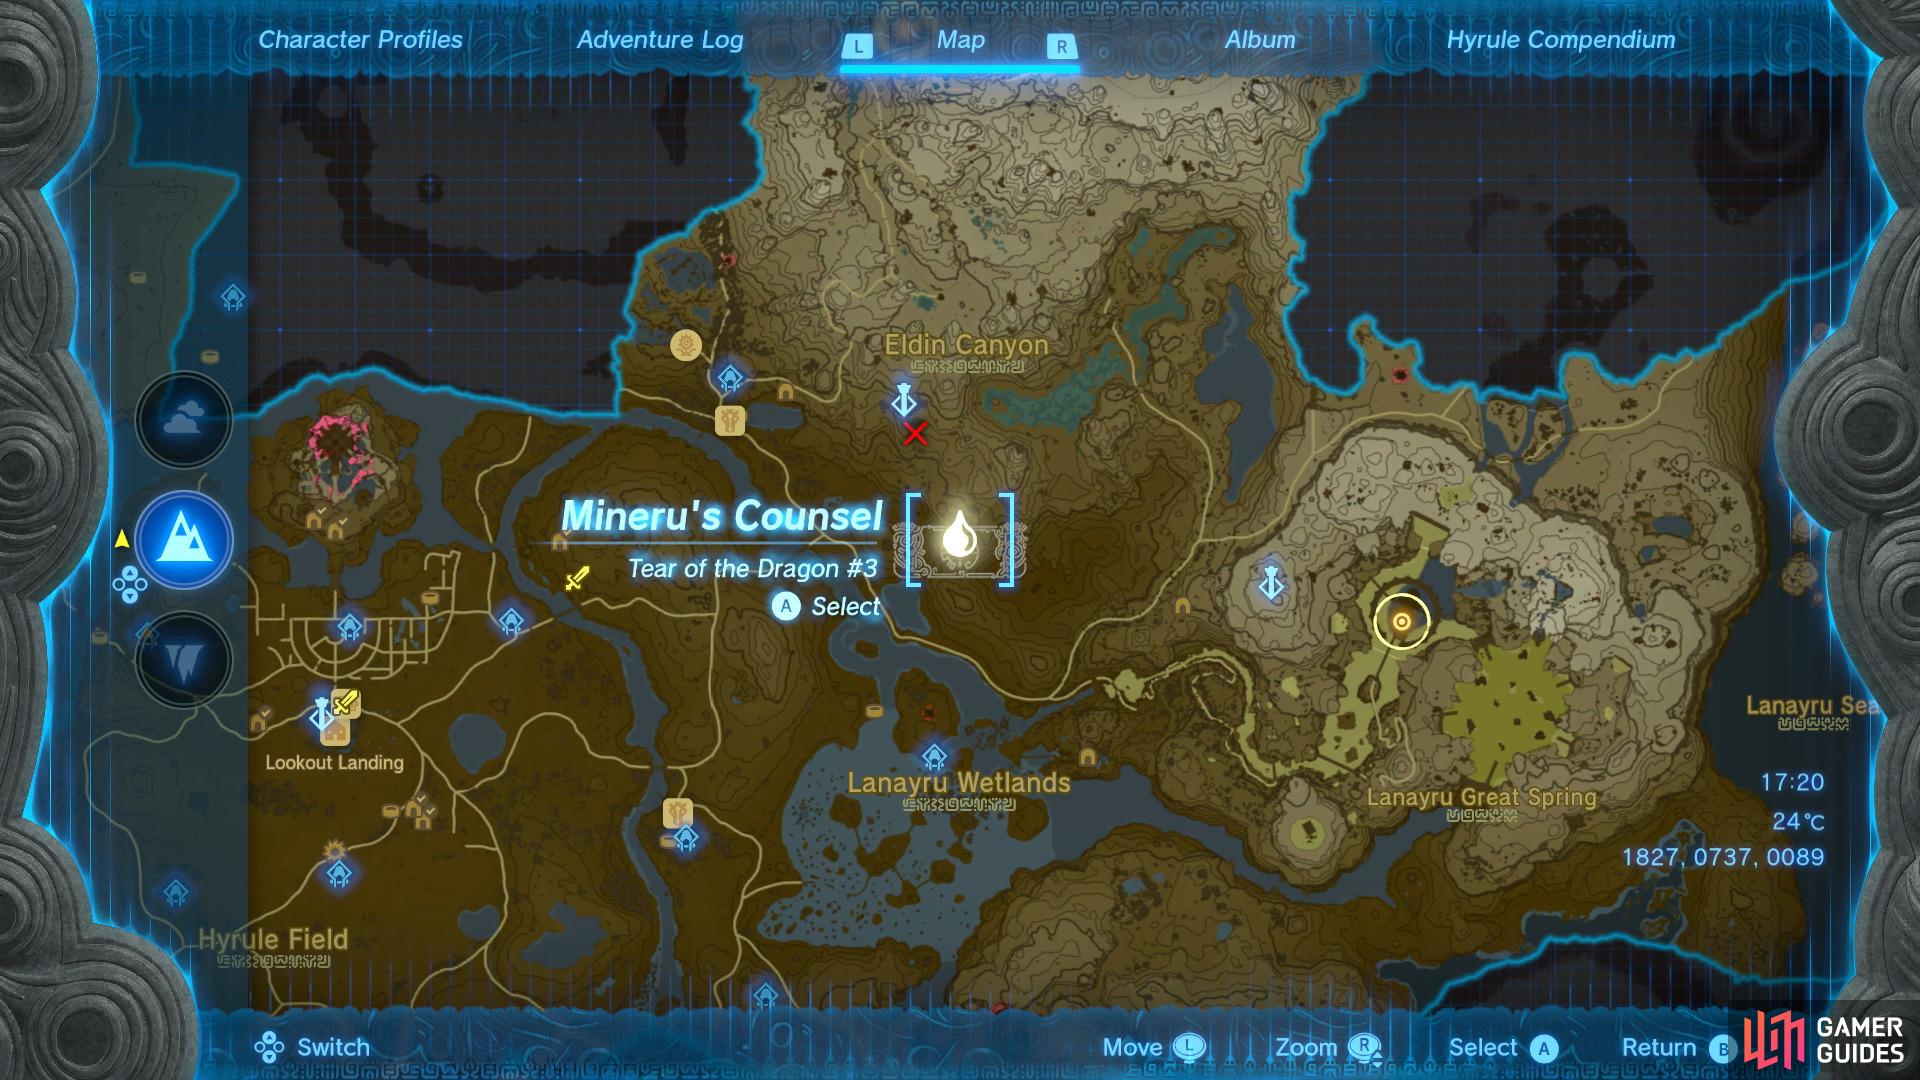
Head to this location on the map
to find the tear at the top of the geoglyph.
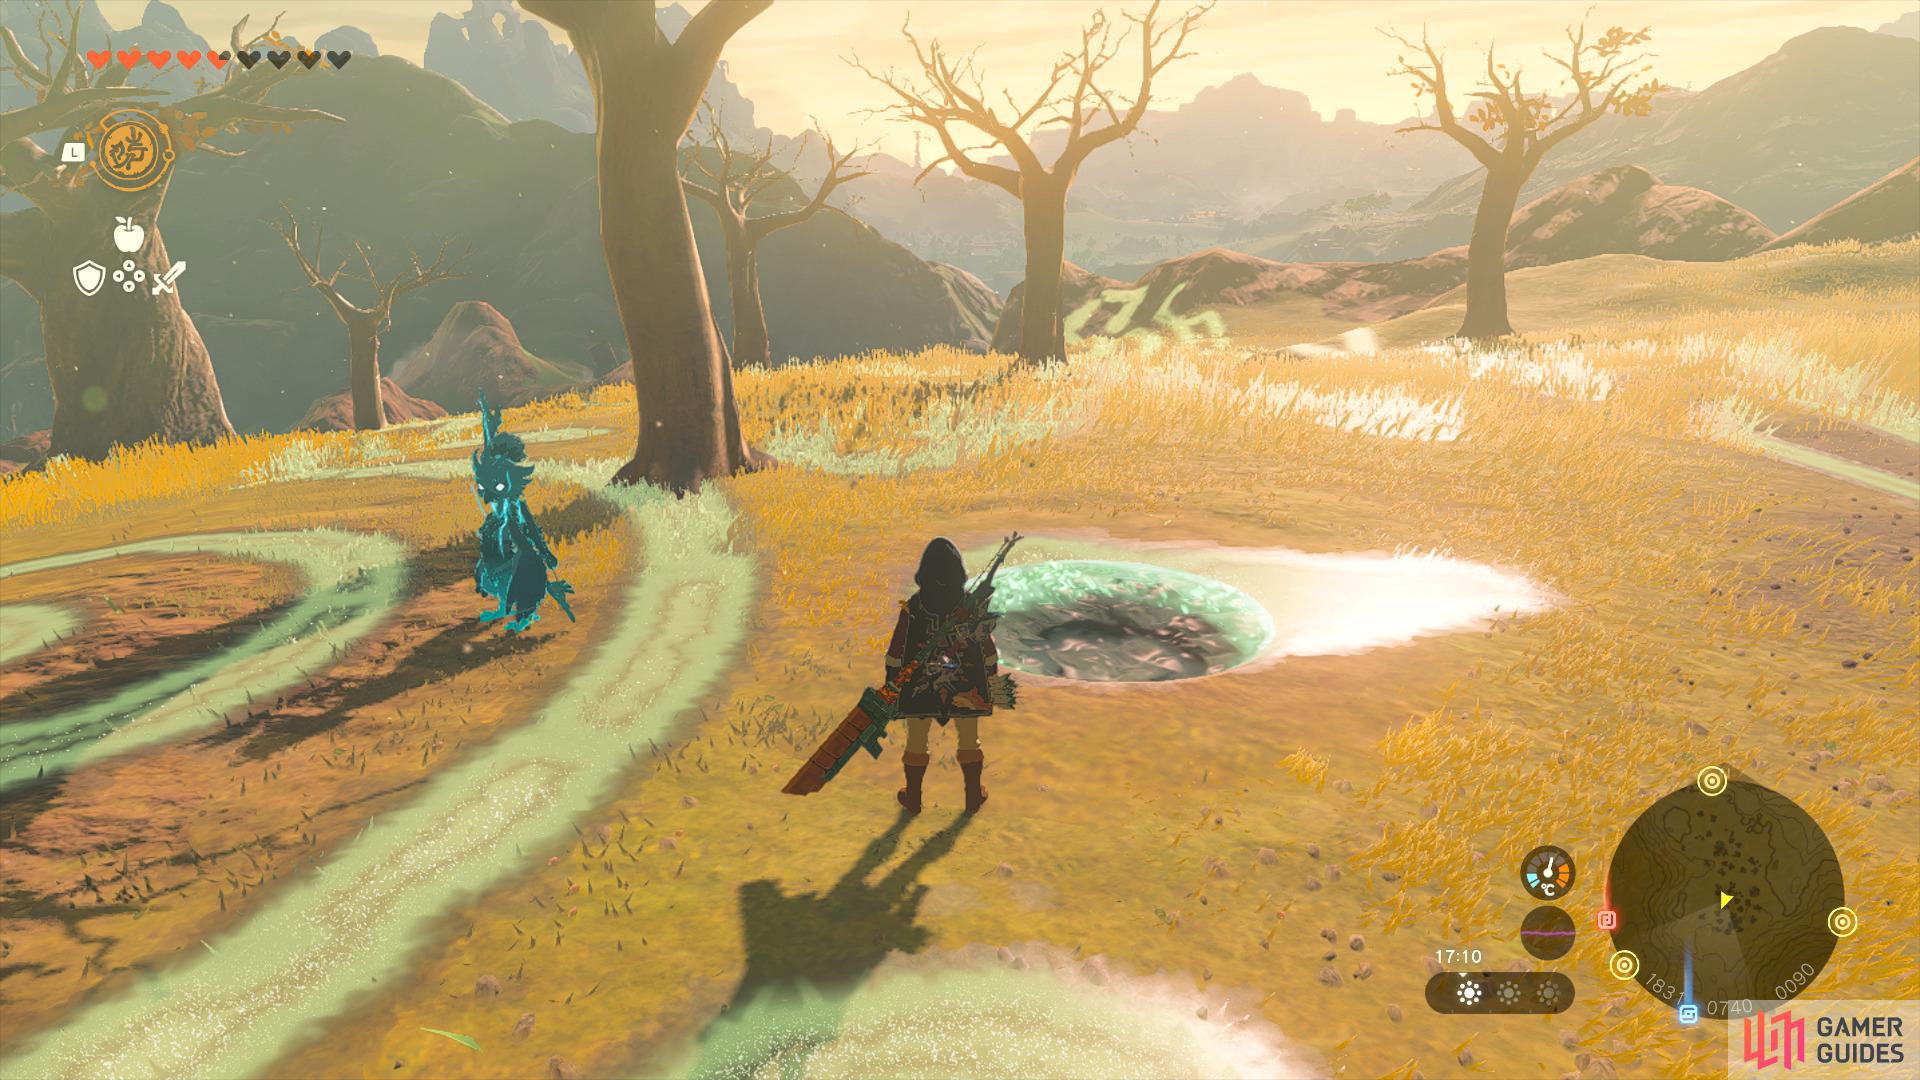
You’ll now want to fast travel to the Eldin Canyon Skyview Tower and you’ll see the next Geoglyph to the southeast, so glide down and head to the coordinates 1827, 0737, 0089 which is in the center of the picture. Interact with the small pool of water to trigger the cutscene ![]() Mineru’s Counsel.
Mineru’s Counsel.
Dragon Tear Location #4 - The Gerudo Assault
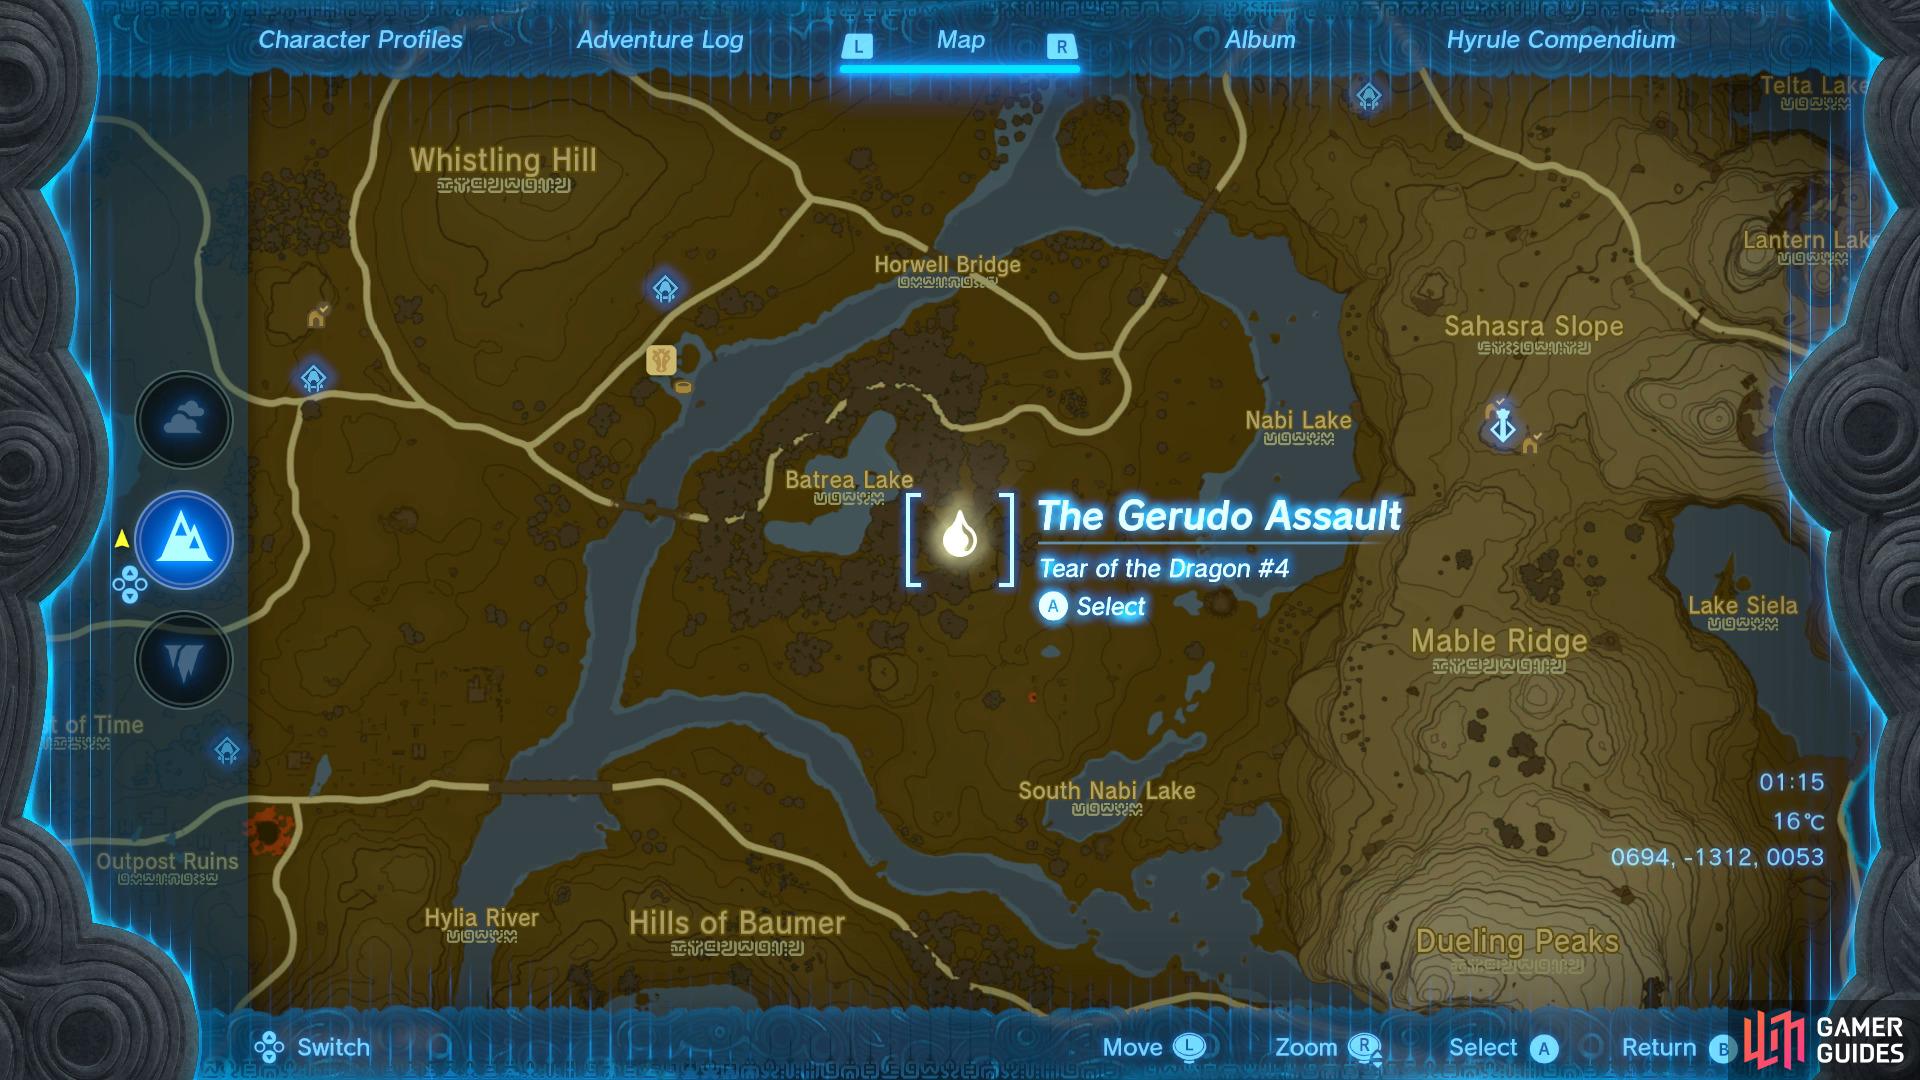
Head to this location on the map
to find the tear at the top right of the geoglyph.
Head to the ![]() Sahasra Slope Skyview Tower which is located to the southeast of
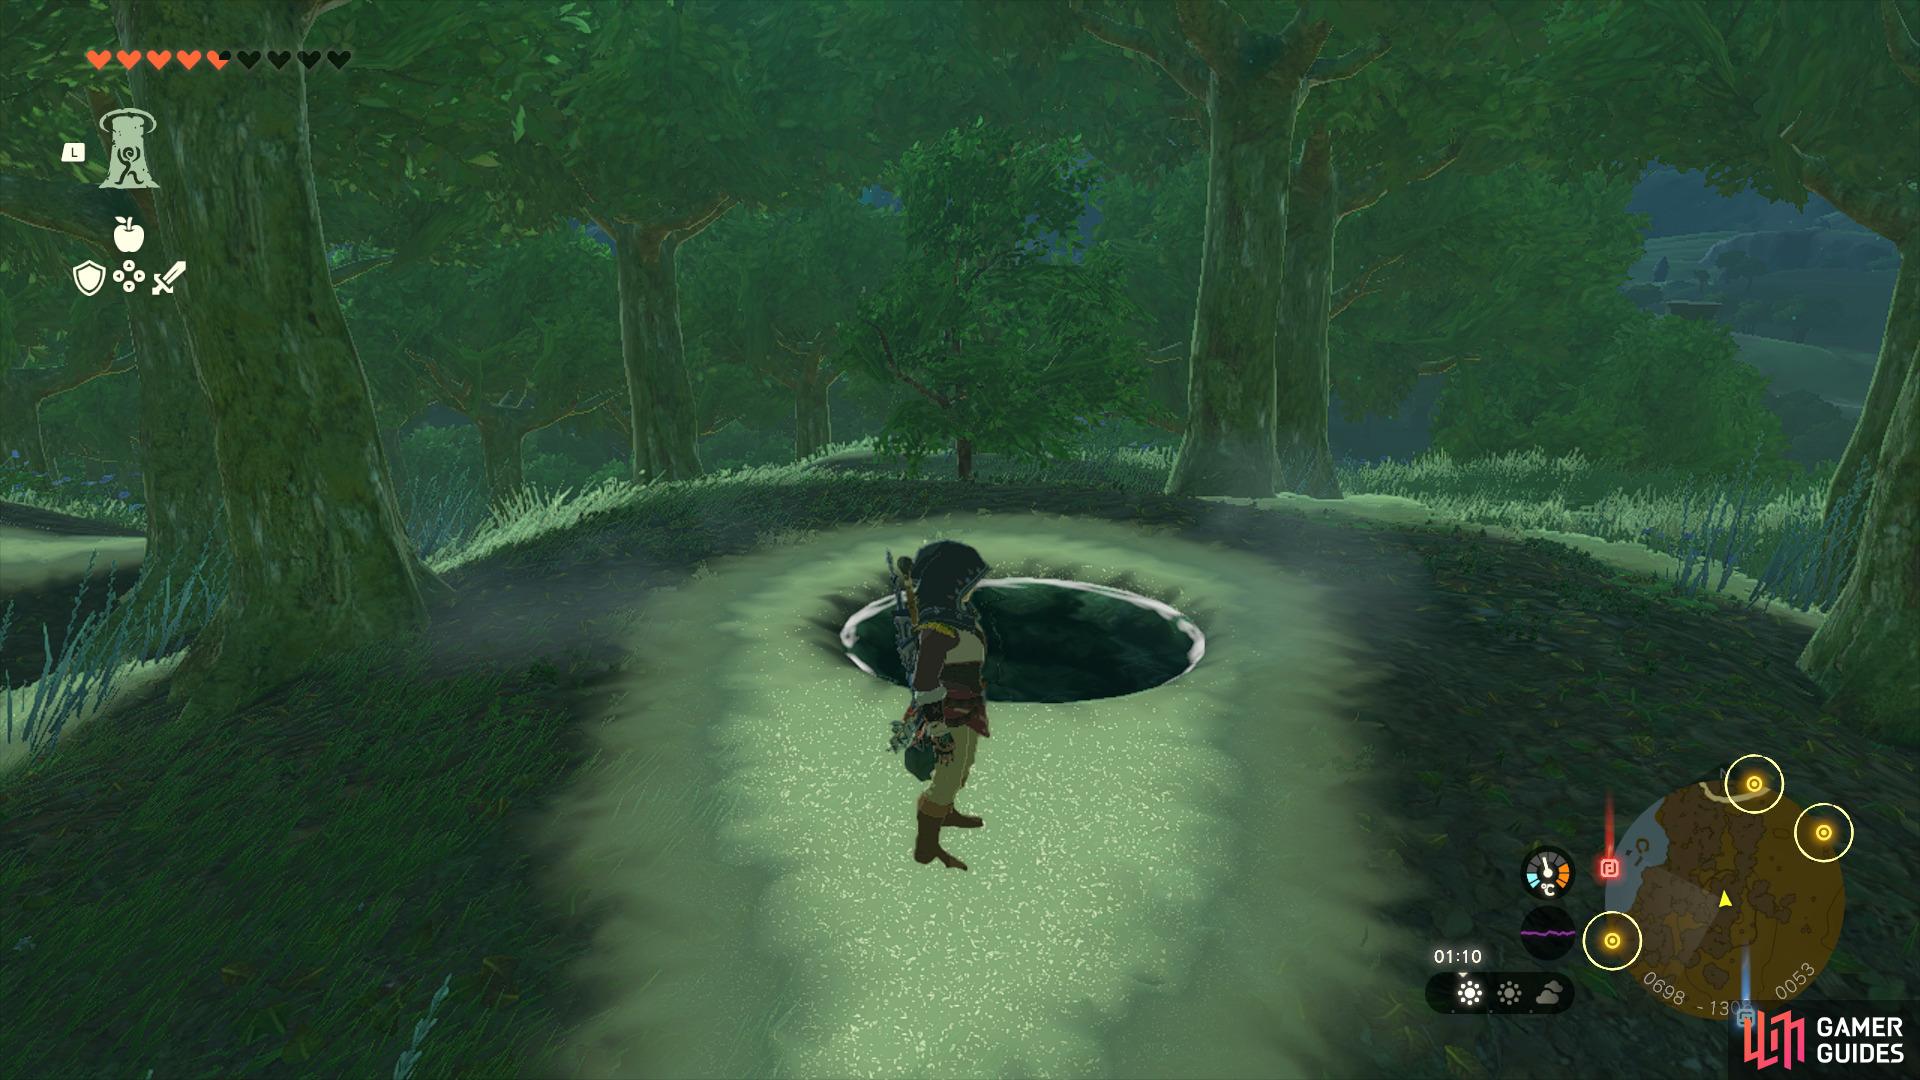
Sahasra Slope Skyview Tower which is located to the southeast of ![]() Lookout Landing and take it up to the sky, then you’ll see the next Geoglyph slightly to the west. Glide over to it, then go to the coordinates 0697, 1309, 0053 which is at the top of the hill and interact with the pool of water to trigger the cutscene The Gerudo Assault.
Lookout Landing and take it up to the sky, then you’ll see the next Geoglyph slightly to the west. Glide over to it, then go to the coordinates 0697, 1309, 0053 which is at the top of the hill and interact with the pool of water to trigger the cutscene The Gerudo Assault.
Dragon Tear Location #5 - A Show of Fealty
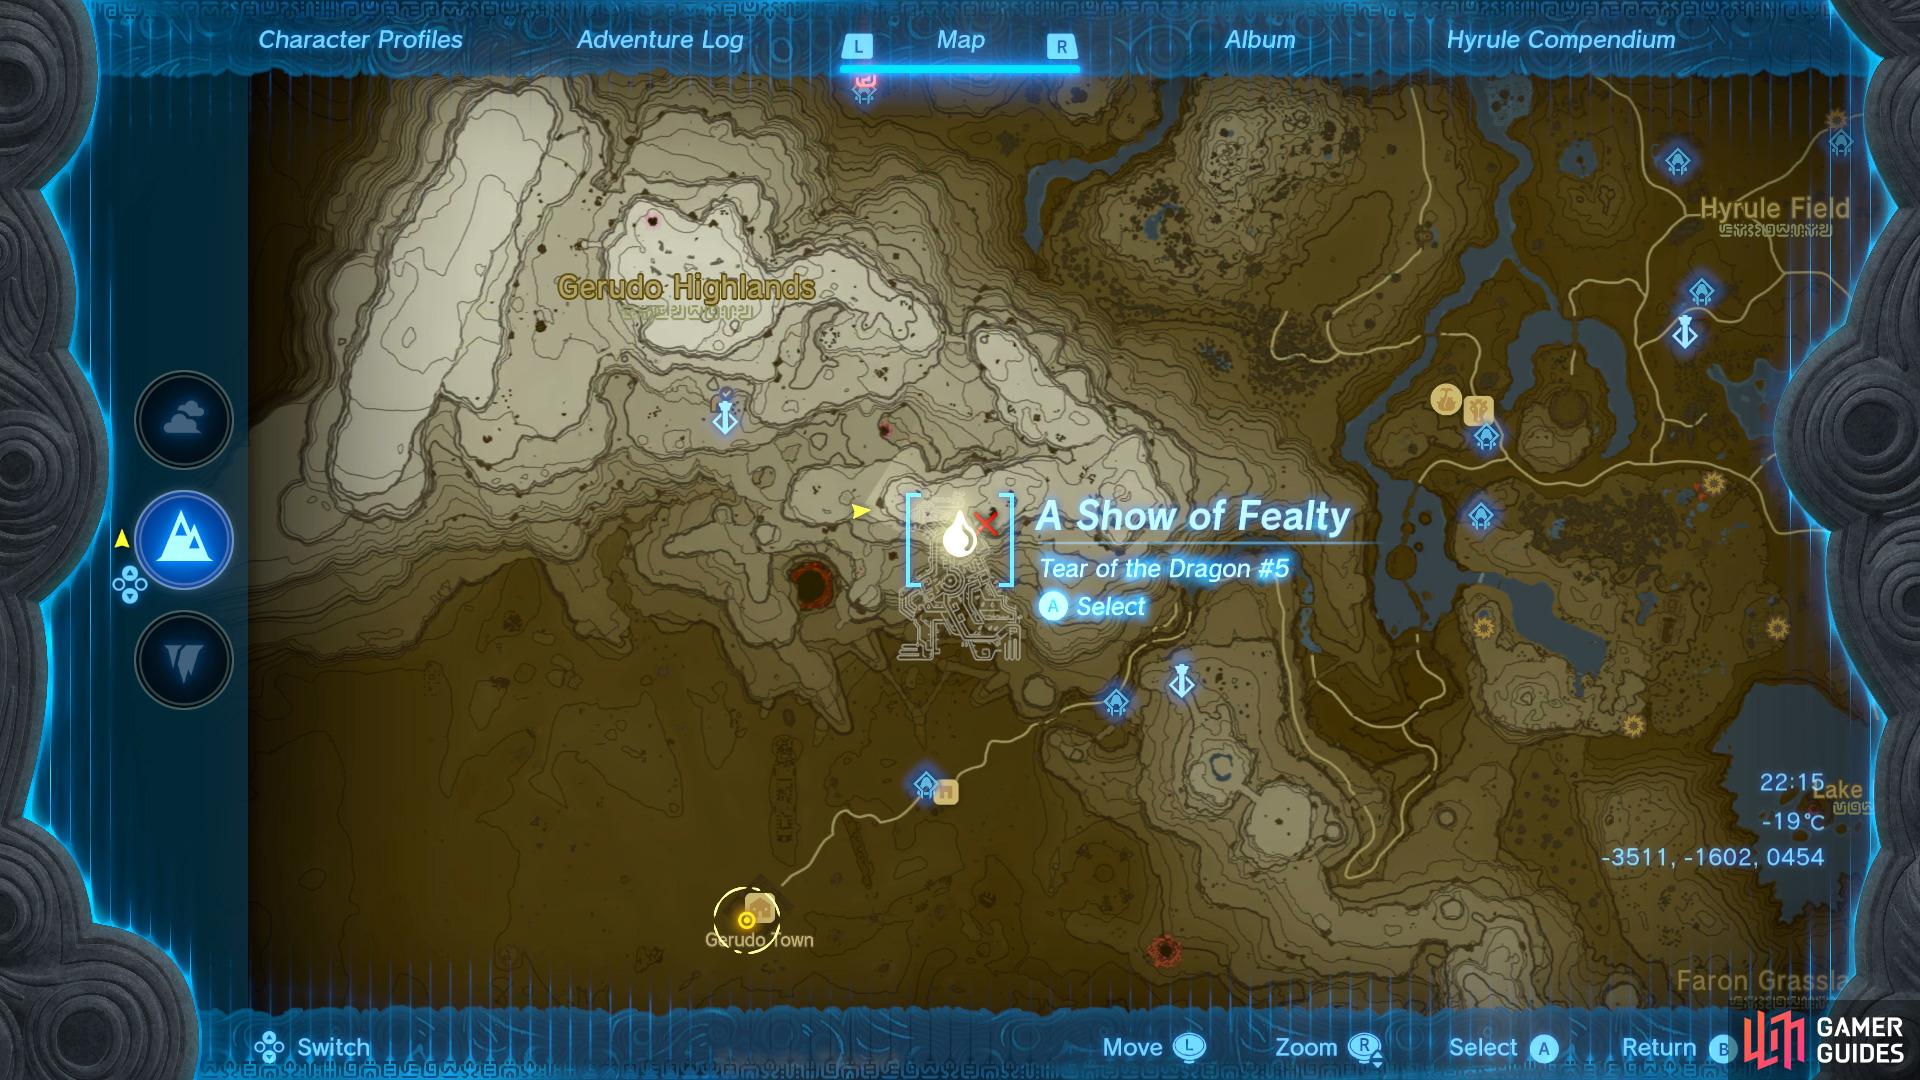
Head to this location on the map
to find the tear in the middle of the geoglyph.
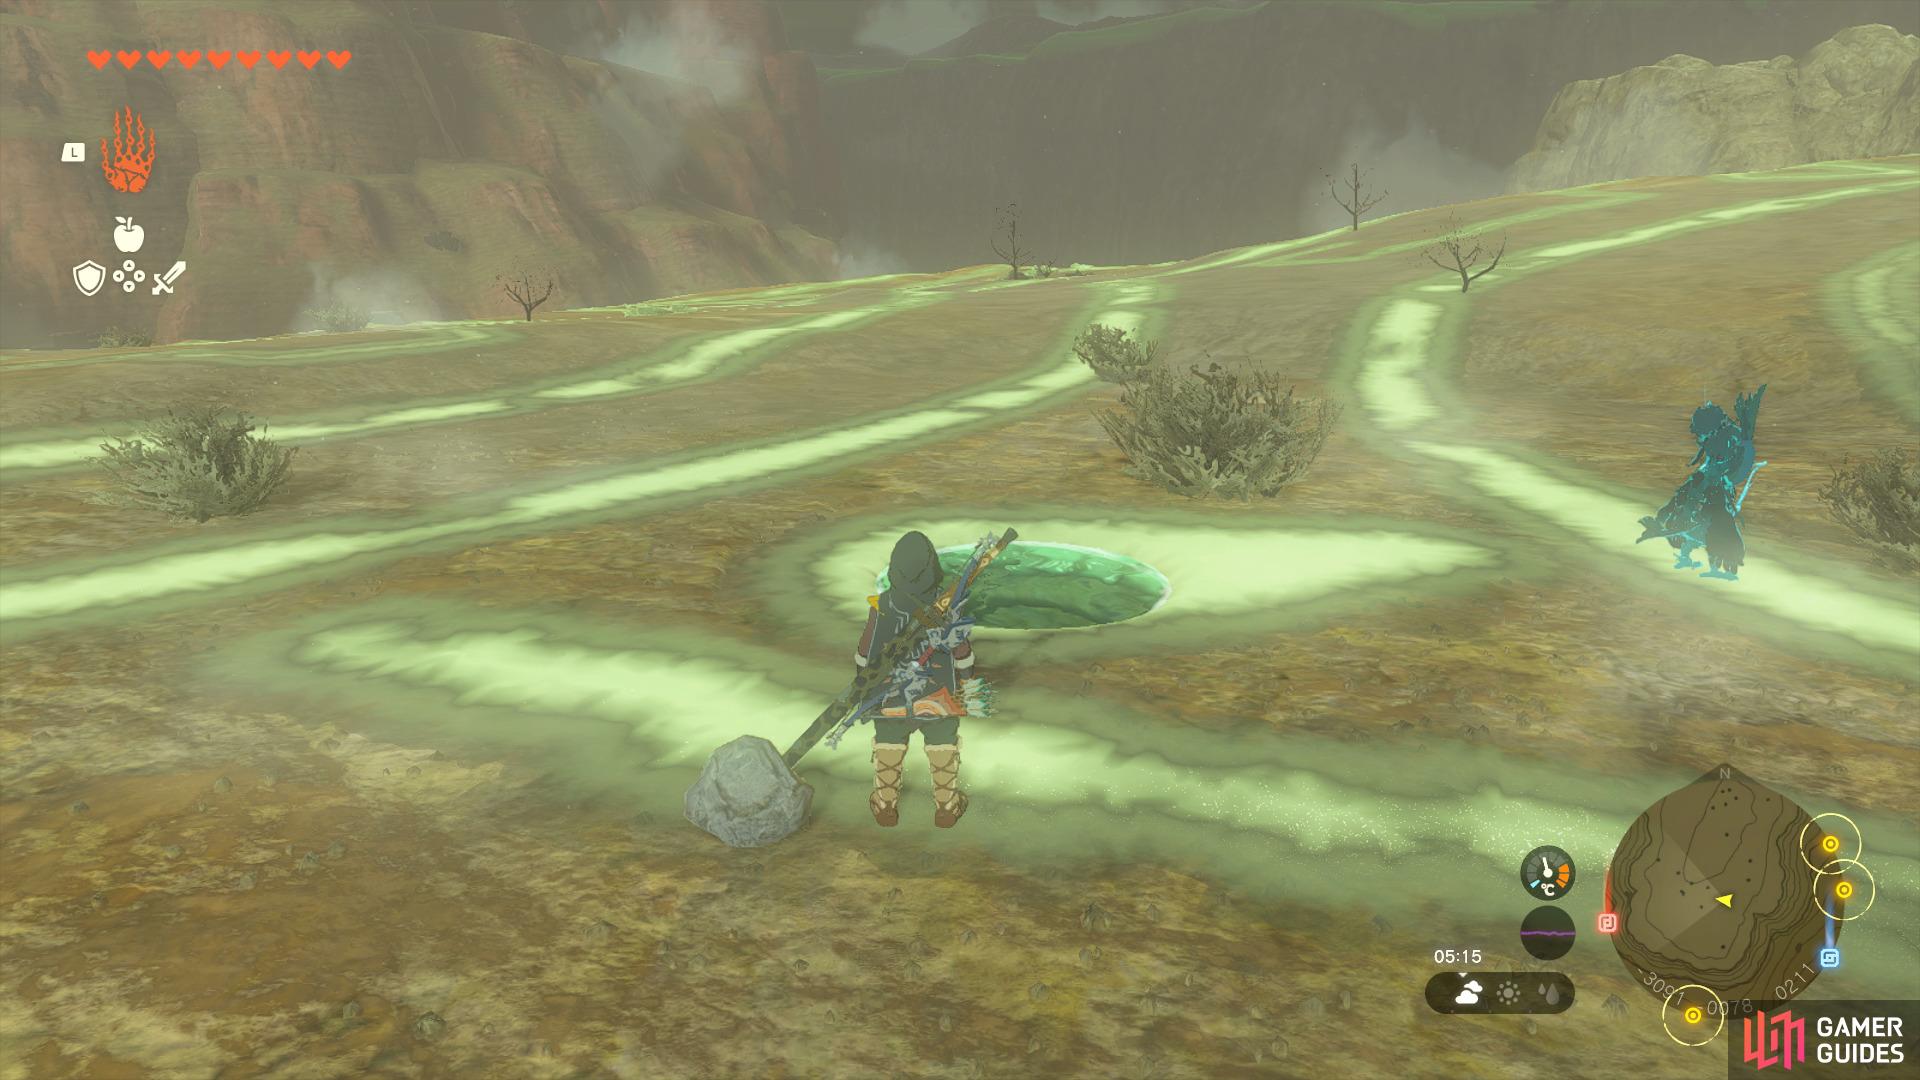
Head to the Gerudo Canyon Skyview Tower and take it up to the sky, then you’ll see the next Geoglyph slightly to the west. You’ll want to land on the second highest ledge and walk up until you reach the coordinates -3178, -1702, 0419 and interact with the pool of water to trigger the cutscene A Show of Fealty.
Dragon Tear Location #6 - Zelda and Sonia
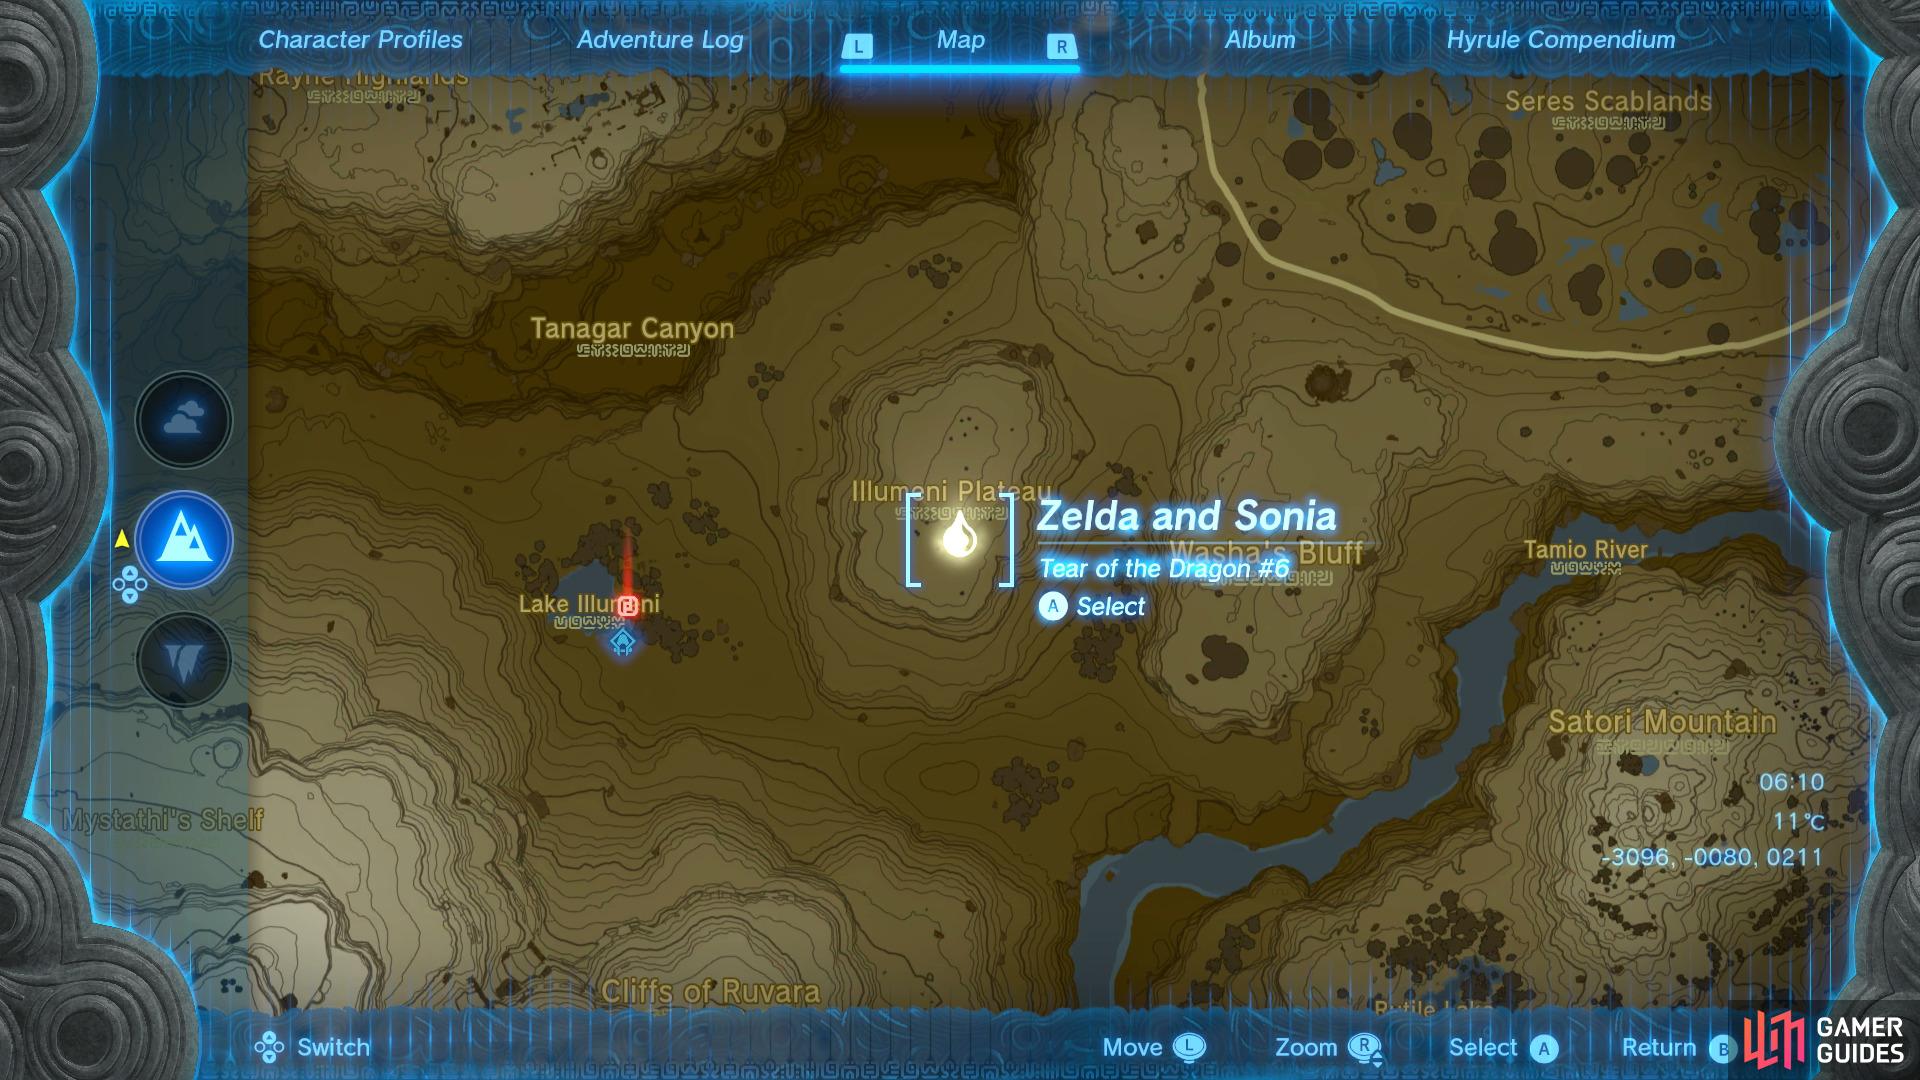
Head to this location on the map
to find the tear on the right side of the geoglyph.
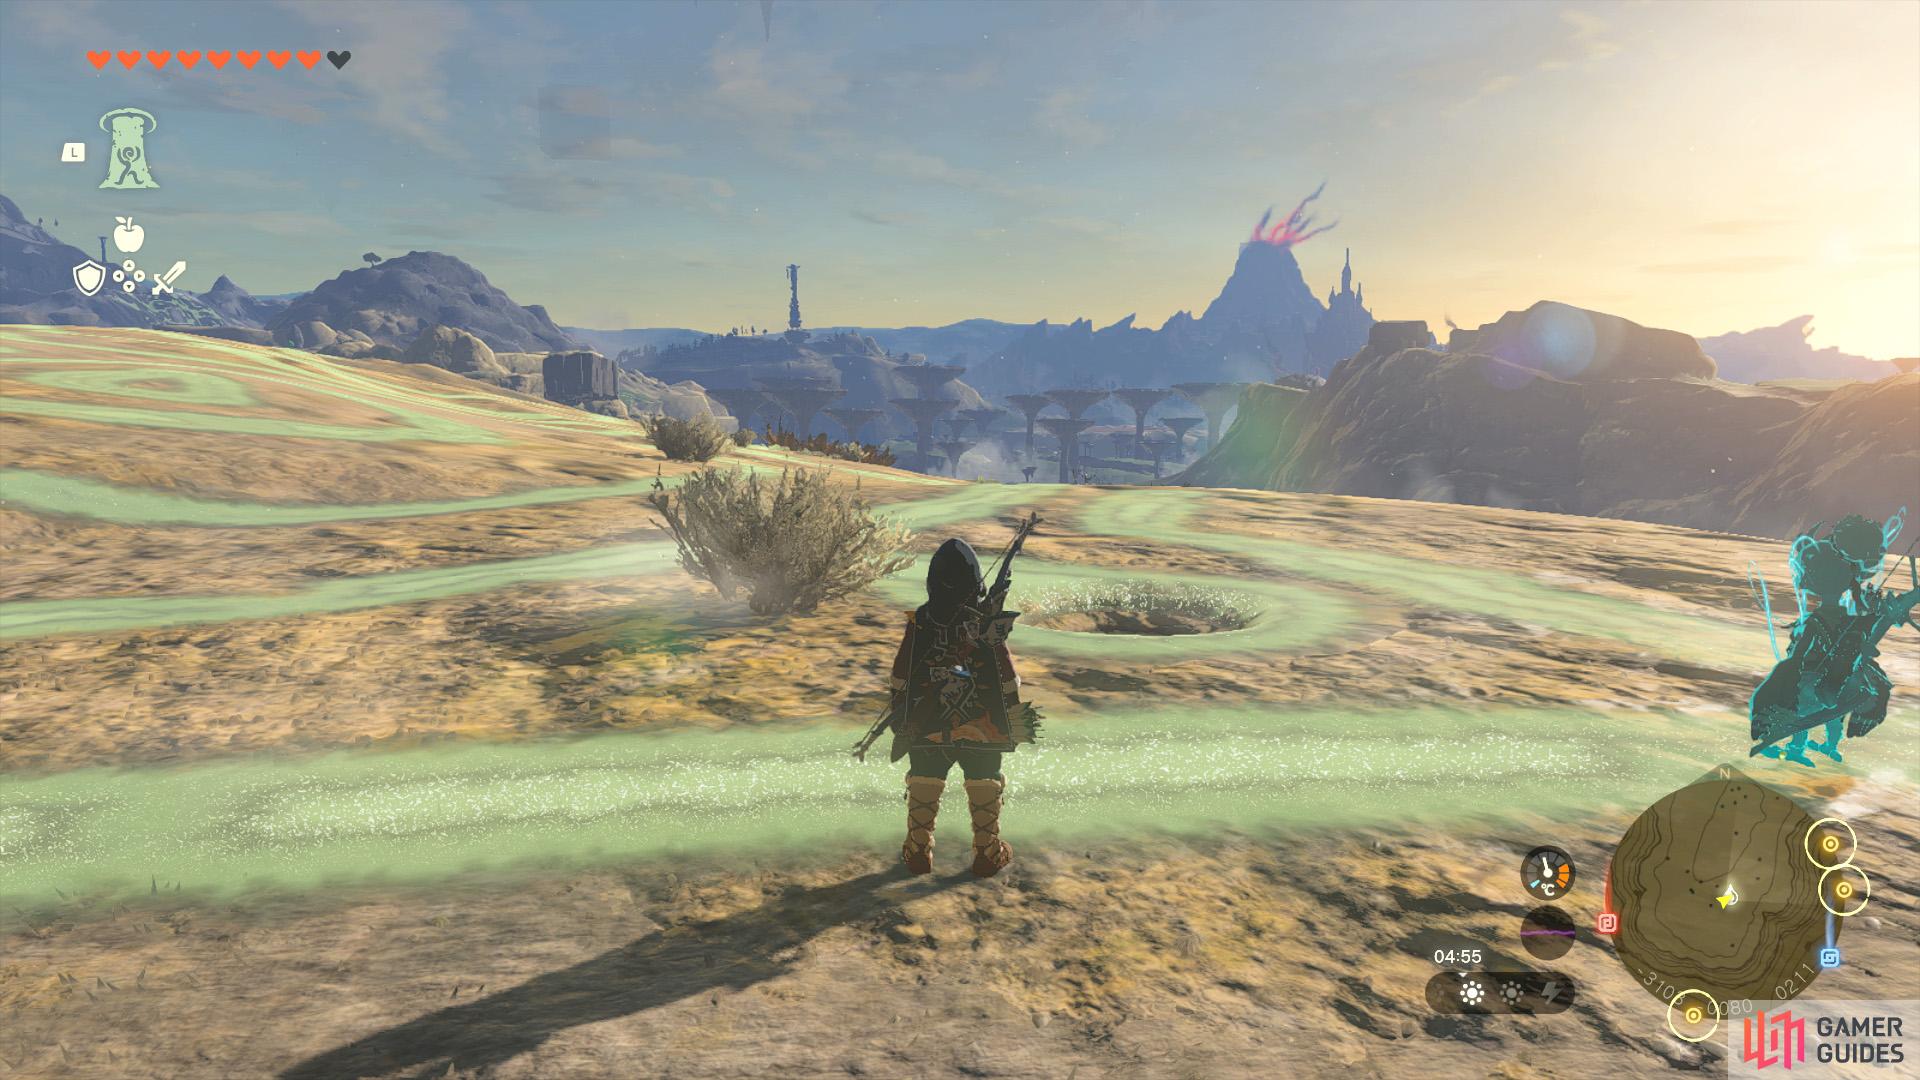
Head to the Gerudo Highland Skyview Tower and take it up to the sky, then glide down to the north to find the next geoglyph sitting on top of a mountain. Once you land, walk along until you reach the then walk up until you reach the coordinates -3091, -0078, 0211 and interact with the pool of water to trigger the cutscene Zelda and Sonia.
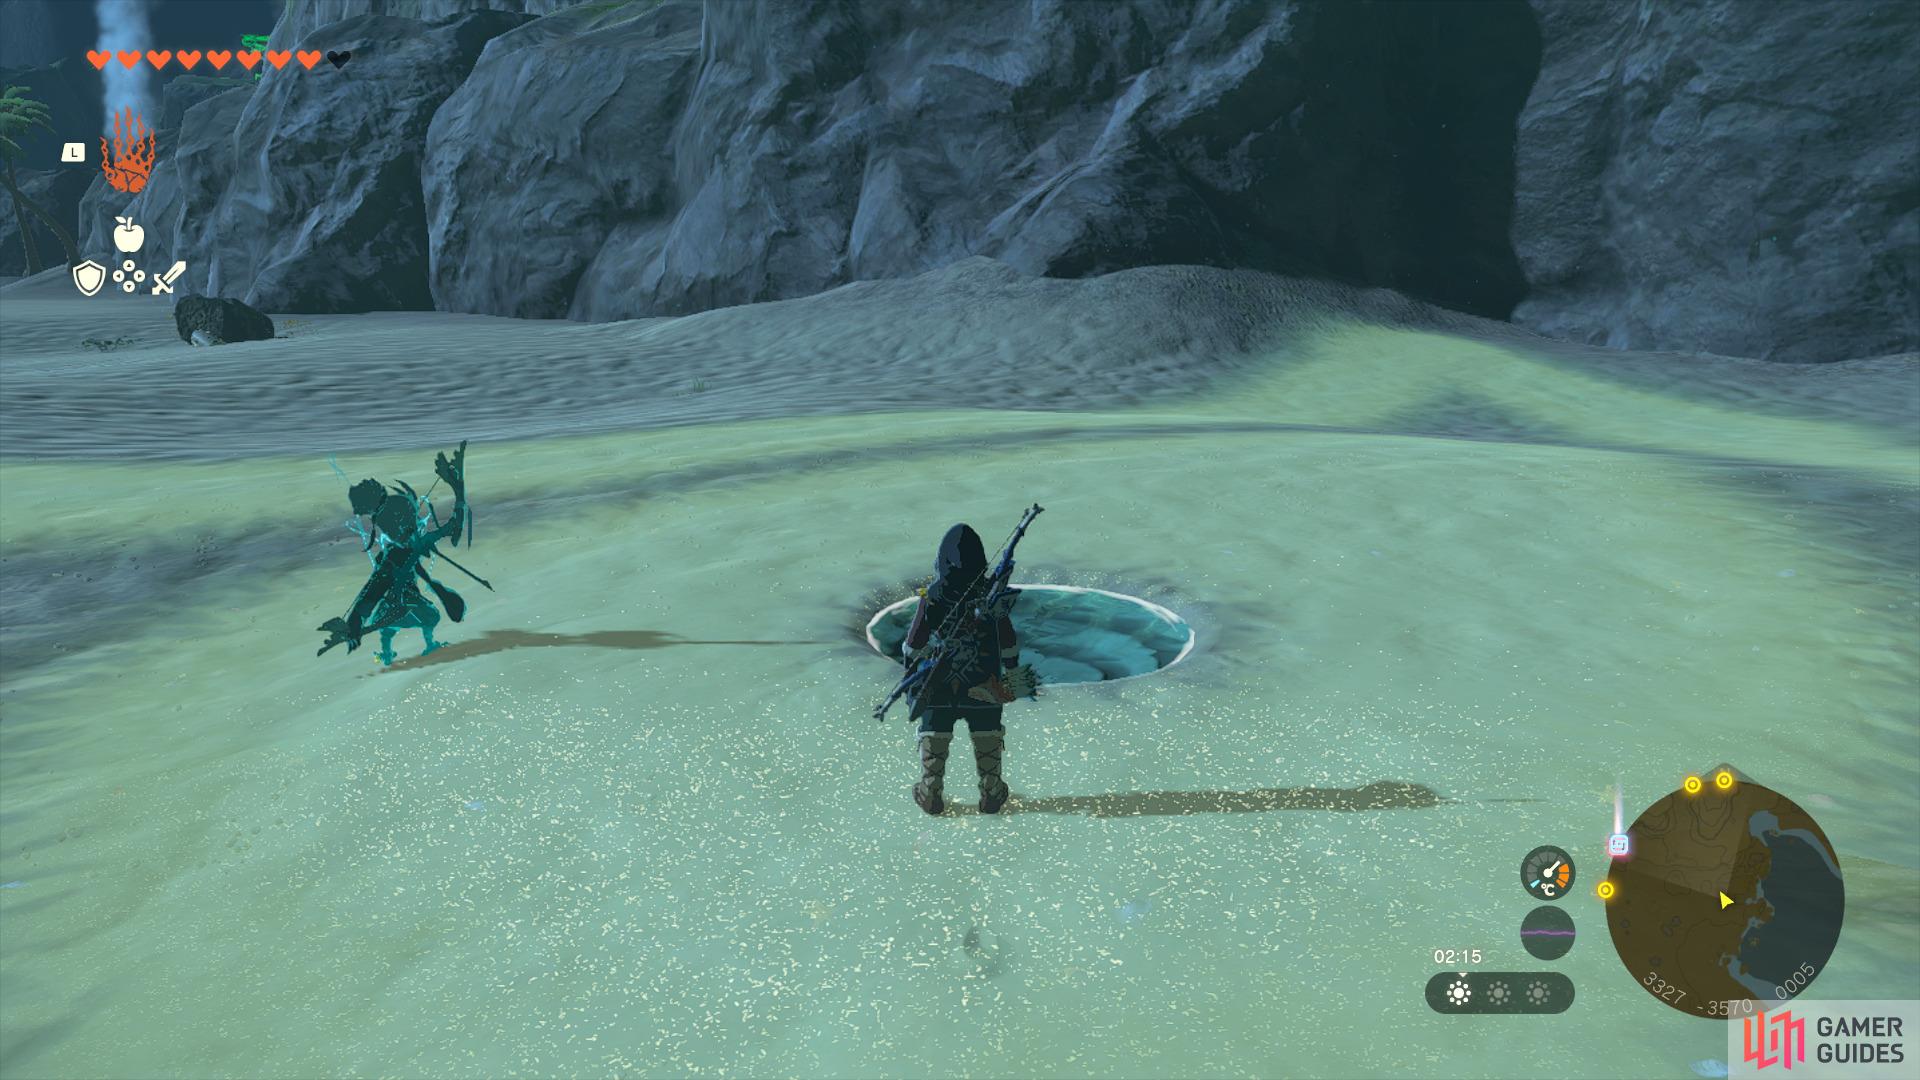
Dragon Tear Location #7 - Sonia is Caught By Treachery
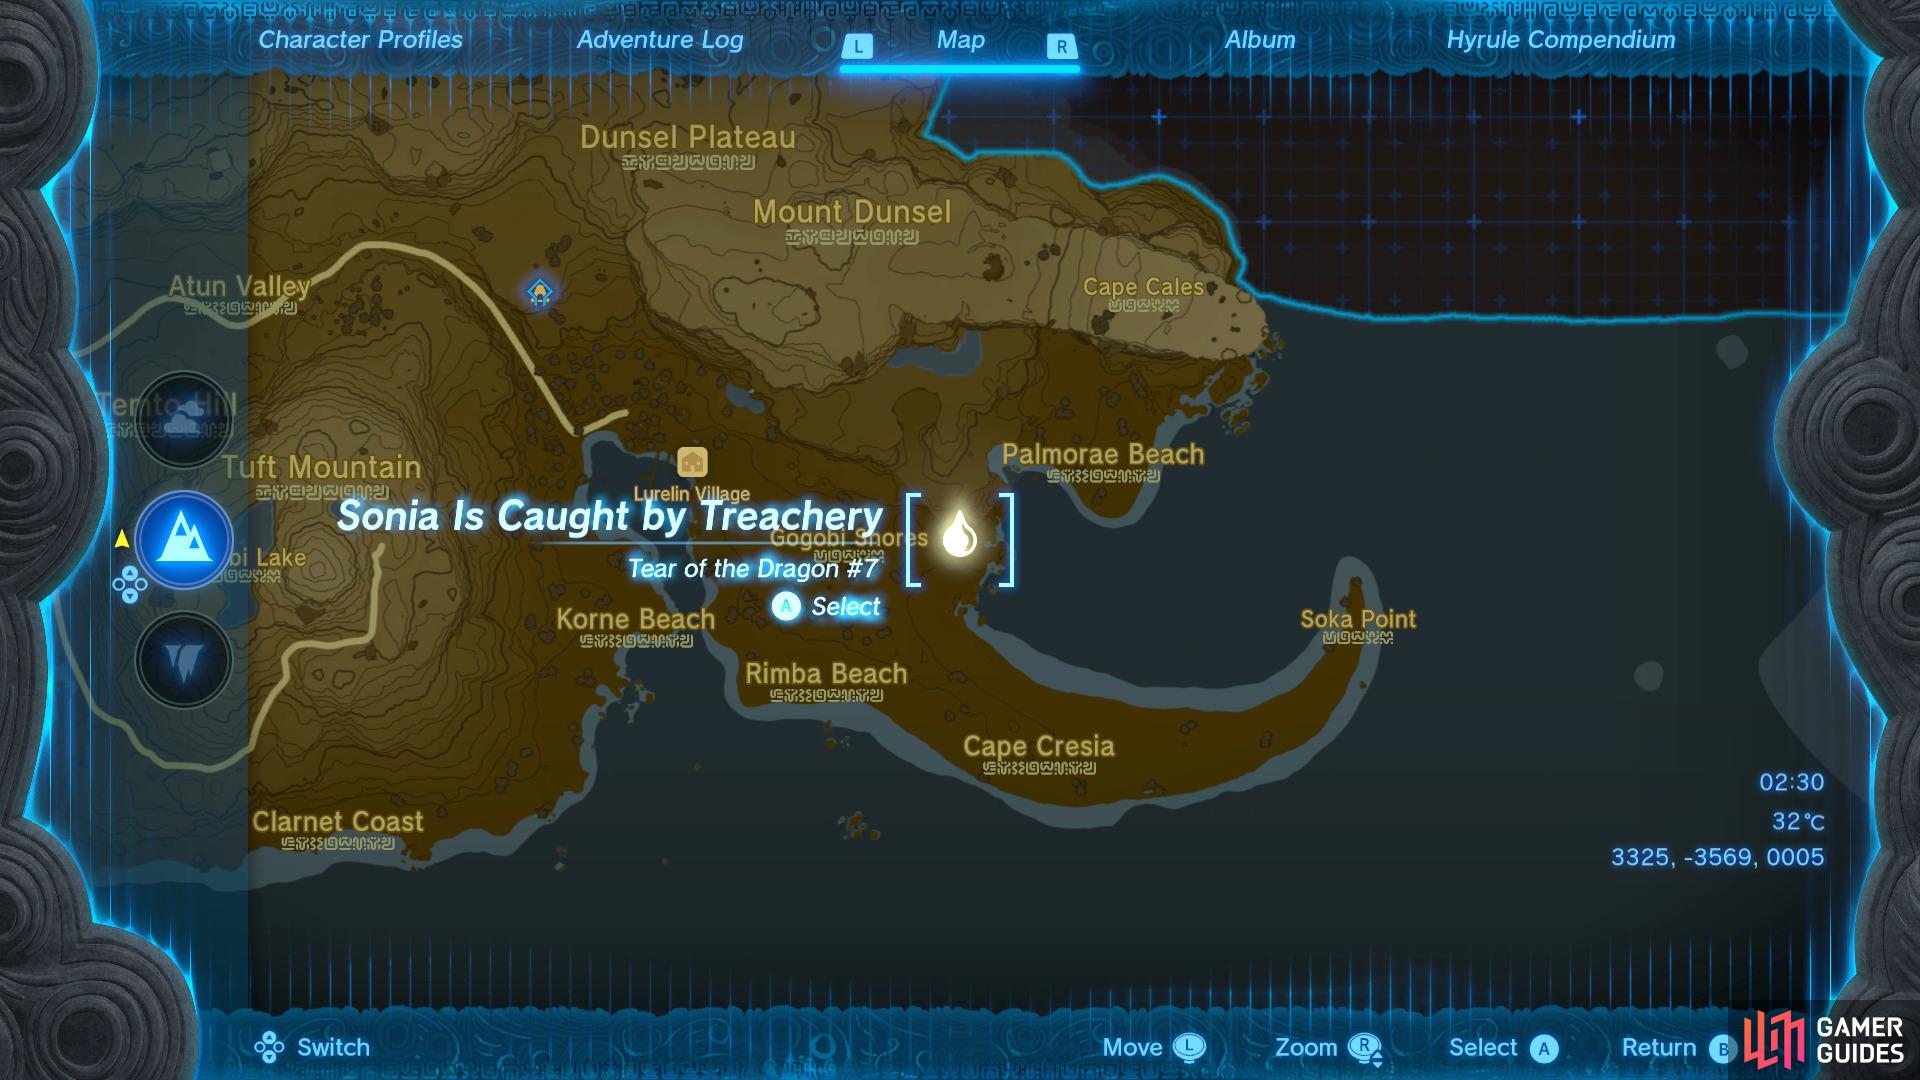
Head to this location on the map
to find the tear on the left side of the geoglyph.
Head to the Rebella Wetland Skyview Tower and take it up to the sky, then glide down to the southeast to find the geoglyph sitting at the edge of the island. When you land you’ll want to walk to the left side of the picture until you reach the coordinates 3324, -3566, 0004 and interact with the pool of water to trigger the cutscene Sonia is Caught By Treachery.
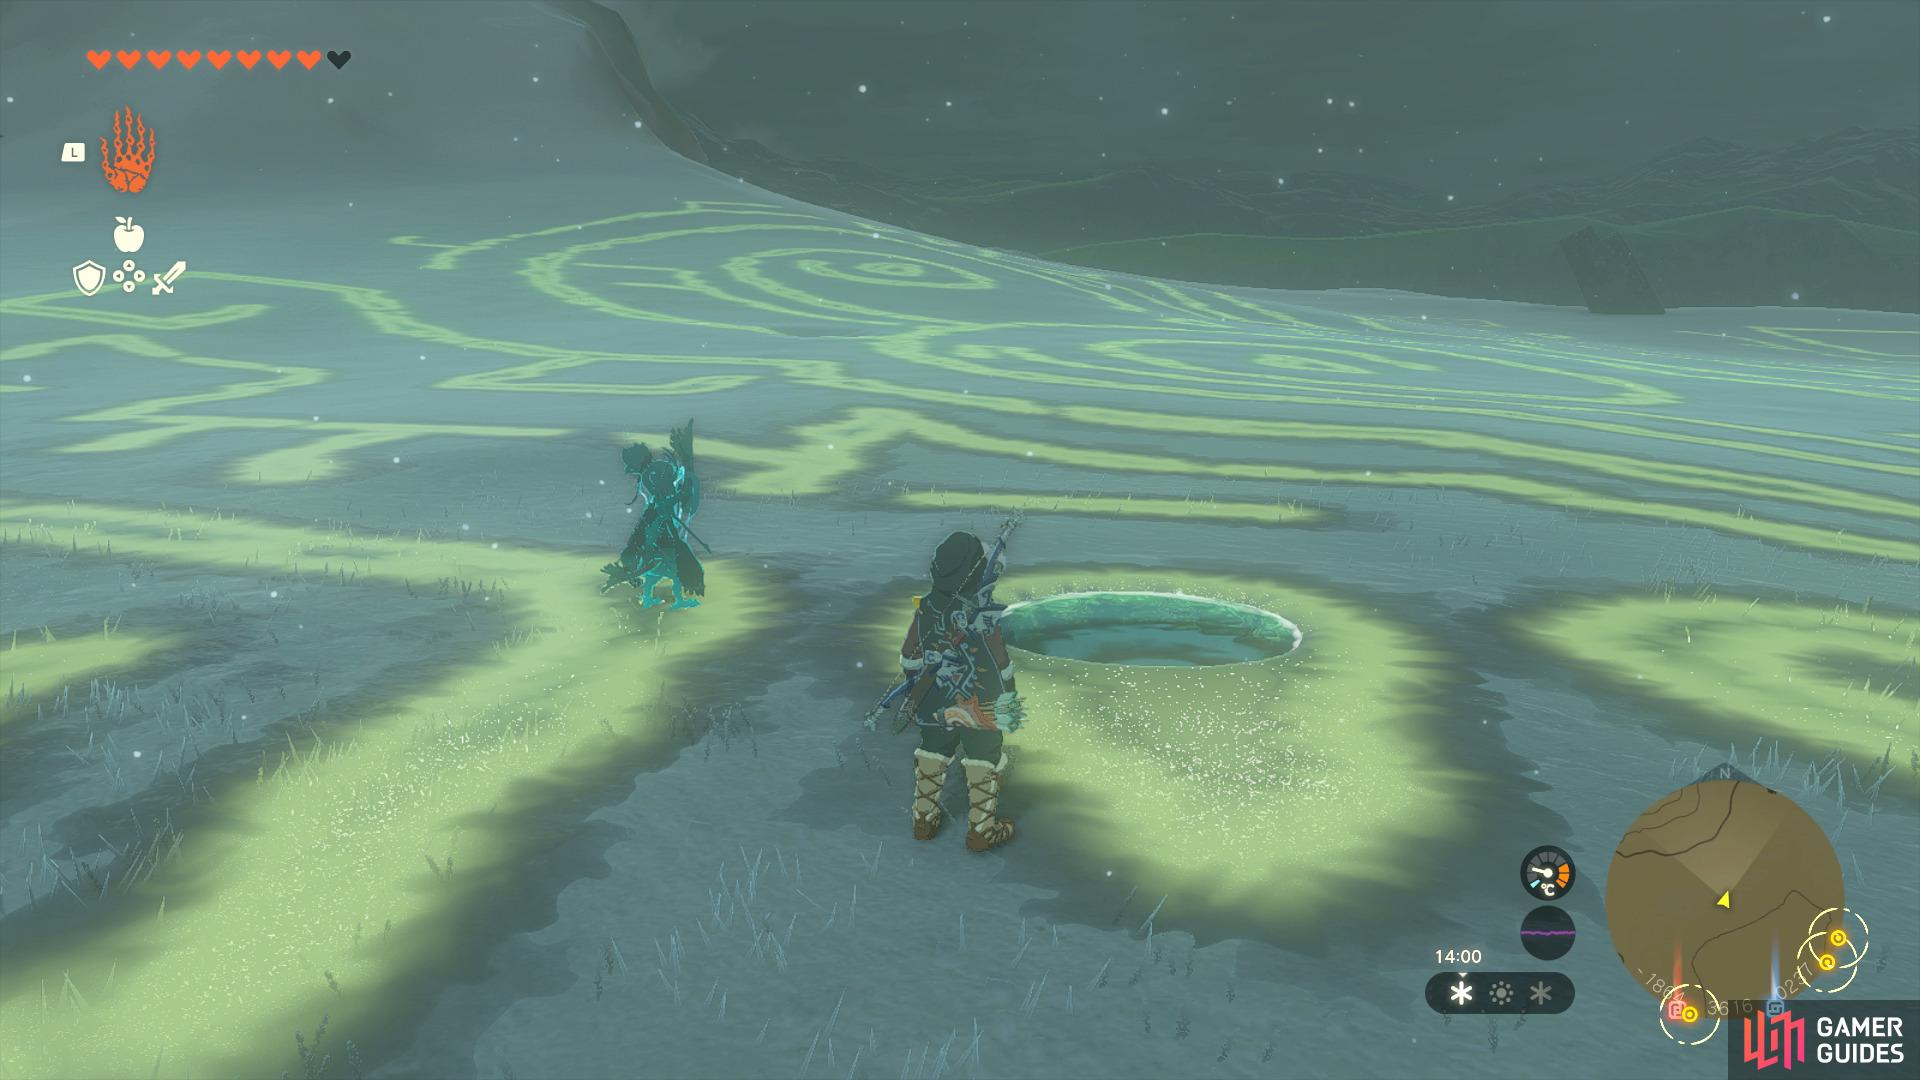
Dragon Tear Location #8 - Birth of the Demon King
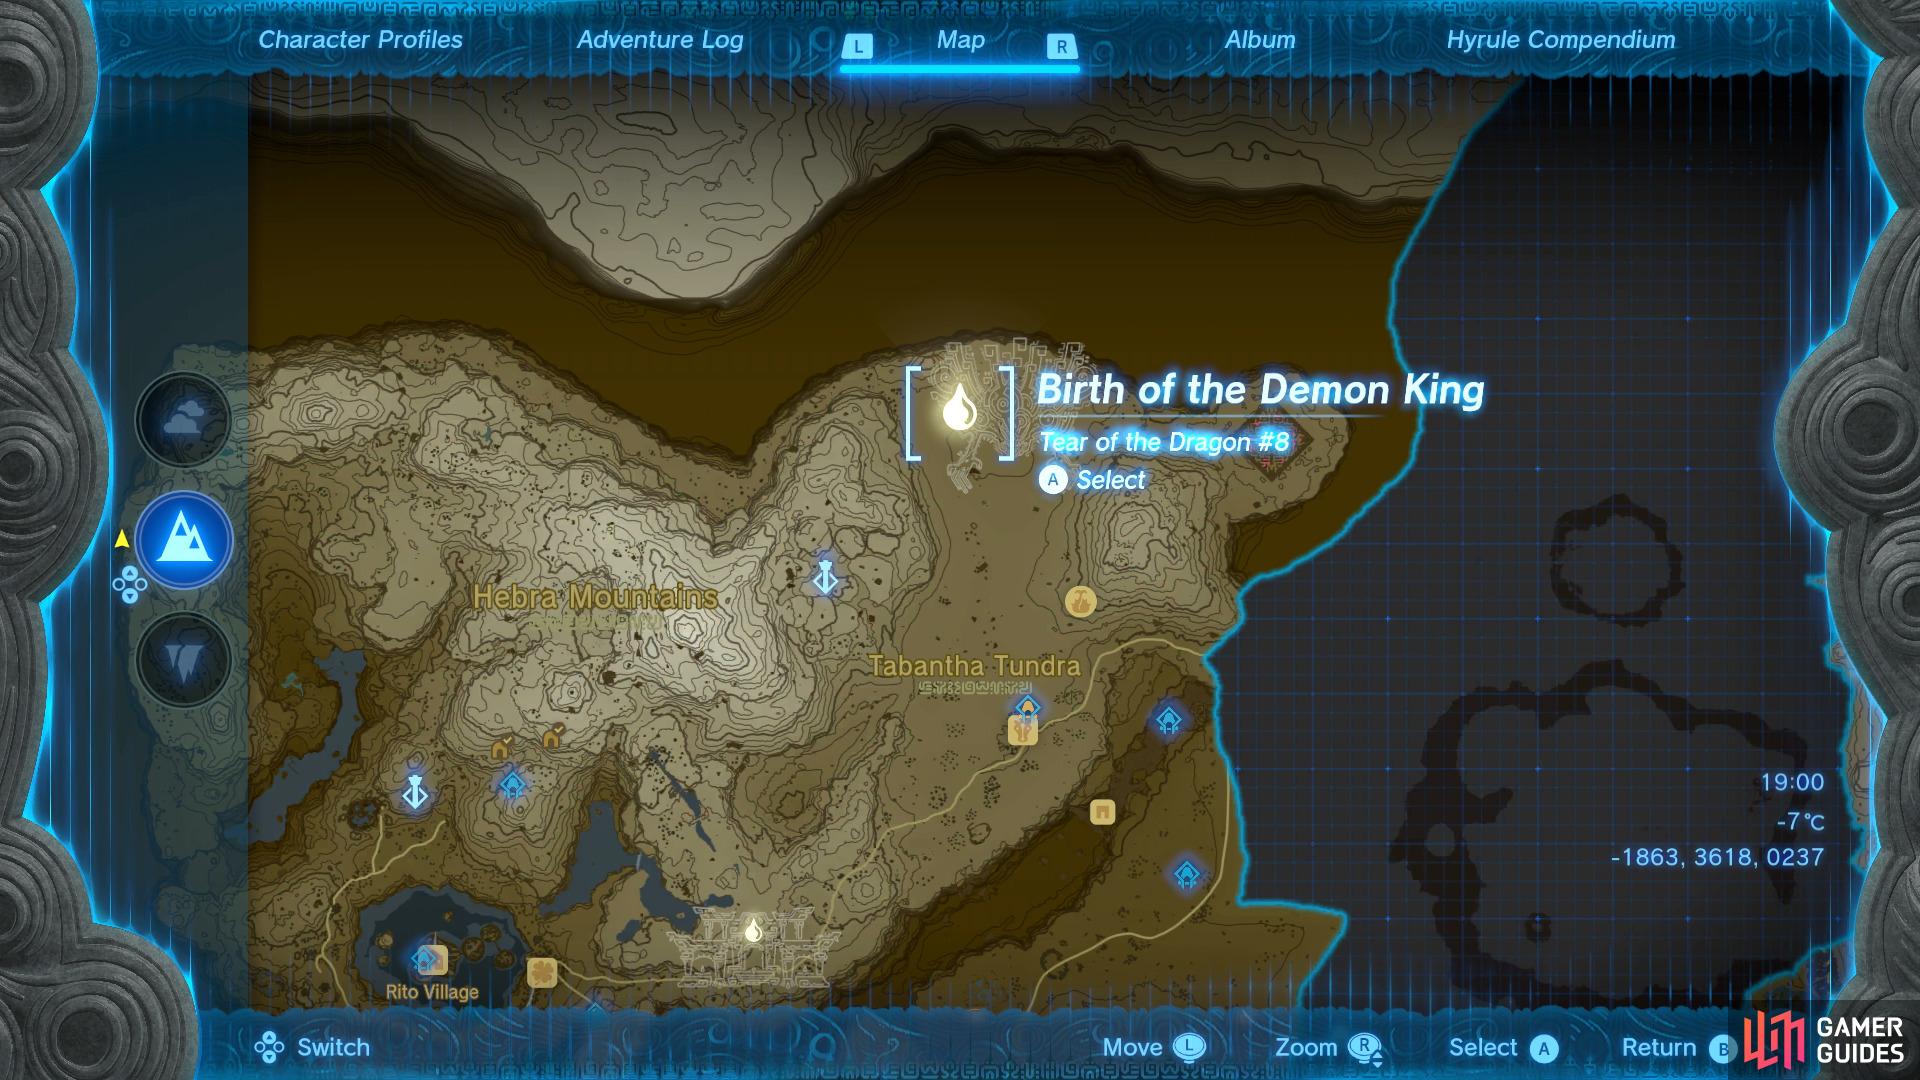
Head to this location on the map
to find the tear sitting on the left side of the geoglyph.
Head to the Pikida Stonegrove Skyview Tower and take it up to the sky, then glide down to the northeast to reach the next geoglyph. Here you’ll want to walk over to the left side until you reach the coordinates -1864, 3618, 0237 and interact with the pool of water to trigger the cutscene Birth of the Demon King.
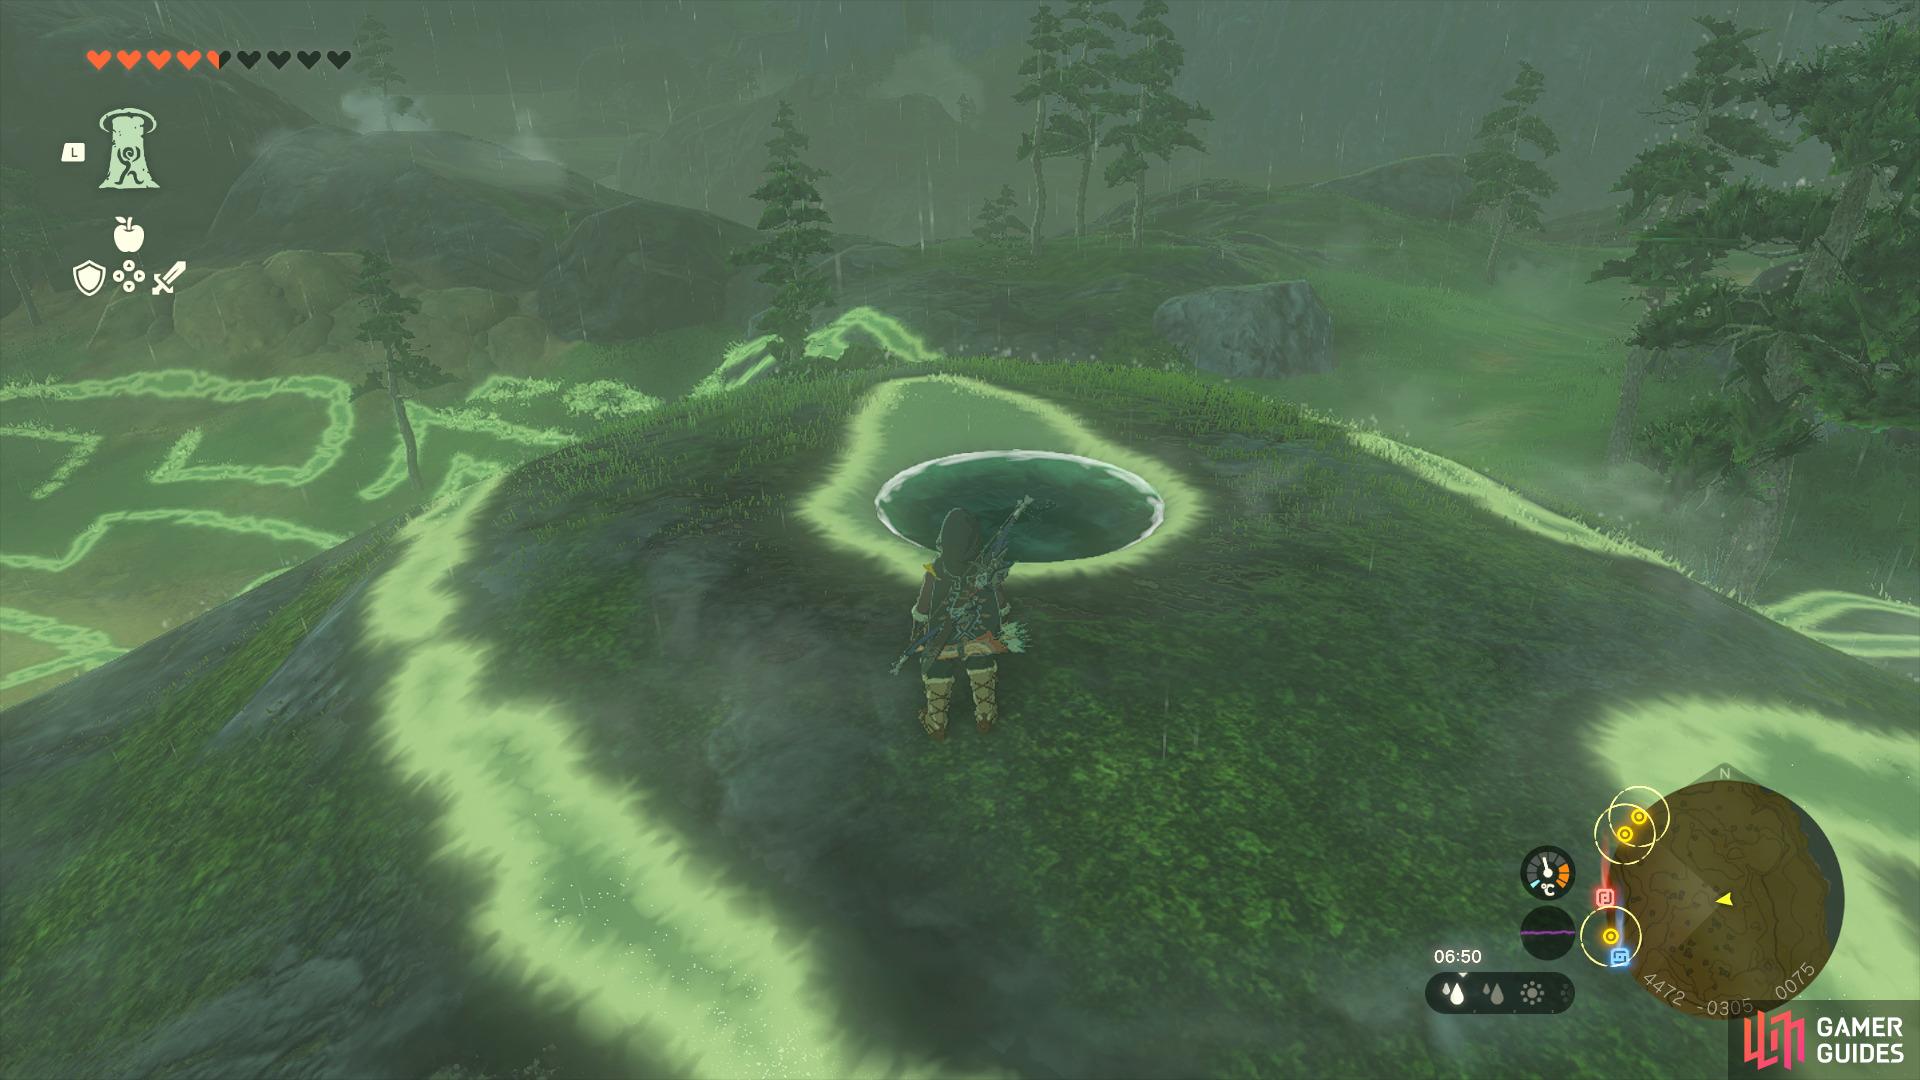
Dragon Tear Location #9 - The Sages’ Vow
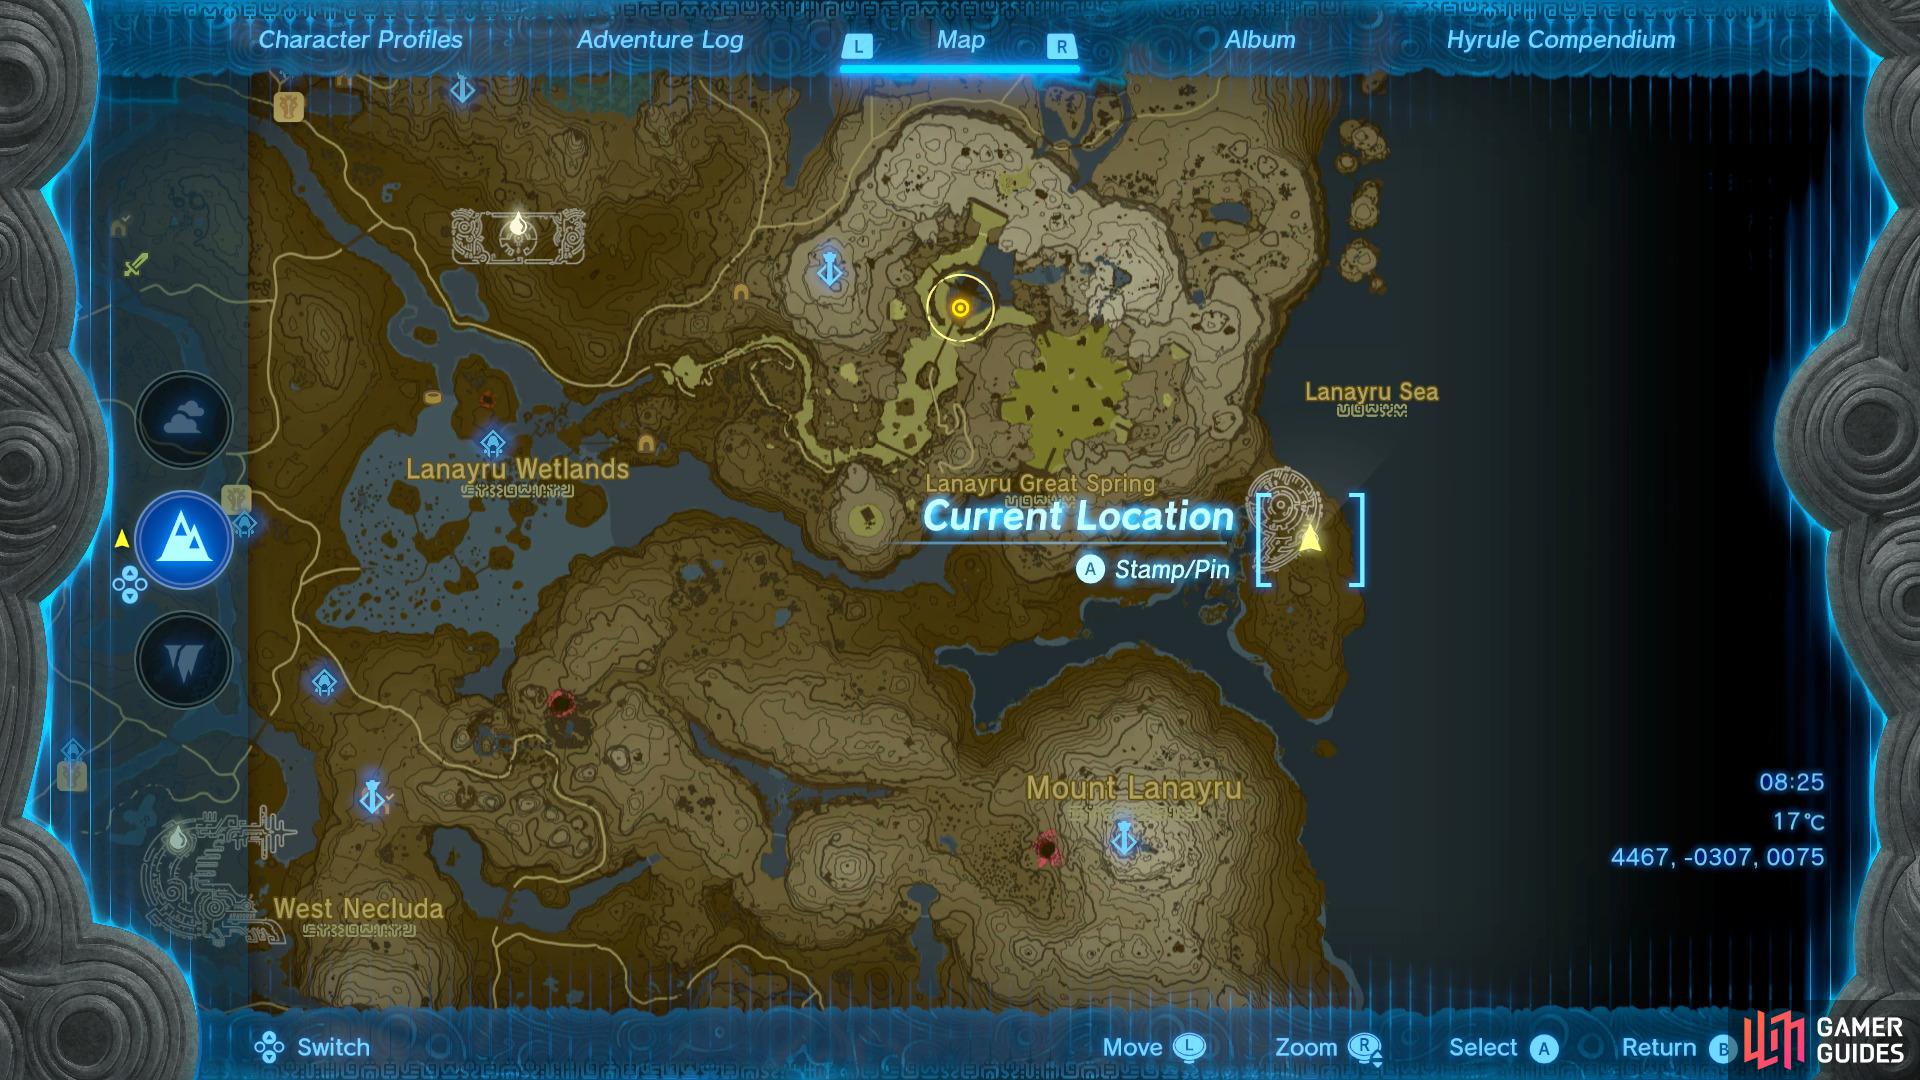
Head to this location on the map
to find the tear sitting on the top left of the geoglyph.
Head to the Mount Lanayru Skyview Tower and take it up to the sky, then glide northeast to reach the next geoglyph. When you land walk up the hill until you reach the coordinates 4472, -0305, 0075 and interact with the pool of water to trigger the cutscene The Sages’ Vow.
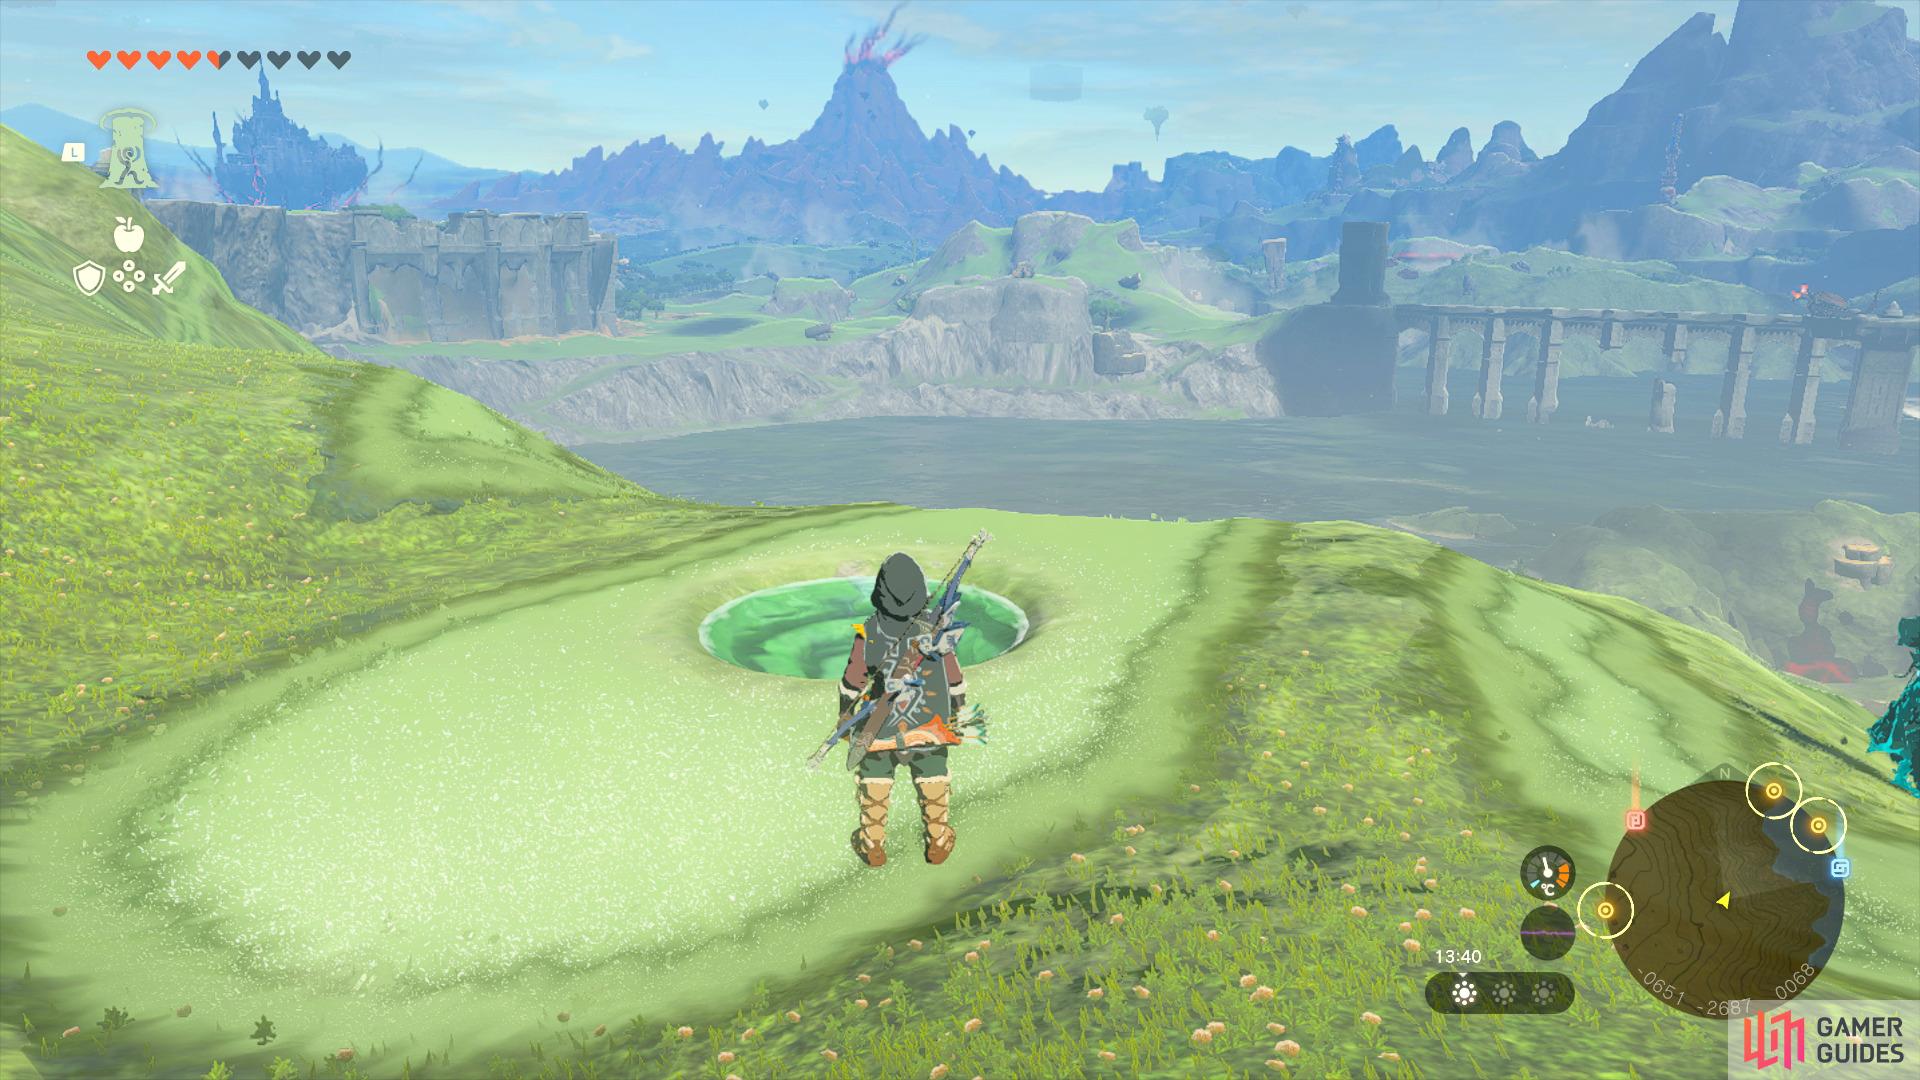
Dragon Tear Location #10 - A King’s Duty
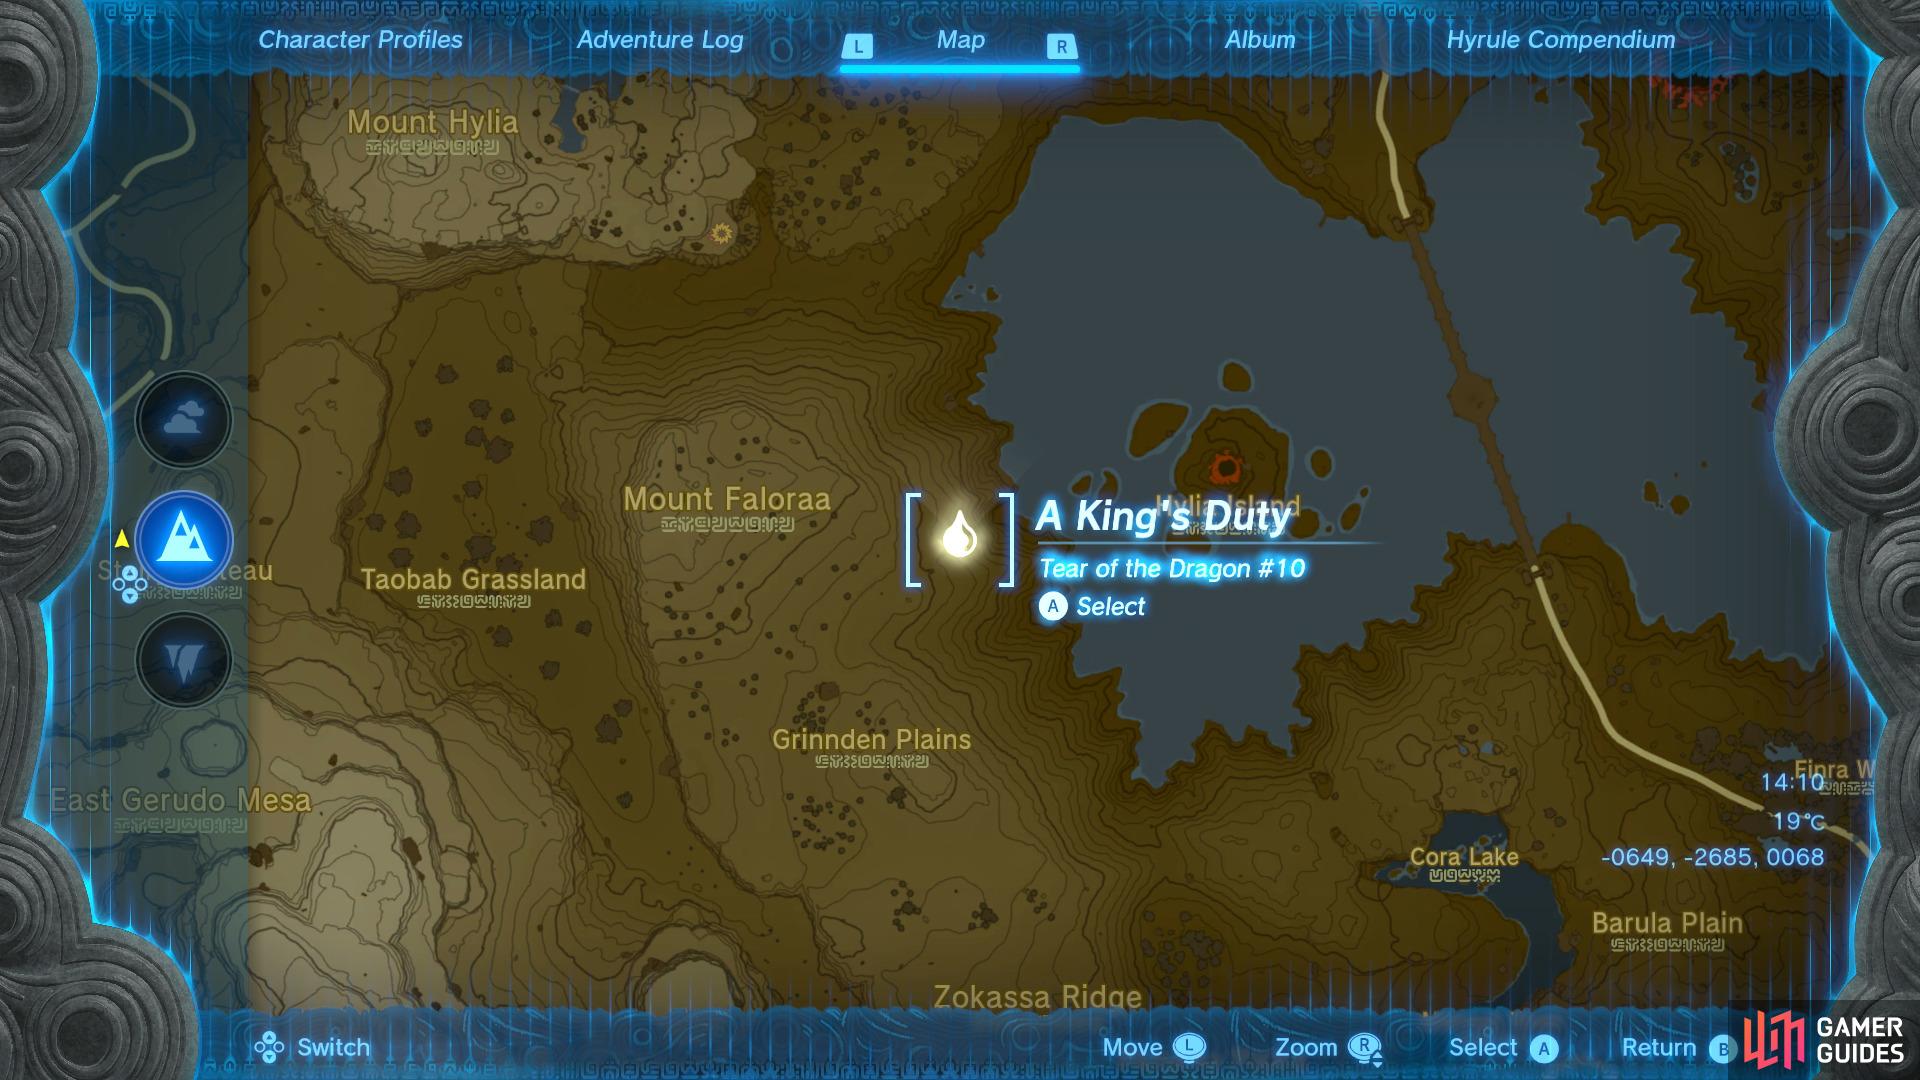
Head to this location on the map
to find the tear sitting on the left side of the geoglyph.
Head to the Popla Foothills Skyview Tower and take it up to the sky, then glide east to reach the next geoglyph and climb up the hill until you reach the coordinates -0649, -2685, 0068 and interact with the pool of water to trigger the cutscene A King’s Duty.
Dragon Tear Location #11 - A Master Sword in Time
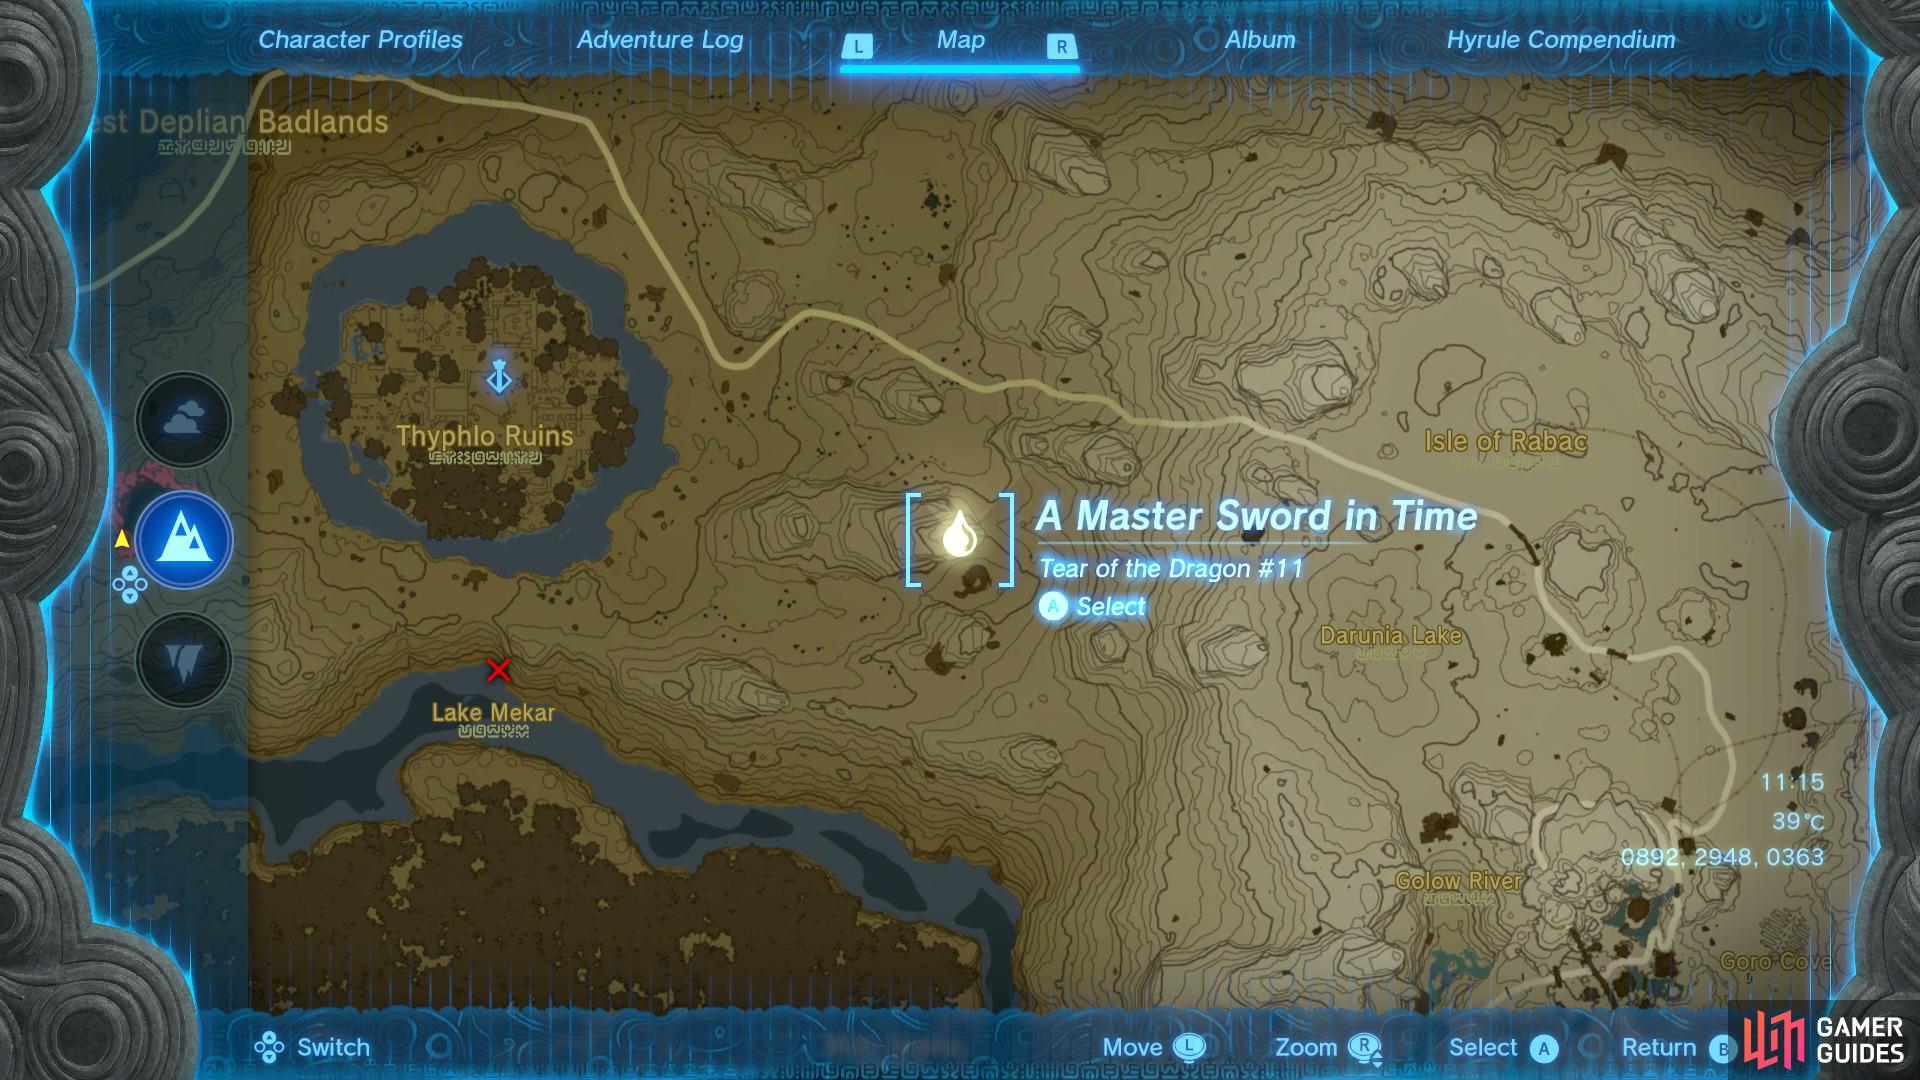
Head to this location on the map
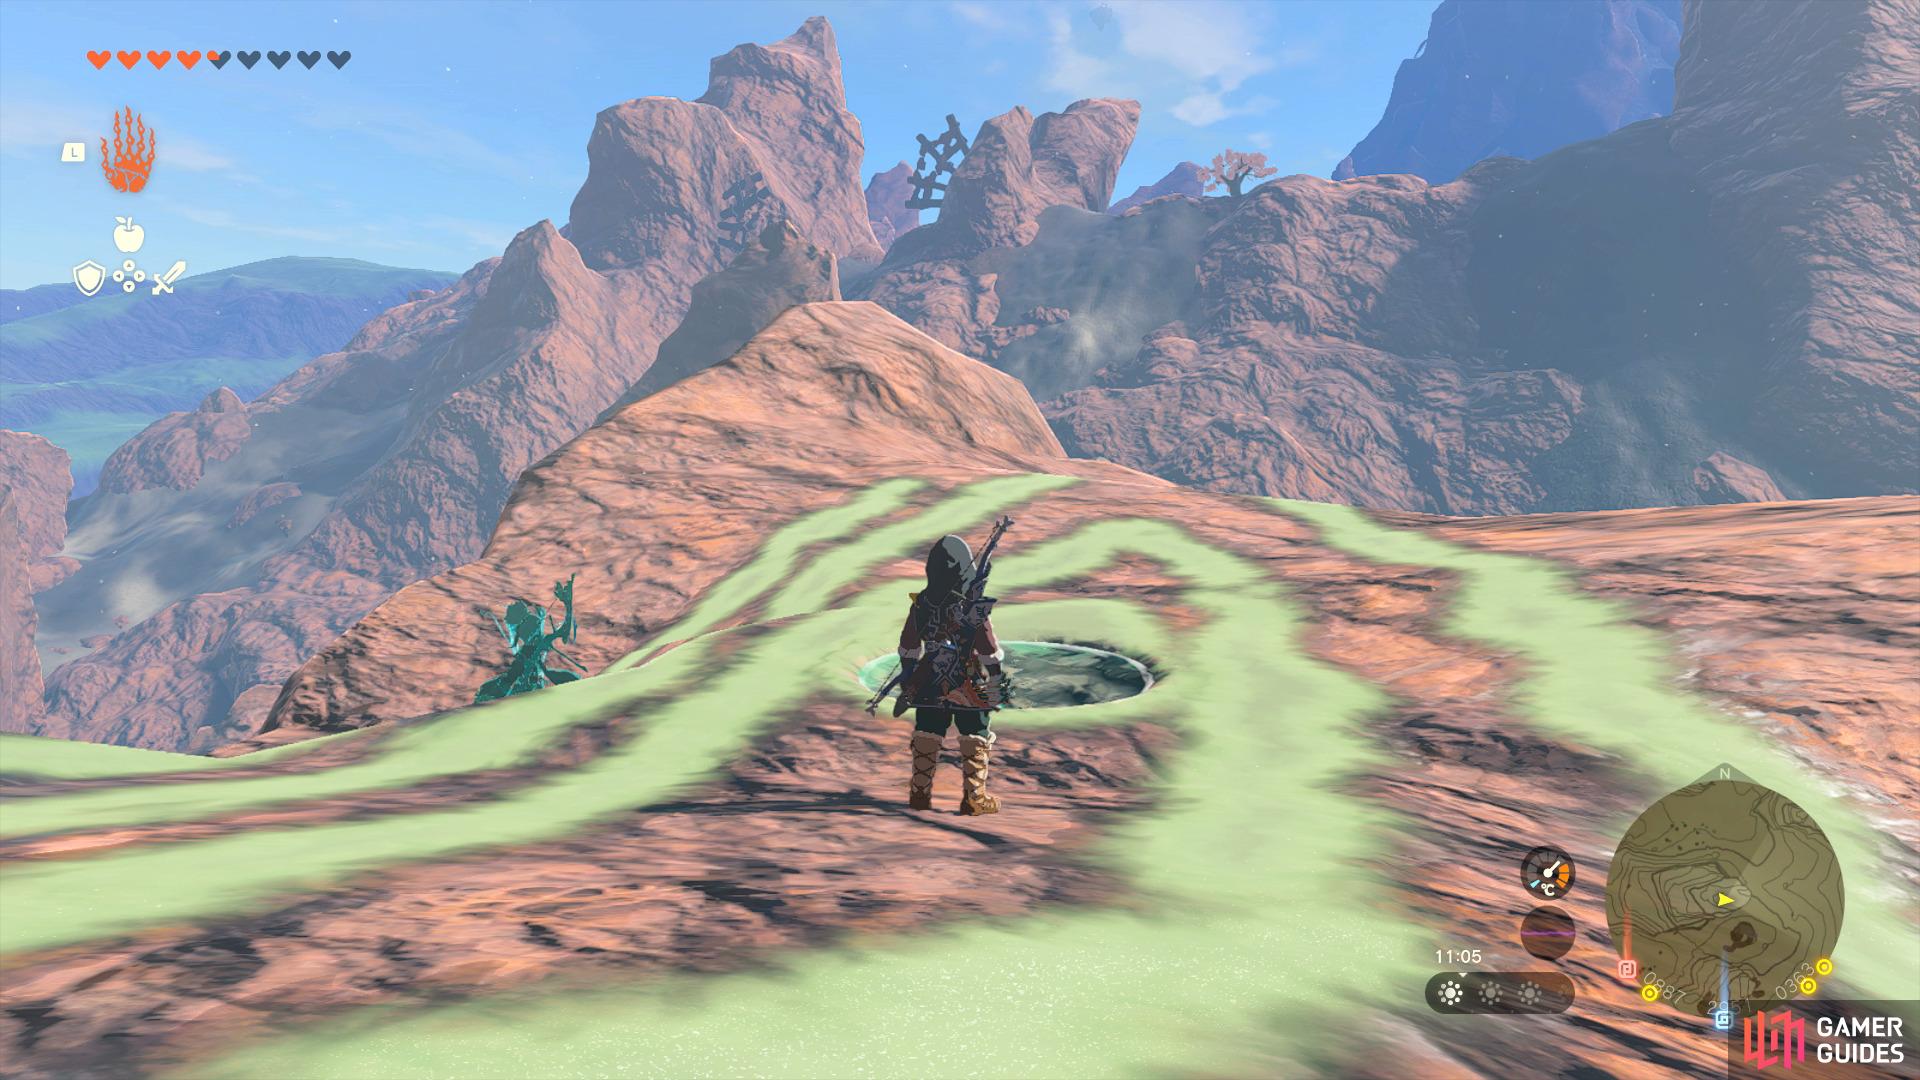
to find the tear sitting at the top of the geoglyph.
Head to the Thyphlo Ruins Skyview Tower and take it up to the sky, then glide east to reach the next geoglyph and walk up to the hill until you reach the coordinates 0887, 2951, 0363 and interact with the pool of water to trigger the cutscene A ![]() Master Sword in Time.
Master Sword in Time.
Dragon Tear Location #12 - Tears of the Dragon
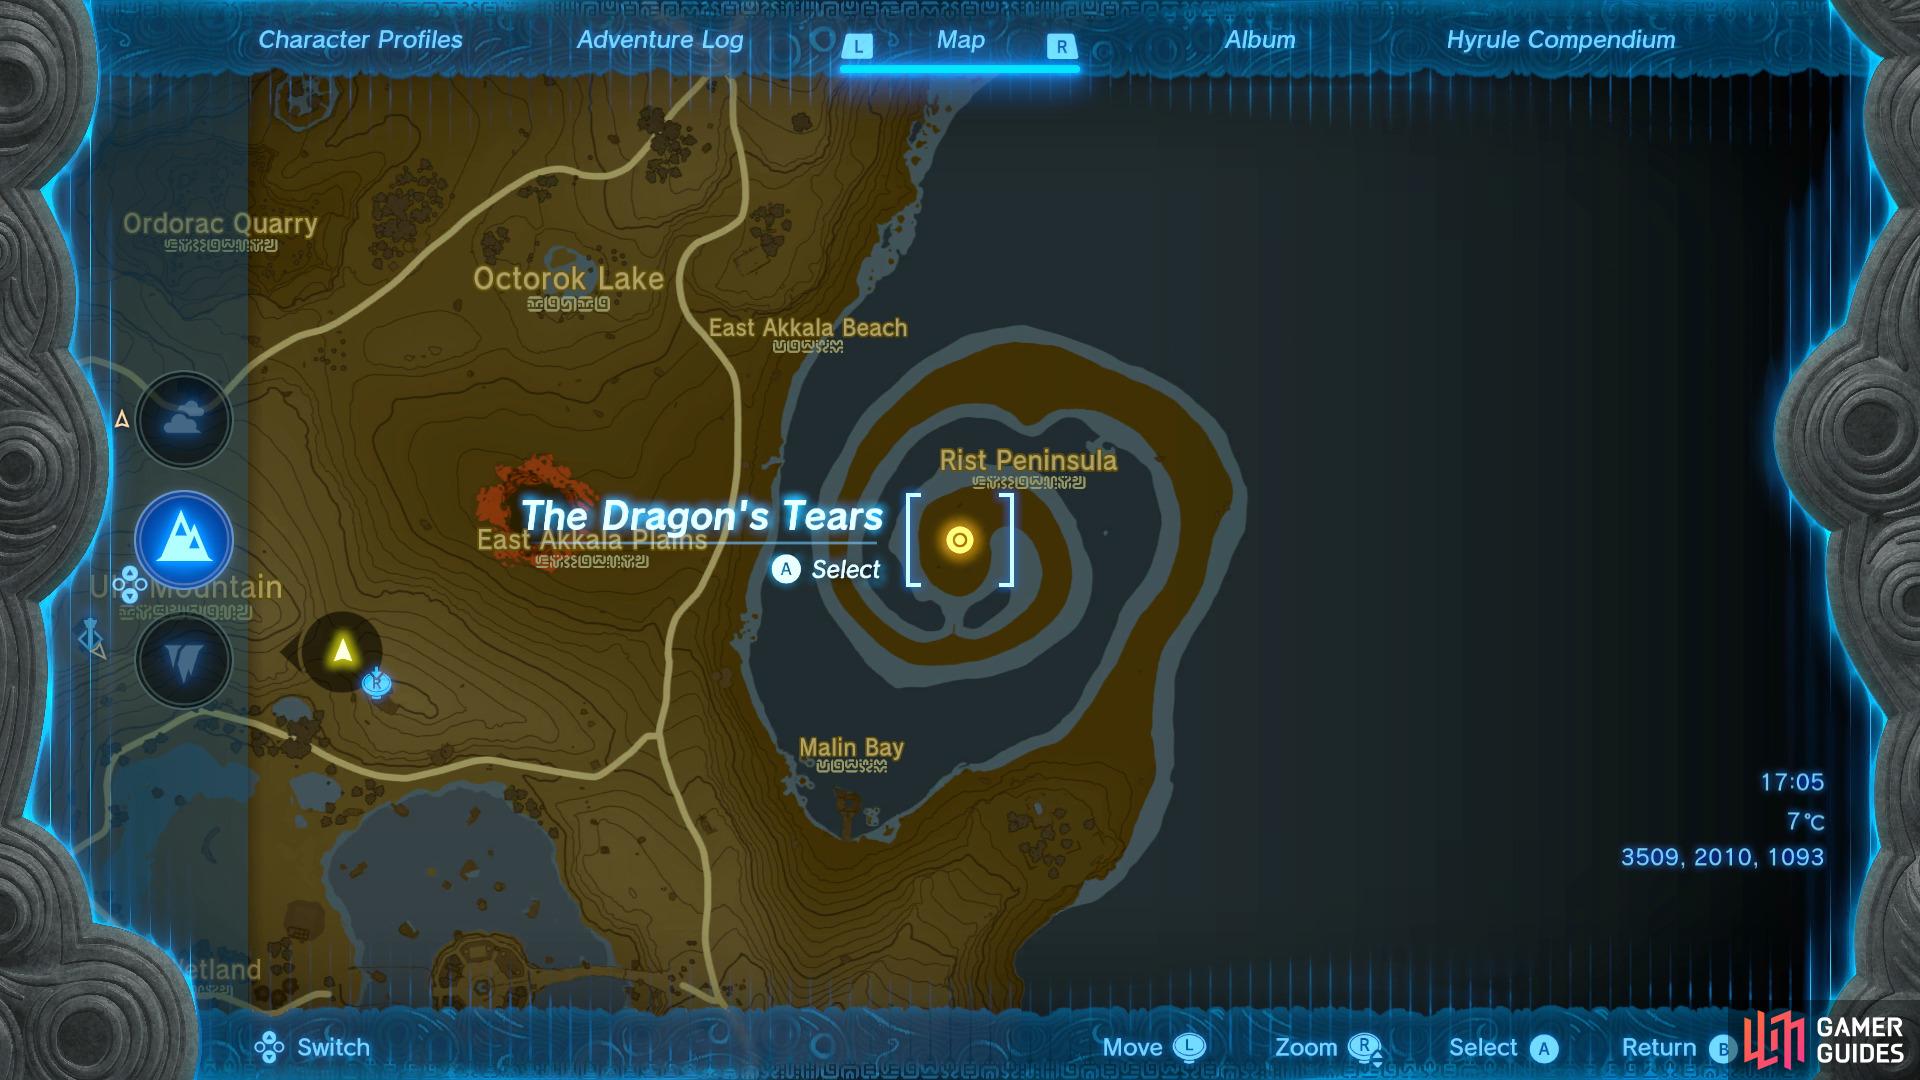
Head to this location on the map
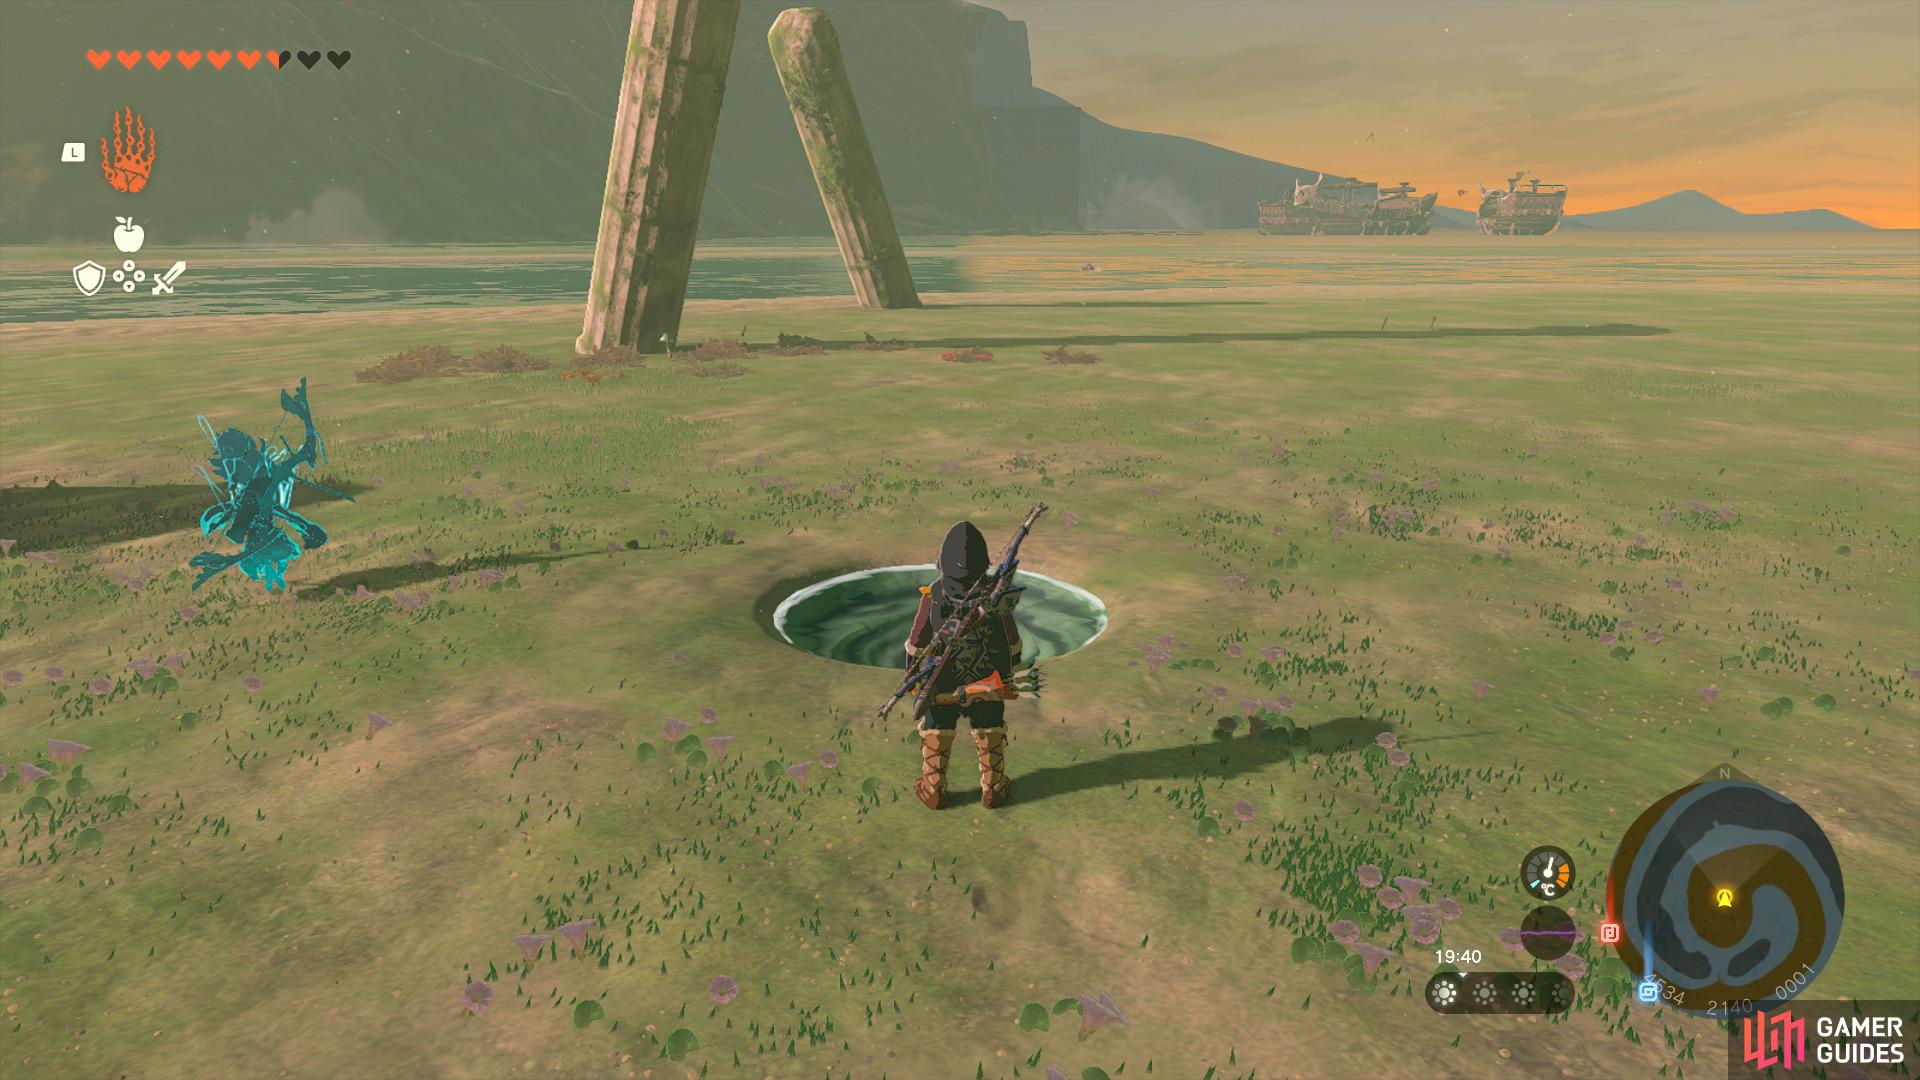
to find the tear in the center of the island.
Once you’ve found all 11 Dragon Tears you’ll want to fast travel to the ![]() Ulri Mountain Skyview Tower, then glide down to the east until you reach the center of the Rist Peninsula. Interact with the pool of water to trigger the cutscene Tears of the Dragon, then the quest will come to a close.
Ulri Mountain Skyview Tower, then glide down to the east until you reach the center of the Rist Peninsula. Interact with the pool of water to trigger the cutscene Tears of the Dragon, then the quest will come to a close.
No Comments